
A pin board is one of the easiest DIY projects that genuinely changes how a room functions and looks. It organizes notes, displays photos, and gives a wall personality all at once. These DIY pin board ideas cover every style and purpose — from a fabric covered statement piece for a bedroom to a functional travel map board to a cute cardboard build for a kids room.
This post contains affiliate links. If you purchase through these links I may earn a small commission at no extra cost to you.
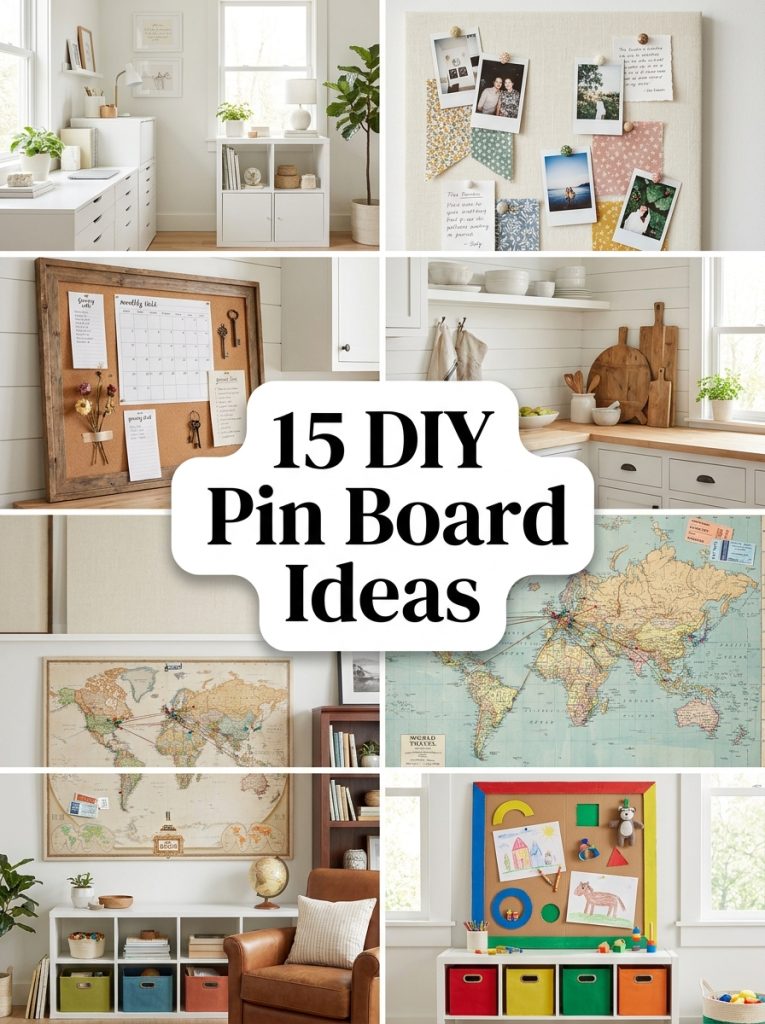
A pin board made your own way is always better than the plain one from the store.
1. Cover a Pin Board in Fabric
A fabric covered pin board is the most popular upgrade because it instantly makes a plain board feel intentional and designed. This pin board canvas fabric covered is a ready made canvas style version in the look to aim for. Make your own by stretching any fabric over a canvas frame or cork board and securing with a staple gun on the back. Linen for neutral minimal rooms, a bold print for a statement piece, or velvet for something more elevated.
Materials Needed:
- Cork board or canvas frame
- Fabric of your choice
- Staple gun and staples
- Scissors
How to Make It:
- Cut fabric to the board size plus 3 inches on each side for wrapping.
- Lay fabric face down and center the board on top.
- Pull fabric up over one side and staple to the back of the frame.
- Pull the opposite side taut and staple, then repeat on the remaining sides.
- Fold corners neatly and staple flat for a smooth front surface.

Fabric Covered Canvas Pin Board
Ready made fabric covered pin board — great reference for your own DIY fabric wrapped version.
Check Price on Amazon2. Build a Large Framed Pin Board
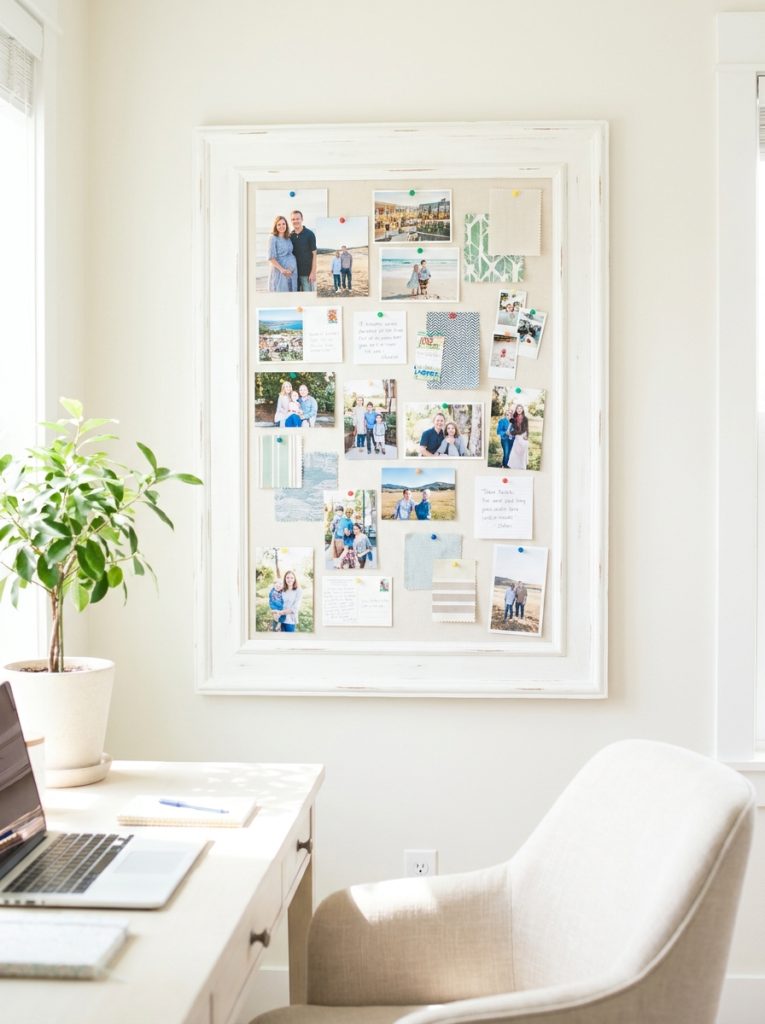
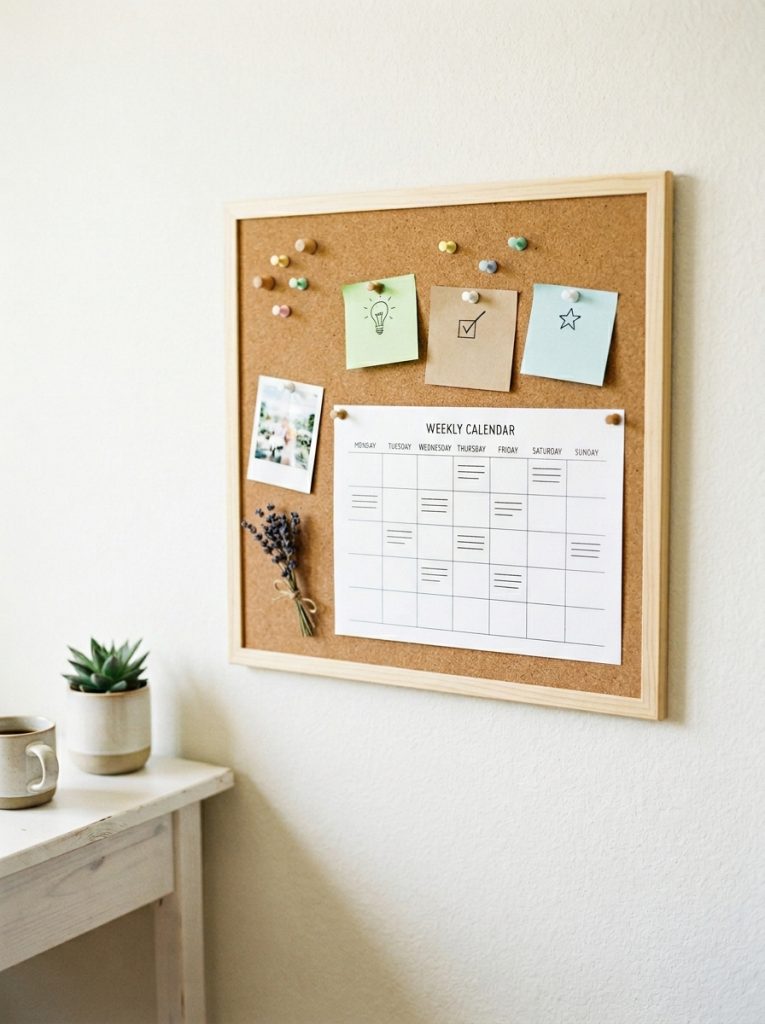
A large framed pin board looks far more finished than a bare cork board with metal clips. Build a wood frame from 1×3 boards, miter the corners, paint or stain, and attach a cork sheet inside. This pin board picture frame large shows the right proportions to aim for — wide enough to hold a real collection of notes and photos without feeling cramped.
Materials Needed:
- Cork sheet cut to size
- 1×3 pine boards for frame
- Miter saw
- Wood glue and finish nails
- Paint or stain
How to Make It:
- Cut cork sheet to your desired board dimensions.
- Cut four frame boards with 45 degree mitered corners to fit around the cork.
- Glue and nail the frame corners together and allow to cure.
- Attach the cork sheet to the back of the frame with construction adhesive.
- Paint or stain the frame and hang on the wall.

Large Framed Pin Board
Large framed pin board with clean wide proportions — great reference for sizing your own DIY build.
Check Price on Amazon3. Use a Cork Sheet Roll for Custom Sizes
A cork sheet roll is the most flexible base material for any DIY pin board project because it cuts to any size or shape needed. This pin board cork sheet roll cuts cleanly with scissors or a craft knife and is thick enough for standard push pins. Use it to build a custom sized board that fits an exact wall space rather than being limited to standard board dimensions.
Materials Needed:
- Cork sheet roll
- Sharp scissors or craft knife
- Ruler and straight edge
- Frame or wall mounting strips
How to Make It:
- Measure the desired board dimensions carefully before cutting.
- Mark cut lines on the cork sheet with a pencil and straight edge.
- Cut with a sharp craft knife in one clean pass.
- Sand any rough edges lightly with fine sandpaper.
- Mount in a frame or directly on the wall with heavy duty adhesive strips.

Pin Board Cork Sheet Roll
Cork sheet roll that cuts to any custom size — perfect base material for a fully personalized pin board.
Check Price on Amazon4. Add a Ribbon Memo Board
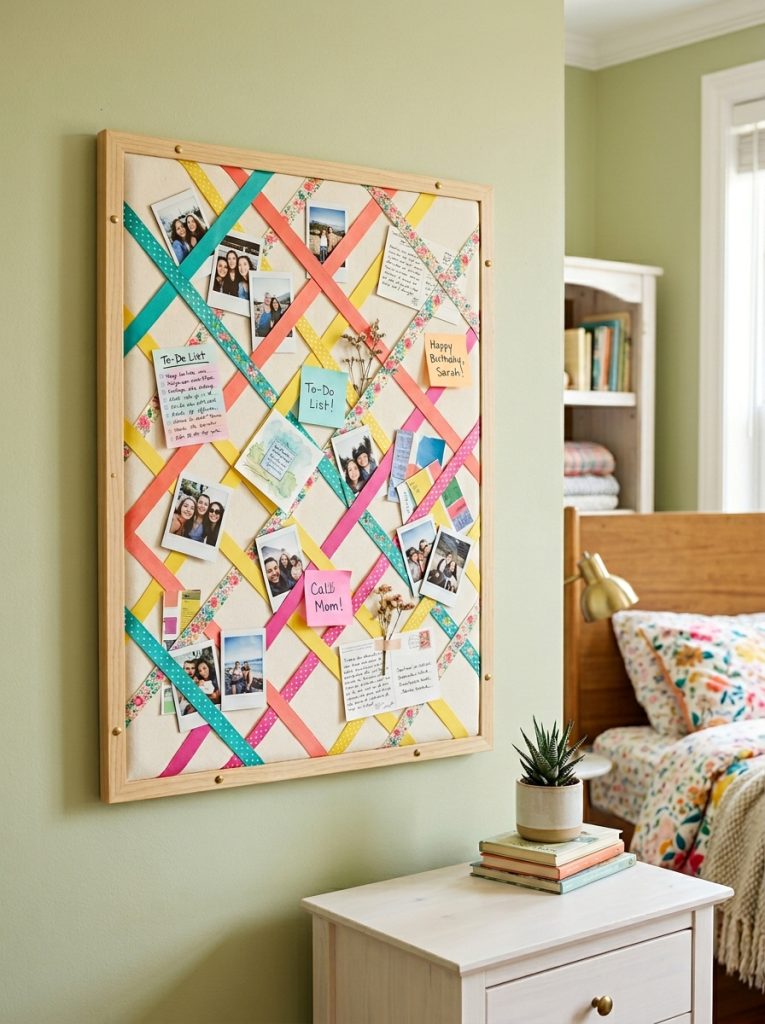
A ribbon memo board uses crisscrossed ribbon stapled to a fabric covered frame to create a grid that holds photos and notes tucked under the intersections — no push pins needed at all. This pin board ribbon memo board shows the finished style. Choose ribbon colors that complement the fabric backing for a coordinated look that works beautifully in a bedroom or craft room.
Materials Needed:
- Fabric covered board or frame
- Decorative ribbon
- Staple gun
- Scissors
How to Make It:
- Cover the board base in fabric first using the standard wrap and staple method.
- Lay ribbon diagonally across the board in one direction and staple ends to the back.
- Lay more ribbon diagonally in the opposite direction creating a crisscross grid.
- Staple all ribbon ends securely to the back of the board.
- Tuck photos and notes under the ribbon intersections.

Ribbon Memo Pin Board
Crisscross ribbon memo board that holds photos and notes without needing a single push pin.
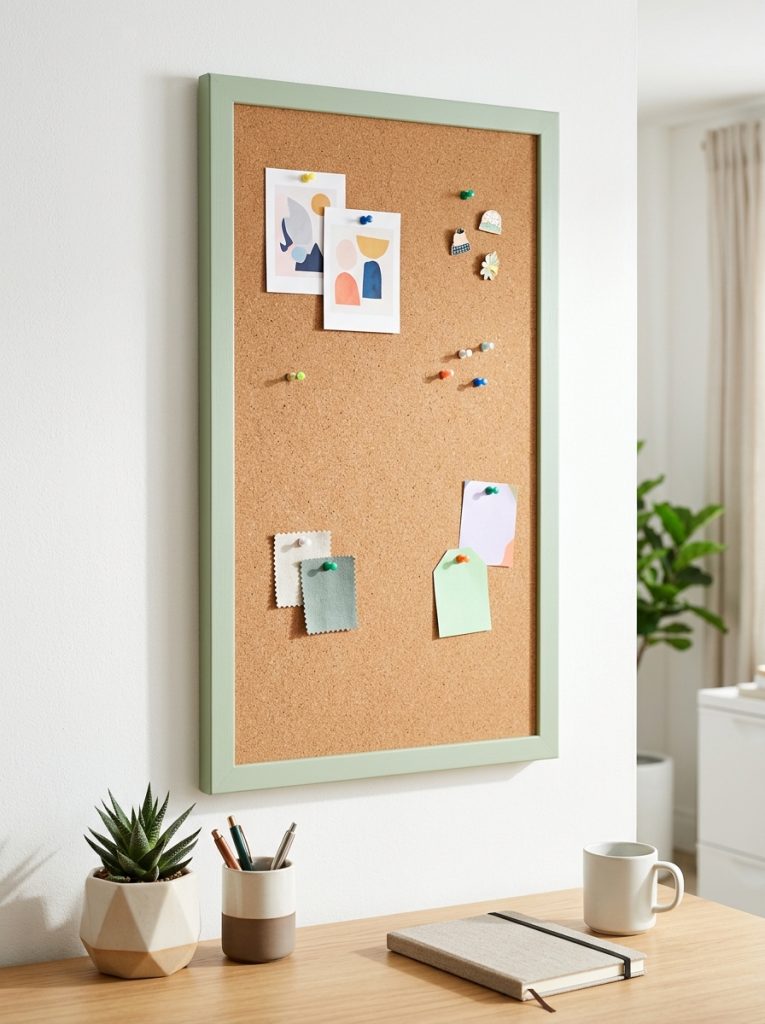
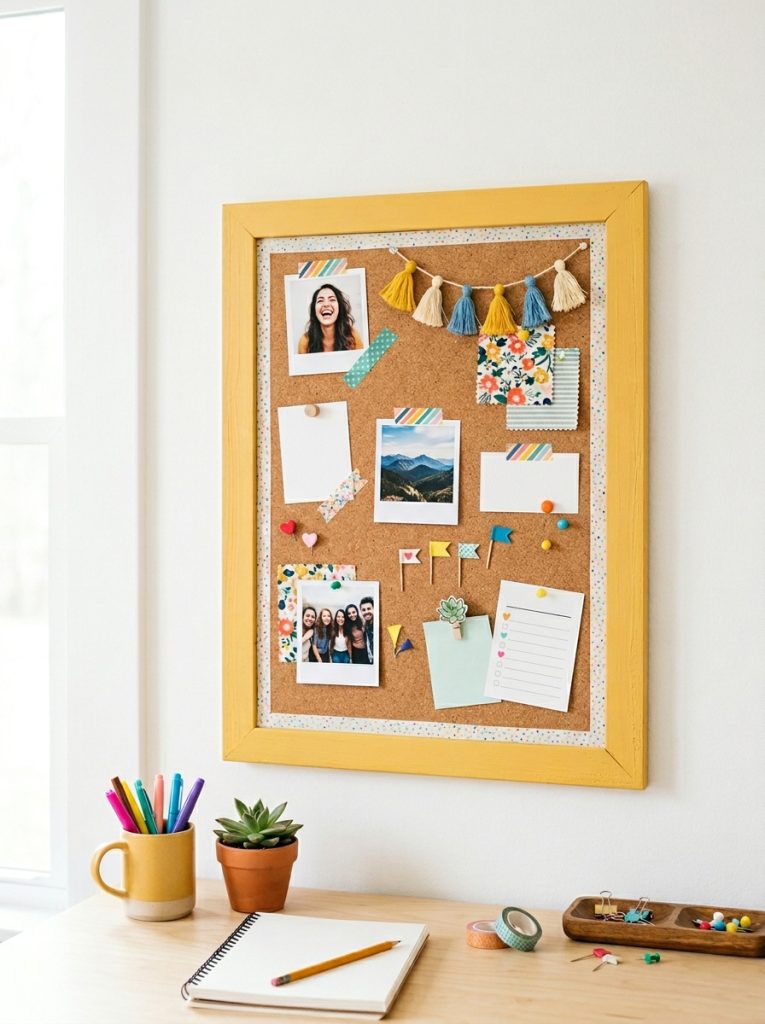
Check Price on Amazon5. Make an Office Desk Pin Board
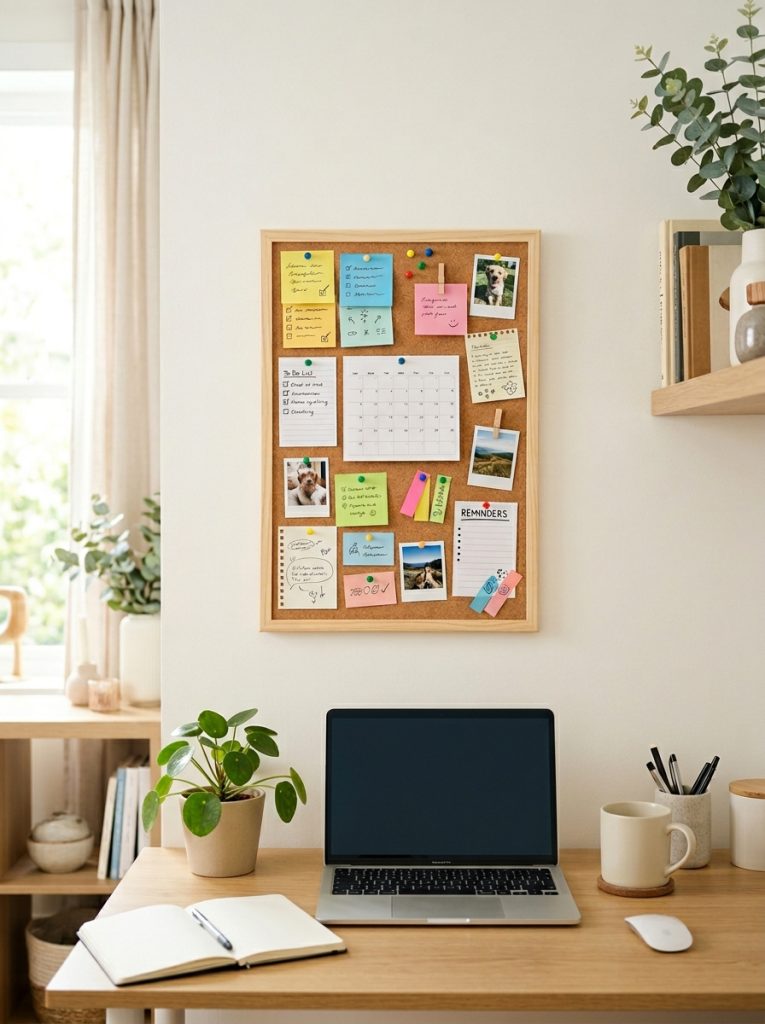
A pin board sized for the space directly above a desk keeps reminders, deadlines, and notes visible exactly where work happens. This pin board office desk is the right compact size for a desk wall rather than a full room board. Organize it into loose zones — current tasks on one side, reference notes on the other — and the board genuinely improves daily productivity.
Materials Needed:
- Cork board sized for desk wall
- Frame or border trim
- Mounting hardware
- Push pins or washi tape for sections
How to Make It:
- Measure the available wall space directly above the desk.
- Cut or buy a cork board to fit that exact space.
- Frame or border the edges for a finished look.
- Mount at eye level when seated at the desk.
- Divide into zones with washi tape or ribbon for tasks, deadlines, and inspiration.

Office Desk Pin Board
Compact pin board sized for above the desk — keeps tasks and reminders visible right where work happens.
Check Price on Amazon6. Build a Cardboard Pin Board for a Kids Room
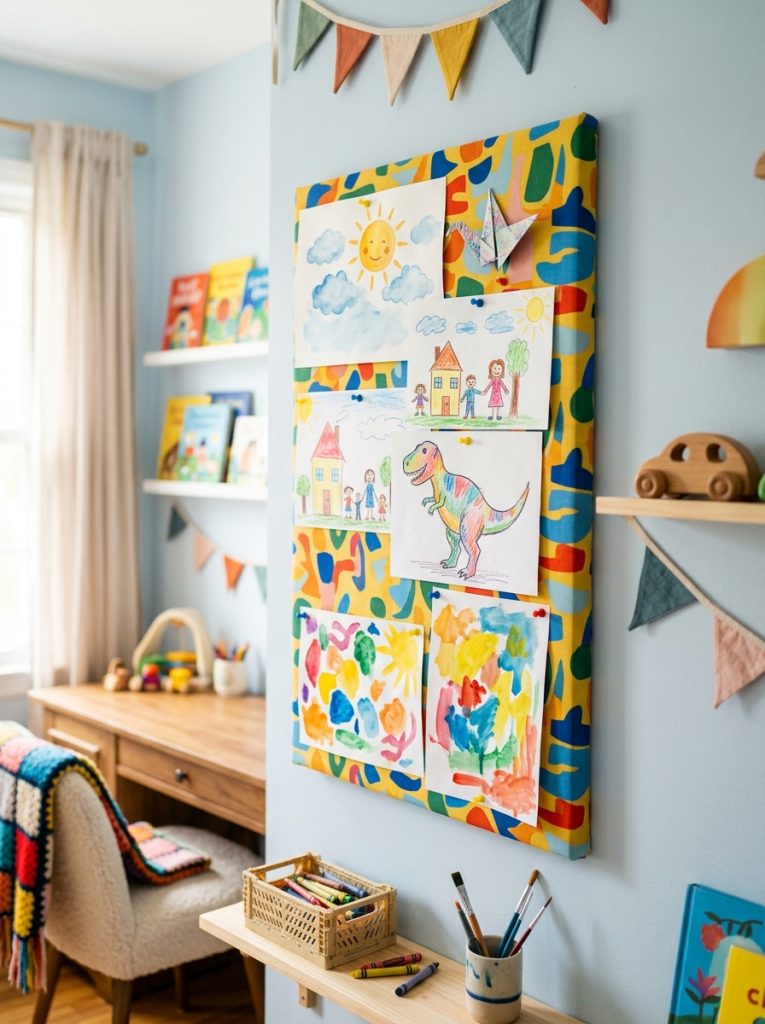
A cardboard pin board is the cheapest option and works perfectly for a kids room where artwork changes constantly. Layer cardboard sheets for rigidity, cover in bright fabric, and the finished board holds push pins just as well as a store bought version. This pin board kids room cardboard shows the fun colorful style that works in a child’s space. Let kids help choose the fabric for a board that feels like their own.
Materials Needed:
- Thick corrugated cardboard (4 to 6 sheets)
- Bright colorful fabric
- Strong craft glue
- Staple gun
How to Make It:
- Cut four to six cardboard sheets to identical dimensions.
- Glue all sheets together and allow to dry completely under weight.
- Cover the layered cardboard in fabric using the wrap and staple method.
- Hang with command strips or small nails.
- Fill with kids artwork and drawings.

Kids Room Cardboard Pin Board
Colorful fabric covered cardboard pin board — budget friendly and perfect for displaying kids artwork.
Check Price on Amazon7. Make a Travel Map Pin Board
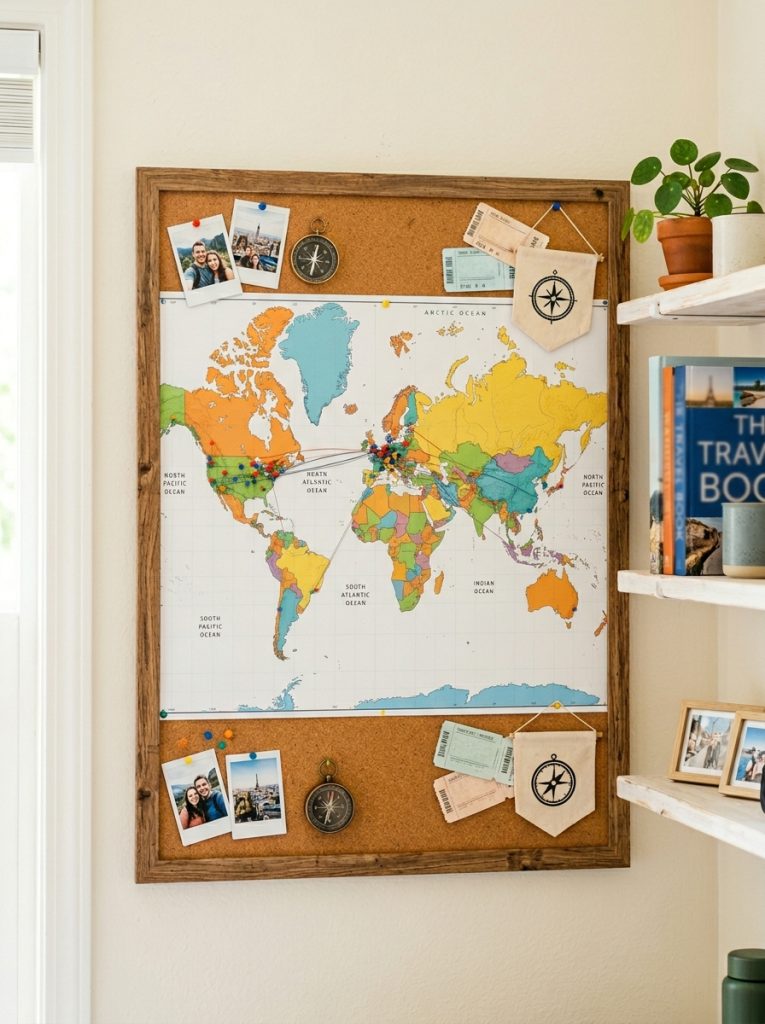
A travel map pin board combines a functional pin board with a personal travel display. Mount a large printed map across a cork board with decoupage medium and use push pins to mark places visited or places to go. This pin board travel map cork is the right base for this build. The cork underneath still functions for pinning regular notes and photos in the corners around the map.
Materials Needed:
- Cork board
- Large format printed map
- Decoupage medium (Mod Podge)
- Foam brush
- Colored push pins
How to Make It:
- Print or buy a large map sized to fit your cork board.
- Apply a thin coat of Mod Podge to the cork surface.
- Lay the map on the wet Mod Podge and smooth out air bubbles from the center outward.
- Apply a topcoat of Mod Podge over the map and allow to dry.
- Add colored push pins to mark visited and wishlist locations.

Travel Map Cork Pin Board
Cork board base perfect for mounting a world map and pinning travel memories and future destinations.
Check Price on Amazon8. Try a Budget Dollar Tree Style Board
A budget pin board built from dollar store cork tiles and basic craft supplies proves that this project does not need expensive materials to look good. This pin board dollar tree style shows the affordable approach. Paint the frame, add ribbon trim, and the finished board looks intentional despite costing only a few dollars in total materials. Great for a first apartment or a project to try with kids.
Materials Needed:
- Dollar store cork tiles or small cork board
- Craft paint
- Ribbon or trim
- Hot glue gun
How to Make It:
- Arrange cork tiles in your desired board size and shape if using multiple tiles.
- Paint the visible frame edges or border in your chosen color.
- Hot glue ribbon trim around the perimeter for a finished edge.
- Mount with adhesive strips or small nails.
- Style with photos and notes using budget push pins.

Budget Dollar Tree Style Pin Board
Affordable cork tile pin board that proves a great looking board does not need a big budget.
Check Price on Amazon9. Build a Pin Board for a Study Table
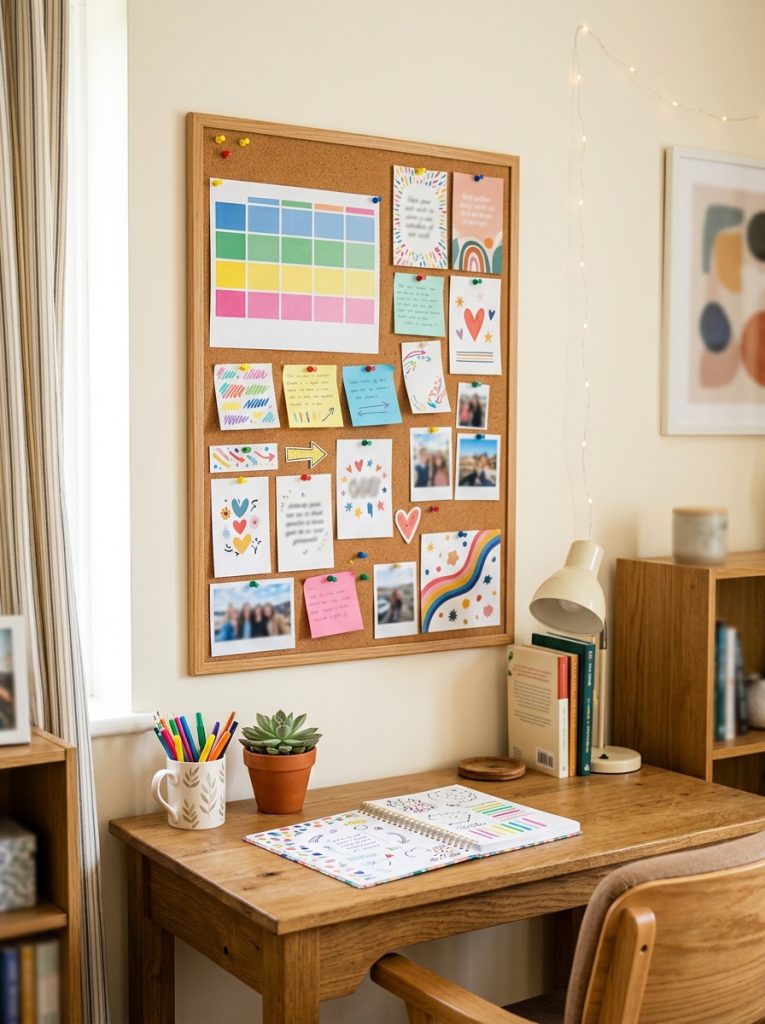
A pin board above a study table helps keep academic life organized in one visible spot — class schedule, assignment deadlines, and motivational notes all in view while working. Build it slightly larger than a desk board since study materials tend to accumulate more than office notes. Color code sections by subject or priority level using different colored push pins or sticky notes for a system that actually gets used daily.
Materials Needed:
- Cork board sized for study area
- Frame or trim
- Colored push pins
- Mounting hardware
How to Make It:
- Measure the wall space above the study table.
- Build or buy a cork board sized generously for that space.
- Frame the edges for a finished look if desired.
- Mount at a height visible while seated at the desk.
- Color code sections by subject using different push pin colors.
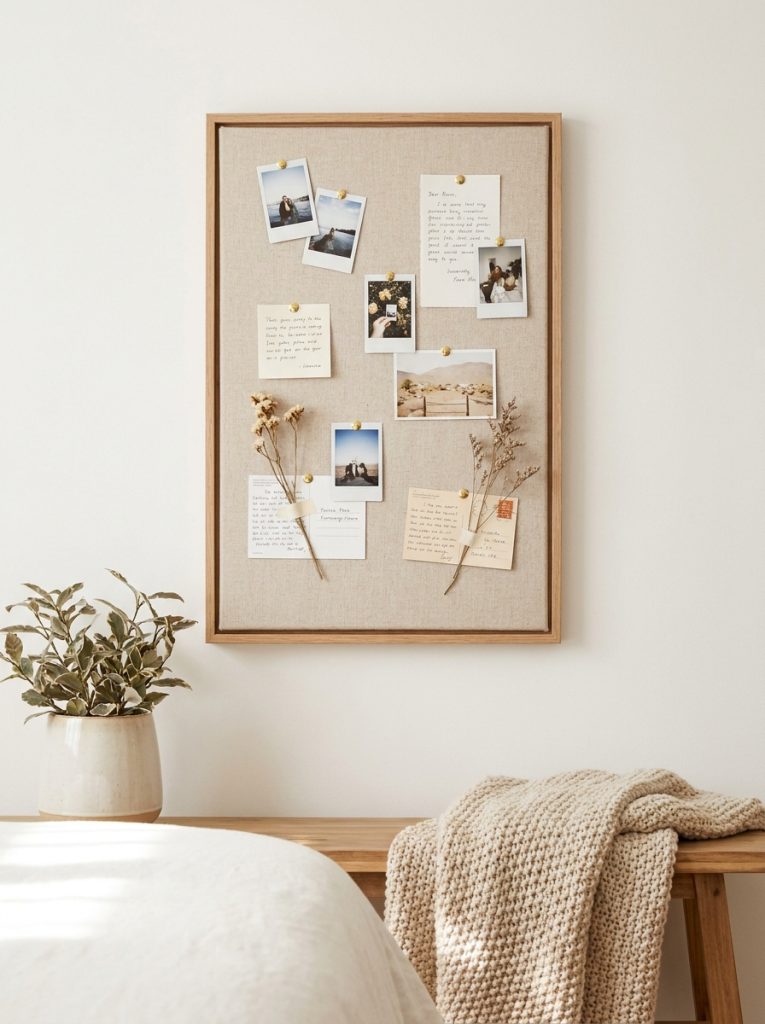
10. Make a Cute Aesthetic Pin Board

A cute aesthetic pin board layers soft colors, dried flowers, and polaroid style photos for a board that looks like a curated mood board as much as a functional pin board. Start with a pale pink or cream fabric base, add gold push pins, and pin a mix of photos, small dried flower stems, and inspirational quotes. The result photographs beautifully and genuinely gets used since everything pinned is something the person wants to see daily.
Materials Needed:
- Fabric covered pin board base
- Gold push pins
- Dried flowers
- Polaroid or printed photos
How to Make It:
- Cover the board base in pale pink or cream fabric using the wrap and staple method.
- Pin photos at varying angles for a casual collected look.
- Tuck small dried flower stems between photos using gold pins.
- Add a few inspirational quote cards or postcards for texture.
- Step back and adjust spacing until the layout feels balanced.
11. Style a Large Office Pin Board
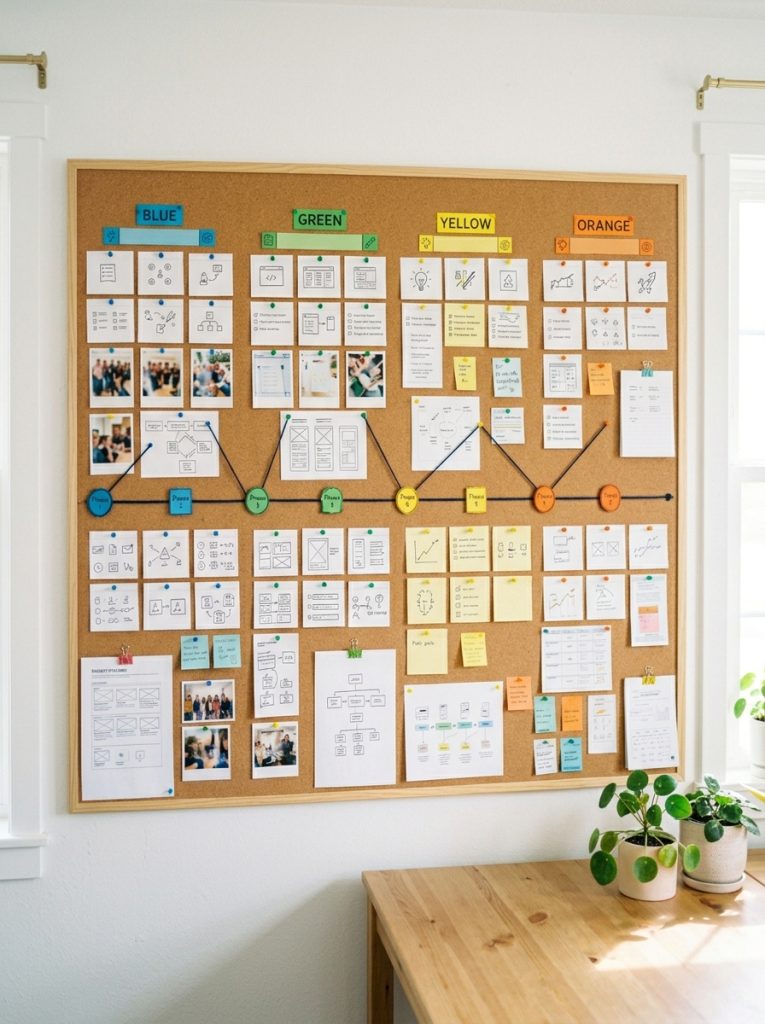
A large office pin board works best when organized into clear zones rather than a free-for-all of papers. Divide the board with ribbon or tape into sections — current projects, deadlines, reference materials, inspiration — and label each clearly. Keep the board directly in sightline from the desk so it gets checked and updated regularly rather than becoming background clutter that nobody actually looks at.
Materials Needed:
- Large cork board
- Ribbon or washi tape for zone dividers
- Label tags
- Push pins
How to Make It:
- Mount a large cork board within easy view of the desk.
- Divide into zones using ribbon or tape in a grid pattern.
- Label each zone clearly with a small tag.
- Pin relevant items only to their designated zone.
- Reset and declutter the board weekly to keep it useful.
12. Build a Wall of Multiple Pin Boards
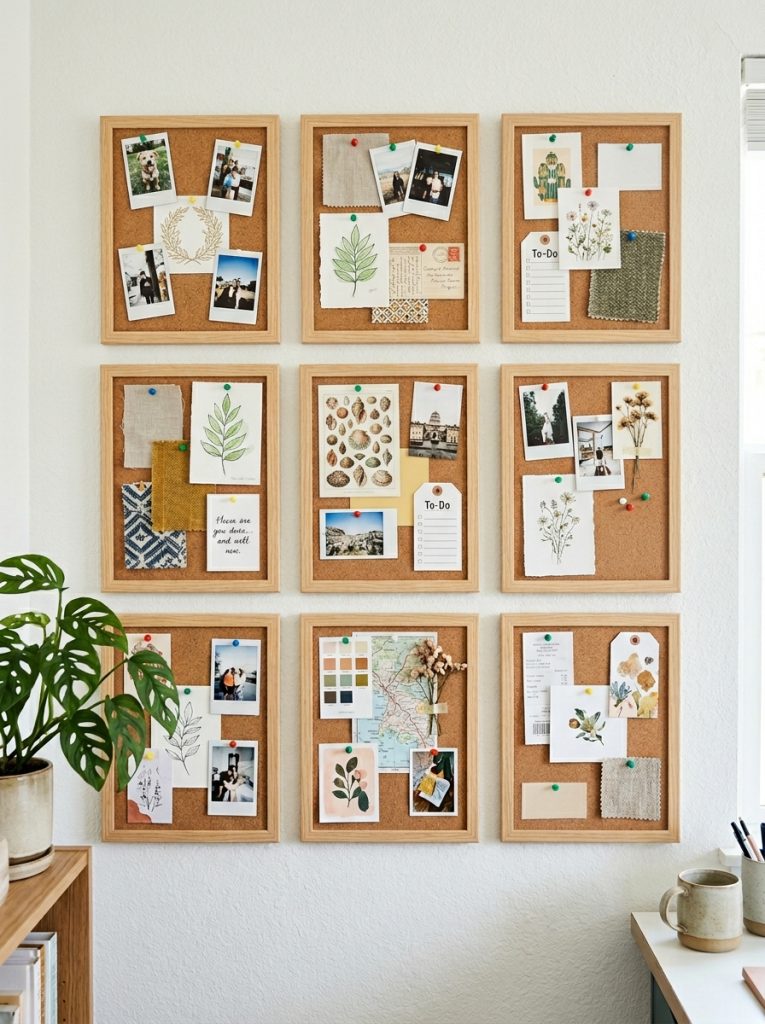
Instead of one large pin board, mounting several smaller matching boards in a gallery wall arrangement creates a striking display while keeping each section organized by category. Build three or four boards in identical frames, space them evenly, and assign each one a different purpose — photos, to-do lists, inspiration, calendar. The gallery effect looks intentional and gives more flexibility to rearrange sections independently.
13. Make a Fabric Scrap Pin Board
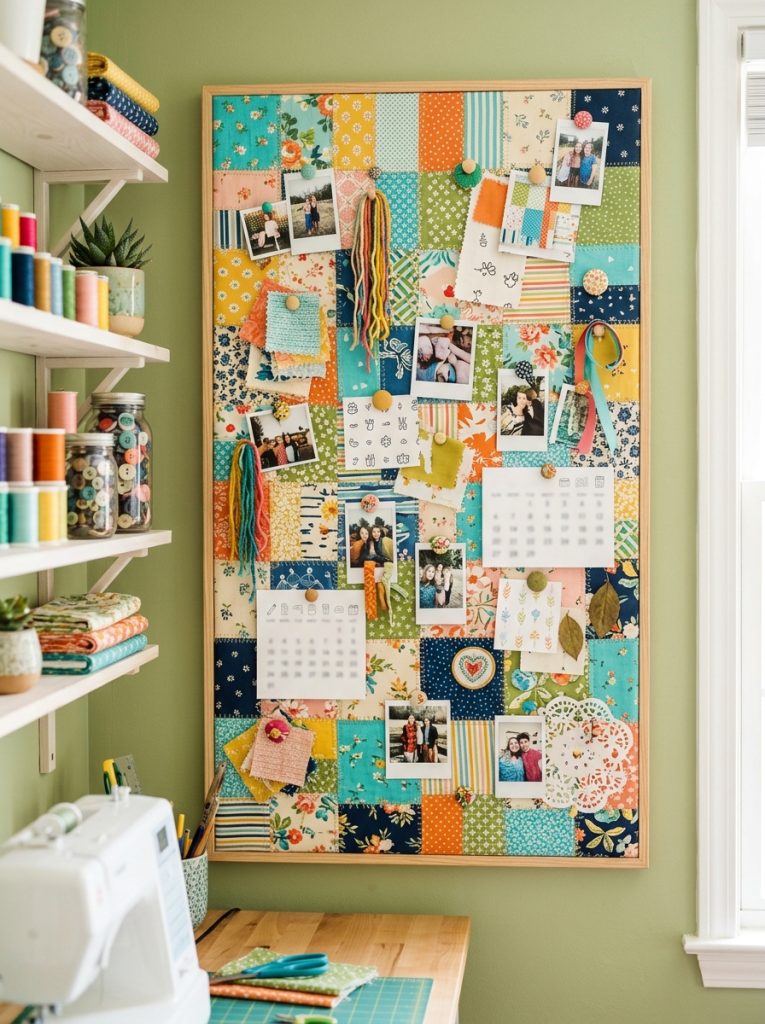
A patchwork fabric scrap pin board is a genuinely creative way to use leftover fabric from other sewing projects. Cut scraps into uniform squares or strips, arrange in a pattern, and glue or sew together before covering the board in the standard wrap and staple method. The patchwork texture adds genuine visual interest that a single fabric color cannot match, and it costs nothing if scraps are already on hand from previous projects.
14. Build a Picture Frame Pin Board Without Cork
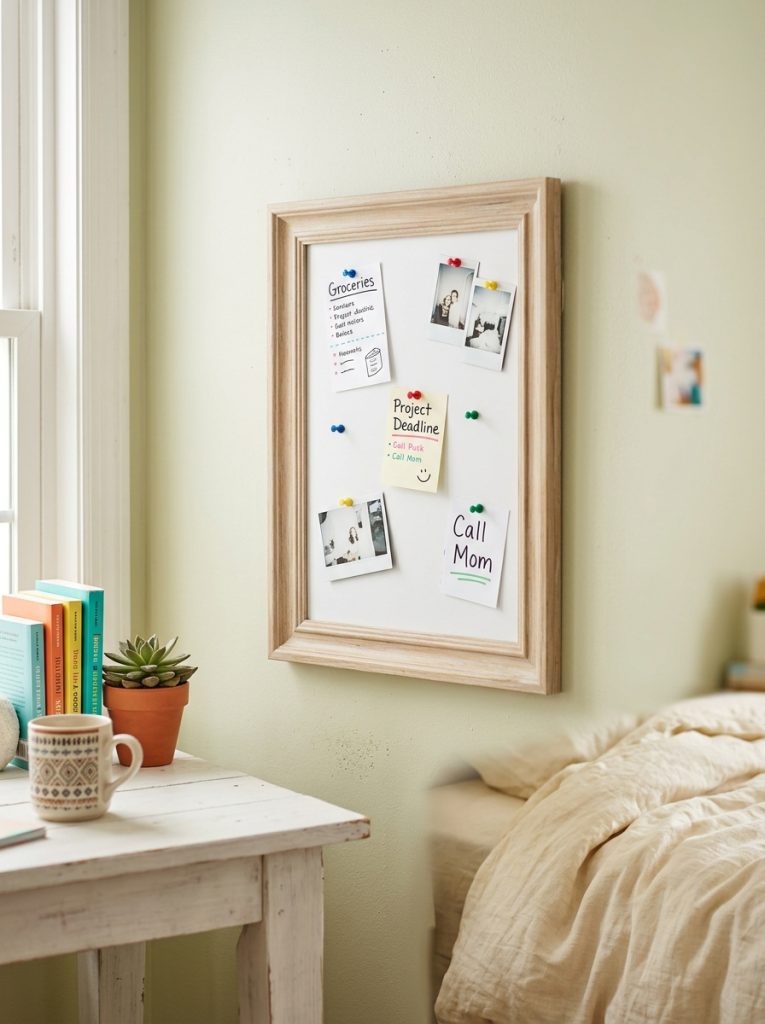
Foam board is a lightweight alternative to cork that works just as well for a pin board and is easier to find in some craft stores. Use a picture frame as the border, cut foam board to fit inside, cover with fabric if desired, and the finished board holds standard push pins reliably. This swap works well when cork sheet is not readily available or when a thinner, lighter board is needed for a temporary or rental space.
15. Keep It Simple — One Board One Purpose
The most effective pin board often has just one clear job — a calendar board, a photo board, or a to-do board, rather than trying to do everything at once. A single purpose board stays cleaner and gets used more consistently because there is no ambiguity about what belongs on it. Start with the simplest version that solves your most pressing organizational need and add more boards later only if a genuine need for them develops.
Final Thoughts on DIY Pin Board
A pin board is one of those small DIY projects that punches well above its weight in terms of impact. Whether covered in fabric, built from a picture frame, mapped out for travel memories, or kept deliberately simple for one clear purpose, the right pin board organizes a space while adding genuine personality. Pick the style that fits your room and start with whatever materials you already have at home.

Amir Ali is the founder and site administrator of HomeDecorEdge, a modern home decor and interior design platform. Since starting the site, he has combined his passion for interior design, practical styling, and color coordination with hands-on content strategy and site management. He guides authors, curates high-quality articles, and ensures readers have access to actionable, visually inspiring, and user-focused home decor advice for apartments, small rooms, and family homes.