
A ring holder solves one of the most common small jewelry problems — rings that get taken off at the sink, the kitchen counter, or the nightstand and then disappear into random surfaces around the house. These DIY ring holder ideas range from a five minute clay dish to a more involved wall mounted display, giving every ring a dedicated home whether it is an everyday band or a treasured engagement ring.
This post contains affiliate links. If you purchase through these links I may earn a small commission at no extra cost to you.
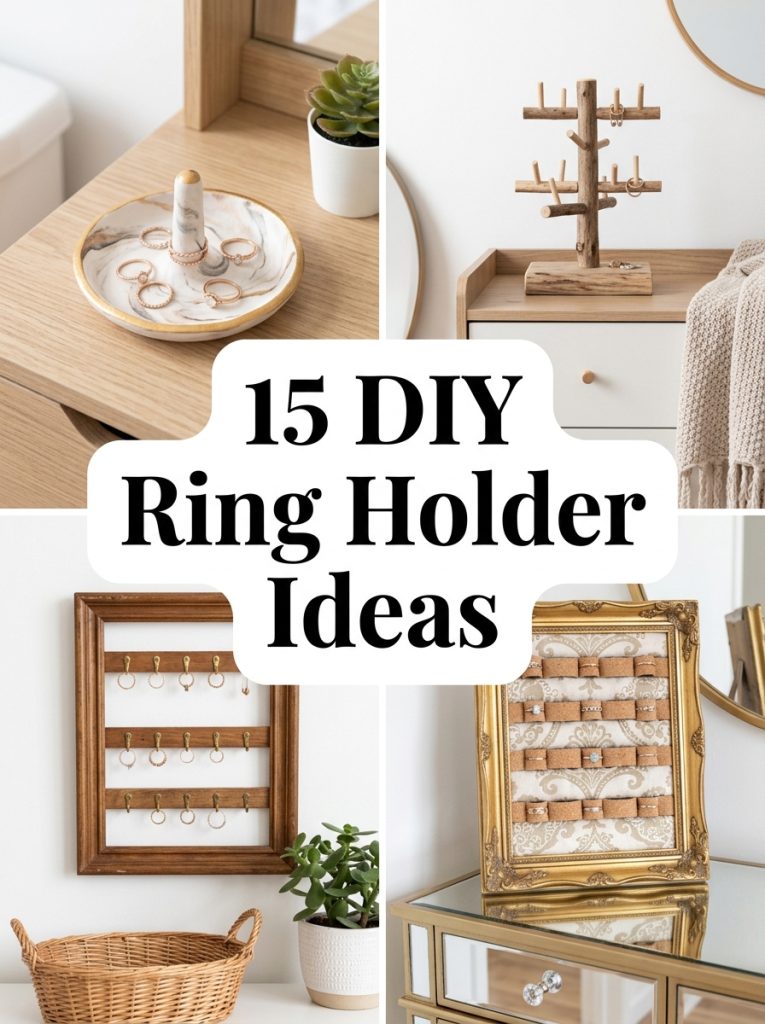
A dedicated ring holder means rings stop disappearing the moment they come off.
1. Sculpt an Air Dry Clay Ring Dish
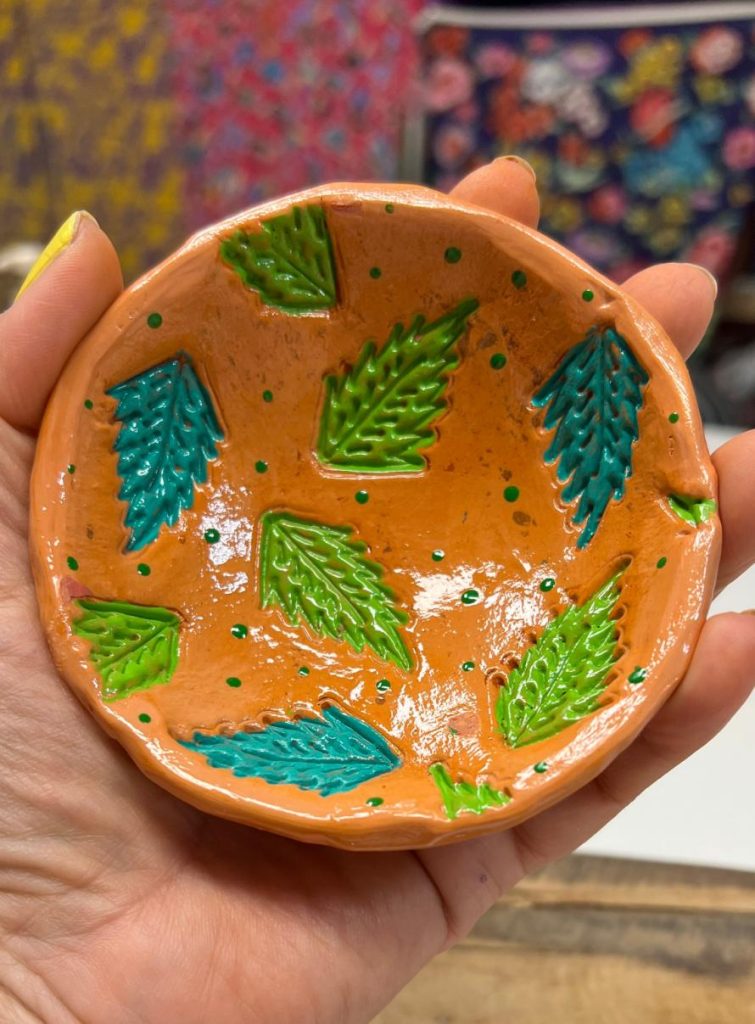
An air dry clay ring dish is the most popular DIY ring holder project because it requires no kiln, no special tools, and finishes in an afternoon. This air dry clay kit has everything needed to sculpt a small dish — roll it flat, drape over a curved mold like a small bowl, and pinch the edges into a scalloped or organic shape while still soft. Paint once fully dry for a finished piece that looks like it came from a boutique shop.
Materials Needed:
- Air dry clay
- Small bowl or rounded mold
- Rolling pin
- Acrylic paint and sealant
How to Make It:
- Roll the clay out to an even thickness of about a quarter inch.
- Drape the rolled clay over a small bowl mold to create a curved dish shape.
- Trim and pinch the edges into a scalloped or organic wavy pattern while the clay is still soft.
- Allow to air dry fully according to the clay package instructions, usually 24 to 48 hours.
- Paint in your chosen color and seal with a clear matte or glossy sealant.

Air Dry Clay Kit
Complete air dry clay kit for sculpting a custom ring dish with no kiln or special tools required.
Check Price on Amazon2. Style a Ceramic Ring Dish for the Bedside
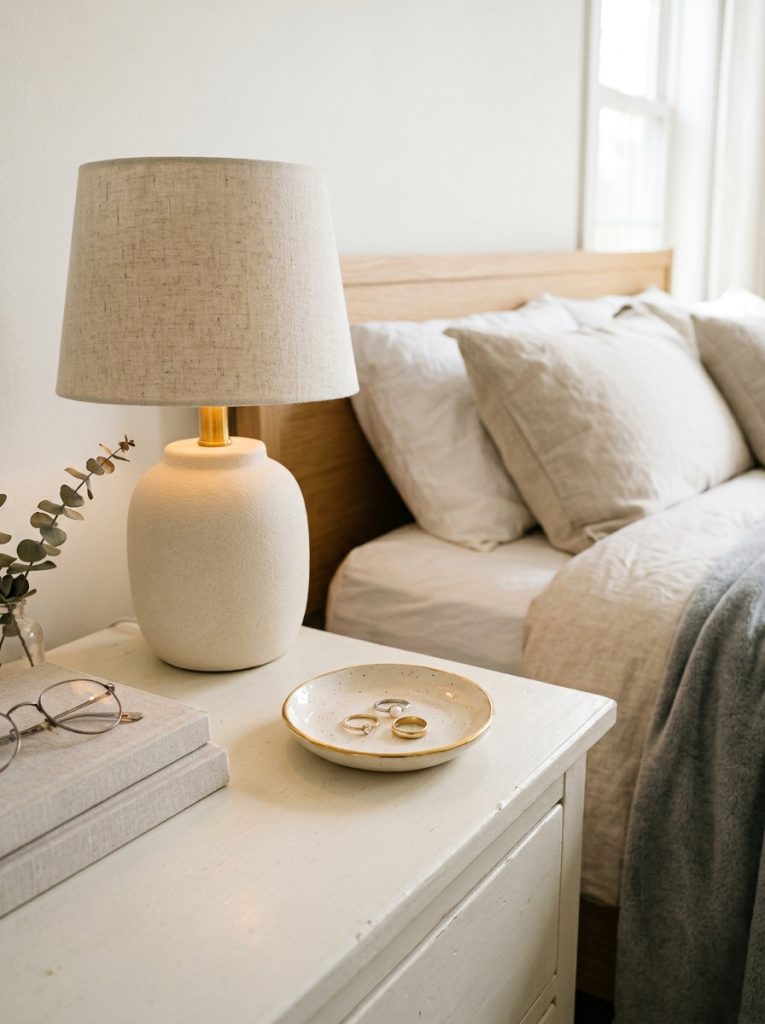
A ceramic ring dish kept on the nightstand catches rings taken off before bed, which is one of the most common moments rings get misplaced. This ring holder dish ceramic has a glazed finish that looks intentional as part of the bedside styling rather than purely functional. Pair it with a small dish for earrings beside it and the whole bedside catch-all area stays organized.
Materials Needed:
- Ceramic ring dish
- Optional small additional dish for earrings
How to Make It:
- Choose a ceramic dish with a finish that complements the bedroom palette.
- Place on the nightstand within easy reach of the bed.
- Make taking rings off and placing them in the dish part of the nightly routine.
- Add a small companion dish for earrings or other small jewelry beside it.

Ceramic Ring Holder Dish
Glazed ceramic ring dish that looks intentional as part of bedside or vanity styling.
Check Price on Amazon3. Build a Wood Stand Ring Holder
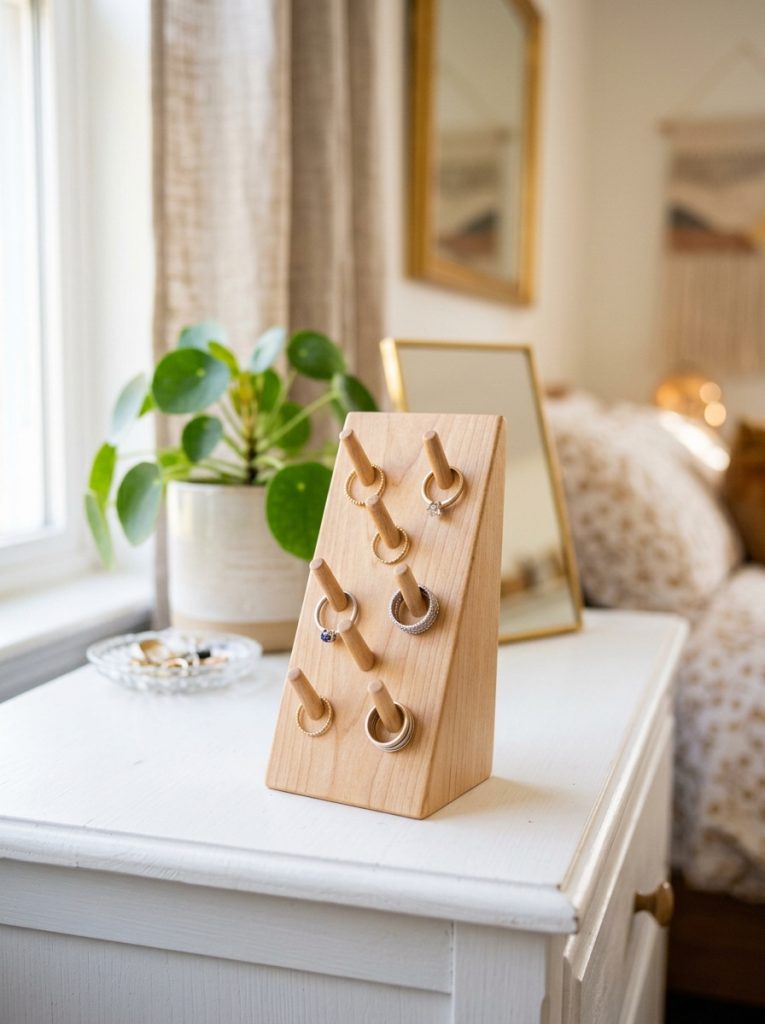
A wood stand with small pegs displays rings upright rather than dropped flat in a dish, which makes each ring individually visible and easy to grab without searching. This ring holder wood stand has the warm natural finish that fits any bedroom decor style. Make your own version by drilling small peg holes into a wood base and gluing in dowel pieces of varying heights for a custom display.
Materials Needed:
- Wood base block
- Wooden dowel pieces or pegs
- Drill with bit matching dowel size
- Wood glue
- Sandpaper and finish
How to Make It:
- Cut or sand a wood base block to your desired shape.
- Mark peg positions spaced evenly across the base.
- Drill holes at each marked position sized to fit the dowel pieces.
- Glue dowel pegs of varying heights into the drilled holes.
- Sand smooth, apply a wood finish, and allow to cure before displaying rings.

Wood Stand Ring Holder
Natural wood stand with pegs that displays each ring upright and individually visible.
Check Price on Amazon4. Mount a Wall Ring Display
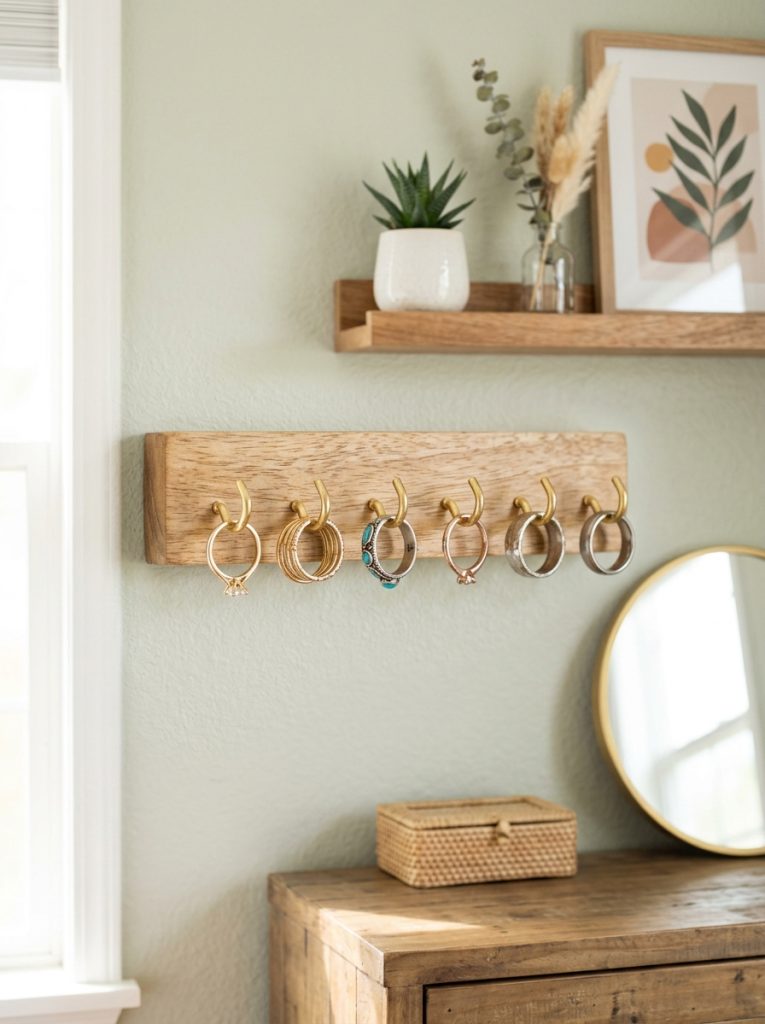
A wall mounted ring display turns a jewelry storage need into wall decor, which works especially well for a small collection of rings worn regularly. This ring holder wall mount has small hooks or pegs spaced for individual rings and mounts with minimal hardware. Position it beside a mirror or vanity area where rings naturally come off during the day.
Materials Needed:
- Wall mounted ring holder
- Wall anchors or adhesive strips
- Level
How to Make It:
- Choose a wall position near where rings are typically removed, such as beside a mirror.
- Mark the mounting position and check level.
- Install wall anchors or adhesive mounting strips according to the product instructions.
- Mount the holder securely.
- Hang rings on the hooks or pegs.

Wall Mount Ring Holder
Wall mounted ring display with individual hooks that turns ring storage into decorative wall art.
Check Price on Amazon5. Use a Decorative Box for Wedding and Engagement Rings
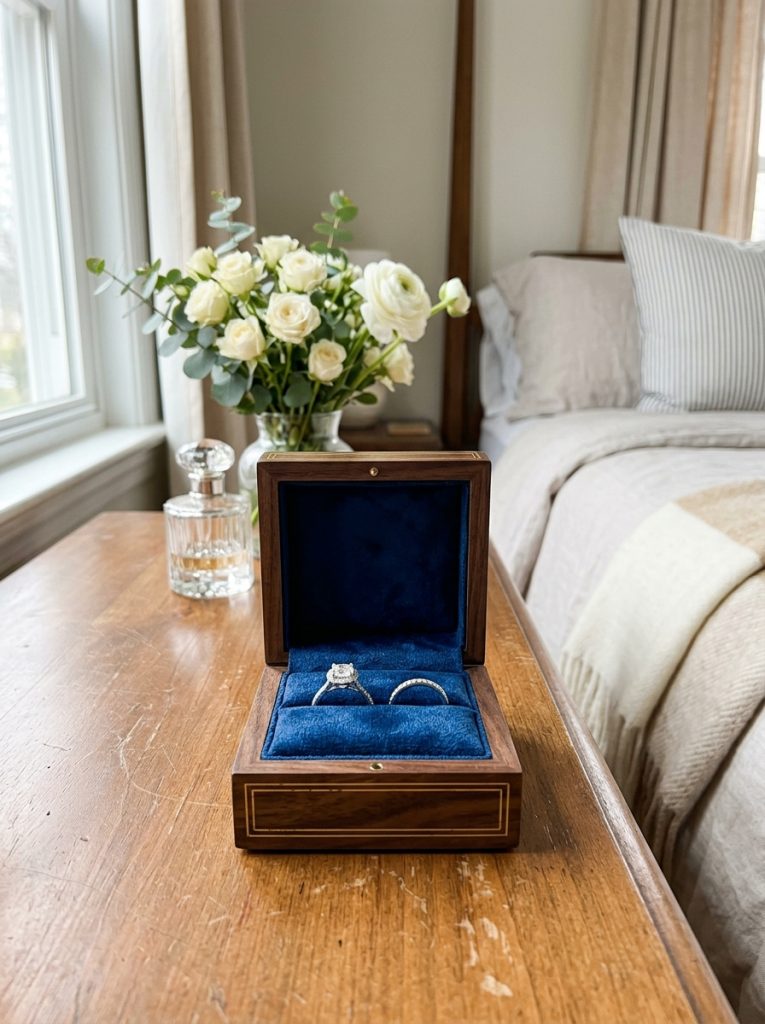
Wedding and engagement rings deserve more protection than an open dish, especially when they come off for activities like washing dishes or applying lotion. This ring holder box display has a lined interior that cushions and protects precious rings while keeping the lid open for quick access during the day and closed for protection at night. The enclosed design also reduces the chance of a ring getting knocked off a surface.
Materials Needed:
- Lined decorative ring box
- Soft cloth for cleaning rings before storage (optional)
How to Make It:
- Position the box on the dresser or vanity in a consistent spot.
- Open the lid during the day for quick access when removing or putting on rings.
- Close the lid at night or when traveling for added protection.
- Periodically wipe the lining clean to keep rings free of dust or residue.

Ring Holder Box Display
Lined decorative box that protects wedding and engagement rings while keeping them easily accessible.
Check Price on Amazon6. Choose a Minimalist Holder for Men’s Rings
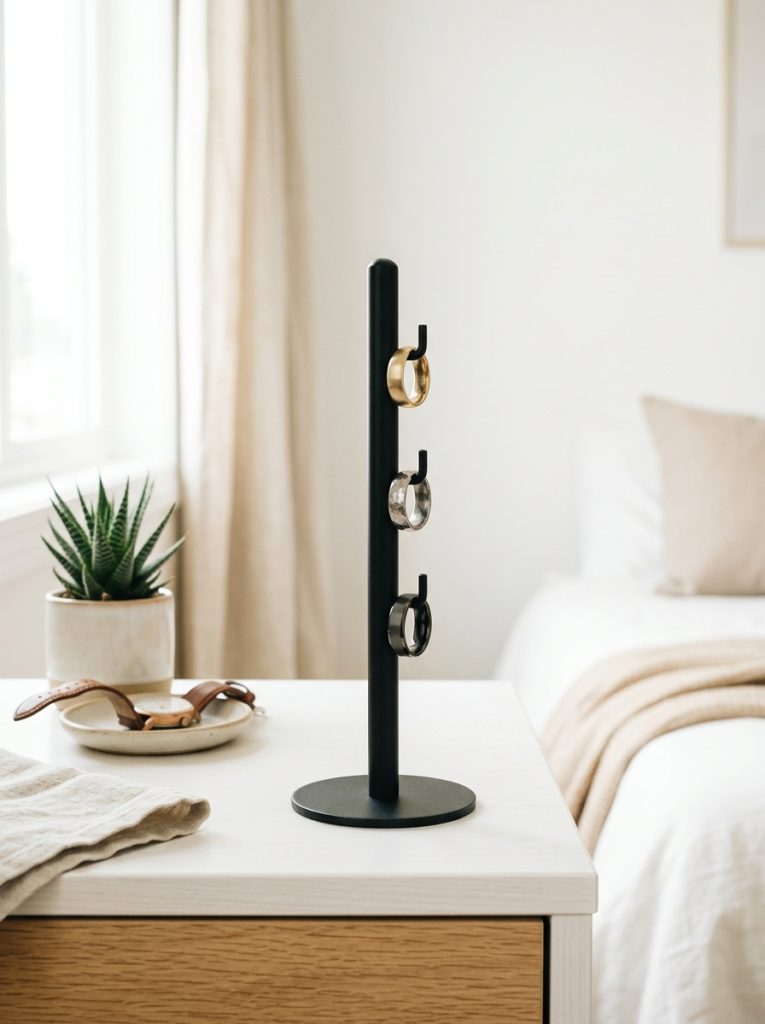
Men’s ring holders work best with a clean, minimal design rather than anything overly decorative. This ring holder men minimalist has a simple geometric shape in concrete or matte black that fits naturally on a dresser without looking out of place. A genuinely minimal piece like this also looks intentional in a shared bedroom where the styling needs to work for both partners.
Materials Needed:
- Minimalist ring holder stand
- Optional small tray underneath for additional small items
How to Make It:
- Choose a holder finish that matches existing dresser hardware or decor.
- Position on the dresser top in a consistent, easy to reach spot.
- Add a small tray underneath if extra space for a watch or wallet is needed.
- Keep the surrounding area clear for the cleanest minimal look.

Minimalist Ring Holder for Men
Clean geometric ring holder in concrete or matte black that suits a minimalist bedroom dresser.
Check Price on Amazon7. Add a Suction Ring Holder Beside the Sink
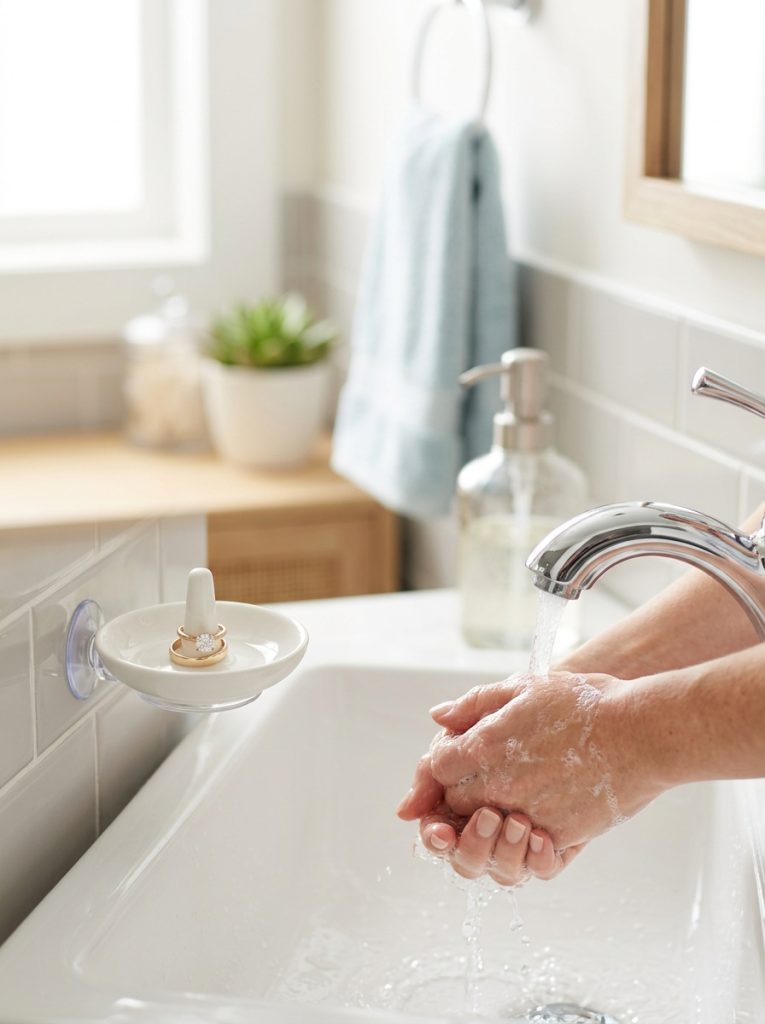
The bathroom sink is one of the most common places rings get lost, slipping off wet fingers and down the drain during handwashing or skincare routines. This ring holder sink bathroom attaches to the tile or mirror beside the sink with a suction cup, giving rings a safe spot the moment they come off before any water touches them. It is a small addition that prevents one of the most heartbreaking jewelry losses possible.
Materials Needed:
- Suction cup ring holder
- Clean, smooth surface for suction (tile or mirror)
How to Make It:
- Clean and dry the tile or mirror surface beside the sink thoroughly.
- Press the suction cup firmly against the surface, holding for several seconds.
- Test that it holds securely before relying on it for valuable rings.
- Make removing rings before washing hands part of the daily routine.

Sink Ring Holder Suction Cup
Suction cup ring holder that mounts beside the bathroom sink to prevent rings from going down the drain.
Check Price on Amazon8. Style a Jewelry Tray for Multiple Rings
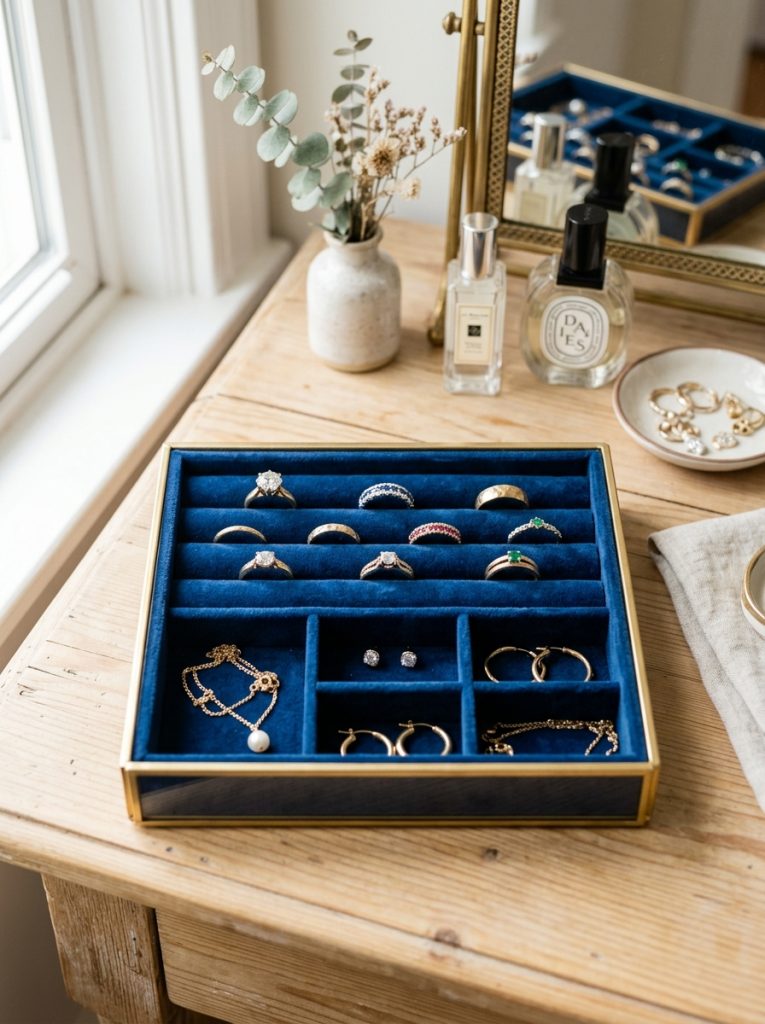
A flat jewelry tray works well for anyone with more than just a couple of rings to store, since the wide flat surface accommodates a larger collection than a single dish or stand. This ring holder tray jewelry has a soft lined surface that prevents rings from sliding around or scratching against each other. Arrange rings loosely rather than packed tightly so each piece stays easy to identify and lift out.
Materials Needed:
- Lined jewelry tray
- Optional small dividers for organizing by type
How to Make It:
- Position the tray on the vanity or dresser surface.
- Arrange rings with some space between each piece to prevent scratching.
- Group similar styles together if the collection is large enough to benefit from sorting.
- Periodically rearrange to keep frequently worn pieces toward the front.

Jewelry Ring Holder Tray
Lined jewelry tray with room for a larger ring collection, arranged loosely to prevent scratching.
Check Price on Amazon9. Build a Picture Frame Ring Display
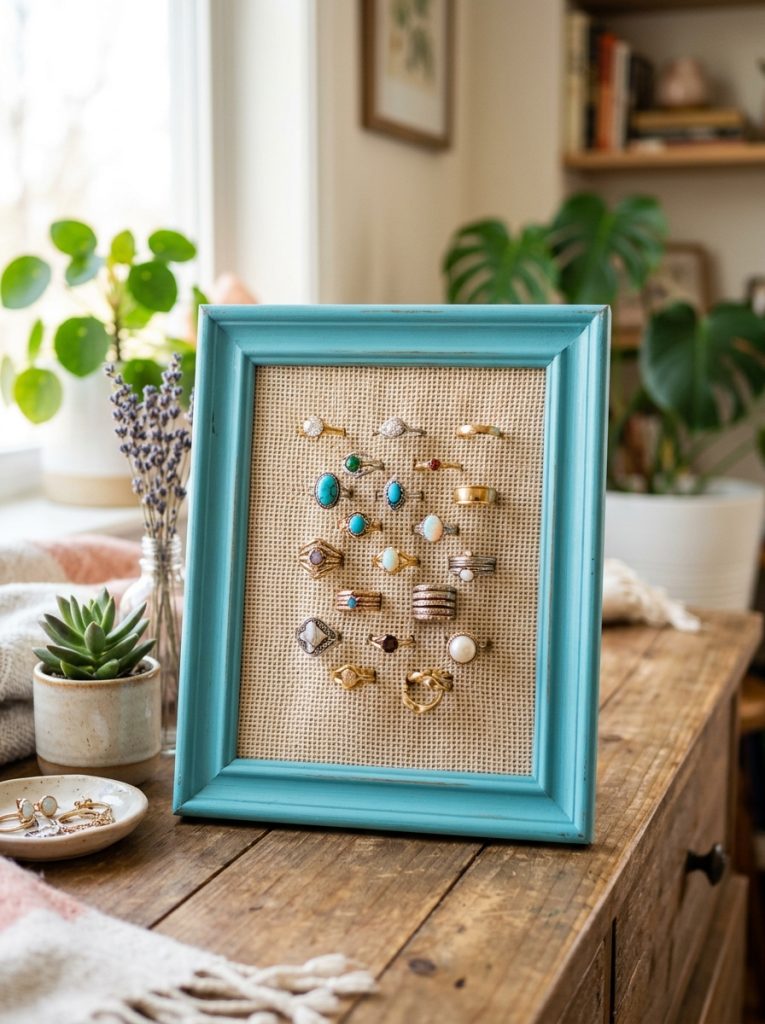
A small picture frame with fine mesh fabric stretched across the opening makes a creative ring display where rings push through the mesh and hang in place. Remove the glass from a small frame, stretch and staple lace or fine mesh fabric across the back opening, and push rings through the holes from the front. The frame can be hung on the wall or propped on a dresser, and the display looks genuinely artistic compared to a standard dish.
Materials Needed:
- Small picture frame
- Fine mesh or lace fabric
- Staple gun
- Scissors
How to Make It:
- Remove the glass and backing from the picture frame.
- Cut mesh or lace fabric to size, slightly larger than the frame opening.
- Stretch the fabric tightly across the frame opening and staple to the back edges.
- Trim excess fabric neatly.
- Push ring bands through the mesh openings from the front to hang them in place.
10. Make a Cardboard Ring Holder Prototype
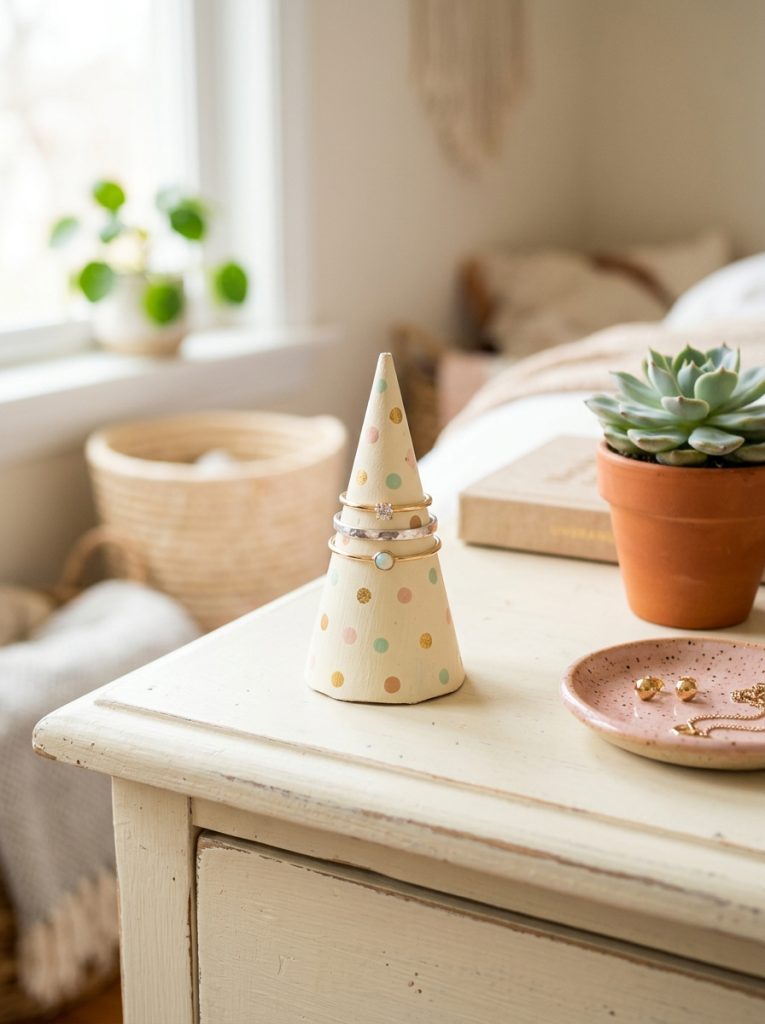
A cardboard ring holder is the cheapest possible starting point for this project and works well as a quick prototype before committing to a more permanent material. Roll a small cardboard cone, paint it in a chosen color, and rings slide onto the cone shape just like a traditional ring stand. It costs nothing if cardboard is already on hand and the small size makes it perfect for a child’s first jewelry organizer or a temporary travel solution.
Materials Needed:
- Cardboard
- Tape or glue
- Craft paint
- Scissors
How to Make It:
- Cut a quarter circle shape from cardboard.
- Roll into a cone shape and secure the seam with tape or glue.
- Trim the base flat so the cone stands upright on its own.
- Paint the cone in your chosen color and allow to dry.
- Slide rings onto the cone for display.
11. Make a Cute Animal Shaped Clay Holder
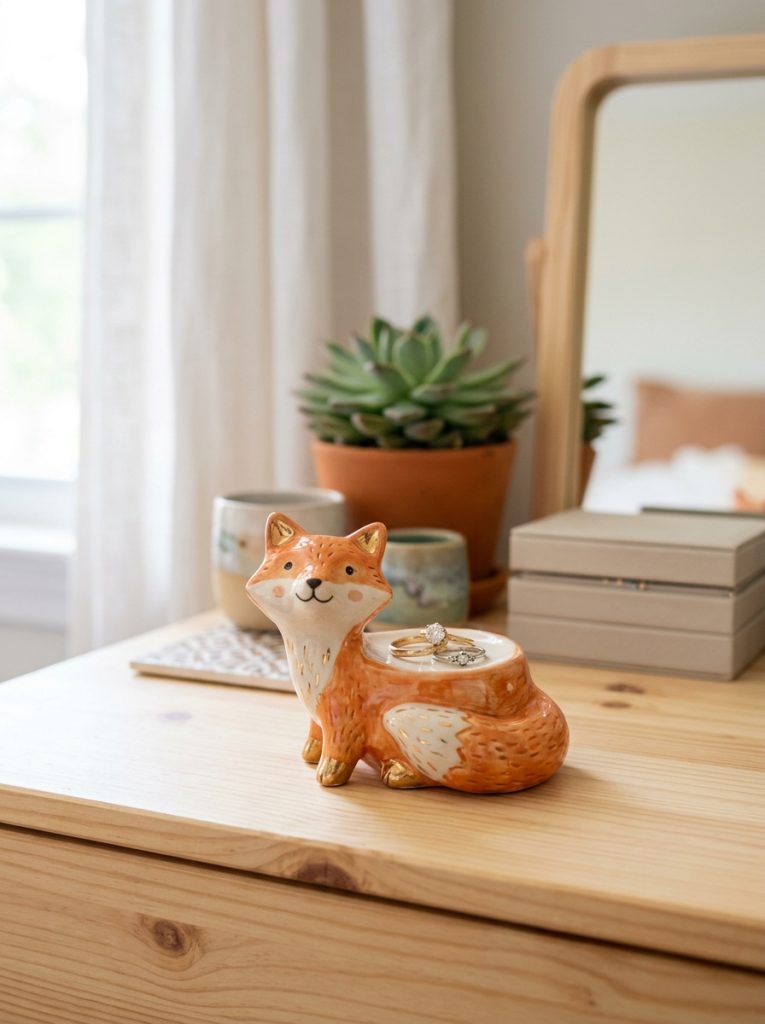
A cute animal shaped clay ring holder makes a charming gift or a fun personal project for anyone who wants something more playful than a plain dish. Sculpt a simple animal form — a cat, bunny, or bear — with a flat or curved back section designed specifically for resting rings. The whimsical shape adds personality to a dresser while still functioning as genuinely practical storage.
Materials Needed:
- Air dry clay
- Small sculpting tools or toothpicks for detail
- Acrylic paint and sealant
How to Make It:
- Sculpt a simple animal body shape from clay, keeping the back flat enough to rest a ring on.
- Add small details like ears or a tail using sculpting tools.
- Smooth any rough seams with wet fingers.
- Allow to air dry completely according to package instructions.
- Paint with acrylic paint and seal once dry.
12. DIY a Paper Origami Ring Holder
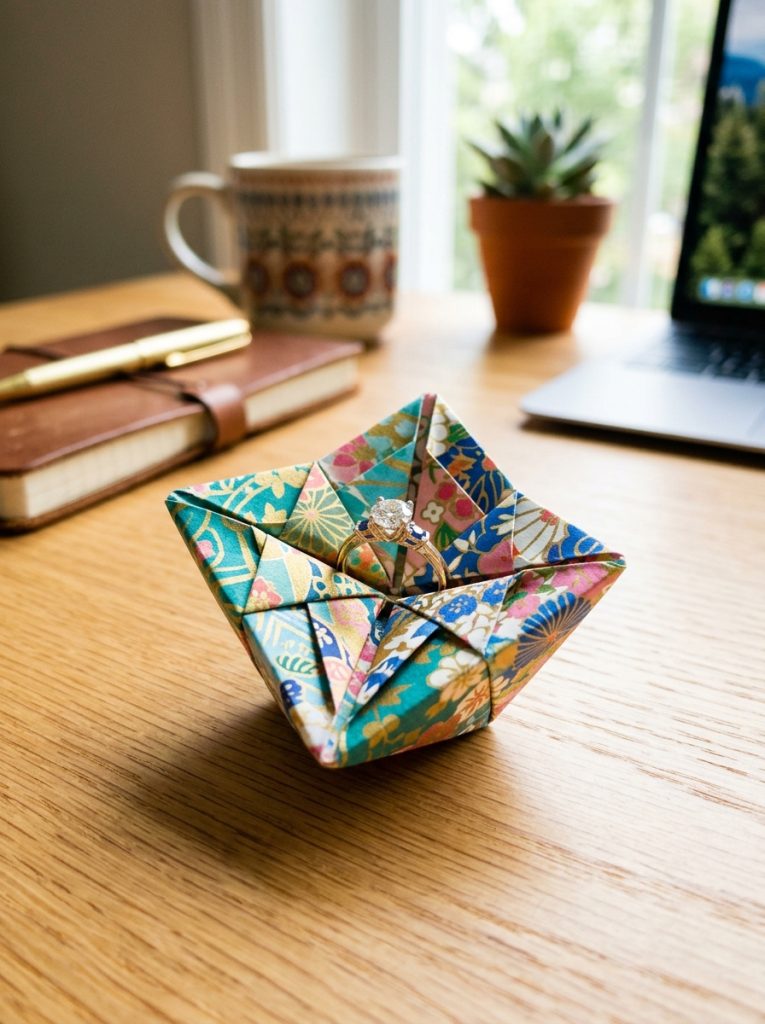
A folded paper origami ring holder is a quick craft project that works well with decorative patterned paper for a coordinated dresser look. Fold a simple box or cone shape using basic origami techniques and the rigid folds hold their shape well enough to display a ring or two. This is one of the few ring holder ideas that costs literally nothing if patterned paper is already on hand.
Materials Needed:
- Decorative origami or patterned paper
- Bone folder or ruler edge for crisp folds
How to Make It:
- Choose a simple box or cone origami pattern suited for paper crafting.
- Fold according to the pattern, using a bone folder or ruler edge for crisp, sharp folds.
- Adjust the final shape so it sits stable on a flat surface.
- Place a ring on or in the folded shape to test functionality.
- Refold with sturdier paper if the first attempt does not hold shape well.
13. Make a Keychain Style Ring Organizer
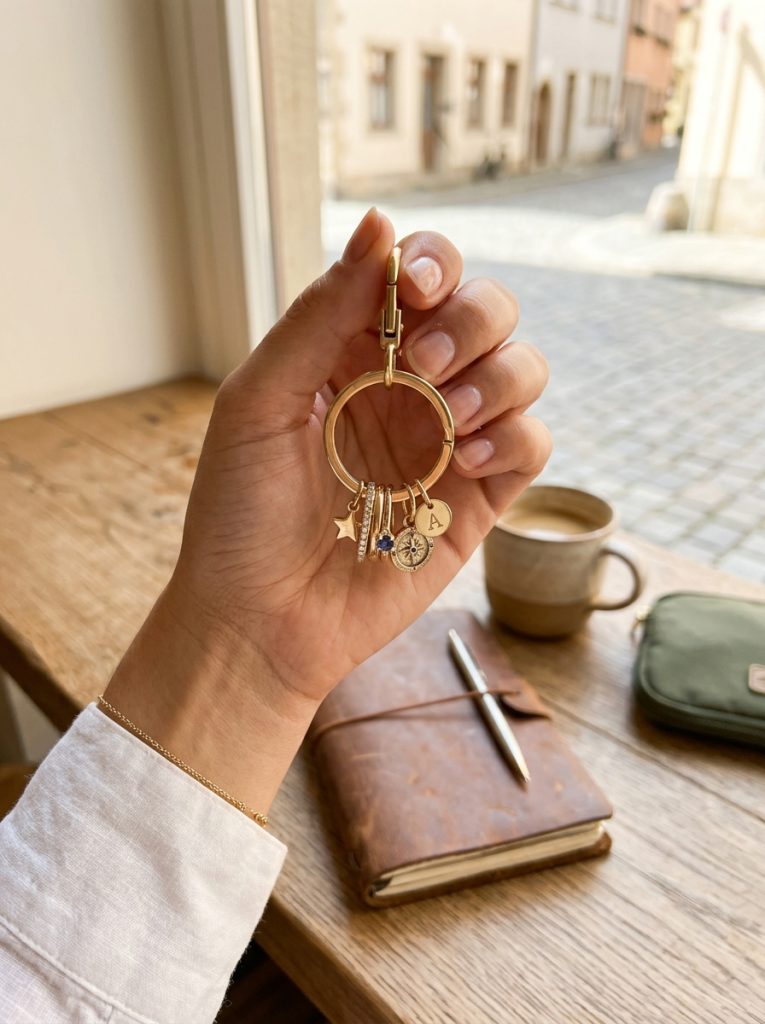
A keychain style ring organizer works well specifically for travel, keeping a small collection of rings together and secure inside a bag rather than loose where they could fall out or get lost. Thread several rings onto a sturdy keyring loop and clip it inside a travel bag or jewelry pouch. This portable approach solves the specific problem of ring storage away from home rather than competing with a dresser display piece.
Materials Needed:
- Sturdy keyring or split ring
- Small clip (optional)
How to Make It:
- Thread rings onto a sturdy keyring or split ring.
- Attach a small clip to the keyring if clipping inside a bag.
- Secure inside a travel bag or jewelry pouch for transport.
- Remove individual rings from the keyring as needed during travel.
14. Build a Multi Ring Display Box
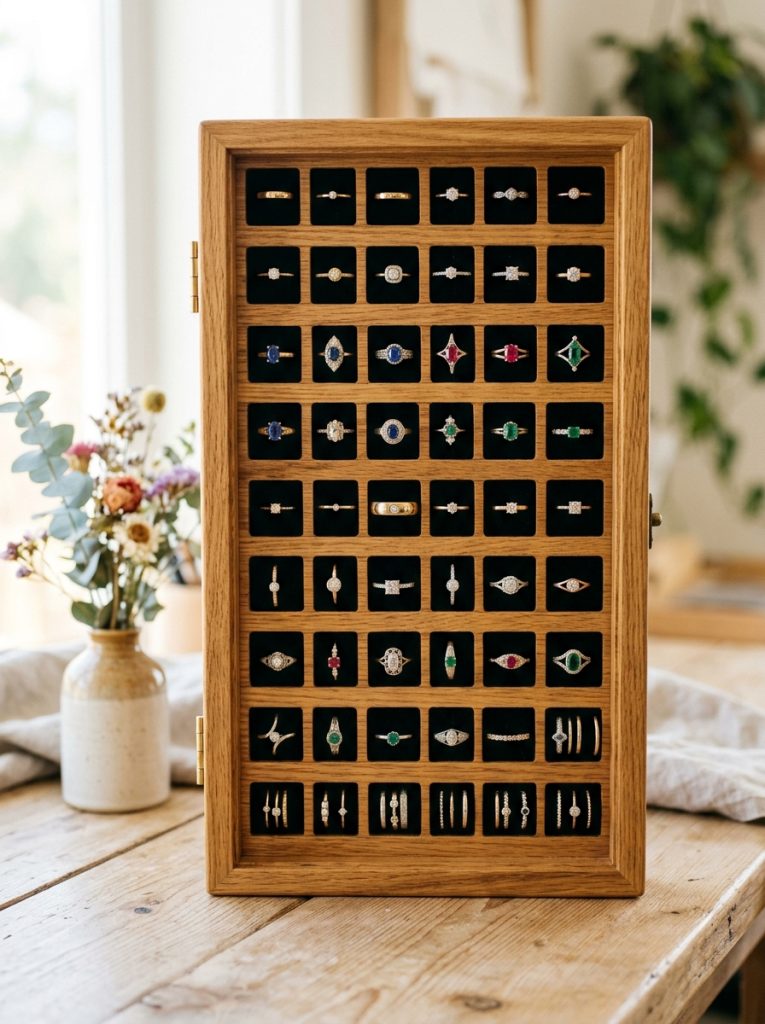
A multi ring display box with individual slots works well for a larger collection where every ring needs its own dedicated spot rather than being grouped loosely. Build a shallow wood box and cut or drill a grid of small slots sized to hold rings upright in individual rows. The organized grid layout makes finding a specific ring fast even with a substantial collection.
Materials Needed:
- Thin plywood for box base and sides
- Drill or rotary tool for slots
- Wood glue
- Sandpaper and finish
How to Make It:
- Build a shallow box frame from thin plywood sized to your ring collection.
- Mark a grid pattern across the base for individual ring slots.
- Drill or cut narrow slots at each marked position sized to hold a ring band upright.
- Sand all edges smooth and apply a wood finish.
- Insert rings into individual slots for an organized display.
15. Style a Wedding Ring Bowl for the Ceremony

A dedicated ring bowl or small dish styled specifically for a wedding ceremony keeps both rings secure and presentable in the moments before the exchange. Choose a small elegant dish in a finish that matches the wedding decor palette, and line it with a small piece of fabric or a flower petal for a styled presentation. After the ceremony, the same dish often becomes the everyday ring holder at home, carrying sentimental value beyond its function.
Materials Needed:
- Small decorative dish or bowl
- Fabric lining or flower petals (optional)
How to Make It:
- Choose a small dish that complements the wedding day color palette.
- Line with a small piece of fabric or fresh petals if desired for presentation.
- Place both rings securely in the dish before the ceremony.
- Keep the dish as a meaningful everyday ring holder after the wedding.
Final Thoughts on DIY Ring Holder
A ring holder is a small project with an outsized impact on how often rings actually get lost around the house. Whether it is a five minute clay dish, a wood stand with individual pegs, or a sink-side suction cup for handwashing safety, the right holder means every ring has a home. Pick the style that fits your space and your rings and make one this week.

Amir Ali is the founder and site administrator of HomeDecorEdge, a modern home decor and interior design platform. Since starting the site, he has combined his passion for interior design, practical styling, and color coordination with hands-on content strategy and site management. He guides authors, curates high-quality articles, and ensures readers have access to actionable, visually inspiring, and user-focused home decor advice for apartments, small rooms, and family homes.