

Macrame wall hangings have a warmth and texture that printed art and framed photographs simply cannot replicate — the dimensional quality of knotted rope adds genuine depth to a wall in a way that flat art does not. The good news for beginners is that even the most impressive-looking macrame wall hangings use only a small number of basic knots repeated in different combinations and scales. These DIY macrame wall hanging ideas start with the simplest beginner-friendly designs and build through to large statement pieces, colorful flower hangings, and driftwood-mounted boho art that suits every interior style.
This post contains affiliate links. If you purchase through these links I may earn a small commission at no extra cost to you.
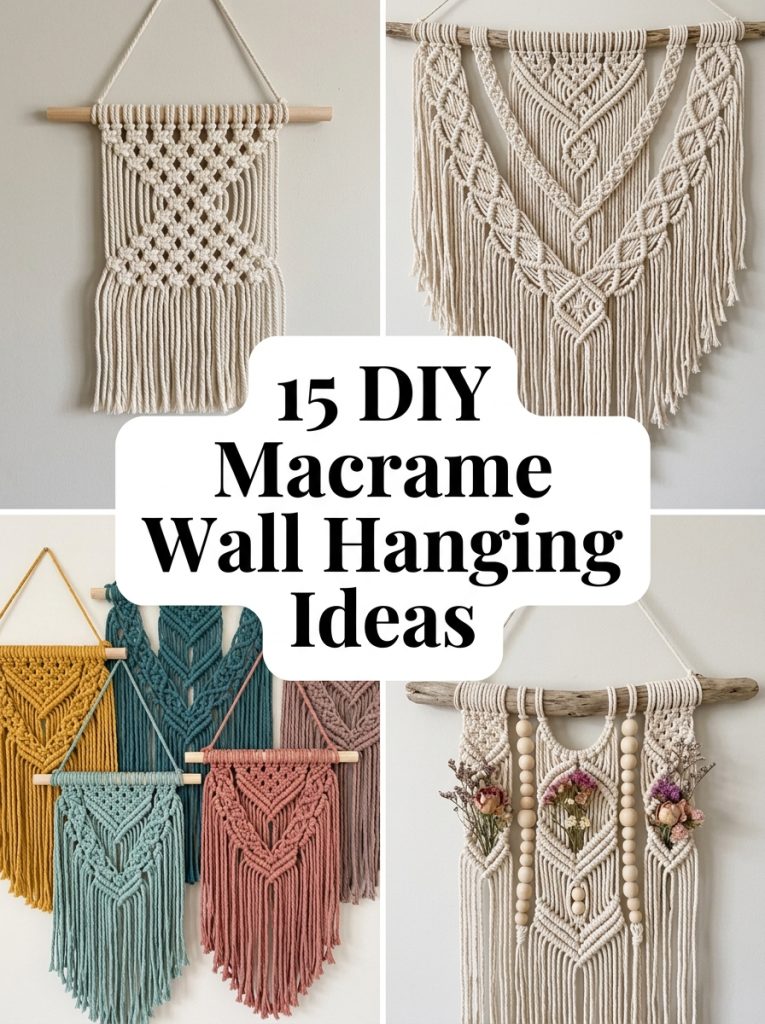
Even the most beginner-friendly macrame knots produce wall art that looks genuinely impressive hanging on any wall.
1. Start with Cotton Macrame Cord
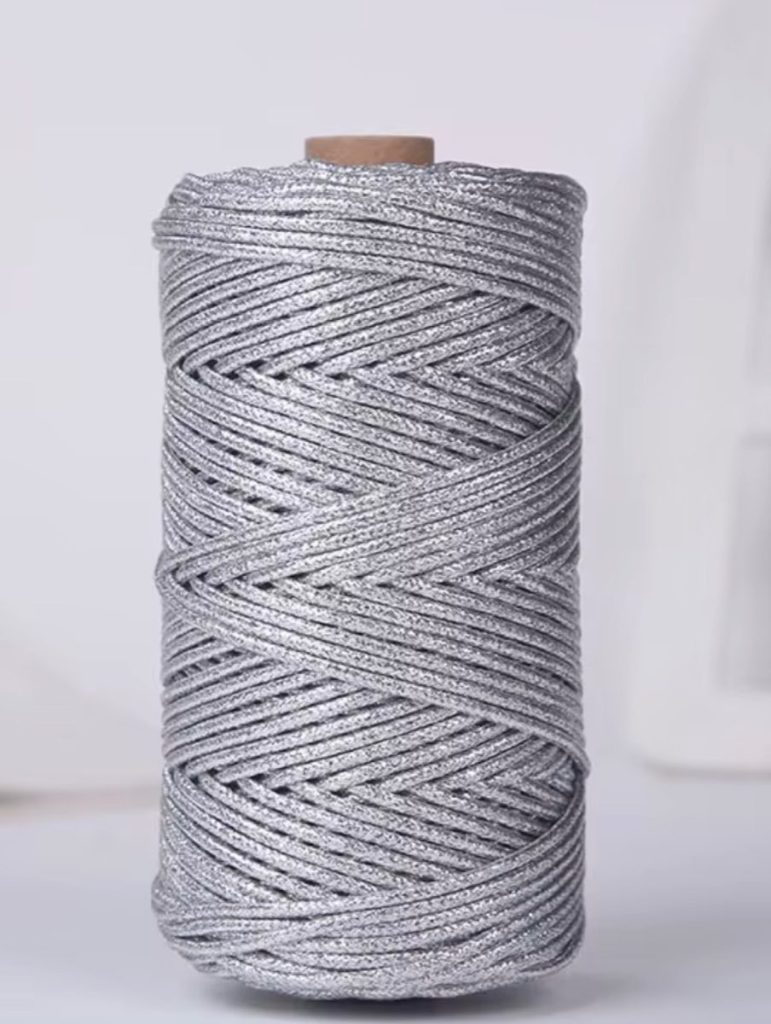
The cord thickness and fiber type determines the entire character of the finished macrame wall hanging — thick cotton rope produces chunky sculptural pieces while fine cord creates delicate intricate patterns. This macrame cord cotton rope 3mm is the most versatile thickness for wall hangings, suitable for both beginner square knot patterns and more complex designs. Natural undyed cotton has the warm cream tone that reads beautifully against white and neutral walls and pairs naturally with wood and plant decor.
Materials Needed:
- 3mm cotton macrame cord
- Wooden dowel or driftwood for mounting
- Scissors
- Measuring tape
- Comb for fringe brushing
How to Make It:
- Cut cord lengths to four times the desired finished length of each hanging strand.
- Fold each cord in half and mount onto the dowel using a lark’s head knot.
- Work square knots across the full width of the hanging as the foundation pattern.
- Add alternating square knots below to create the classic macrame diamond pattern.
- Trim fringe to an even length and brush out with a comb for a soft fluffy finish.

3mm Cotton Macrame Cord
Versatile 3mm cotton cord suitable for both beginner and advanced macrame wall hanging projects.
Check Price on Amazon2. Use a Beginner Kit for Your First Project
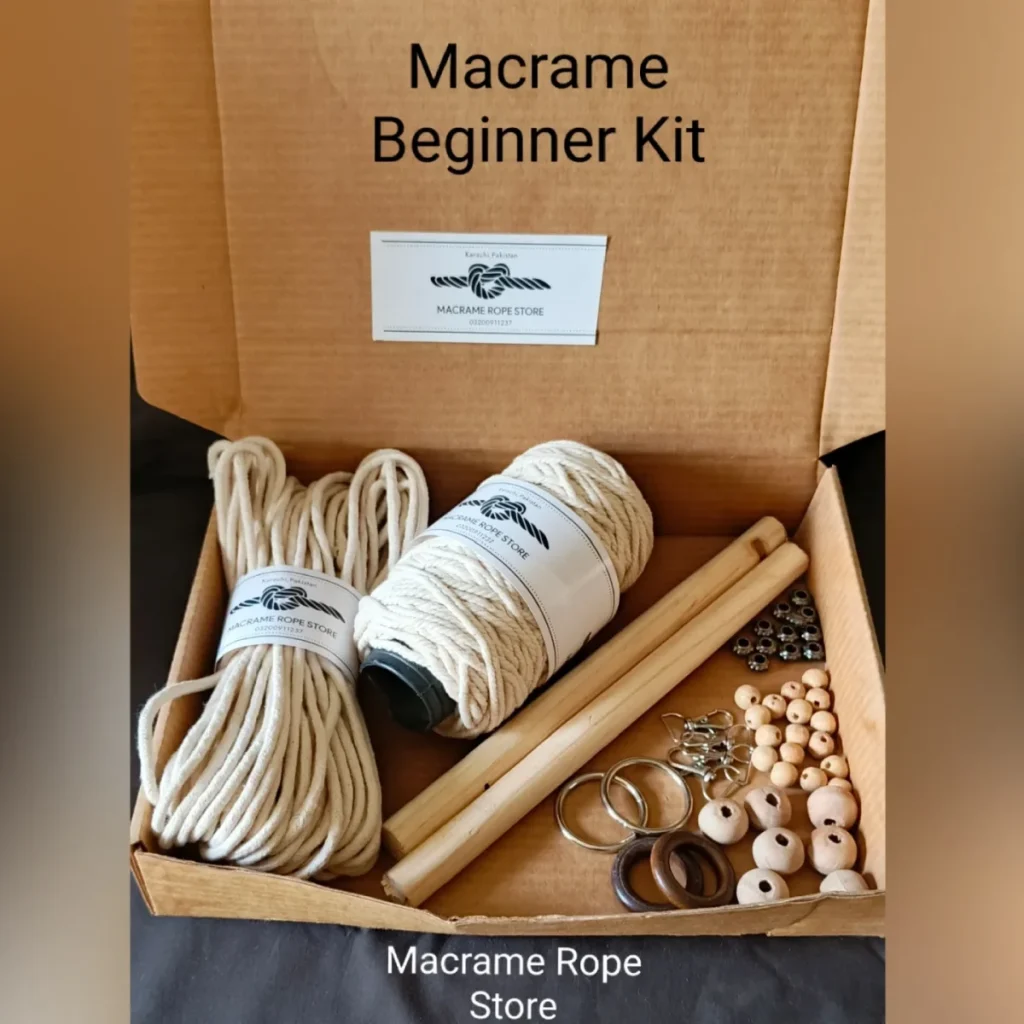
A beginner macrame kit removes every barrier to starting — the cord is pre-cut to the right lengths, the dowel is included, and the instruction card walks through each knot step by step without needing to watch a video. This macrame wall hanging kit beginner produces a complete wall hanging from the first session with no prior experience required. The kit format also means no cord calculation errors — one of the most common beginner mistakes that results in running out of cord mid-project. For more beginner craft ideas check out these air dry clay ideas.
Materials Needed:
- Complete beginner macrame kit
- Flat surface or clothes rail for working
- Tape for securing the dowel while knotting
How to Make It:
- Secure the dowel to a fixed point at a comfortable working height before mounting any cord.
- Follow the kit instructions to mount all cords using lark’s head knots.
- Work each row of knots from left to right keeping tension consistent throughout.
- Check progress against the instruction card pattern at each stage before continuing.
- Trim and brush out the fringe as the final step following the kit finishing instructions.

Beginner Macrame Wall Hanging Kit
Complete kit with pre-cut cord, dowel, and step-by-step instructions for a first macrame wall hanging.
Check Price on Amazon3. Mount on a Wooden Dowel Rod
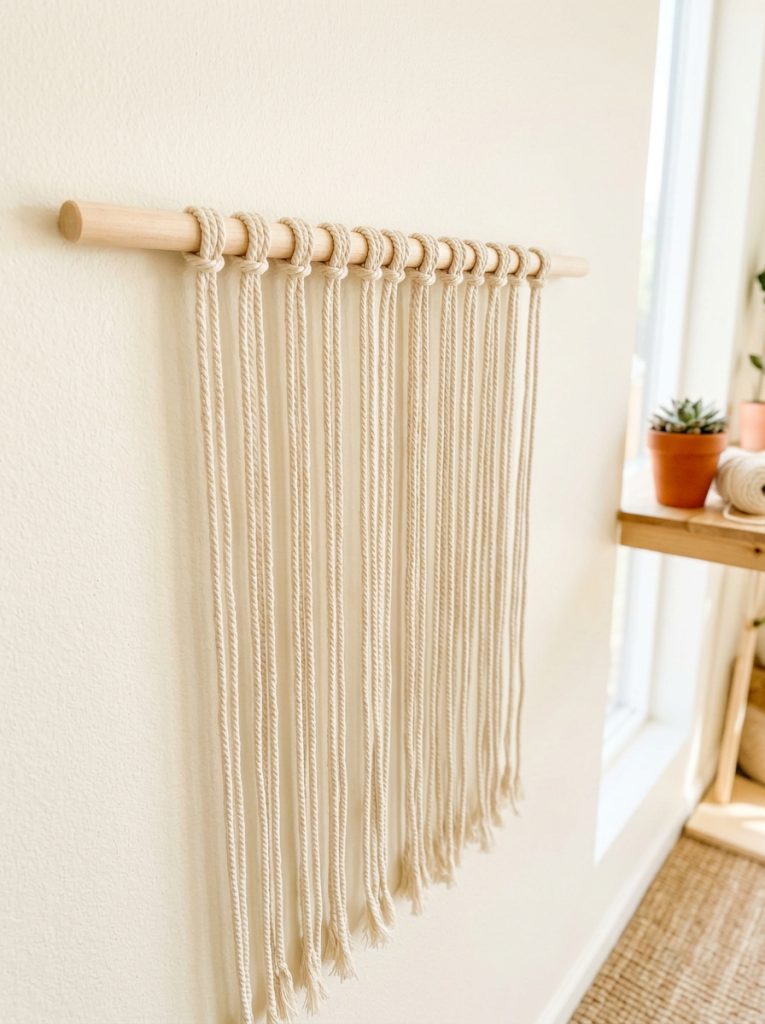
The dowel rod is the structural element that gives a macrame wall hanging its width and hanging point — the quality and finish of the dowel contributes directly to the finished aesthetic. This macrame wooden dowel rod has a smooth sanded finish that suits the natural cotton cord without creating rough edges that catch the fibers. Choose a dowel diameter proportional to the hanging width — a thicker dowel for wider heavier hangings and a slimmer one for smaller delicate pieces.
Materials Needed:
- Wooden dowel rod in appropriate diameter and length
- Sandpaper for any rough sections
- Twine or leather cord for hanging loop
- Optional beeswax for finishing
How to Make It:
- Sand the dowel smooth at both ends if any rough edges are present.
- Tie a hanging loop of twine or leather cord to both ends of the dowel.
- Mount the dowel at a comfortable knotting height before adding any cord.
- Attach macrame cord using lark’s head knots spaced evenly across the full dowel length.
- Optionally rub with beeswax for a subtle finish that adds warmth to the natural wood.

Macrame Wooden Dowel Rod
Smooth sanded dowel that provides the structural width and hanging point for any macrame wall hanging.
Check Price on Amazon4. Add Wooden Beads for Detail
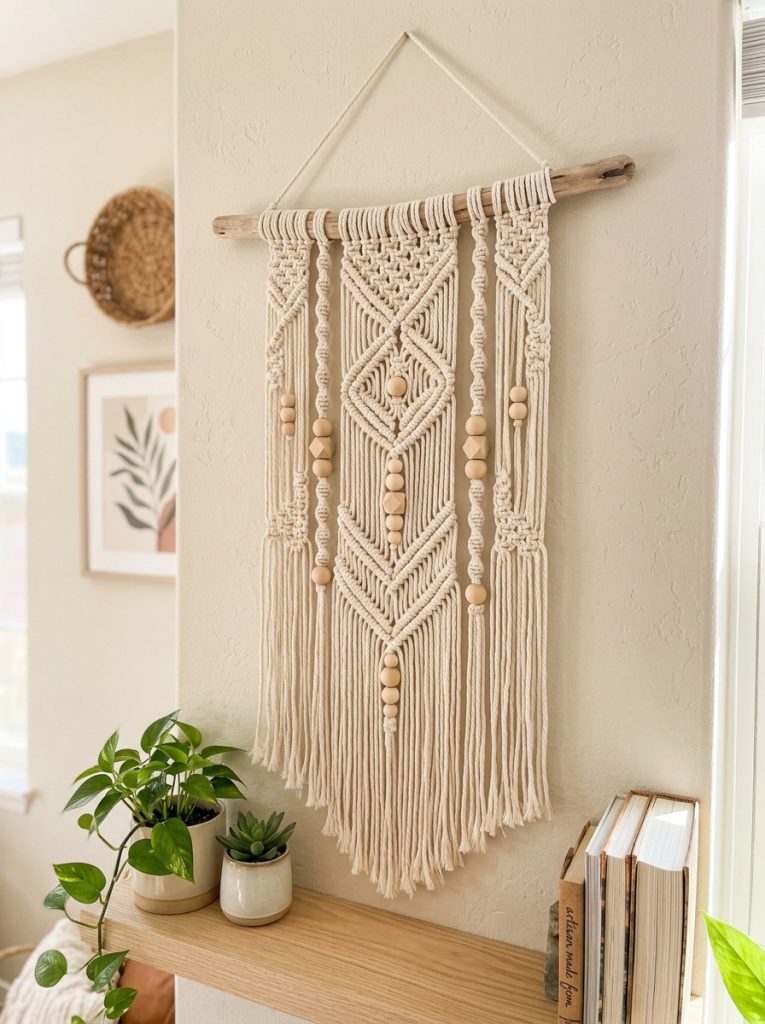
Wooden beads threaded onto macrame cord strands add a dimension of texture and rhythm to a wall hanging that knots alone cannot produce — the solid bead against the soft cord creates a visual contrast that makes the design more interesting from a distance. This macrame beads wooden set has a range of sizes and the right hole diameter for standard macrame cord. Thread beads onto individual strands between knotted sections or use them to mark the transition between different pattern zones.
Materials Needed:
- Wooden beads in appropriate hole size for cord diameter
- Macrame cord
- Scissors
- Tapestry needle for threading if holes are small
How to Make It:
- Complete a section of knotting before adding beads so the bead placement has context.
- Thread individual cord strands through bead holes — a tapestry needle helps with tighter beads.
- Slide each bead to the desired position on the strand.
- Tie a knot directly below each bead to lock it in position.
- Continue knotting the pattern below the beads incorporating them into the design flow.

Wooden Macrame Beads
Range of wooden bead sizes that add texture and boho detail to any macrame wall hanging design.
Check Price on Amazon5. Work on a Metal Ring Hoop
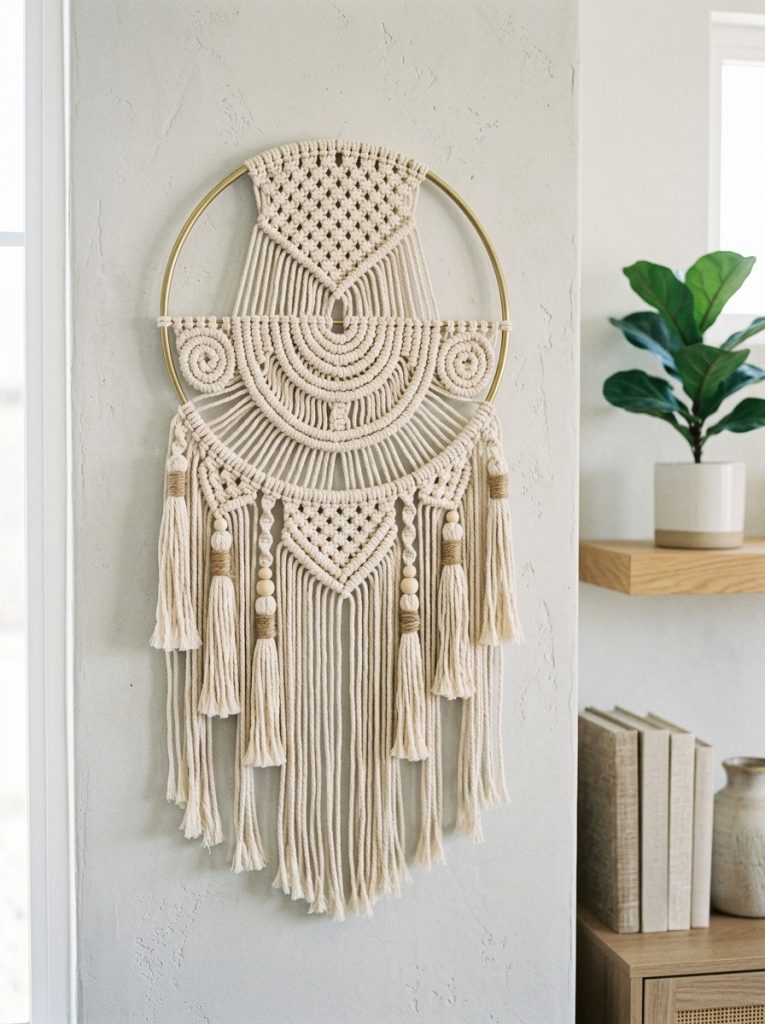
A metal ring hoop gives a macrame wall hanging a completely different silhouette from the standard rectangular dowel-mounted format — the circular form creates a medallion-style piece that reads as a single bold wall art object rather than a textile panel. This macrame ring metal hoop has the smooth finish that cord wraps around cleanly without catching. Work the macrame from the top of the ring downward, leaving the bottom sections as loose fringe that hangs below the ring for a half-circle boho effect.
Materials Needed:
- Metal ring hoop in chosen diameter
- Macrame cord
- Scissors
- Comb for fringe finishing
How to Make It:
- Wrap the top section of the ring with cord to create a clean covered surface for the hanging point.
- Mount cords across the top third of the ring interior using lark’s head knots.
- Work square knots and spiral knots across the mounted cords working downward.
- Leave the lower cords as loose fringe hanging below the ring bottom.
- Trim fringe to a V shape or chevron for a clean finished profile.

Metal Ring Hoop for Macrame
Smooth metal hoop that creates a circular medallion-style macrame wall art piece instead of a rectangular hanging.
Check Price on Amazon6. Make a Macrame Feather Wall Hanging
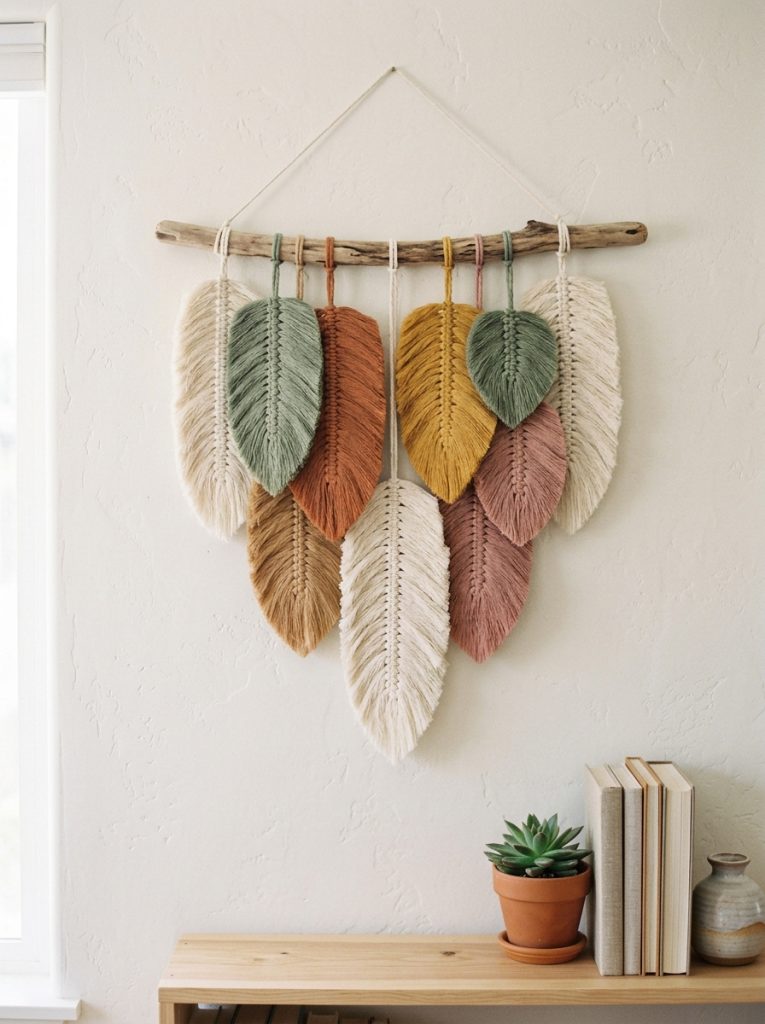
Macrame feathers are one of the most beginner-friendly macrame projects and also one of the most visually striking — a group of differently sized feathers arranged together on a wall reads as a complete boho installation that takes only an afternoon to make. This macrame feather wall hanging shows the finished size and style to aim for. Brush the fringe ends thoroughly with a stiff comb for the most realistic feather silhouette and dip the tips in watercolor or fabric dye for a colorful ombre effect. For more boho craft ideas check out these DIY room decor ideas.
Materials Needed:
- Macrame cord in natural and optional dyed colors
- Leaf shaped wire or cardboard template
- Stiff comb or pet slicker brush
- Optional watercolor or fabric dye for tips
- Hot glue for securing cord base
How to Make It:
- Cut a bundle of cord strands to a consistent length for each feather.
- Fold the bundle in half and secure the fold tightly with a binding wrap of cord.
- Untwist and separate all individual cord plies to create a full soft fringe.
- Brush vigorously with a stiff comb working from tip toward the base.
- Trim the brushed fringe into a feather leaf shape using sharp scissors.

Macrame Feather Wall Hanging
Brushed macrame feathers in natural and dyed colors for a boho wall hanging installation.
Check Price on Amazon7. Create a Large Statement Macrame Hanging
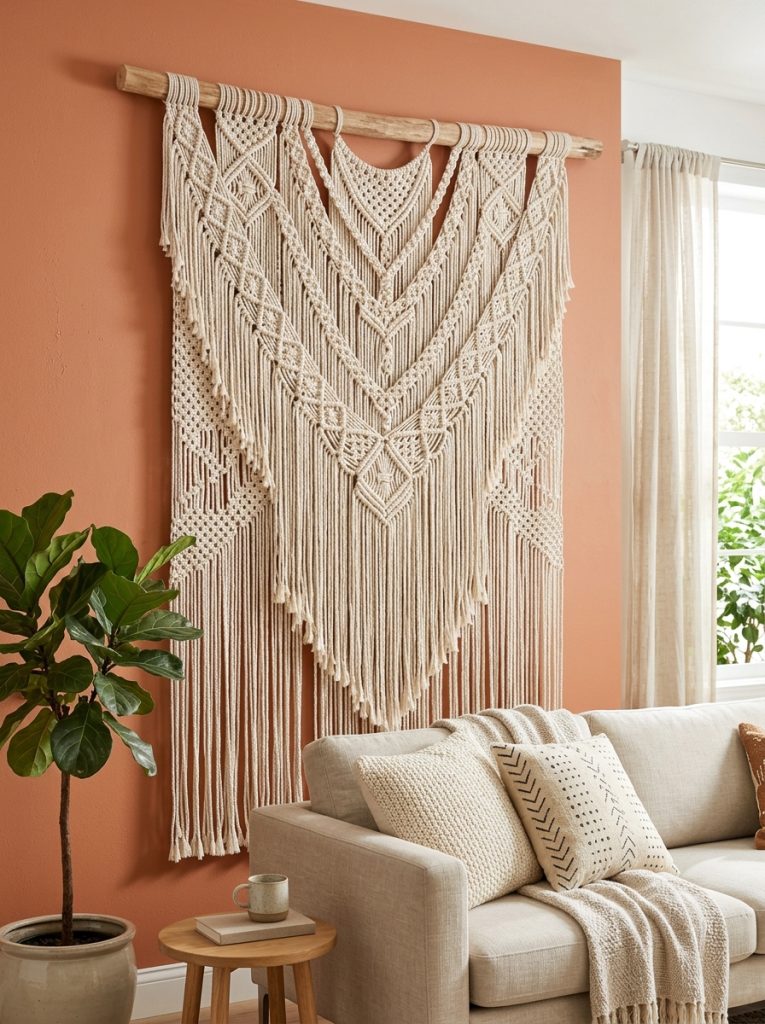
A large macrame wall hanging — wider than sixty centimeters and longer than one meter — creates a genuine focal point on any wall that smaller hangings cannot achieve at scale. The challenge of a large piece is keeping consistent tension across many more working cords than a small hanging, which is why building the skill on smaller pieces first pays off significantly when scaling up. A large hanging suits a bedroom wall above the bed, a living room feature wall, or an entryway where the full height is available to display the complete piece.
8. Make a Macrame Flower Wall Hanging
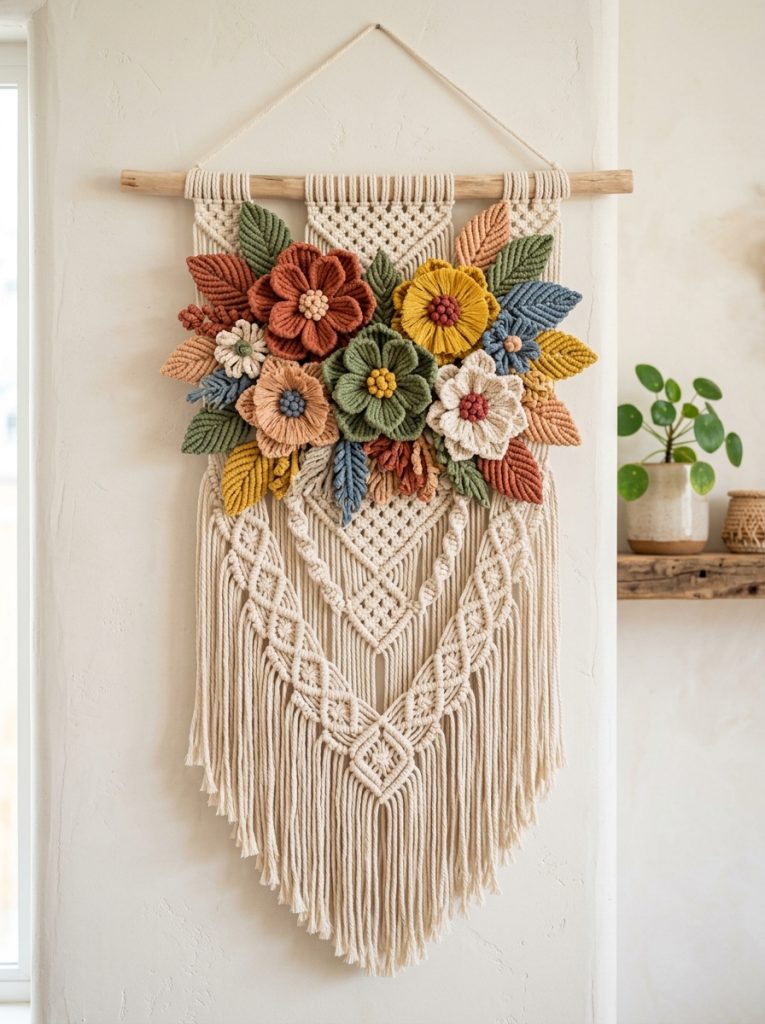
Macrame flowers are created by working a circular arrangement of square knots around a central ring or button, producing a three-dimensional flower shape that stands slightly proud of the surrounding flat knotting. A wall hanging incorporating several macrame flowers at different sizes mixed with standard knotted sections creates a botanical wall art piece with genuine dimensional interest. Dye individual flowers in soft watercolor tones before assembly for the most beautiful finished result.
9. Try a Colorful Dyed Macrame Hanging
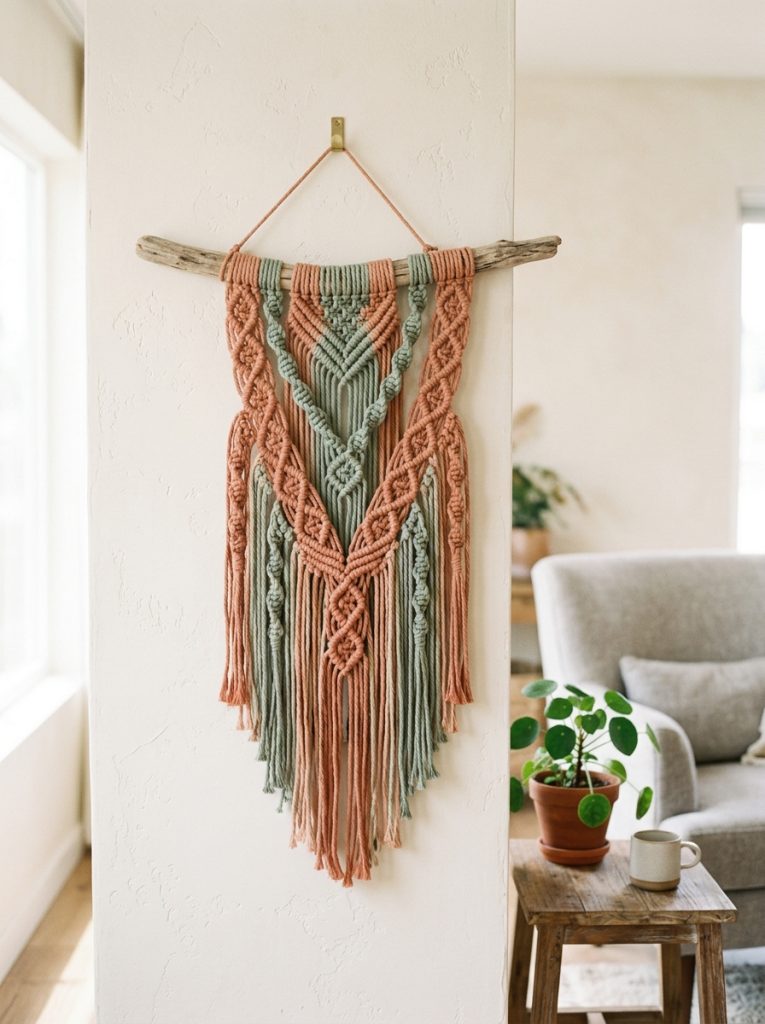
A colorful macrame wall hanging dyes sections of cord before knotting to create a pattern of color that emerges through the finished knotwork in an organic unpredictable way. Dip-dye the bottom fringe section in one color, tie-dye individual cord bundles before mounting, or dye specific strands and weave them through natural cord for a subtle color accent. Terracotta, blush, sage green, and mustard yellow all read as distinctly boho and suit the natural cotton base cord without looking garish.
10. Mount on Driftwood for a Natural Look
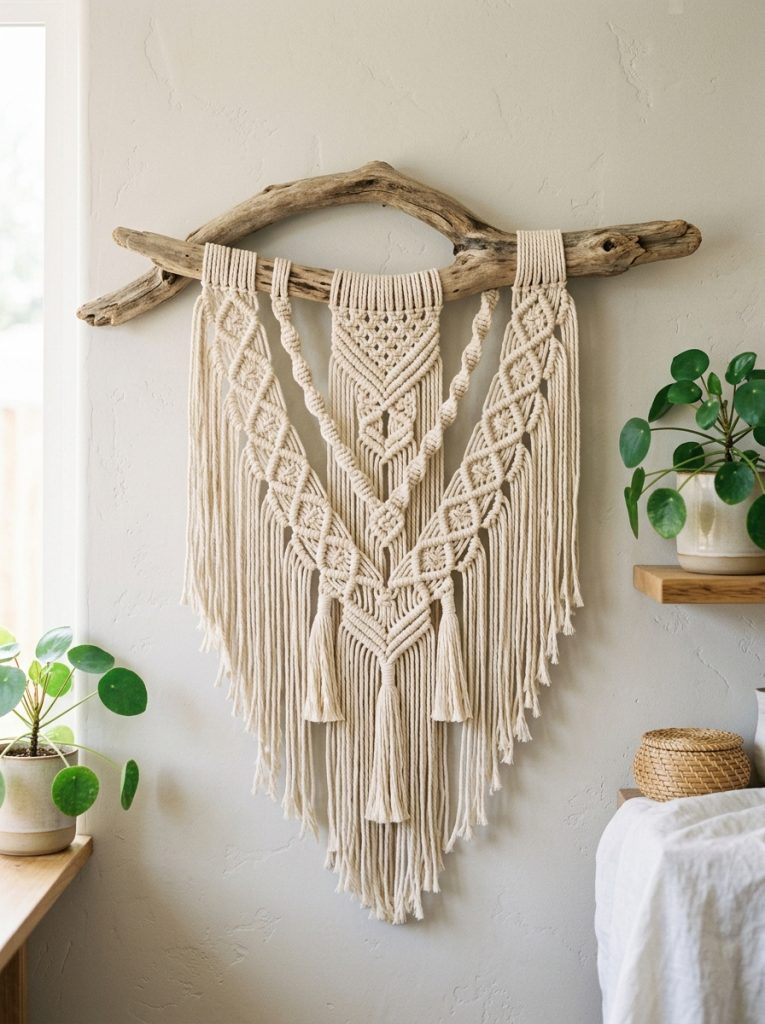
Driftwood as a macrame mounting point adds an organic sculptural quality that a straight dowel rod cannot replicate — the natural curves, bark texture, and weathered grey color of found driftwood makes the hanging look like it was made specifically for that piece of wood rather than a generic hanging. Source driftwood from beaches or riverbeds, clean and dry thoroughly before use, and choose pieces with interesting natural curves or branch points that add visual interest to the overall composition.
11. Make a Simple Boho Wall Hanging
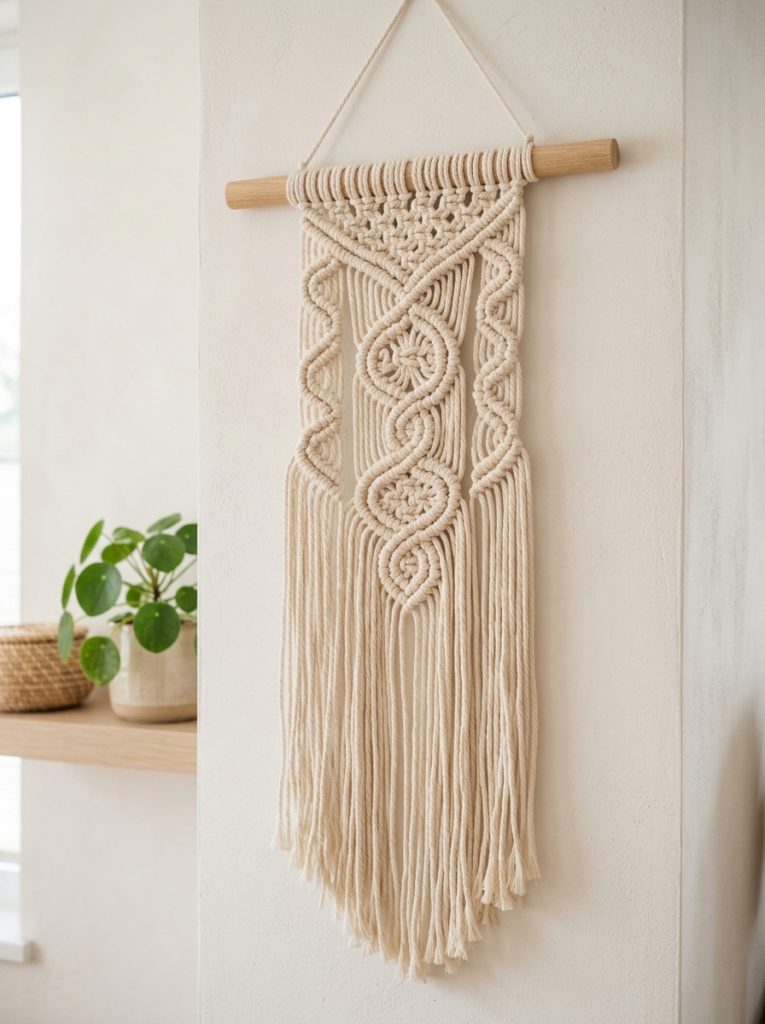
A simple boho macrame wall hanging using only spiral knots and long flowing fringe is one of the most elegantly minimal approaches to the craft — the repetitive spiral creates a beautiful twisted column texture that looks complex but uses only a single repeating knot. The long fringe section below the knotted area should be at least as long as the knotted section itself for the most dramatic boho proportions and the best movement when hanging in a room with air circulation.
12. Create a Macrame Shelf Wall Hanging
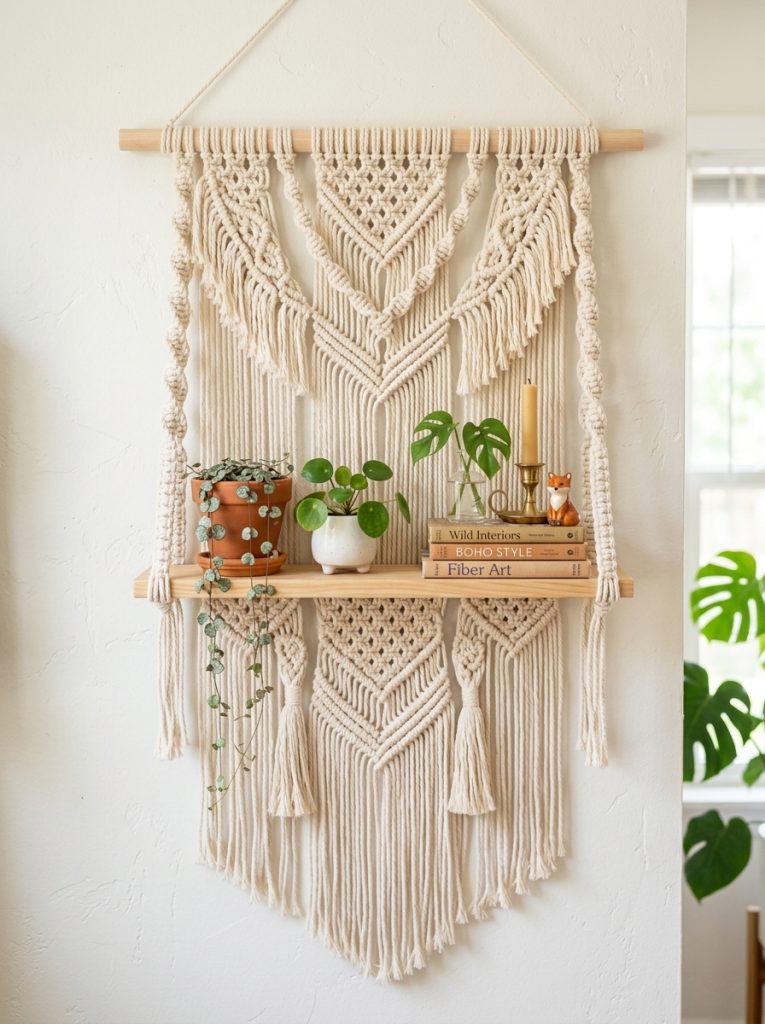
A macrame shelf hanging incorporates a small functional wooden shelf into the knotted design, creating a piece that is simultaneously wall art and useful storage for small plants, crystals, or decorative objects. Build the shelf into the hanging by suspending a short wooden board using four vertical cord sections at each corner, then continue the macrame design above and below the shelf. The combined functional and decorative element makes a macrame shelf hanging one of the most practical craft projects on this list.
13. Try a Weaving and Macrame Combined Hanging
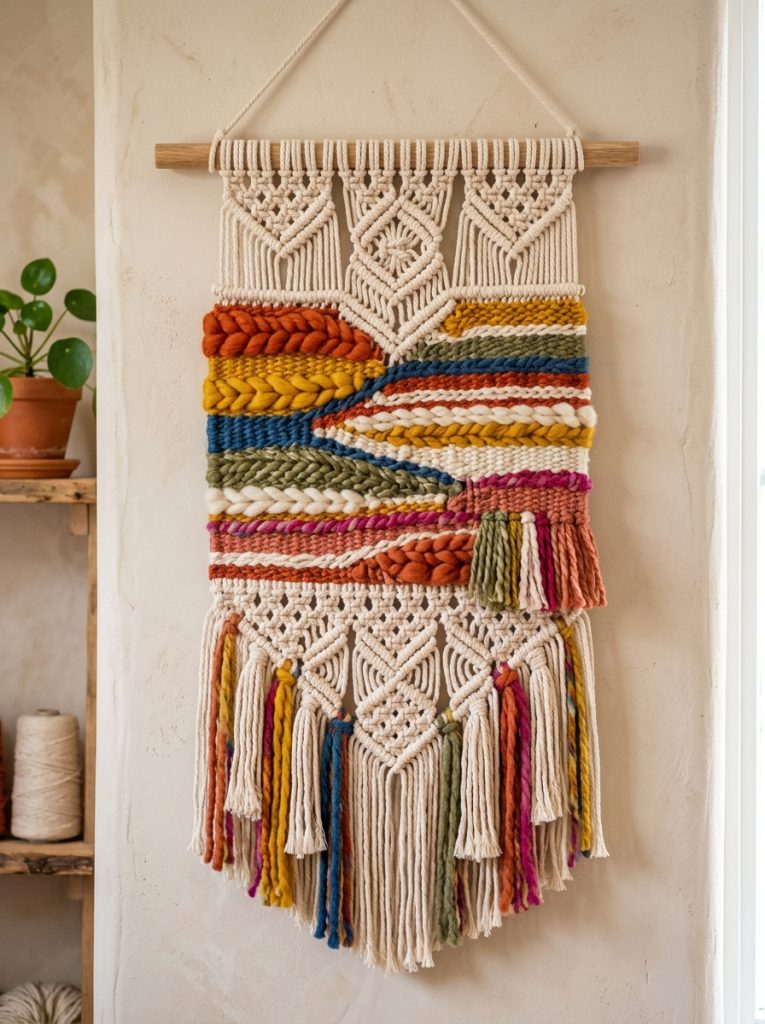
Combining weaving with macrame in one hanging creates a richer textile surface than either technique produces alone — woven sections of colorful wool or yarn provide dense color and pattern while the macrame knotted sections add dimensional structure and texture around them. Mount warp threads vertically on the dowel, weave horizontal sections of colorful yarn through them, and work macrame knots in the sections between the woven areas for a complex mixed-textile wall hanging.
14. Make a Macrame Planter Wall Hanging
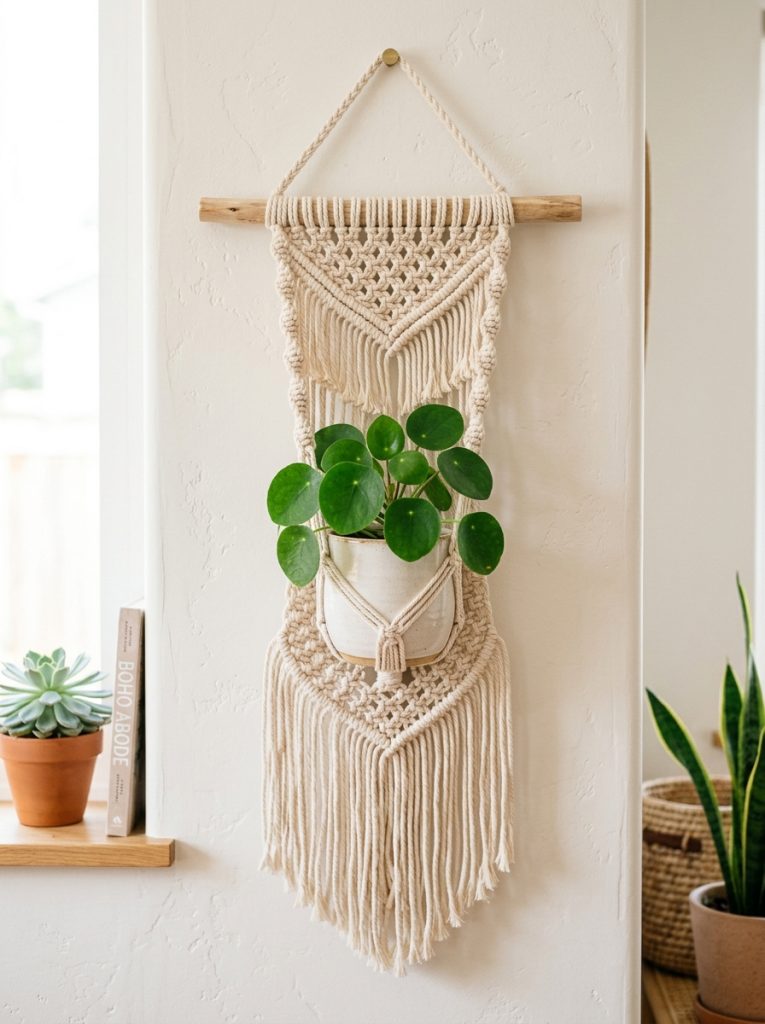
A macrame wall planter combines the decorative element of a wall hanging with the living quality of an indoor plant — a knotted cradle holds a small pot suspended from a dowel with trailing plants hanging down from the living center of the piece. The combination of natural cord, wood, and living plant creates the most genuinely biophilic wall installation possible from a macrame project. For more plant display ideas check out these indoor house plants aesthetic ideas.
15. Add Fringe Finishing for a Professional Result
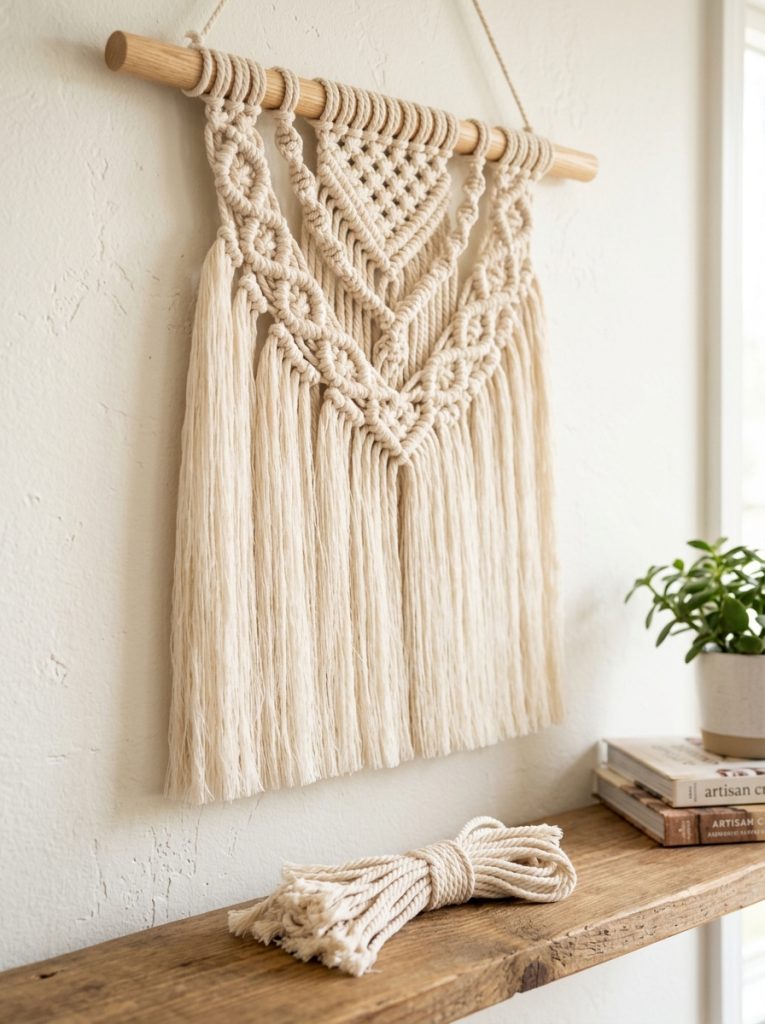
The fringe finish is what separates a completed macrame wall hanging from a truly professional-looking piece — properly brushed, trimmed, and shaped fringe transforms the raw cord ends into a soft flowing textile element that looks entirely intentional. Untwist every individual cord ply completely before brushing, use a stiff pet slicker brush or comb working from tip toward the knots, and trim the final shape with very sharp scissors only after brushing is completely finished. A wavy or chevron trim is more forgiving than a perfectly straight cut for first attempts.
Final Thoughts on DIY Macrame Wall Hanging Ideas
Macrame rewards patience and repetition more than any special artistic skill — the same basic square knot worked in different combinations produces results that range from simple beginner pieces to complex large-scale boho installations. Start with a beginner kit to learn the fundamental knots, make several small pieces to build confidence with tension and fringe finishing, and the skills transfer naturally to larger and more ambitious pieces from there.

Amir Ali is the founder and site administrator of HomeDecorEdge, a modern home decor and interior design platform. Since starting the site, he has combined his passion for interior design, practical styling, and color coordination with hands-on content strategy and site management. He guides authors, curates high-quality articles, and ensures readers have access to actionable, visually inspiring, and user-focused home decor advice for apartments, small rooms, and family homes.