

If you keep chickens, you already know the open water dish problem. Ten minutes after you fill it, there’s straw in it, mud in it and somehow, every single time, poop in it. Then the hens knock it over and stand there looking thirsty.
A good waterer fixes all of that. Closed systems with nipples or cups keep water clean, last for days between refills and save you a lot of scrubbing. Most of them are cheap and easy to make with a bucket, some PVC or even a plastic bottle. These 12 DIY chicken waterer ideas cover everything from simple bucket builds to automatic rain barrel systems, winter heaters and tiny waterers for chicks in the brooder.
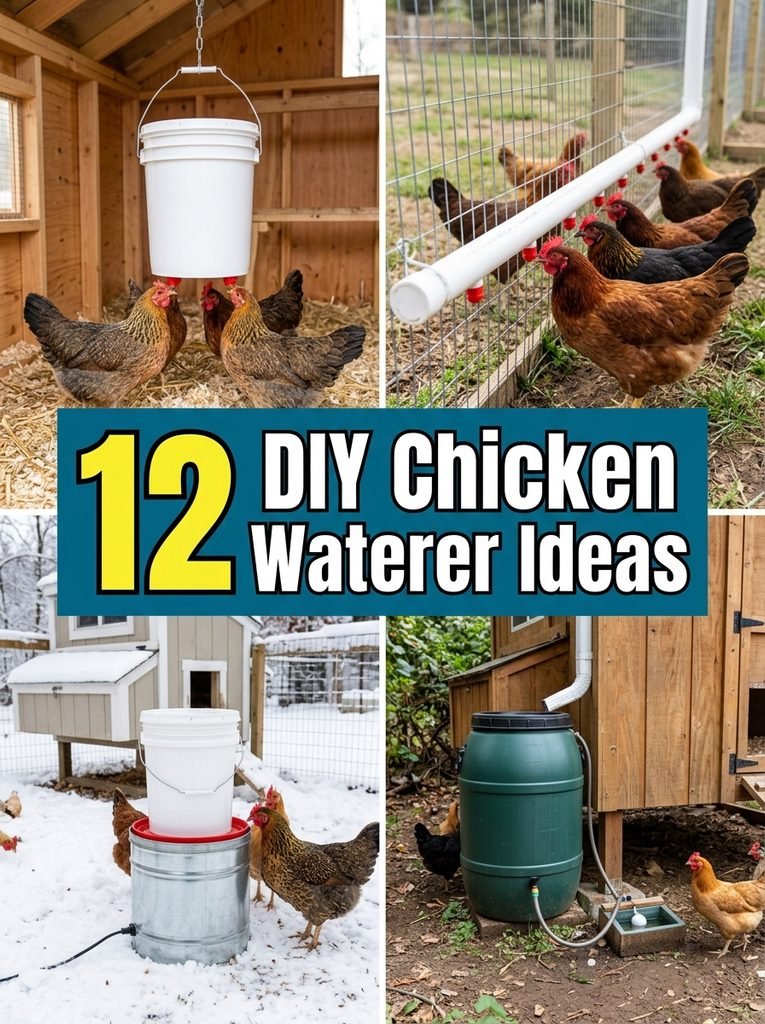
15 Gallon Bucket Nipple Waterer
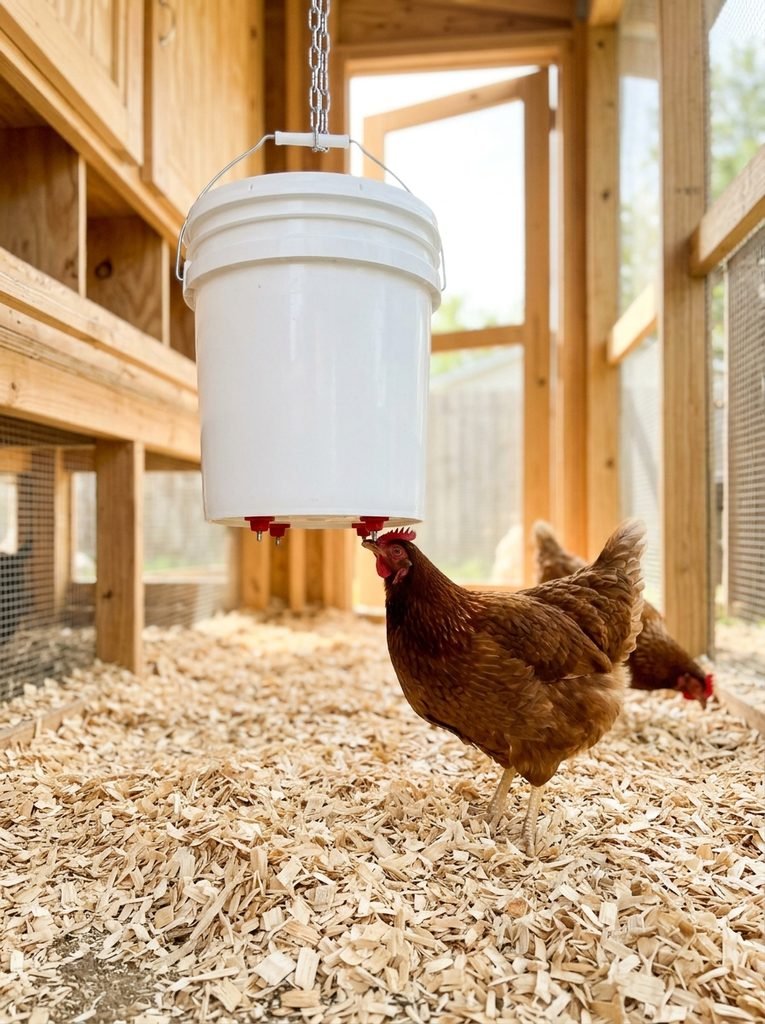
This is the classic DIY chicken waterer, and for good reason. A food grade bucket with nipples screwed into the bottom holds 5 gallons of clean water that chickens can’t step in or kick dirt into. It lasts days between refills for a small flock.
I built my first one in about 20 minutes. My hens figured out the nipples by the end of the day.
- Water stays clean for days
- Holds 5 gallons
- Takes about 20 minutes to make
Project Card · 20 minutes · Easy
Materials Needed
- One food grade 5 gallon bucket with a lid
- Four to six screw in poultry nipples
- A drill with an 11/32 inch bit
- A short chain or rope and a sturdy hook
- A marker
How to Make It
- Wash the bucket and lid well with warm soapy water.
- Turn the bucket upside down and mark four to six evenly spaced spots on the bottom, about 2 inches in from the edge.
- Drill a hole at each mark with the 11/32 inch bit.
- Screw a nipple into each hole by hand until it’s snug, then give it a quarter turn more.
- Fill the bucket with water, put the lid on and check for drips.
- Hang it so the nipples sit just above your chickens’ heads, so they reach up slightly to drink.
Don’t want to DIY?
Chicken Waterer Nipples
A pack of screw in poultry nipples is all you need to turn any bucket or pipe into a clean, no mess chicken waterer.
PRO TIP Tap the nipples with your finger the first day so a drop of water shows. Chickens learn fast once they see the water.
2PVC Pipe Nipple Waterer System
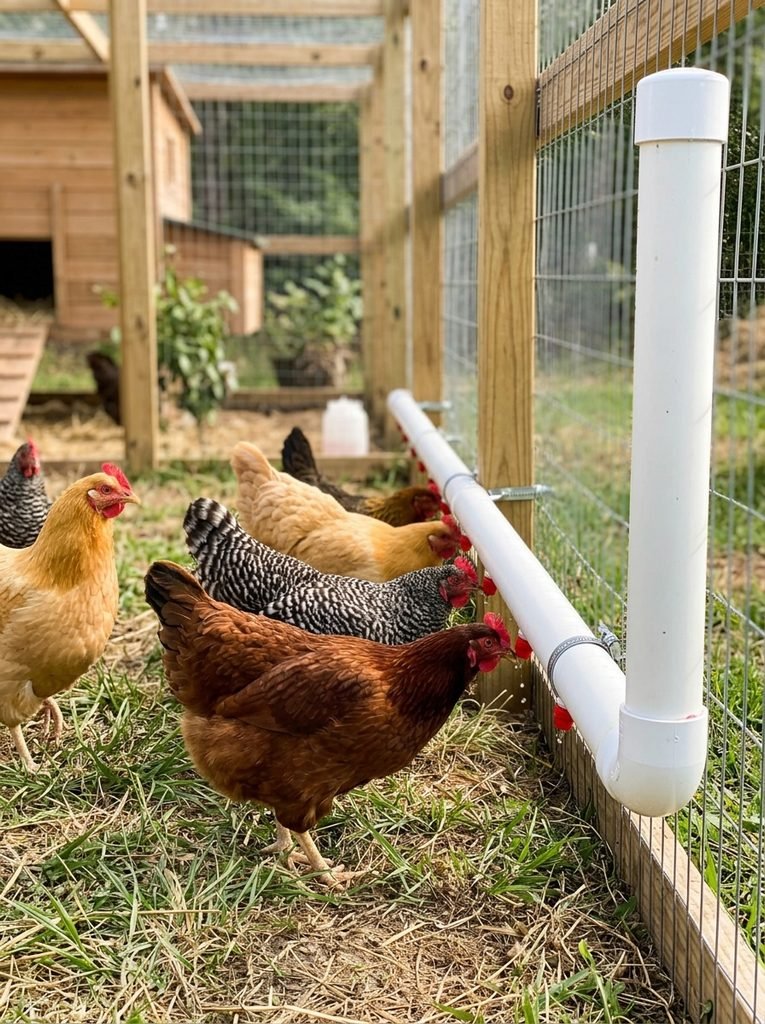
For a bigger flock, a PVC pipe system lets many chickens drink at once along one long pipe. A tall pipe at one end works as the fill tube and holds extra water, so the system lasts longer between refills.
In my experience, it’s the best setup for a run with eight or more hens.
- Many hens can drink at once
- Easy to refill from the top
- Very cheap to build
Project Card · One afternoon · Easy
Materials Needed
- 3 inch PVC pipe for the horizontal drinking pipe
- A 3 inch PVC elbow and end cap
- A vertical PVC pipe and cap for the fill tube
- Screw in poultry nipples
- A drill with an 11/32 inch bit
- PVC primer and cement
- Pipe straps and screws
How to Make It
- Cut the horizontal pipe to the length you want and glue an end cap on one end.
- Drill holes along the bottom of the pipe about 8 inches apart and screw in the nipples.
- Glue the elbow to the open end and fit the vertical fill pipe into it.
- Let the cement cure fully, then rinse the whole system with clean water.
- Strap the horizontal pipe level along a fence or wall so the nipples sit just above your hens’ heads.
- Fill the system through the vertical pipe and put the cap on top.
PRO TIP Mount the drinking pipe perfectly level. If it slopes, the low nipples drip and the high ones run dry.
3Heated Winter Waterer
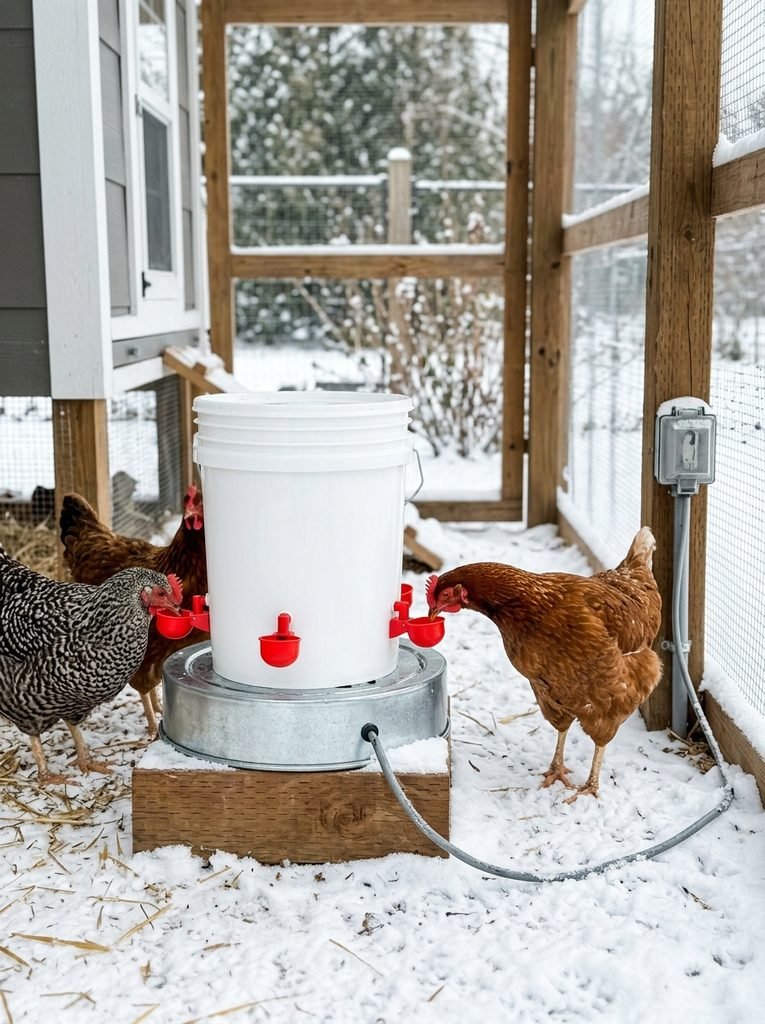
Frozen water is every chicken keeper’s winter headache. A bucket with side cups sitting on a heated base keeps water liquid all day, even below freezing. Side cups work better than bottom nipples in winter, because bottom nipples freeze first.
Honestly, this one setup saved me from carrying hot water out every icy morning.
- No more frozen water
- Side cups don’t freeze easily
- Saves daily trips in the cold
Project Card · 30 minutes · Easy
Materials Needed
- A food grade 5 gallon bucket with a lid
- Three or four horizontal drinking cups
- A drill with the bit size your cups need
- A thermostatically controlled heated poultry base
- An outdoor rated extension cord and a covered GFCI outlet
- A wooden block or paver to set it on
How to Make It
- Mark three or four spots around the side of the bucket, about 3 inches up from the bottom.
- Drill a hole at each mark with the bit size listed for your cups.
- Screw the cups into the holes snugly and fill the bucket to check for leaks.
- Set the heated base on a block or paver so it stays level and off wet ground.
- Place the bucket on top of the base and plug it into a covered GFCI outlet.
- Keep the cord tucked and protected so chickens can’t peck at it.
Don’t want to DIY?
Heated Chicken Waterer Base
A thermostatically controlled heated base switches on only when it’s freezing and keeps your flock’s water liquid all winter.
PRO TIP Skip homemade heaters with light bulbs. They’re a real fire risk in a coop full of straw. A heated base made for poultry is much safer.
4Rain Barrel Waterer with a Float Valve
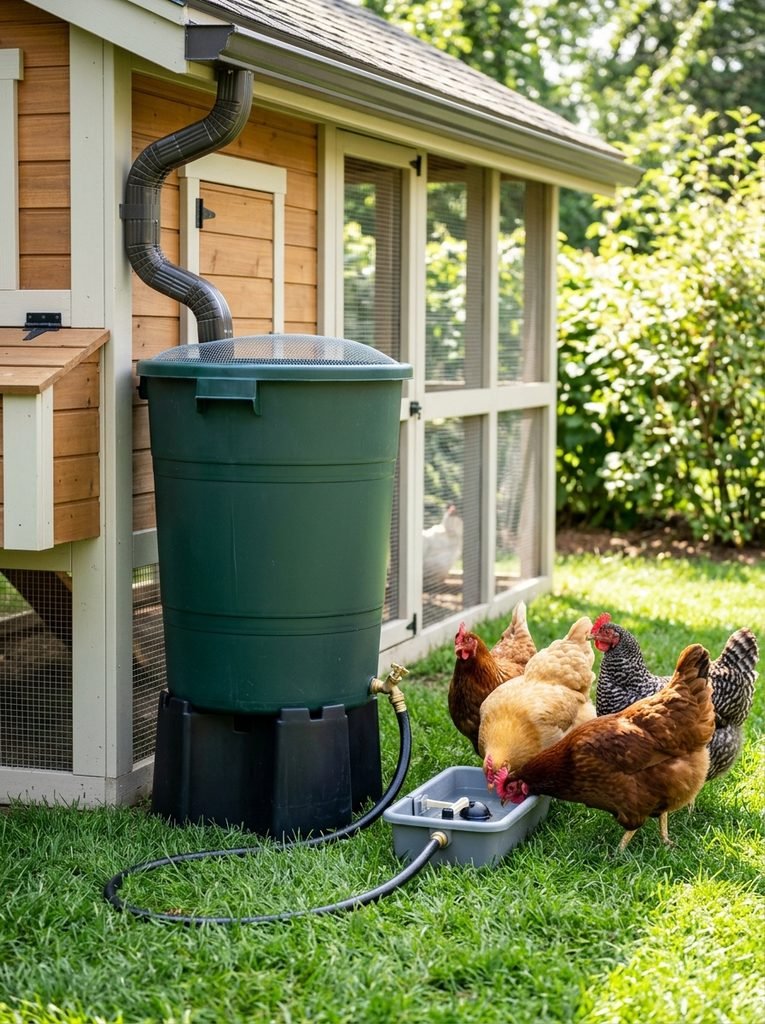
For a large flock, a rain barrel connected to a trough with a float valve gives you an almost automatic waterer. Rain fills the barrel, and the float valve tops up the trough as the chickens drink.
Add a screen on top of the barrel to keep leaves and mosquitoes out, and clean the trough weekly.
Start Your 30-Day Home Reset
Stop waiting for a "perfect" free weekend. Grab the 30-day plan and start feeling lighter in your own home by tomorrow.
View the 30-Day Plan Printable PDF · Instant download- Nearly automatic refills
- Uses free rainwater
- Great for large flocks
You’ll need: a rain barrel with a spigot, a hose, a small trough and a float valve.
Don’t want to DIY?
Automatic Float Valve Waterer
A float valve waterer connects to a barrel or hose and keeps water topped up on its own, so you rarely have to refill.
5Cooler Waterer
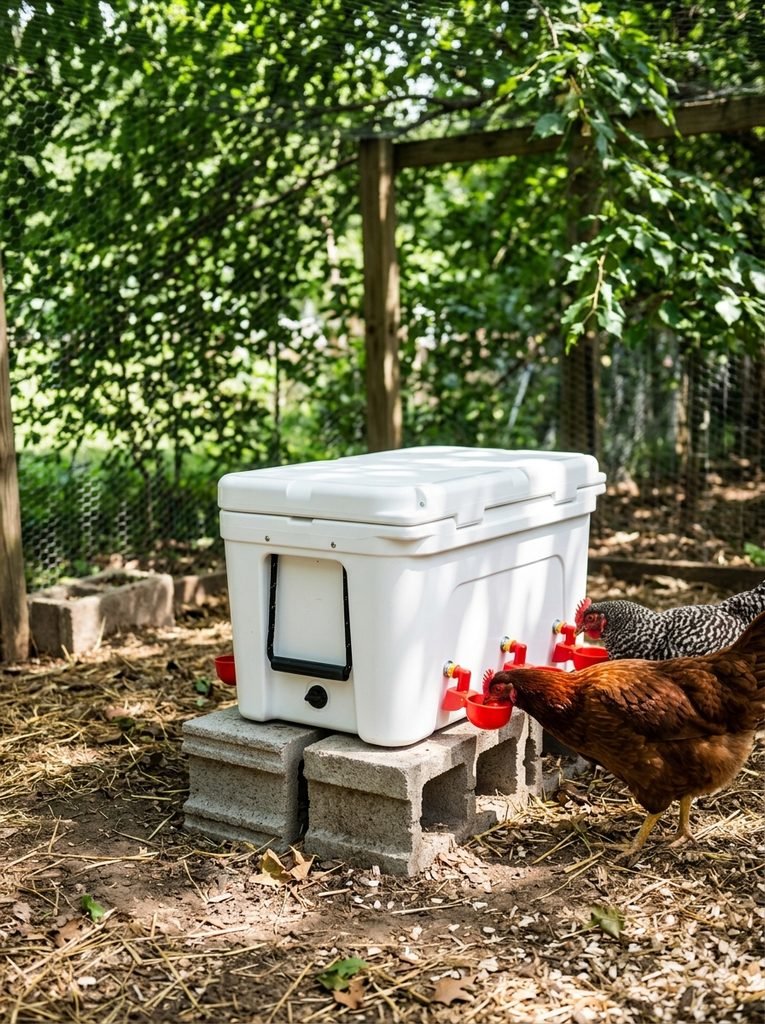
An insulated cooler with drinking cups in the side keeps water cool in summer heat and slows freezing in winter. It’s a smart all season waterer, and old coolers are easy to find for free.
Set it on blocks in the shade during summer. Cool water keeps hens drinking and laying in the heat.
- Keeps water cool in summer
- Slows freezing in winter
- Great use for an old cooler
You’ll need: an insulated cooler, horizontal drinking cups, a drill and two cinder blocks.
65 Gallon Jug Dispenser Waterer
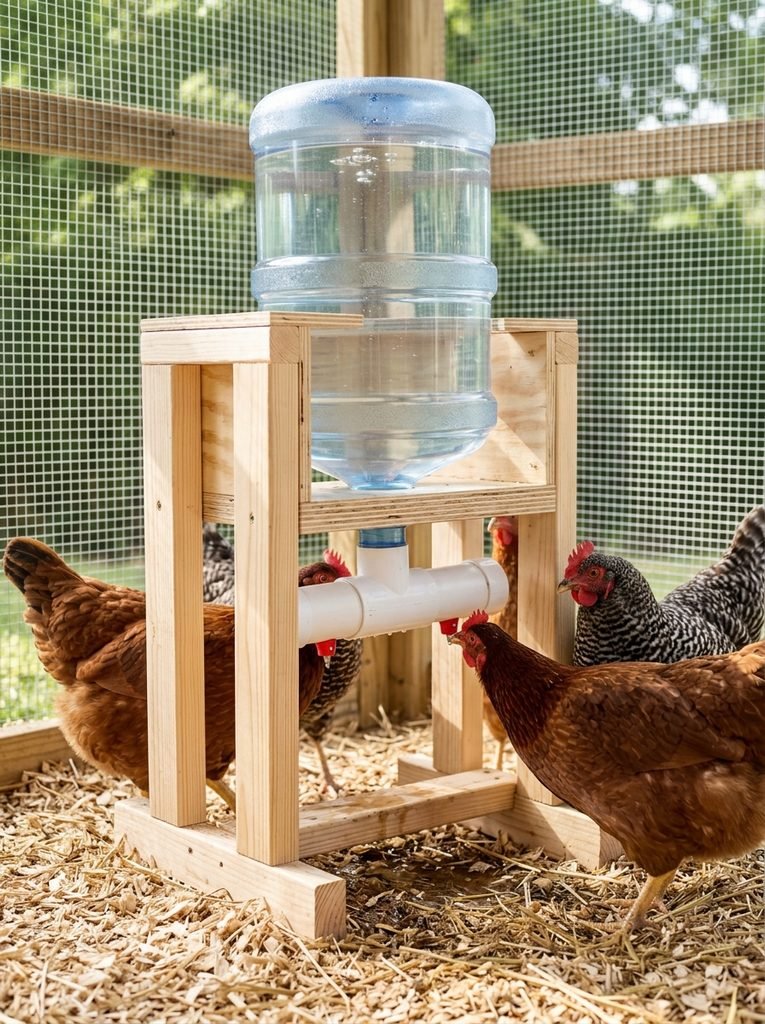
A 5 gallon water jug, like the ones used in water dispensers, makes a great clear waterer. Turn it upside down into a holder that feeds a short pipe with nipples. You can see the water level at a glance.
I’d keep it in the shade. Clear jugs in full sun grow algae quickly.
- See the water level easily
- Holds a lot of water
- Simple to refill
You’ll need: a clean 5 gallon water jug, a wooden stand, a short PVC pipe, nipples and a jug adapter cap.
7Plastic Bottle Waterer
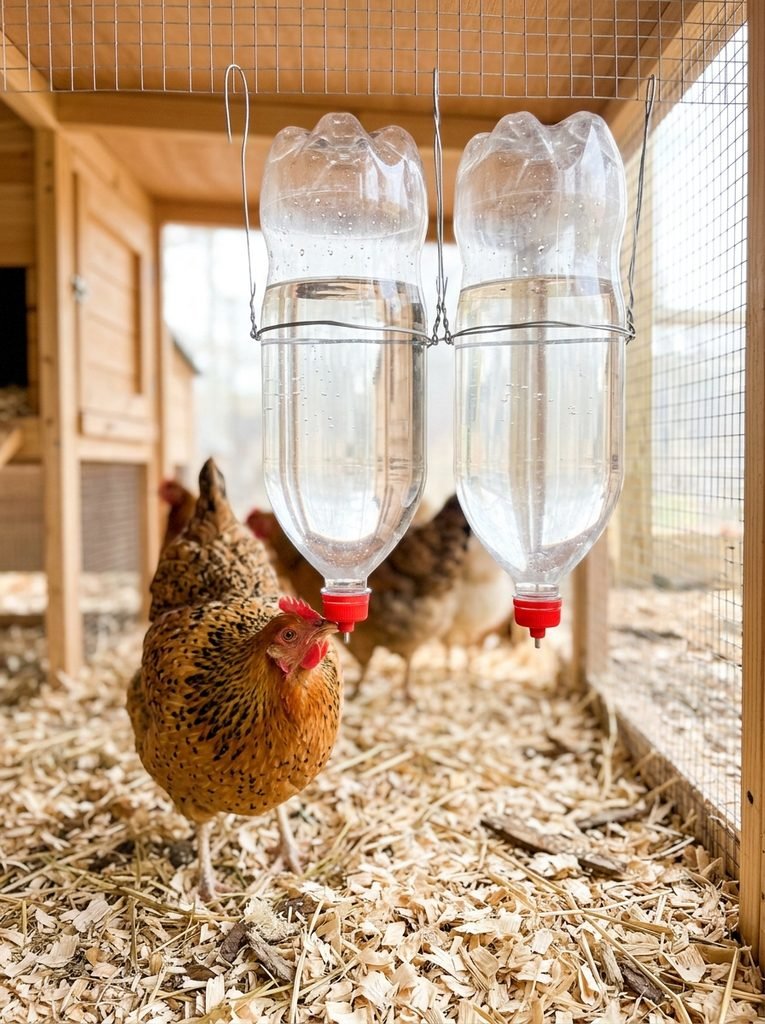
For a small flock or a quick fix, screw a poultry nipple into the cap of a large plastic bottle and hang it upside down. It’s the easiest waterer you can make, and it costs almost nothing.
It’s perfect for a broody hen in a separate pen or a couple of hens in a small coop.
- Almost free to make
- Ready in five minutes
- Great for small or temporary pens
You’ll need: a large clean plastic bottle, a screw in poultry nipple, a drill and some wire to hang it.
8Mason Jar Chick Waterer for the Brooder
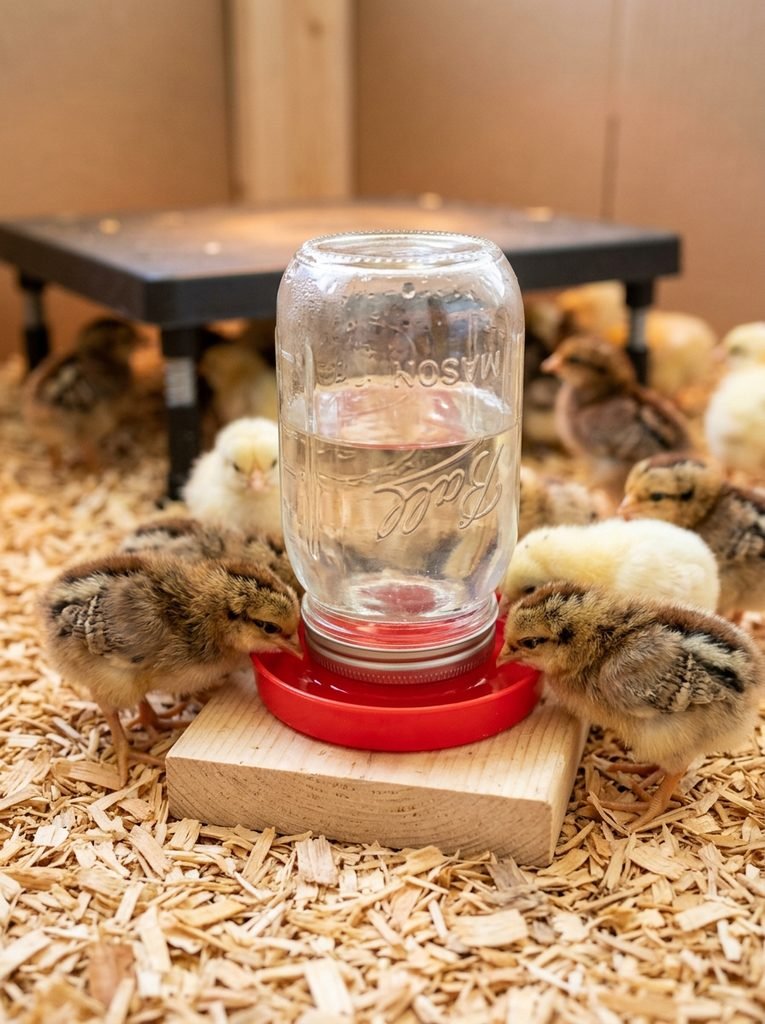
Baby chicks need a small, shallow waterer they can’t drown in. A mason jar screwed into a chick waterer base is simple, cheap and easy to clean. Set it on a small block so the chicks don’t kick shavings into it.
A tip I picked up: add a few clean marbles or pebbles to the drinking ring for the first days. It keeps tiny chicks from getting soaked.
- Safe for tiny chicks
- Easy to clean
- Uses a jar you already have
You’ll need: a mason jar, a chick waterer base that fits it and a small wooden block.
9Hanging Waterer
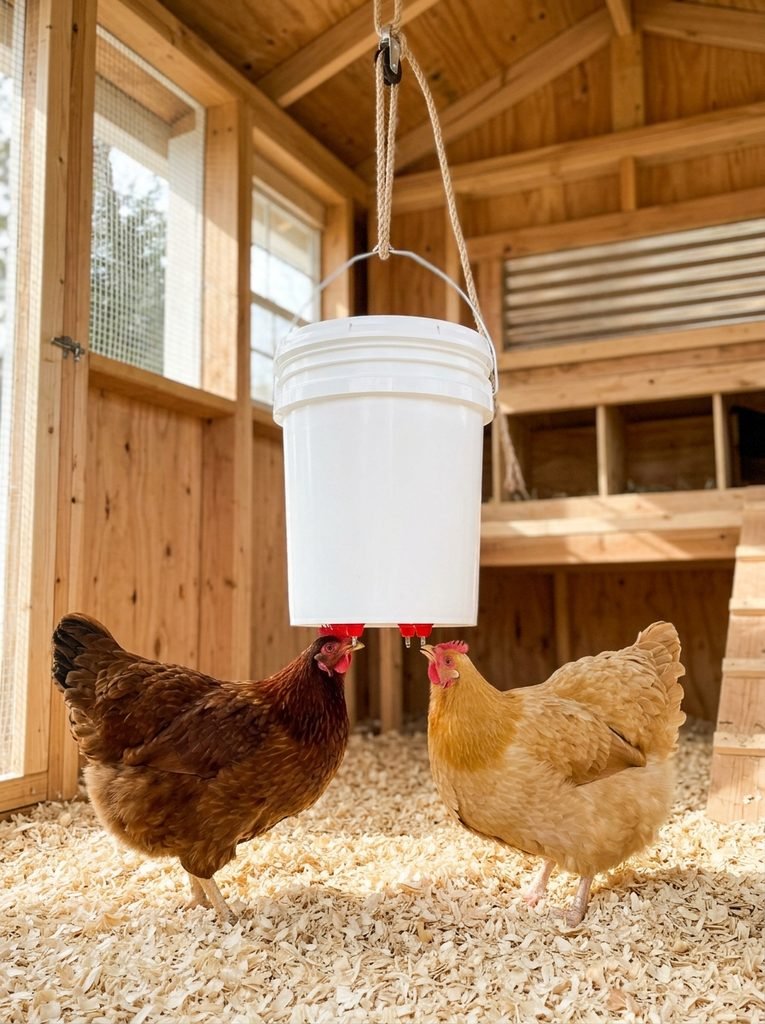
Hanging your waterer keeps it off the floor, so no dirt or bedding gets kicked into it. A simple rope and pulley lets you raise it as your chickens grow and lower it to refill.
Honestly, hanging the waterer is the easiest way to keep the coop floor dry too.
- Stays clean off the floor
- Easy height adjustment
- Keeps the coop floor dry
You’ll need: a sturdy hook, a rope and a small pulley or a chain with an S hook.
10Trough Waterer with Drinkers
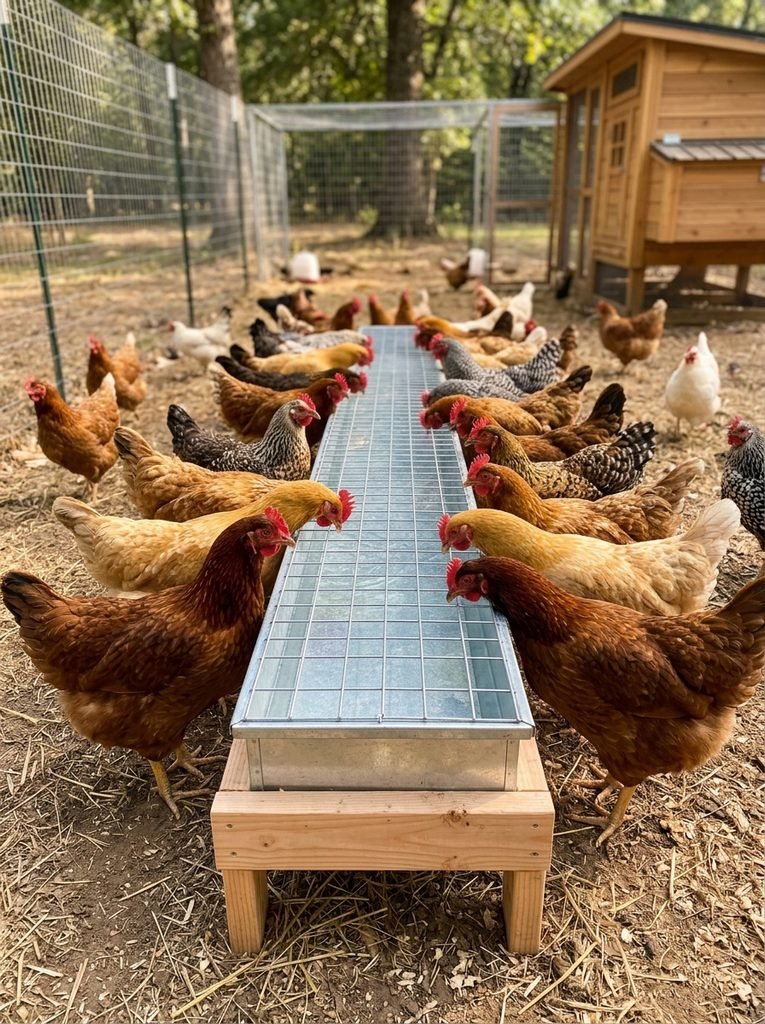
For a big flock, a long trough lets lots of chickens drink at once. Add a wire grid over the top so they can dip their beaks in but can’t climb or scratch in the water.
Raise it on a low stand to keep dirt out.
- Room for the whole flock
- Wire grid keeps water cleaner
- Easy to see and refill
You’ll need: a narrow galvanized trough, a low wooden stand and a piece of wire mesh for the top.
11Waterer and Feeder Station
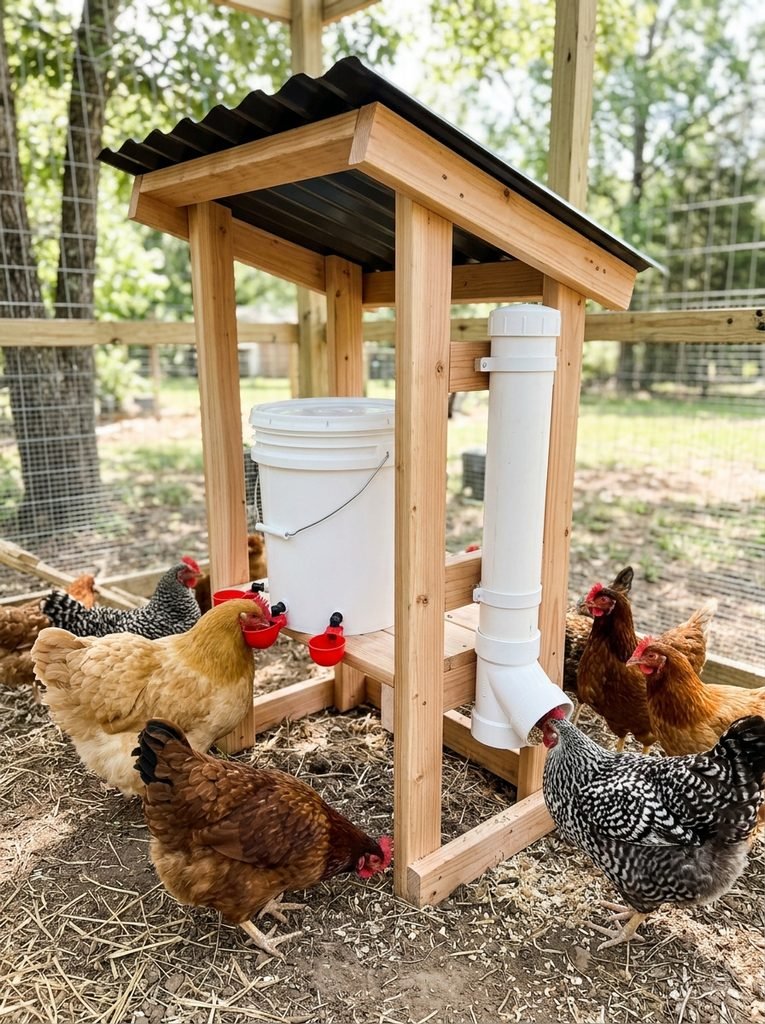
Put the waterer and feeder together under a small roof and you get one tidy station. Food stays dry, water stays shaded, and you refill both in one trip.
Keep the waterer a little away from the feeder so wet beaks don’t make the feed soggy.
- Refill both in one trip
- Roof keeps feed dry
- Tidy, organized run
You’ll need: a small wooden frame with a roof, a bucket waterer and a PVC gravity feeder.
12Poultry Fountain on a Stand
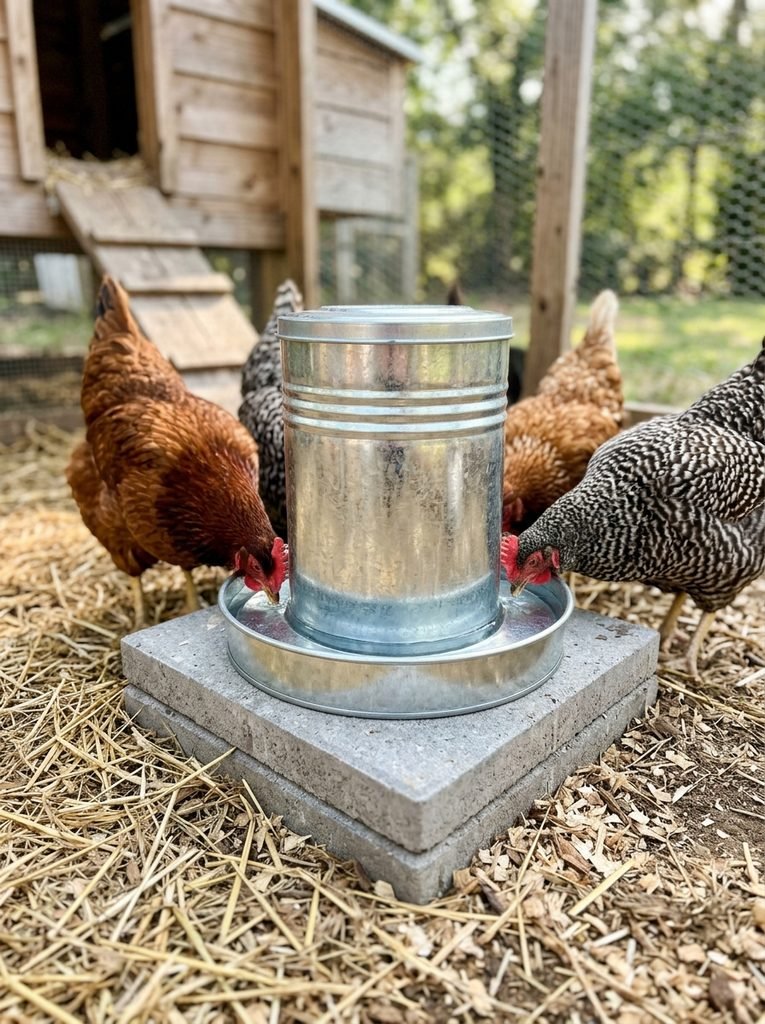
A classic poultry fountain works much better when you raise it on a simple stand. Lifting it just a few inches keeps straw and dirt out of the drinking ring, so you clean it far less often.
Raise it to about the height of your chickens’ backs.
- Classic waterer, cleaner water
- Simple stand idea
- Works with fountains you already own
You’ll need: a poultry fountain and two pavers or a small wooden block stand.
Frequently Asked Questions
What size drill bit do I need for chicken waterer nipples?
Most screw in poultry nipples need an 11/32 inch drill bit. Always check the package, since some brands use a slightly different size.
How high should a chicken waterer be?
Nipples should sit just above your chickens’ heads so they reach up to drink. Cups and open waterers should sit at about the height of their backs.
How do I keep chicken water from freezing?
Use a heated base made for poultry, choose side cups instead of bottom nipples, and keep the waterer out of the wind. Avoid homemade bulb heaters, which can start fires.
How often should I clean a chicken waterer?
Rinse it every few days and scrub it with a little vinegar once a week. Clean water keeps your flock healthy and stops algae growing.
Final Thoughts on DIY Chicken Waterer Ideas
The best DIY chicken waterer keeps water clean, cool in summer and liquid in winter. Start with a simple 5 gallon bucket nipple waterer, add a PVC system as your flock grows, and set up a heated base before the first frost. Clean water means healthier hens, and a lot less scrubbing for you.


Amir Ali is the founder and site administrator of HomeDecorEdge, a modern home decor and interior design platform. Since starting the site, he has combined his passion for interior design, practical styling, and color coordination with hands-on content strategy and site management. He guides authors, curates high-quality articles, and ensures readers have access to actionable, visually inspiring, and user-focused home decor advice for apartments, small rooms, and family homes.