

Every garden shed I’ve ever seen has a stack of empty terra cotta pots in the corner.
They’re cheap, they’re sturdy, and they’re secretly the best craft supply around. With a bit of paint and glue, a plain clay pot turns into a ladybug, an owl, a bird bath or a grinning pumpkin.
These projects are great for beginners and perfect for a weekend with kids. Most take an hour or less, and nothing needs special skills. If you can hold a paintbrush, you’re ready.
Below are 12 DIY clay pot garden craft projects I love, including a few air dry clay ideas and two fun Halloween pots for this time of year.
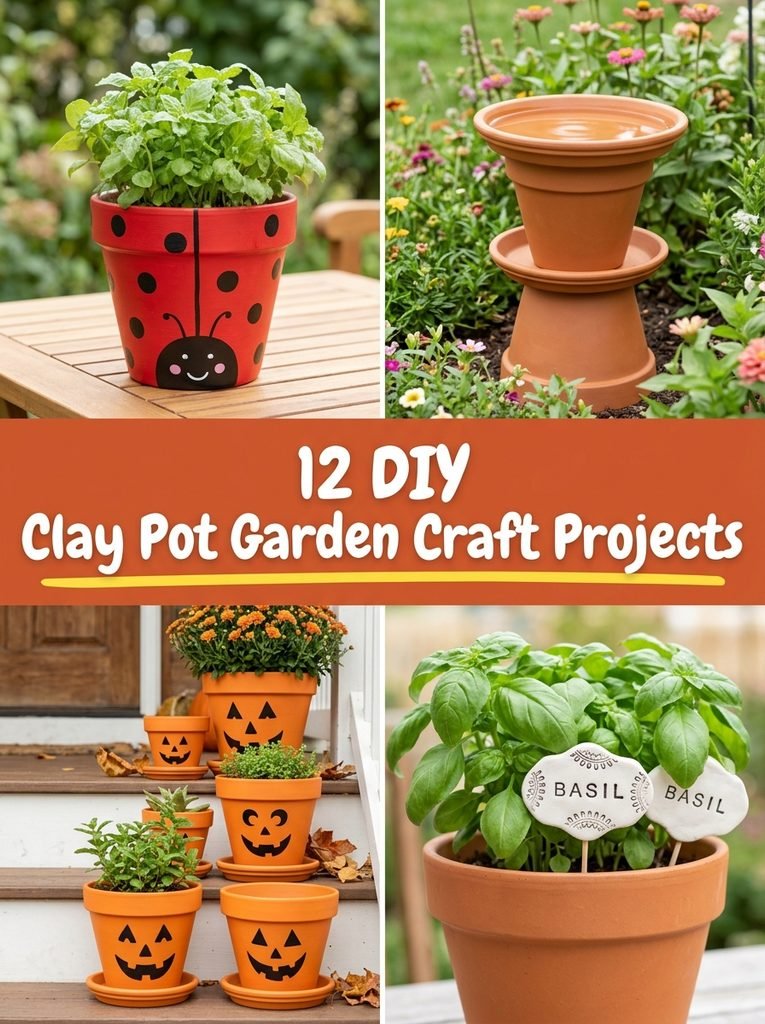
Quick Picks
- Easiest for kids: Painted Terra Cotta Ladybug Pots (idea 1)
- Best garden feature: Stacked Clay Pot Bird Bath (idea 2)
- Best for Halloween: Jack o Lantern Pumpkin Pots (idea 5)
- Best air dry project: Air Dry Clay Plant Markers (idea 7)
1. Painted Terra Cotta Ladybug Pots
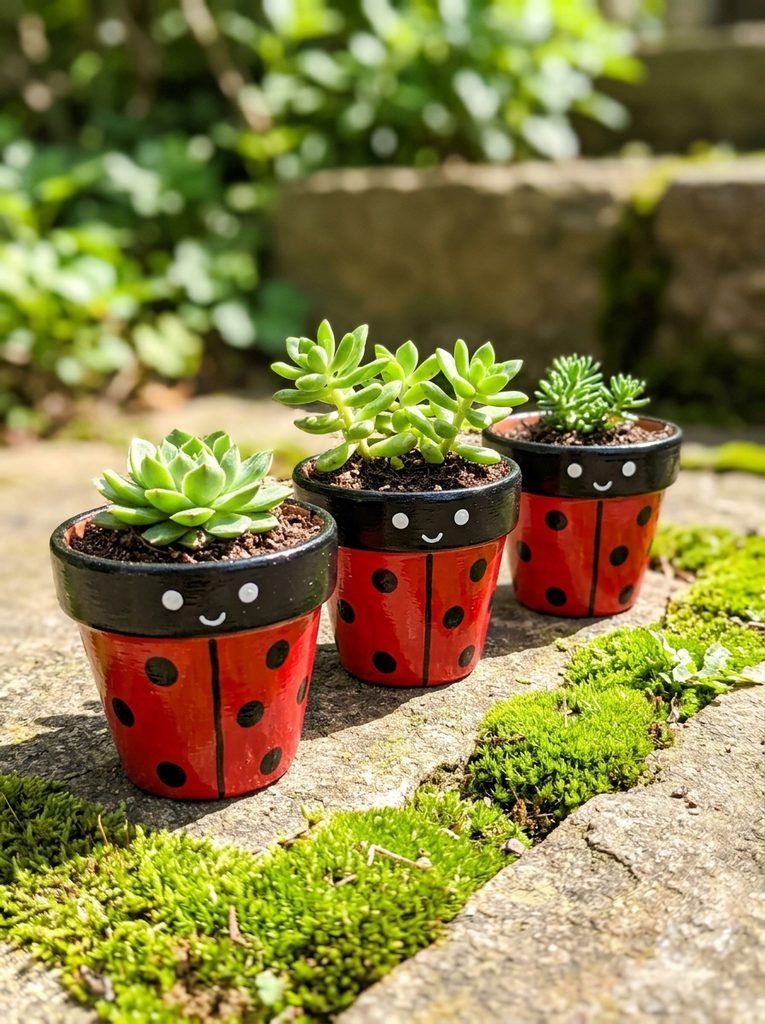
This is the perfect first project for little ones. Paint the pot red, paint the rim black for the head, then dot on spots with the end of a paintbrush. Two white dots for eyes and a little smile, and it’s done.
I’d suggest a coat of white primer first. Terra cotta soaks up paint, so the red looks dull without it. Use outdoor acrylic craft paint so the ladybugs stay bright in the garden.
You’ll need: small terra cotta pots, red, black and white paint, a round brush
Best for: toddlers and young kids
2. Stacked Clay Pot Bird Bath
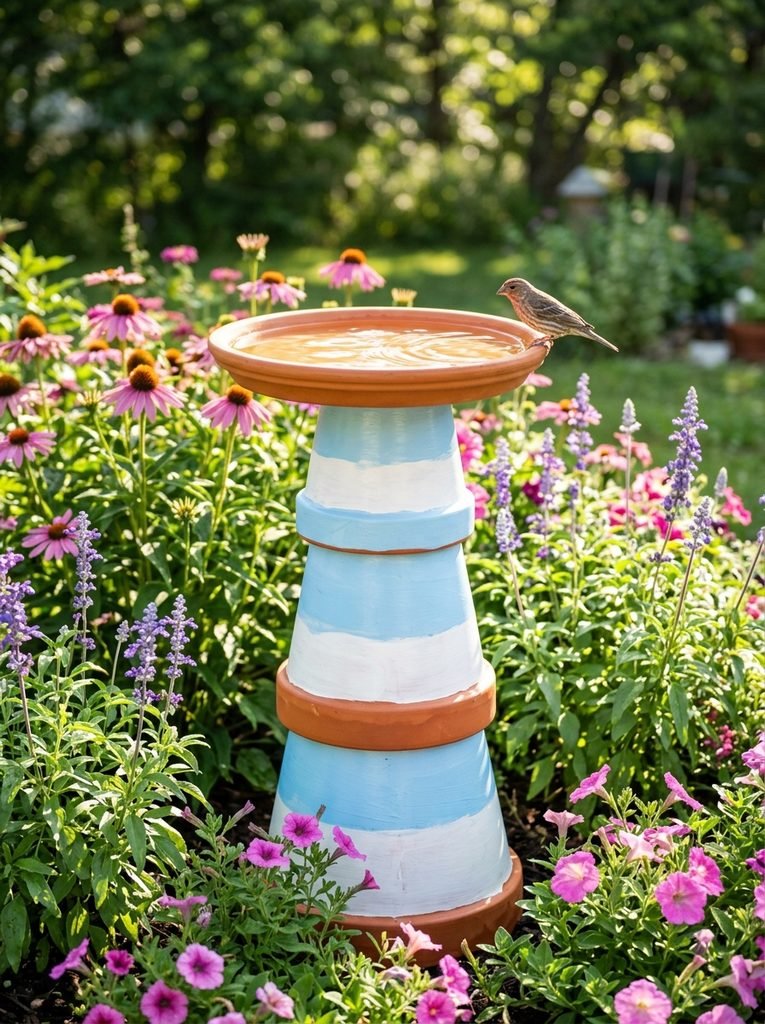
This is the classic clay pot project, and it really does look lovely in a flower bed. Three pots stacked upside down make the stand, and a wide saucer on top holds the water. The birds don’t care that it cost you very little.
One important rule: paint and seal only the outside. Leave the inside of the water saucer bare, so no paint or sealer ends up in the water the birds drink.
⏱ 2 hours plus curing💲 Low🛠 Easy
Materials Needed
- Three terra cotta pots in large, medium and small sizes
- One wide, shallow terra cotta saucer
- Outdoor acrylic paint and brushes
- Clear outdoor sealer
- Outdoor waterproof glue
How to Make It
- Wash and dry all the pots and the saucer.
- Paint the outside of the pots and the underside of the saucer, then let them dry.
- Seal only the painted outside surfaces, outdoors, and let them dry fully.
- Set the large pot upside down on level ground, then glue the medium and small pots on top, each upside down.
- Glue the saucer on top and let the glue cure as long as the label says.
- Add an inch or two of clean water and refresh it every couple of days.
Tip: Keep the water shallow, no deeper than about two inches. Small birds prefer to stand in it, not swim.
3. Clay Pot Garden Friend
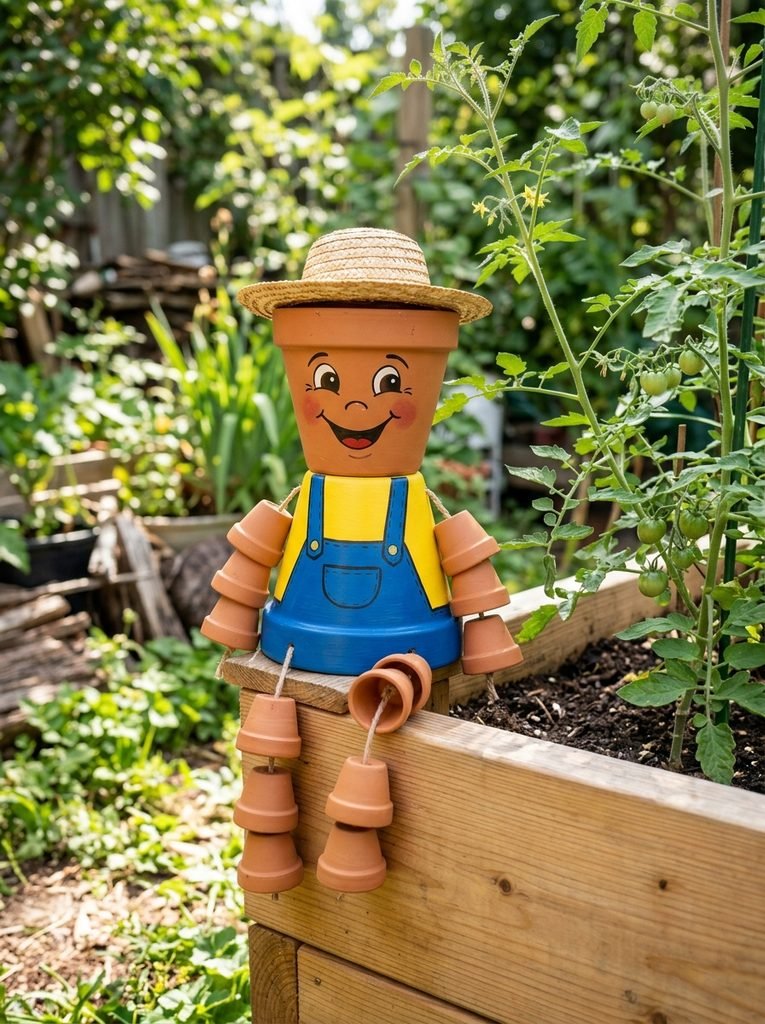
Kids absolutely love making a little clay pot person to “watch” the garden. A medium pot is the body, tiny pots strung on rope make the arms and legs, and a small pot on top becomes the head.
Let the kids paint the clothes and face however they like. The sillier the better. An adult should handle the glue and the knotting, and the kids take charge of the paint.
⏱ 2 hours💲 Low🛠 Easy
Materials Needed
- One medium terra cotta pot for the body
- One small pot for the head
- Eight to twelve mini pots for arms and legs
- Strong outdoor rope or twine
- Outdoor acrylic paint, brushes and outdoor glue
How to Make It
- Paint all the pots: clothes on the body, skin tone or a fun color on the head, and matching colors on the limbs.
- Once dry, an adult threads rope through the drainage holes of the mini pots to make two arms and two legs, knotting each end.
- Thread the arm and leg ropes through the body pot’s hole and knot them inside.
- Glue the head pot on top of the upside down body pot.
- Paint the face, add a small hat if you like, and seal the outside.
Tip: Tie a big knot at the end of each limb, larger than the drainage hole, so the pots can’t slide off.
4. Clay Pot Owls
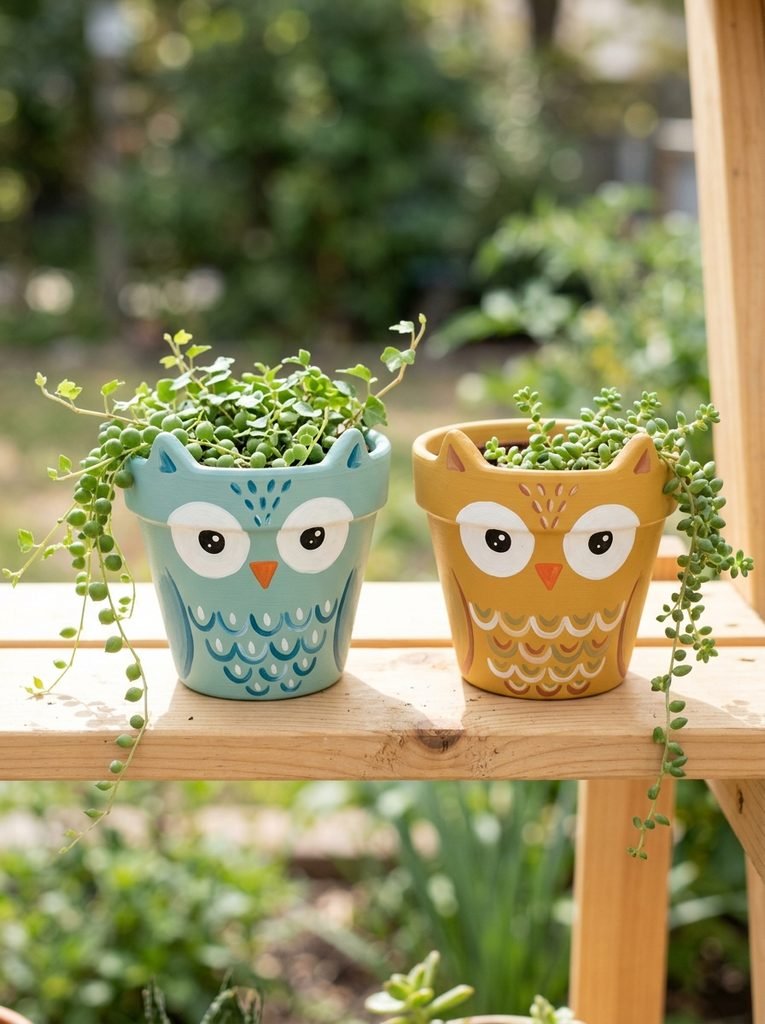
Owls are such a sweet animal idea. Big round eyes near the rim, a little beak and a few rows of painted scallops for feathers. Even messy painting looks charming on an owl.
A tip I picked up: use a bottle cap dipped in white paint to stamp perfect round eyes. Kids find it easy, and the eyes come out even every time.
Best for: animal lovers and windowsill herb pots
Start Your 30-Day Home Reset
Stop waiting for a "perfect" free weekend. Grab the 30-day plan and start feeling lighter in your own home by tomorrow.
View the 30-Day Plan Printable PDF · Instant download5. Jack o Lantern Pumpkin Pots
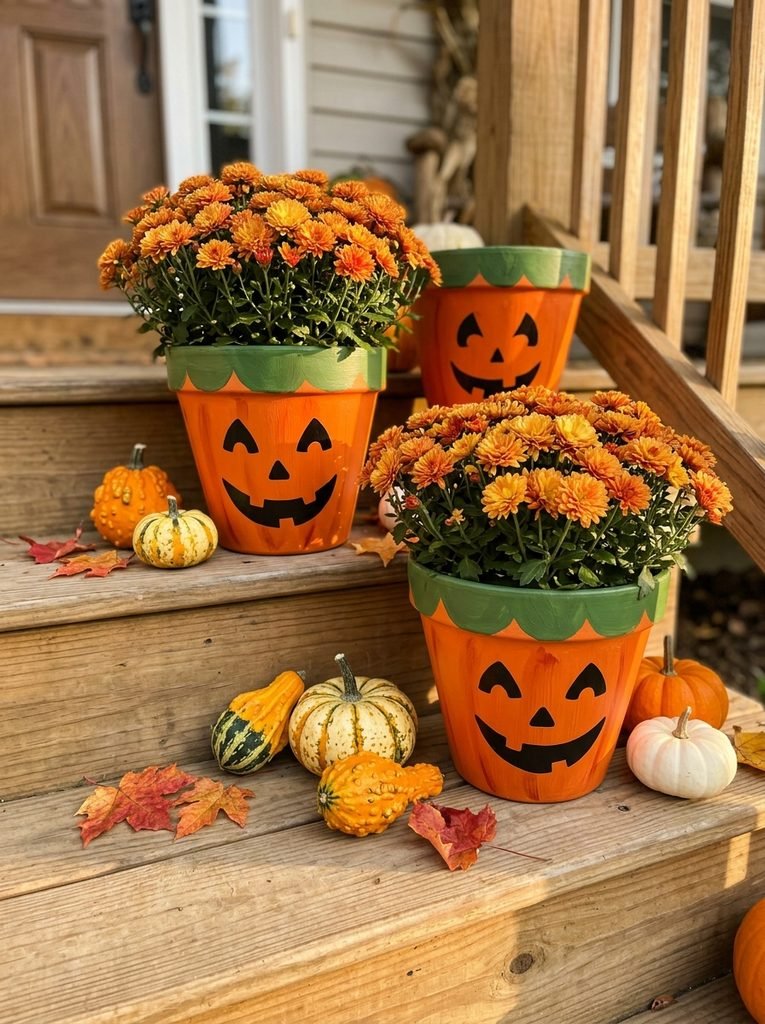
Terra cotta is already halfway to pumpkin orange, so this one is almost too easy. Paint the pot bright orange, paint the rim green, then add a happy or spooky jack o lantern face in black.
Fill them with orange mums or little succulents and line them up on the porch steps. I like making them in three sizes. They last way longer than real pumpkins, and you can bring them out again next year.
Best for: fall porches and Halloween fun with kids
6. Spooky Ghost Pots
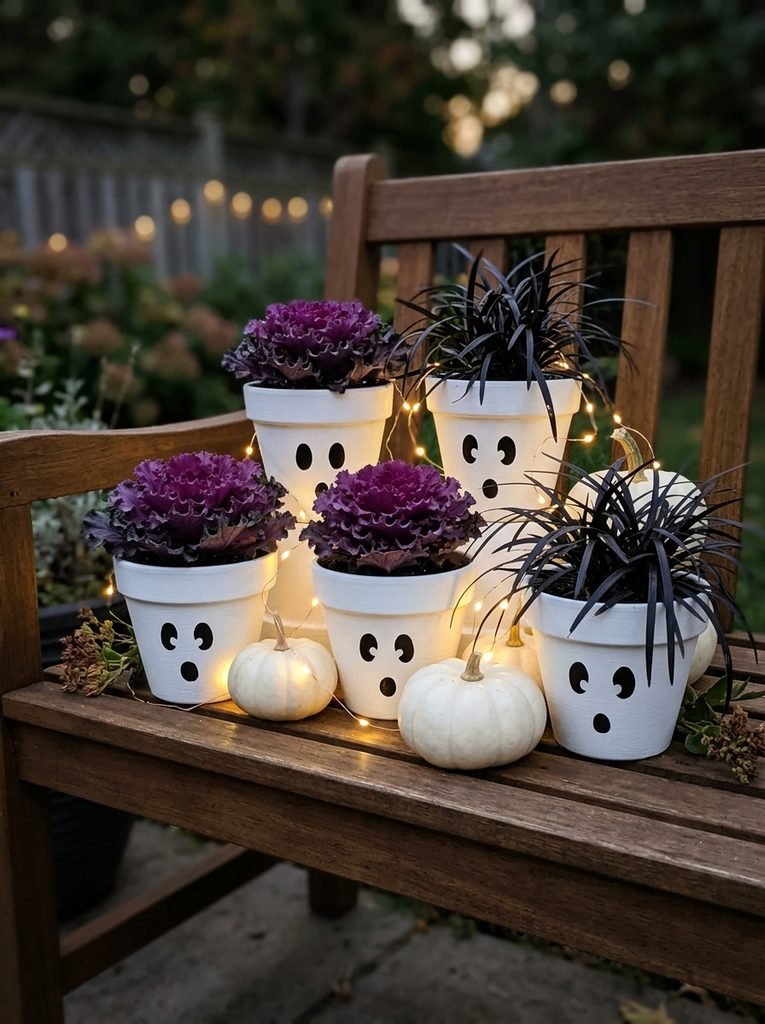
Ghost pots are just white pots with cute faces, and they’re adorable next to the pumpkin pots. Two black ovals for eyes and a round “oooh” mouth is all you need.
Honestly, dark plants make them look extra spooky. Try purple kale or dark grasses inside. Add a coat of glow in the dark paint over the white for a fun surprise after sunset.
You’ll need: white and black outdoor paint, glow in the dark craft paint if you like
Best for: Halloween porches and quick kid crafts
7. Air Dry Clay Plant Markers
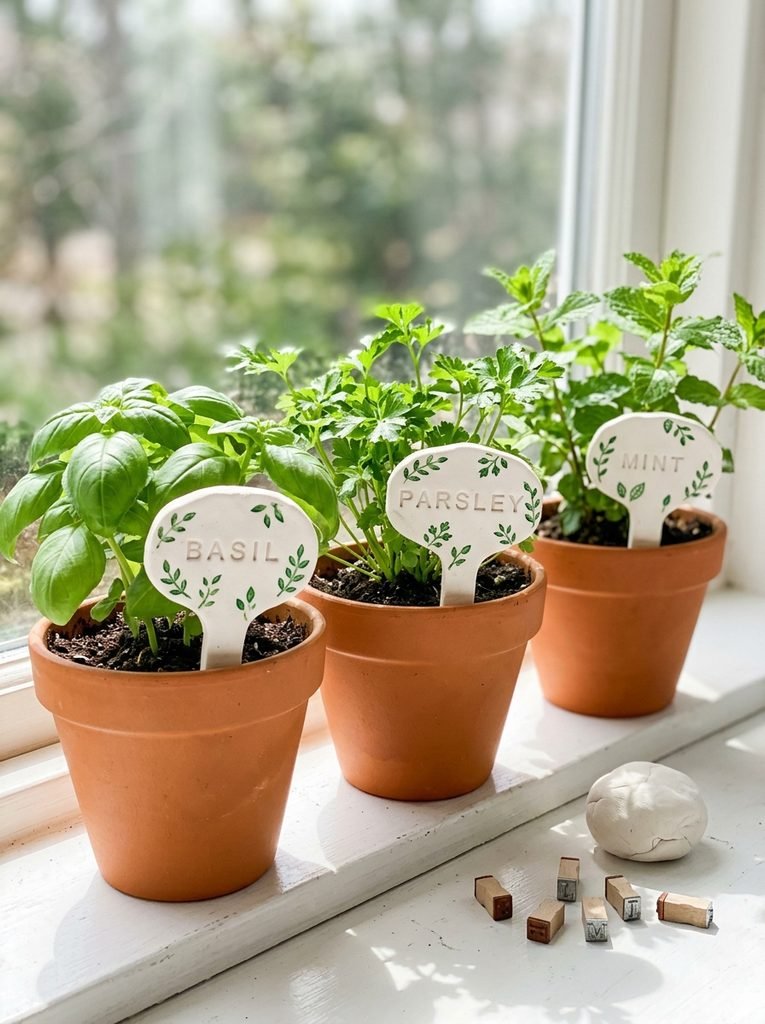
Air dry clay is wonderful for beginners because there’s no oven involved. These little markers look so neat in herb pots, and kids can press in letters with cheap alphabet stamps.
One honest warning: air dry clay isn’t waterproof. Seal the markers well, especially the part that goes into the soil, or they’ll soften after a few waterings.
⏱ 1 hour plus drying💲 Low🛠 Easy
Materials Needed
- White air dry clay
- Rolling pin and a butter knife or clay cutter
- Alphabet stamps
- Acrylic paint and a fine brush
- Clear outdoor sealer
How to Make It
- Roll the clay out to about a quarter inch thick.
- Cut paddle shapes about 5 inches long with a pointed bottom for the soil.
- Press in the plant names with alphabet stamps and smooth the edges with a damp finger.
- Let them dry flat for one to two days, turning them over halfway.
- Paint the letters or small leaves, then seal every side twice.
Tip: Dry them under a light book for the last few hours. Air dry clay loves to curl as it dries.
8. Air Dry Clay Mini Mushrooms for Pots
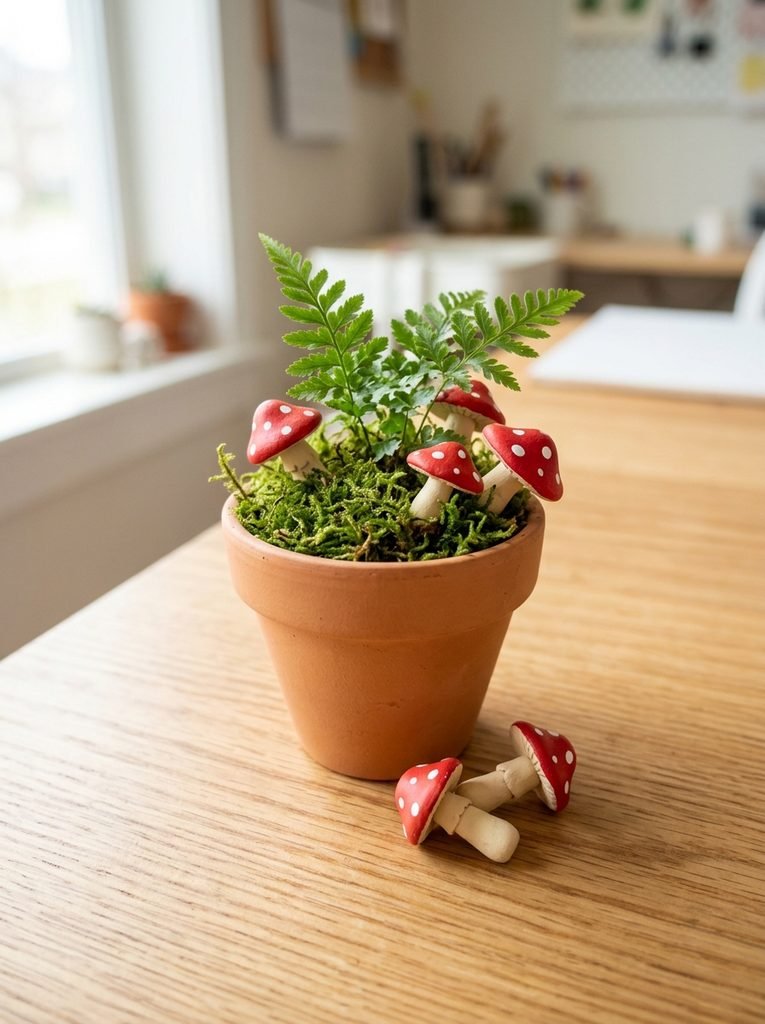
Little toadstools are the easiest air dry clay shapes ever. Roll a small log for the stem, a ball pressed into a dome for the cap, and stick them together. Paint the caps red with white dots.
Tuck them into moss in a pot and suddenly it’s a tiny fairy garden. Kids love this one. Push a toothpick into the stem before drying so it stands firmly in the soil.
You’ll need: air dry clay, red and white paint, toothpicks, clear sealer
Best for: fairy gardens and small hands
9. Clay Pot Toad House
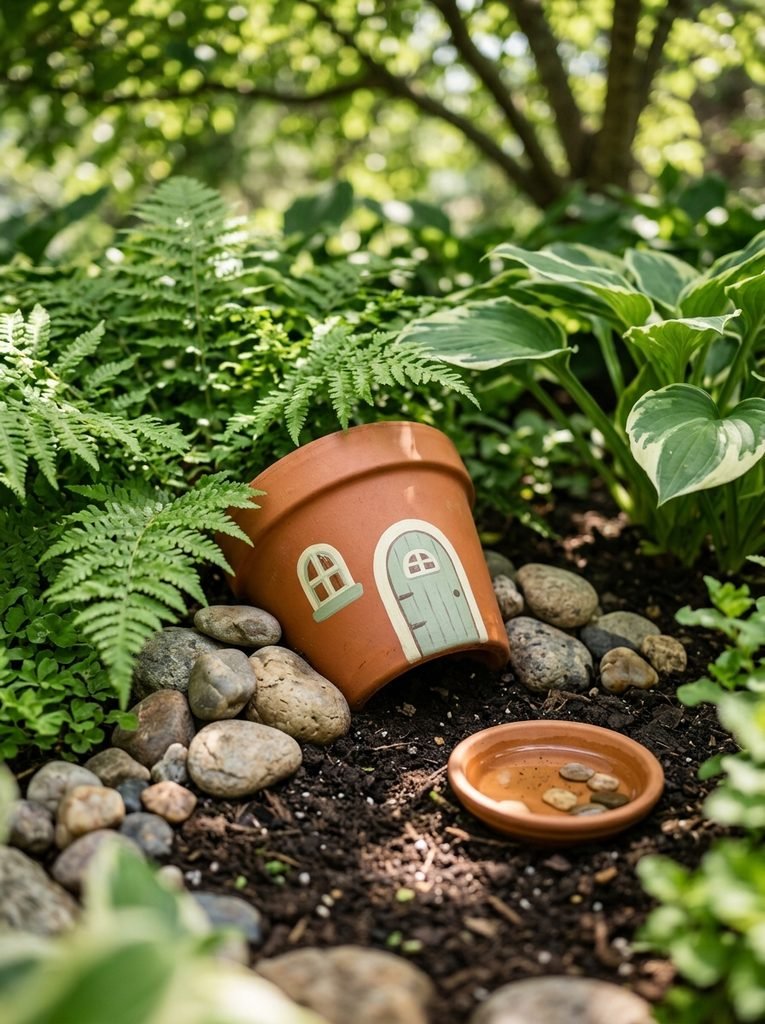
A toad house is a sweet project that actually helps your garden. Toads eat slugs and bugs, and they love a cool, shady hideout. A clay pot on its side, half buried in soil, makes the perfect little cave.
Paint only the outside, with a little door and window for fun, and leave the inside bare. Place it somewhere shady and damp, add a shallow water dish nearby, and be patient. It can take a while for a toad to move in.
Best for: nature loving kids and shady garden corners
10. Terra Cotta Wind Chime
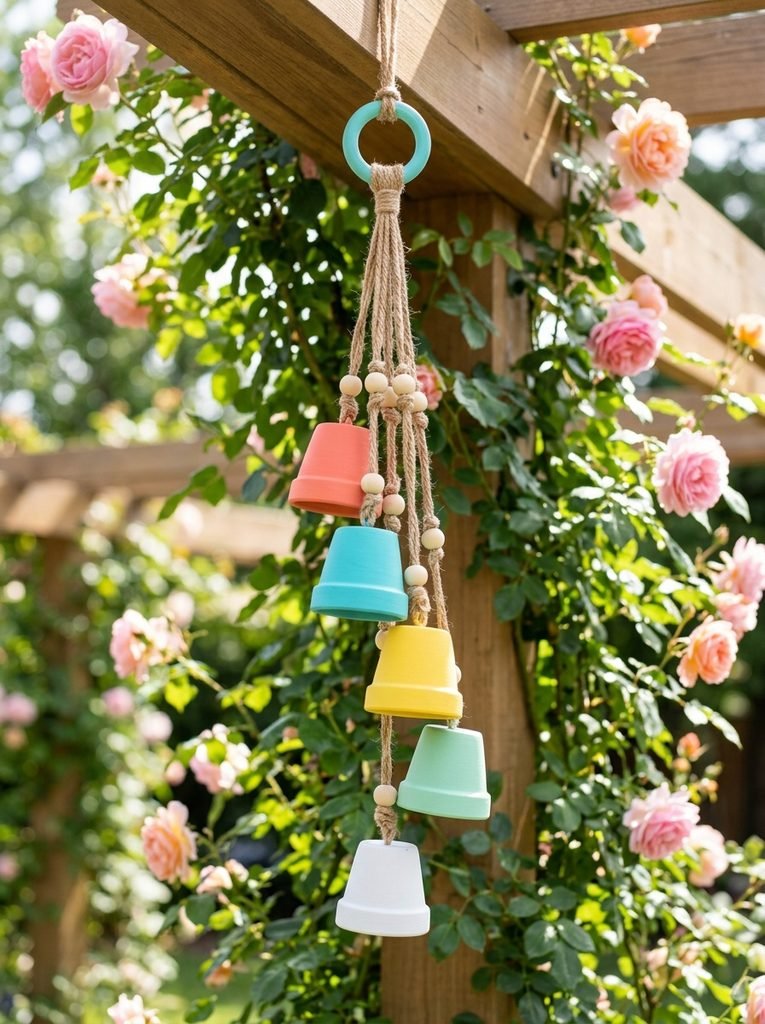
Mini terra cotta pots make a soft, earthy clinking sound when they bump in the breeze. Paint each one a different bright color and hang them upside down at different heights. It’s fun, colorful and very easy.
Tie a big knot or wooden bead under each pot so it stays in place. Hang it from something sturdy and away from walkways, because terra cotta can crack if it falls. I keep mine under a pergola beam.
You’ll need: mini terra cotta pots, outdoor rope, wooden beads, a wooden ring
Best for: porches and patios with a gentle breeze
11. Chalkboard Rim Herb Pots
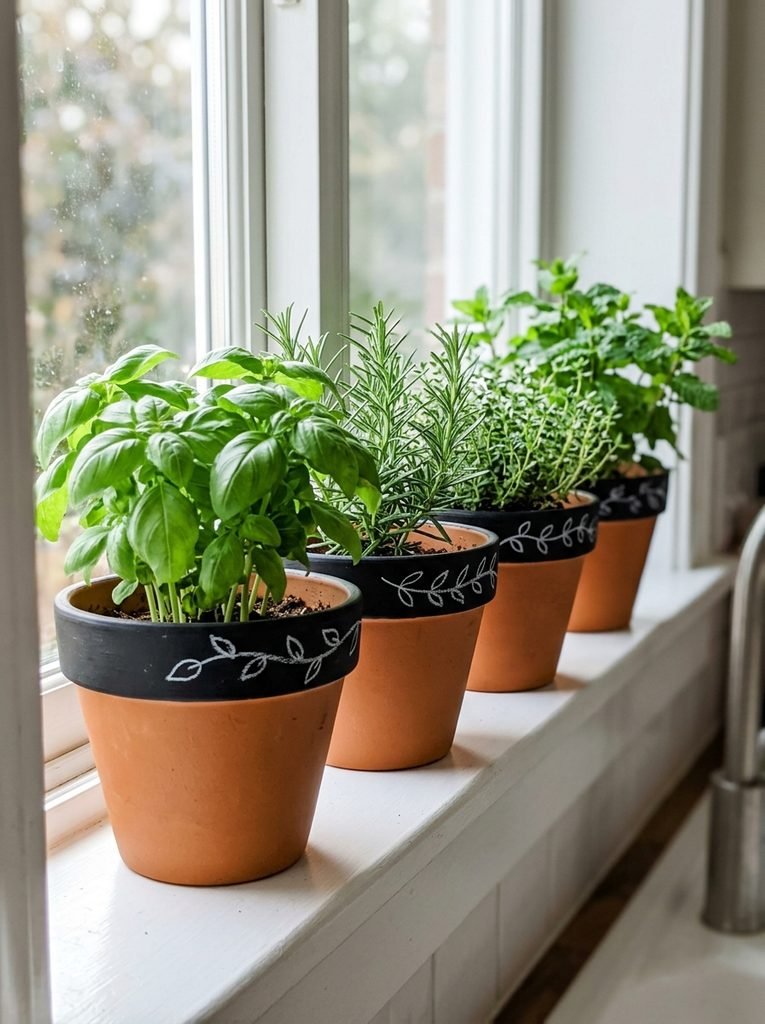
This is the simplest beginner project here, and it’s genuinely useful. Paint just the rim of each pot with chalkboard paint, then write the herb name in chalk. Change it whenever you swap plants.
I like leaving the rest of the pot plain terra cotta. The black rim and natural clay look clean and modern together. Use painter’s tape for a crisp line under the rim.
You’ll need: chalkboard paint, painter’s tape, chalk or chalk markers
Best for: kitchen windowsills and total beginners
12. Clay Pot Turtle
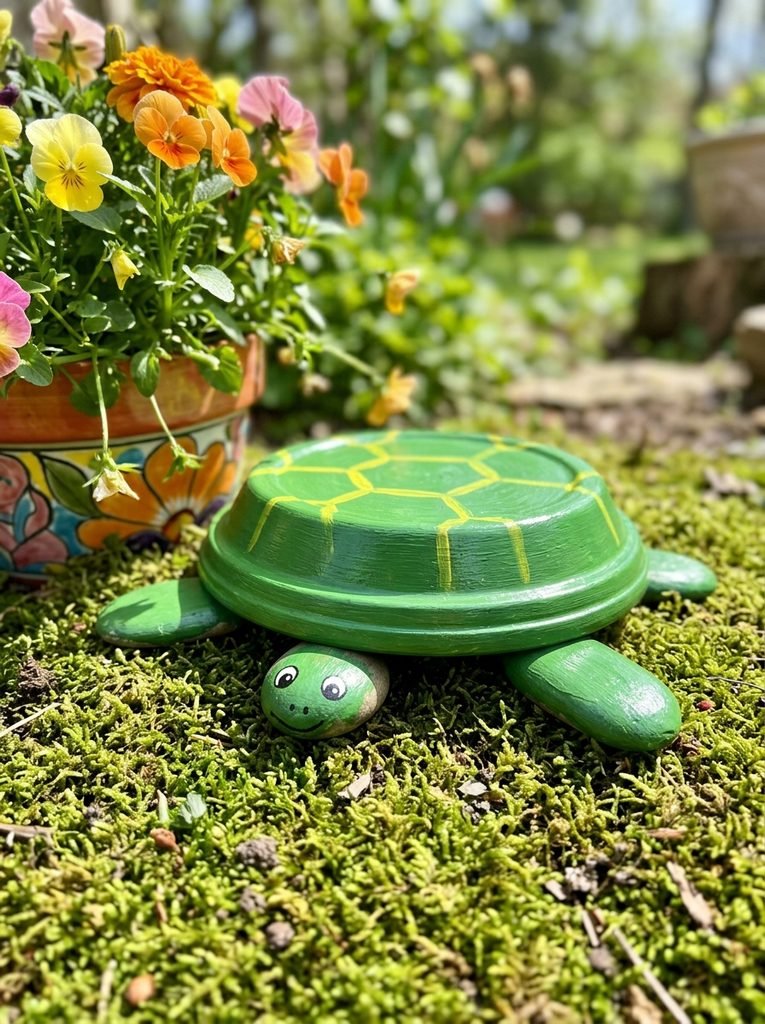
Flip a clay saucer upside down and it’s already shaped like a turtle shell. Paint it green with a yellow pattern, then glue on smooth stones for the head and feet. Kids love naming their turtles.
It’s a great way to use up leftover saucers. Make a whole family in different sizes and hide them around the garden for little ones to find. An adult should do the gluing with outdoor glue.
You’ll need: terra cotta saucers, smooth stones, green and yellow paint, outdoor waterproof glue
Best for: garden treasure hunts with kids
Frequently Asked Questions
What paint works best on terra cotta pots?
Outdoor acrylic craft paint works best. Prime with white first so the colors stay bright, then add a clear outdoor sealer.
Do I need to seal painted clay pots?
Yes, for anything that lives outside. Sealing stops paint from peeling when the clay absorbs water. Spray sealers should always be used outdoors.
Is air dry clay waterproof?
No. Air dry clay softens when wet, so seal every side well before using it outdoors or near watered plants.
Which clay pot crafts are best for young kids?
Ladybug pots, ghost pots, owls and air dry mushrooms are the easiest. Let kids paint, and keep glue, drills and spray sealers as adult jobs.
Can I paint the inside of a bird bath saucer?
It’s best not to. Leave the inside of the water dish bare, so no paint or sealer gets into the water birds drink.
How do I stop terra cotta crafts from cracking in winter?
Bring them into a shed or garage before hard frost. Wet terra cotta can crack when water inside it freezes.
Final Thoughts on DIY Clay Pot Garden Craft Projects
A few plain clay pots and some paint can keep kids busy for a whole afternoon and make your garden a lot more cheerful. Start with a ladybug or a ghost, then work up to the bird bath. Every little pot adds a bit of fun to the yard.


Amir Ali is the founder and site administrator of HomeDecorEdge, a modern home decor and interior design platform. Since starting the site, he has combined his passion for interior design, practical styling, and color coordination with hands-on content strategy and site management. He guides authors, curates high-quality articles, and ensures readers have access to actionable, visually inspiring, and user-focused home decor advice for apartments, small rooms, and family homes.