

I’ll admit it. I didn’t get the wooden Christmas tree trend at first.
Then I made one. A few pine boards, an afternoon in the garage, and suddenly I had a tree that never drops needles, fits in a small corner and comes out year after year.
Now I’m hooked. Wooden trees can be rustic, painted, modern, tiny or tall enough for the porch.
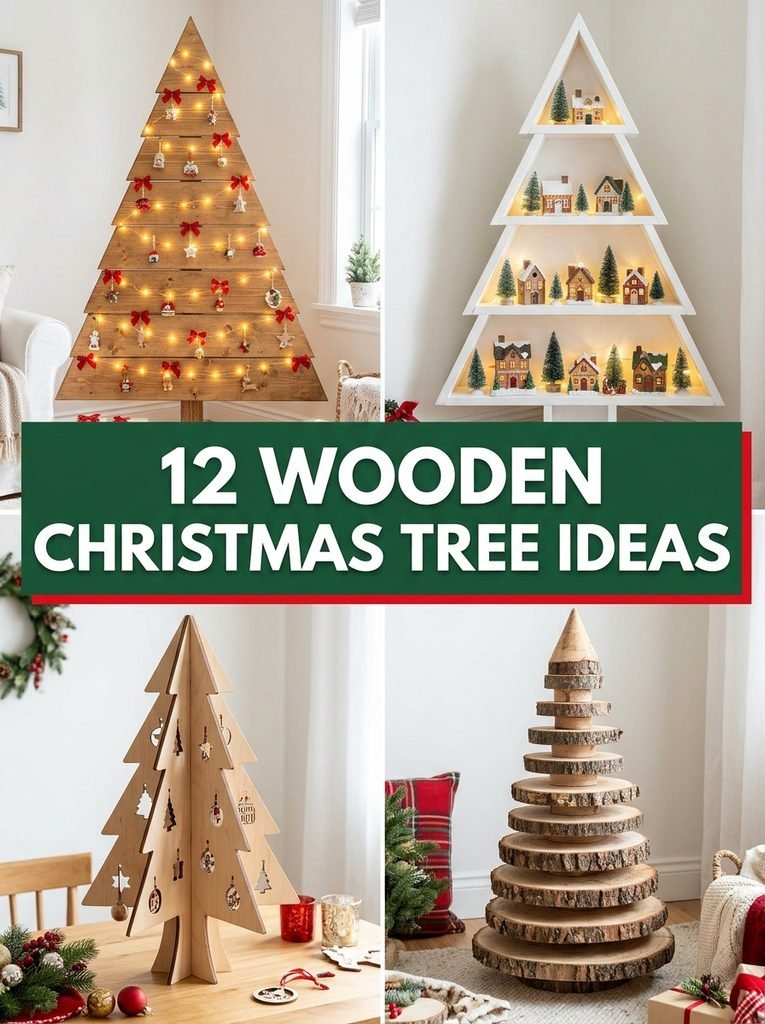
Here are 12 wooden Christmas tree ideas, with simple plans you can build, ways to decorate them, and what to check if you’d rather buy one.
Quick Picks
- Best first build: Classic DIY Wooden Board Tree (idea 1)
- Most modern: 3D Slot Together Wooden Tree (idea 6)
- Best for collectors: Wooden Shelf Tree for a Village Display (idea 2)
- Buying one? What to Check Before Buying (idea 12)
1. Classic DIY Wooden Board Tree With Free Pattern
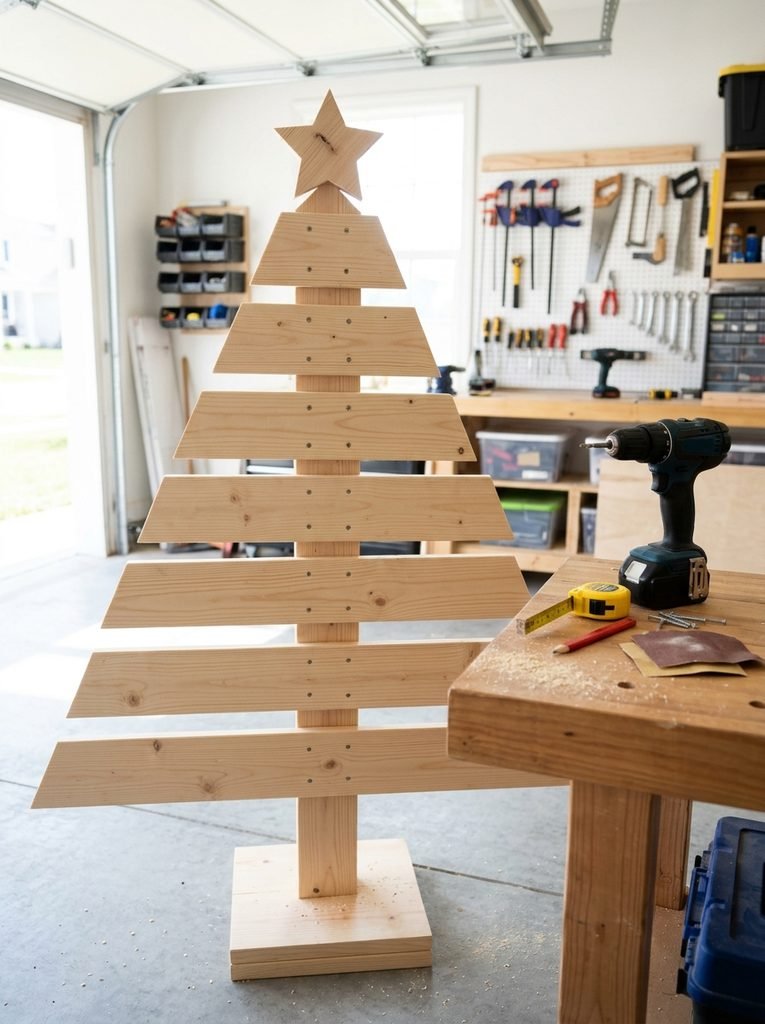
This is the classic wooden tree, and it’s the best first build. Horizontal boards get shorter as they go up, all screwed onto one center trunk.
Here’s the simple pattern I use. Boards of 24, 20, 16, 12, 8 and 4 inches, spaced about 5 inches apart on a 36 inch trunk. It ends up around 3 feet tall, perfect for a corner or entryway.
⏱ 2 to 3 hours💲 Low🛠 Easy to Moderate
Materials Needed
- One 8 foot 1×4 pine board for the branches
- One 2×2 board, 36 inches long, for the trunk
- One 2×8 board cut to 10 inches for the base
- 1.25 inch wood screws and wood glue
- A saw, cordless drill, tape measure and 120 grit sandpaper
- Safety glasses
How to Make It
- Cut the 1×4 into six boards: 24, 20, 16, 12, 8 and 4 inches.
- Mark the center of each board and sand every cut edge smooth.
- Screw the trunk straight down into the center of the base from underneath, using glue too.
- Starting 6 inches up, attach the longest board to the trunk, then each shorter board about 5 inches above the last.
- Add a wooden star on top and paint, stain or leave it natural.
Tip: Always wear safety glasses while cutting and drilling. Drill small pilot holes first so the pine doesn’t split near the ends.
2. Wooden Shelf Tree for a Village Display
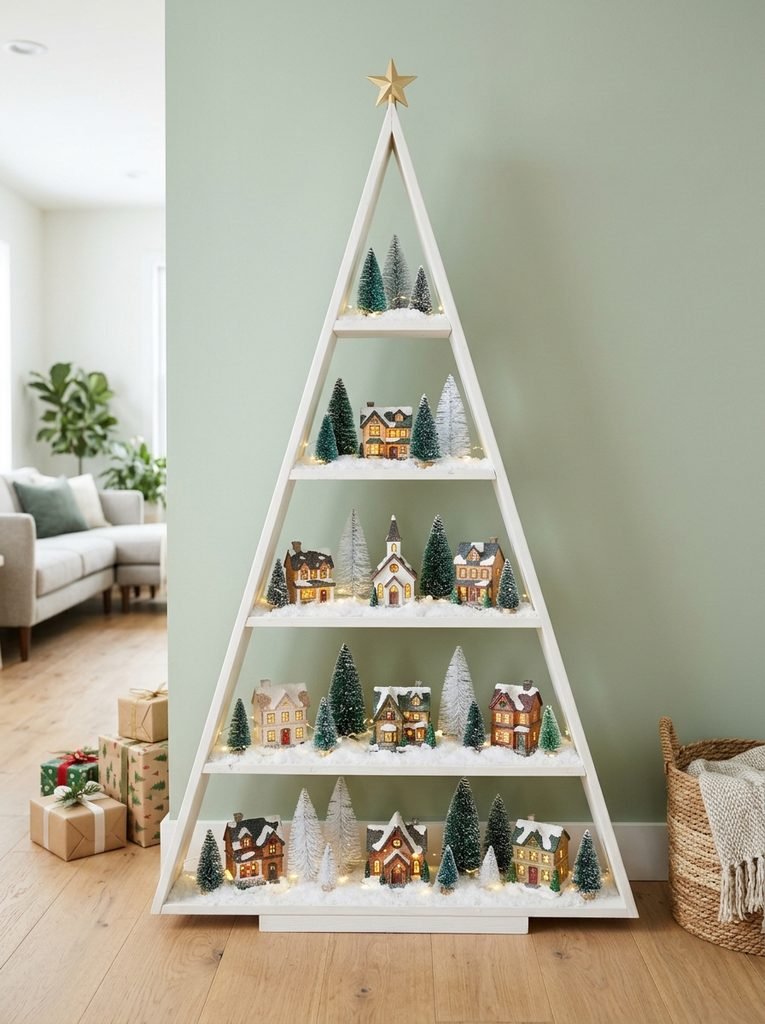
Got a Christmas village collection? A wooden shelf tree is the perfect way to show it off. Each tier holds little houses, trees and figures, all arranged in a tree shape.
It saves table space and makes the village look like a real little hillside town. After Christmas, use it for plants or small decor.
Shop it: a tree shaped wooden display shelf, lighted village houses
Best for: village collectors and small spaces
3. Painted Wooden Tree Ideas
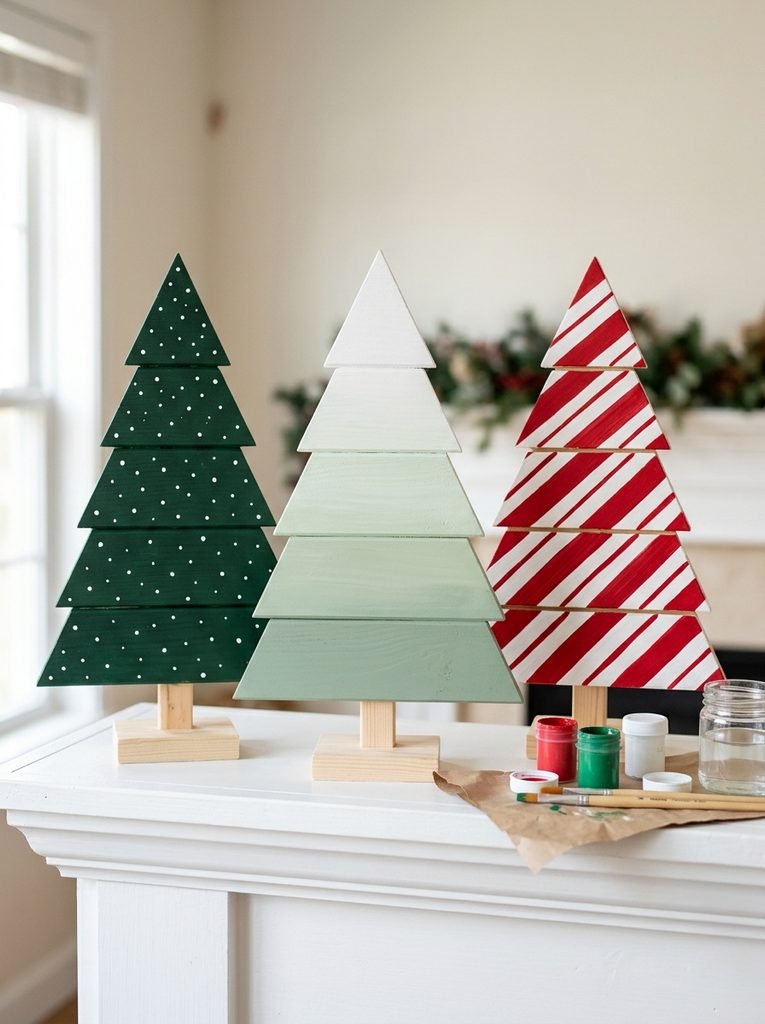
Paint turns a plain wooden tree into something totally personal. Classic green with white dot snow is sweet. An ombre from white to sage feels modern. Candy cane stripes are just plain fun.
Chalk paint is easiest because it sticks to raw wood with no primer. A small dot tool makes perfect snow dots every time.
You’ll need: chalk paint set, dotting tools, small brushes
Best for: colorful, playful decor
Printable Bundle
Christmas Printable Bundle
Christmas planner, 24 advent activity cards, 36 gift tags, handmade labels, Santa letter and family games.
4. Rustic Stacked Wood Slice Tree
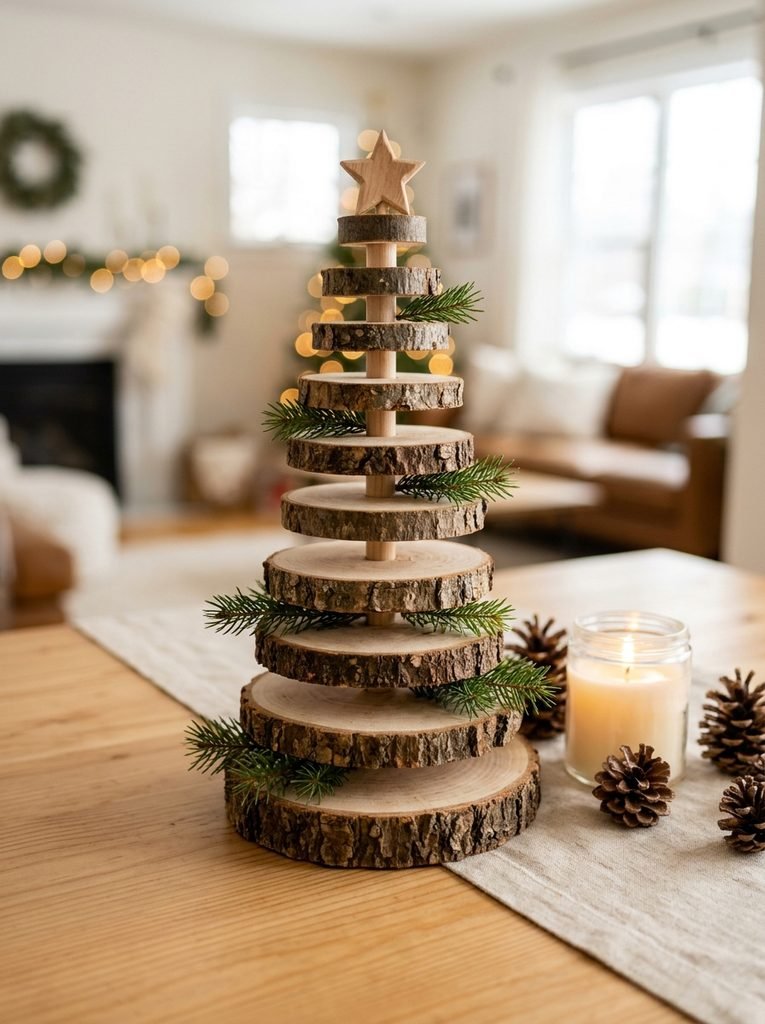
Stacked wood slices make the most rustic little tree. Drill a hole in the center of each slice and slide them onto a dowel, biggest to smallest.
The bark edges give it so much natural charm. Make a few in different heights and group them on a mantel or table.
You’ll need: natural wood slices in assorted sizes, a wooden dowel, a drill
Best for: rustic and cabin style homes
Printable Games
Christmas Party Games Pack
9 fun games for family, friends and office parties: trivia, charades, gift swap and more.
5. Wooden Christmas Tree With Lights
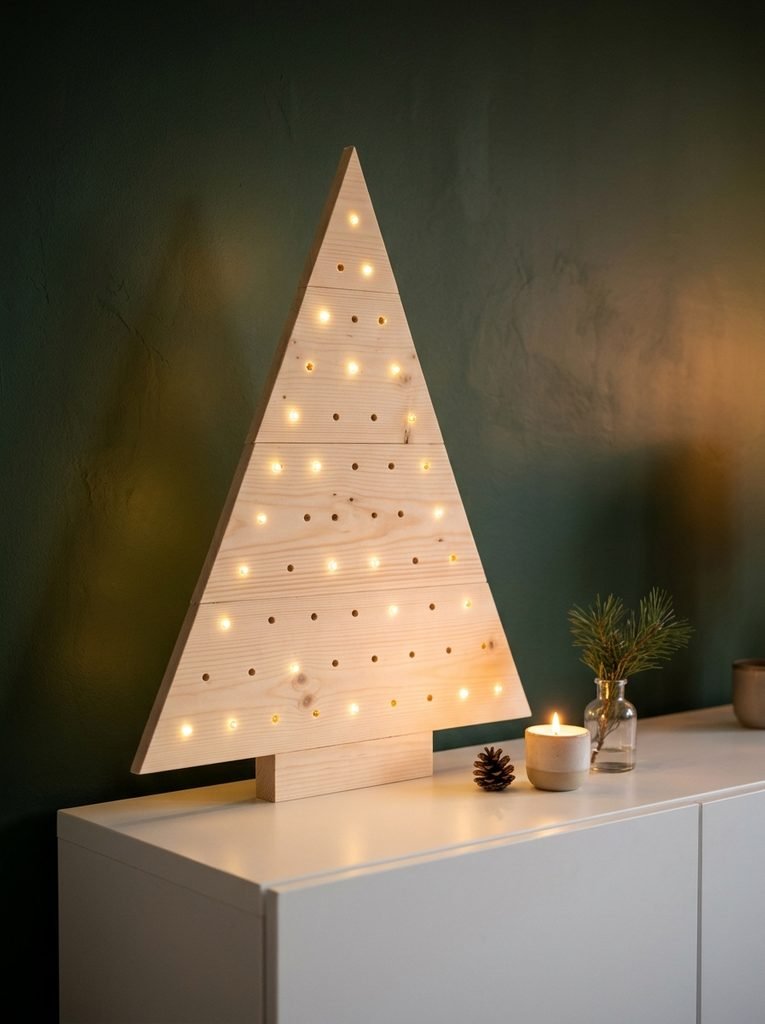
Add lights and your wooden tree becomes a glowing showpiece. Drill small holes in a pattern and push LED bulbs through from the back, or simply wrap fairy lights around the boards.
Only use LED lights on wood. They stay cool, so there’s no risk of scorching. A battery pack hidden behind the tree keeps it cord free.
You’ll need: battery LED string lights, a drill bit to match the bulb size
Best for: cozy evening glow
6. 3D Slot Together Wooden Tree
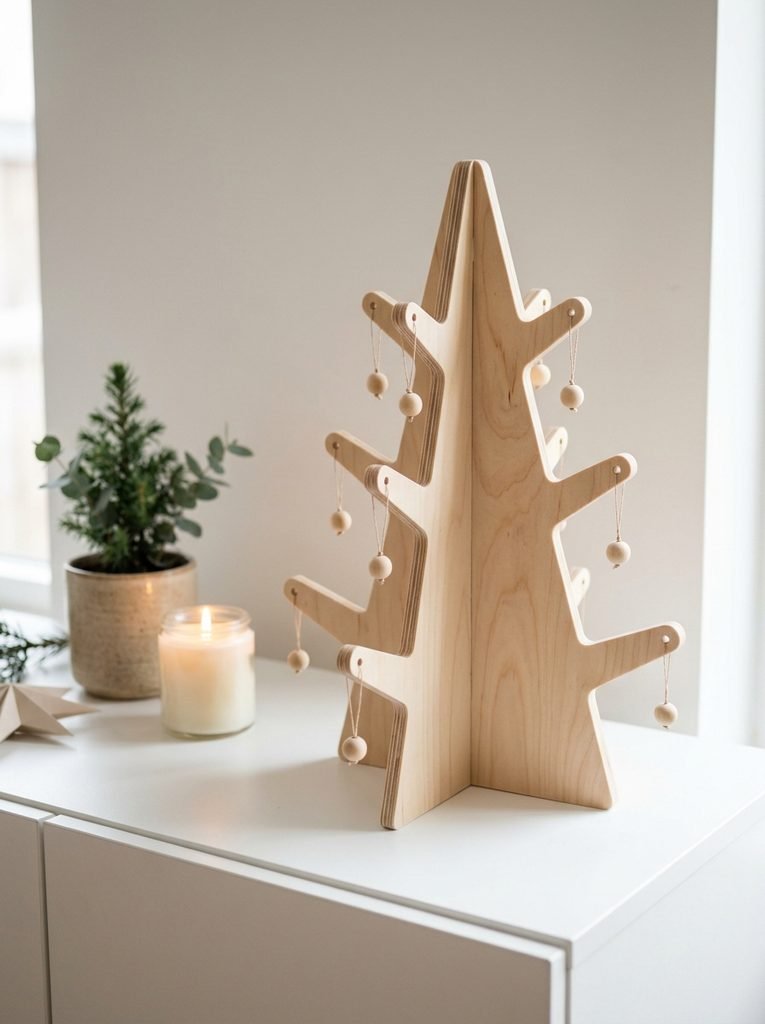
This tree is modern, clever and stores totally flat. Two plywood tree shapes slot together into a 3D tree that stands on its own. No glue, no screws.
After Christmas, just pull them apart and slide them behind a cabinet. I love how clean it looks in a Scandi style room.
⏱ 1.5 hours💲 Low🛠 Moderate
Materials Needed
- One 2 by 2 foot sheet of 1/4 inch birch plywood
- A jigsaw with a fine wood blade
- Ruler, pencil and 120 and 220 grit sandpaper
- Clamps and safety glasses
How to Make It
- Draw a tree shape 18 inches tall and 12 inches wide, then trace it again so you have two identical pieces.
- Clamp the plywood and cut both trees out with the jigsaw.
- On the first tree, cut a slot from the top down to the middle, as wide as the plywood.
- On the second tree, cut the same slot from the bottom up to the middle.
- Sand all edges smooth and slide the two pieces together at the slots.
Tip: Cut the slots a tiny bit narrow first, then sand to fit. A snug slot holds the tree steady, while a loose one makes it wobble.
7. Wooden Tree Collar, Stand and Base
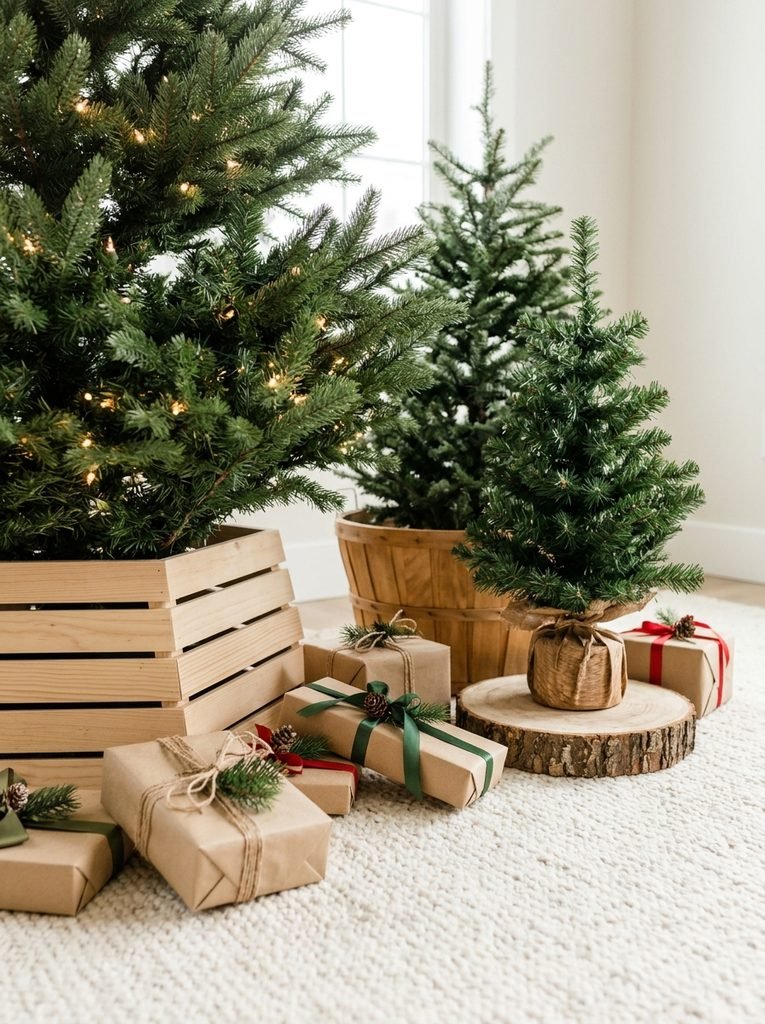
Wood isn’t only for the tree itself. A wooden collar, stand or base makes any Christmas tree look more finished, and it hides that ugly metal stand.
A slat collar is a cleaner swap for a fabric tree skirt. A thick wood slice base works beautifully under small tabletop trees. Both last for years.
Shop it: a wooden tree collar, a large wood slice round for a small tree base
Best for: hiding tree stands neatly
8. DIY Decoupage Wood Slice Ornaments
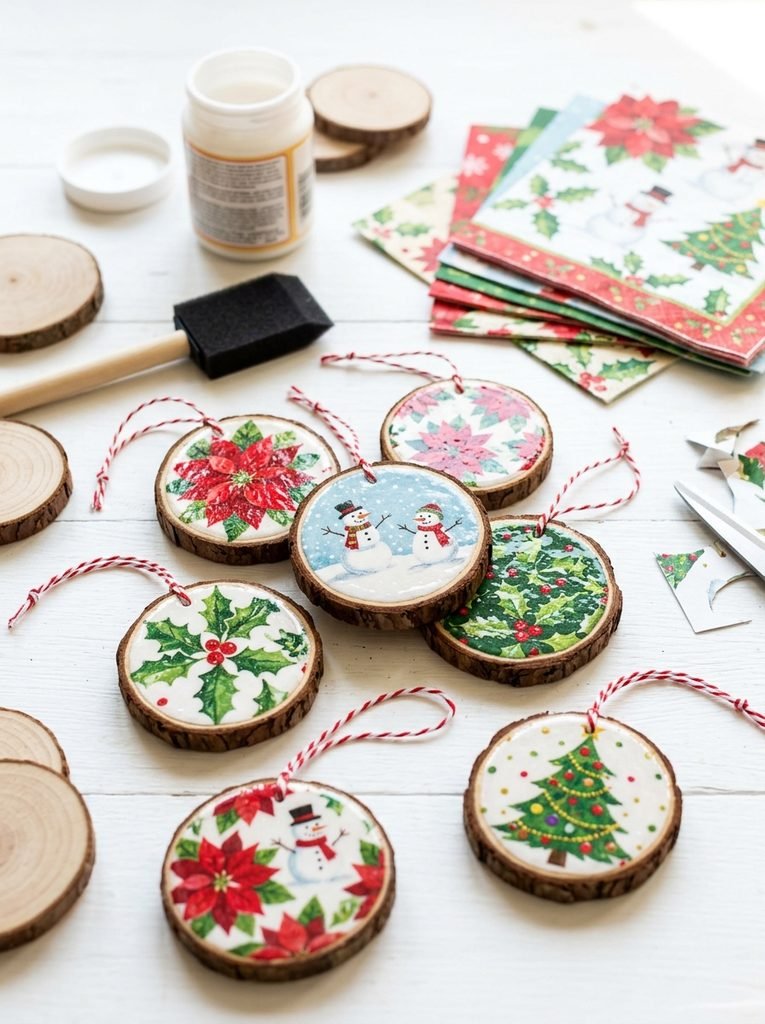
These ornaments are perfect for a wooden tree. Decoupage a pretty Christmas napkin onto a wood slice, seal it, and you have a glossy, handmade ornament.
Patterned paper napkins are the secret. They’re thin, so they melt right into the wood. Make a whole set in one afternoon.
⏱ 1 hour plus drying💲 Low🛠 Easy
Materials Needed
- Wood slices with holes, about 3 inches
- Christmas paper napkins with small designs
- Decoupage glue and sealer
- A foam brush and small scissors
- Red and white twine
How to Make It
- Cut a design from the napkin and peel off the plain back layers so only the thin top layer is left.
- Brush a thin coat of decoupage glue onto the wood slice.
- Lay the napkin on top and gently smooth it out from the center.
- Let it dry, then brush two more thin coats over the top to seal.
- Thread twine through the hole and tie a loop for hanging.
Tip: Make sure wood slices are fully dry before you start. Damp wood can crack or grow mold, so leave fresh cut slices to dry for a few weeks.
9. Wooden Advent Calendar Tree
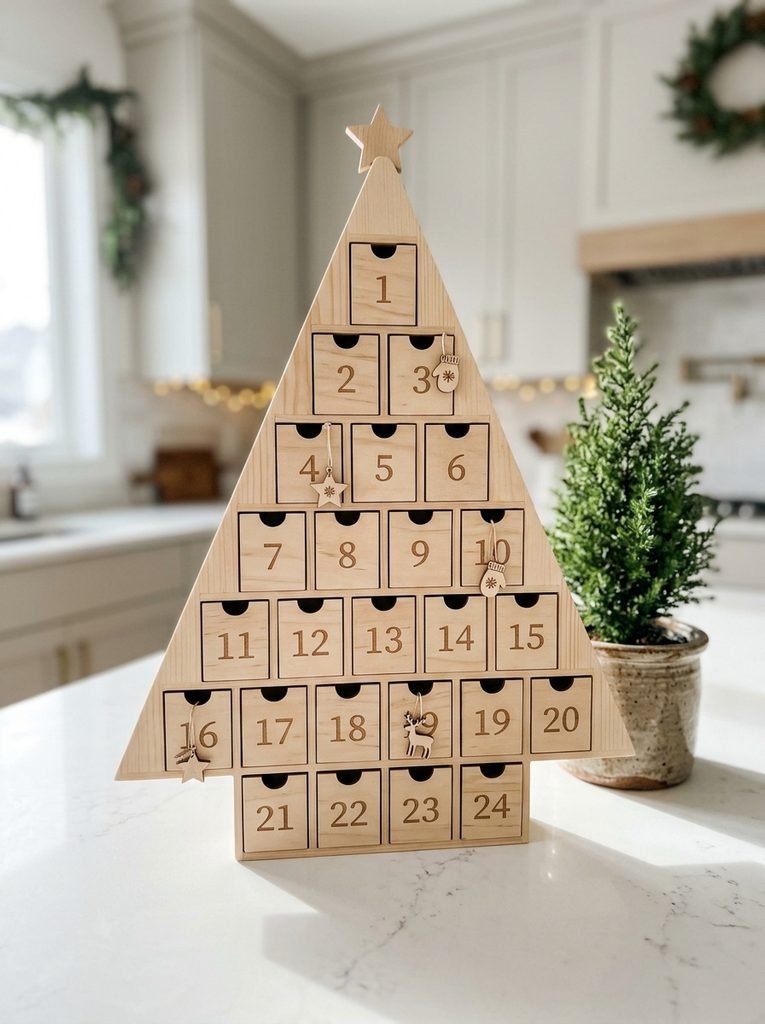
A wooden advent calendar tree is a keepsake you’ll use every year. Some have tiny drawers for treats. Others have numbered pegs where you add one wooden ornament each day.
Kids love the daily ritual. And when Christmas comes, the tree is fully decorated and ready to enjoy.
Shop it: a wooden advent calendar tree with drawers
Best for: families with kids
10. Large Outdoor Wooden Porch Tree
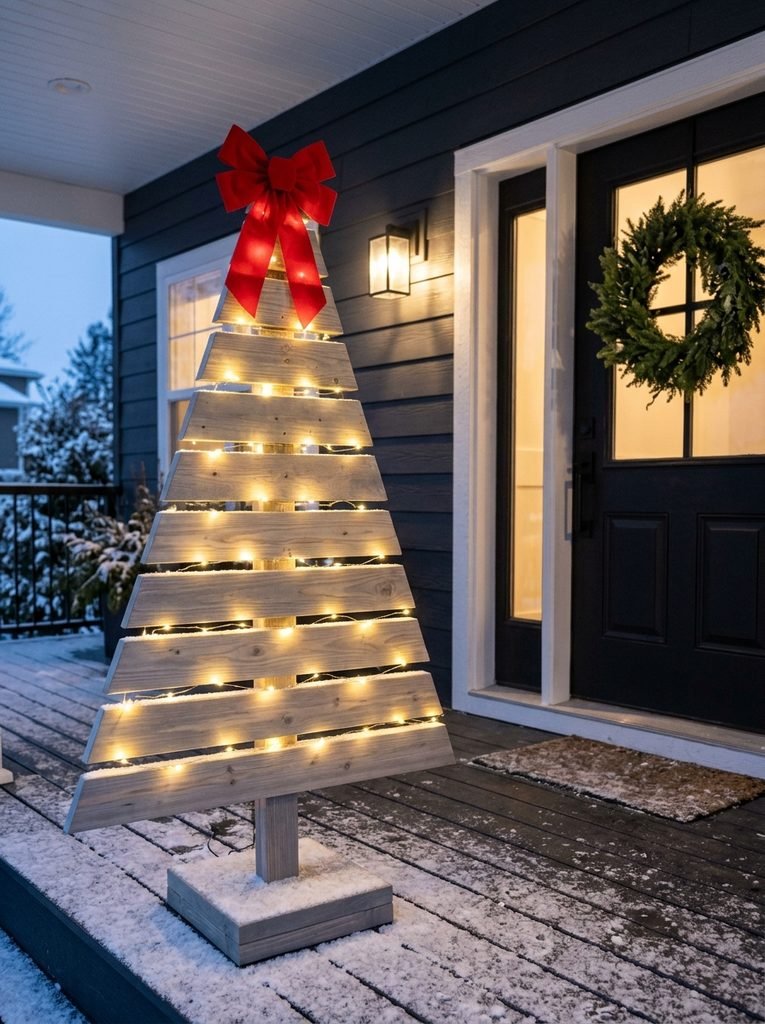
Scale up the board tree from idea 1 for a big outdoor version. A 5 foot cedar tree by the front door looks amazing, especially wrapped in lights at night.
Cedar handles weather best. Seal it well, use a wide heavy base, and pick lights made for outdoor use.
You’ll need: cedar boards, clear outdoor wood sealer, waterproof outdoor string lights
Tip: Wind can easily tip a tall wooden tree. Weigh the base down with a sandbag or screw it to the porch floor so it stays put.
11. How to Decorate a Wooden Tree
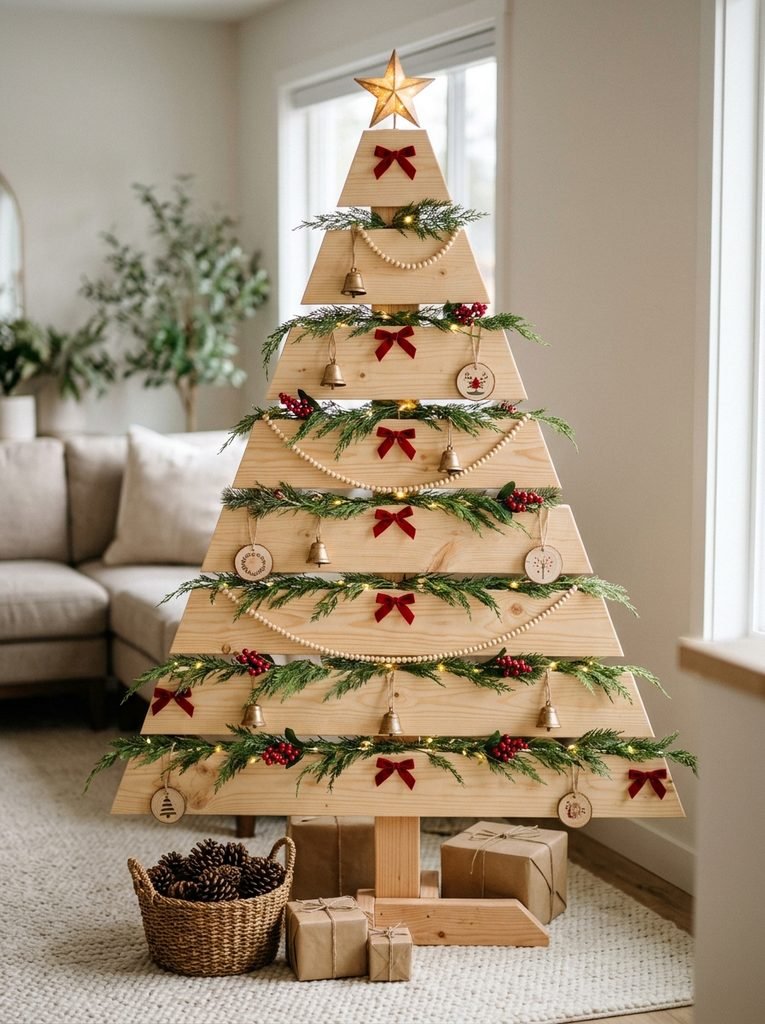
A wooden tree has flat boards instead of branches, so decorating it is a little different. Drape a thin garland across the boards, then hang small ornaments from tiny cup hooks screwed underneath each board.
Keep decorations small and light. Mini bows, bells, bead garland and wood slice ornaments look best. Big heavy ornaments can tip a small tree.
You’ll need: small cup hooks, wood bead garland, mini bells
Best for: anyone with a wooden tree
12. What to Check Before Buying a Wooden Tree
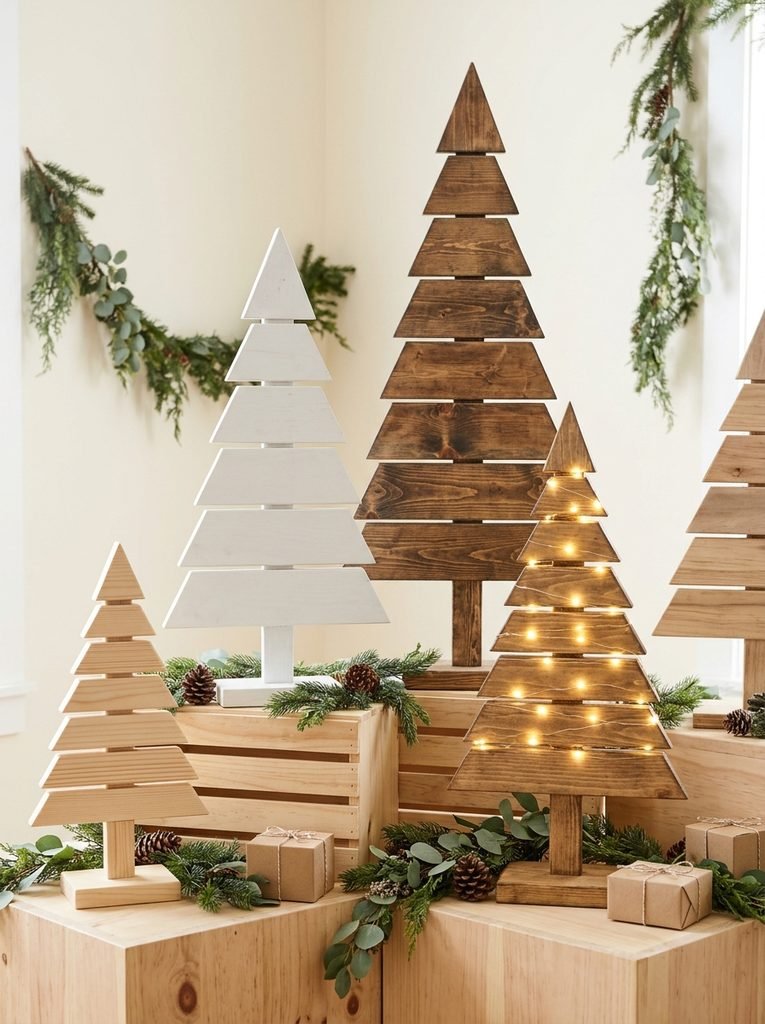
No time to build? Lots of retailers sell ready made wooden trees, and prices range a lot. Before you buy, check a few things so you get one you’ll love for years.
Look at the real height and base size, since photos can be misleading. Solid wood lasts longer than thin MDF. Check if it folds flat for storage, if lights are included, and if it’s sealed for outdoor use. Holiday sales usually start in November, so that’s a good time to compare.
Compare prices: tabletop wooden trees, wooden trees with lights, large outdoor wooden trees
Best for: anyone who wants to skip the build
Frequently Asked Questions
How do you make a simple wooden Christmas tree?
Cut six 1×4 boards at 24, 20, 16, 12, 8 and 4 inches, then screw them onto a 36 inch 2×2 trunk attached to a small base.
What wood is best for a wooden Christmas tree?
Pine is cheap and easy for indoor trees. Birch plywood is great for 3D trees. Cedar is best for outdoor trees because it handles weather.
Can I put lights on a wooden Christmas tree?
Yes, but only LED lights. They stay cool and won’t scorch the wood. Battery lights keep it cord free.
How do you hang ornaments on a wooden tree?
Screw small cup hooks into the underside of each board, or drill tiny holes and use ornament hooks. Keep ornaments light.
Can a wooden Christmas tree go outside?
Yes, if it’s made of cedar or sealed with an outdoor wood sealer. Use a heavy base so wind can’t tip it over.
When are wooden Christmas trees on sale?
Holiday sales often start in November, with more deals right after Christmas. Buying after the holidays is a smart way to save for next year.
Final Thoughts on Wooden Christmas Tree Ideas
A wooden Christmas tree is cozy, simple and lasts for years. Build one in an afternoon, paint it your way, or pick up a ready made one. Either way, it’ll become part of your Christmas story.


Amir Ali is the founder and site administrator of HomeDecorEdge, a modern home decor and interior design platform. Since starting the site, he has combined his passion for interior design, practical styling, and color coordination with hands-on content strategy and site management. He guides authors, curates high-quality articles, and ensures readers have access to actionable, visually inspiring, and user-focused home decor advice for apartments, small rooms, and family homes.