

My couch corner looks like it lost a fight with a lawn mower. Little threads, a tiny bald patch and one very proud cat sitting beside it.
Here’s the thing I finally understood. Cats don’t scratch to be naughty. They stretch, mark their territory and keep their claws healthy. All I had to do was give them something better than my sofa.
And you don’t need to spend much. Cardboard, sisal rope and a bit of wood can beat most store bought scratchers, because you choose the size, height and place.
Here are 12 DIY ideas for every kind of cat and every kind of room. Three of them come with full step by step build cards.
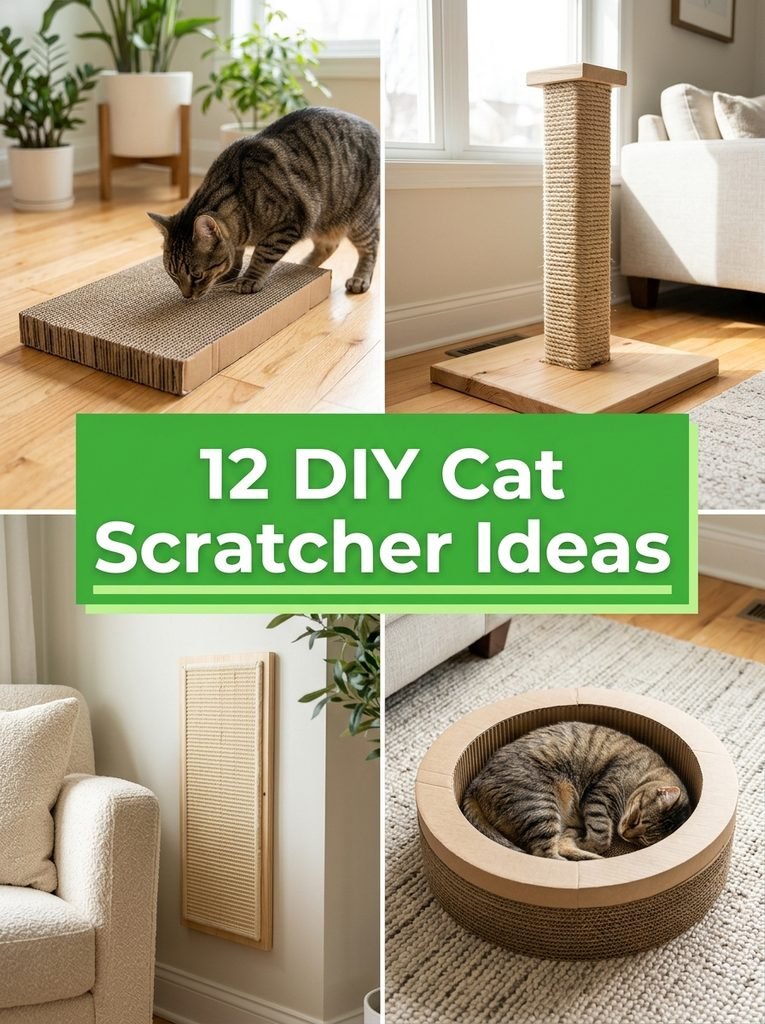
Quick Picks
- Easiest build: Simple Cardboard Scratcher Pad (idea 1)
- Best for tall cats: Sisal Rope Scratching Post (idea 4)
- Saves your sofa: Couch Corner Scratch Guard (idea 5)
- Prettiest: Picture Frame Scratcher Wall Art (idea 10)
1. Simple Cardboard Scratcher Pad
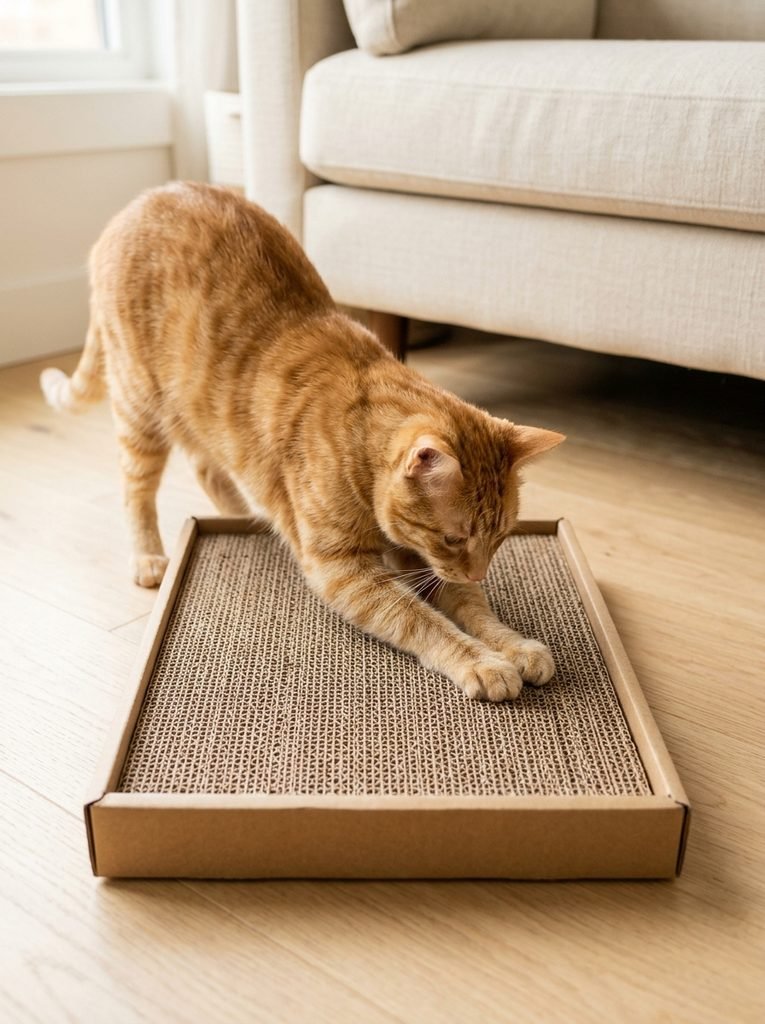
This is the one I’d start with. Strips of corrugated cardboard, packed tight on their sides, give cats that satisfying shredding feel. Most cats take to it on the very first day.
The secret is the direction. Stand the cardboard strips on their edges, so the ridges face up. A tip I picked up: keep the pad tightly packed, so the strips don’t slide out when your cat digs in.
⏱ 1 hour💲 Low🛠 Easy
Materials Needed
- Plain brown corrugated cardboard boxes, 6 to 8 large sheets
- Non toxic white craft glue
- Heavy duty box cutter and a metal ruler
- One shallow cardboard tray or box lid, about 4 inches deep
How to Make It
- Cut the cardboard into long strips, each about 3 inches wide.
- Spread glue along one side of a strip and press it against the next strip, building a long stack.
- Roll the stack up into a tight spiral, or lay several short stacks side by side.
- Press the whole block firmly into the tray so it fits snugly with no gaps.
- Weigh it down with a few books and let the glue dry for a full 24 hours.
Tip: An adult should handle the box cutter. Let the glue dry fully before your cat gets near it, and sweep up cardboard crumbs if your cat likes to nibble.
2. Cardboard Box Cat House Scratcher
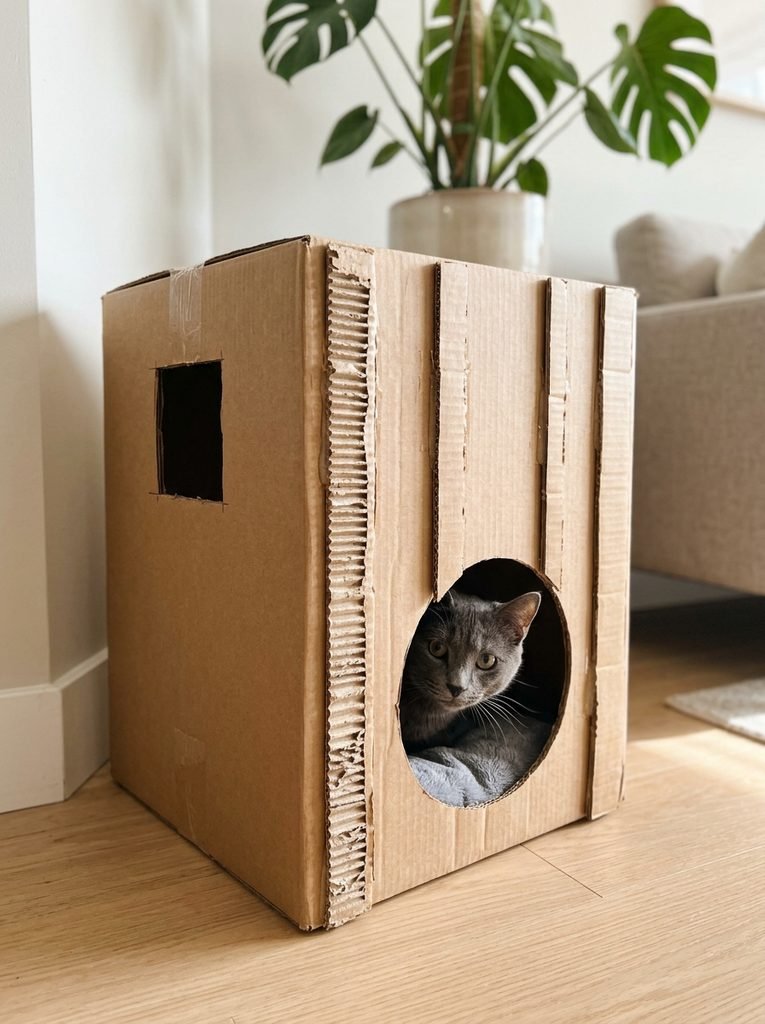
Every cat owner knows the box rule. If there’s a box, the cat will sit in it. So why not make the box earn its place and double as a scratcher?
Cut a round door and a little window, then glue strips of cardboard around the outside. Inside, drop in a soft cushion. I’d pick a washable pet pad, because it makes the house a favorite nap spot.
Best for: shy cats and multi cat homes
3. Wall Mounted Sisal Scratch Board
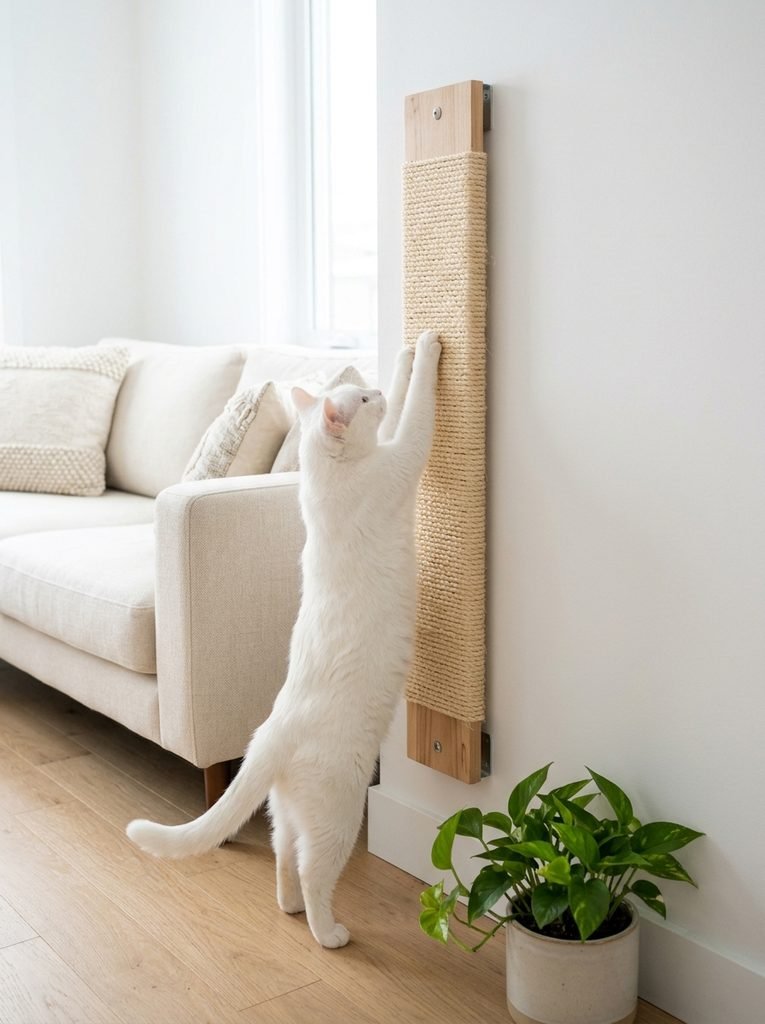
Cats love a full body stretch, and a wall board lets them do it properly. It also takes up no floor space, which is a big win in a small home.
Hang it right next to the spot your cat already scratches, like a sofa arm or a door frame. Honestly, placement matters more than the design. A cat will ignore the prettiest board in the wrong place.
⏱ 2 hours💲 Medium🛠 Intermediate
Materials Needed
- One 1×6 pine board, about 30 inches long
- Natural untreated sisal rope, 1/4 inch, 100 feet
- Heavy duty staple gun
- Two heavy duty metal wall brackets with screws
- Non toxic glue, drill and a stud finder
How to Make It
- Sand the board edges smooth and staple the end of the rope to the back of the board.
- Wrap the rope around the board, pushing each turn tightly against the last one.
- Every few turns, dab a little glue under the rope to hold it in place.
- Staple the final end on the back, then cut and tuck away any loose strands.
- Find the wall studs, then screw the brackets into the studs and fix the board to them at stretching height.
Tip: Always screw into studs, because a cat pulling hard can loosen weak anchors. Use only natural sisal with no oil or chemicals, and trim any loose threads right away. Adults should use the drill and staple gun.
4. Sisal Rope Scratching Post
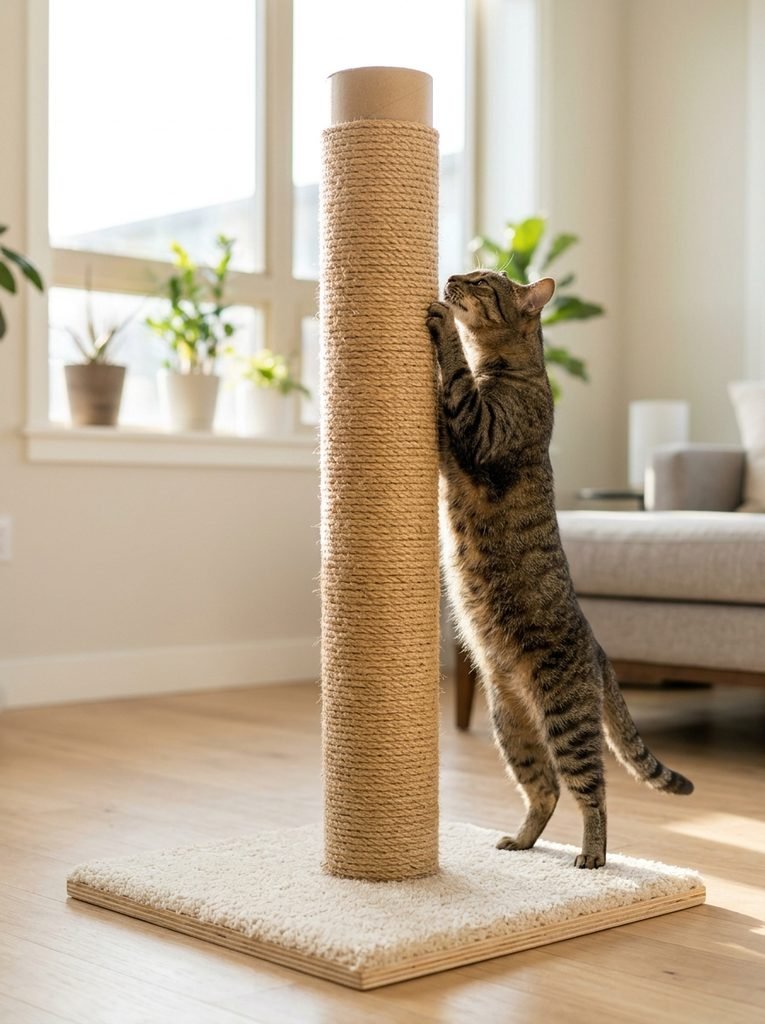
A good post is tall, steady and rough. Tall cats need at least 30 inches, so they can stretch fully. If a post wobbles even a little, most cats refuse to use it again.
The base is the part people skimp on. Make it wide and heavy. I use a square about 18 inches across, and it stays rock solid even when my biggest cat throws his whole weight at it.
⏱ 3 hours💲 Medium🛠 Intermediate
Materials Needed
- Heavy duty cardboard tube, 4 inch wide, 36 inch long
- One 18 by 18 inch plywood base, 3/4 inch thick
- Natural untreated sisal rope, 3/8 inch, 150 feet
- Two wood blocks, long screws and non toxic glue
- Scrap carpet or felt to cover the base
How to Make It
- Screw the wood blocks onto the center of the base to make a snug holder for the tube.
- Glue the tube over the blocks and push it down so it sits tight.
- Glue the end of the rope at the bottom of the tube and wrap upward, pressing each turn tight against the last.
- At the top, glue the final end down and tuck it under the last turn.
- Cover the base with carpet, with all staples facing down and inward, and let everything dry for 24 hours.
Tip: Test the post by pushing hard on top. If it moves, widen the base. Keep screw tips and staples fully covered, trim loose rope ends, and let an adult handle the saw and drill.
5. Couch Corner Scratch Guard
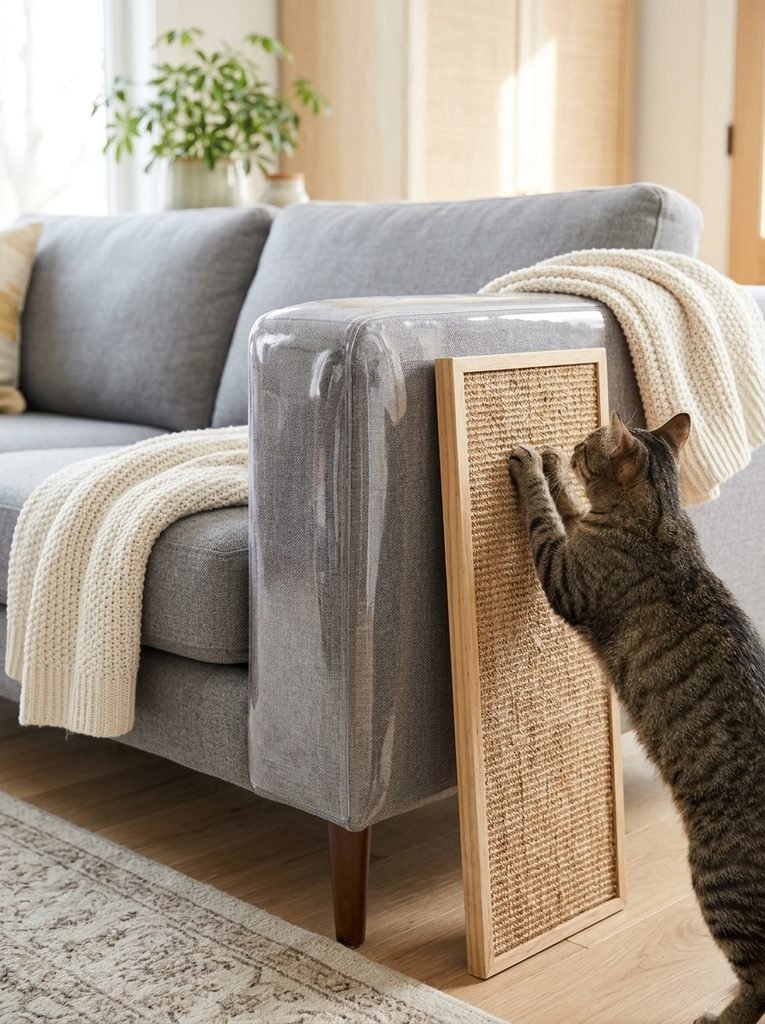
Cats usually pick one favorite corner and attack it daily. Instead of fighting it, place a better target right next to the same spot.
A quick fix I like is clear couch corner guards, set of 4. They cover the damaged corner while your cat learns to use the new scratcher next to it. Praise helps too.
Best for: cats who love one specific sofa corner
6. Cat Tree Tower With Scratch Poles
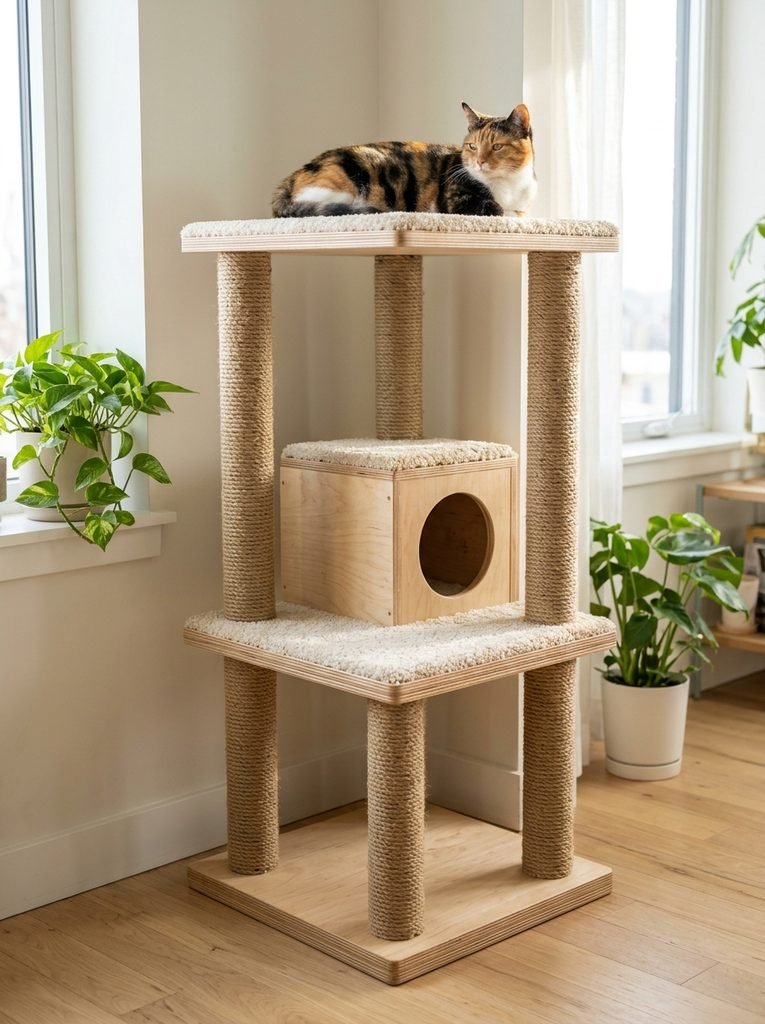
A cat tree gives your cat height, a scratch post and a nap spot all in one. Cats feel safest up high, so a tower by the window is almost always a hit.
You can build a simple one from three platforms and a few cardboard tubes wrapped in rope. For a faster route, start with a flat pack cat tree with sisal poles and upgrade it with your own rope.
Best for: active cats and homes with window space
7. Low Pile Carpet Scratch Ramp
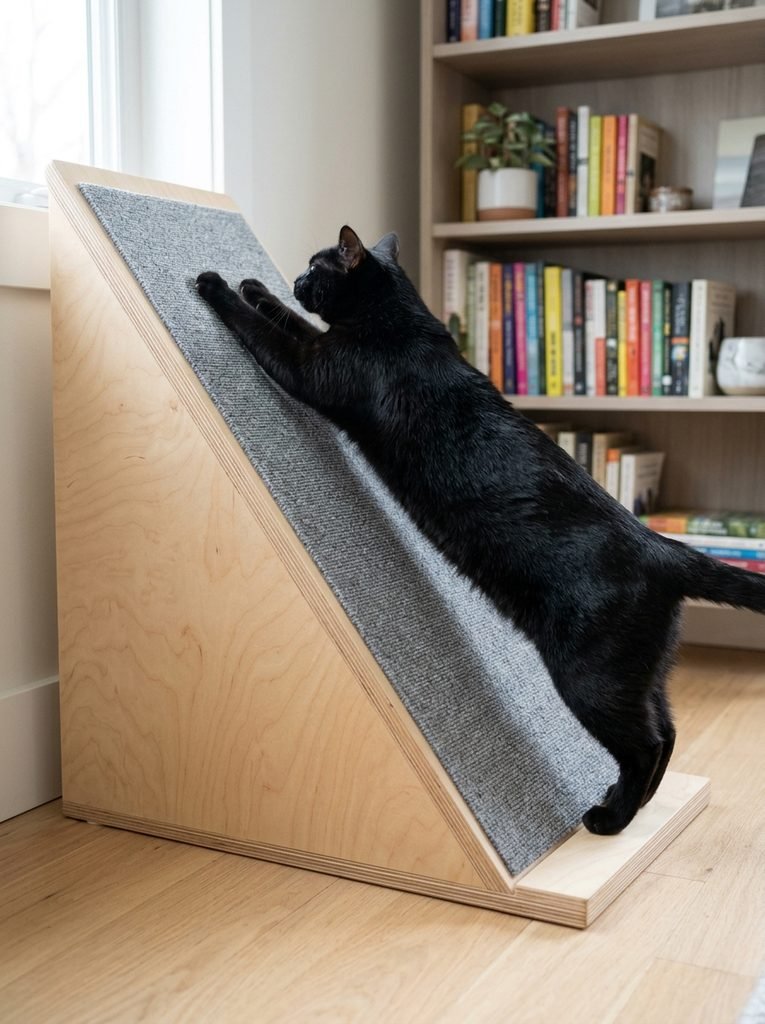
Some cats love to scratch on a slope, almost like they’re climbing. A low ramp covered in carpet is perfect for them, and it’s easy to move around.
Here’s my honest warning. Carpet can teach a cat that rugs are fair game. So keep it low pile, flat and only on the ramp, never loose on the floor. A peel and stick low pile carpet tile stays flat on the board.
Best for: cats who like sloped or flat scratching
8. Side Table With a Built In Scratch Post
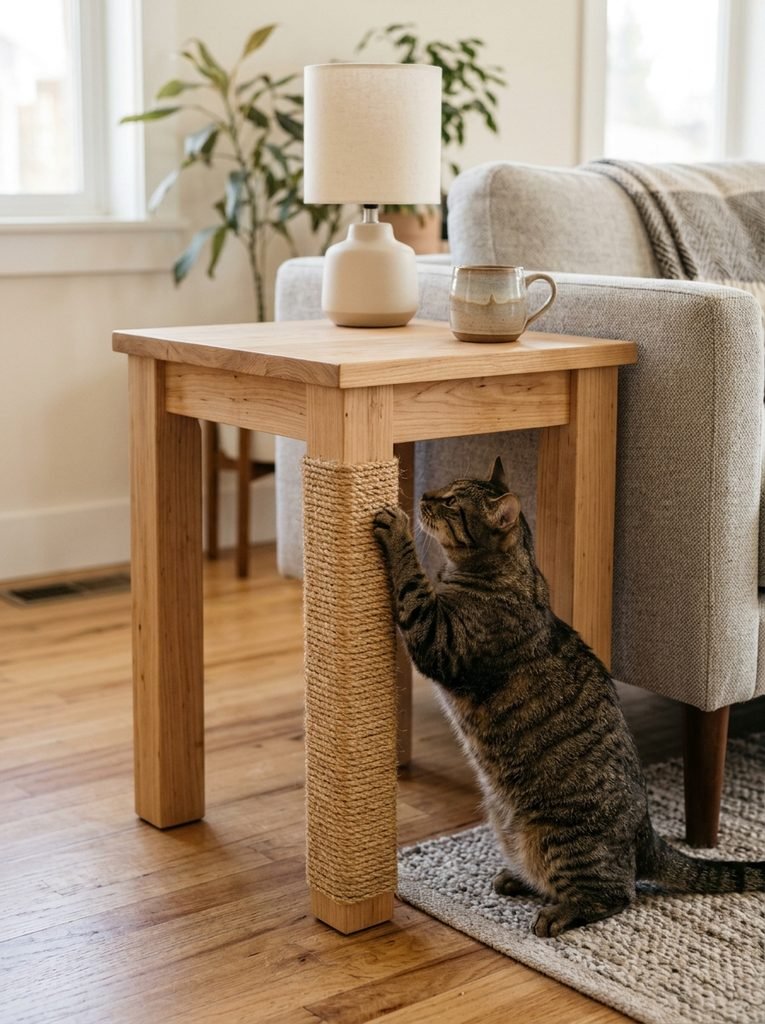
Not everyone wants a big scratching post in the middle of the room. A side table with one wrapped leg looks like normal furniture, and your cat gets a post right where you sit.
Pick a table with thick, sturdy legs and wrap just one with thick natural sisal rope. Choose a heavy table, so it can’t tip when your cat leans in.
Best for: small living rooms and style minded cat owners
9. Rope Wrapped Table Leg
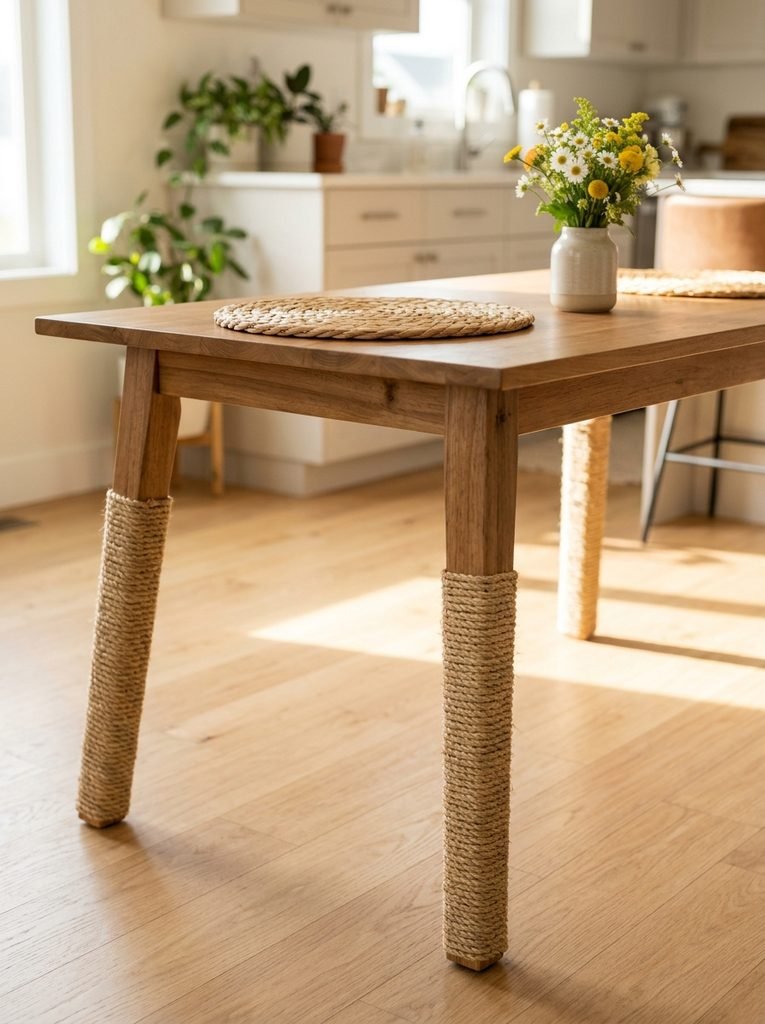
If your cat attacks the legs of your dining table or desk, don’t scold. Wrap the lower half of those legs in sisal instead. The cat keeps scratching, and the wood stays safe.
Wrap from the floor up to about 18 inches, which is where cats stretch. A dab of glue under each turn keeps the rope from sliding down. Natural rope looks tidy against most wood tones.
You’ll need: natural sisal rope for furniture legs, non toxic glue
Best for: cats who scratch dining chairs and table legs
10. Picture Frame Scratcher Wall Art
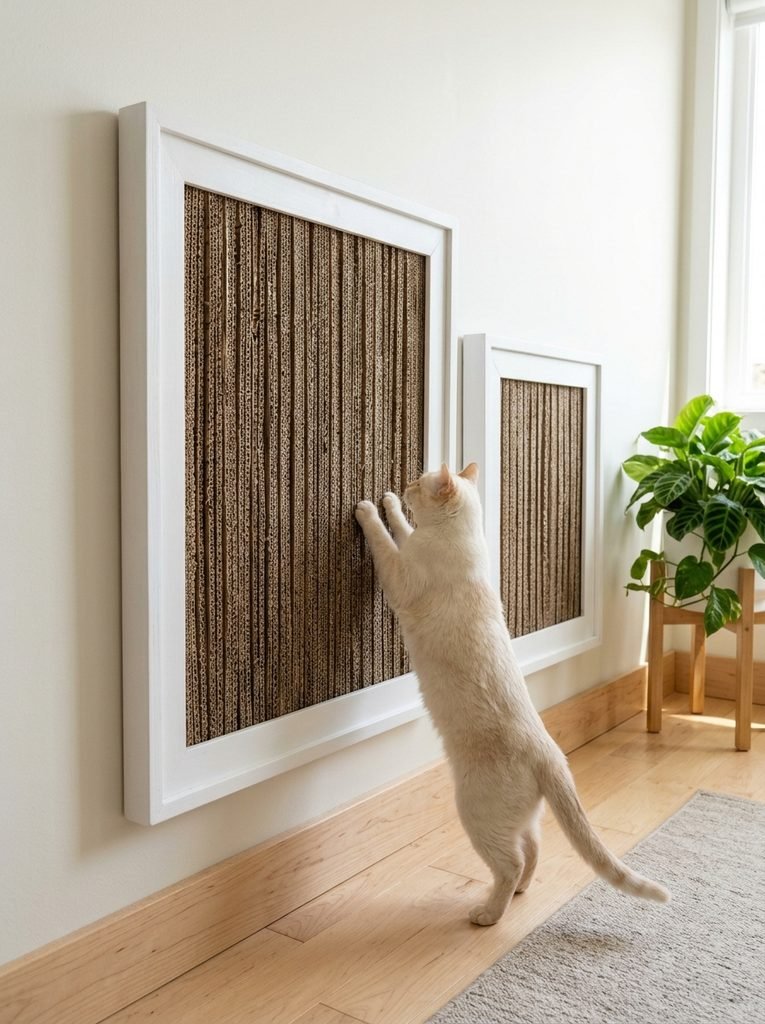
This one looks like a modern art piece. A frame filled with cardboard strips hangs on the wall, and a cat scratcher blends right into your decor.
Take a budget store picture frame, remove the glass and pack it with tight cardboard strips. I like painting the frame white or black, so it feels like real decor. Hang it low, about a cat’s height.
You’ll need: deep shadow box frame, 16 by 20 inches, cardboard strips
Best for: stylish homes where a scratcher must look like art
11. Yarn Wrapped Scratch Pole
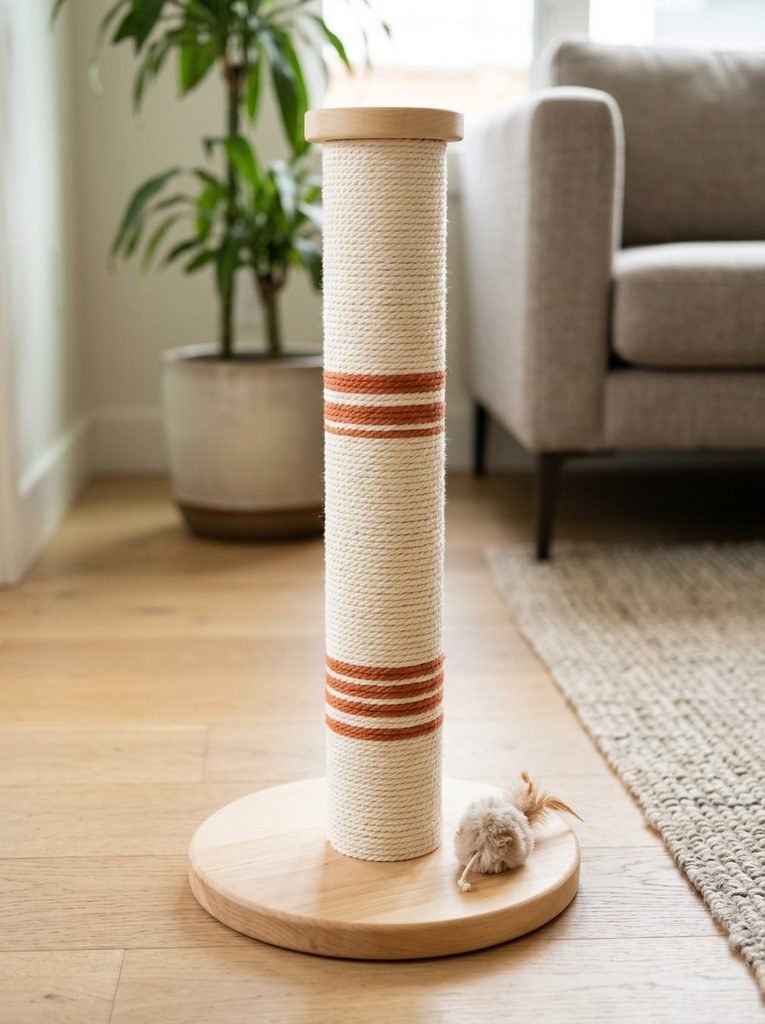
Yarn gives a softer, cozier look than sisal, and it’s a fun way to use up leftover skeins. It works best on a short pole, since cats scratch it more gently.
Here’s the safety part, and it matters. Loose yarn can be swallowed and cause serious problems for cats. Wrap it very tightly, glue every few turns and leave no loose ends. If your cat chews yarn, choose sisal instead.
You’ll need: thick cotton yarn, 4 skein pack, a short wooden pole
Best for: cats who don’t chew string and crafters with leftover yarn
12. Round Cardboard Ring Lounger
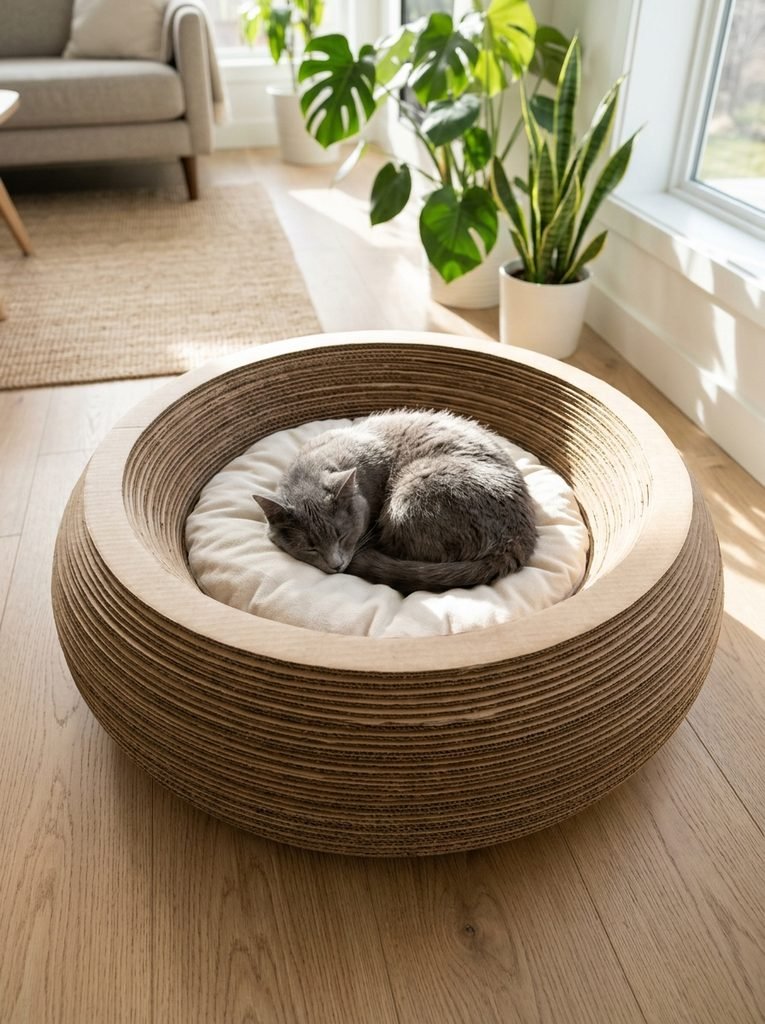
This is a bed and a scratcher in one. Your cat scratches the sides, then curls up in the middle for a nap. It’s the cat lounger that never gets ignored.
Roll long glued strips of cardboard into a thick oval and leave a dip in the center. Add a soft cushion and press it in snug. Replace it when the sides get shredded, and the scrap goes straight into recycling.
You’ll need: washable round cushion, 20 inch, plenty of corrugated cardboard
Best for: napping cats and recycling lovers
Frequently Asked Questions
Why do cats scratch furniture?
Cats scratch to stretch, mark territory with scent glands in their paws and keep their claws in shape. It’s normal, so give them a better place to do it.
Where should I put a cat scratcher?
Put it right next to the thing your cat already scratches, or near where they sleep. Cats often stretch and scratch just after waking up.
Which is better, cardboard or sisal?
Both work, and many cats like both. Cardboard is cheap and good for flat scratching. Sisal lasts longer and suits tall posts and wall boards.
How tall should a scratching post be?
At least 30 inches, so your cat can stretch fully. It also needs a heavy, wide base so it can’t wobble or tip.
How do I get my cat to use a new scratcher?
Rub a little catnip on it and place it near their favorite scratching spot. Praise or a treat when they use it helps, and never punish them for scratching.
Is glue safe to use on cat scratchers?
Use only non toxic glue, and let it dry fully for 24 hours before your cat touches it. Keep staples and screws completely covered or hidden.
Final Thoughts on DIY Cat Scratcher
You don’t need a fancy cat tree to save your couch. A simple cardboard pad in the right spot often works within a day. Start with one, watch your cat, and build more from there.


Amir Ali is the founder and site administrator of HomeDecorEdge, a modern home decor and interior design platform. Since starting the site, he has combined his passion for interior design, practical styling, and color coordination with hands-on content strategy and site management. He guides authors, curates high-quality articles, and ensures readers have access to actionable, visually inspiring, and user-focused home decor advice for apartments, small rooms, and family homes.