
Building a mud kitchen for your kids is one of the most rewarding DIY projects you can tackle in a weekend — it costs very little, takes just a few hours and gives children months and years of creative outdoor play. Whether you want a simple pallet build or a full outdoor wooden kitchen with a sink and chalkboard, this step by step guide covers everything you need to know.
This post contains affiliate links. If you purchase through these links I may earn a small commission at no extra cost to you.
Follow this easy step by step guide to build the perfect mud kitchen for your kids this weekend.
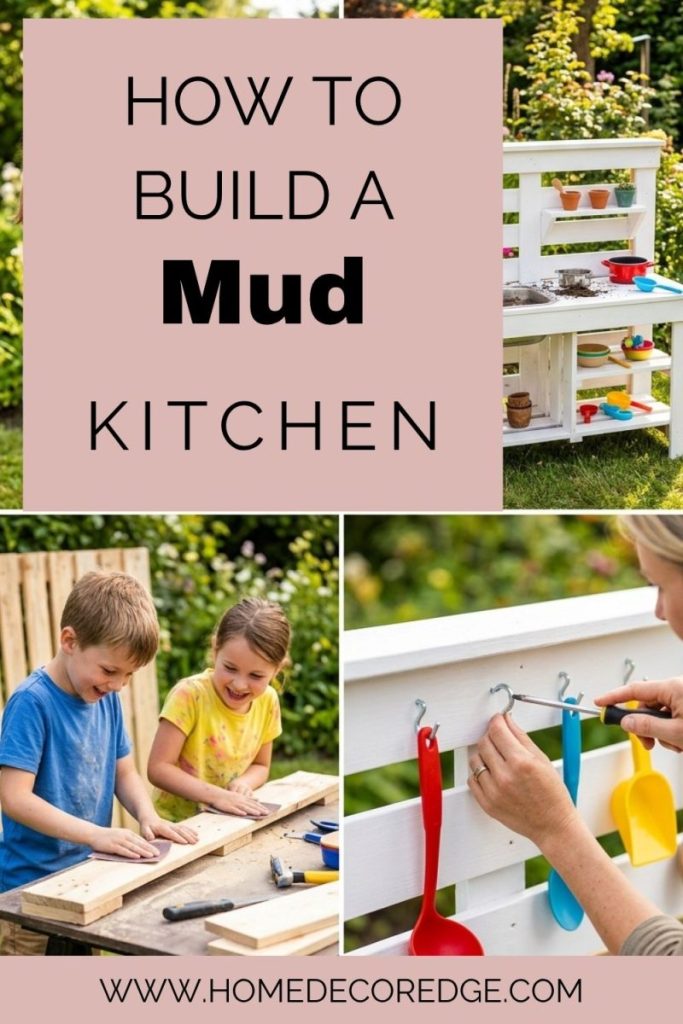
Here is everything you need to build a beautiful mud kitchen for your kids from scratch — simple easy and completely beginner friendly.
What You Need Before You Start
Tools and Materials List
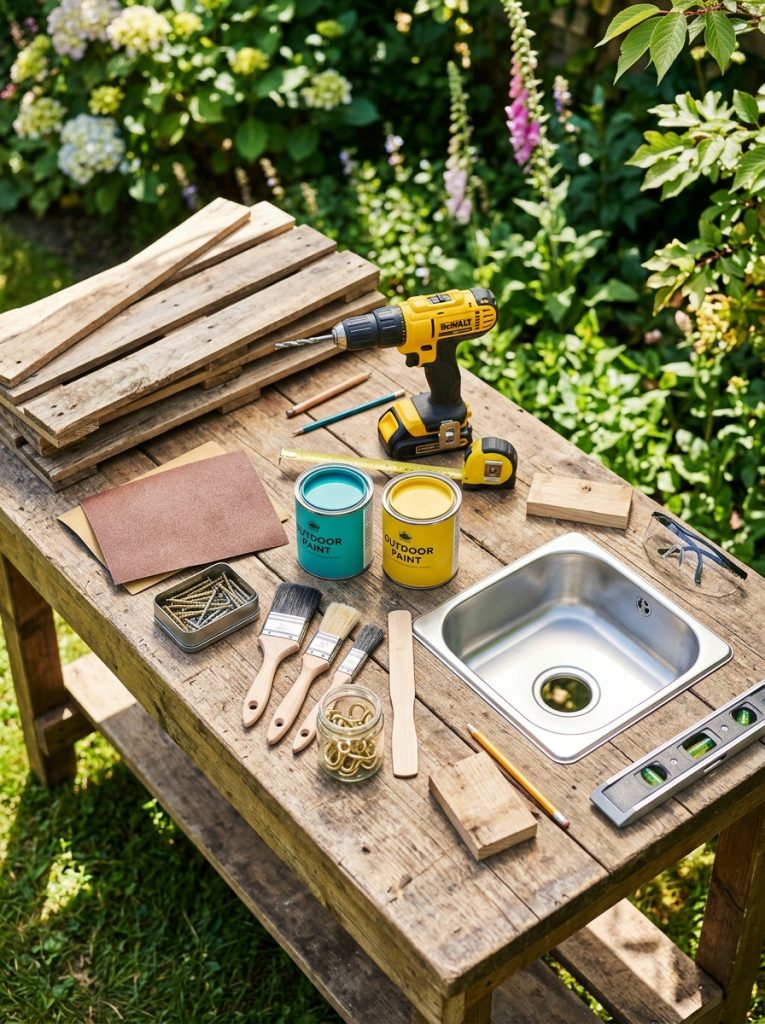
Before you start building gather everything you need so the project runs smoothly from start to finish. For a basic pallet mud kitchen you need very few tools and most materials can be sourced for free or very cheaply. Having everything ready before you start makes the whole build take just 2-3 hours from start to finish.
Materials Needed:
- 2-3 wooden pallets — free from local businesses or Facebook Marketplace
- Sandpaper — medium and fine grit
- Outdoor screws and drill
- Outdoor weatherproof paint and brushes
- Cup hooks for hanging utensils
- Small sink basin
- Chalkboard paint for menu board panel
Tools Needed:
- Electric drill and screwdriver bits
- Jigsaw for cutting sink hole
- Measuring tape and pencil
- Paintbrushes and paint tray
- Safety glasses and gloves
Step by Step — How to Build a Basic Pallet Mud Kitchen
Step 1. Choose and Prepare Your Pallets

The first step is choosing the right pallets for your mud kitchen build. Look for HT stamped pallets — this means heat treated and safe for children. Avoid pallets stamped MB which means methyl bromide treated and are not safe. Check all pallets carefully for loose nails, splinters and damaged boards before starting your build. For a standard mud kitchen you need 2-3 pallets of similar size.
How to Do It:
- Source 2-3 HT stamped pallets of similar size — free from local businesses
- Inspect each pallet carefully for loose nails, splinters and damaged boards
- Remove any protruding nails with a hammer or pry bar
- Lay pallets flat and mark out your planned kitchen layout with chalk
Step 2. Sand All Surfaces Smooth
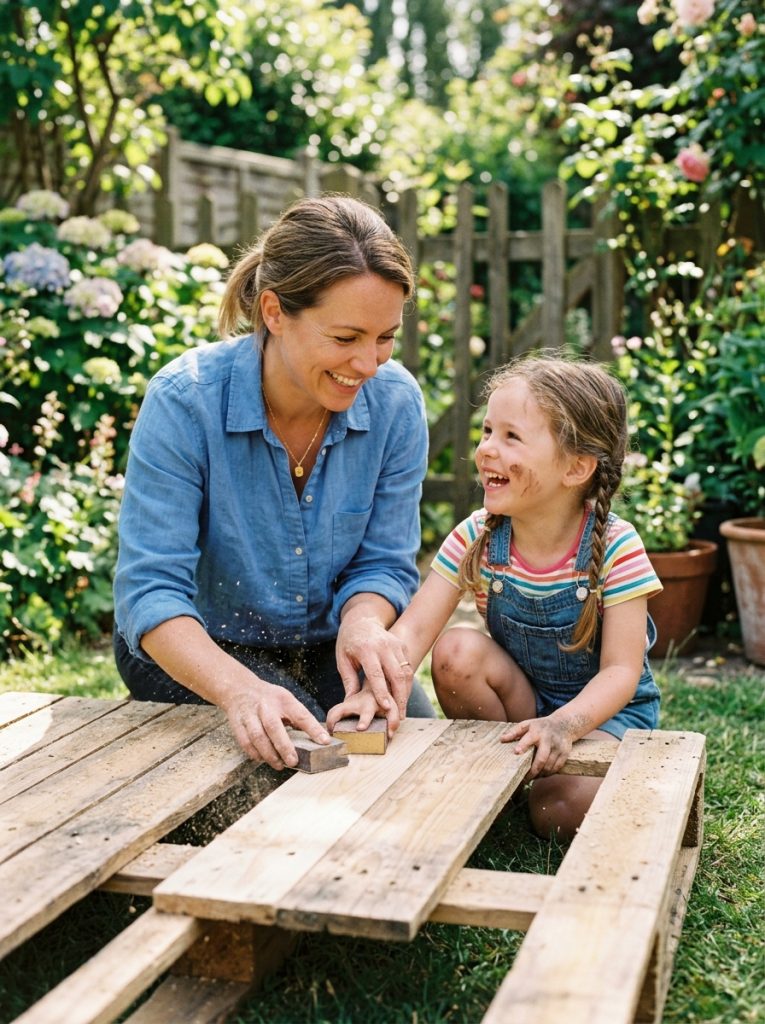
Sanding is the most important safety step — smooth surfaces mean no splinters for little hands. Sand all surfaces your children will touch — the work surface, edges, back panel and any shelves. Start with medium grit sandpaper and finish with fine grit for a completely smooth result. This step also helps the paint adhere better for a longer lasting finish.
How to Do It:
- Start with medium grit sandpaper on all rough surfaces and edges
- Pay extra attention to corners and edges where splinters form most
- Follow with fine grit sandpaper for a completely smooth finish
- Wipe all surfaces with a damp cloth to remove all dust before painting
Step 3. Paint with Outdoor Weatherproof Paint
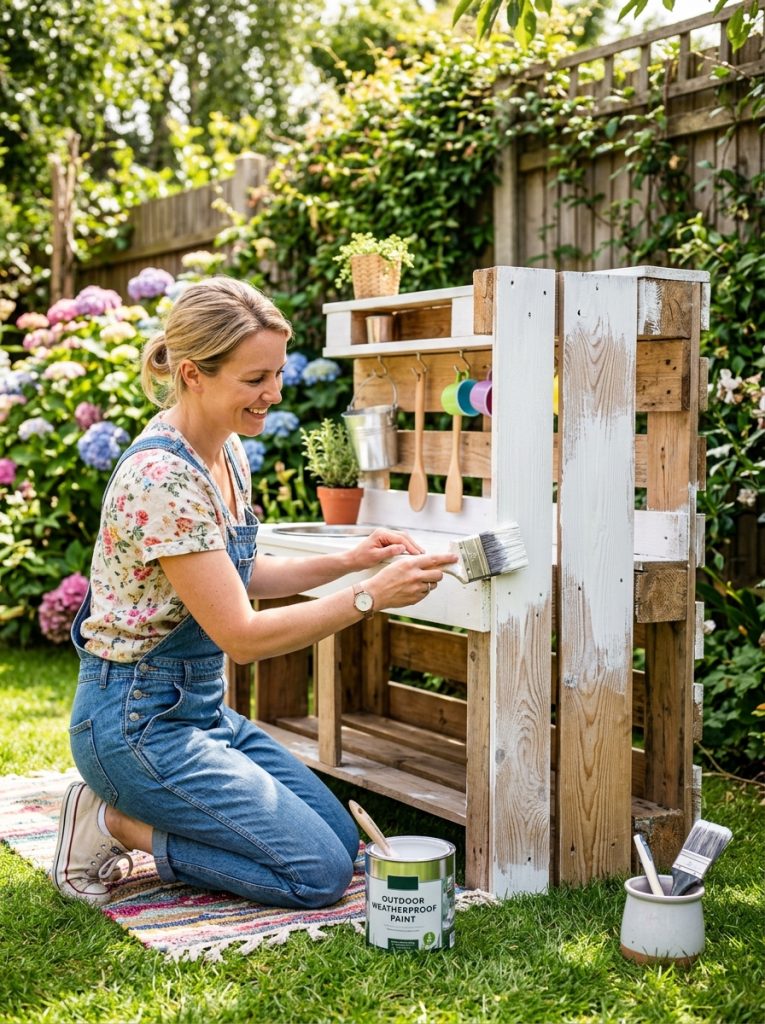
Outdoor weatherproof paint is essential for a mud kitchen that will last — standard interior paint will peel and crack within weeks in the garden. Choose a bright fun color that your children love and apply two full coats letting each dry completely before the next. This Outdoor Weatherproof Wood Paint is perfect for mud kitchens — it is durable, child safe and available in beautiful colors that stay bright all season.
How to Do It:
- Apply first coat of outdoor weatherproof paint to all surfaces
- Allow to dry fully — at least 2 hours between coats
- Apply second coat for full coverage and durability
- Allow 24 hours to cure fully before assembling the kitchen

Outdoor Weatherproof Wood Paint
Durable outdoor weatherproof wood paint — perfect for mud kitchens, stays bright and protected through all weather conditions.
Check Price on AmazonStep 4. Assemble the Pallet Frame
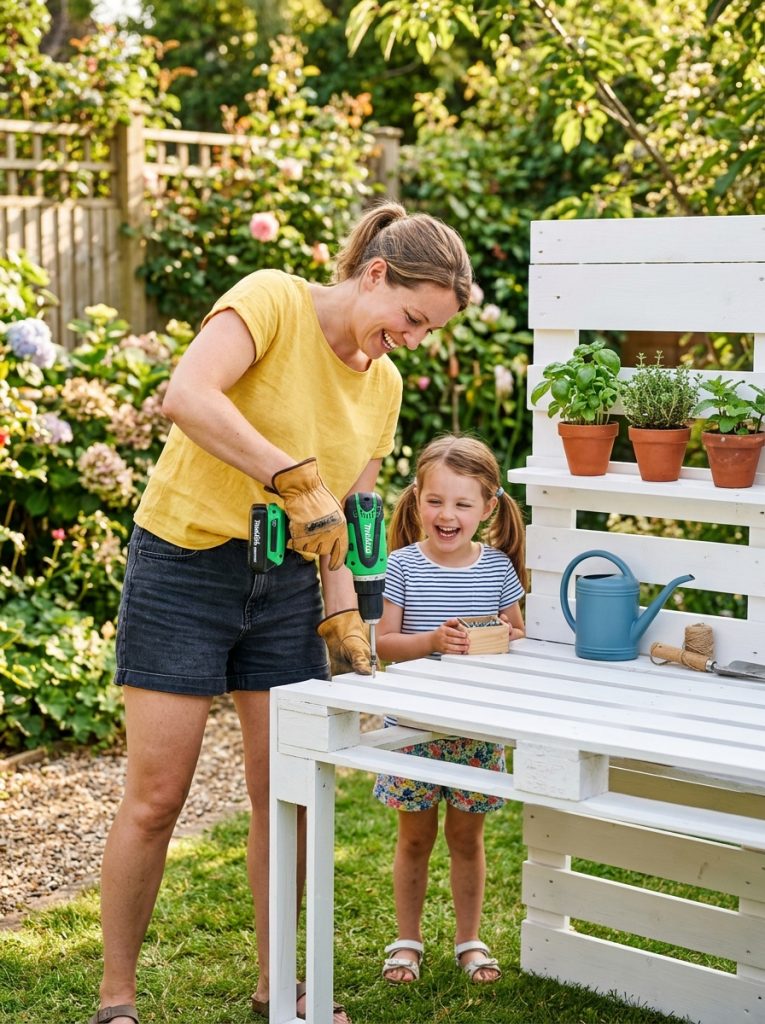
With your pallets painted and dry it is time to assemble the main frame. Stand one pallet upright on its end to form the main work surface — this gives you a natural shelf at the bottom and a solid work top at the right height for children. Attach a second pallet behind it vertically as the back panel which will hold your shelves, hooks and accessories.
How to Do It:
- Stand the main work surface pallet upright on its end
- Check the height is comfortable for your child — adjust if needed
- Position second pallet behind as the back panel
- Screw both pallets together firmly using long outdoor screws through the connecting boards
Step 5. Cut and Fit the Sink Basin
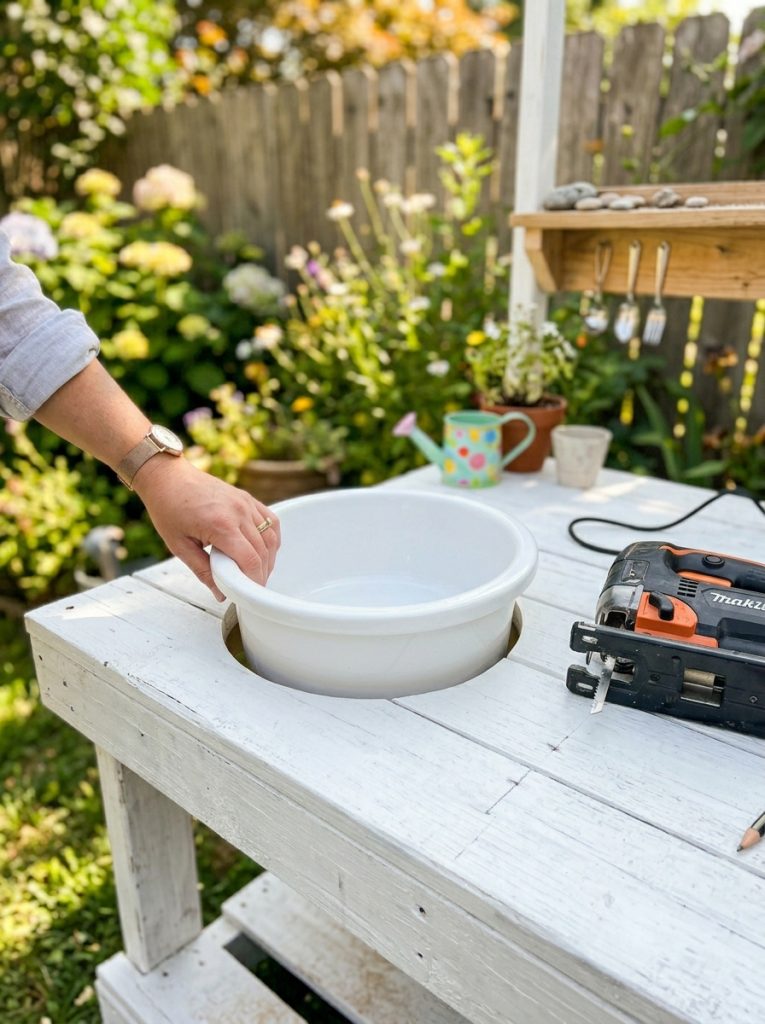
Adding a sink is the feature that takes your mud kitchen from good to great — kids absolutely love it. Mark the outline of your sink basin on the work surface, cut it out with a jigsaw and drop the basin in. Place a bucket underneath to collect water. This Kids Mud Kitchen Sink fits perfectly into any standard pallet build and is the most played-with feature of any mud kitchen setup.
How to Do It:
- Place sink basin upside down on work surface and trace around it with pencil
- Drill a starter hole inside the marked area
- Use jigsaw to carefully cut along the marked line
- Drop sink basin into hole and secure from underneath with brackets or screws

Kids Mud Kitchen Sink
Kids mud kitchen sink basin — fits any DIY pallet build perfectly and is the most loved feature of any outdoor mud kitchen.
Check Price on AmazonStep 6. Add Cup Hooks for Hanging Utensils
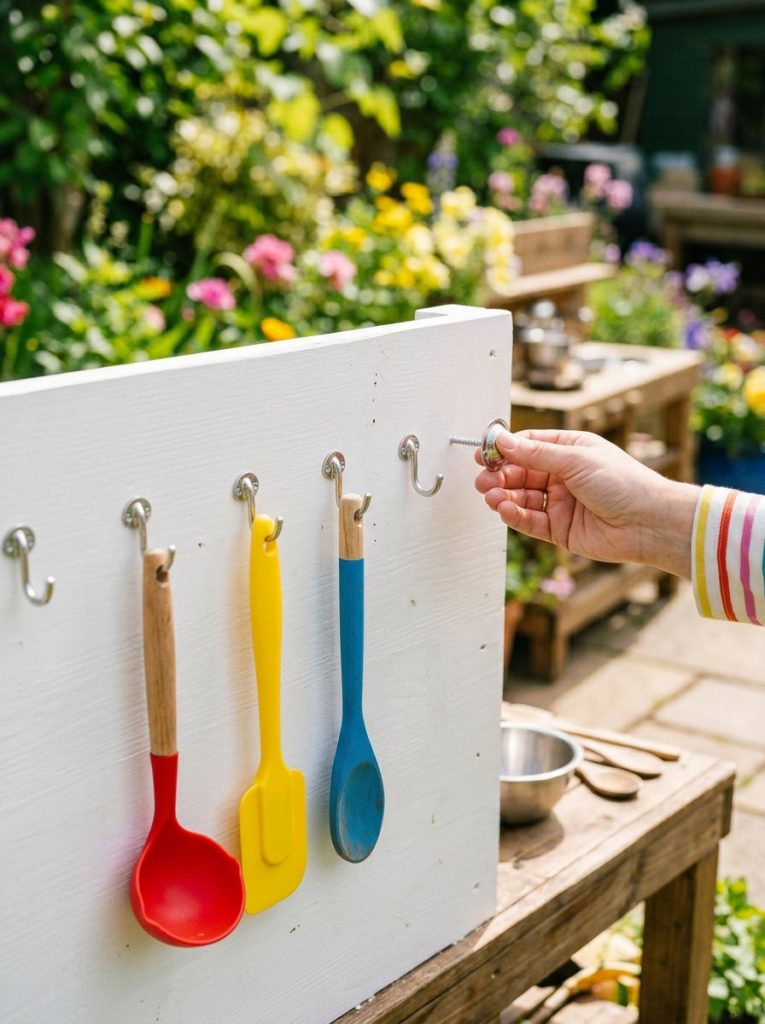
Cup hooks on the back panel keep all utensils organized and within easy reach for little hands. Screw them in at child height so kids can independently access and return tools — this encourages independence and tidying up after play. This Cup Hooks Set includes everything you need and the hooks screw in by hand without any tools needed.
How to Do It:
- Mark hook positions on back panel at child height — space 8-10cm apart
- Screw cup hooks in by hand or with a screwdriver
- Optional — paint a small silhouette behind each hook so children know where to return utensils
- Hang a colorful utensil on each hook

Cup Hooks Set
Cup hooks set for mud kitchen — screw in easily by hand and keep all utensils organized and within reach for kids.
Check Price on AmazonStep 7. Paint a Chalkboard Menu Panel
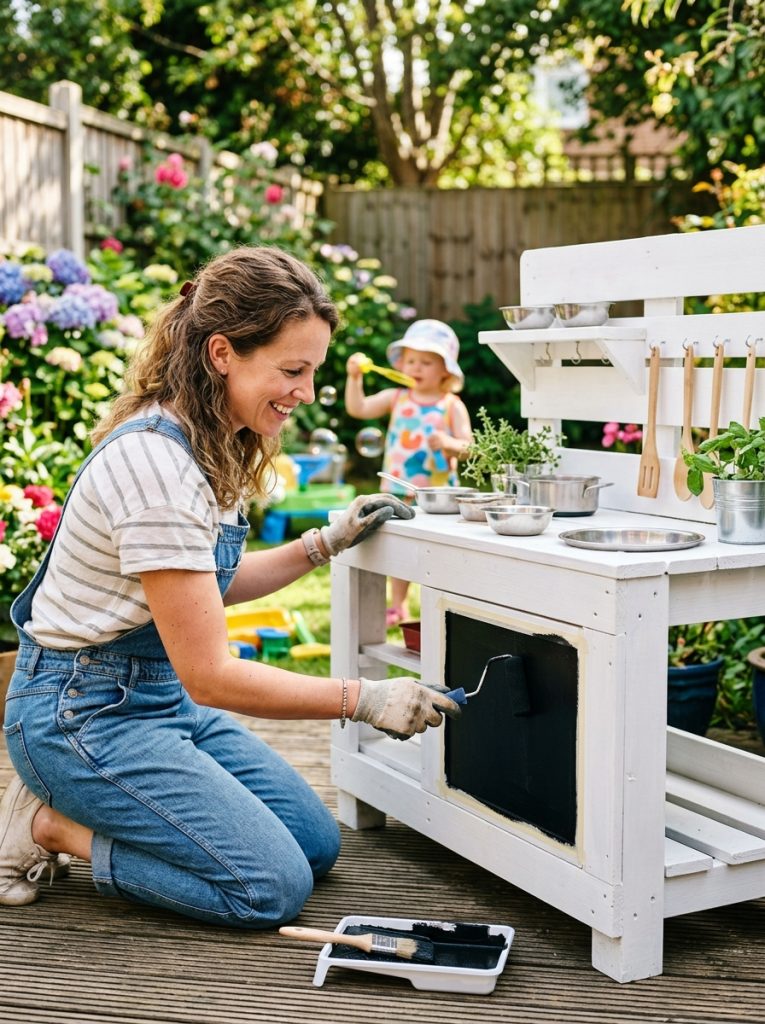
A chalkboard panel on the front of your mud kitchen transforms it into a full outdoor restaurant — kids write their own menus, prices and daily specials and update them constantly. Apply two coats of chalkboard paint to a smooth section of the front panel and let it cure for 24 hours before use. This Chalkboard Paint goes on smoothly and creates a perfect writing surface that wipes clean with a damp cloth.
How to Do It:
- Mark out a rectangular chalkboard panel section on the front of the kitchen
- Apply first coat of chalkboard paint with a small foam roller
- Allow to dry completely then apply a second coat
- Allow 24 hours to cure before writing on it for the first time

Chalkboard Paint
Smooth chalkboard paint for mud kitchen menu panels — easy to apply, wipes clean and creates the perfect kids menu board surface.
Check Price on AmazonStep 8. Stock with Accessories and Utensils
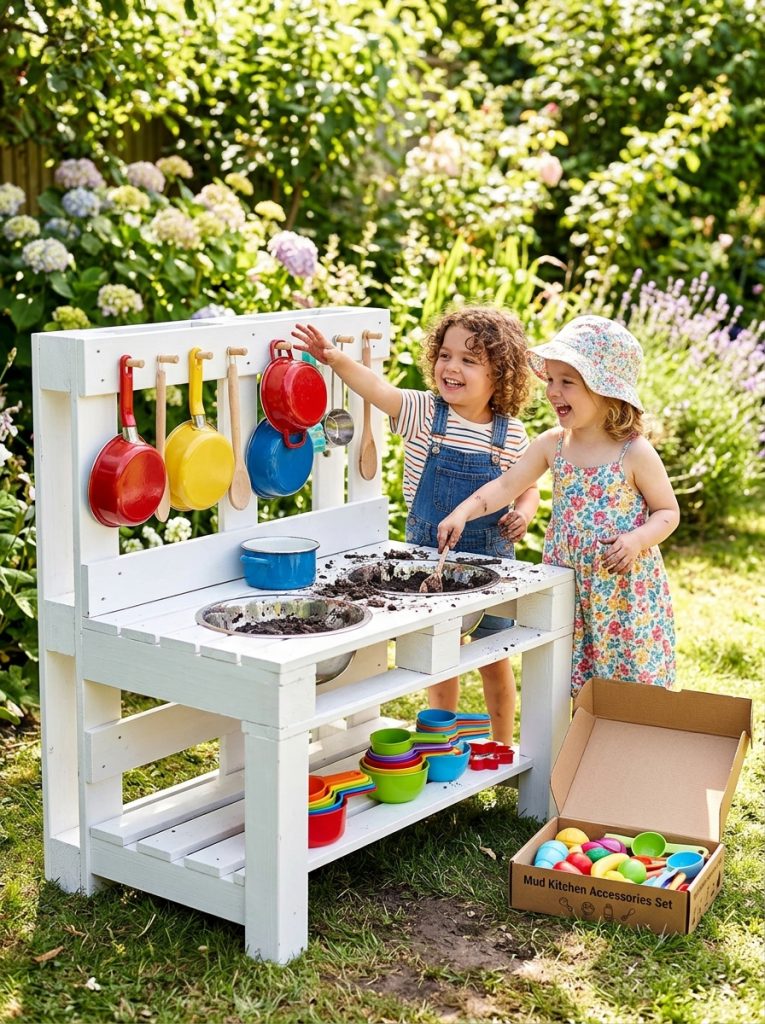
The final step is the most fun — stocking your finished mud kitchen with all the accessories kids need for creative play. Pots, pans, measuring cups, spoons, ladles and bowls all make the play experience much richer. This Mud Kitchen Accessories Set includes everything young chefs need and this Mud Kitchen Pots and Pans set adds the perfect finishing touch to any mud kitchen build.
How to Do It:
- Hang pots pans and utensils on cup hooks on the back panel
- Place measuring cups bowls and spoons on the lower shelf
- Add a small bucket under the sink drain hole
- Fill a container with clean water beside the kitchen for play

Mud Kitchen Accessories Set
Complete mud kitchen accessories set for kids — pots pans utensils and bowls for hours of creative outdoor cooking play.
Check Price on Amazon
Mud Kitchen Pots and Pans
Kids outdoor mud kitchen pots and pans set — durable colorful and perfect for hours of imaginative outdoor mud play.
Check Price on AmazonSimple and Easy Variations
Simple Mud Kitchen — No Tools Version
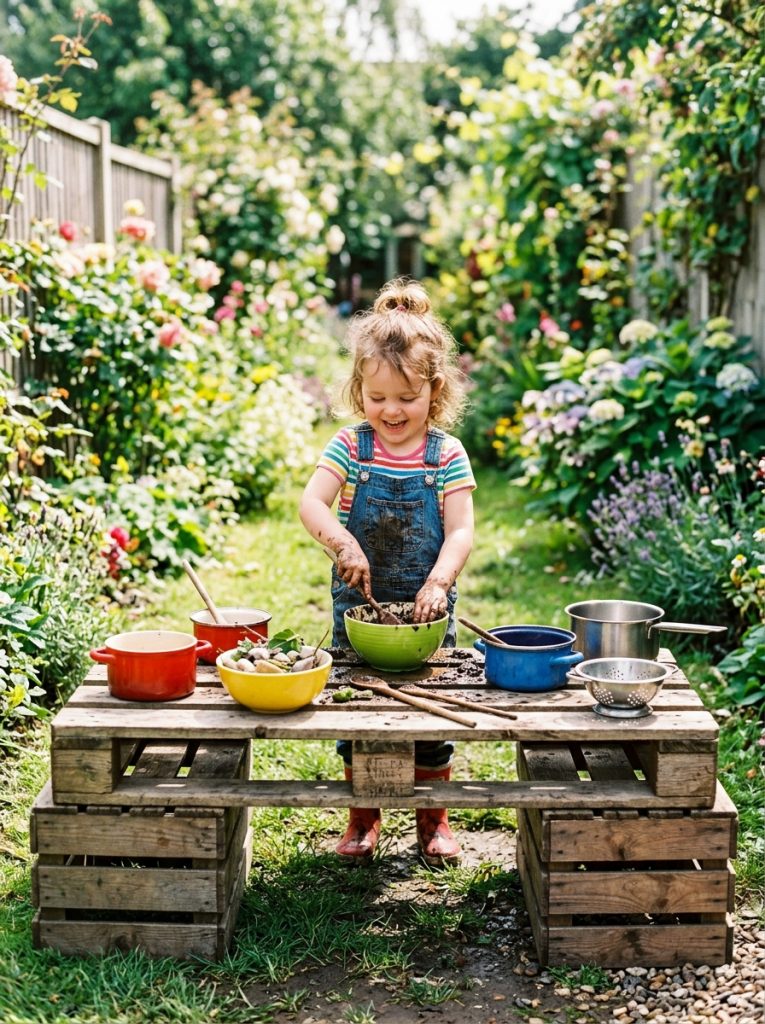
If you want the simplest possible mud kitchen with no cutting or drilling needed, lay a single pallet flat across two wooden crates or upturned buckets to create a work surface at the right height. Add a plastic bowl as the sink and a few hooks on the fence behind for utensils. This version takes under 10 minutes to set up and costs absolutely nothing if you have spare pallets and crates.
Easy Outdoor Mud Kitchen with Ready-Made Kit
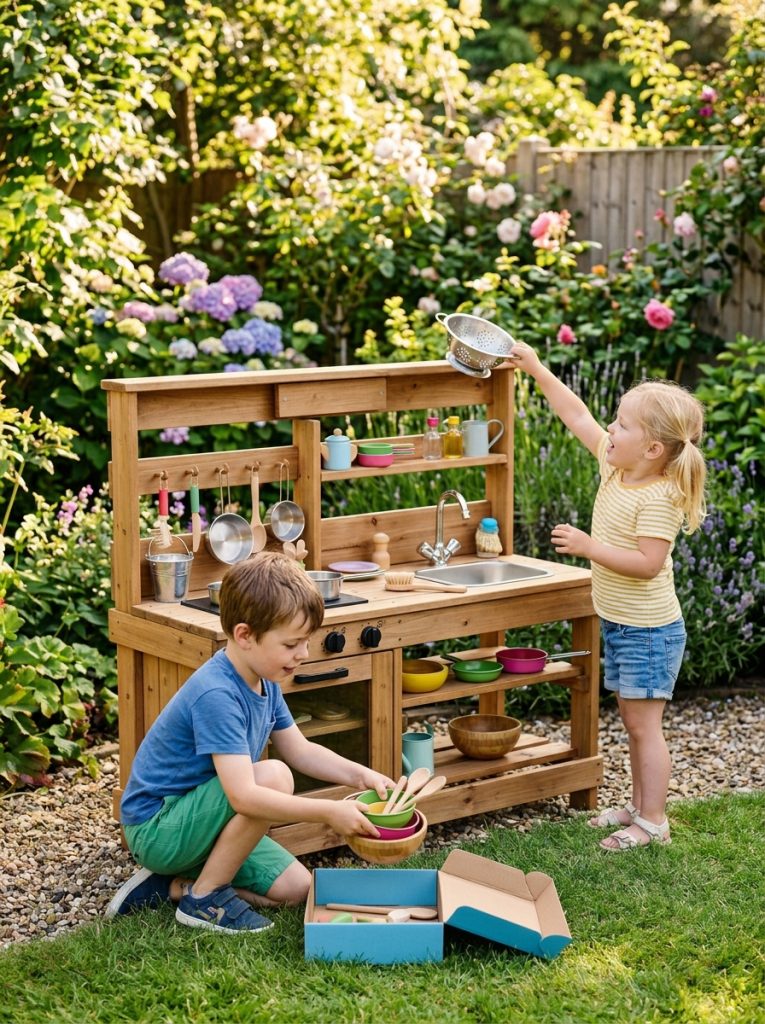
If building from scratch feels too much, a ready-made outdoor mud kitchen kit gives you a beautiful professional result in just a couple of hours with no cutting or special tools required. This Kids Outdoor Mud Kitchen Wooden comes with everything pre-cut and pre-drilled — just follow the simple assembly instructions and stock with accessories.

Kids Outdoor Mud Kitchen Wooden
Beautiful ready-made wooden outdoor mud kitchen — pre-cut pre-drilled and easy to assemble for a professional result without any building.
Check Price on AmazonDIY Outdoor Mud Kitchen Building Plans Tips
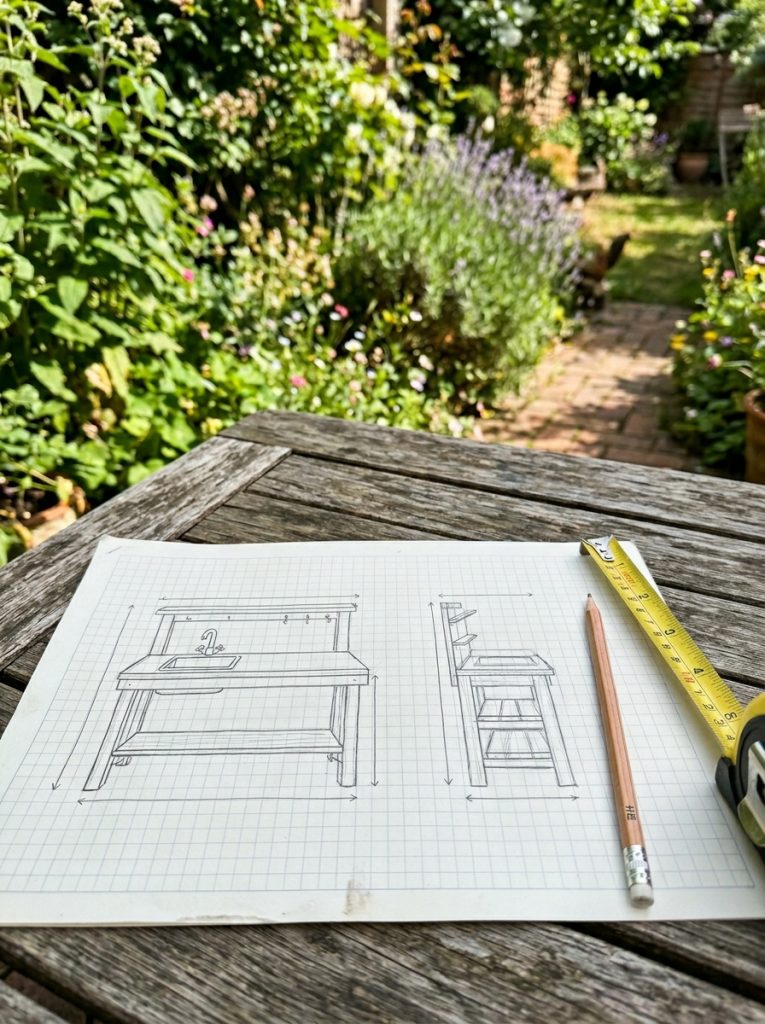
Before starting any mud kitchen build it is worth spending 15 minutes sketching a simple plan. Measure your child’s height and work out the ideal counter height — typically 55-65cm for ages 2-6. Decide where the sink will go, how many hooks you need and whether you want a lower shelf. Having a simple plan means fewer mistakes and a much better finished result. For more DIY kids outdoor inspiration check out these mud kitchen ideas that show exactly what your finished build can look like.
Building Plans Key Measurements:
- Counter height: 55-65cm for ages 2-6
- Sink hole: trace your chosen basin and add 5mm clearance
- Hook spacing: 8-10cm apart at child shoulder height
- Shelf depth: minimum 20cm for pots and pans
Final Thoughts
Building a mud kitchen for your kids is one of the most rewarding weekend DIY projects you can do — it costs very little, takes just a few hours and the smiles on your children’s faces when they see their new outdoor kitchen make every minute of effort completely worth it. Start with the basic pallet build, add a sink and some accessories and you will have a mud kitchen your kids will play with for years.

Amir Ali is the founder and site administrator of HomeDecorEdge, a modern home decor and interior design platform. Since starting the site, he has combined his passion for interior design, practical styling, and color coordination with hands-on content strategy and site management. He guides authors, curates high-quality articles, and ensures readers have access to actionable, visually inspiring, and user-focused home decor advice for apartments, small rooms, and family homes.