
Window boxes are one of the fastest ways to add color and character to any house exterior. A simple box of flowers below a window transforms a plain wall into something that looks intentional and cared for. These DIY window box ideas cover every exterior type — brick, vinyl siding, wood — and every budget from almost free cardboard builds to proper cedar planters that last for years.
This post contains affiliate links. If you purchase through these links I may earn a small commission at no extra cost to you.
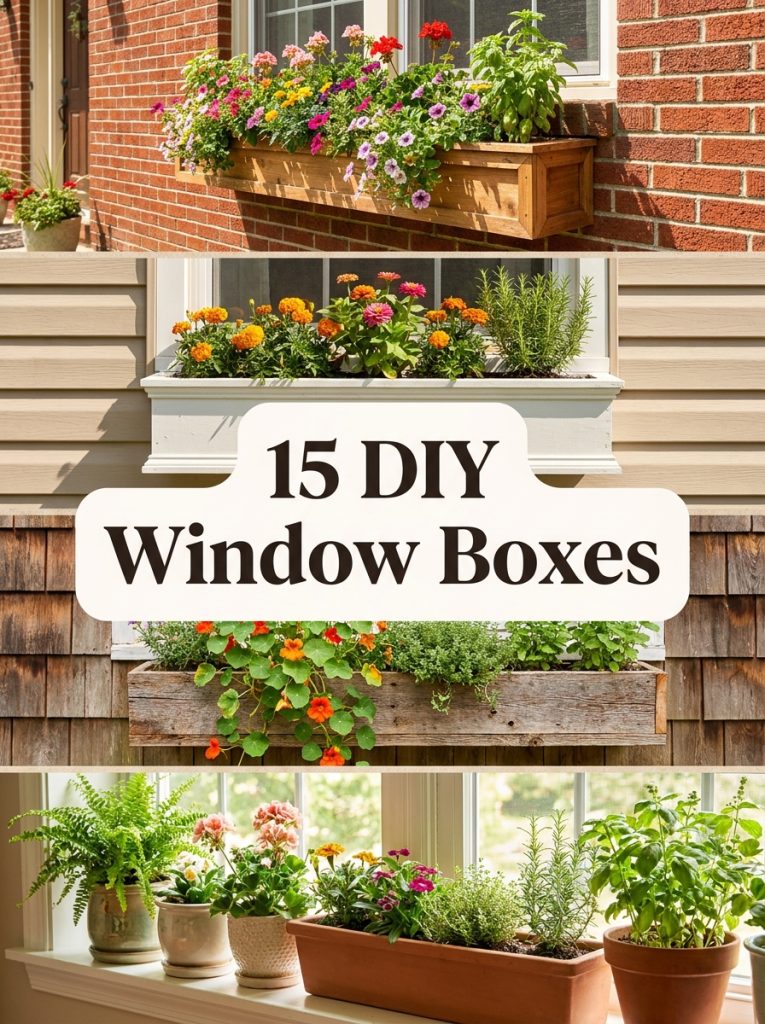
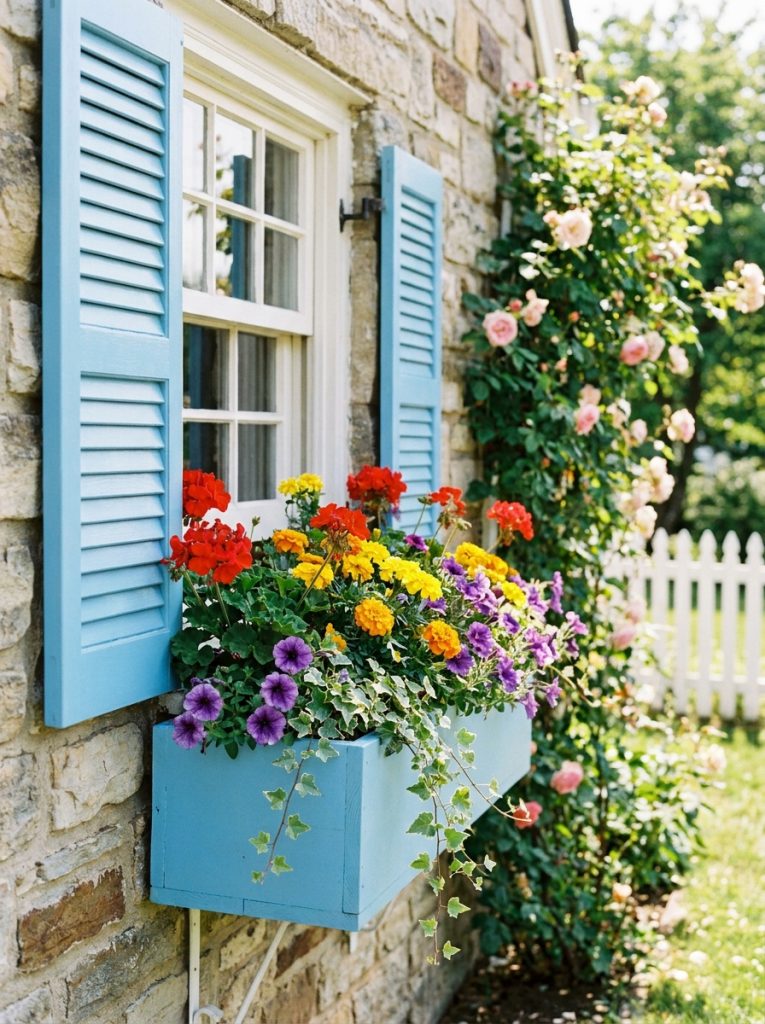
One window box changes the whole look of a house exterior.
1. Build a Classic Wooden Window Box

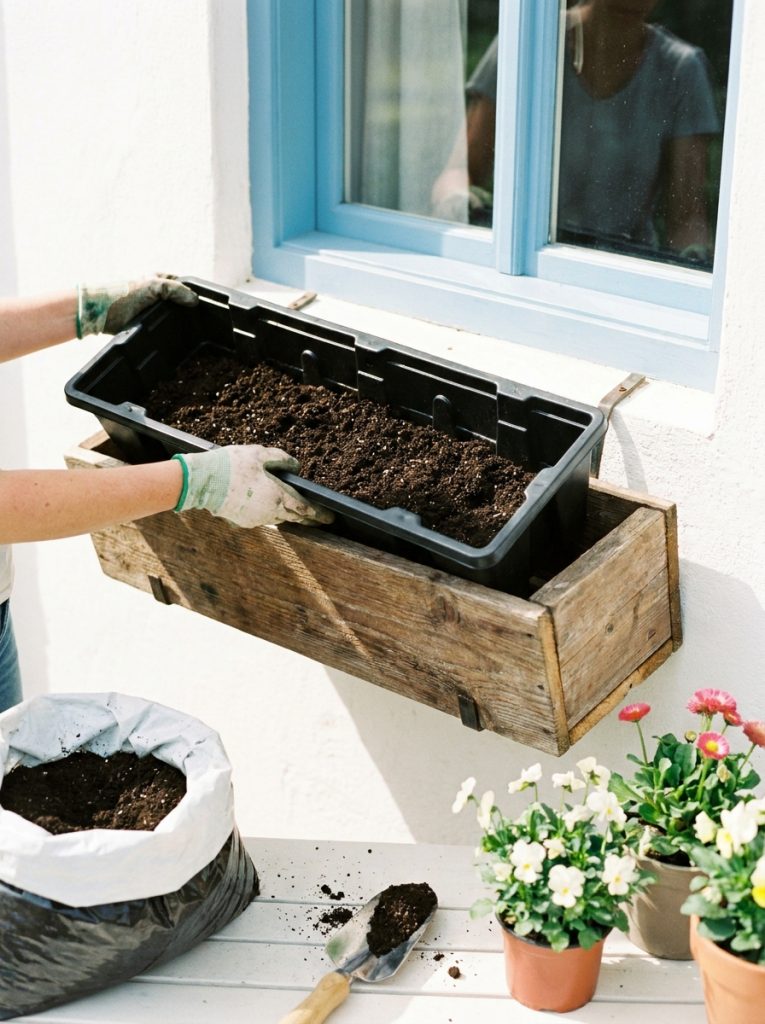
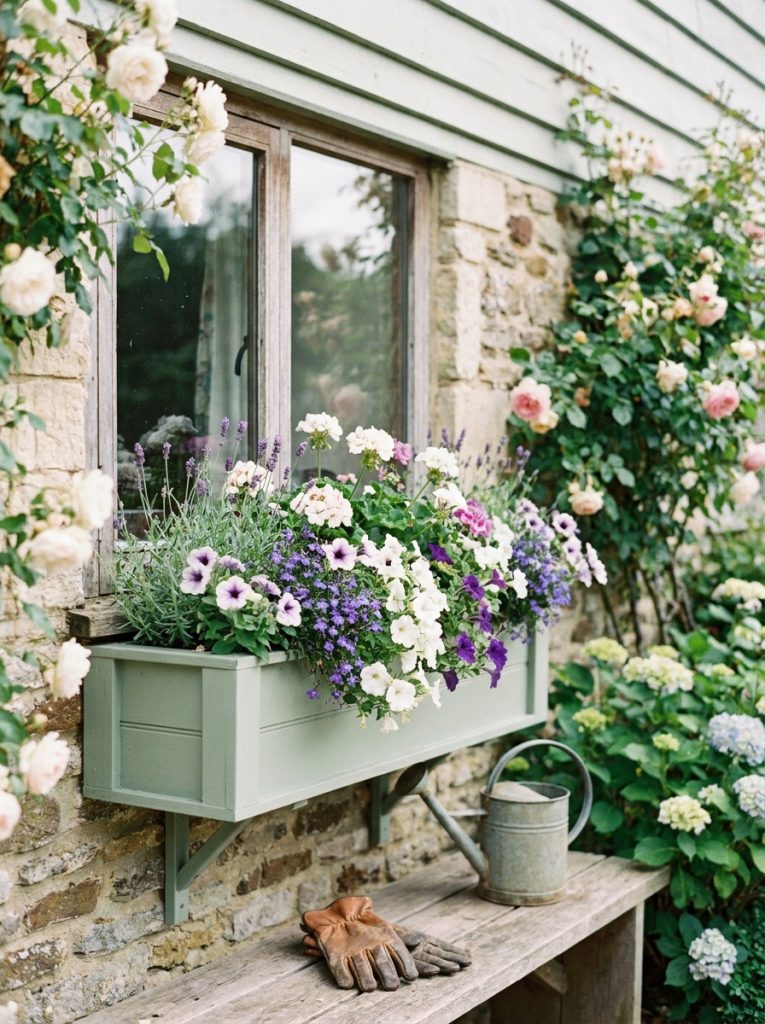
A simple wooden window box is the most versatile and beginner friendly build on this list. Cut four boards, screw them together, add a bottom with drainage holes, paint it to match the house trim, and mount it below the window. This wooden window box planter shows the finished standard to aim for. Cedar or pine both work well — cedar lasts longer without sealing but pine painted with exterior paint holds up for years too.
Materials Needed:
- Cedar or pine boards (1×6 or 1×8)
- Exterior screws and drill
- Sandpaper
- Exterior paint
- Landscape fabric liner
- Mounting brackets
How to Make It:
- Cut boards to the width of your window plus a few inches on each side.
- Assemble four sides into a rectangular box with exterior screws at each corner.
- Cut and attach a bottom board with drainage holes drilled every 4 to 6 inches.
- Sand all surfaces smooth and paint with exterior rated paint.
- Mount with brackets below the window, line with landscape fabric, and fill with potting mix.

Wooden Window Box Planter
Classic wooden window box planter — great ready made option or blueprint for your own DIY build.
Check Price on Amazon2. Mount a Window Box on a Brick House
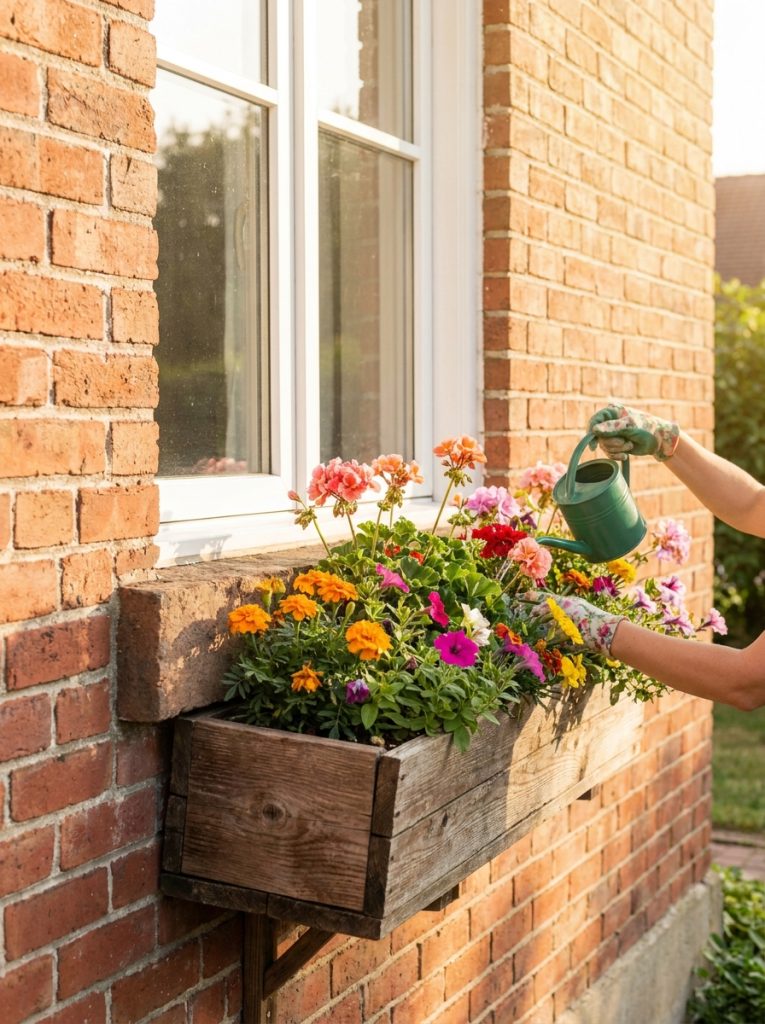
Mounting a window box on brick requires masonry anchors instead of standard wood screws. Drill into the mortar joints rather than the bricks themselves — mortar is easier to drill and less likely to crack. This window box for brick house comes with the right hardware for brick mounting included. Use it as your guide for sizing and hardware if you are building your own box for a brick exterior.
Materials Needed:
- Cedar window box
- Masonry drill bit
- Masonry anchors and screws
- Window box brackets rated for brick
- Landscape fabric and potting mix
How to Make It:
- Hold the bracket against the brick wall below the window and mark the drill points on the mortar joints.
- Drill into the mortar with a masonry bit to the anchor depth.
- Insert masonry anchors into each hole.
- Screw the brackets firmly into the anchors.
- Set the window box onto the brackets, check level, and secure in place.

Window Box for Brick House
Window box with brick mounting hardware included — installs securely on any brick exterior wall.
Check Price on Amazon3. Use Strong Brackets for a Secure Mount
The bracket is the most important part of any window box installation. A box full of wet soil and plants is surprisingly heavy and the wrong bracket will pull out of the wall over time. These window box planter brackets are heavy duty and rated for the weight of a full planter. Install them into wall studs or use masonry anchors on brick and render surfaces for a mount that stays solid for years.
Materials Needed:
- Heavy duty window box brackets
- Stud finder
- Drill and appropriate screws or masonry anchors
- Level
How to Make It:
- Use a stud finder to locate wall studs below the window.
- Hold brackets against the wall at the correct height and mark screw positions.
- Drill pilot holes into the studs or insert masonry anchors for non-wood surfaces.
- Screw brackets firmly into place and check with a level.
- Set the window box onto the brackets and secure with the included hardware.

Window Box Planter Brackets
Heavy duty brackets rated for full planter weight — installs into studs or masonry for a secure long term mount.
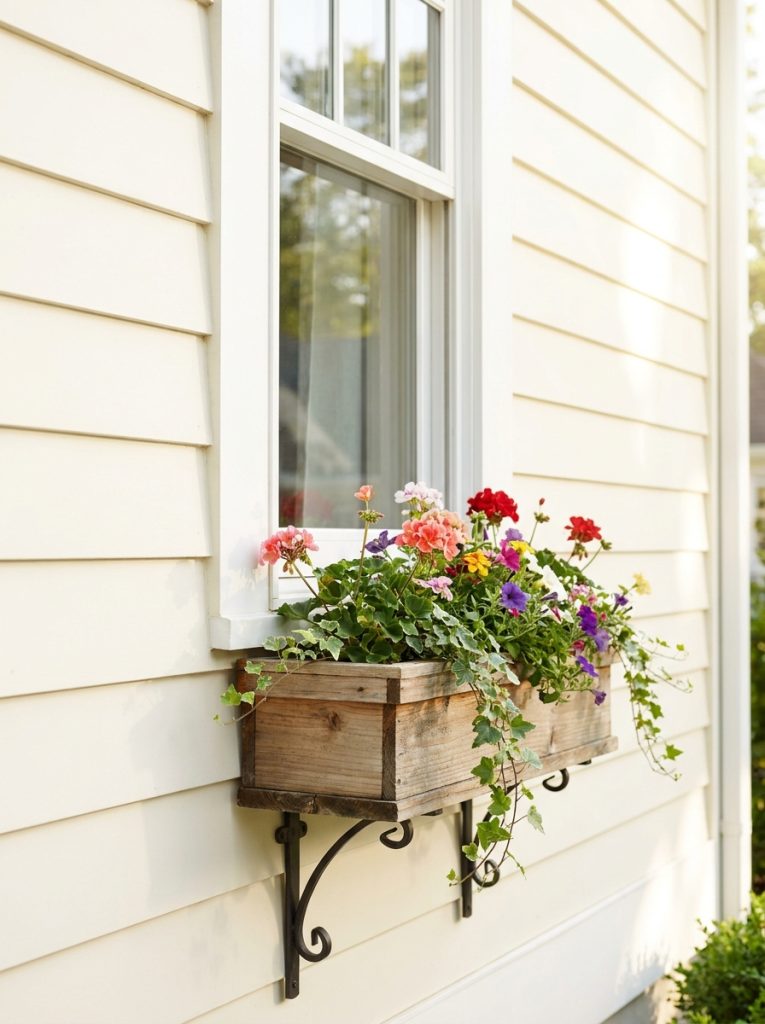
Check Price on Amazon4. Install a Window Box on Vinyl Siding
Vinyl siding needs special consideration because screwing directly into it can crack the panels. Use vinyl siding hooks that clip between the siding panels without any drilling at all for a lightweight box. For heavier builds use a vinyl siding mounting block to create a solid flat surface and screw brackets into the wall studs behind it. Either way the siding stays undamaged and the box hangs securely.
Materials Needed:
- Vinyl siding hooks or mounting block
- Cedar or vinyl window box
- Level
- Drill (for mounting block method)
How to Make It:
- For lightweight boxes, slide vinyl siding hooks between panel rows and hang the box directly.
- For heavier boxes, install a vinyl mounting block by drilling through the siding into the wall stud behind.
- Attach window box brackets to the mounting block surface.
- Set the window box on the brackets, check level, and secure.
5. Add a Liner for Cleaner Planting
A liner inside a window box protects the wood from constant moisture contact and extends the life of the box significantly. It also makes replanting much easier — lift the liner out, replant, drop it back in. This window box liner insert fits most standard window box sizes and has drainage holes built in. A small addition that makes a big difference to how long the box lasts.
Materials Needed:
- Window box liner insert
- Window box (any material)
- Potting mix
- Plants
How to Make It:
- Measure the inside dimensions of your window box before ordering a liner.
- Drop the liner into the box — it should fit snugly with a small gap around the edges.
- Fill the liner with potting mix rather than filling the box directly.
- Plant as normal and water through the liner drainage holes.
- When replanting, simply lift the liner out and refresh the soil without touching the box.

Window Box Liner Insert
Fitted liner that protects the window box from moisture and makes replanting quick and clean.
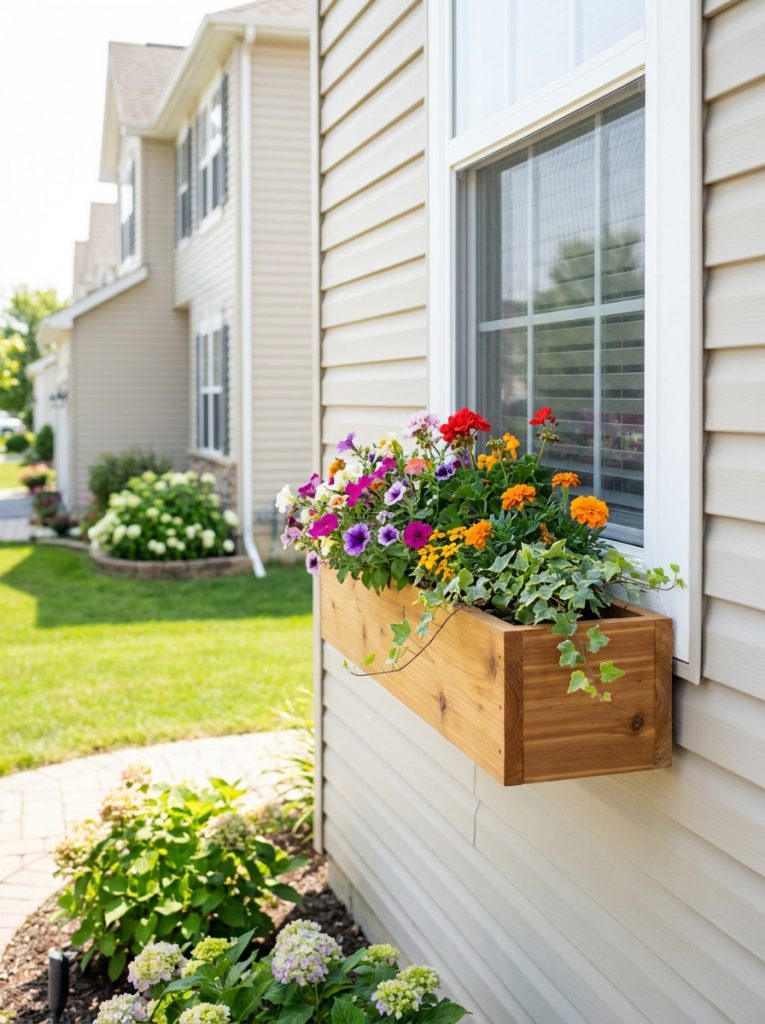
Check Price on Amazon6. Install a Vinyl Window Box for Zero Maintenance
Vinyl window boxes never rot, never need painting, and never warp in the rain. They are the lowest maintenance option for any home exterior and look clean and neat season after season. This vinyl window box planter is a solid ready made option that installs in minutes. If your house already has vinyl siding a vinyl box in a matching color blends in naturally and looks like it came with the house.
Materials Needed:
- Vinyl window box planter
- Window box brackets
- Drill and screws
- Potting mix and plants
How to Make It:
- Choose a vinyl box length that matches or slightly exceeds your window width.
- Install mounting brackets at the correct height below the window.
- Snap or slide the vinyl box onto the brackets according to the manufacturer instructions.
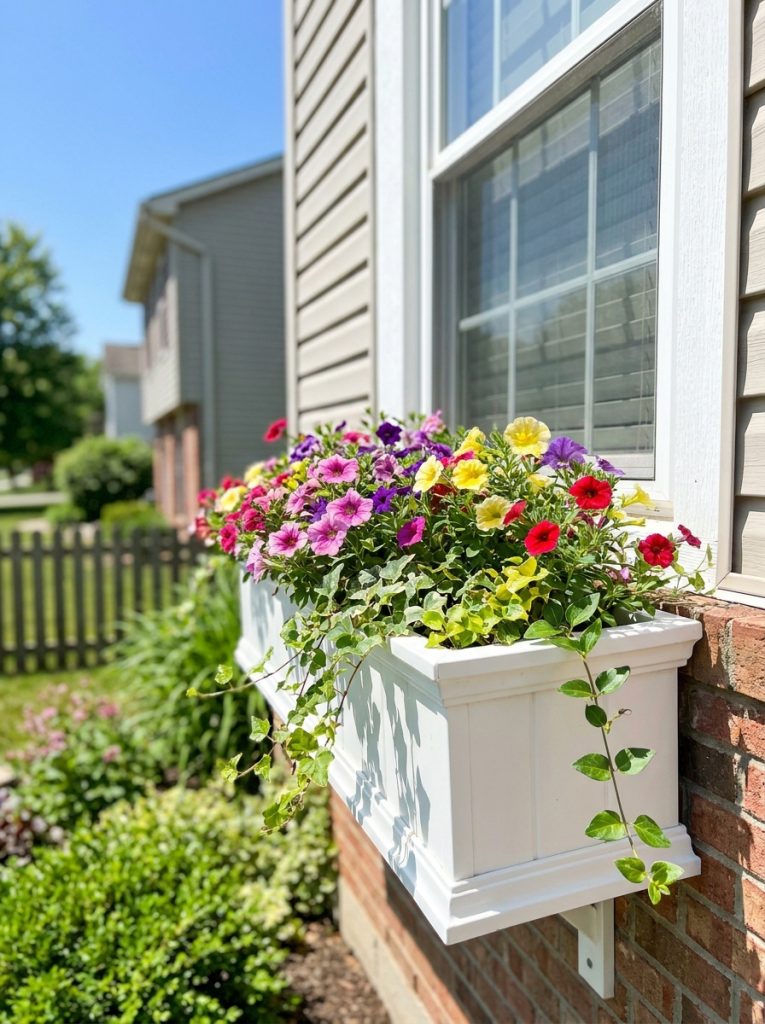
- Fill with potting mix and plant with colorful trailing flowers for the best exterior impact.
Vinyl Window Box Planter
Zero maintenance vinyl window box that never rots or needs painting — installs in minutes.
Check Price on Amazon7. Build a Cheap Window Box from Fence Pickets
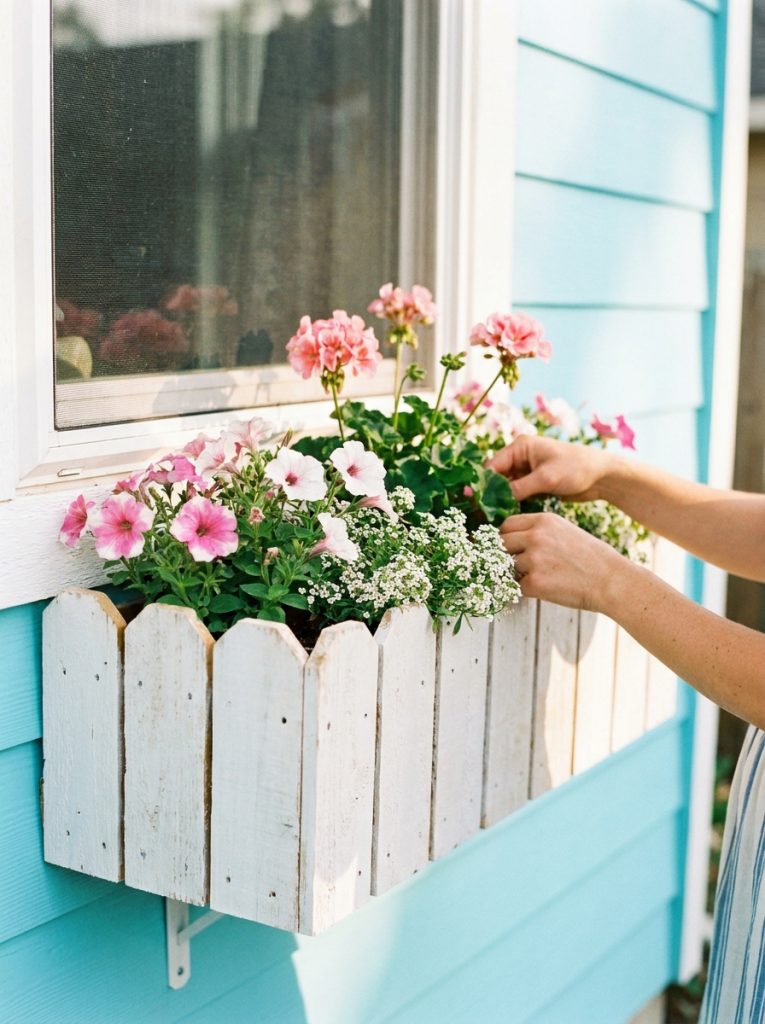
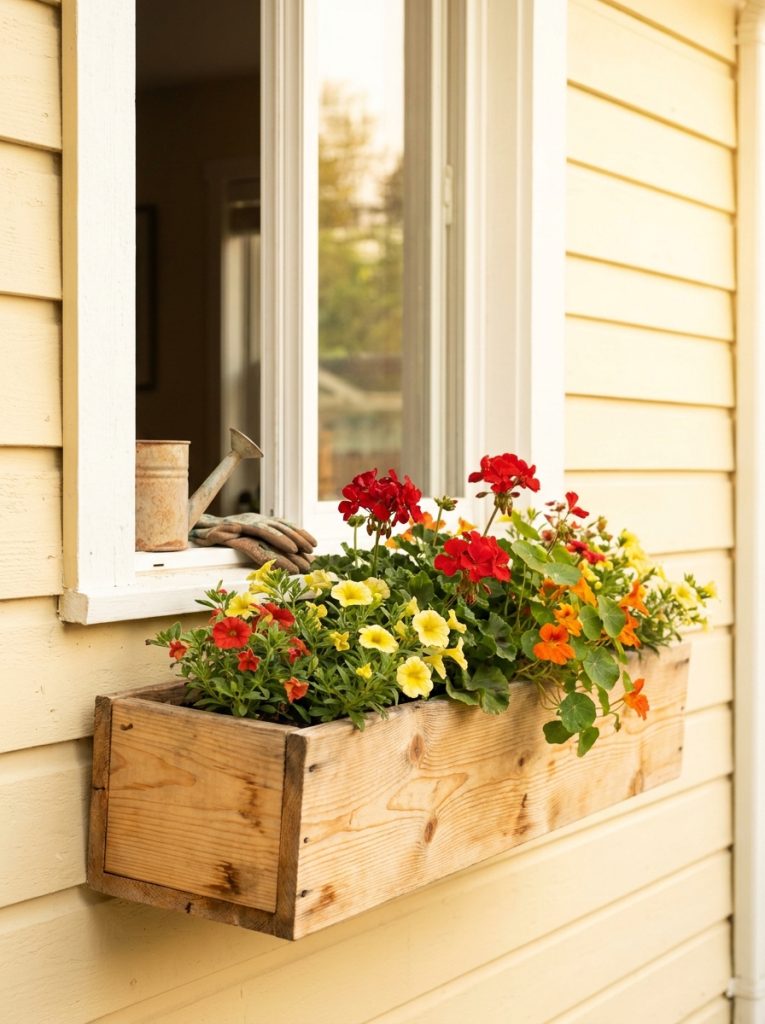
Cedar fence pickets cost almost nothing and make excellent window boxes. One picket cut into four pieces gives you enough material for a small to medium box. Sand, paint, add drainage holes, mount with brackets, and the finished result looks identical to a box that costs five times as much. A true budget window box build that anyone can do in under an hour. For more budget outdoor ideas check out these cheap trellis ideas.
Materials Needed:
- Cedar fence pickets (1 to 2 depending on box size)
- Exterior screws and drill
- Sandpaper
- Exterior paint
- Mounting brackets
How to Make It:
- Cut one fence picket into two long side pieces and two shorter end pieces.
- Cut a bottom piece from the remaining picket material.
- Assemble with exterior screws and drill drainage holes in the bottom.
- Sand, paint with exterior paint, and mount below the window with brackets.
8. Add Shutters for a Charming Window Box Look
Adding small decorative shutters on either side of a window box takes the whole exterior look to another level. It gives a cottage or farmhouse feel that looks custom and considered. This window box with shutters shows the finished style. Build your own by cutting small shutter panels from thin wood boards, adding simple louvre lines with a router or paint, and attaching them to the wall on each side of the box.
Materials Needed:
- Standard wooden window box
- Thin pine boards for shutters
- Router or paint for louvre detail
- Exterior paint
- Screws for wall mounting
How to Make It:
- Build or buy a standard wooden window box and mount it below the window.
- Cut two shutter panels from thin pine boards sized to the window height.
- Add louvre detail with a router or simply paint horizontal lines for the effect.
- Paint shutters to match or complement the window box and house trim.
- Mount shutters flush to the wall on each side of the window box.

Window Box with Shutters
Window box with decorative shutters included — charming cottage style look for any house exterior.
Check Price on Amazon9. Build an Indoor Window Box for Herbs
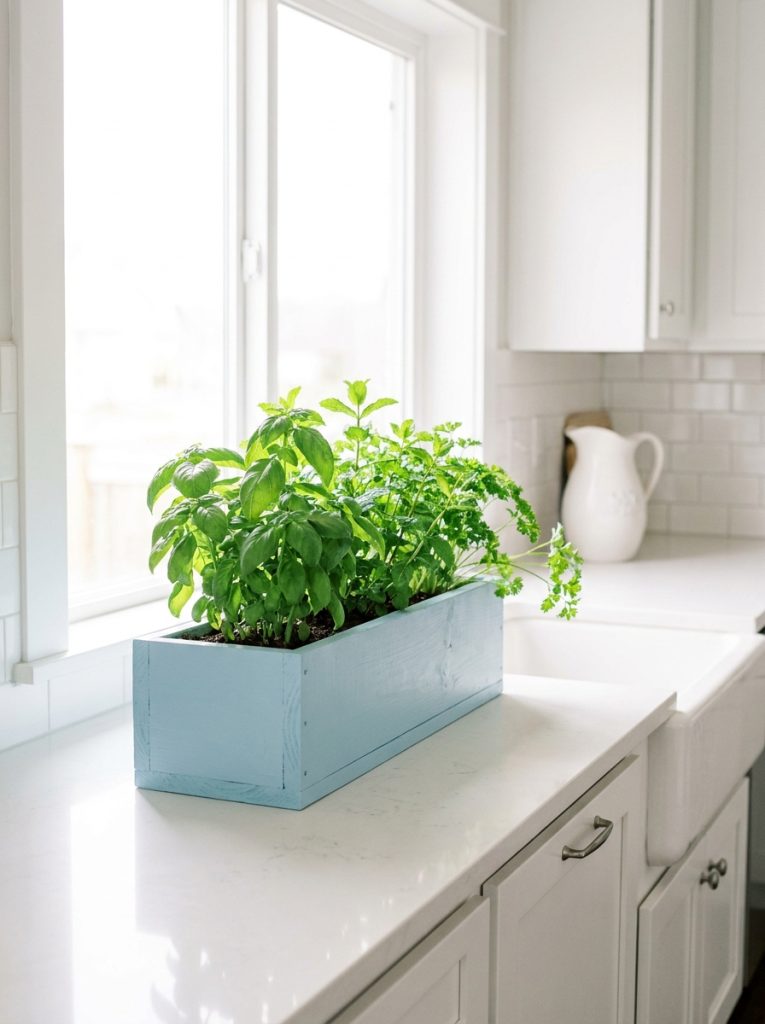
An indoor window box on the kitchen windowsill keeps fresh herbs within arm’s reach while cooking. This indoor window box planter fits most standard windowsills and has a drainage tray included to protect surfaces. Build your own from a shallow cedar box slightly narrower than the windowsill and line with a waterproof tray underneath. Fill with basil, mint, parsley, and thyme for a proper kitchen herb garden.
Materials Needed:
- Shallow cedar or pine box
- Waterproof tray for drainage
- Indoor potting mix
- Herb plants or seeds
How to Make It:
- Build or buy a shallow box sized to fit your windowsill with a few inches clearance on each side.
- Drill small drainage holes in the base.
- Place a waterproof drainage tray under the box to protect the windowsill.
- Fill with indoor potting mix and plant herbs suited to the light level of the window.
- Water sparingly — indoor herbs do not need as much water as outdoor ones.

Indoor Window Box Planter
Indoor window box planter with drainage tray — perfect for a kitchen windowsill herb garden.
Check Price on Amazon10. Build a Simple Easy Flower Window Box
The easiest window box you can build is just two side boards, two end boards, and a bottom — all the same width, all straight cuts, six screws, done. No special tools, no complicated joinery. Paint it any color, add a liner, fill with your favorite summer flowers, and mount it below the window. It takes about forty minutes start to finish and adds more curb appeal than almost any other project that quick.
Materials Needed:
- Pine or cedar boards (1×6)
- Exterior screws
- Drill
- Exterior paint
- Brackets and liner
How to Make It:
- Cut two long side boards and two short end boards all from the same 1×6 width.
- Screw the sides to the ends to form a rectangle.
- Cut and attach a bottom board with drainage holes drilled across it.
- Sand, paint, and mount below the window with brackets.
- Add a liner, fill with potting mix, and plant with trailing summer flowers.
11. Build a Window Box Valance Style
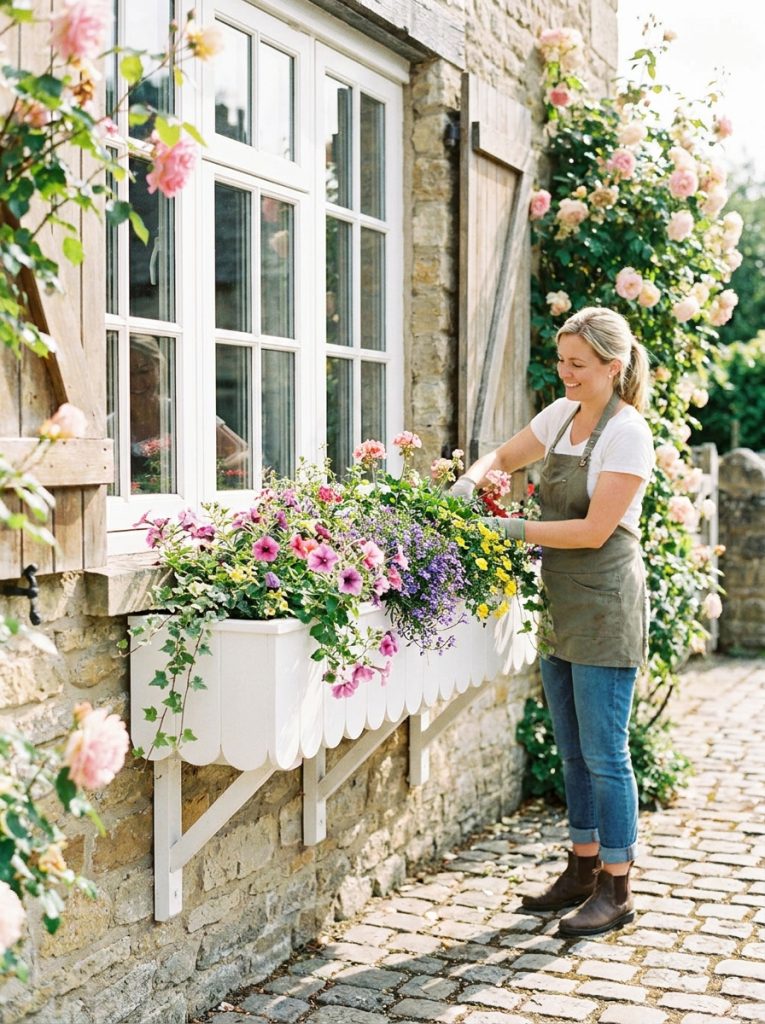
A valance style window box has a decorative shaped front panel — scalloped, arched, or scrolled — that makes it look far more custom and detailed than a plain box. Cut the front board into your chosen shape with a jigsaw before assembling. Paint white for a classic cottage look or a bold color for something more contemporary. The shaped front panel is what everyone notices first.
Materials Needed:
- Cedar or pine boards (1×8 for front panel)
- Jigsaw for shaping the front panel
- Exterior screws and drill
- Sandpaper and exterior paint
- Mounting brackets
How to Make It:
- Cut the front panel board to your desired box length.
- Draw your chosen scallop or arch shape along the bottom edge of the front panel.
- Cut the shape with a jigsaw and sand the cut edge smooth.
- Assemble the box using the shaped board as the front panel.
- Paint and mount as a standard window box.
12. Build a Greenhouse Window Box for Seedlings

A window box with a clear plastic or acrylic lid becomes a mini greenhouse for starting seedlings. The lid traps warmth and humidity which speeds up germination significantly. Build a standard box and hinge a cut-to-size piece of clear acrylic on the back edge as the lid. Open it during the day when temperatures are warm and close it at night to protect tender seedlings from cold.
Materials Needed:
- Cedar box (standard build)
- Clear acrylic sheet cut to fit
- Small hinges
- Drill
- Seed starting mix
How to Make It:
- Build a standard cedar window box with drainage holes.
- Cut a clear acrylic sheet to the same length and slightly wider than the box top.
- Attach the acrylic sheet to the back top edge of the box with small hinges.
- Fill the box with seed starting mix and plant seeds directly or place seedling trays inside.
- Close the lid at night and prop it open during warm days for ventilation.
13. Make a Cardboard Window Box Prototype First
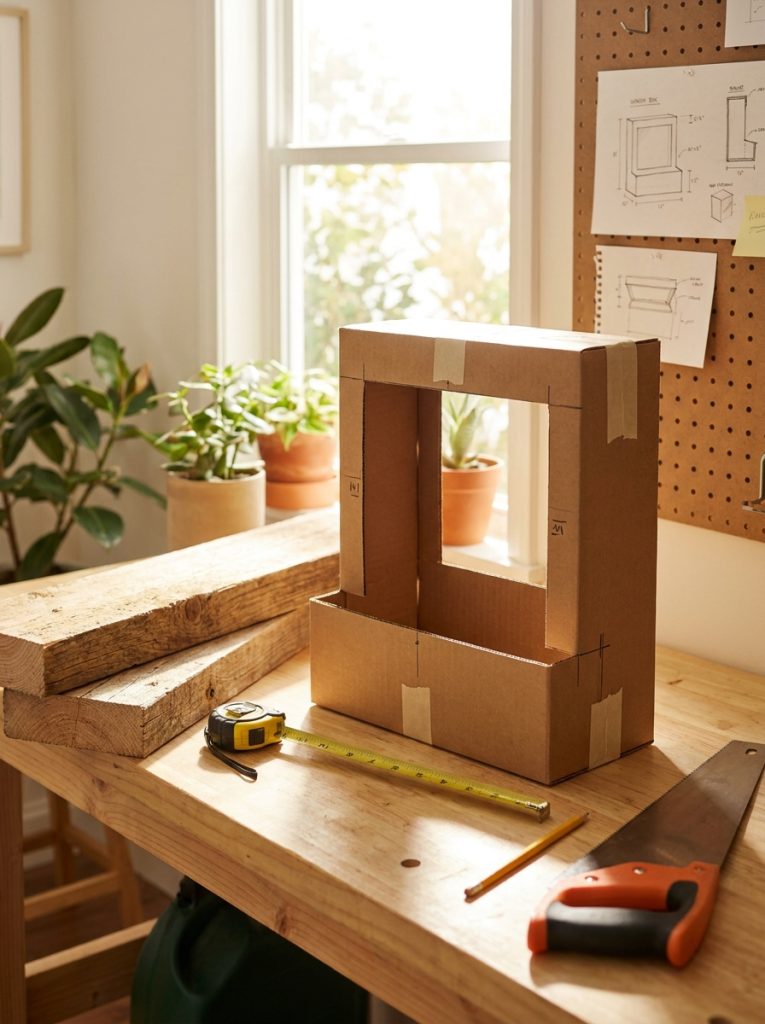
Before cutting expensive wood always build a cardboard prototype first. Cut and tape cardboard into the exact box dimensions you want, hold it up below the window, and check the proportions before committing to wood. It takes five minutes and saves you from cutting boards to the wrong size. It is the single most useful step most first time window box builders skip.
Materials Needed:
- Cardboard boxes (free)
- Packing tape
- Scissors or box cutter
- Measuring tape
How to Make It:
- Measure the window width and decide your desired box length and depth.
- Cut cardboard panels to those exact dimensions.
- Tape together into a box shape and hold it up below the window.
- Adjust the dimensions if needed and retape until the proportions look right.
- Use the cardboard box as your cutting template for the real wood build.
14. Build a Garden Style Window Box with Trellis
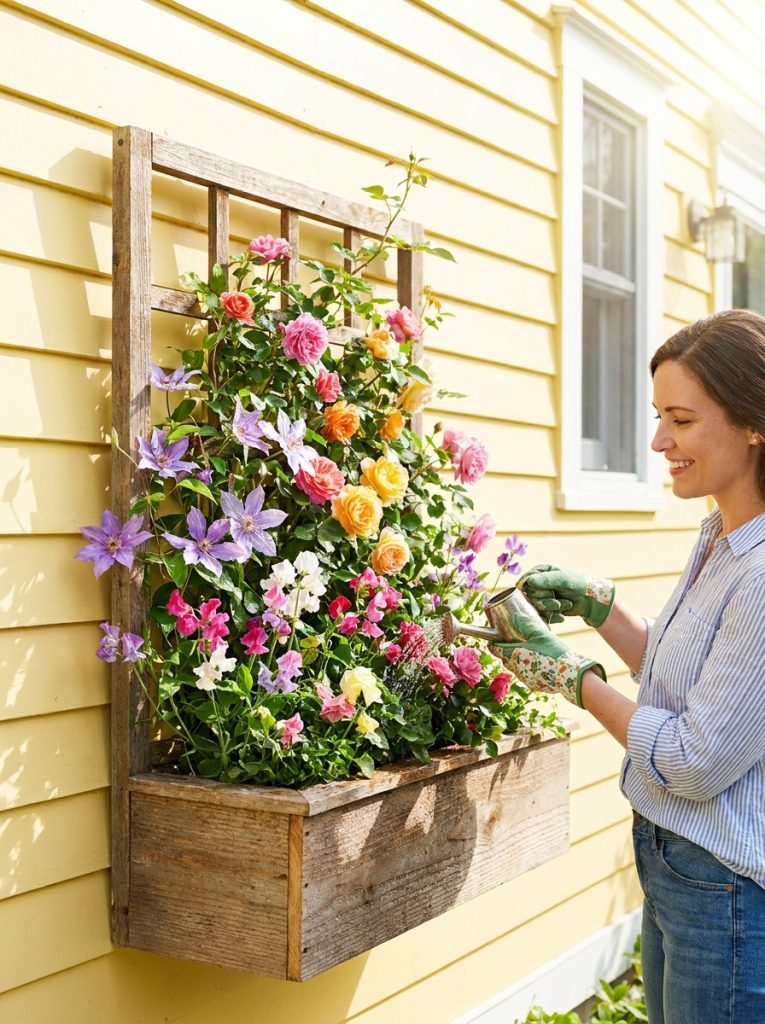
A window box with a trellis attached at the back gives climbing plants like sweet peas, nasturtiums, and small clematis somewhere to grow upward. It frames the window beautifully and adds vertical interest to the wall above the box. Attach a simple grid trellis panel to the back of the box before mounting and train climbing plants up it as they grow. These DIY bird bath ideas pair well with a garden window box setup for a full cottage garden exterior look.
Materials Needed:
- Standard cedar window box
- Small wooden or metal trellis panel
- Exterior screws
- Climbing plant varieties
- Wall mounting hardware
How to Make It:
- Build or buy a standard window box.
- Attach a trellis panel to the back top edge of the box with screws so it stands vertically.
- Mount the whole assembly below the window with the trellis resting against the wall.
- Plant climbing varieties in the box and gently tie young shoots to the trellis as they grow.
15. Keep It Simple — One Box One Window Done
You do not need to box every window on the house. Start with one. The front facing window that gets the most visibility from the street is the best place to begin. Build the simplest box you can, paint it a color that complements the house, fill it with plants that suit your light conditions, and see how much the whole exterior changes. One window box done well is better than five mediocre ones rushed through in a weekend.
Materials Needed:
- Cedar or pine boards (1×6)
- Exterior screws and drill
- Exterior paint in your chosen color
- Mounting brackets
- Seasonal flowering plants
How to Make It:
- Measure the most visible window on your house front and build a box to that width.
- Keep the build simple — four sides and a bottom, straight cuts only.
- Paint in a color that works with the house exterior palette.
- Mount securely below the window and fill with plants suited to the sun exposure.
Final Thoughts on DIY Window Boxes
A window box is one of the highest impact outdoor projects for the time and money you put in. Whether you build a simple cedar box this weekend, mount a vinyl box that needs zero maintenance, or add decorative shutters for a cottage look, the result always makes the house exterior look more finished and welcoming. Pick one window, build one box, and start there.

Amir Ali is the founder and site administrator of HomeDecorEdge, a modern home decor and interior design platform. Since starting the site, he has combined his passion for interior design, practical styling, and color coordination with hands-on content strategy and site management. He guides authors, curates high-quality articles, and ensures readers have access to actionable, visually inspiring, and user-focused home decor advice for apartments, small rooms, and family homes.