
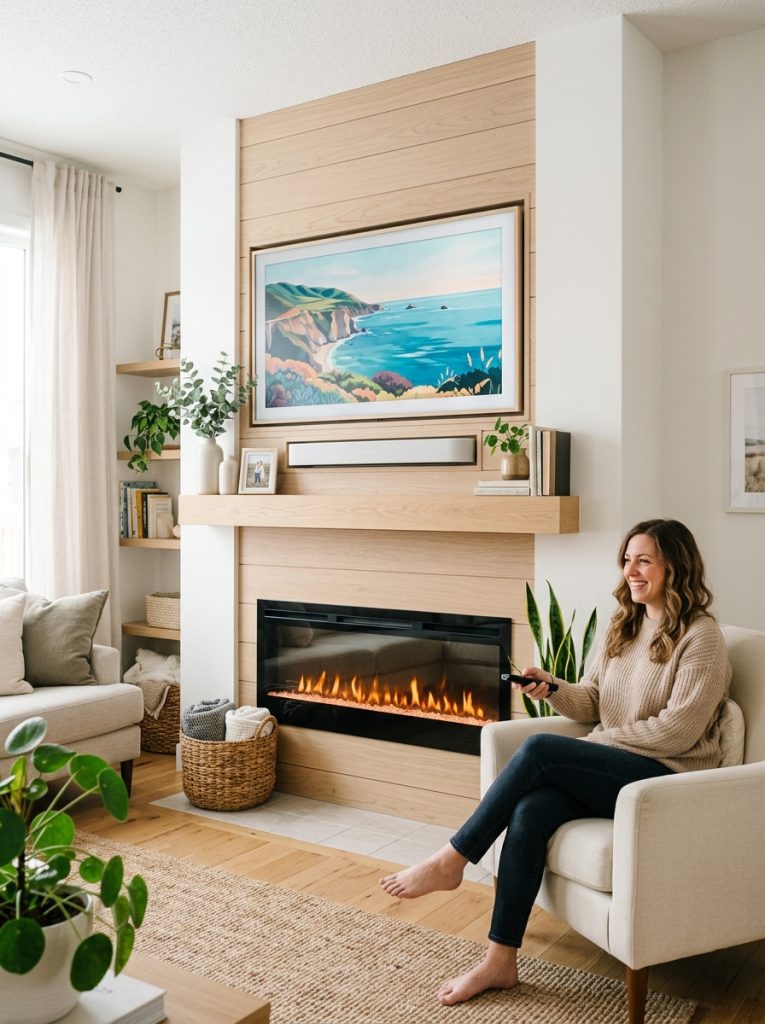
A fireplace TV wall is the single most impactful project you can build in a living room. It anchors the entire space, creates a focal point the room organizes itself around, and adds architectural detail that makes a house feel custom built rather than standard. These DIY fireplace TV wall ideas cover every style from shiplap farmhouse to stone veneer modern, with builds for standard rooms, bedrooms, corners, and vaulted ceilings.
This post contains affiliate links. If you purchase through these links I may earn a small commission at no extra cost to you.
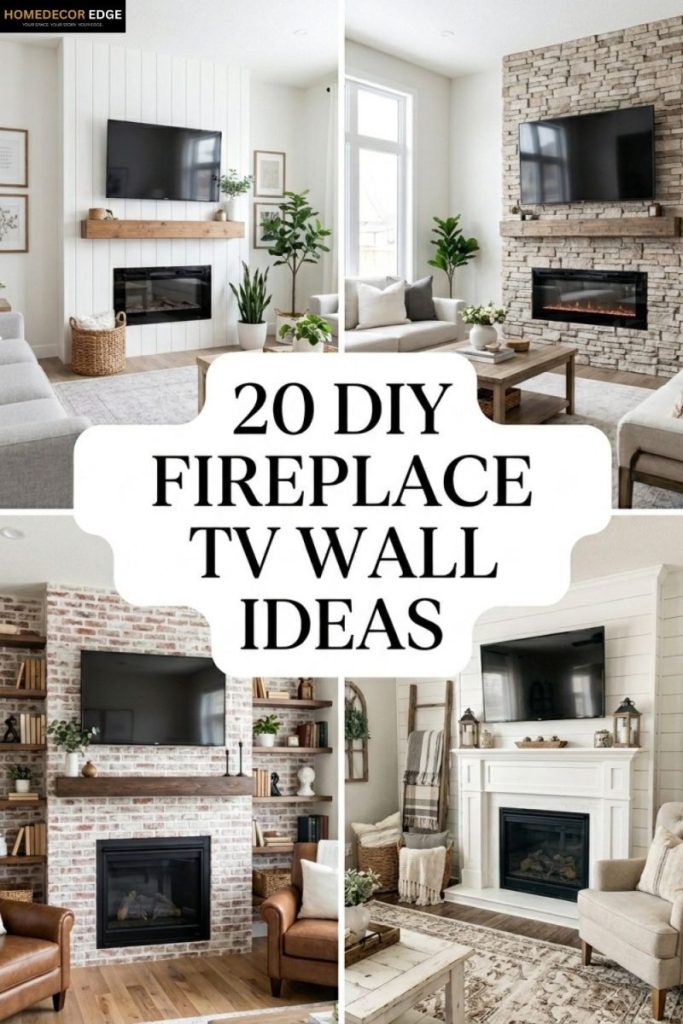
A fireplace TV wall changes everything about how a living room feels and functions.
1. Build a Shiplap Fireplace TV Wall
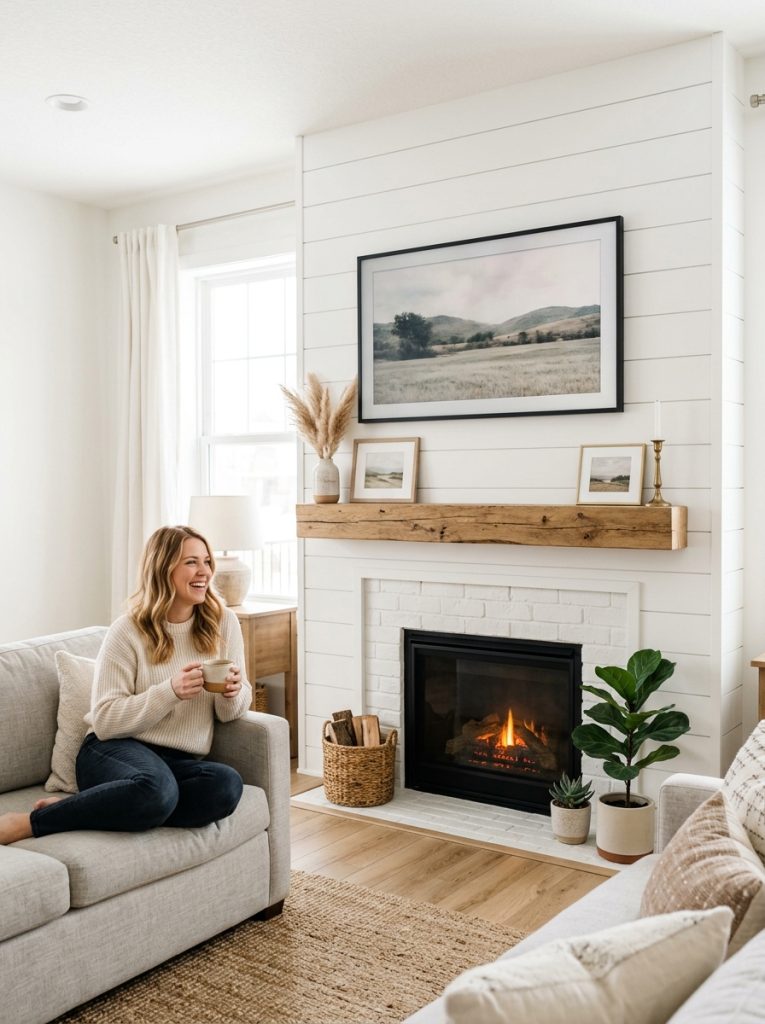
Shiplap is the most popular fireplace TV wall treatment for a reason — it is fast to install, inexpensive, and looks completely custom when painted and trimmed properly. Install horizontal shiplap boards across the full wall from floor to ceiling, paint white or a soft neutral, add a floating wood mantel, and mount the TV above. This shiplap panel kit makes installation significantly faster than cutting individual boards. The finished result looks like a designer built-in that costs a fraction of professional pricing. For more living room inspiration check out these living room design ideas.
Materials Needed:
- Shiplap panels or 1×6 tongue and groove boards
- Stud finder and level
- Finish nails and nail gun
- Wood filler and sandpaper
- White paint and primer
- Floating mantel shelf
How to Make It:
- Find and mark all wall studs across the full wall width.
- Start at the bottom of the wall and nail the first shiplap row level — this row sets everything above it.
- Work upward row by row nailing each board into the studs with finish nails.
- Cut boards around the fireplace opening and any outlets as you go.
- Fill nail holes, sand, prime, and paint — two coats for full coverage.
- Mount the mantel shelf above the fireplace and hang the TV above.
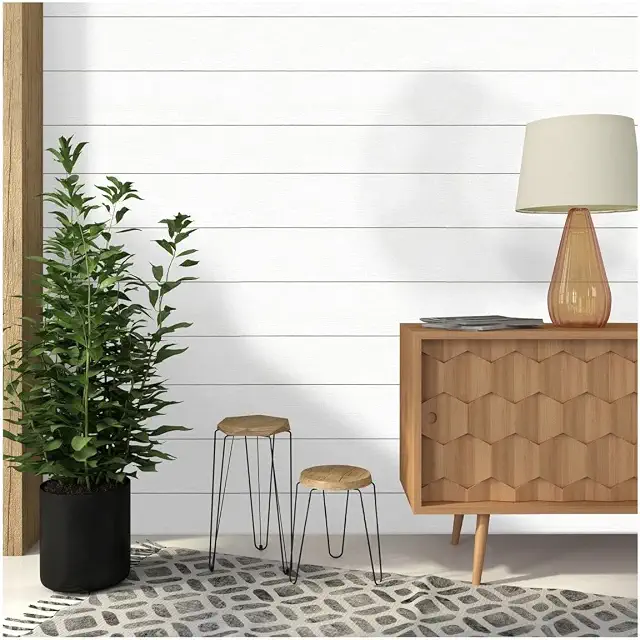
Shiplap Panels for TV Wall
Shiplap panel kit that speeds up fireplace TV wall installation — pre-grooved for a clean authentic look.
Check Price on Amazon2. Add a Floating Mantel Shelf
The mantel shelf is the centerpiece of any fireplace TV wall — it defines the fireplace, creates a display surface, and separates the fire from the TV visually. A thick floating wood mantel in a natural or stained finish looks far more substantial than a thin shelf. This fireplace TV wall mantel shelf is the right proportions for a standard fireplace opening. Mount it with heavy duty lag bolts into the wall studs for a shelf that holds candles, art, and decor without flexing.
Materials Needed:
- Thick wood mantel shelf (4 to 6 inch depth minimum)
- Heavy duty lag bolts
- Stud finder
- Drill and socket wrench
- Level
How to Make It:
- Mark the mantel position on the wall — typically 6 to 12 inches above the fireplace opening.
- Find studs behind the mounting area with a stud finder.
- Drill pilot holes through the wall at stud positions.
- Drive lag bolts through the wall into the studs leaving them protruding by 3 to 4 inches.
- Drill corresponding holes in the back of the mantel shelf and press it over the lag bolts onto the wall.

Fireplace TV Wall Mantel Shelf
Thick floating wood mantel shelf in the right proportions for a fireplace TV wall build.
Check Price on Amazon3. Apply Faux Brick Panels for a Classic Look
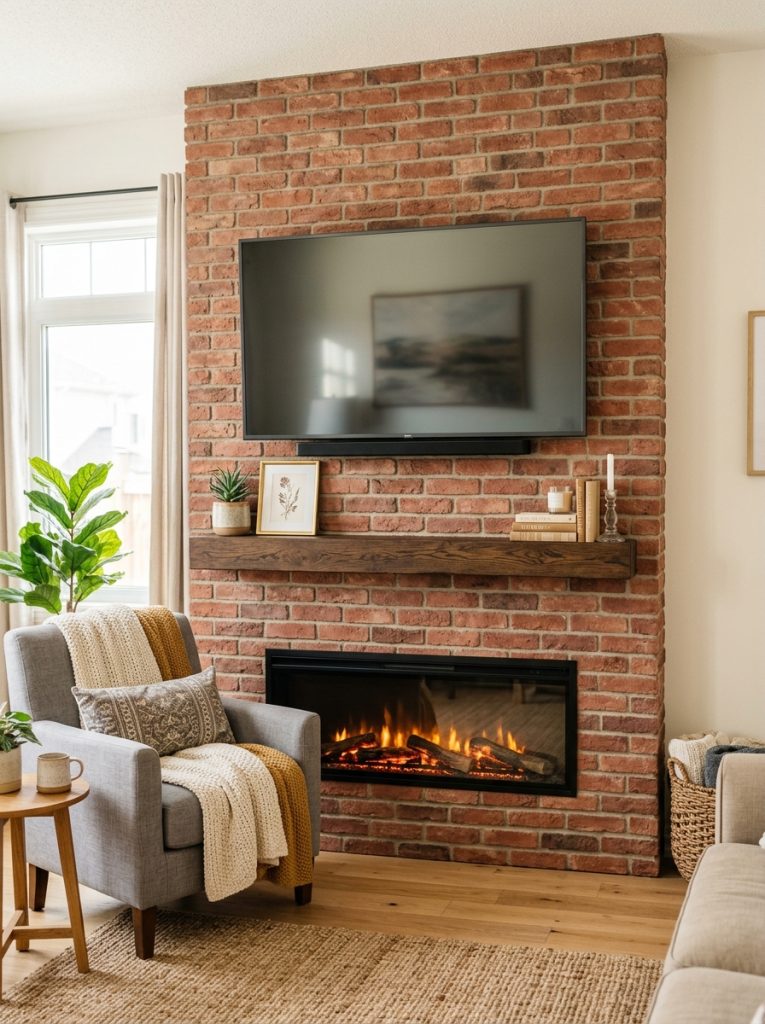
Faux brick panels give a fireplace TV wall a classic traditional look without the weight, cost, or installation complexity of real brick. The panels are lightweight, cut with a standard saw, and glue directly to drywall. This faux brick panel kit has a realistic texture and comes in sections that align seamlessly at the joints. Paint or dry brush with a lighter tone after installation to age the brick and make it look even more authentic.
Materials Needed:
- Faux brick panels
- Construction adhesive
- Finish nails for extra security
- Saw for cutting panels to size
- Paint for aging effect (optional)
How to Make It:
- Measure the wall area and plan panel layout to minimize seams in visible areas.
- Cut panels to fit around the fireplace opening and any obstacles.
- Apply construction adhesive to the back of each panel in a grid pattern.
- Press panels firmly to the wall and drive finish nails through the brick texture into studs.
- Fill any visible seams with joint compound, paint the whole surface, and dry brush a lighter tone over the brick texture for realism.

Faux Brick Panels for TV Wall
Lightweight faux brick panels with realistic texture — glue directly to drywall for a classic fireplace TV wall look.
Check Price on Amazon4. Apply Stone Veneer for a Modern Look
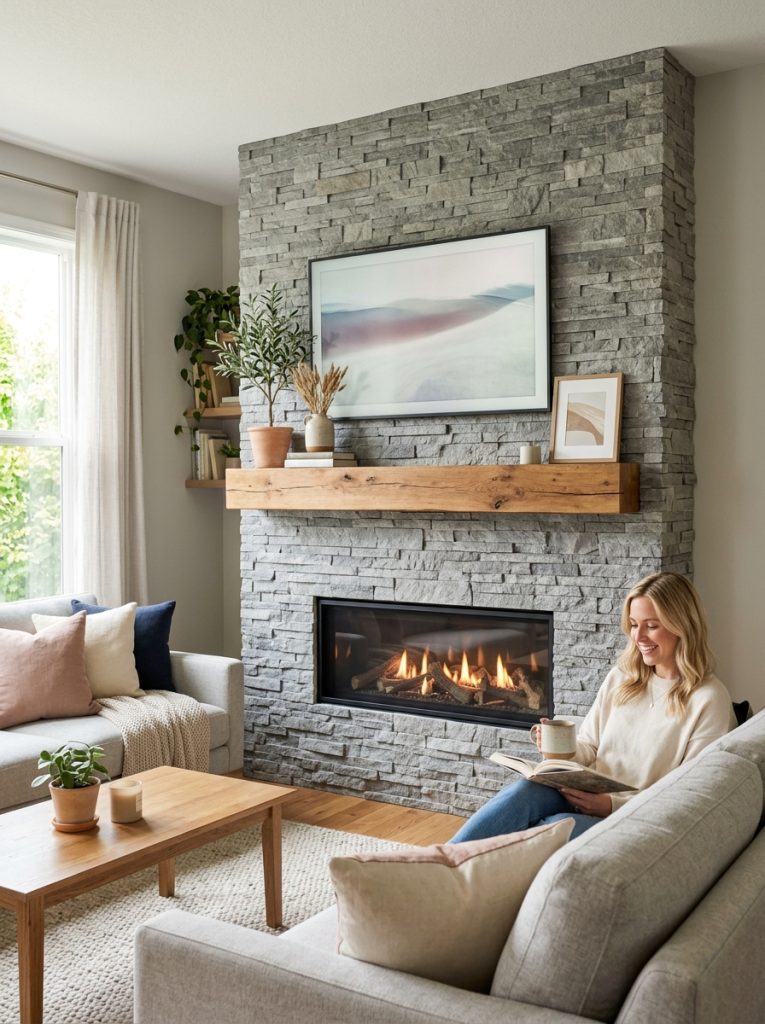
Stone veneer gives a fireplace TV wall a high-end modern look that real stone provides at a fraction of the weight and cost. Thin stone veneer panels apply with mortar or construction adhesive directly over drywall or cement board. This stone veneer panel kit has the right thickness and texture for a realistic natural stone finish. Use it on the full wall for maximum impact or just the fireplace surround for a more focal accent treatment.
Materials Needed:
- Stone veneer panels
- Mortar or heavy duty construction adhesive
- Notched trowel
- Tile saw or angle grinder for cutting
- Grout for filling joints (optional)
How to Make It:
- Install cement board over the drywall in the stone veneer area for a stable base.
- Apply mortar or adhesive to the back of each stone panel with a notched trowel.
- Press panels firmly to the wall working from the bottom up.
- Cut panels with a tile saw to fit around the fireplace opening and edges.
- Fill joints with grout if desired and seal the stone surface once fully cured.

Stone Veneer Panels for TV Wall
Natural stone veneer panels for a high-end modern fireplace TV wall at a fraction of real stone cost.
Check Price on Amazon5. Add Floating Shelves on Each Side
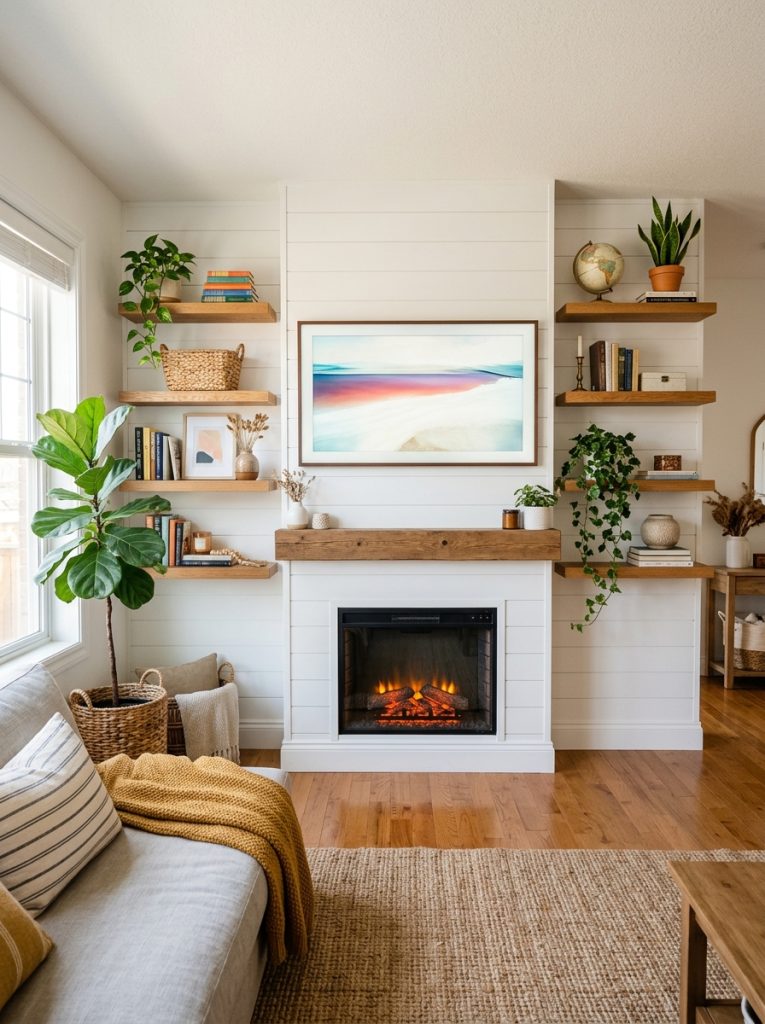
Floating shelves on either side of the TV above the fireplace complete the built-in look without the complexity of full bookshelves. Three or four shelves per side at staggered heights hold books, plants, and decorative objects at eye level while the TV watches. This floating shelf set comes in matching lengths for a symmetrical installation. Mount into studs with heavy duty brackets and the shelves hold real weight — not just lightweight decor.
Materials Needed:
- Floating shelves (matched pairs)
- Heavy duty shelf brackets
- Stud finder and level
- Drill and wall anchors
- Decorative objects for styling
How to Make It:
- Mark stud positions on the wall on each side of the TV.
- Plan shelf heights — stagger them so no two shelves on opposite sides are at exactly the same level.
- Mount brackets into studs at each shelf position and check level carefully.
- Slide floating shelves onto brackets and secure with set screws.
- Style with books, plants, and objects in odd numbers for the most natural look.

Floating Shelves for Fireplace TV Wall
Matched floating shelf set for symmetrical installation on each side of a fireplace TV wall.
Check Price on Amazon6. Add Cabinet Storage on Each Side
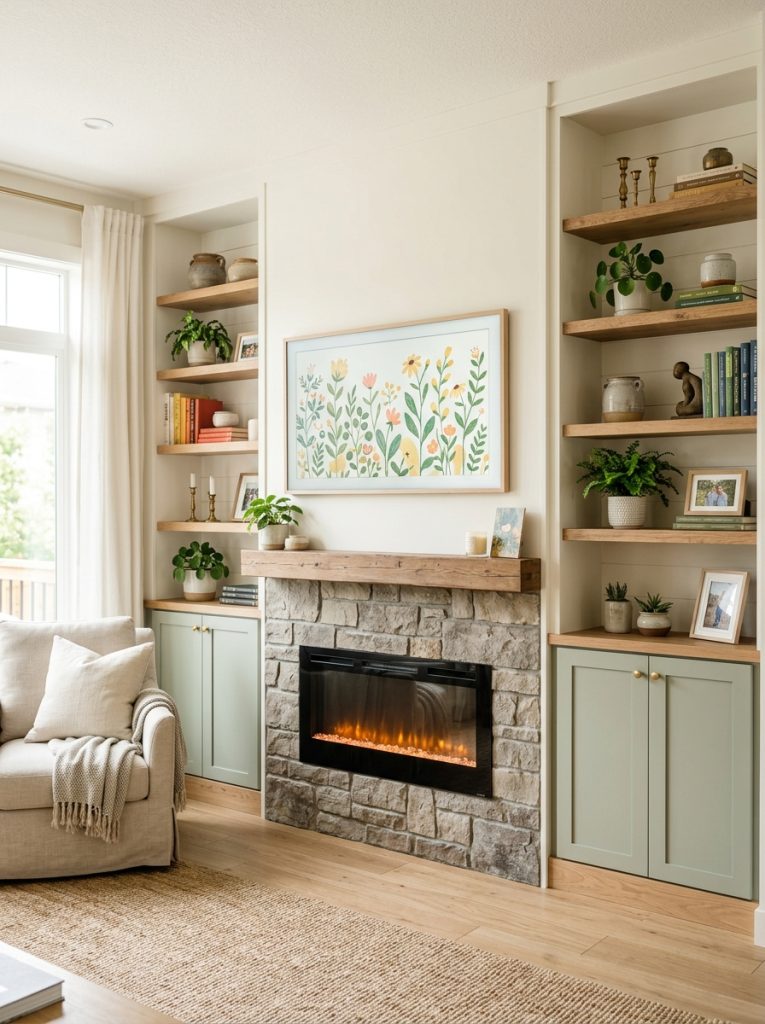
Cabinets flanking the fireplace and TV solve the living room storage problem completely. Media equipment, game controllers, blankets, and remotes disappear behind closed doors while shelves above display books and decor. This fireplace TV wall cabinet storage is a ready made version to reference for proportions. Build your own from plywood with face frame trim and simple inset or overlay doors — paint to match the wall color for a built-in effect.
Materials Needed:
- Plywood for cabinet boxes
- Face frame lumber (1×3 pine)
- Cabinet doors and hinges
- Cabinet hardware (knobs or pulls)
- Wood screws and drill
- Paint
How to Make It:
- Build two identical cabinet boxes from plywood sized to fit on each side of the fireplace.
- Attach face frames around each box front with glue and finish nails.
- Hang cabinet doors on the lower section with concealed hinges.
- Add adjustable shelves in the upper open section.
- Secure both cabinets to the wall at stud positions and paint the whole unit to match the wall.

Fireplace TV Wall Cabinet Storage
Cabinet storage unit for flanking a fireplace TV wall — hides media equipment behind closed doors.
Check Price on Amazon7. Hide the TV Cables Cleanly
Nothing ruins a beautiful fireplace TV wall faster than visible cables running down the wall from the mounted TV. An in-wall cable management kit routes all cables through the wall from the TV mounting point down to the outlet below the mantel so nothing is visible from the front. This TV wall cable management kit includes the wall plates, flexible conduit, and all hardware needed. Takes about an hour to install and the difference in the finished look is enormous.
Materials Needed:
- In-wall cable management kit
- Drywall saw
- Fish tape for routing cables
- Screwdriver
- Paintable wall plates
How to Make It:
- Cut two wall plate openings — one at TV height behind the TV, one at outlet height below.
- Feed the flexible conduit between both openings through the wall cavity.
- Pull all TV cables through the conduit from the top opening to the bottom.
- Connect cables to the TV above and to the media equipment and power at the bottom.
- Snap wall plates into both openings and paint if needed to match the wall.

TV Wall Cable Management Kit
In-wall cable management kit that hides all TV cables completely for a clean professional finish.
Check Price on Amazon8. Use Drywall Anchors for Secure Mounting
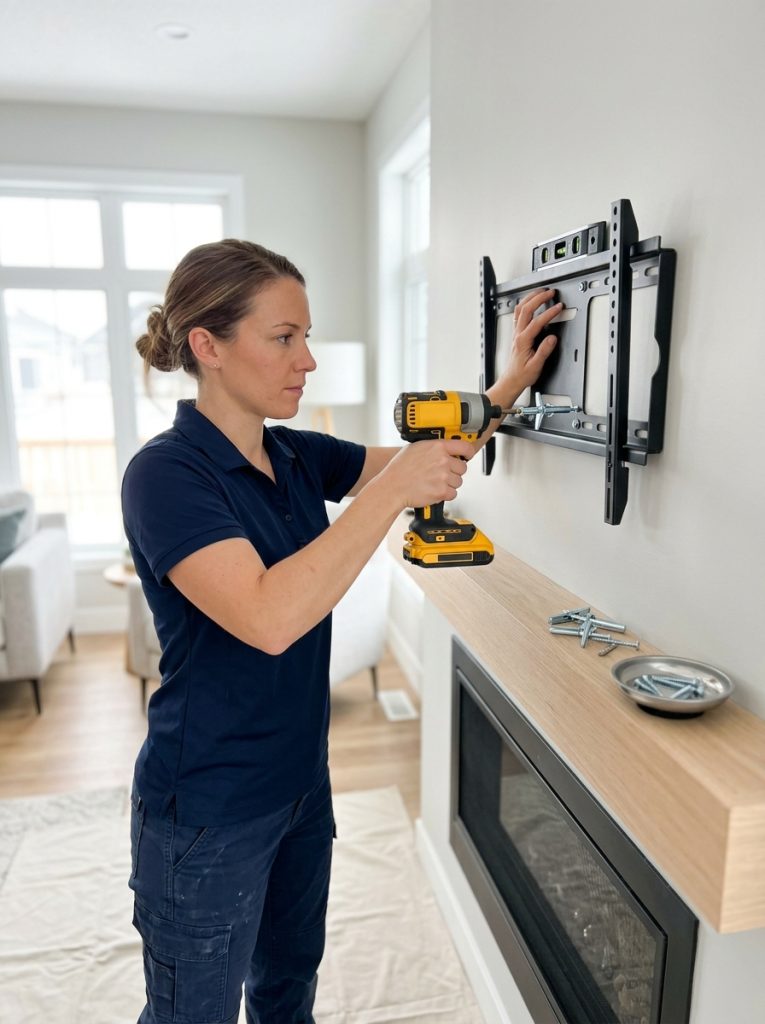
Mounting a TV and heavy shelves on a fireplace wall that does not always have studs in the right positions requires the right anchors. Standard drywall anchors strip out under TV weight — use toggle bolt anchors or snap toggles rated for the load. These heavy duty drywall anchors hold up to 50 pounds each in drywall without hitting a stud which makes positioning flexible and reliable. Always verify the TV mount total weight rating before choosing anchors.
Materials Needed:
- Heavy duty toggle bolt anchors
- Drill with appropriate bit size
- TV wall mount
- Torque screwdriver
- Level
How to Make It:
- Mark the TV mount position on the wall and identify stud locations.
- Mount into studs where possible for maximum strength.
- For positions between studs, drill holes sized for the toggle bolt anchors.
- Fold toggle wings and push through the hole — wings expand behind the drywall.
- Tighten bolts until snug against the wall surface — do not overtighten which crushes drywall.

Heavy Duty Drywall Anchors
Toggle bolt anchors rated for heavy loads in drywall — essential for secure TV and shelf mounting.
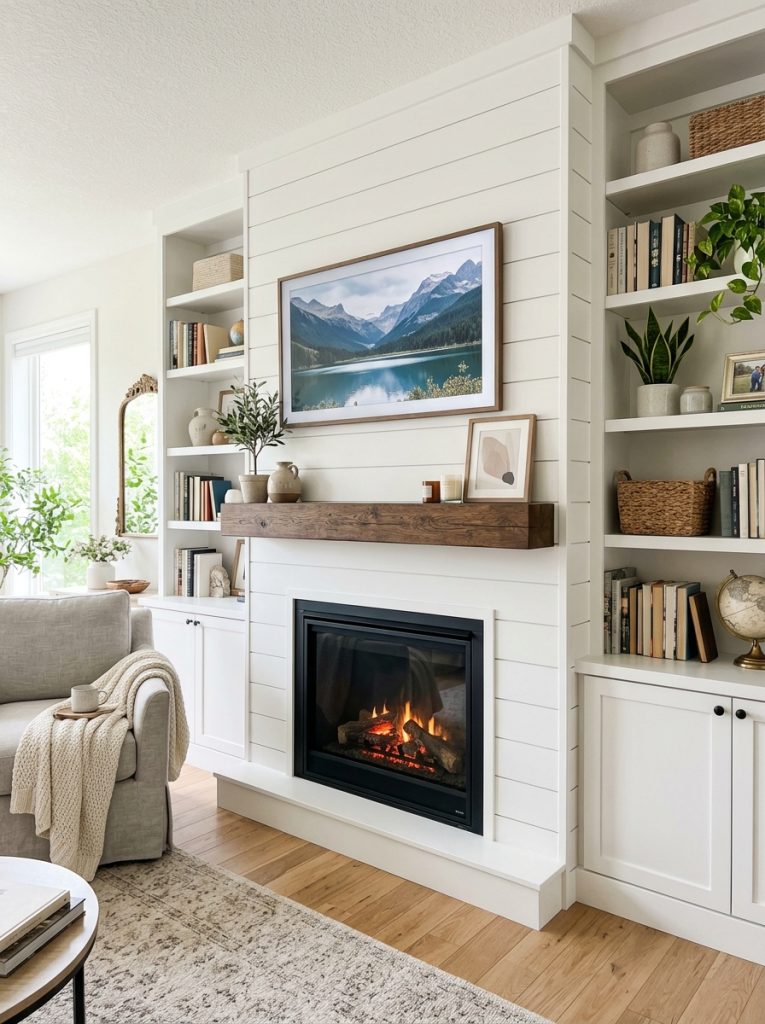
Check Price on Amazon9. Build a Fireplace TV Wall with Bookshelves
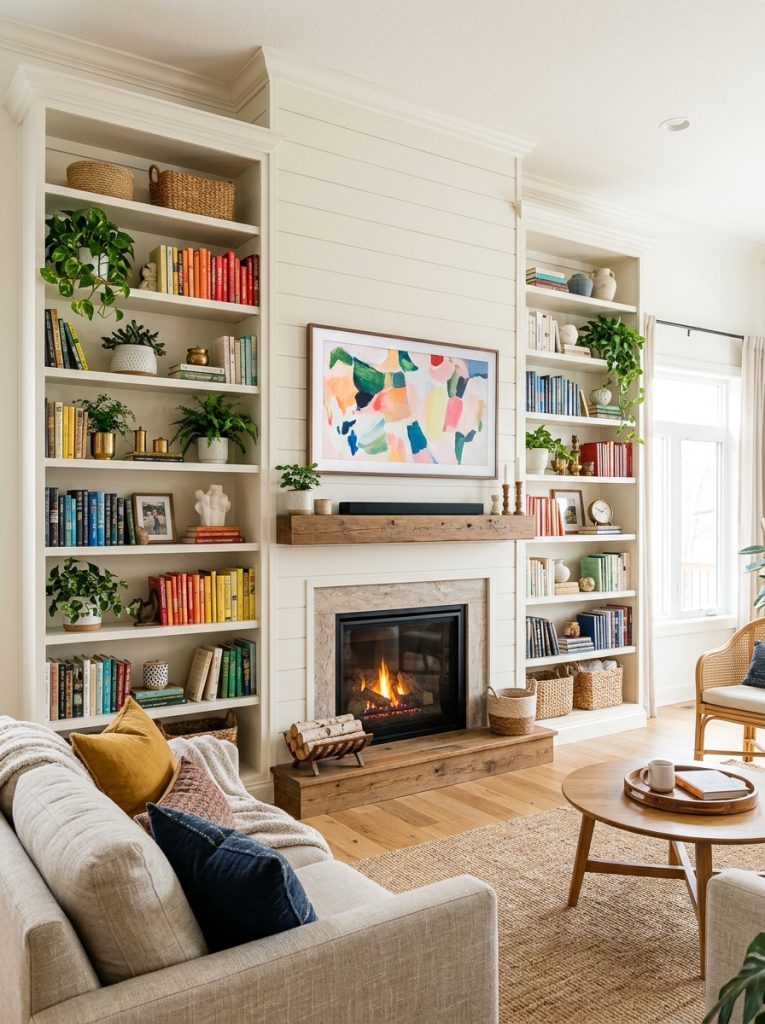
Full height bookshelves flanking the fireplace and TV is the most impressive version of a fireplace TV wall build. The shelves fill the wall from floor to ceiling on both sides, the fireplace sits in the center, and the TV mounts above the mantel creating a completely built-in wall that looks like it cost thousands professionally installed. Build each bookshelf section from plywood with face frame trim and adjustable shelves — paint everything including the wall inside the shelves in one color for the most seamless built-in effect.
Materials Needed:
- Plywood for bookshelf boxes
- 1×3 pine for face frames
- Adjustable shelf pins and shelves
- Finish nails and wood glue
- Paint — same color as wall for built-in effect
How to Make It:
- Build two tall plywood bookshelf boxes sized to fill the wall space on each side of the fireplace.
- Attach face frames around each box front for a furniture-grade finished look.
- Install adjustable shelf pins inside each box at 2 inch intervals.
- Cut adjustable shelves to fit inside each section.
- Secure boxes to the wall and ceiling, paint the entire wall assembly in one color, and style with books and objects.
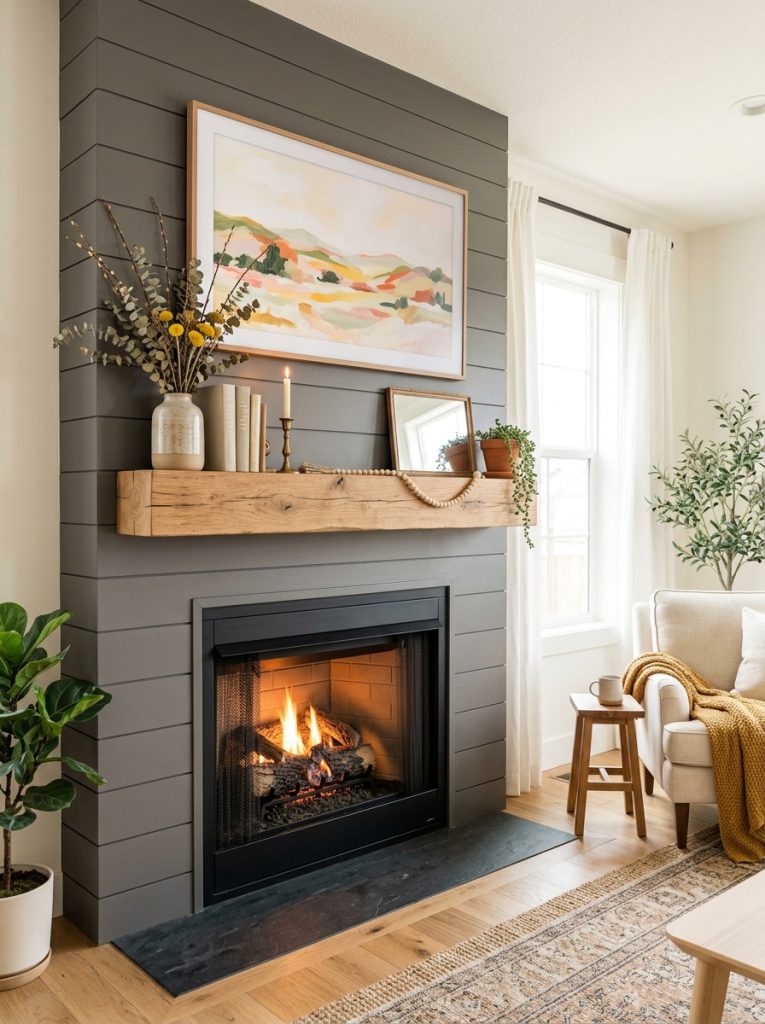
10. Build a Farmhouse Fireplace TV Wall
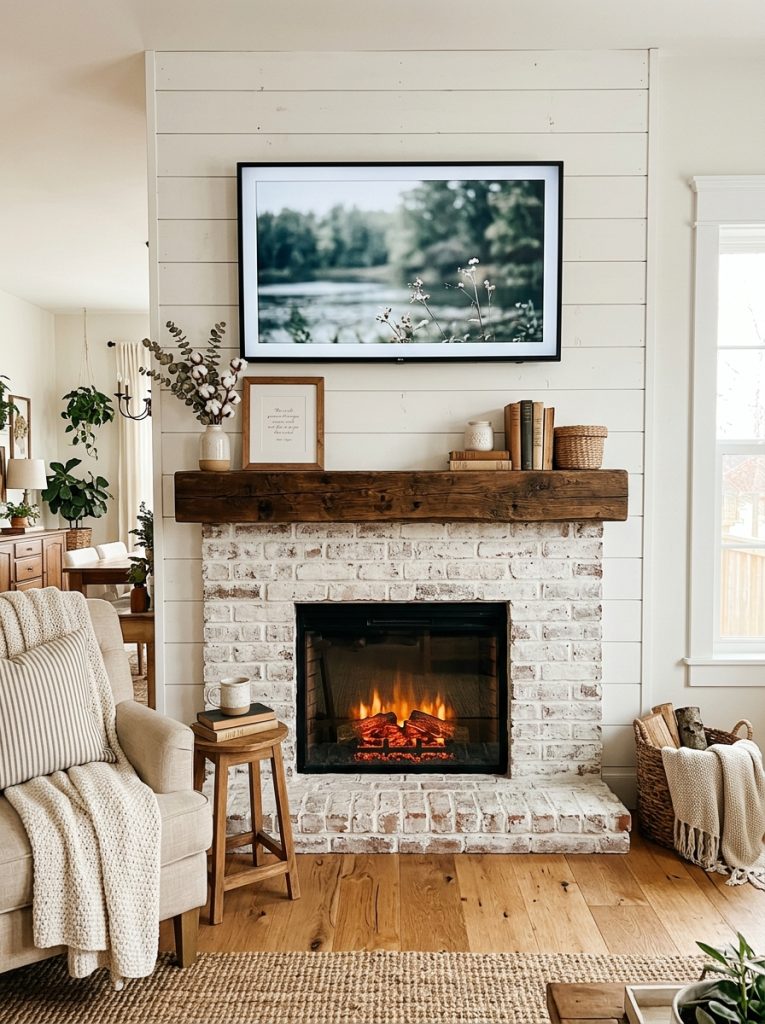
A farmhouse fireplace TV wall combines shiplap walls, a rustic wood beam mantel, and a brick or faux brick surround for a cohesive country home look. The key is layering textures — the smooth painted shiplap against the rough brick and raw wood beam reads as genuinely farmhouse rather than just decorated. Keep the color palette to white, cream, natural wood, and brick tones and the whole wall looks collected and authentic rather than theme-y.
Materials Needed:
- Shiplap panels
- Faux brick surround panels
- Reclaimed wood beam for mantel
- White paint
- Finish nails and construction adhesive
How to Make It:
- Install shiplap across the full wall painted white.
- Apply faux brick panels around the fireplace opening as the surround.
- Mount a thick reclaimed wood beam as the mantel shelf above the fireplace.
- Mount the TV above the mantel with cables hidden in the wall.
- Style the mantel with farmhouse decor — lanterns, greenery, simple framed art.
11. Build a Bedroom Fireplace TV Wall
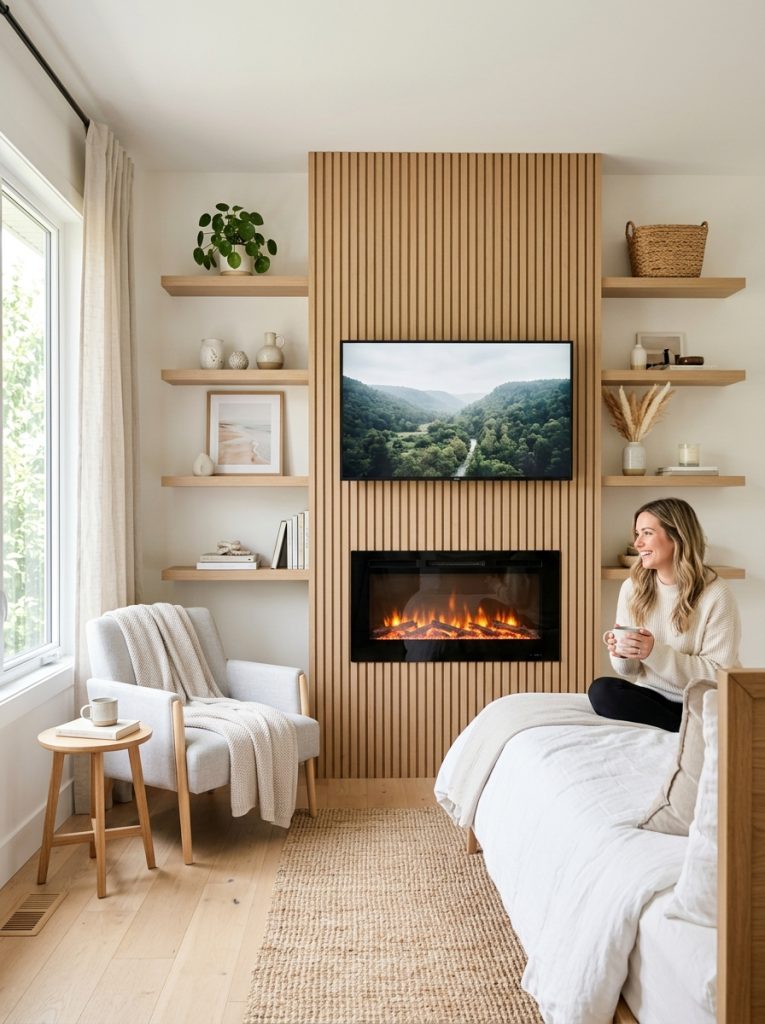
A bedroom fireplace TV wall is more intimate in scale than a living room version and works especially well with a wall-mounted electric fireplace insert. The insert mounts flush into a drywall surround, the TV goes above, and floating shelves on each side hold books and personal objects. Keep the bedroom version lower in height and less aggressive in scale — a bedroom wall should feel calm rather than imposing. For more bedroom ideas check out these bedroom inspiration ideas.
Materials Needed:
- Wall mounted electric fireplace insert
- Drywall for building the surround box
- Floating shelves
- Paint
- TV mount and cable management
How to Make It:
- Build a drywall surround box around the electric fireplace insert to give it a built-in appearance.
- Frame the surround with thin trim molding for a finished edge.
- Paint the surround and wall in the same bedroom color.
- Mount the TV above the surround and route cables through the wall.
- Add floating shelves on each side at proportions suited to the bedroom scale.
12. Build a Corner Fireplace TV Wall
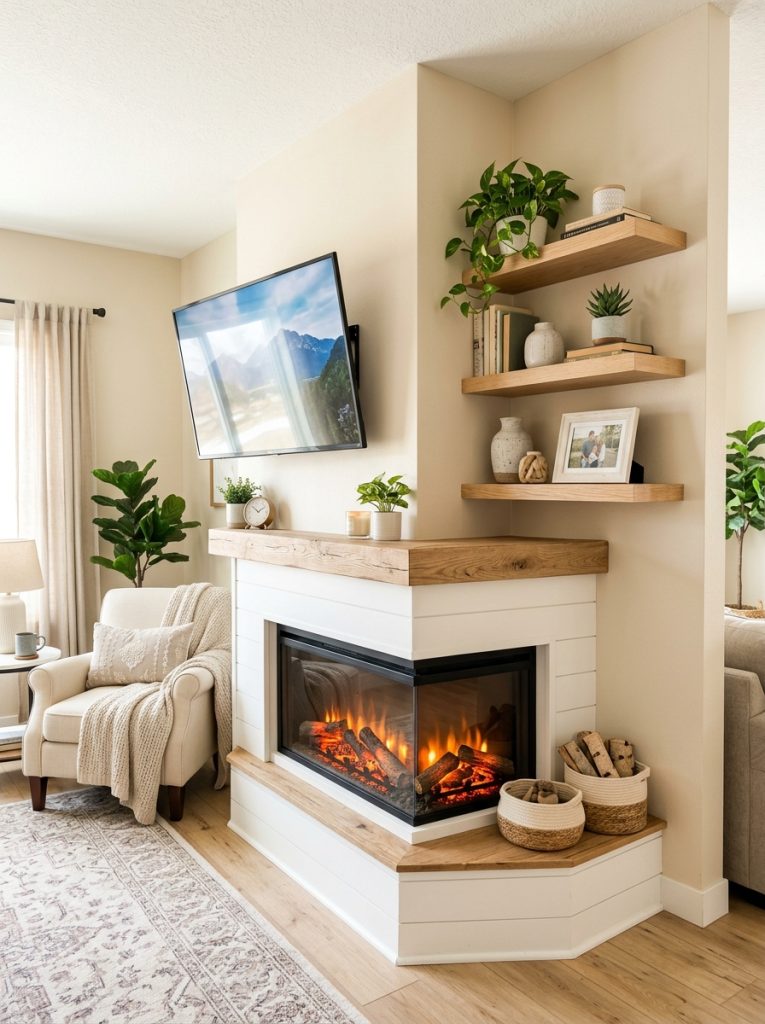
A corner fireplace TV wall makes use of the dead corner space that most rooms ignore. Build a corner surround from drywall or MDF at 45 degrees, install a corner electric fireplace insert, and mount the TV on an articulating wall mount that swings to face the main seating area. The corner position actually makes the fireplace visible from more angles in the room than a flat wall placement which is a genuine functional advantage.
Materials Needed:
- Corner electric fireplace insert
- MDF or drywall for corner surround
- Articulating TV wall mount
- Trim molding for surround edges
- Paint
How to Make It:
- Build a 45 degree corner drywall or MDF box sized to house the fireplace insert.
- Cut the front face of the surround at 45 degrees to present squarely into the room.
- Install the corner fireplace insert into the surround box.
- Mount an articulating TV mount on the adjacent wall above and to one side of the corner.
- Trim the surround with molding, paint, and add shelves on the adjacent walls.
13. Add Hidden Storage to a Fireplace TV Wall

Hidden storage in a fireplace TV wall is one of those features that impresses everyone who discovers it. Build false panel doors into the bookshelf sections that look like the back of the shelf but swing open to reveal a deep storage compartment behind. Push-to-open magnetic catches keep them looking seamless. Store charging equipment, important documents, seasonal decor, or anything that needs to disappear completely behind a wall that looks like pure shelving.
Materials Needed:
- Bookshelf wall build with deep sections
- Plywood for hidden door panels
- Push-to-open magnetic catches
- Piano hinges for door swing
- Paint to match shelf interior
How to Make It:
- Build the bookshelf sections with extra depth behind the shelf area — 12 to 16 inches of hidden space.
- Build a panel door from plywood that fits exactly inside the shelf opening.
- Attach the panel to the shelf frame with piano hinges so it swings inward.
- Install push-to-open magnetic catches so the door closes flush with no visible handle.
- Paint the door to exactly match the shelf interior so it is invisible when closed.
14. Build a Shiplap and Stone Fireplace TV Wall
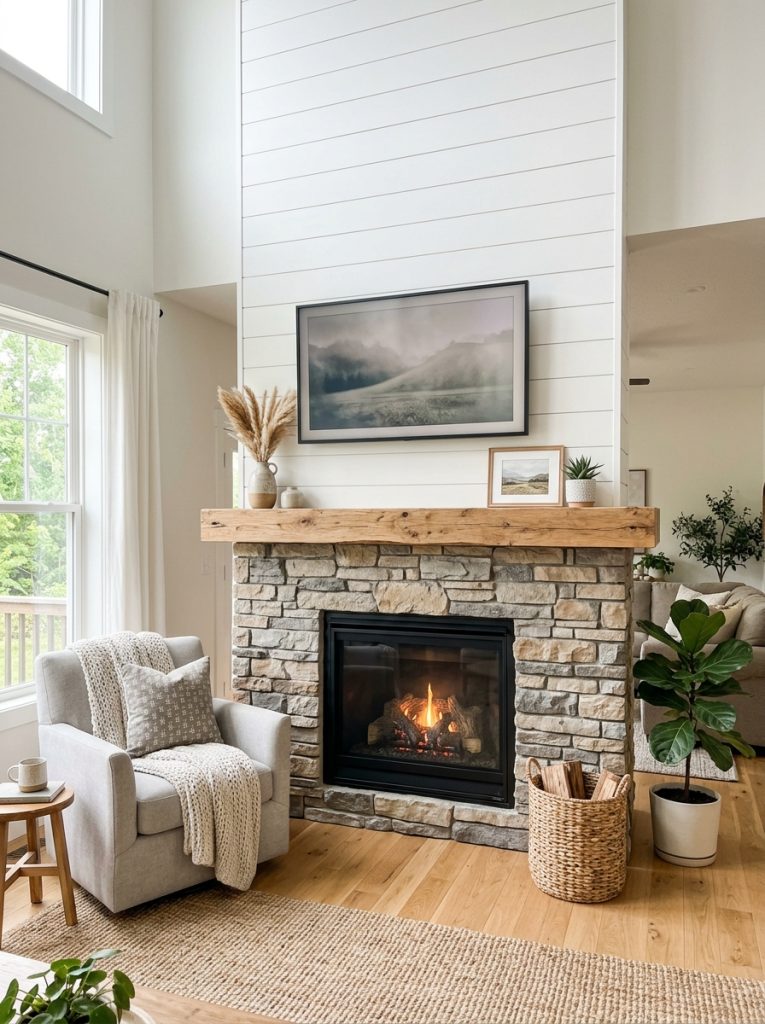
Combining shiplap and stone on the same fireplace TV wall gives the best of both materials — the warmth and texture of natural stone around the fireplace opening and the clean graphic quality of painted shiplap above and beside it. The transition line between stone and shiplap typically runs at mantel height which creates a natural visual division. This combination photographs extremely well and works in both farmhouse and contemporary settings depending on the stone and paint colors chosen.
Materials Needed:
- Shiplap panels for upper wall
- Stone veneer for fireplace surround
- Wood beam mantel
- White paint for shiplap
- Mortar or adhesive for stone
How to Make It:
- Install stone veneer around the fireplace opening up to mantel height.
- Mount the mantel shelf at the transition line between stone and shiplap.
- Install shiplap panels from the mantel height upward to the ceiling.
- Paint the shiplap in white or a soft neutral.
- Mount TV above the mantel and hide cables through the shiplap wall.
15. Build a Rock Fireplace TV Wall
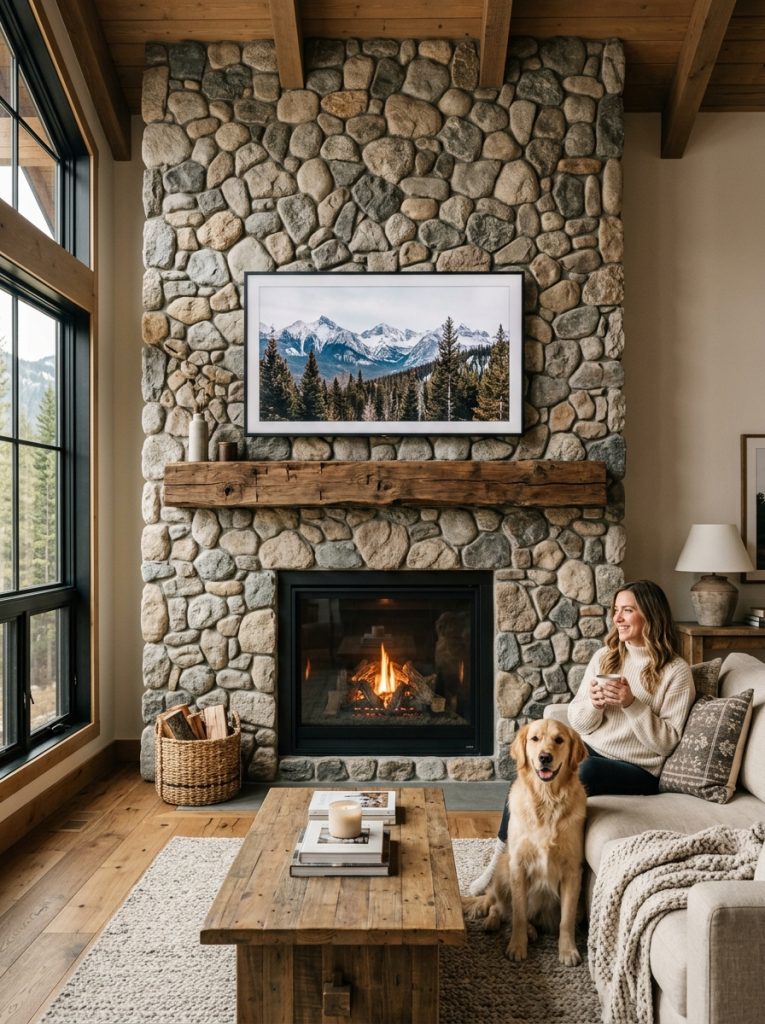
A full river rock fireplace TV wall is the most dramatic treatment on this list and reads immediately as a statement architectural feature. Apply individual river rocks with mortar to a cement board substrate — this is more time intensive than panel systems but the result is completely authentic natural stone that no panel can replicate. Work in small sections letting mortar set before adding more rocks and the wall builds up steadily over a weekend.
Materials Needed:
- River rock stones
- Cement board substrate
- Type S mortar
- Notched trowel and grout bag
- Stone sealer
How to Make It:
- Install cement board over the existing wall in the rock application area.
- Mix Type S mortar to a thick peanut butter consistency.
- Apply mortar to the back of each rock and press firmly to the cement board.
- Work from the bottom upward pressing rocks close together with consistent joint gaps.
- Fill joints with mortar using a grout bag, brush off excess before it sets, and seal the finished wall.
16. Build a Vaulted Ceiling Fireplace TV Wall
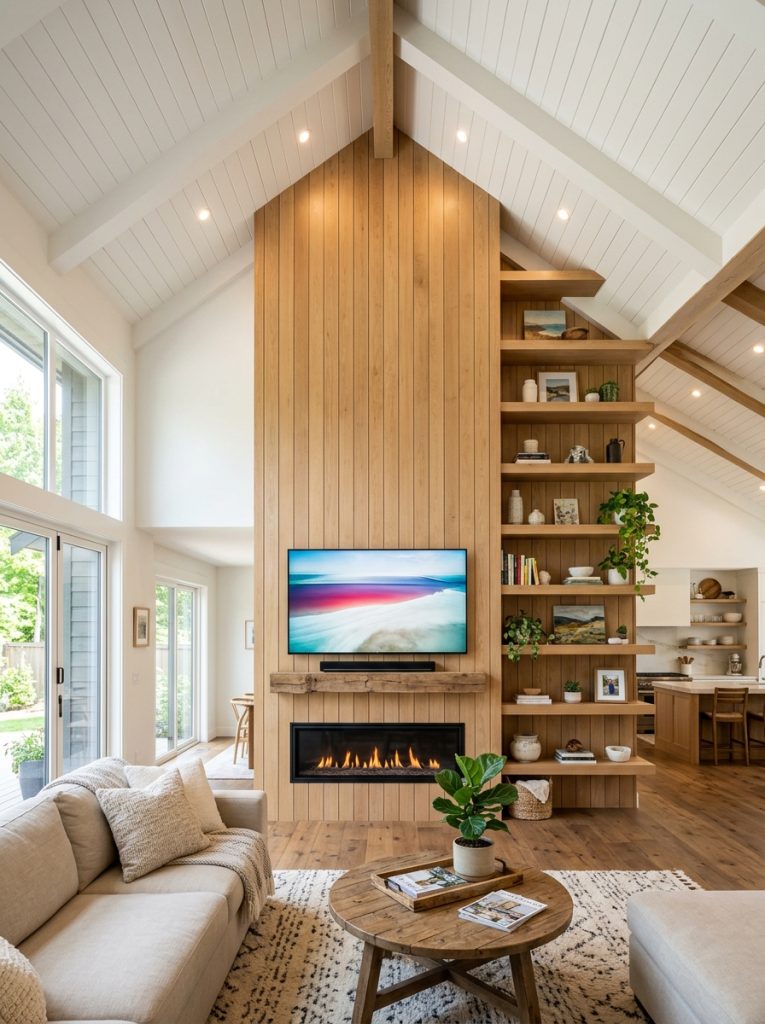
A fireplace TV wall on a vaulted ceiling wall requires planning the wall treatment to follow the ceiling angle rather than ending at a flat soffit. Let the shiplap or stone treatment run all the way to the angled ceiling line — the height makes the wall even more dramatic and the angled top edge adds an architectural detail that a flat wall never has. Keep the actual fireplace and TV at standard heights and let the wall treatment above them fill the dramatic vaulted space.
Materials Needed:
- Wall treatment panels (shiplap, stone, or brick)
- Angle finder for ceiling angle cuts
- Miter saw for angled cuts
- Level and chalk line
- Standard fireplace and TV mounting hardware
How to Make It:
- Measure the vaulted ceiling angle precisely with an angle finder.
- Set the miter saw to the ceiling angle for all top edge cuts.
- Install wall treatment panels from the floor upward cutting the top row to follow the vault angle.
- Build out the fireplace surround and mantel at standard heights.
- Mount the TV above the mantel and route cables down through the wall treatment.
17. Build a Slanted Ceiling Fireplace TV Wall
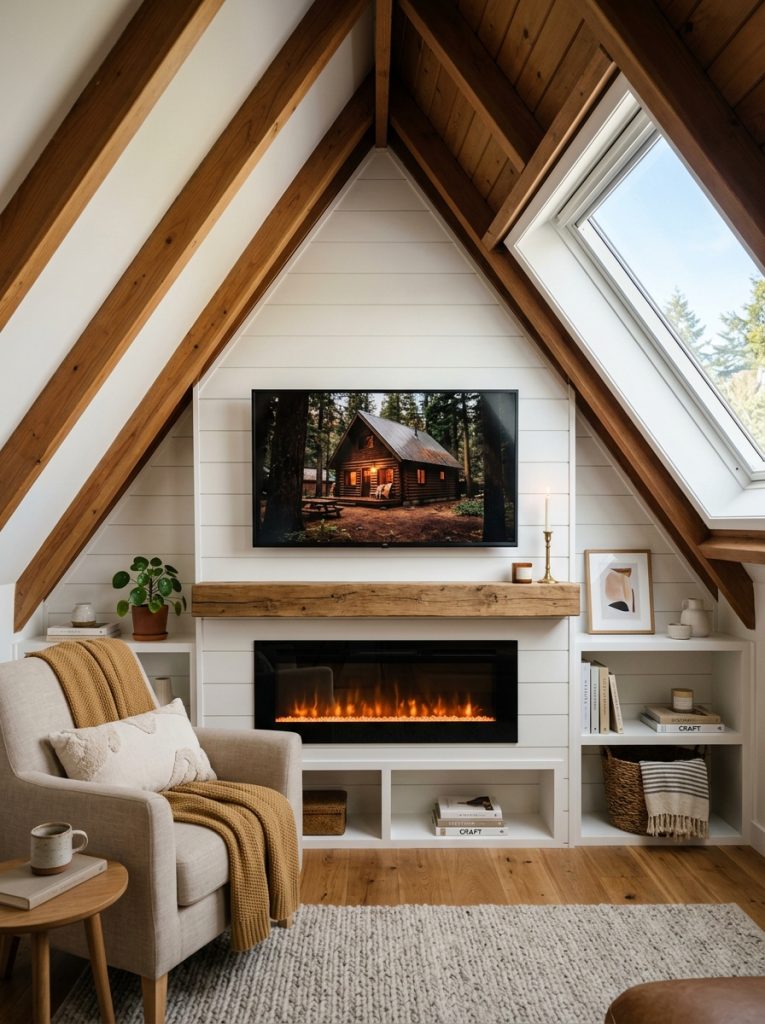
A slanted ceiling wall in an attic conversion or loft bedroom is one of the most challenging but rewarding fireplace TV wall builds. The key is keeping the fireplace insert and TV at proper viewing heights regardless of the ceiling line above them. Build a flat vertical section of wall for the TV and fireplace at the correct height and then handle the slanted transition to the ceiling with trim or a built-in bookshelf section that follows the slope.
Materials Needed:
- Wall framing lumber for flat vertical section
- Wall treatment of choice
- Fireplace insert
- TV mount
- Angled trim for ceiling transition
How to Make It:
- Frame a flat vertical wall section from the floor to the height needed for the TV and fireplace.
- Apply the chosen wall treatment across this flat section.
- Build the transition from the flat wall top to the slanted ceiling with angled trim or a stepped bookshelf.
- Mount the fireplace insert and TV within the flat wall section at correct heights.
- Finish the ceiling transition with painted trim that follows the slope cleanly.
18. Build a Faux Hearth Below the Fireplace

A raised hearth below the fireplace opening adds an authentic architectural detail that flat floor-level fireplace TV walls lack. Build a simple platform from plywood faced with tile, slate, or stone veneer that extends forward from the fireplace into the room by 12 to 16 inches. The raised hearth also acts as a natural visual base for the whole fireplace TV wall composition making the entire wall feel more grounded and substantial.
Materials Needed:
- Plywood for hearth platform frame
- Tile, slate, or stone veneer for facing
- Tile adhesive and grout
- Tile saw
- Bullnose tile for front edge
How to Make It:
- Build a plywood platform box at your desired hearth height — typically 6 to 8 inches.
- Cover the top and front face with cement board for tile adhesion.
- Apply tile adhesive and set tiles across the top and front face of the hearth.
- Use bullnose tiles on the front edge for a clean finished profile.
- Grout all joints, seal the tile, and allow to cure fully before placing any objects on the hearth.
19. Build a Tall Ceiling Fireplace TV Wall
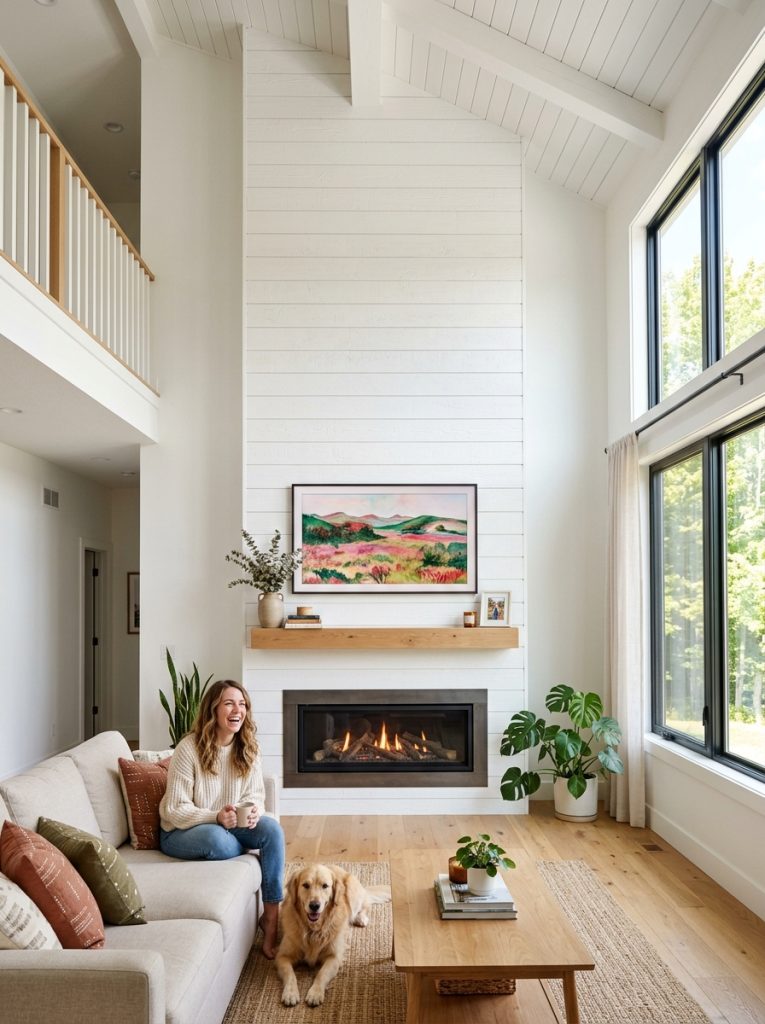
Tall ceilings give a fireplace TV wall its most dramatic potential. Run the wall treatment from the floor to the full ceiling height and the wall becomes a genuine architectural statement. For very tall walls above the TV and mantel use large scale art, a mirror, or a decorative panel to fill the upper section rather than leaving a vast expanse of plain wall treatment. The scale of tall ceiling rooms requires bolder decisions to keep the fireplace wall from looking small or unfinished.
Materials Needed:
- Wall treatment panels cut for full ceiling height
- Scaffold or tall ladder for installation
- Large format art or mirror for upper section
- All standard fireplace TV wall components
How to Make It:
- Install the wall treatment from the floor to the full ceiling height working in sections.
- Rent a scaffold for anything above 10 feet for safe installation.
- Place the fireplace and mantel at standard heights regardless of ceiling height.
- Fill the wall area above the TV with a large format mirror, oversized art, or decorative panels.
- Ensure the upper section is visually balanced with the lower fireplace TV section.
20. Follow a Step by Step Plan for the Whole Build
The most important step in any fireplace TV wall build is planning before touching a single tool. Draw the full wall to scale on paper — mark stud positions, fireplace dimensions, TV size, shelf heights, and cabinet positions. A clear plan prevents expensive mistakes and makes the build faster because every decision has already been made. Measure twice for every cut, work from the floor up on all treatments, and finish one section completely before moving to the next. The result always looks more professional when built from a clear plan.
Materials Needed:
- Graph paper for planning
- Measuring tape and stud finder
- Full materials list based on your plan
- All selected wall treatment, shelving, and hardware
How to Make It:
- Measure the wall precisely — width, height, and fireplace opening dimensions.
- Draw the wall to scale on graph paper marking stud positions and all planned elements.
- Make a complete materials list from the drawing before buying anything.
- Install wall treatments first, then fireplace surround, then mantel, then shelves, then TV last.
- Hide cables as the final step before styling the finished wall with decor.
Final Thoughts on DIY Fireplace TV Wall
A fireplace TV wall is the most impactful single project you can do in a living room. The planning and build take a weekend or two but the result changes the room permanently and adds genuine value to the home. Pick the style that fits your room — shiplap farmhouse, stone modern, full bookshelves, or a corner build — draw your plan, get your materials, and start building.

Amir Ali is the founder and site administrator of HomeDecorEdge, a modern home decor and interior design platform. Since starting the site, he has combined his passion for interior design, practical styling, and color coordination with hands-on content strategy and site management. He guides authors, curates high-quality articles, and ensures readers have access to actionable, visually inspiring, and user-focused home decor advice for apartments, small rooms, and family homes.