

Every camper owner hits the same wall eventually: the cabinets are full, the bed swallows gear that never comes back out, and something in the back always rattles loose the moment you hit a gravel road. 15 camper storage ideas can turn a cramped travel trailer, fifth wheel, or small motorhome into a space that stays organized at the campsite and secure on the highway, and the fix usually costs less than a tank of gas.
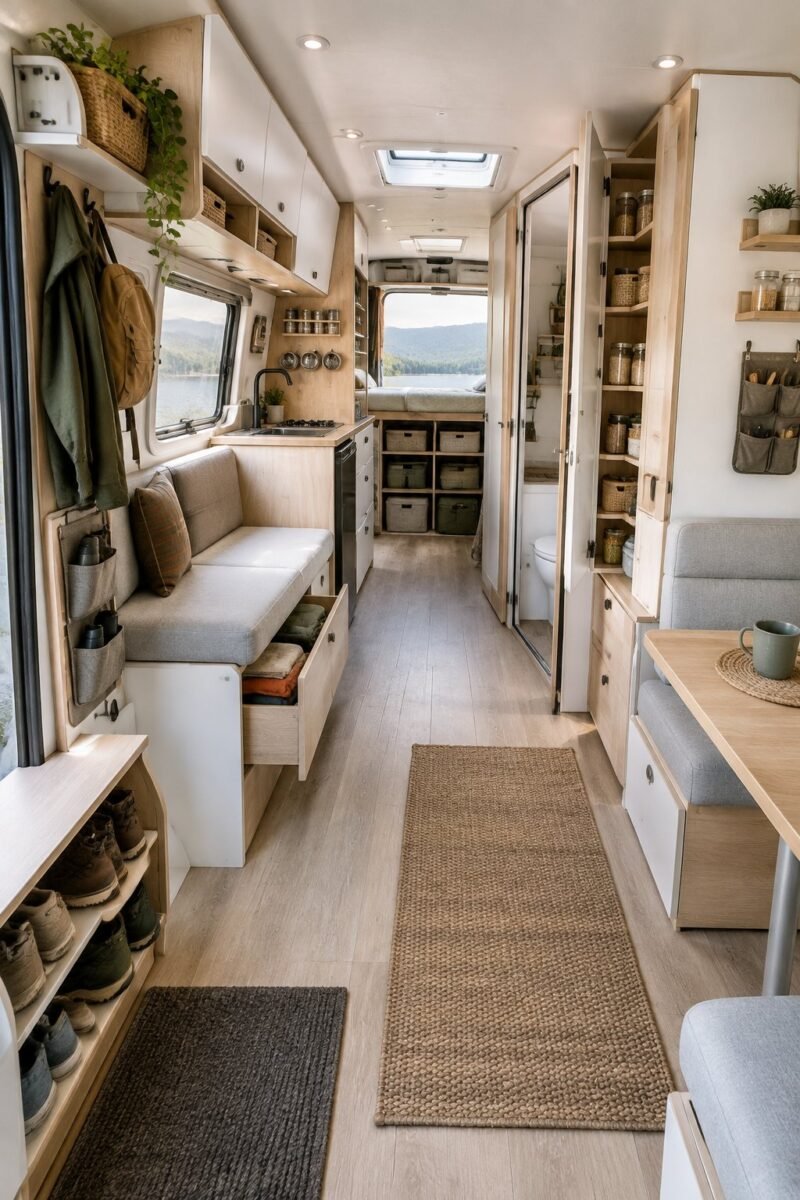
I’ve spent enough weekends chasing rolling cans out from under a dinette to know that storage in a small rig has two jobs. It has to hold your gear neatly at the campsite, and it has to keep that same gear from becoming a projectile at 65 miles per hour. The ideas below cover both, from under-bed platforms to pass-through basements, with notes on what’s renter-friendly and what calls for a drill.
If you’re outfitting a new-to-you trailer or just tired of digging through the same overstuffed cabinet, these fixes are worth an afternoon of your time. Grab a tape measure and a cup of coffee, and let’s get your rig road-ready.
1) Raised Under-Bed Platform With Adjustable Shelving
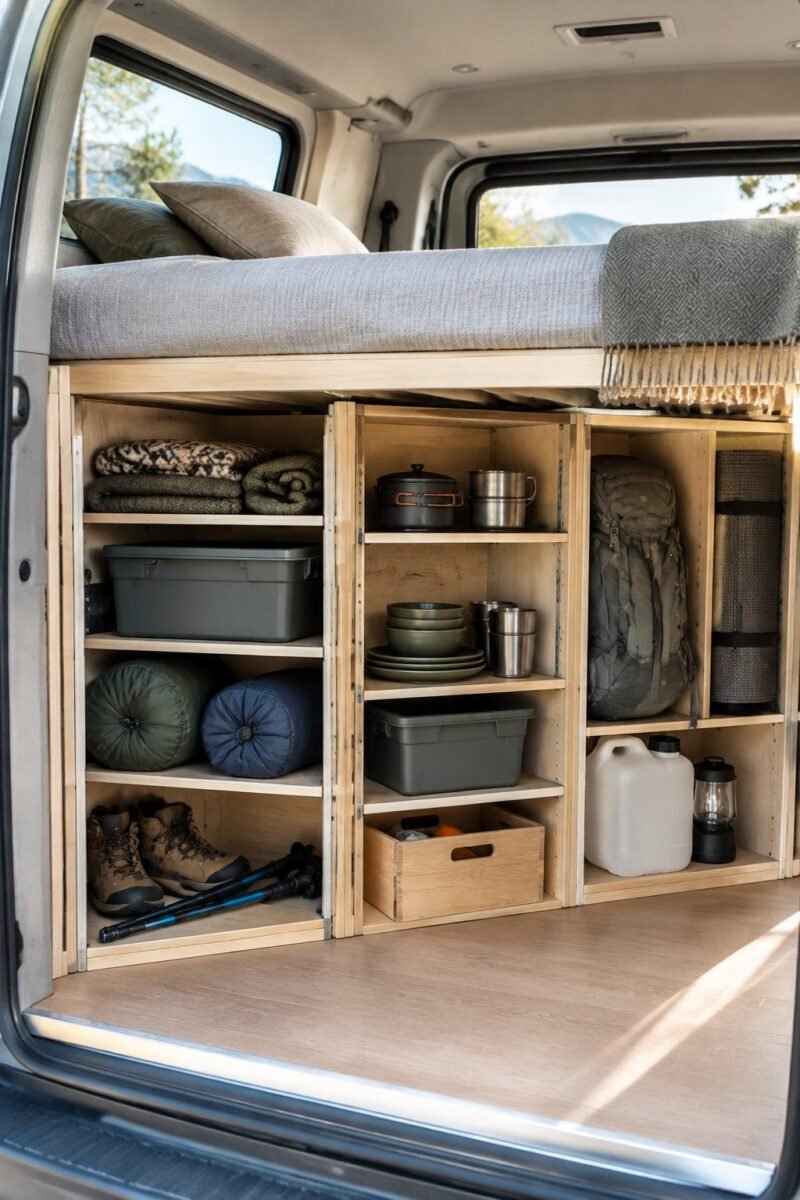
Raising your bed frame a few inches and adding adjustable shelving underneath turns wasted void space into your biggest storage win. Many campers already have a lifted bed platform with room for bins, but loose adjustable shelves let you customize the height for boots, totes, or a small dresser.
Measure your clearance before buying anything. Six inches fits shoe bins; sixteen inches fits camp chairs and a folded table.
Secure shelves to the platform frame with L-brackets rather than letting them float, and add a lip or rail along the open edge so bins can’t slide out during travel. Use stackable bins with locking lids instead of open boxes; open totes dump their contents the first time you take a sharp curve. Label each bin by category (bedding, tools, off-season clothes) so you’re not unloading the whole cavity to find one item.
2) Inside Cabinet-Door Command Center With Adhesive Pockets
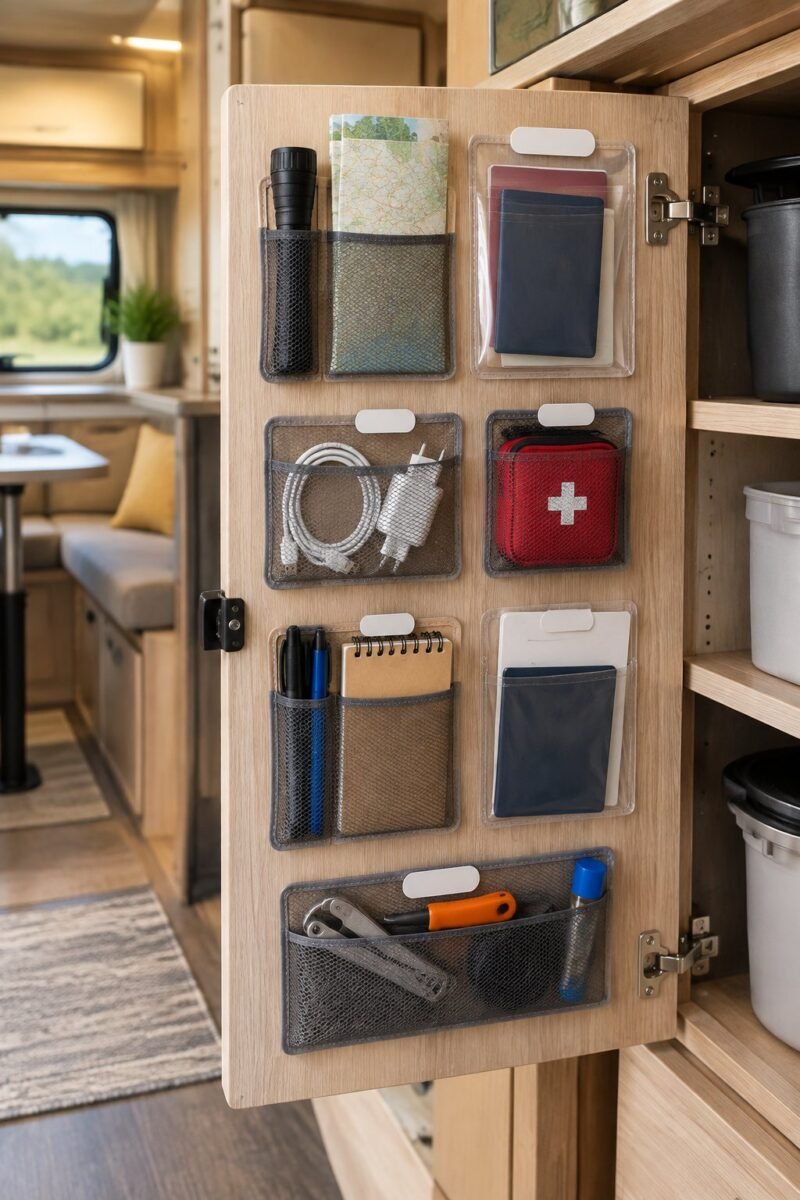
Adhesive pockets and small clear bins mounted to the inside of a cabinet door claim storage space you’re already paying for but never using. This spot works well for maps, sunglasses, chargers, headlamps, and other small items that otherwise sink to the bottom of a junk drawer.
Choose pockets rated for the door’s weight limit, and skip anything heavier than a paperback book or a coiled cable. Stick pockets to a clean, dry surface and let the adhesive cure for 24 hours before loading them, since heat and humidity inside a parked camper can weaken adhesive bonds early.
Test the door swing with everything loaded. Overstuffed pockets can catch on countertops or block the door from closing flush, which stresses the hinge over time. This setup is fully removable, making it a favorite for renters and full-timers alike.
3) Full-Extension Pull-Out Shelves for Deep Galley Cabinets
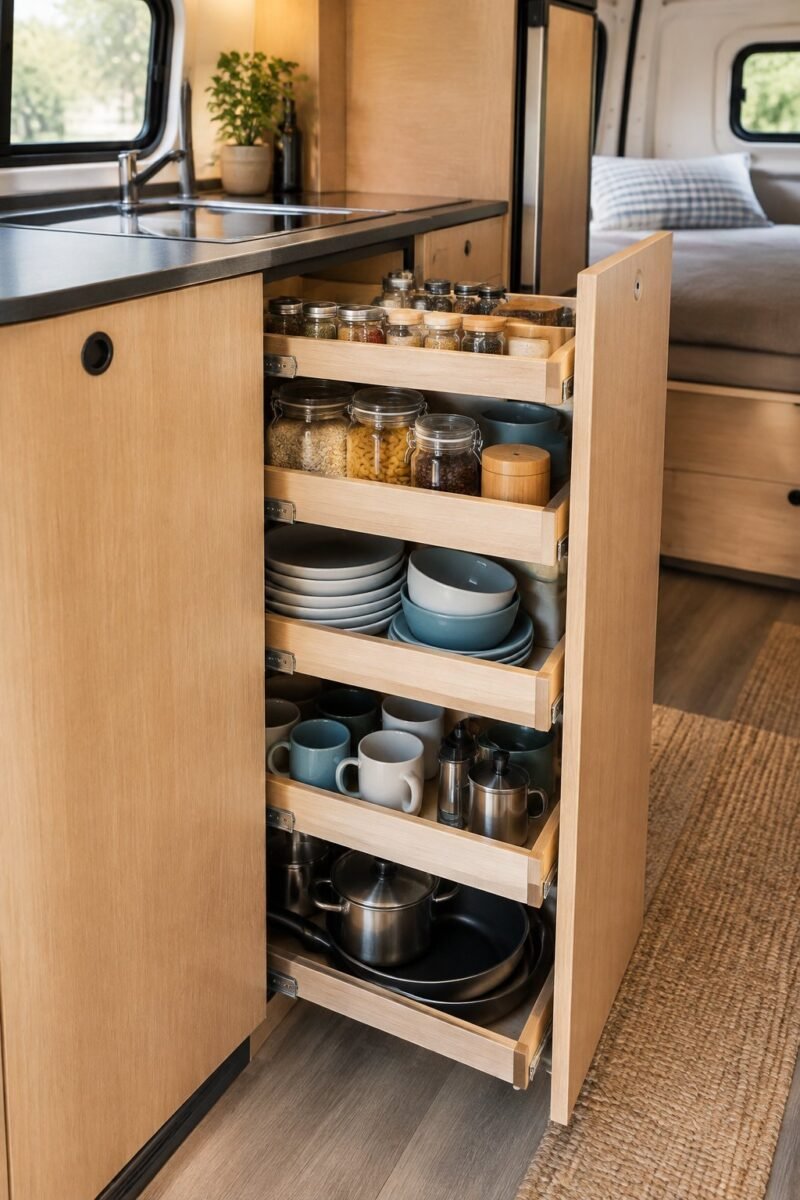
Full-extension pull-out shelves solve the classic deep-cabinet problem where the back third of the space becomes a graveyard for pans you never see again. Sliding shelves bring everything to arm’s reach instead of forcing you to kneel and dig.
Look for slides rated for at least 75 pounds if you’re storing cast iron or a stack of canned goods. Install a positive-latch catch, not just a magnet, so the shelf can’t roll open on a rough road and dump cookware onto the cabinet floor.
Add a low front lip to each shelf tier to catch small items like lids or spice jars. This upgrade requires drilling into the cabinet interior, so it’s best for owners who plan to keep the rig long-term rather than a weekend rental setup.
4) Clear Stackable Pantry Bins With Non-Slip Liners
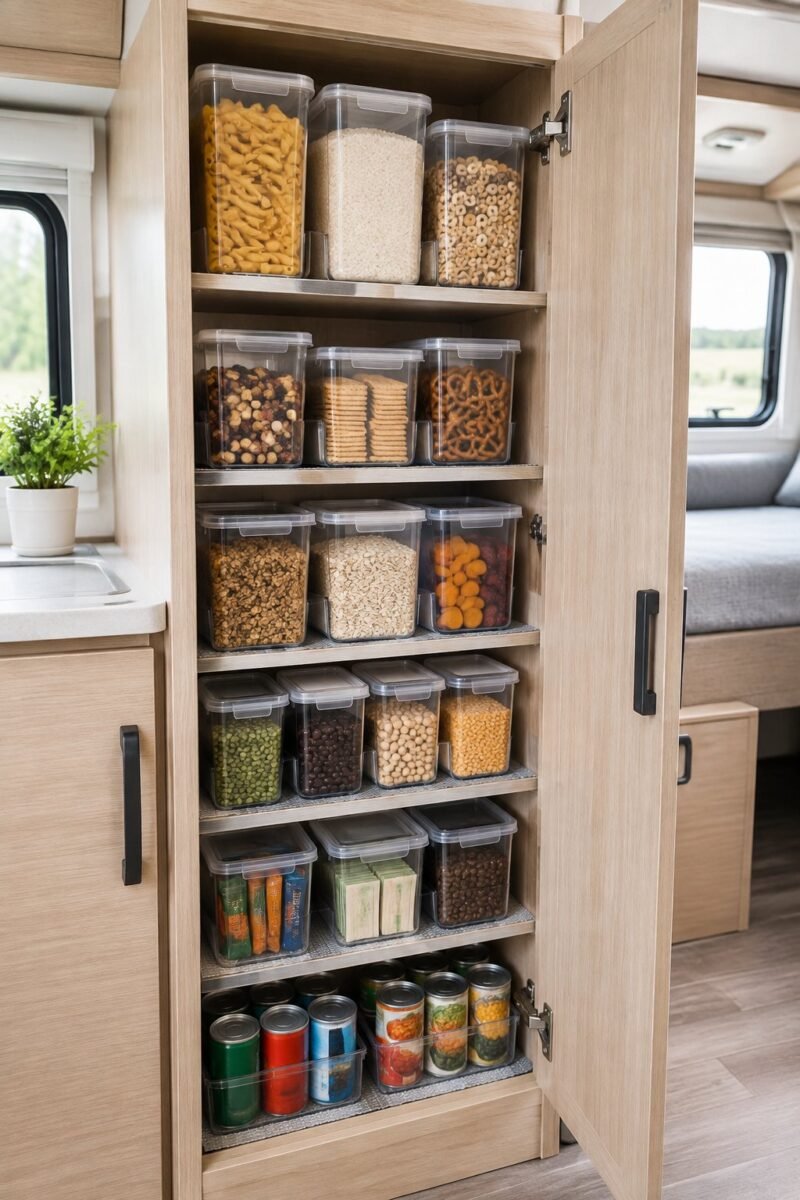
Clear stackable bins with non-slip shelf liners keep dry pantry goods visible and steady instead of sliding around every time the cabinet door opens. Seeing contents at a glance saves you from opening five containers hunting for pasta.
Choose bins with snap-lock lids for anything prone to spilling, like rice, cereal, or coffee grounds. A thin rubber shelf liner under each bin adds just enough grip to stop sliding on cornering, without needing any hardware.
Stack by weight, heaviest on the bottom, and keep the stack no more than three bins tall in a cabinet under six feet, so nothing topples when you brake. Uniform bin sizes stack more securely than mismatched containers and make better use of every inch of shelf height.
5) Tension-Rod Dividers for Pots, Pans, and Cutting Boards
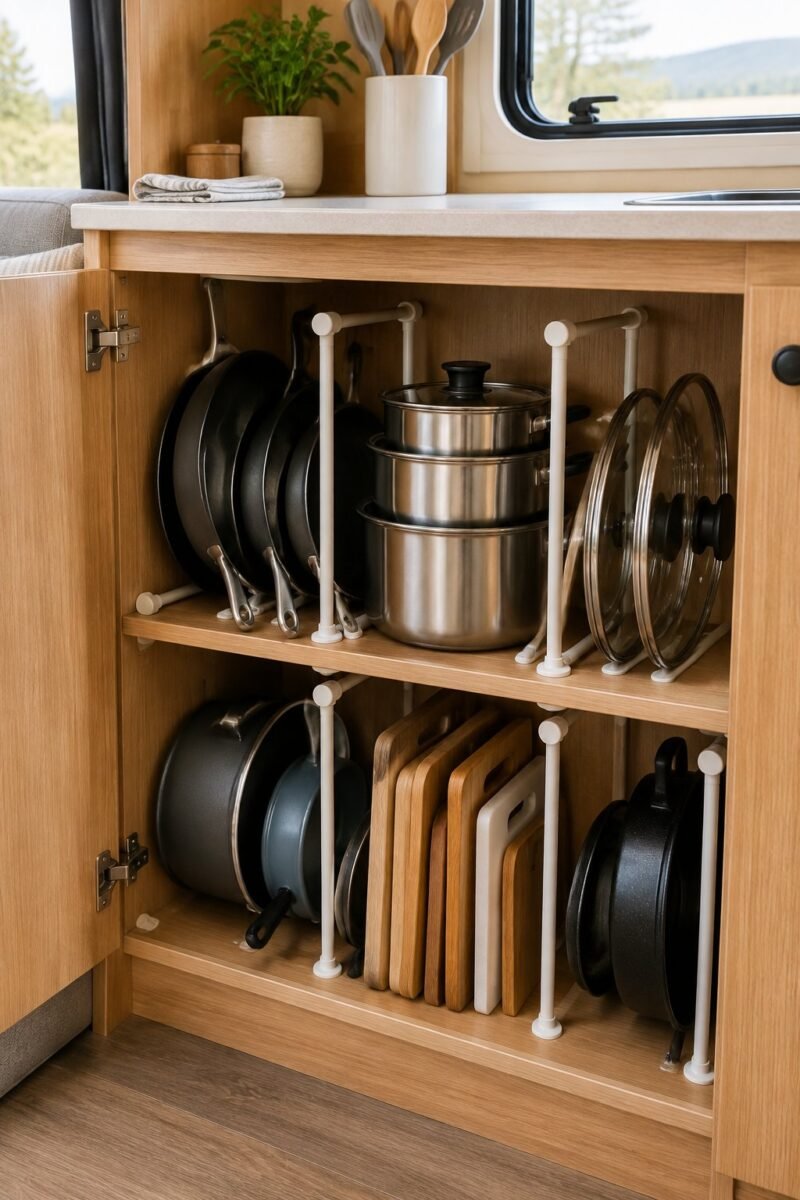
Spring-loaded tension rods installed vertically inside a cabinet create narrow slots that keep pans, lids, and cutting boards standing upright instead of stacked and sliding. This trick works especially well in the awkward cabinet next to a stove where flat stacking wastes space.
Pick rods with rubberized tips so they grip cabinet walls without denting the laminate, and press-fit them tightly enough that they don’t loosen from vibration on gravel roads. Test the fit by pushing hard against each rod before you load anything behind it.
Group similar shapes together (baking sheets on one side, cutting boards on the other) since mixed shapes tend to lean and jam. This is one of the cheapest fixes on this list and requires zero drilling, making it ideal for both rented and owned campers.
Start Your 30-Day Home Reset
Stop waiting for a "perfect" free weekend. Grab the 30-day plan and start feeling lighter in your own home by tomorrow.
View the 30-Day Plan Printable PDF · Instant download6) Over-the-Door Shoe Organizer for Bath and Closet Supplies
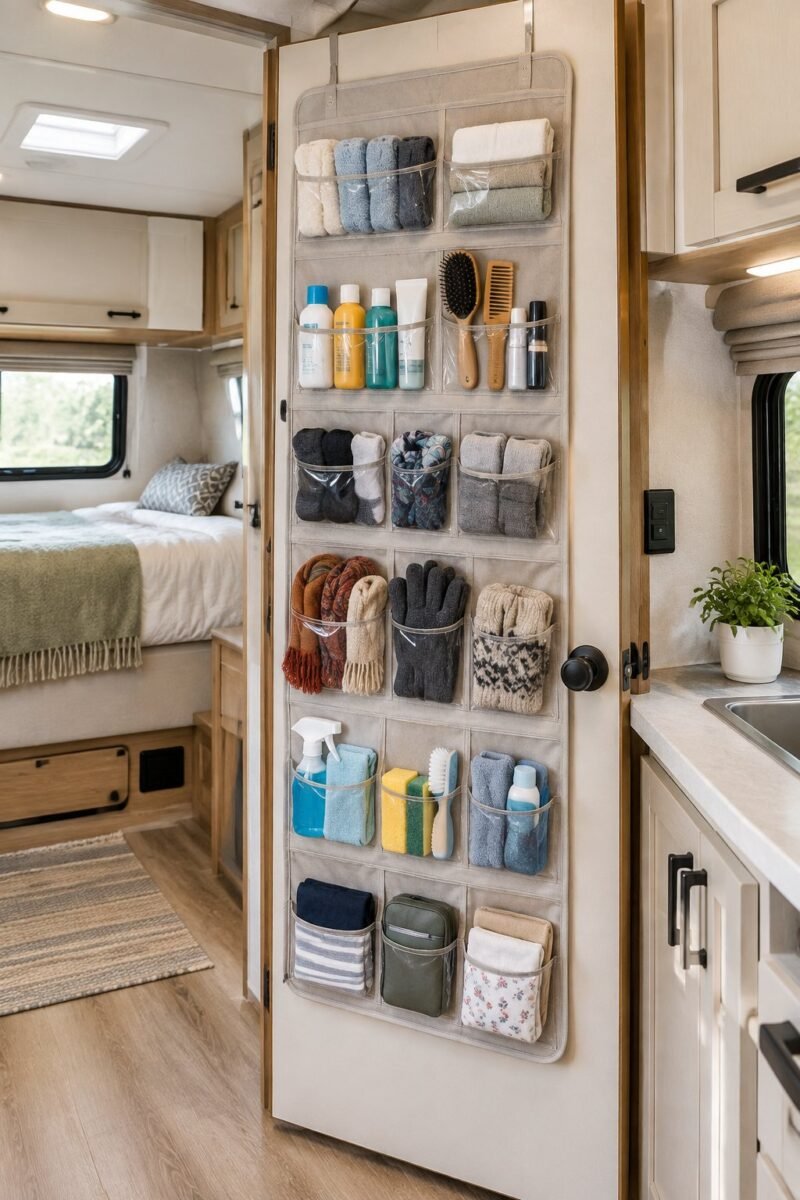
A fabric over-the-door shoe organizer turns the back of a bathroom or closet door into a wall of small-item storage without touching a single screw. It’s ideal for travel-size toiletries, rolled washcloths, cleaning supplies, or first-aid items you want visible and grabbable.
Choose a lightweight canvas version over vinyl in humid climates, since vinyl pockets can trap moisture against the door finish. Hook styles that clip over the door top are the most renter-friendly option and come off in seconds when you move out or sell the rig.
Keep heavier items like bottles of cleaner in the lower pockets, closer to the hinge side, so the door doesn’t feel unbalanced when swinging shut on a bumpy site.
7) Vacuum-Seal Bags for Linens and Seasonal Clothing
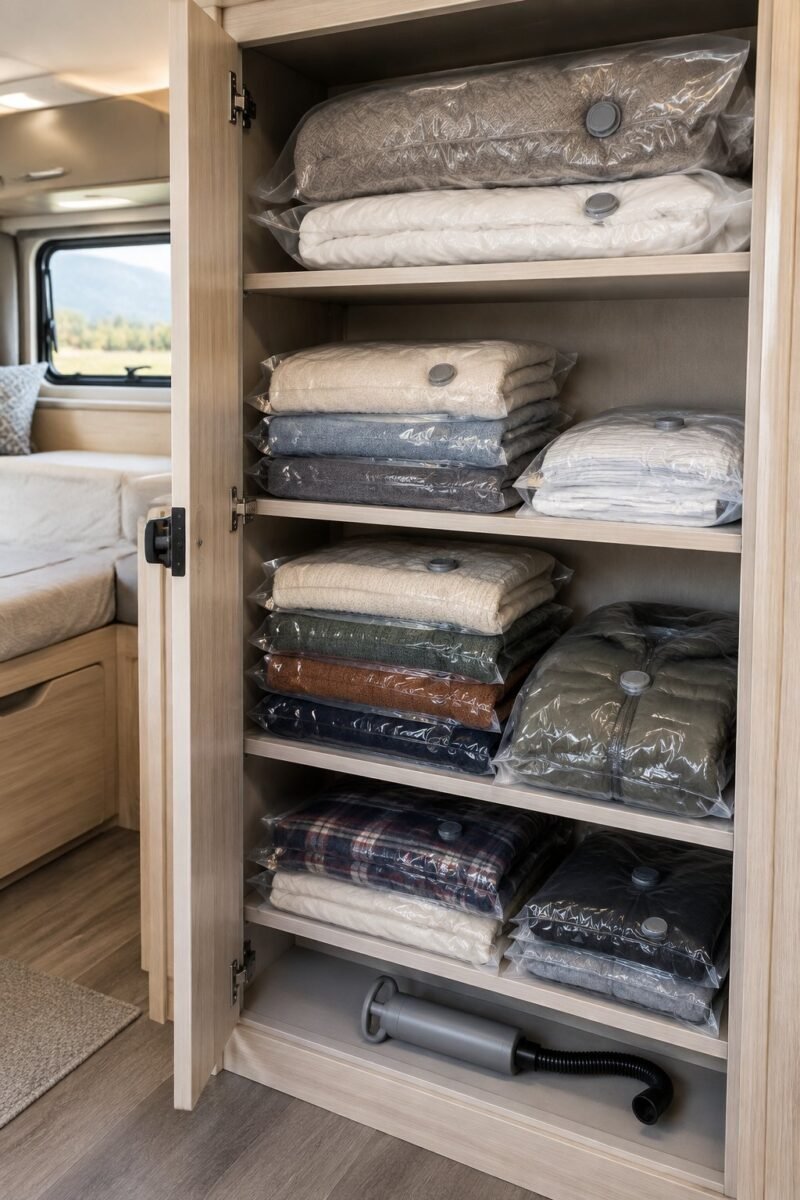
Vacuum-seal bags compress bulky linens, blankets, and off-season clothing down to a fraction of their normal size, freeing up cabinet and under-bed room for gear you use every trip. A queen comforter that eats an entire shelf can shrink to the size of a throw pillow.
Use bags with a one-way valve and a manual hand pump if you don’t want to rely on an electric vacuum while boondocking. Store sealed bags flat rather than crushed into a corner, since folded creases in a compressed bag can weaken the seal over time.
Check bags every few months for slow air leaks, especially in humid storage compartments, and re-seal as needed. This is a low-cost fix that works equally well for full-timers rotating seasonal wardrobes and weekend campers stashing extra bedding.
8) Hanging Fabric Closet Shelves for Folded Clothes
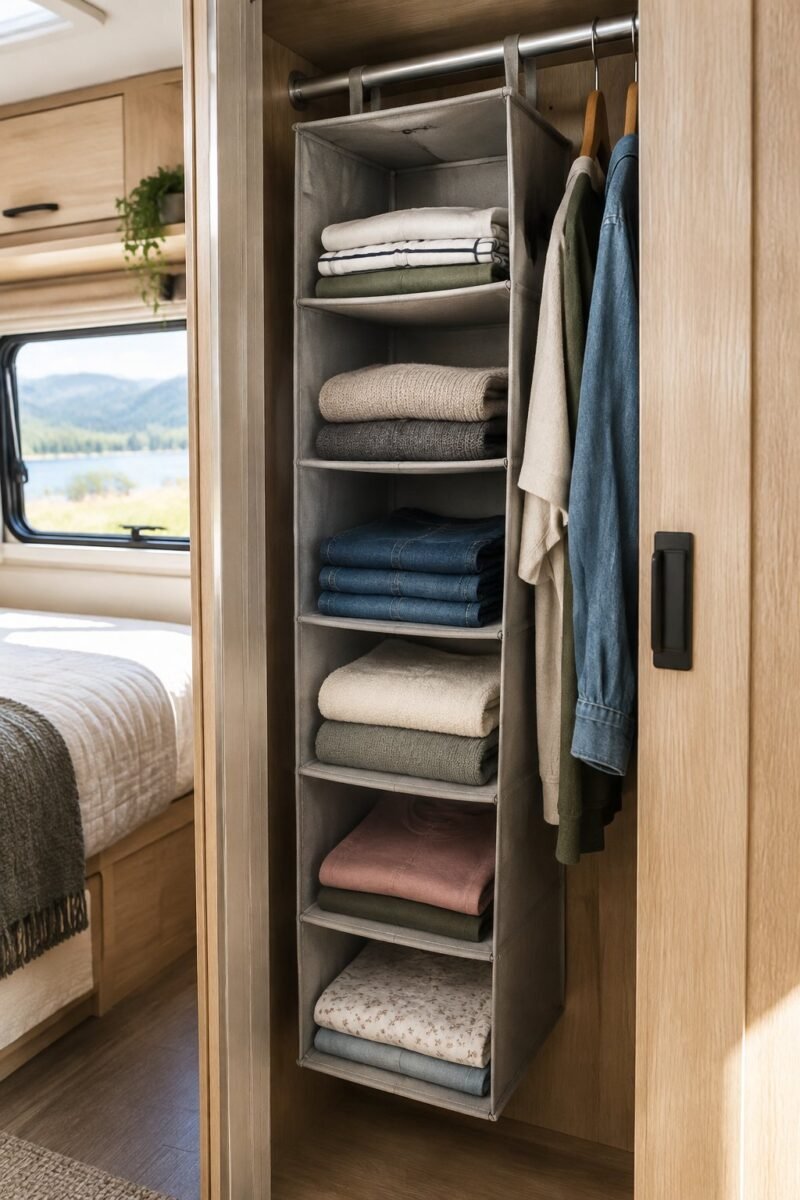
A hanging fabric shelf unit clipped to the closet rod adds four to six horizontal shelves in the vertical space most campers waste on a few hanging shirts. It’s a quick way to fit folded clothes, towels, or shoes without adding a single shelf bracket to the wall.
Choose a unit with reinforced cardboard or plastic inserts in each shelf tier so folded stacks keep their shape instead of sagging into a hammock shape. Keep the loaded weight modest, since these units hang entirely from the closet rod and can pull it loose if overloaded on rough roads.
This setup is fully removable and travels well between rigs, making it a strong pick for renters, seasonal campers, and anyone still deciding how they want to configure a permanent closet system.
9) Under-Sink Tension Rod for Spray Bottles
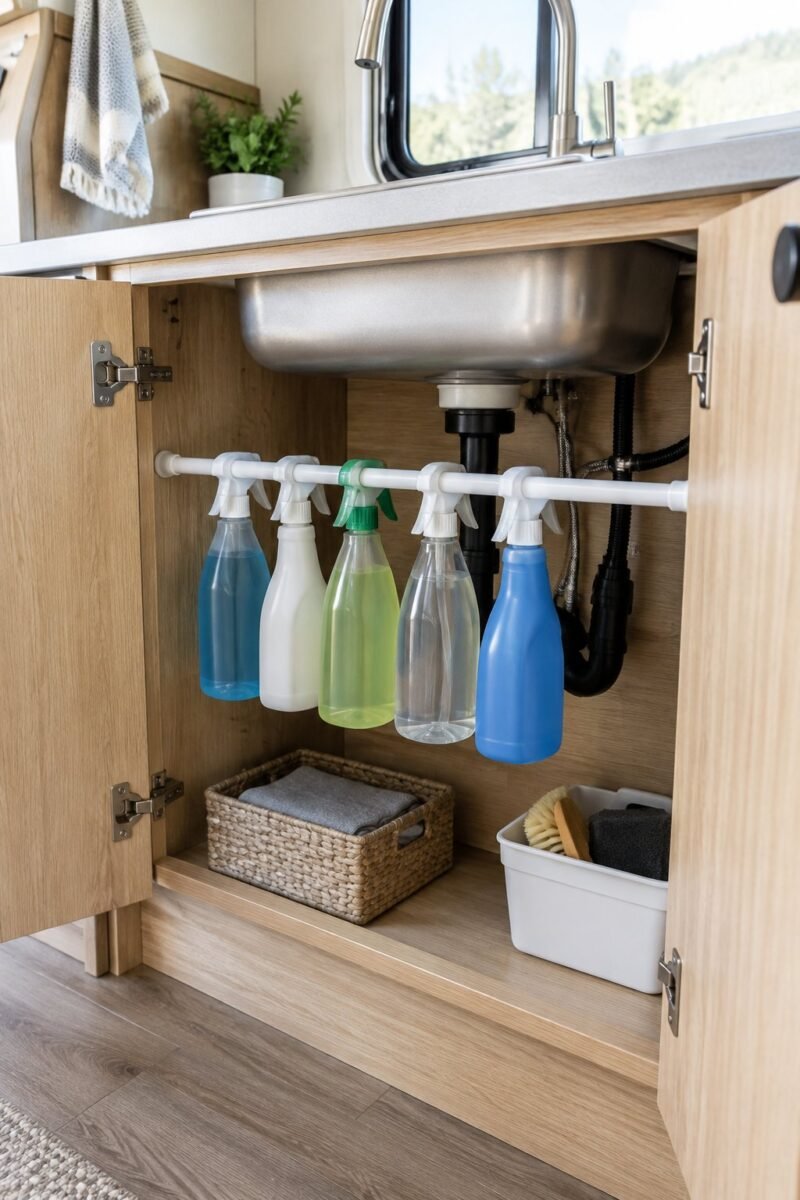
A single tension rod mounted low inside the under-sink cabinet lets you hang spray bottles by their trigger handles, clearing the cabinet floor for bins or trash storage. This is one of the simplest fixes on this list and takes about five minutes to install.
Position the rod low enough that bottle bottoms clear the cabinet floor by an inch or two, so nothing drags or tips during travel. Choose bottles with sturdy trigger necks; flimsy handles can bend or snap under the bottle’s weight over a long drive.
Pair this with a small tray underneath to catch drips and protect the cabinet floor from moisture damage, a common issue in under-sink storage where leaks go unnoticed until the laminate swells.
10) Suction-Cup Shower Caddy for Toiletries
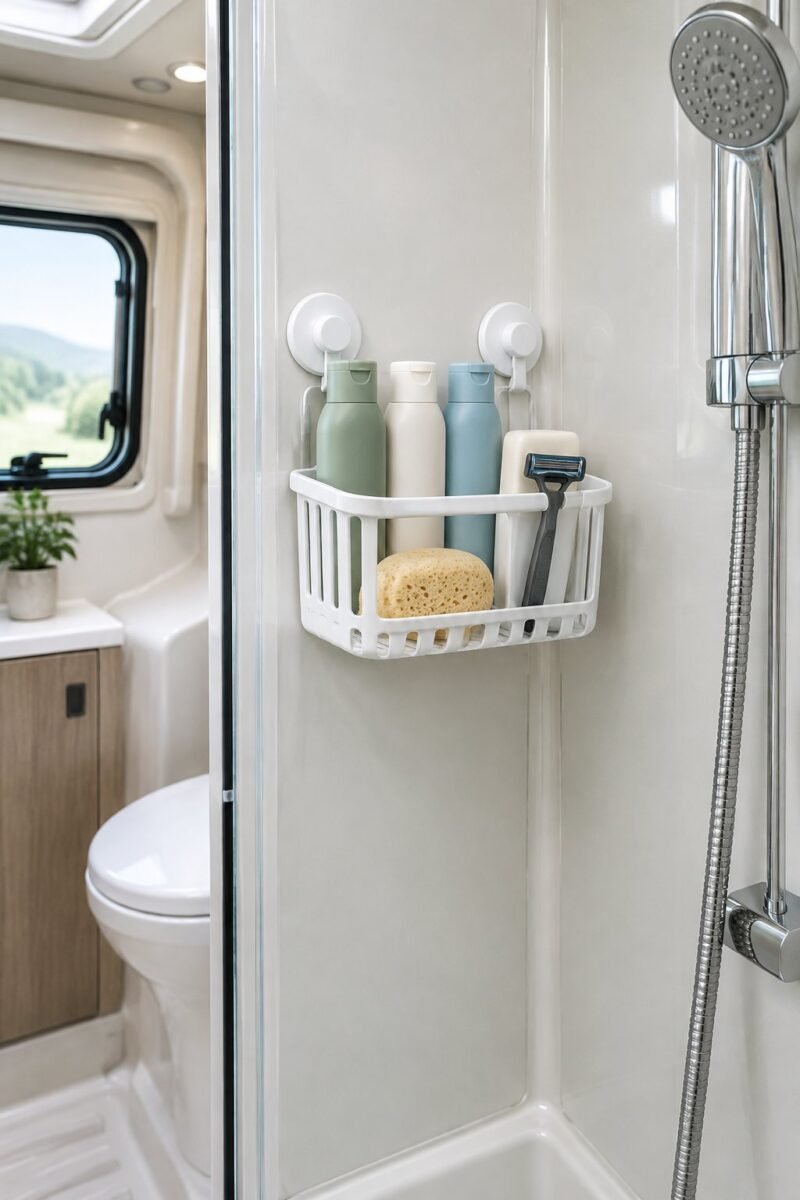
A suction-cup shower caddy holds shampoo, soap, and razors off the tiny shower floor or corner shelf, which matters in a wet bath where every surface is prone to slipping and pooling water. Suction mounts avoid drilling into fiberglass shower walls, which can crack the gel coat.
Clean the mounting surface with rubbing alcohol before pressing the suction cups on, since soap residue is the most common reason these caddies fall off mid-trip. Choose a caddy with drainage holes so it doesn’t collect standing water and mildew.
Check the suction seal before every trip, not just at setup, since temperature swings inside a closed-up rig can weaken the grip over a season of storage.
11) Magnetic Spice Tins on a Metal Cabinet Panel
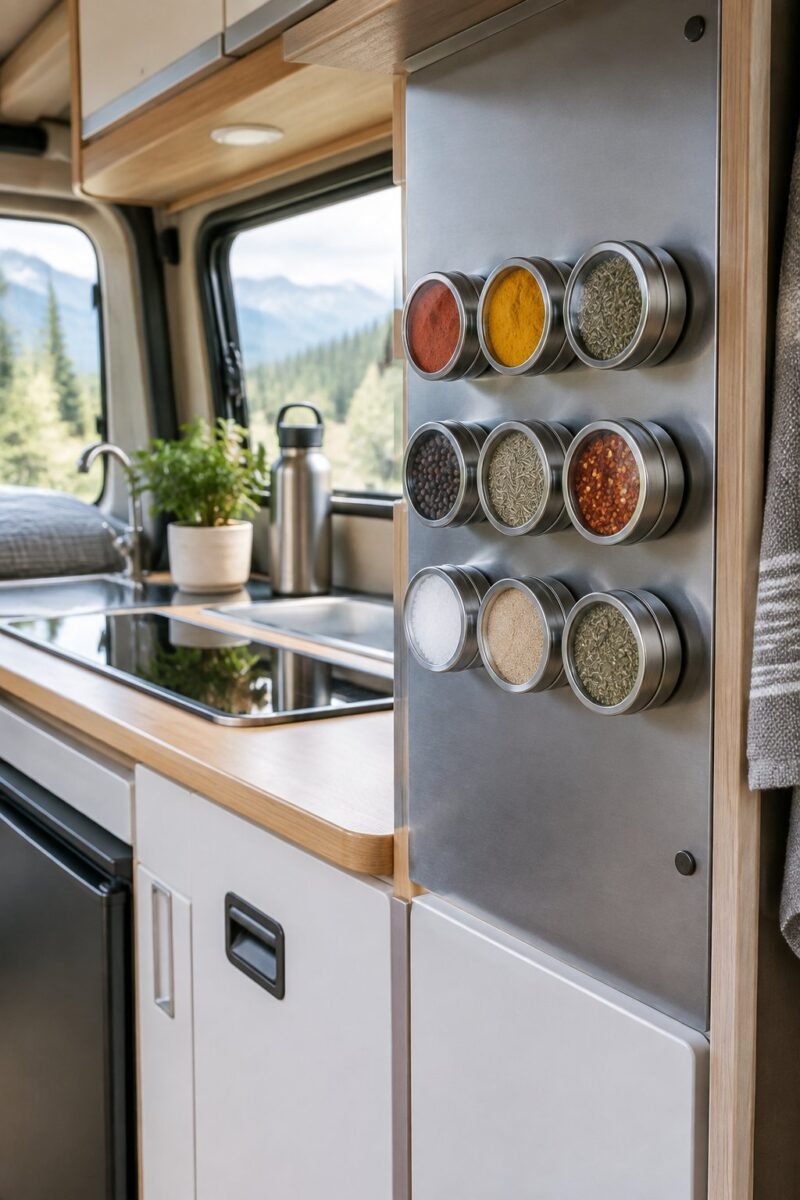
Magnetic spice tins stuck to a metal cabinet panel or refrigerator side clear an entire shelf of small jars while keeping seasonings visible and secure during travel. Many camper galleys have at least one metal surface, often the fridge side, that’s sitting unused.
Test your surface with a refrigerator magnet first; some panels are aluminum or laminate-covered and won’t hold. Choose tins with a strong magnetic base rather than adhesive-backed magnets, which weaken faster in a kitchen’s heat and humidity.
Label tin lids from above, since side labels disappear once tins are packed close together. This idea costs very little and adds almost no bulk, which makes it worth doing even if you only have room for four or five spices.
12) Collapsible Silicone Food Containers in Overhead Cabinets
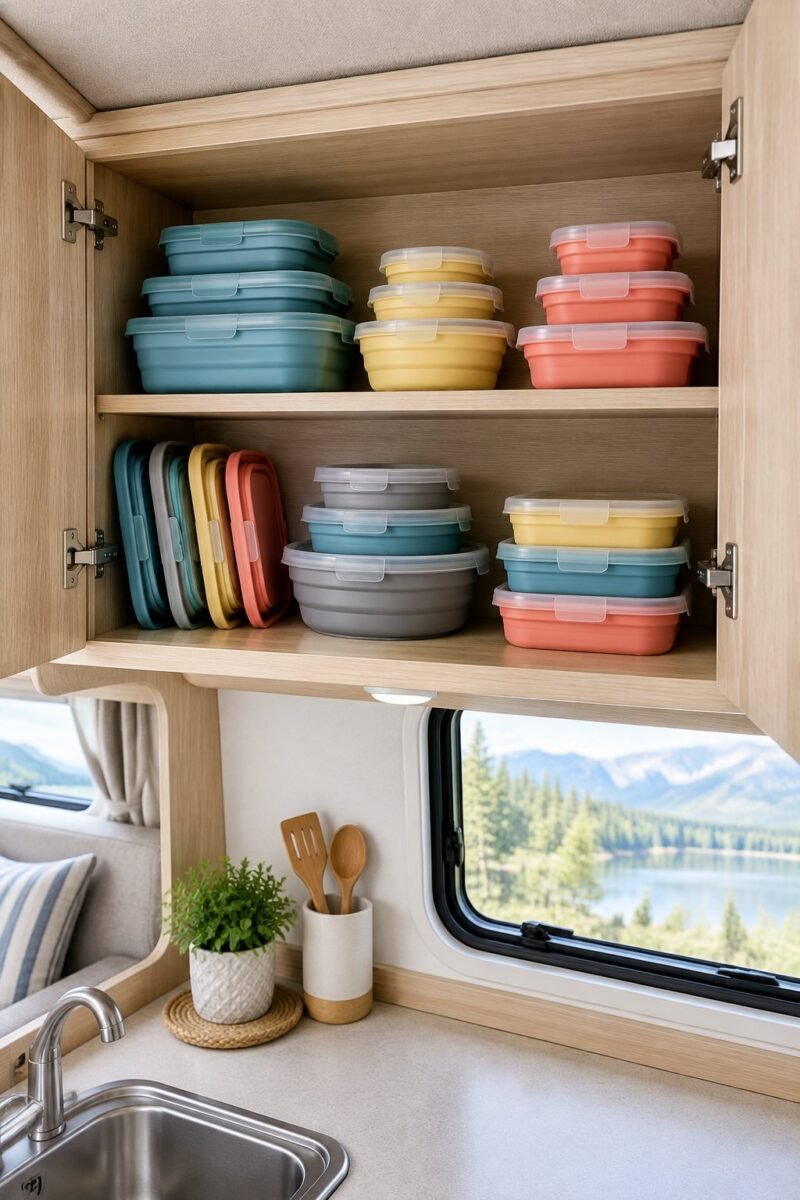
Collapsible silicone containers flatten to a fraction of their expanded height when empty, making them one of the best options for shallow overhead cabinets where rigid Tupperware stacks awkwardly. Store them flat until you need one, then pop it open for leftovers or dry snacks.
Choose containers with a solid locking lid, since some collapsible designs seal less tightly than rigid plastic and can leak if packed on their side. Nest flattened containers by size, largest on the bottom, to use every inch of shelf height efficiently.
Keep them away from direct heat sources like a stovetop backsplash, since repeated heat exposure can shorten the life of the silicone folds faster than normal use.
13) Pegboard Tool Wall in Pass-Through Storage
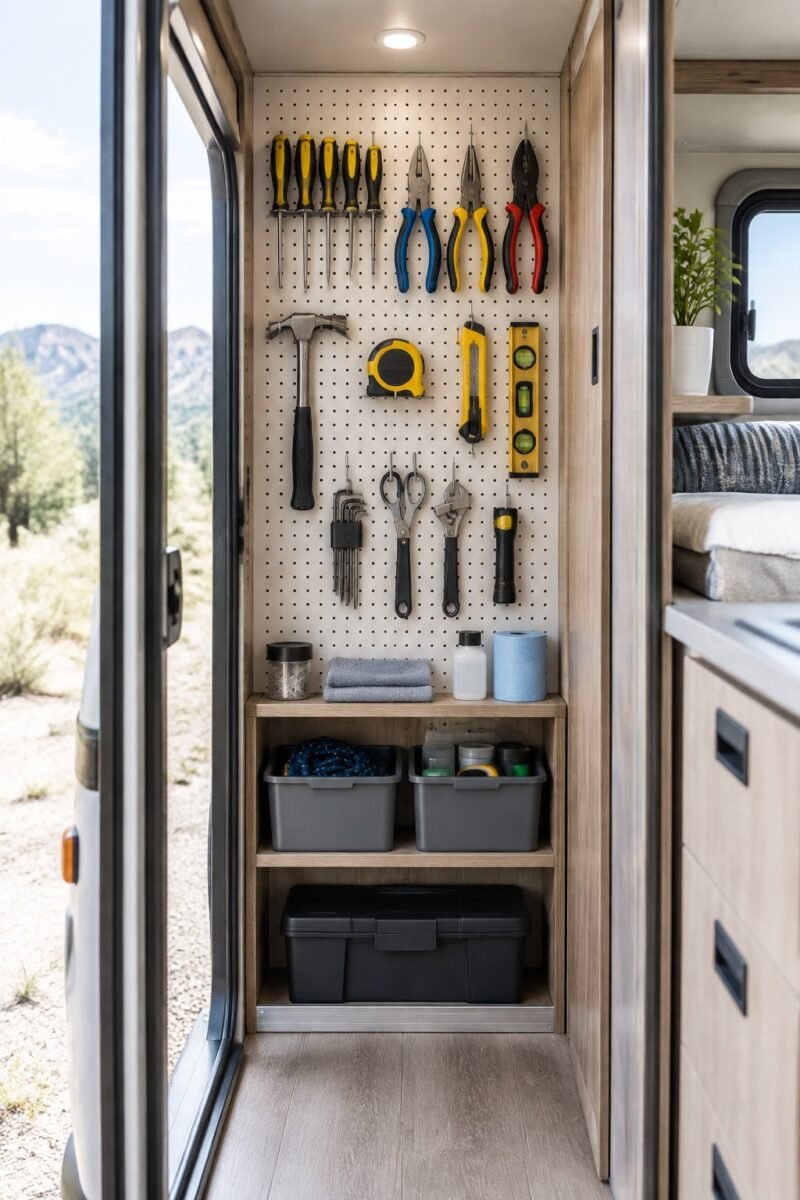
A pegboard panel mounted to the wall of a pass-through compartment gives hand tools, tie-downs, and leveling blocks their own visible spot instead of a tangled pile at the bottom of a bin. You see at a glance what’s missing before you pull away from a site.
Use pegboard hooks with locking clips or zip-tie loops, since standard hooks can vibrate loose on gravel roads and drop tools onto the compartment floor. Choose a marine-grade or powder-coated pegboard if your pass-through isn’t fully sealed, since bare metal hardware rusts quickly from road spray.
Group tools by task (leveling, hitching, repairs) so you’re not hunting through the whole board at a dark campsite. This setup requires drilling into the compartment wall, making it best suited for owned rigs rather than short-term rentals.
14) Labeled Milk-Crate Gear Modules in the Pass-Through Basement
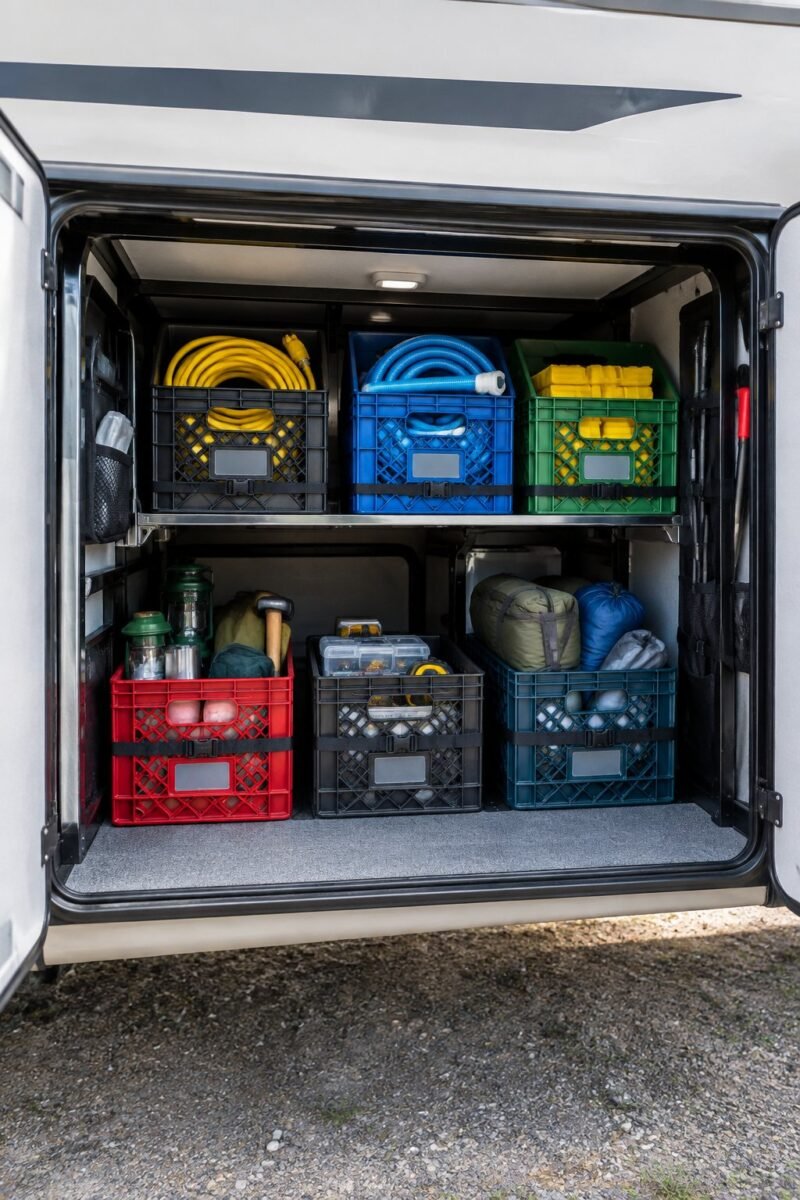
Labeled plastic crates sized to your basement compartment turn a jumbled pass-through into a set of grab-and-go modules for cooking gear, tools, or outdoor supplies. Crates keep weight distributed evenly and make loading day far faster than digging through loose gear.
Measure your compartment depth and width before buying, since basement doors often have a shorter clearance than the interior space suggests. Choose crates with solid sides rather than open milk-crate lattice if you’re storing anything you don’t want exposed to road dust and moisture.
Label each crate on the short end facing the door so you can identify contents without pulling every crate out. Strap crates to an anchor point or wedge them tightly together to prevent shifting during transit.
15) E-Track Rails and Cargo Nets for Camp Chairs and Mats
E-track rails bolted to a pass-through wall let you cinch camp chairs, outdoor mats, and folding tables against the compartment side using adjustable cargo straps, so bulky gear stops sliding around loose items stored beneath it. The rail system adjusts to fit odd-shaped gear that never sits well in a bin.
Space anchor points every foot or so along the rail for flexibility as your gear collection changes season to season. Pair rails with a cargo net across open shelving to catch anything that isn’t strapped directly, especially useful for mats and pool noodles that don’t have a natural tie-down point.
Installing E-track requires drilling into the compartment wall, so it suits owners planning to keep their rig for years rather than a short rental period.
How to Match Storage to Your Camper
Matching storage upgrades to your specific rig starts with an honest look at how you travel, not just what looks tidy at the campsite. A weekend camper and a full-timer need different priorities, even in the same floor plan.
Which storage upgrades are worth measuring for first?
Measure under-bed clearance and deep galley cabinets first, since these two spaces offer the biggest capacity gains for the least effort. A raised platform or pull-out shelf only works if you know your exact clearance before ordering hardware or bins.
How can you keep bins and gear from shifting while driving?
Use bins with locking lids, add lips or rails to open shelves, and strap or wedge crates tightly in pass-through compartments. Loose gear is the top cause of cabinet damage and rattling noise on travel days, so anything that can slide needs a physical barrier or tie-down.
What should stay inside the camper versus in pass-through storage?
Keep food, clothing, and moisture-sensitive items inside the climate-controlled cabin, and reserve the pass-through basement for tools, outdoor gear, and anything that tolerates temperature swings and road dust. Items sensitive to freezing or humidity, like canned goods in winter, do better inside.
How can you add storage without drilling into RV walls?
Choose tension rods, suction cups, adhesive pockets, magnetic tins, and hanging fabric organizers, all of which install and remove without tools. These options suit renters, rig-flippers, and anyone still testing a layout before committing to a permanent build.
Frequently Asked Questions
What are the best camper storage ideas for a small space?
Under-bed platforms, pull-out cabinet shelves, and stackable pantry bins deliver the biggest space gains in a small camper. Pair those with tension rods and door-mounted organizers to claim the smaller gaps around them.
How can I add storage to a camper without drilling?
Tension rods, suction-cup caddies, adhesive-backed pockets, magnetic tins, and hanging fabric shelves all install without screws or drilling. These options work well for rented rigs, rigs you plan to sell soon, or anyone hesitant to commit to a permanent change.
Which camper storage ideas work best under a bed?
A raised platform with adjustable shelving and locking-lid bins works best under a camper bed, since it customizes to your exact clearance and keeps contents from shifting. Add a rail or lip along the open edge for extra security on rough roads.
How do I stop cabinet storage from shifting while driving?
Use non-slip shelf liners, tension rods as dividers, and bins with locking lids rather than open totes. Test everything by driving a short, bumpy stretch and listening for rattles before a longer trip.
What should I keep in RV pass-through storage?
Tools, camp chairs, leveling blocks, hoses, and outdoor gear belong in pass-through basement storage, since that space tolerates temperature swings and road dust better than the cabin interior. Food and moisture-sensitive items are better kept inside.
Are vacuum bags safe for camper bedding and clothing?
Vacuum-seal bags are safe for linens and seasonal clothing and can shrink bulky items to a fraction of their size. Check the seal every few months, since humidity inside a closed-up storage compartment can weaken the valve over time.


Amir Ali is the founder and site administrator of HomeDecorEdge, a modern home decor and interior design platform. Since starting the site, he has combined his passion for interior design, practical styling, and color coordination with hands-on content strategy and site management. He guides authors, curates high-quality articles, and ensures readers have access to actionable, visually inspiring, and user-focused home decor advice for apartments, small rooms, and family homes.