Every December, a kid hands me a card that looks like glue had a rough day. Glitter everywhere. A tree with seven branches on one side. I love it more than anything from a store.
That is what handmade Christmas cards are really about. They are not neat. They are proud, and the people who get them keep them for years.
This list has 12 Christmas card craft ideas for kids that work with real short attention spans. Most take 20 to 45 minutes, and the supplies are things you probably own or can grab cheap.
Pick one or two that match your kid’s age. Little ones can do thumbprints and torn paper. Older kids can handle the pop up tree and the stamps with an adult close by.
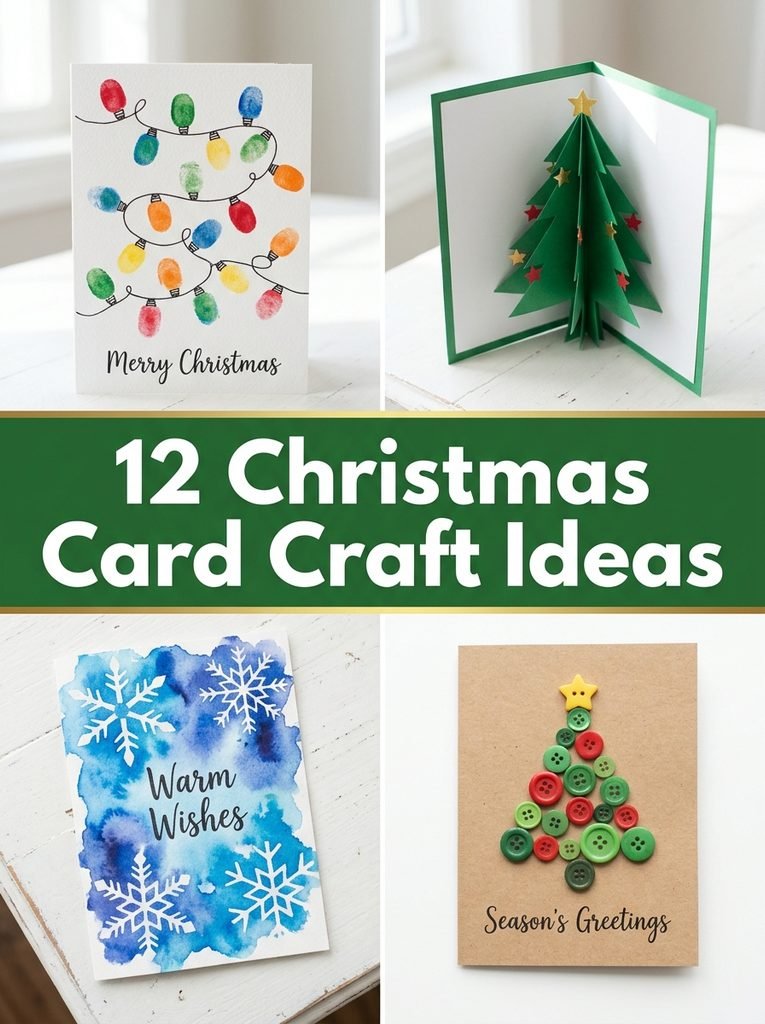
Quick Picks
- Easiest build: Thumbprint Christmas Lights Card (idea 1)
- Best for little kids: Torn Paper Christmas Tree Card (idea 5)
- Prettiest: Watercolor Resist Snowflake Card (idea 3)
1. Thumbprint Christmas Lights Card

This is the card I hand to the youngest kids first. A string of lights is just a wavy line with dots on it, so there is nothing to get wrong. A set of washable ink pads for kids keeps the mess small and the colors bright.
The magic happens when the ink dries. Add a tiny cap and a little hook line with a marker, and every thumbprint suddenly turns into a real bulb. Kids love that part more than the printing.
⏱ 30 minutes💲 Low🛠 Easy
Materials Needed
- White cardstock, folded in half
- Washable ink pads in 4 colors
- Black fine tip marker
- Pencil
- Wet wipes
How to Make It
- Draw a gently curved wire across the front of the card in pencil.
- Press a thumb on an ink pad and print bulbs along the wire, switching colors as you go.
- Let the ink dry for about 10 minutes.
- Trace the wire with the black marker, then add a tiny cap on top of each bulb.
- Write a message inside and add a few little rays around the bulbs if you like.
Tip: Draw the wire in pencil first so the bulbs follow one clean line. Kids stay much happier with the result.
2. Pop Up Christmas Tree Card
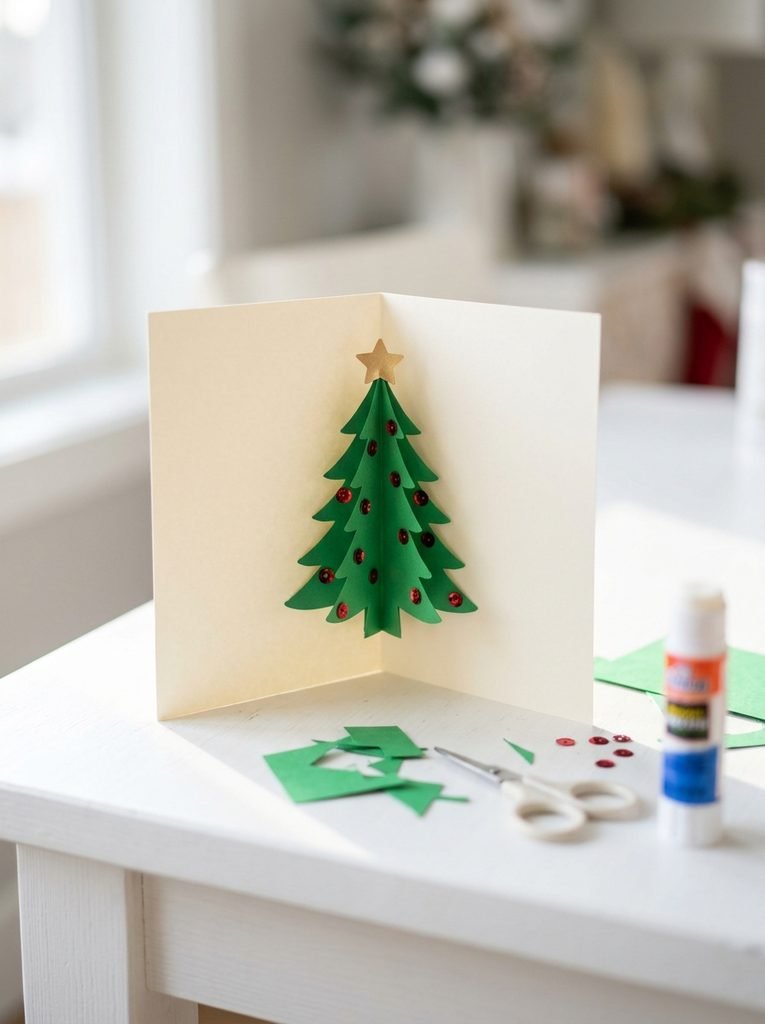
A flat card is sweet, but a tree that stands up when you open it gets a real gasp. The trick is simpler than it looks. You fold a tree in half and glue each half to one side of the card. Stock up on green cardstock paper because kids will want to make three or four.
An adult should cut the tree shape for younger kids, but older ones can handle it with kid safe scissors. Decorate the tree flat before you glue it down. It is so much easier than decorating a tree that is already standing.
⏱ 45 minutes💲 Low🛠 Medium
Materials Needed
- Cream or red cardstock for the card base, folded in half
- Green cardstock for the tree
- Glue stick
- Star sticker and small sequins
- Kid safe scissors
How to Make It
- Fold the card base in half and crease it well.
- Cut a tree from green cardstock that is narrower than half the card and shorter than its height.
- Fold the tree in half down the middle, then open it again and decorate it with sequins and a star.
- Put glue on the back of the left half only and press it inside the left page, with the tree fold lined up on the card fold.
- Glue the right half the same way, then close the card slowly and open it to see the tree pop.
Tip: Keep the tree smaller than half the card. If it is too wide, the card will not close flat.
3. Watercolor Resist Snowflake Card
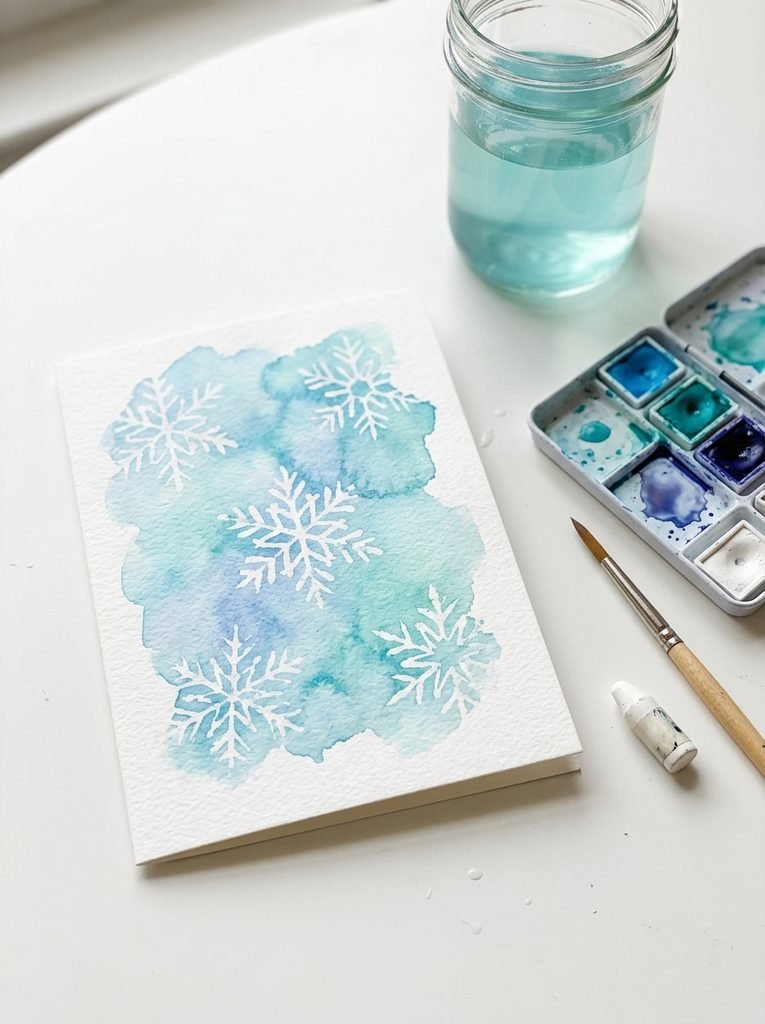
This one feels like real art, and it is secretly easy. Kids draw white snowflakes with a crayon, then paint over them. The wax pushes the paint away and the snowflakes appear like magic. A basic kids watercolor paint set works perfectly.
It is a great pick if you want a cleaner, more aesthetic look than glitter and glue. Honestly, these end up looking like cards from a gift shop, and kids are very proud when that happens.
⏱ 40 minutes plus drying💲 Low🛠 Easy
Materials Needed
- Heavy white paper or watercolor paper
- White wax crayon
- Watercolor paints in blue, teal and purple
- Wide soft brush
- Cup of water
How to Make It
- Cut the paper to card size and fold it after the painting is done.
- Draw several snowflakes with the white crayon and press hard.
- Wet the brush and wash blue and teal paint over the whole page.
- Watch the snowflakes pop through, then let the paper dry flat.
- Fold it into a card and write the message inside.
Tip: Press hard with the crayon and go over each line twice. The harder you press, the whiter the snowflake shows.
Printable Labels
Toy Bin Labels with Pictures
60 picture labels for toys, art supplies and kids' clothes. Kids see the picture and know where it goes.
Printable Bundle
Christmas Printable Bundle
Christmas planner, 24 advent activity cards, 36 gift tags, handmade labels, Santa letter and family games.
4. Button Christmas Tree Card
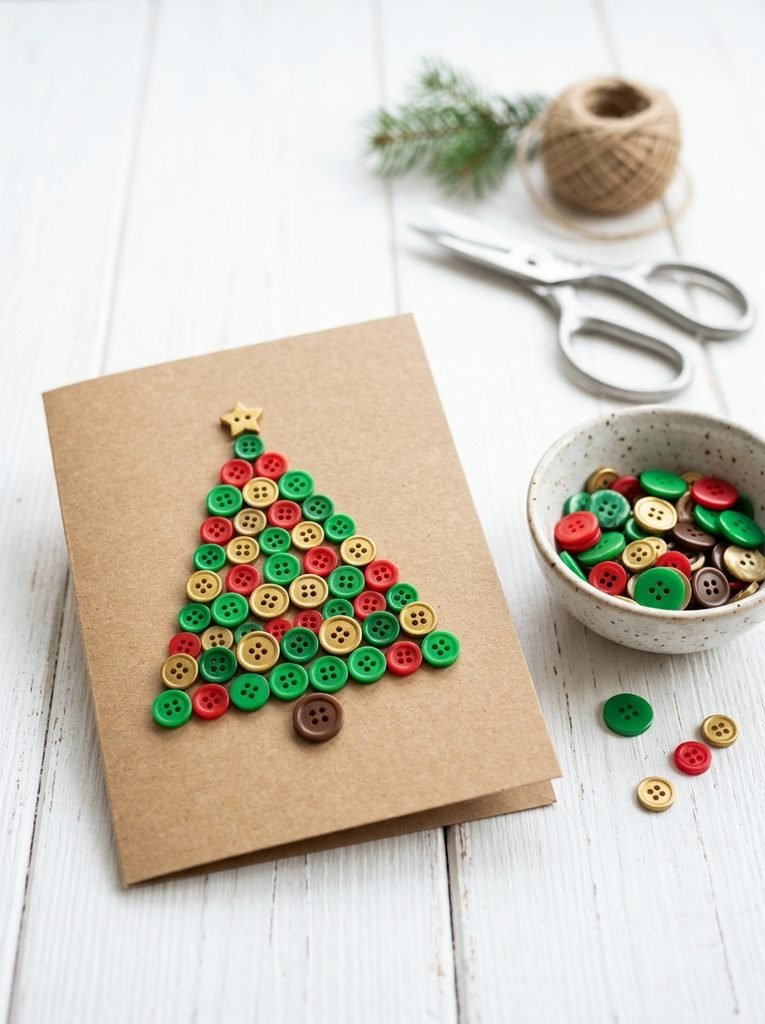
Buttons turn into ornaments the second they land on a tree shape. Start with big buttons at the bottom and finish with tiny ones at the top. Kids love sorting colors, which makes this a calm, quiet kind of craft.
Buttons are small parts, so this one is for kids who no longer put things in their mouth, with an adult nearby. Use tacky craft glue, because a glue stick will not hold the weight.
You’ll need: assorted craft buttons
Best for: kids five and up who enjoy sorting and patterns
Printable Games
Christmas Party Games Pack
9 fun games for family, friends and office parties: trivia, charades, gift swap and more.
5. Torn Paper Christmas Tree Card
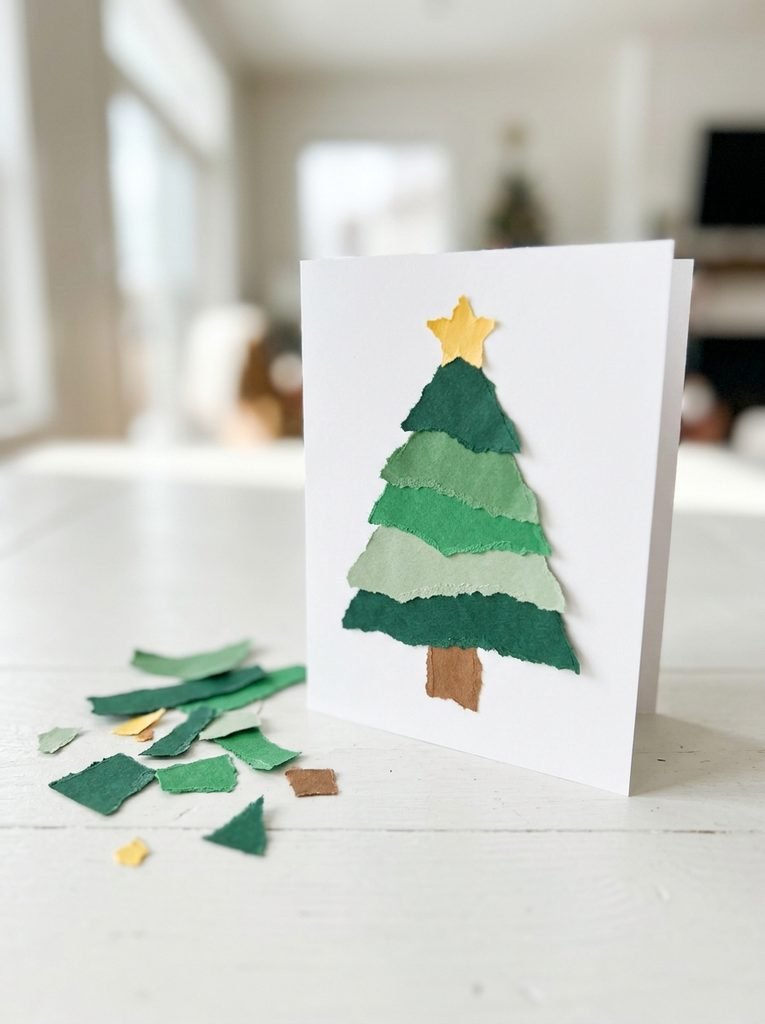
Torn paper is the best craft for little hands. There is no cutting and no wrong answer, because ragged edges actually look better. The rough edges give the tree a soft, cozy texture.
Let kids tear strips from construction paper in two or three shades of green. Glue the longest strip at the bottom and work up. If a piece looks messy, tear a smaller one and cover it.
You’ll need: green construction paper pack
Best for: little kids ages three to five who are not ready for scissors
6. Pom Pom Snowman Card
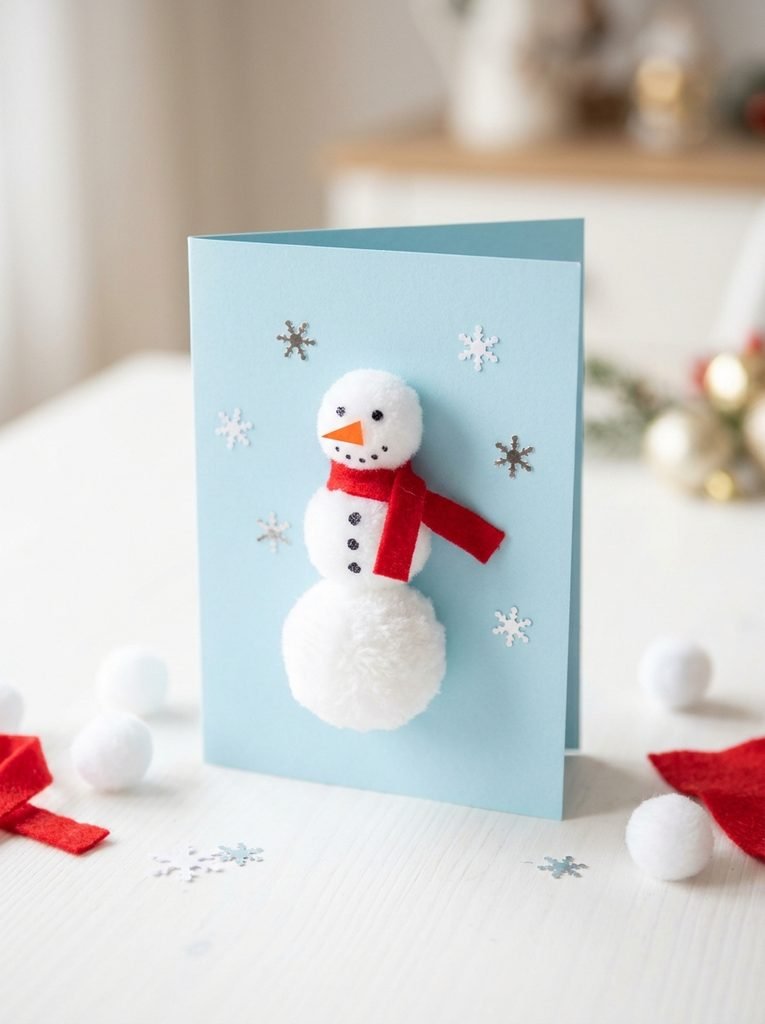
A fluffy snowman on a blue card looks so cute that people will think you bought it. Three pom poms in different sizes stack up into a body, and a tiny orange paper nose does the rest.
Use white craft pom poms in assorted sizes and glue them with tacky glue. Draw the face with a marker instead of gluing on loose eyes. Small parts can come off, so drawing them is safer for little ones.
Best for: kids who love soft textures and a cute finished card
7. Washi Tape Minimal Tree Card
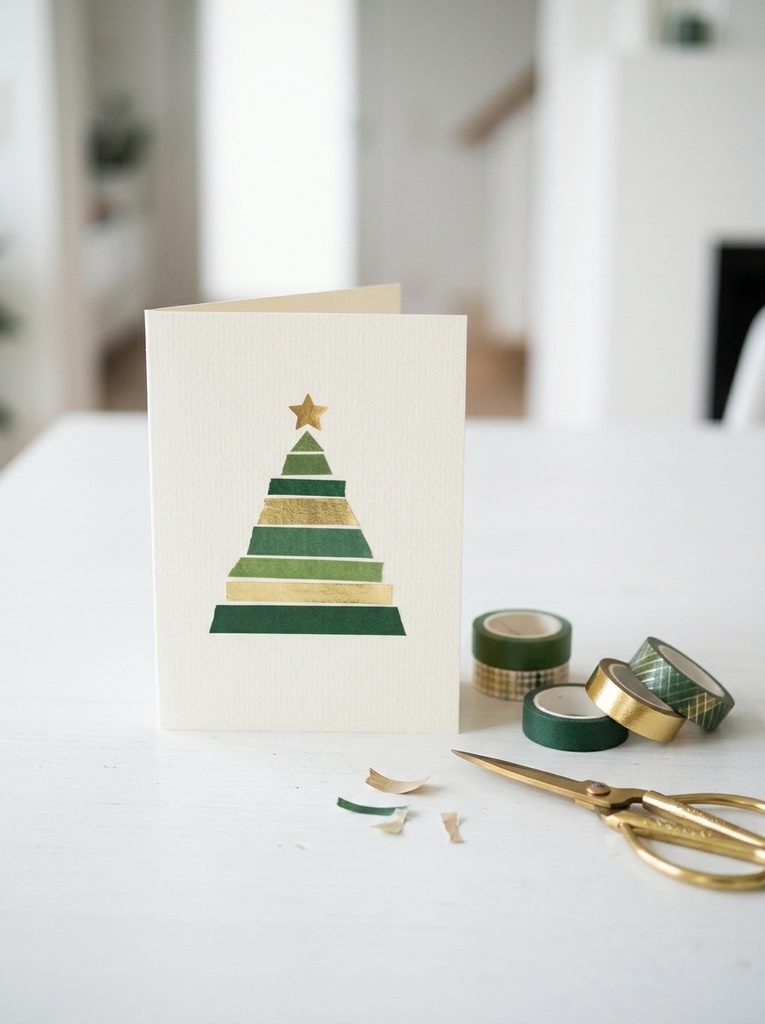
If your older kid thinks glitter is for babies, this is the card. Strips of washi tape make a clean, modern tree with almost no skill needed. It looks like something from a stationery shop.
Press each strip a little shorter than the last to build the triangle. A washi tape set in green and gold gives you plenty to work with. Trim the sticky edges with scissors while the tape is still on the card.
Best for: older kids and teens who like a clean, modern look
8. Cotton Ball Santa Beard Card
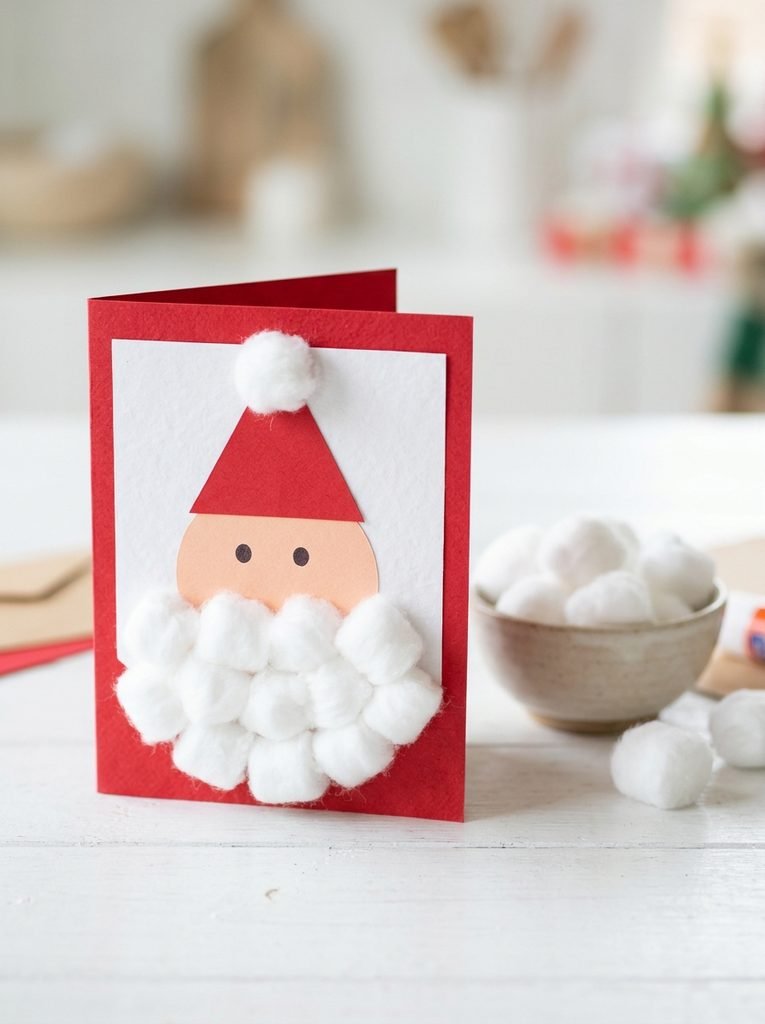
Santa is mostly beard, which makes him perfect for a craft. A fluffy cotton ball beard gives the card real texture, and kids love pulling it apart to make it look big and bushy.
Pull each cotton ball a little thinner before gluing so it looks more like hair than a lump. Jumbo cotton balls work best because they spread out nicely. Add a cotton ball to the tip of the hat, and Santa is done.
Best for: toddlers and young kids who love a soft, fluffy craft
9. Popsicle Stick Tree Card
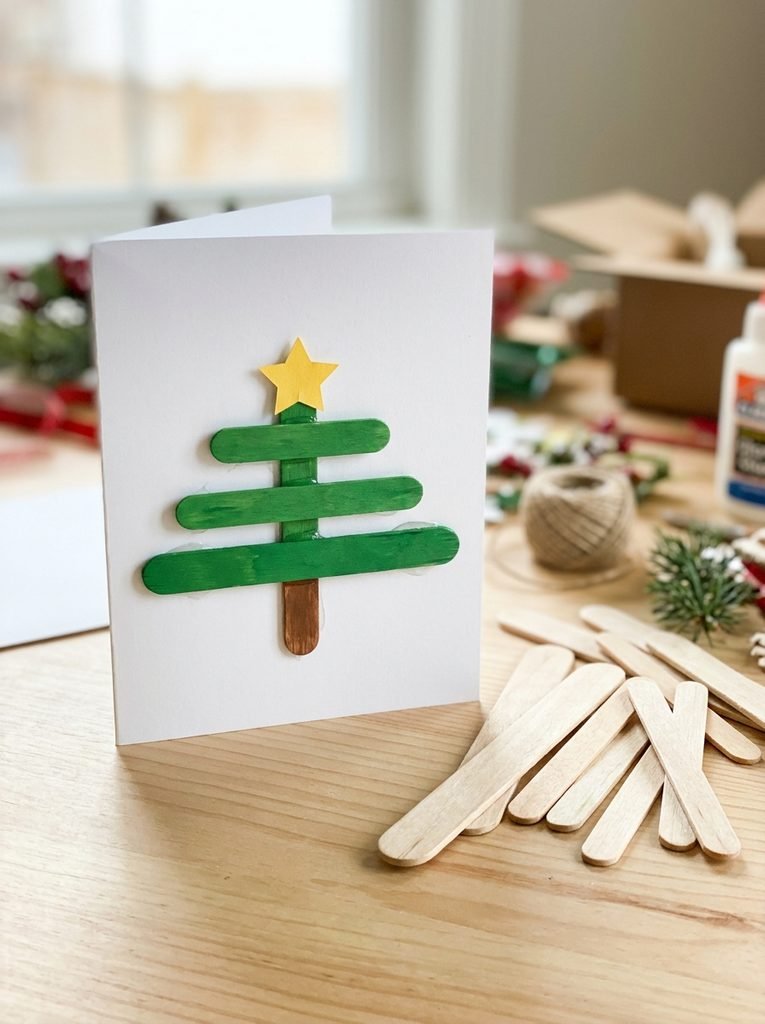
Craft sticks come in three sizes, and a tree is the perfect way to use all of them. Glue a jumbo stick at the bottom, a regular one in the middle and a mini one at the top, then add a tiny trunk. You get a neat three tier tree without any cutting.
Paint the sticks green before you glue them, because it is much easier on a flat surface. Buy a pack of craft sticks in assorted sizes and you will have enough for a whole family of cards.
Best for: kids six and up who like building things
10. Potato Stamp Pattern Card
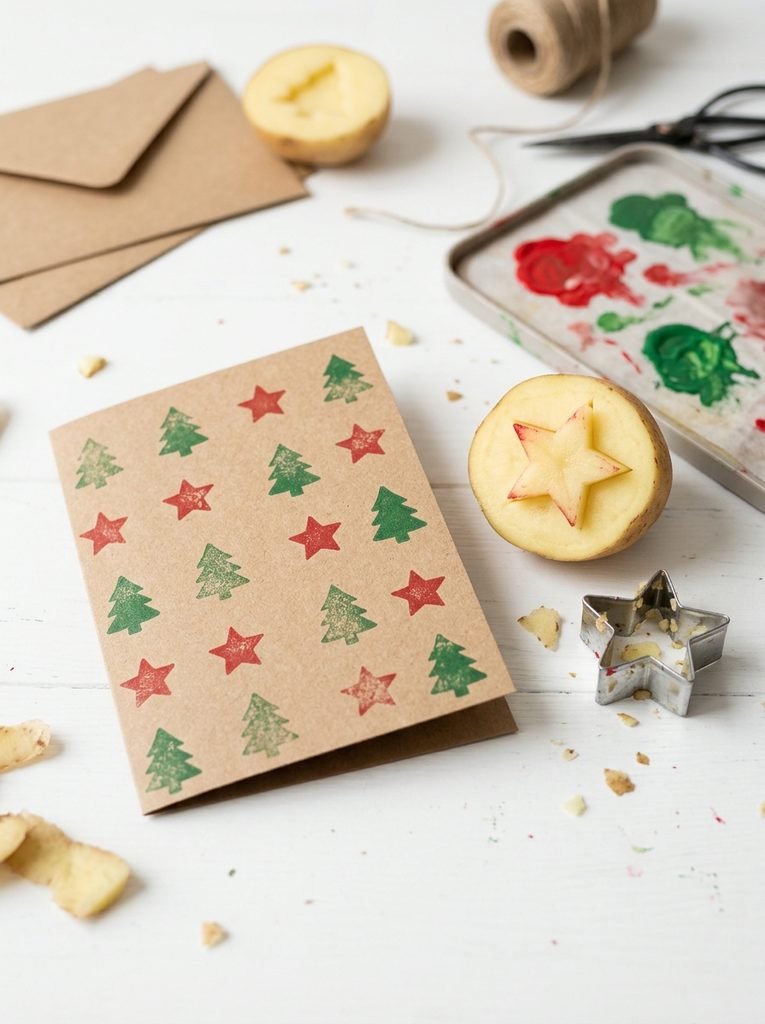
Potato stamps feel old school, and kids love them. One potato, a simple shape and a little paint make a pattern you can repeat all over a card. Stars and little trees are easiest.
An adult should cut the potato and carve the shape. Press a cookie cutter into the flat potato first to leave an outline, which makes carving much easier. Use washable tempera paint and blot the stamp on a paper towel before printing.
Best for: confident kids who want a pattern they can repeat
11. Pop Out Heart Card for Grandparents
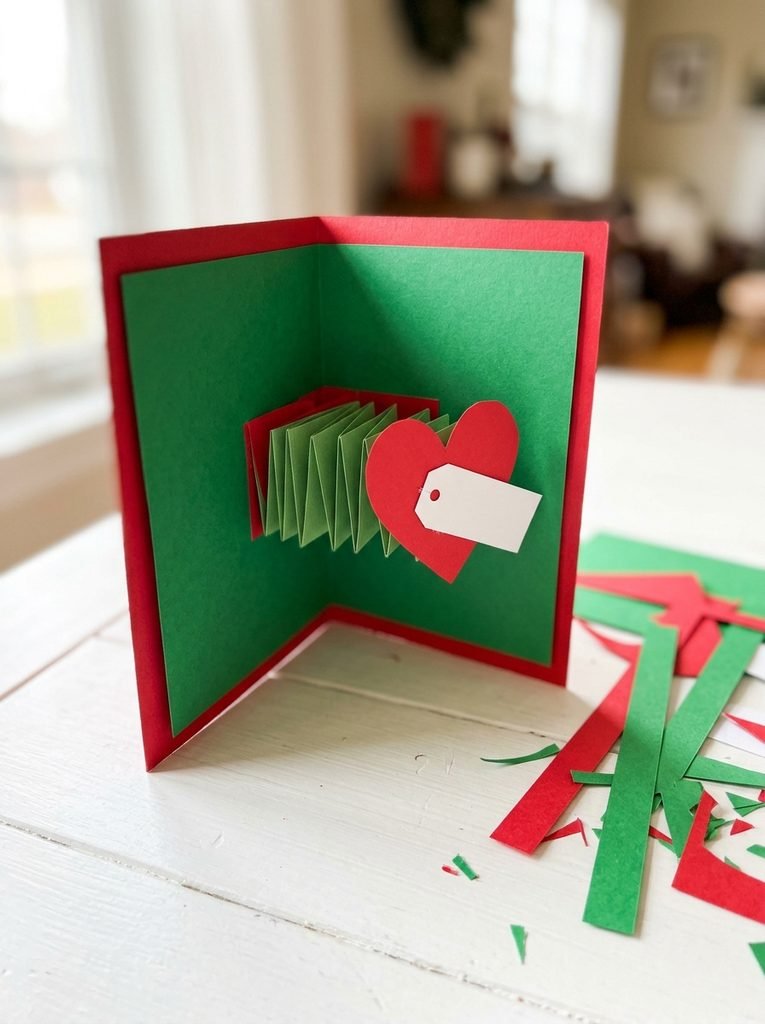
A heart that bounces out of the card is a lovely surprise for grandma and grandpa. You make a little paper spring from two folded strips, glue a heart to one end and tuck the other end inside the card.
Cut two strips of craft paper, fold them in zigzags and glue them at right angles to make the spring. A double sided craft paper pad makes this easy because both sides have pretty colors. Write a message on the heart, because that is what they will keep.
Best for: kids who want to make something special for grandparents
12. Matching Handmade Envelopes and Stamp Set
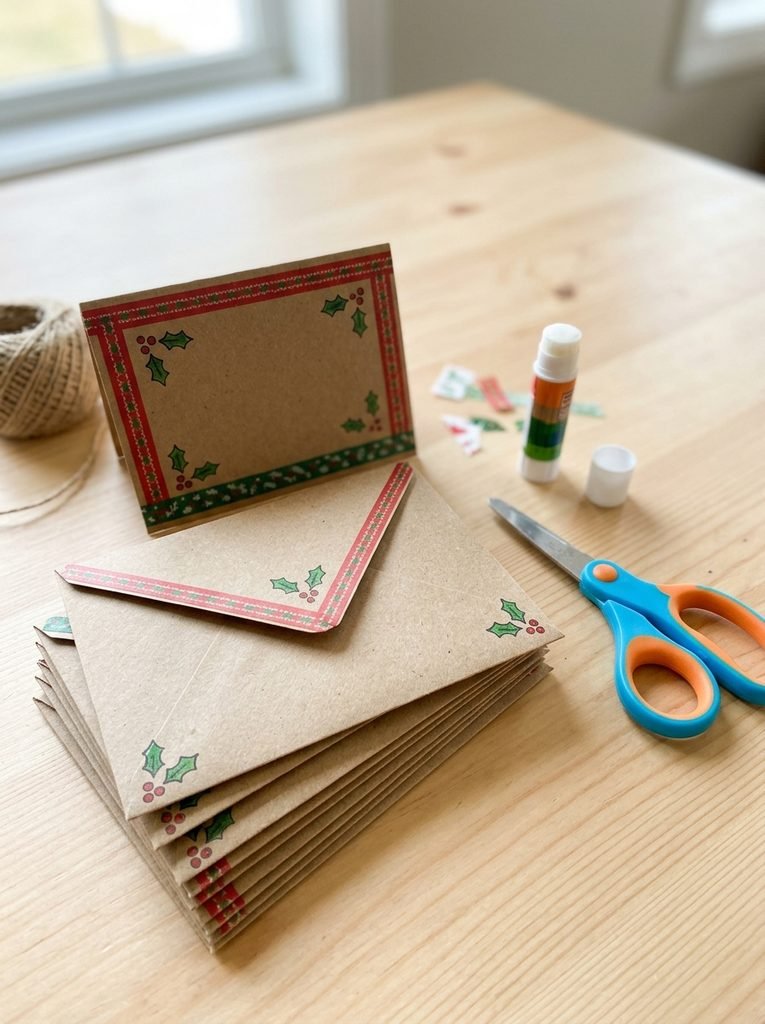
A handmade card deserves a handmade envelope. Trace a store bought envelope onto kraft paper, cut it out, fold it and glue the flaps. Kids can decorate the front with stickers or a drawn stamp.
You can skip the envelope making if time is short. Still, a decorated envelope makes the whole thing feel like a gift. If you plan to mail the cards, you will need real postage, and flat designs mail best.
You’ll need: kraft paper envelopes, Christmas stickers for kids
Best for: families making a big batch of cards to send or hand out
Frequently Asked Questions
What age can kids start making Christmas cards?
Kids as young as 2 or 3 can make thumbprint and torn paper cards with help. Most kids can work on their own from about 6 or 7.
How long do these cards take?
Most take 20 to 45 minutes. Add 10 to 20 minutes if the paint or glue needs to dry.
What paper works best for a card base?
Sturdy cardstock, about 80 to 110 lb, folds cleanly and holds glue and paint. Thin printer paper gets soggy and bends.
Which glue should I use?
A glue stick is fine for paper. Use tacky craft glue for buttons and pom poms. Hot glue is for adults only.
Will these cards fit in an envelope?
Fold a sheet of letter paper in half twice to get 4.25 by 5.5 inches, which fits an A2 envelope. Pop up and button cards are bulky, so hand them over or use a padded envelope.
How do I make a lot of cards quickly?
Work in an assembly line. Fold all the cards first, then do one step at a time for every card, such as all the trees, then all the stars.
Final Thoughts on Christmas Card Craft Ideas for Kids
The best card is the one a kid made and wants to give. Do not worry if the tree leans or the glue shows. That is exactly what grandparents and friends are hoping for. Pick one idea, clear the table and let them make a mess.