

Every beautiful tree has the same ugly secret: a green metal stand with a water bowl that nobody wants to look at. A DIY stand cover fixes it in an afternoon and makes the tree look finished from top to bottom.
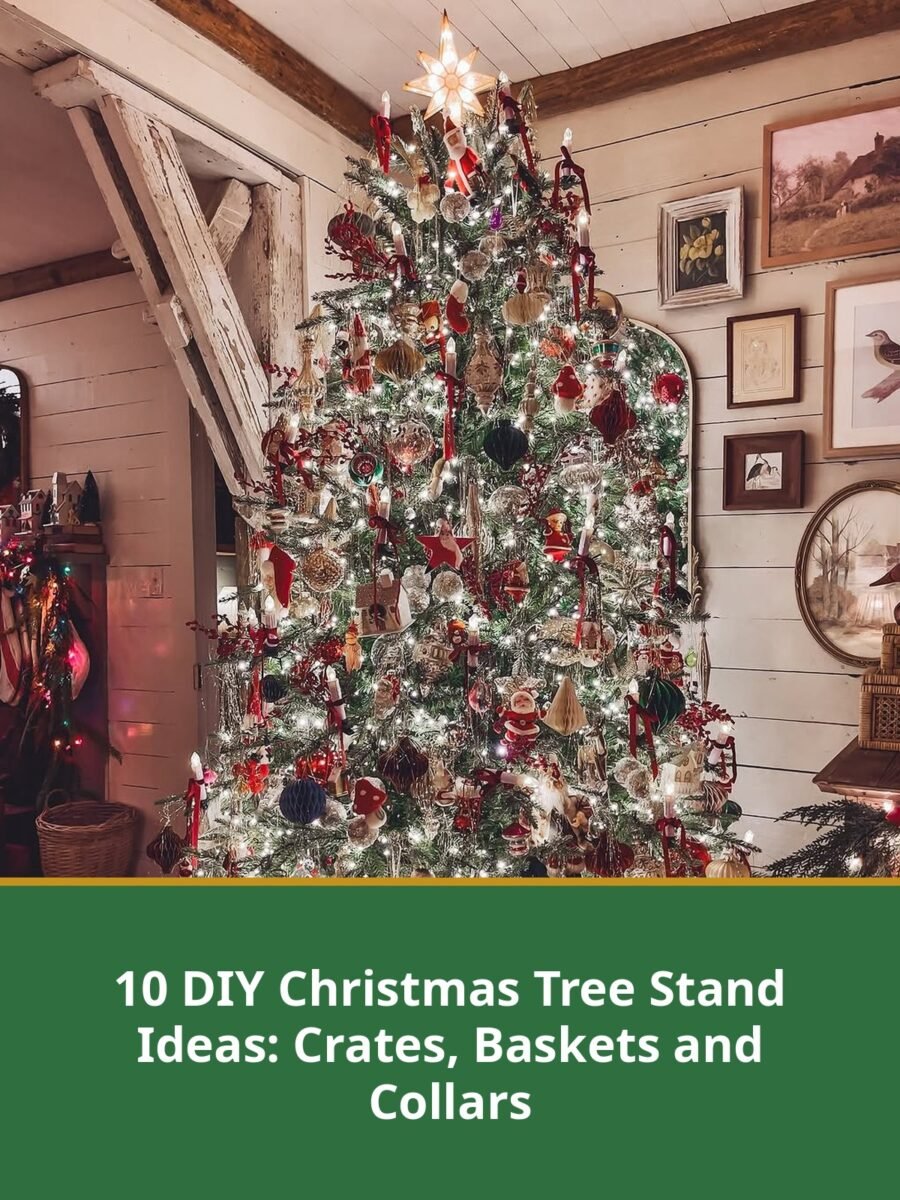
Crates, collar boxes and baskets are the three classic covers, and this list has all of them, plus crocks, buckets and galvanized tubs for different styles. The stand inside still does the real work of holding the tree and its water.
The first three ideas are builds with materials and steps: a stenciled crate cover, an X frame collar box, and the famous woven basket tree. The rest are quick styling options from real homes.
One rule for every idea here: the decorative cover never holds the tree up. Keep your proper metal stand inside, keep the water bowl reachable, and check a real tree water level daily.
Quick Picks
- Quickest: Idea 3, the woven basket tree, done in about twenty minutes.
- Most farmhouse: Idea 1, the stenciled Farm Fresh crate cover you build yourself.
- Most polished: Idea 2, the X frame collar box that looks bought, not built.
1. Farm Fresh Wooden Crate Stand Cover
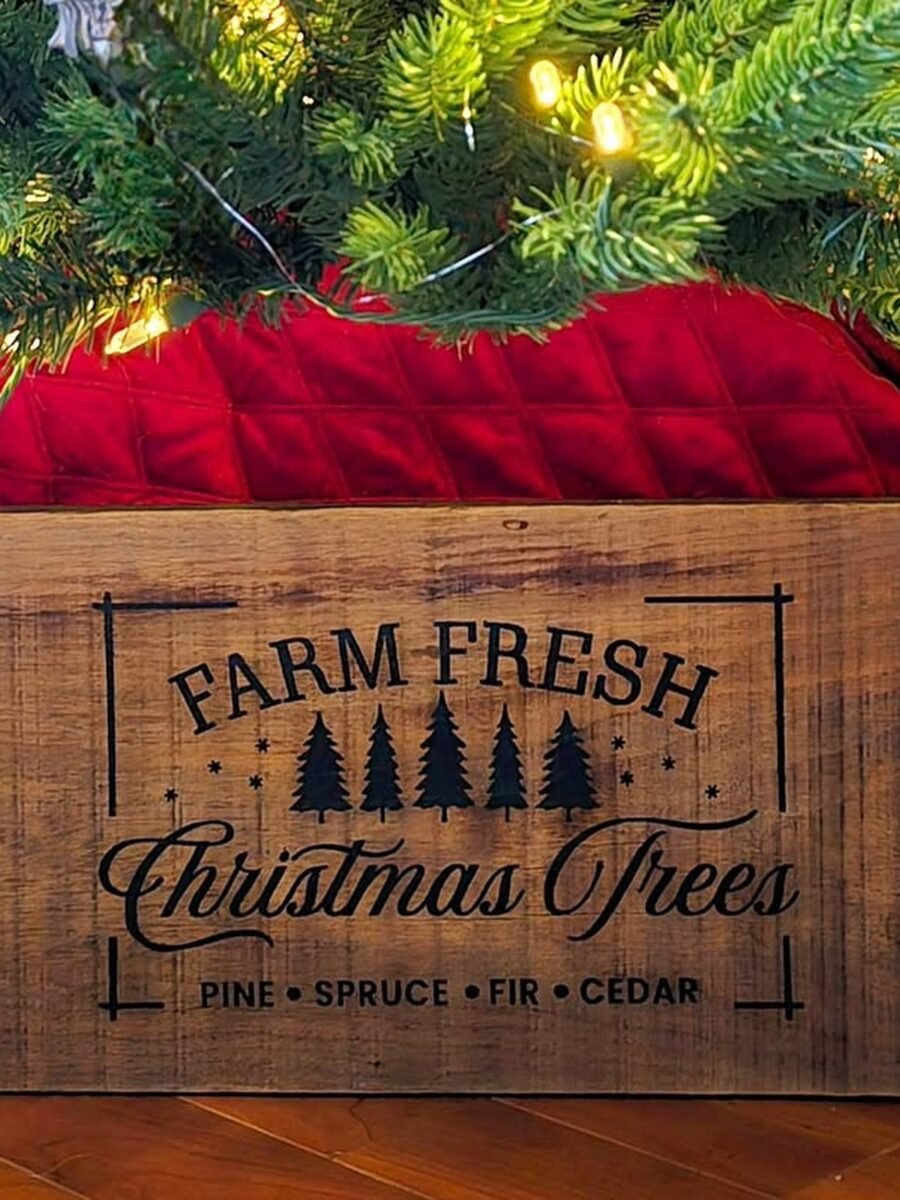
A wooden crate slipped over the stand hides every ugly metal leg and gives the tree a farmhouse base. The stenciled Farm Fresh lettering is optional, but it turns a cover into a feature. Build the crate open at the back or in two L shaped halves so it slides around a tree that is already standing.
⏱ 2 hours💲 Low🛠 Medium
Materials Needed
- Four wood planks or an old crate, cut to size
- Screws and a drill, or wood glue and nails
- Sandpaper and paint or stain
- Letter stencils and paint for the wording, optional
- Your regular metal tree stand
How to Make It
- Measure your stand: the crate must be wider than the legs and tall enough to clear the water bowl.
- Cut four planks to size and sand every edge smooth.
- Screw or glue three sides together, leaving the back open, or build two L shaped halves.
- Paint or stain the crate and let it dry fully. Add stenciled wording if you like.
- Set the tree in its normal stand first, then slide the crate around it and push it closed.
Tip: Build the crate in two halves. A one piece box has to go over the top of the tree before you stand it up, which is a two person job with a decorated tree.
2. X Frame Wooden Collar Box
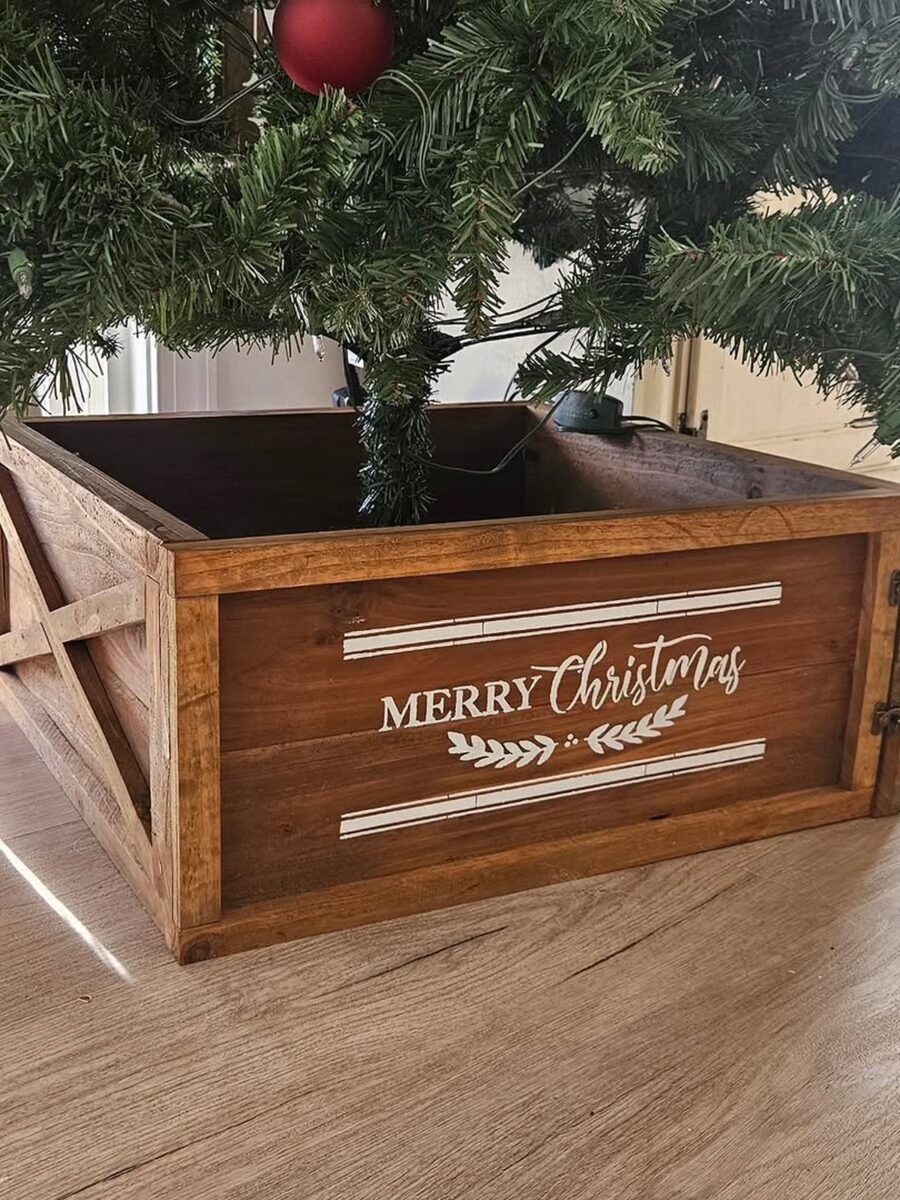
The X frame collar box looks like something from a furniture store and costs a few boards. Crossed braces on each face give it that barn door style, and the flat top edge finishes the base neatly. It is sturdy, it hides the stand and the water bowl, and it folds flat if you hinge one corner.
⏱ 2 to 3 hours💲 Low to medium🛠 Medium
Materials Needed
- Pine boards for four sides and the X braces
- A saw, drill and screws
- Wood stain and a clear finish
- Stencils or a paint pen for lettering
- Hinges if you want the box to open
How to Make It
- Cut boards for four equal sides, sized to clear your stand legs by at least 2 inches on each side.
- Join the sides into a box with screws, leaving the top and bottom open.
- Cut thin battens and fix them as X braces on the front and sides.
- Stain the box, let it dry, then add lettering with stencils or a paint pen.
- Place the box around the stand before the tree goes in, or hinge one corner so it opens around a standing tree.
Tip: Sand and stain before assembly if you can. Getting a brush inside a finished box is the slowest part of the whole build.
3. Tree in a Woven Basket Stand
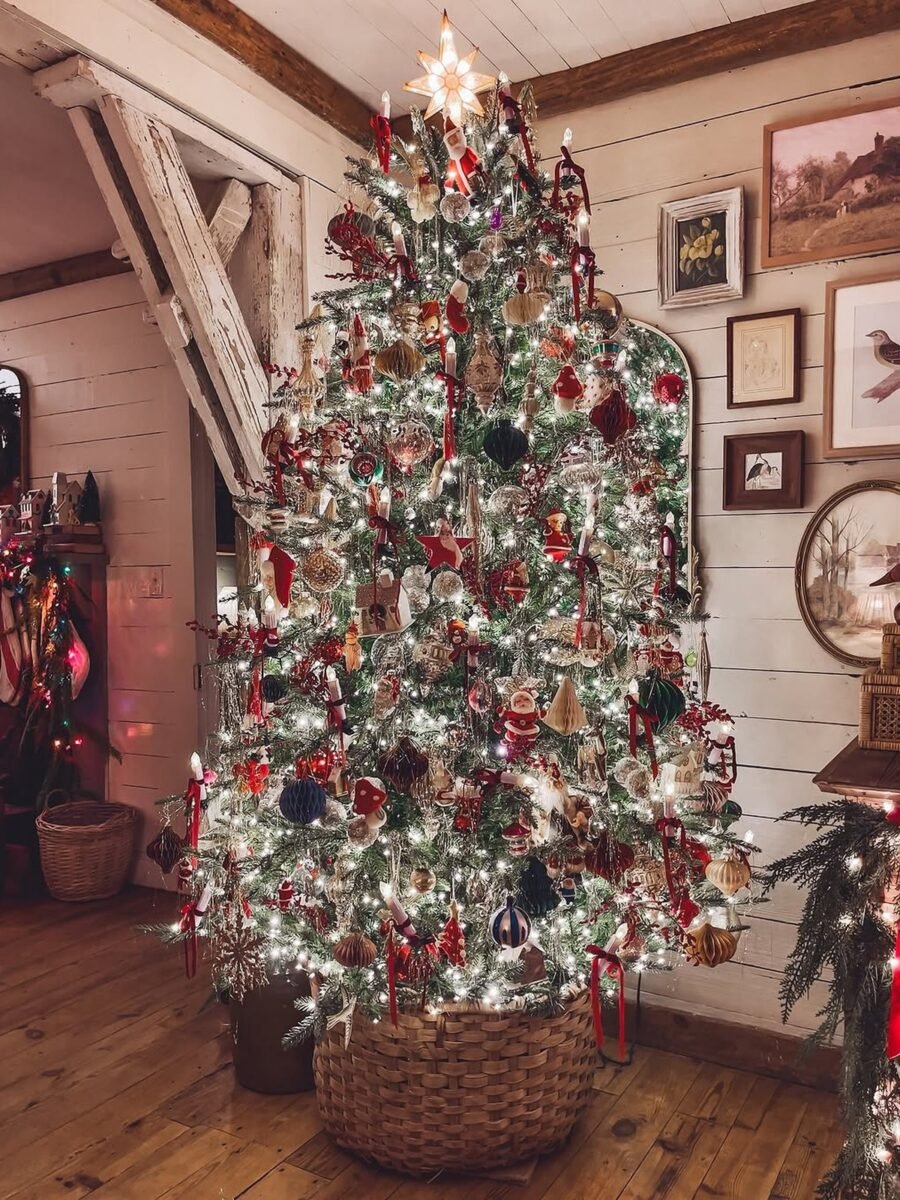
The basket tree is the look that fills home magazines every December, and it takes twenty minutes. The stand sits inside a big woven basket, the rim softens the base of the tree, and the texture warms up the whole room. It works for real and artificial trees, and for cottages it is hard to beat.
⏱ 20 minutes💲 Medium🛠 Easy
Materials Needed
- A large woven basket with a wide opening, or an extra large wicker tree collar
- Your regular metal tree stand
- An old blanket or towels for padding
- A waterproof tray or mat for under a real tree
How to Make It
- Put a waterproof tray or mat on the floor where the tree will stand.
- Set your metal stand inside the basket and open its legs fully. Pad around it with a blanket so nothing rattles or tilts.
- Stand the tree in the stand as normal and tighten the screws.
- Pull the basket rim up around the lowest branches and fluff the branches down over the edge.
- For a real tree, leave a gap at the back of the basket so you can reach in and top up the water.
Tip: Measure the stand, not the tree. The basket opening must be wider than the fully opened stand legs, or the tree will sit crooked all season.
Printable Bundle
Christmas Printable Bundle
Christmas planner, 24 advent activity cards, 36 gift tags, handmade labels, Santa letter and family games.
4. Flocked Tree in a Big Wicker Basket
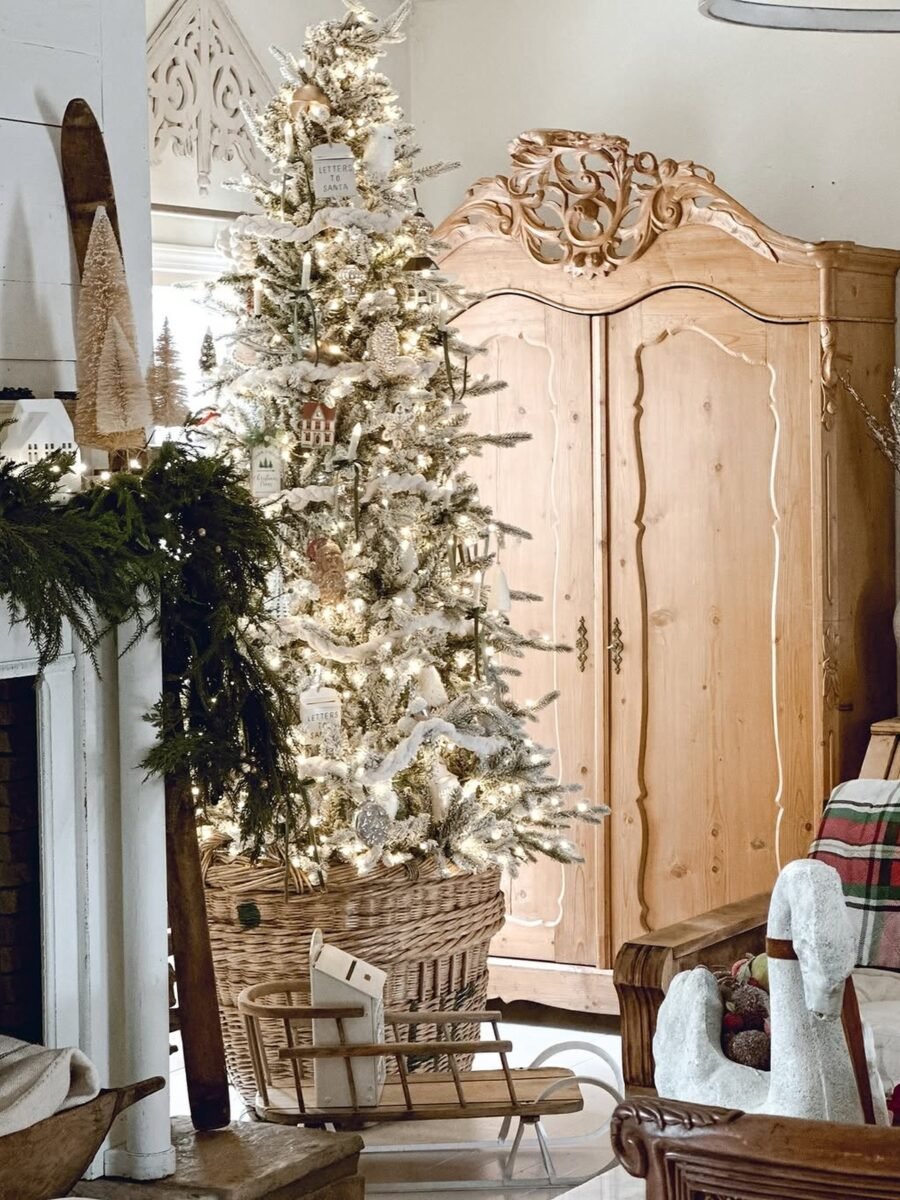
Snowy flocked branches and natural wicker are made for each other. The basket grounds the white tree and stops it looking floaty, and the woven texture reads cozy even in a very pale room. This pairing suits flocked trees better than any metal collar.
You’ll need: A large wicker basket, your regular stand and a waterproof mat underneath.
Best for: Soft neutral and white Christmas schemes
Printable Games
Christmas Party Games Pack
9 fun games for family, friends and office parties: trivia, charades, gift swap and more.
5. White Wicker Collar With a Burlap Bow
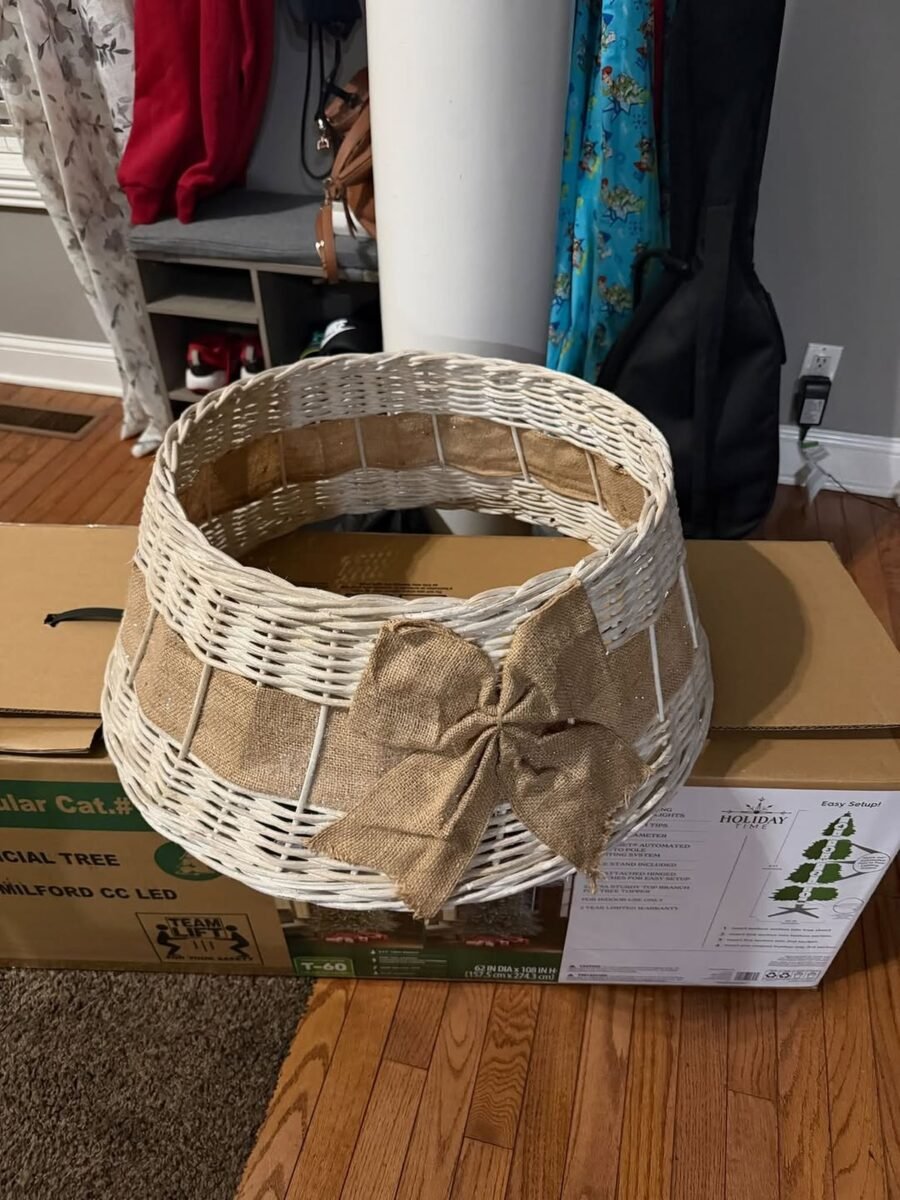
A white collar keeps the base as light as the room. The burlap bow adds the one warm note it needs, and together they finish a bright tree without any dark or heavy shapes at the bottom. Collars like this fold flat, so storage is easy too.
You’ll need: A white wicker or rattan collar and a burlap bow or ribbon.
Best for: Bright rooms and white or Scandi style trees
6. Tree in a Printed Crock Container
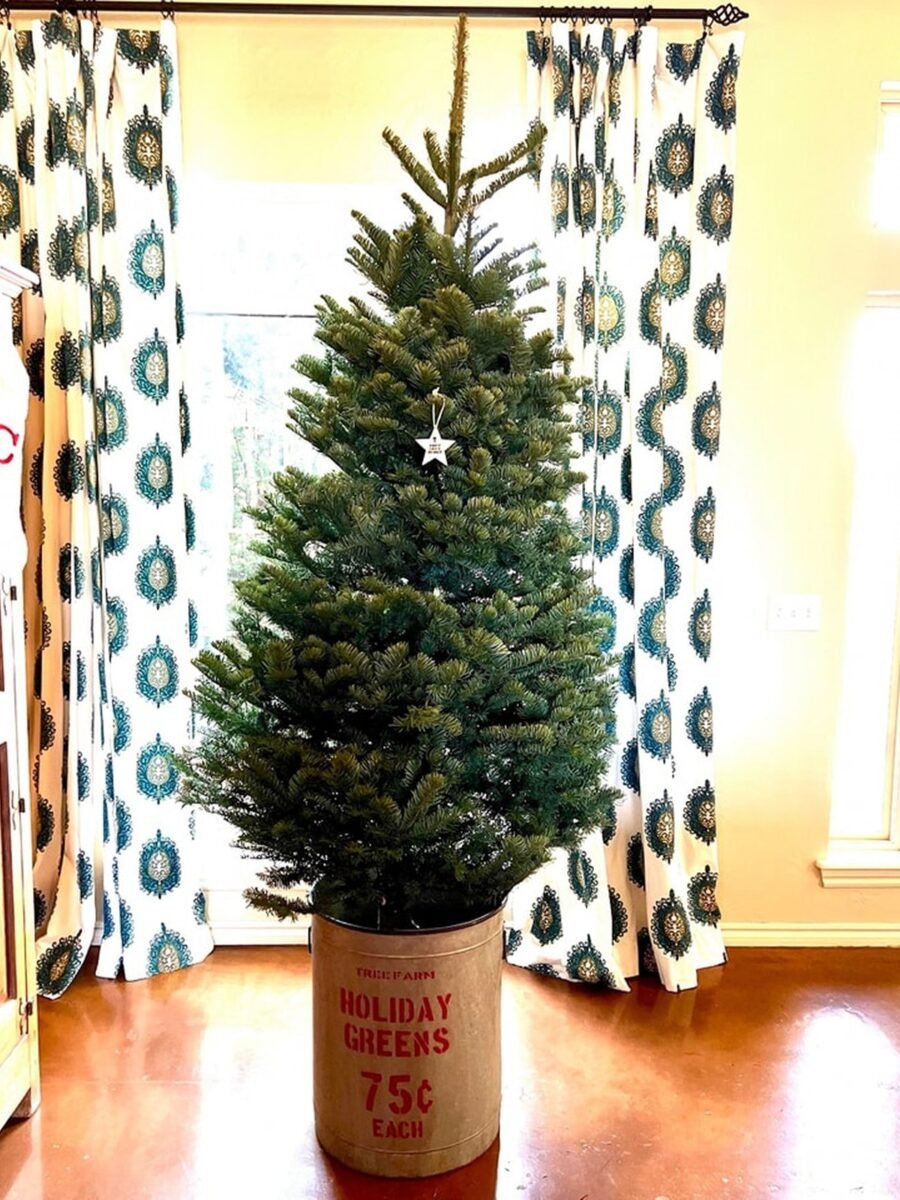
A big printed crock gives the tree a pot plant feel and a bit of humor. The stand hides inside, the container carries the message, and the tree looks deliberately potted rather than parked. Weight a light container with bricks so a tall tree stays steady.
You’ll need: A large crock, tub or printed container, plus bricks or sand for weight if it is light.
Best for: Kitchen trees and cheerful family spaces
7. White Farm Fresh Metal Bucket Stand
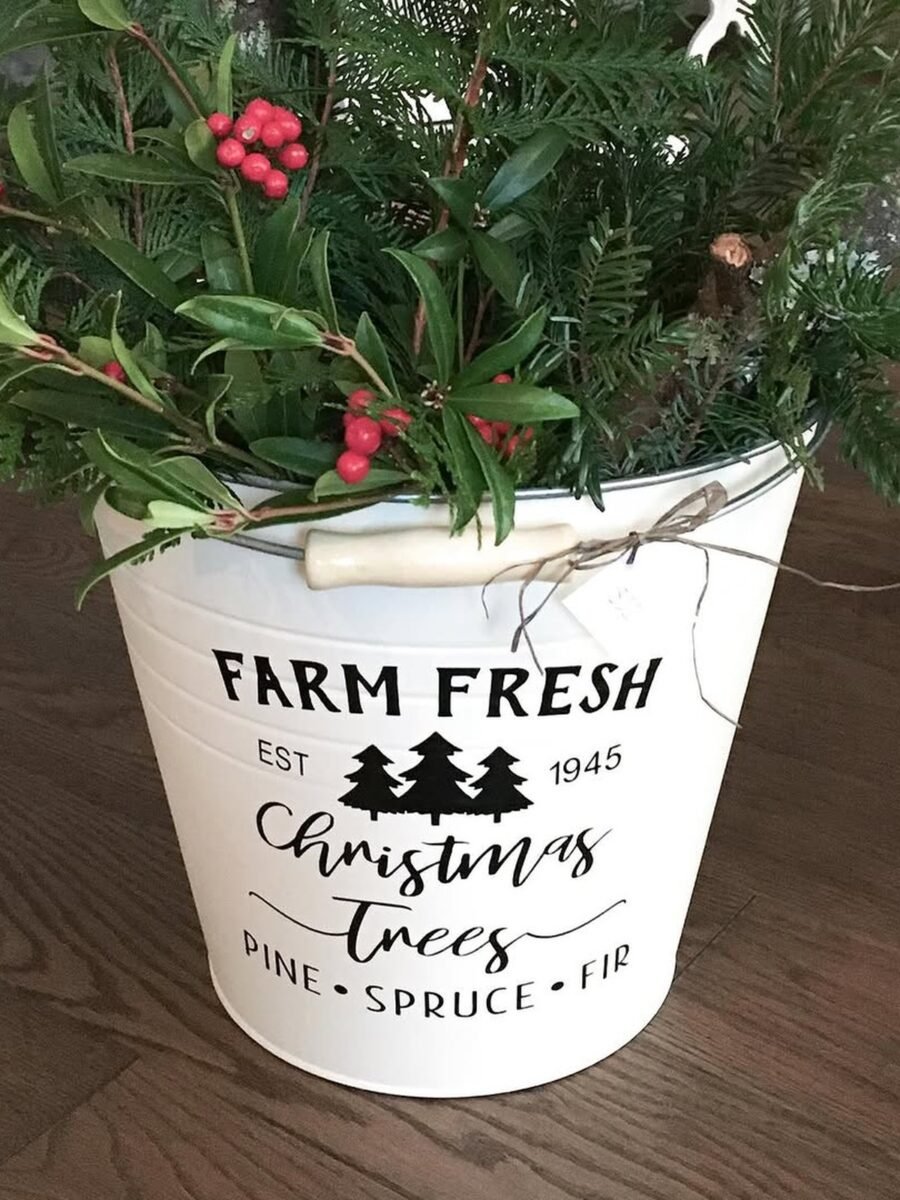
A white metal bucket with simple lettering is the farmhouse classic. Greenery tucked around the rim hides the join between bucket and branches. Metal buckets are light, so stand the tree in its normal stand inside the bucket rather than trusting the bucket alone.
You’ll need: A white metal bucket or tub, greenery sprigs and your regular stand inside.
Best for: Farmhouse porches and entryways
8. Galvanized Container for a Slim Tree
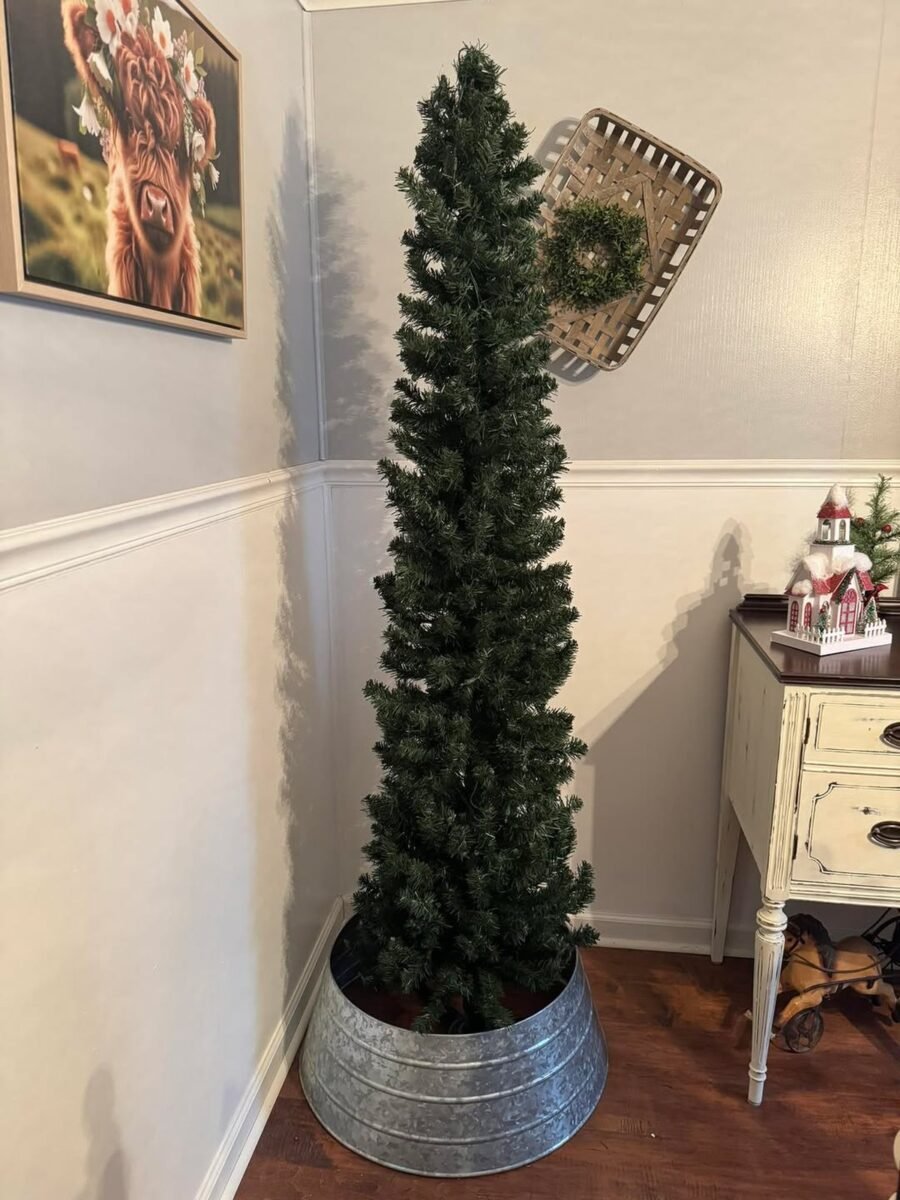
Galvanized metal suits a tall slim tree and a more vintage or industrial room. The container is narrow like the tree, so the whole thing reads as one tall shape. Check the container for sharp rims and fold a cloth over any edge the branches rest on.
You’ll need: A galvanized tub or tall metal container and a stand that fits inside it.
Best for: Slim trees and industrial or vintage rooms
9. Tree Raised on a Crate in the Corner

Raising a small tree on a crate buys height without buying a bigger tree. The crate becomes part of the display, with room in front for gifts or a nativity scene. Make sure the crate is solid and level, and keep the tree back from the edge.
You’ll need: A sturdy wooden crate, a small tree with its stand, and a level floor spot.
Best for: Corners and small rooms where the tree sits raised
10. A Matching Pair of Basket Trees

Two trees in matching wicker baskets make a calm, symmetrical display that looks planned from the doorway. Matching bases are the trick: even if the trees differ a little, identical baskets tie them together like a pair of lamps.
You’ll need: Two matching baskets and two stands, or one basket look repeated across a pair of trees.
Best for: Symmetrical rooms and double tree displays
Frequently Asked Questions
What should a DIY tree stand be made of?
The stand itself should be a strong standard metal stand that grips the trunk and holds water. The DIY part is the cover around it: a crate, collar, basket or bucket that hides the stand without touching it. Never rest the tree weight on the decorative cover.
How do I measure for a tree collar or crate cover?
Measure the widest point of your stand legs and the height of the stand bowl. The cover must be at least 2 inches wider than the legs on every side and tall enough to clear the bowl so you can still add water. When in doubt, size up.
How do I water a real tree inside a basket or collar?
Keep the stand bowl accessible. A collar or crate with one open side, or a basket you can slide, lets you top up water daily. For a real tree, check the water every day for the first week, because a dry stand is a fire risk and shortens the tree life.
Will a basket or collar trap moisture under the tree?
Use a basket collar with an open back or a gap at the bottom, or set the basket on small feet so air flows. Most woven collars are made for this and leave the bottom open. If your basket is fully closed, check under it weekly for damp.
How do I stop a tall tree from tipping in a DIY stand?
Anchor it. Use the stand screws properly, keep heavy ornaments balanced, and for very tall trees add a discreet fishing line from the top of the tree to a wall hook. A wide, heavy collar or crate base also adds visual and real stability against bumps.
How do I store a DIY stand cover after Christmas?
Collars fold or nest, crates stack and baskets hold other decorations for storage. Store them dry and indoors so wood and wicker do not go musty. A crate cover doubles as storage for the ornaments that hang above it.
Final Thoughts on DIY Christmas Tree Stand
The stand is the part of the tree everyone pretends not to see, and fixing it takes an afternoon at most. Build a crate, fold a collar around the legs, or drop the whole stand into a basket, and the tree suddenly looks furnished instead of parked. Match the cover to your room and your tree will look finished from the star right down to the floor.

