

Glitter ornaments are the fastest way to make a tree look expensive. A box of plain clear ornaments, a little clear coat and a pot of fine glitter become jewel bright balls that catch every light on the tree, and each one takes about five minutes of actual work.
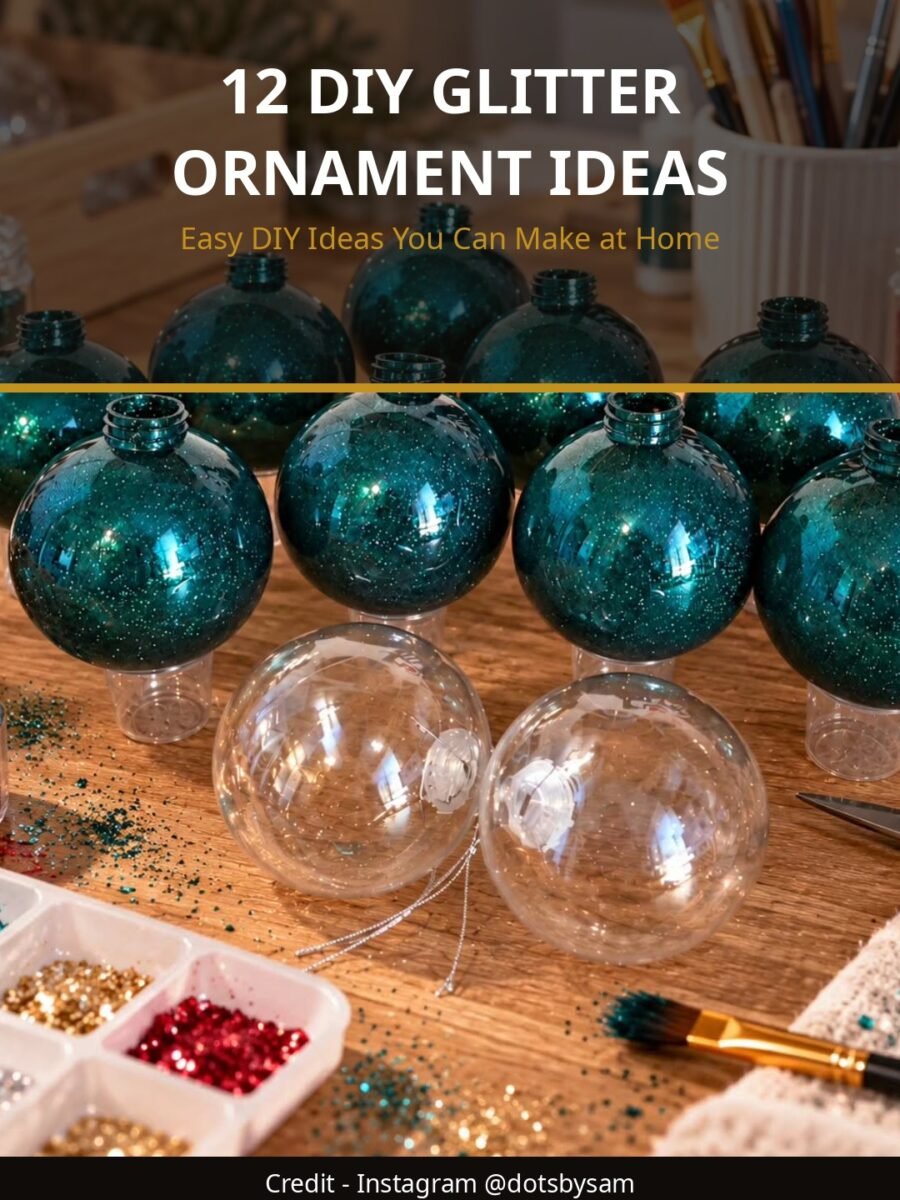
The big secret is putting the glitter on the INSIDE. A thin coat of clear polycrylic or floor polish swirled inside the ornament grabs the glitter, the cap goes back on, and the sparkle stays sealed inside where it cannot shed on your floor, your gifts or your cat.
Work over a tray or a sheet of paper so loose glitter pours straight back into its jar, and keep glitter away from eyes and little mouths. A paper cup makes the perfect drying stand for each finished ornament.
This list starts with three builds: the classic glitter inside method, five different finishes to try, and oversized statement ornaments. After that come coated baubles, pastel sets, snowman globes, foam balls and personalized designs.
Quick Picks
- Best basic method: Classic Glitter Inside Ornaments (idea 1)
- Best variety: Five Glitter Ornament Finishes (idea 2)
- Best statement piece: Oversized Glitter Ornaments (idea 3)
1. Classic Glitter Inside Ornaments

BuildAbout 5 minutes eachNo shed finish
This is the method behind almost every beautiful glitter ornament you have ever pinned. Clear coat goes in, excess drains out, fine glitter goes in and coats the inside wall, and the result is a smooth, jewel like ball with all the sparkle sealed safely inside.
Materials Needed
- Clear plastic or glass ornaments with removable caps
- Clear polycrylic or water based floor polish
- Extra fine glitter in assorted colors
- Paper cups for draining and drying
- A small funnel or a rolled paper cone
- A syringe or squeeze bottle for the clear coat
- Ribbon for hanging
How to Make It
- Take the cap off the ornament and set it aside.
- Squirt a little clear coat inside and swirl slowly until the whole inside is coated.
- Turn the ornament upside down over a paper cup and let the excess drain for a few minutes. This step is what stops drips and bare patches.
- Pour in a spoon of extra fine glitter, cover the opening with a thumb, and shake and swirl until the inside is fully coated.
- Tip the extra glitter back into its jar, stand the ornament in a clean cup, and let it dry for several hours or overnight.
- Replace the cap, add ribbon, and hang.
Tip: Fine glitter coats smoothly, chunky glitter coats patchy. For the classic glassy finish, always reach for extra fine glitter, and do the draining step without rushing it.
2. Five Glitter Ornament Finishes
BuildOne method, five looksGreat for color themes
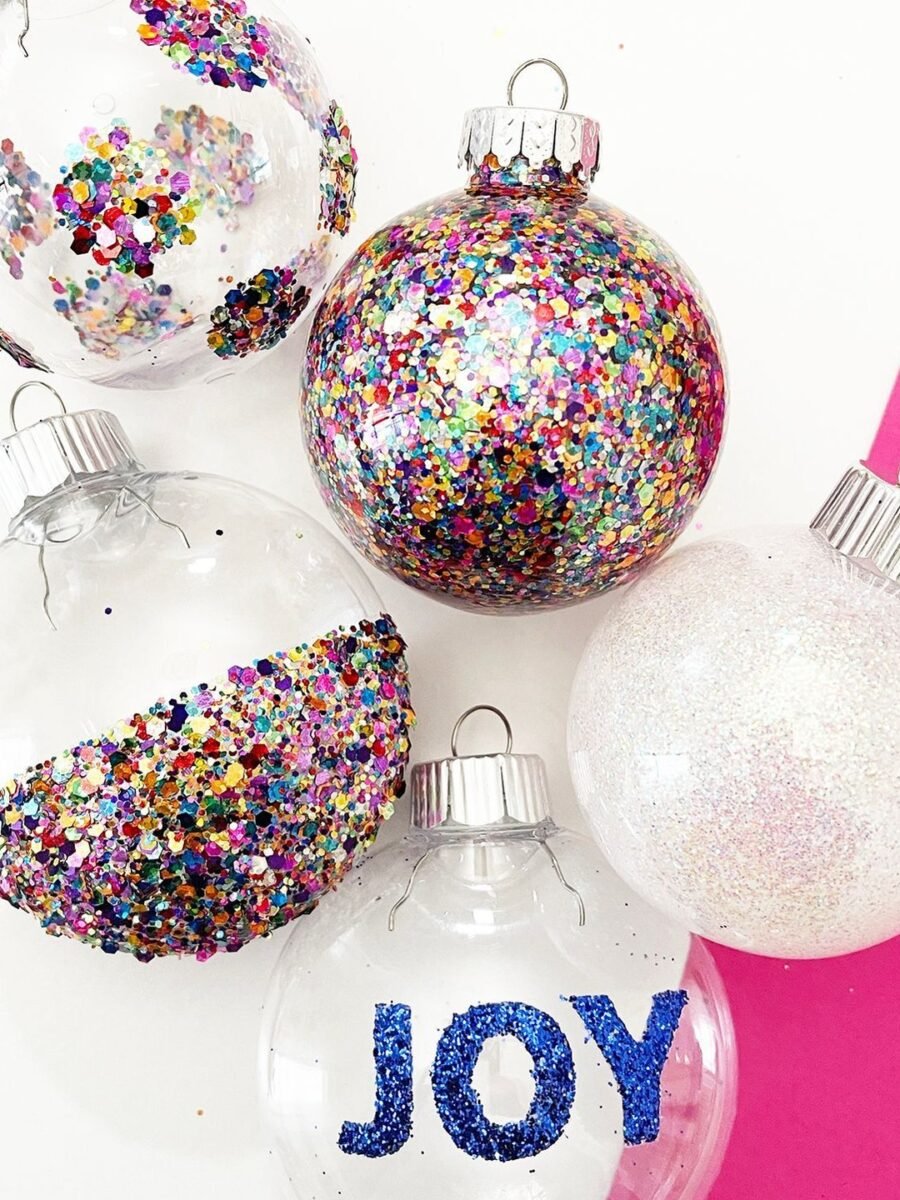
Once the basic method clicks, one box of ornaments becomes a whole collection. This maker shows five finishes side by side: full rainbow confetti glitter, a half dipped look, soft white shimmer, a clear ball with bold glitter letters, and classic gold. Pick a color story and make a matched set.
Materials Needed
- Clear ornaments
- Clear coat and paper cups
- Extra fine glitter in several colors, plus chunky confetti glitter
- Vinyl letters or letter stickers (optional)
- Painter tape for half dipped designs
- Ribbon in matching colors
How to Make It
- For the full glitter ball, follow the classic method in idea 1 from start to finish.
- For the half dipped look, coat and glitter only by swirling the clear coat halfway up the inside, or tape the outside and glitter the inside in two stages.
- For glitter letters, stick vinyl letters on the OUTSIDE of a finished clear or lightly glittered ornament and press them down firmly.
- For the soft white finish, use white or iridescent glitter and let the coat drain a little longer for a lighter cover.
- Let every ornament dry fully in its cup before capping.
- Group the finished set in odd numbers on the tree for the best look.
Tip: Decide your color story before you start: two metallics plus one color always looks planned. Random rainbows are fun for kids trees, matched sets are the ones that look store bought.
3. Oversized Glitter Ornaments

BuildBig impactSame method, larger scale
Everything about the classic method works at jumbo size too, and oversized glitter ornaments are the ones guests ask about. Use them on a big tree, in a bowl on the table, or hanging in a window where the light hits them all day.
Materials Needed
- Large clear plastic ornaments (plastic is safer than glass at this size)
- Clear coat, more than you think you need
- Extra fine glitter in statement colors
- Large paper cups or a muffin tray for draining
- Wide ribbon for hanging
How to Make It
- Work with plastic ornaments for oversized pieces. They are light, safe and hang without stressing branches.
- Add clear coat generously and swirl patiently. Big ornaments need more turning to coat every wall.
- Drain upside down in a sturdy cup for at least five minutes.
- Add glitter in two rounds for the fullest coverage: coat, shake, tip out, then repeat in any thin spots.
- Dry overnight before capping, as the larger surface stays tacky longer.
- Hang with wide ribbon, or display in bowls and baskets where they cannot roll away.
Tip: A muffin tray is the best drying rack for big ornaments. Each cup holds one ball steady, and the whole tray moves to a safe shelf in one go.
Printable Bundle
Christmas Printable Bundle
Christmas planner, 24 advent activity cards, 36 gift tags, handmade labels, Santa letter and family games.
4. Glitter Coated Bauble Makeover

Glitter can also go on the outside to rescue an old, scratched bauble. Brush the ball with glue in sections, roll or sprinkle it with fine glitter, and an ornament headed for the bin becomes new again. This one goes a step further and turns the refreshed bauble into a tiny hot air balloon.
You’ll need: an old bauble, craft glue, a brush, fine glitter, and string for the finish.
Best for: Upcycling tired ornaments
5. Purple Glitter Ornaments with Pinstripes

A tray of purple glitter ornaments, each one finished with hand painted pinstripes, shows where this craft goes with a steady hand. The glitter base is the classic inside method, and the painted lines on the outside turn simple balls into custom pieces made for a friend.
You’ll need: purple glitter ornaments from the classic method, enamel paint pens, and a steady rest for your hand.
Best for: Custom gifts for car and purple lovers
6. Pastel Glitter Ornament Set

Not every Christmas tree wants red and gold. This pastel set, peach, mint, baby blue, lilac and soft pink, all with the same fine glitter finish, looks like spring candy on the tree. Pastels are a lovely choice for nurseries, girls rooms and soft neutral decor.
You’ll need: clear ornaments, clear coat, and fine glitter in pastel shades.
Best for: Nurseries and soft color themes
7. Glitter Filled Baubles in Classic Colors

Rose gold, black, copper and deep blue, finished with gold initial letters: this is the grown up end of the glitter craft. Metallic glitter inside clear balls, a monogram on the front, and the set looks like it came from a boutique. Light bulb shaped ornaments join in for a fun twist.
You’ll need: clear ornaments in ball and bulb shapes, metallic fine glitter, and gold letter stickers.
Best for: Monogram gifts and glam trees
Printable Games
Christmas Party Games Pack
9 fun games for family, friends and office parties: trivia, charades, gift swap and more.
8. Snowman Glitter Globe Ornaments
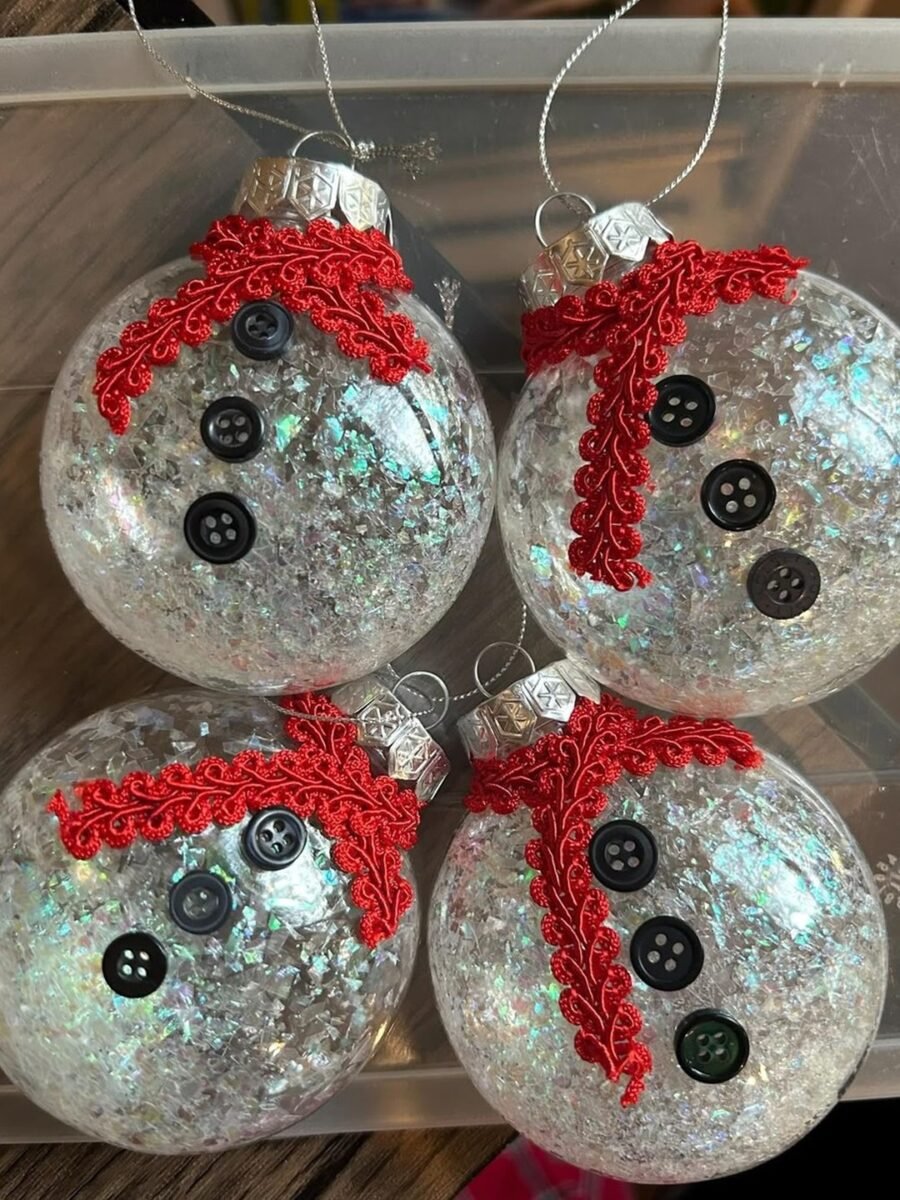
Fill a globe with iridescent white glitter, glue three black buttons down the front, wrap a tiny red scarf at the neck, and a snowman appears. These were made at a community art class, which tells you how teachable the idea is. A row of snowmen on a mantel is pure December joy.
You’ll need: clear globe ornaments, iridescent glitter, small black buttons, glue, and thin red ribbon or felt for scarves.
Best for: Classes, groups and snowman collectors
9. Glitter on the Inside, No Mess
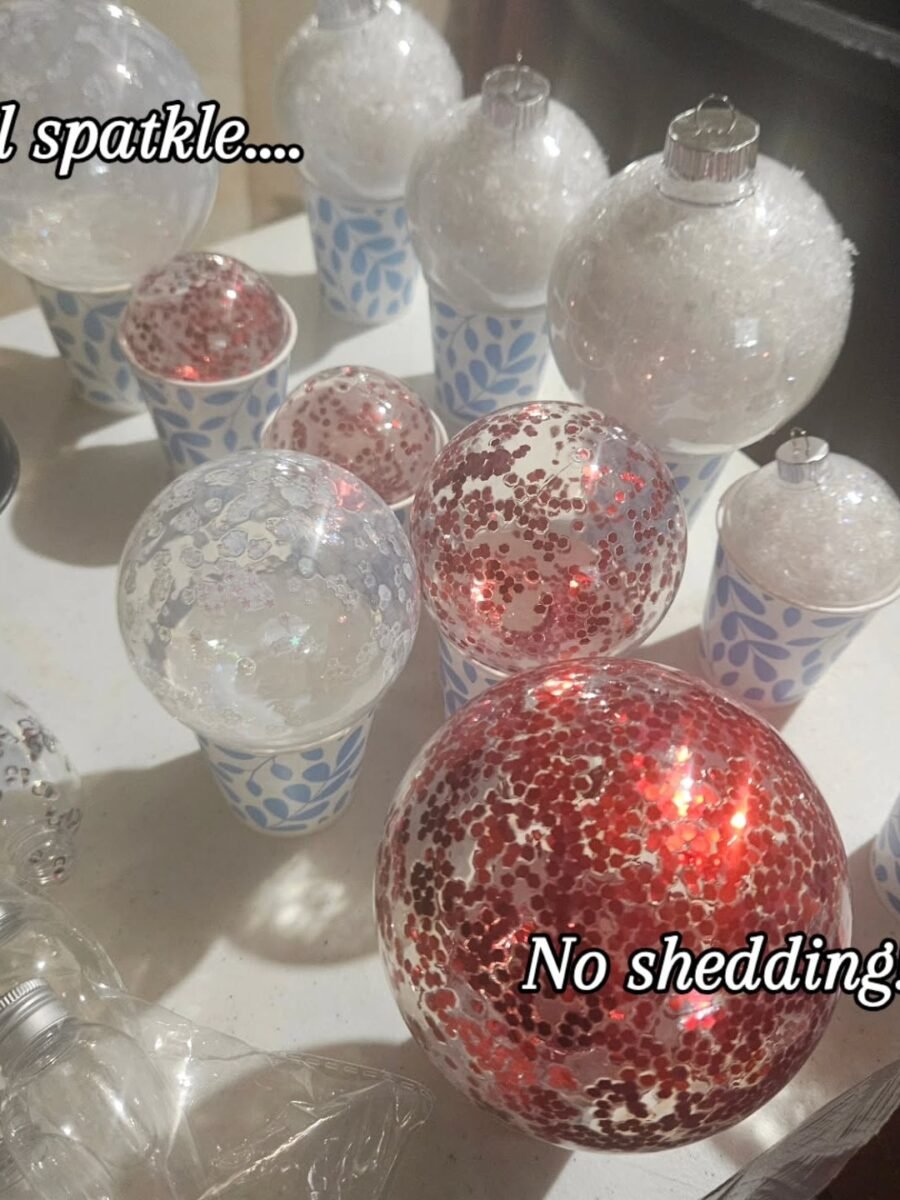
Her caption says it all: she loves sparkle but hates the mess, so the glitter goes on the inside. The ornaments stand in paper cups while they are filled and dried, the sparkle seals in, and the finished balls, snowy white and one bold red, shed nothing at all.
You’ll need: clear ornaments, clear coat, white and red glitter or sequins, and paper cups.
Best for: Glitter lovers who hate sweeping
10. Folded Glitter Foam Ball Ornaments

No clear balls at all in this version. Small folded pieces of glitter foam are layered and glued into a spiky, flower like ball that sparkles from every angle. It is a good project for older kids, uses no loose glitter, and the finished balls are light and unbreakable.
You’ll need: glitter foam sheets in several colors, scissors, glue, and a hanging loop.
Best for: Unbreakable ornaments for kids rooms
11. Flat Disc Glitter Ornaments with Lettering
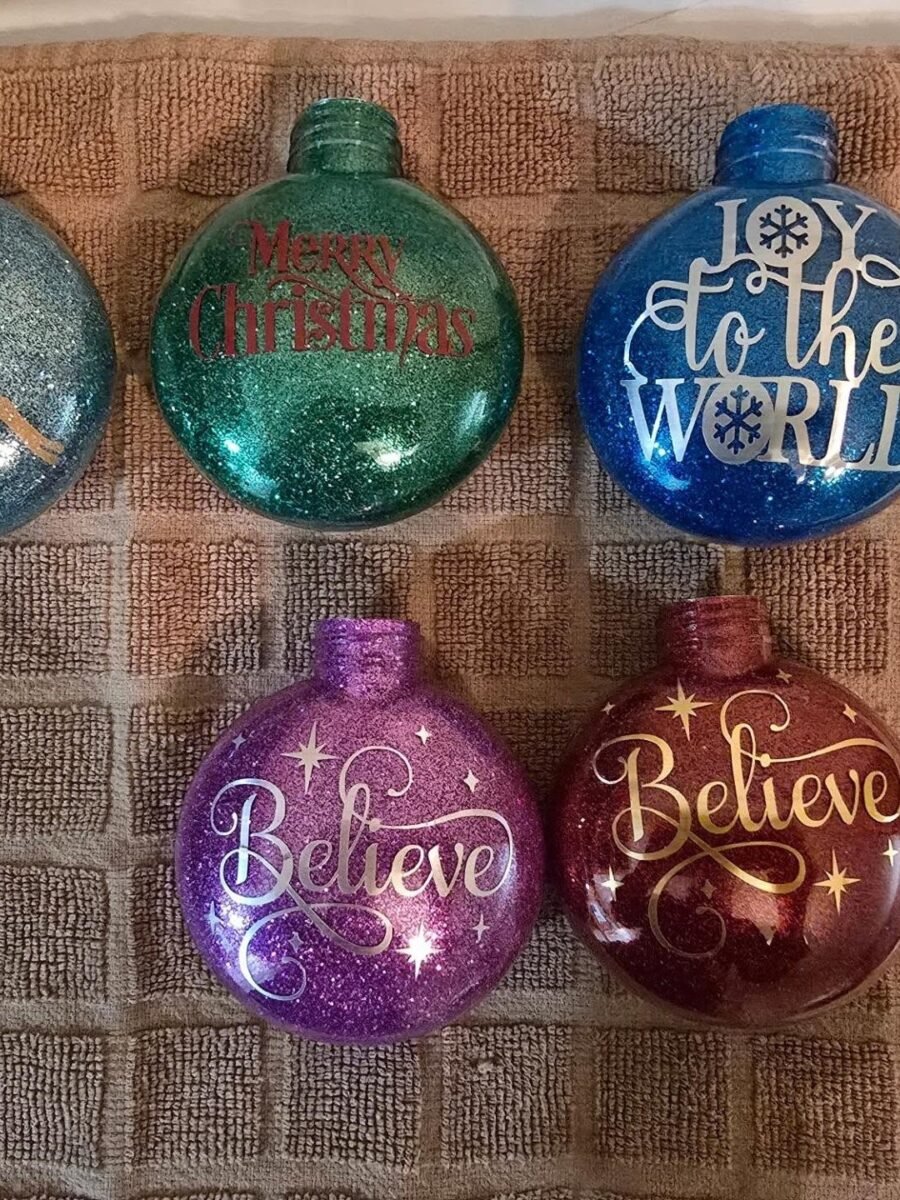
Flat disc ornaments take glitter beautifully and hang flat against the branches, and the wide face is perfect for words: Merry Christmas, Joy to the World, Believe. Coat the disc with the inside method or a fine outside layer, add lettering, and you have ornaments that read like little signs.
You’ll need: flat disc clear ornaments, fine glitter, clear coat, and letter stickers or a paint pen.
Best for: Word art and faith themed trees
12. Personalized Glitter Name Ornaments
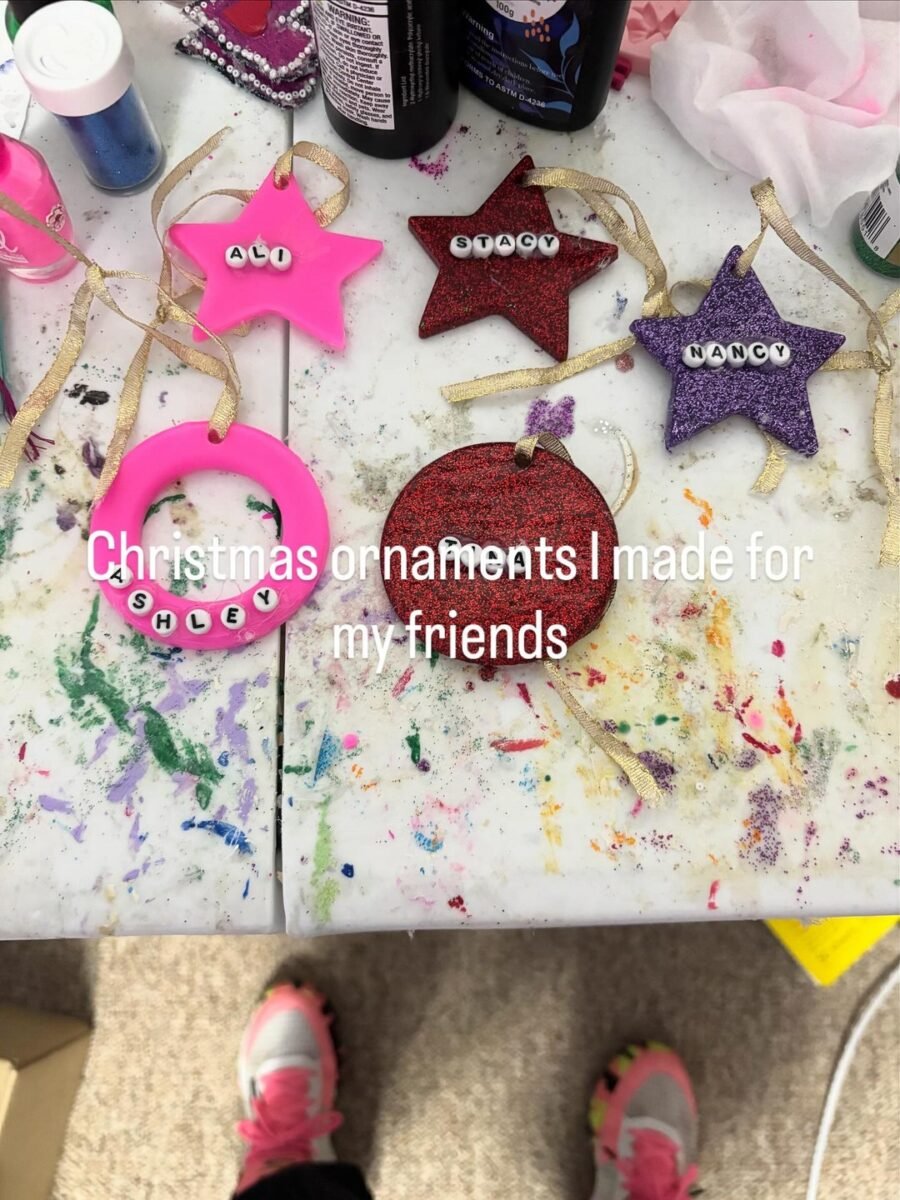
Stars and flat circles in bright glitter, each one finished with letter beads spelling a name, were made as gifts for friends. Personal ornaments are the ones people keep for decades. Make one per family member and hang them together at the front of the tree.
You’ll need: flat ornaments or wooden shapes, glitter and glue or the inside method, and letter beads or stickers.
Best for: Friend and family gift sets
Frequently Asked Questions
What do you put inside an ornament to make glitter stick?
A thin coat of clear polycrylic or water based floor polish. Swirl a little inside the ornament until every wall is coated, drain the excess into a cup for a few minutes, then add extra fine glitter and shake. As the coat dries, it locks the glitter to the inside wall with a smooth, no shed finish.
Why is my glitter ornament patchy or streaky?
Usually the clear coat was not drained long enough, so it pooled and slid, or the glitter was too chunky. Drain for a full few minutes until only a thin film remains, use extra fine glitter, and add a second glitter round while the first is still slightly tacky if you see thin spots.
Are plastic or glass ornaments better for glitter crafts?
Plastic is safer, lighter and best for kids, oversized ornaments and anything that will be handled a lot. Glass gives a slightly clearer, more premium finish for display trees. Both take the inside glitter method exactly the same way.
How long do DIY glitter ornaments need to dry?
Give them at least several hours, and overnight is better, especially for large ornaments. The clear coat must be fully dry before the cap goes back on, or trapped moisture can fog the inside. Stand them in paper cups somewhere safe while they dry.
How do I keep glitter from getting everywhere?
Work over a tray or a big sheet of paper, pour glitter with a funnel or a folded paper cone, and tip excess glitter straight back into its jar after every ornament. The inside method itself is the biggest fix: once the cap is on, the glitter is sealed in and sheds nothing. Keep loose glitter away from eyes and wash hands after crafting.
Can kids make glitter ornaments?
Yes, with the inside method and plastic ornaments, children can do the shaking and color choosing while an adult handles the clear coat pouring. Fine glitter should stay out of eyes and mouths, so supervise young children, and choose the folded glitter foam ornaments from this list for the youngest crafters.
Final Thoughts on Diy Glitter Ornaments Ideas
A box of clear ornaments and a row of glitter jars is an afternoon of pure, satisfying making. The inside method keeps the sparkle where it belongs, the colors are entirely yours, and the finished balls look like they cost far more than they did.
Start with a matched set using the classic build, try the five finishes for variety, and make one oversized statement piece for the front of the tree. By next Christmas, store bought baubles are going to look a little plain.

