

A headboard changes the whole feel of a bedroom. It anchors the bed, adds height, and gives the room a finished look that a bare wall behind a mattress never has. These DIY headboard ideas cover every style and budget — from a simple cheap wood build that takes one afternoon to a fully upholstered fabric headboard that looks like it came from a furniture store.
This post contains affiliate links. If you purchase through these links I may earn a small commission at no extra cost to you.
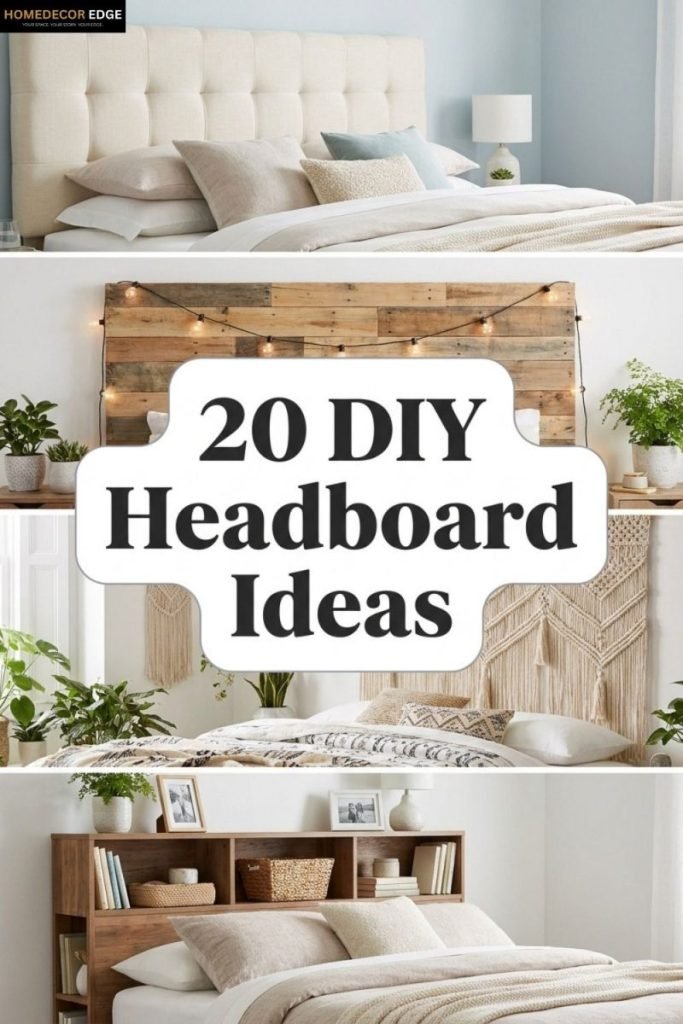
The right headboard makes a bedroom feel completely finished and intentional.
1. Build an Easy Upholstered Fabric Headboard
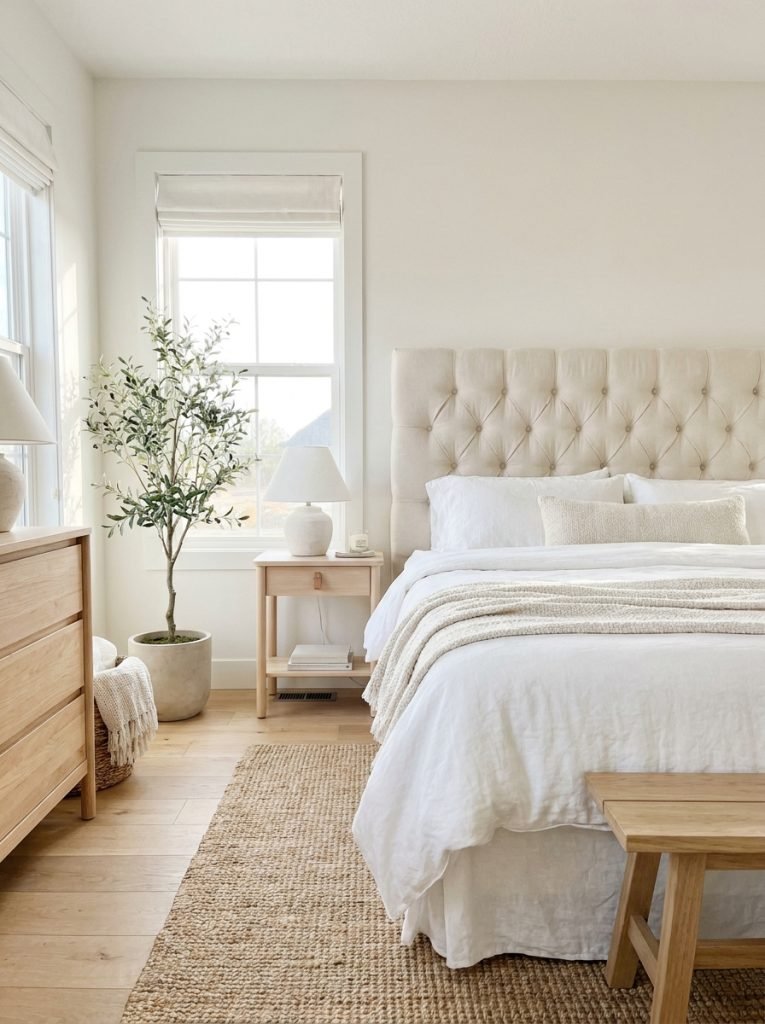
An upholstered headboard looks expensive and is one of the most satisfying DIY bedroom builds you can do. Cut a plywood panel to size, layer foam padding on top, wrap in fabric, and mount behind the bed. This DIY headboard fabric kit includes the foam and fabric in the right weights for a professional finish. Choose a neutral linen or a textured boucle for a look that works in any bedroom style from minimal to maximalist.
Materials Needed:
- Plywood sheet cut to headboard size
- High density foam padding
- Upholstery fabric
- Staple gun and staples
- Mounting hardware or legs
How to Make It:
- Cut plywood to your desired headboard width and height — standard is bed width plus a few inches on each side.
- Cut foam to the same dimensions and attach to the plywood with spray adhesive.
- Lay fabric face down, center the foam-covered plywood on top, and pull fabric tightly over the back.
- Staple fabric to the back of the plywood working from the center outward on each side.
- Add legs or wall mounting hardware to the back and position behind the bed.

DIY Headboard Fabric Kit
Foam and fabric kit for building a professional quality upholstered headboard at home.
Check Price on Amazon2. Build a Simple Wood Plank Headboard
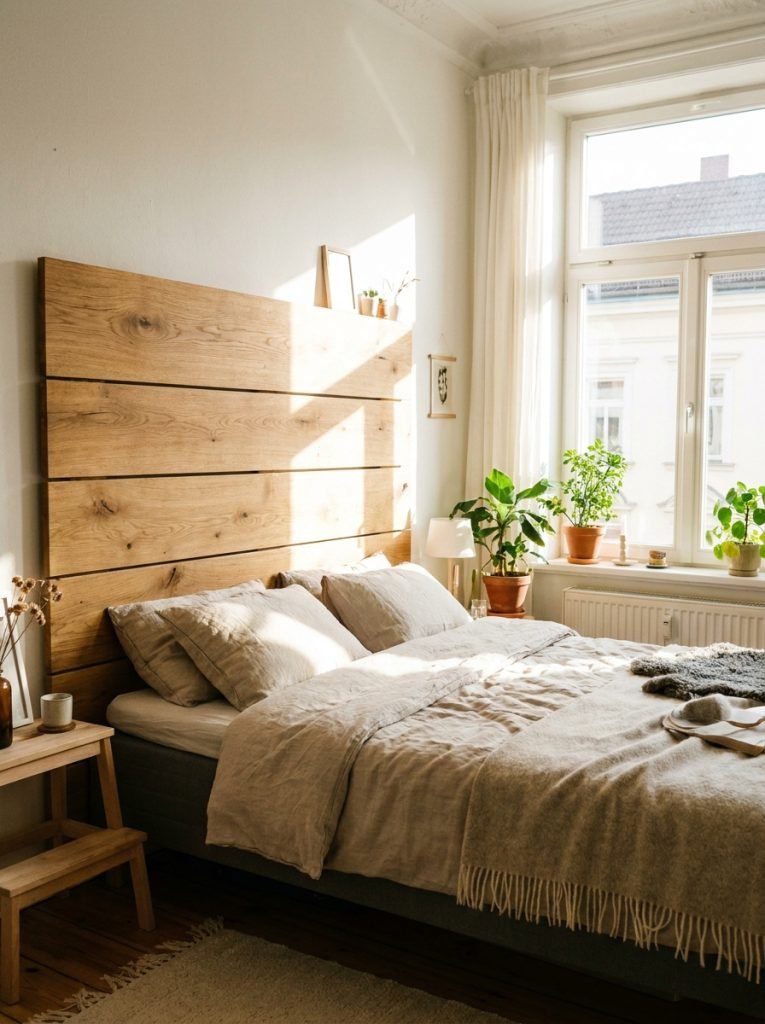
A wood plank headboard is one of the easiest builds on this list. Cut boards to your desired width, sand smooth, finish with paint or stain, and mount behind the bed. Horizontal planks give a modern farmhouse look, vertical planks feel taller and more dramatic. This wood plank headboard shows the finished style to reference for proportions and finish. Natural wood tones work in almost any bedroom palette.
Materials Needed:
- 1×6 or 1×8 pine or cedar boards
- Wood screws and drill
- Sandpaper
- Wood stain or paint
- Wall mounting cleats or headboard brackets
How to Make It:
- Cut boards to your desired headboard width — typically bed width plus 4 to 6 inches on each side.
- Lay boards side by side and connect them at the back with two horizontal cleats screwed across all boards.
- Sand all surfaces smooth and apply stain or paint in your chosen finish.
- Mount the finished headboard panel to the wall behind the bed using a French cleat or headboard brackets.

Wood Plank Headboard
Clean wood plank headboard — great ready made option or blueprint for your own DIY build.
Check Price on Amazon3. Add a Headboard with Shelves and Storage
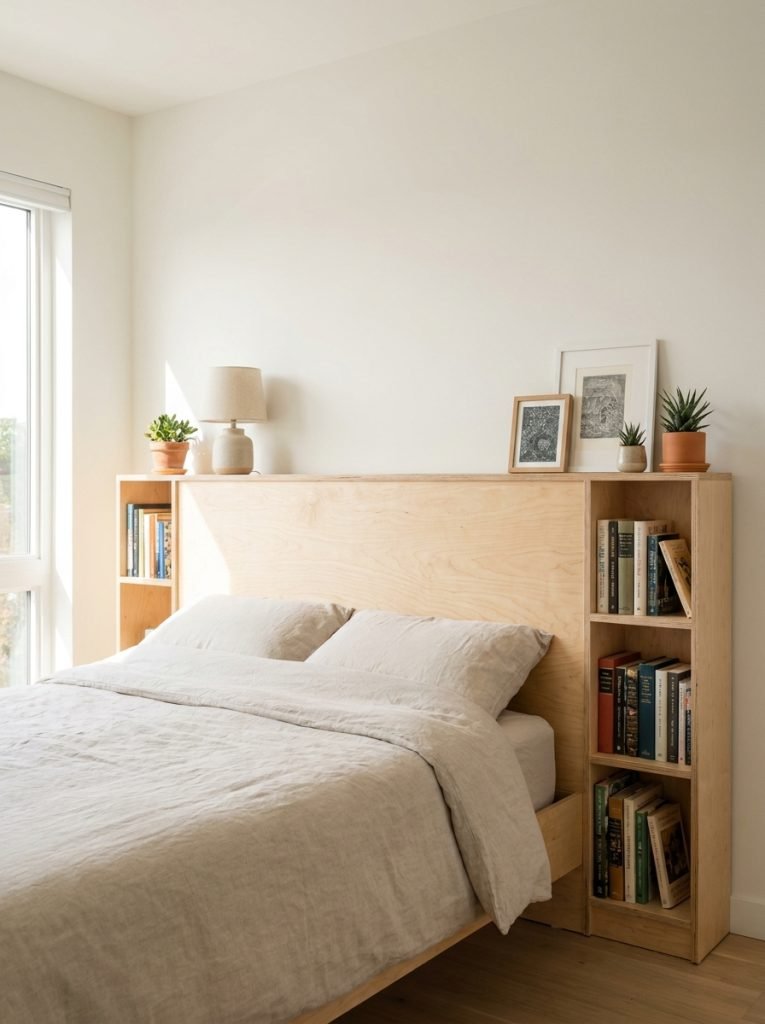
A headboard with shelves replaces the nightstand entirely — books, lamp, phone, and water glass all sit right at the head of the bed without taking any floor space. This headboard with shelves storage shows the finished layout to aim for. Build a central panel with side towers that extend to nightstand height for a fully integrated bedroom storage solution that looks custom built. For more bedroom storage ideas check out these bedroom inspiration ideas.
Materials Needed:
- Plywood for central panel and side towers
- 1×6 boards for shelves
- Wood screws and drill
- Sandpaper and paint or stain
- Wall mounting hardware
How to Make It:
- Build two identical side tower boxes from plywood with two or three shelves inside each.
- Cut a central headboard panel to connect both towers at the top.
- Attach the central panel between the two towers at the desired headboard height.
- Sand smooth and paint or stain the whole unit in one consistent finish.
- Mount to the wall or rest against it and position the bed in front.

Headboard with Shelves Storage
Headboard with built in side shelves that replaces nightstands and adds storage right at the bed.
Check Price on Amazon4. Hang a Boho Macrame Headboard
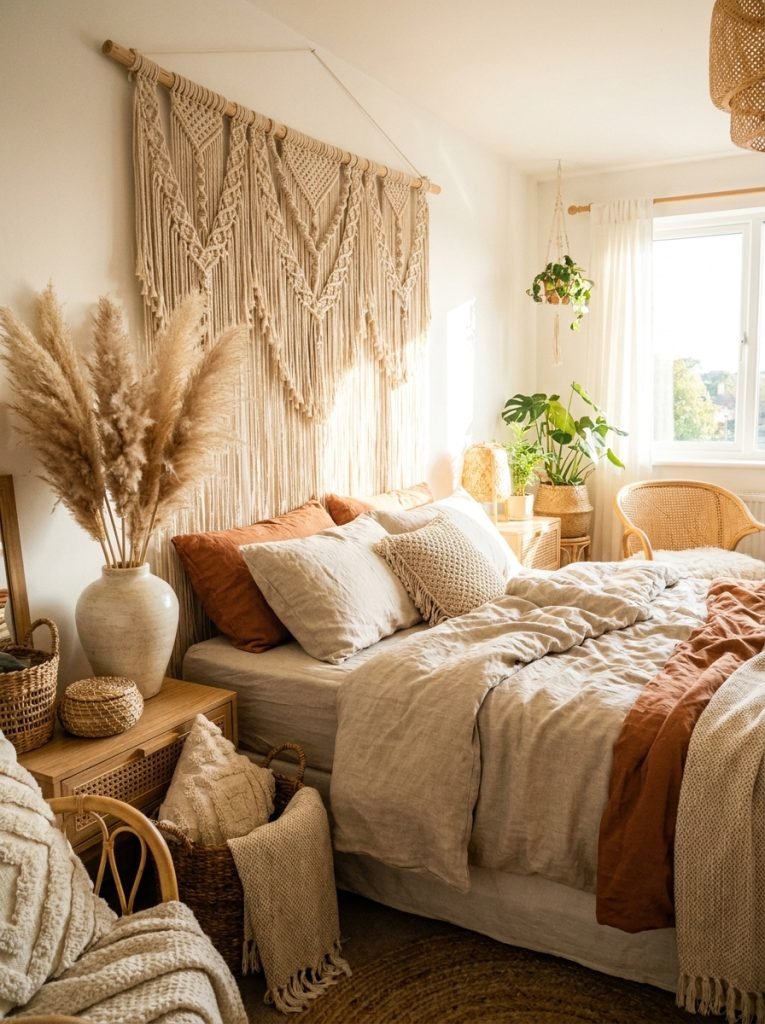
A macrame wall hanging makes a beautiful boho headboard that requires zero woodworking. Hang it on a dowel rod mounted to the wall behind the bed and the texture and natural fiber immediately transforms the room. This boho macrame headboard is a ready made version with the right scale for a queen or king bed. Pair with natural linen bedding and dried pampas grass for a full boho bedroom look.
Materials Needed:
- Macrame wall hanging
- Wooden dowel rod
- Wall hooks or nails
- Level
How to Make It:
- Mount two wall hooks at equal heights behind the bed center at your desired headboard height.
- Thread the dowel rod through the top of the macrame hanging.
- Rest the dowel rod on both wall hooks so the macrame hangs centered behind the bed.
- Adjust height so the hanging sits just above the pillows when the bed is made.

Boho Macrame Headboard
Macrame wall hanging that works as a stunning boho headboard with zero woodworking required.
Check Price on Amazon5. Build a Fun Kids Headboard
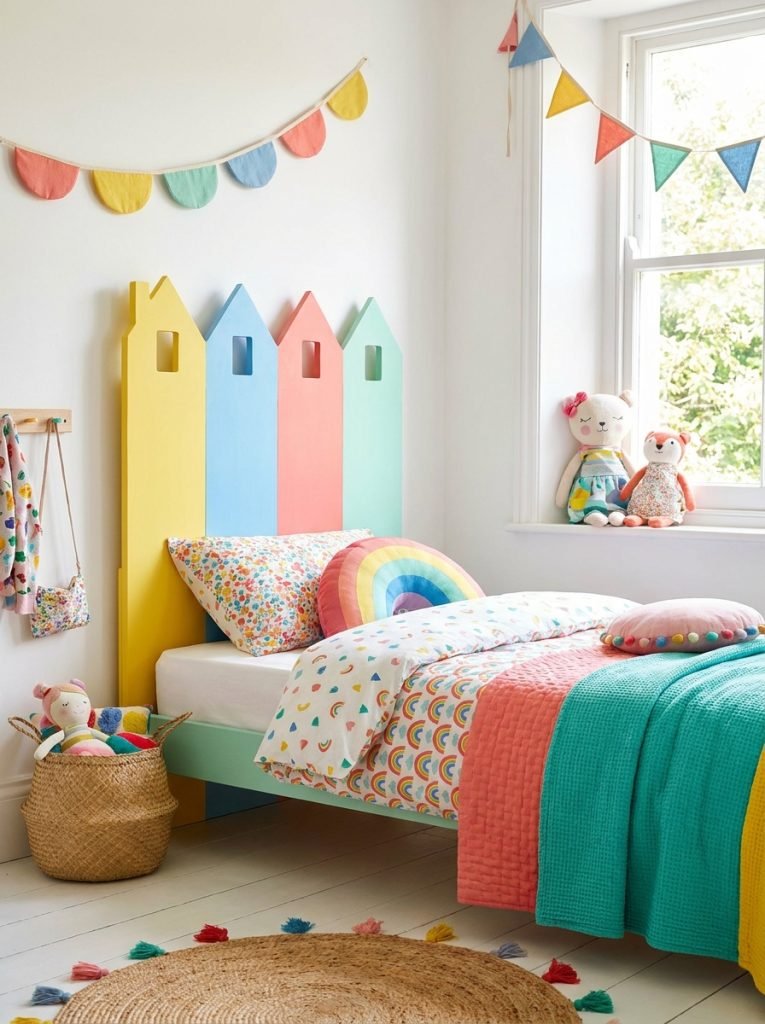
A kids headboard is a great opportunity to build something with personality — a house shape, a castle outline, a simple arch with their name painted on it. Cut the shape from plywood, sand smooth, paint in bright colors, and mount behind the bed. This kids headboard shows the fun shaped style that works best in a child’s room. Build it simple enough that it can be repainted as their taste changes.
Materials Needed:
- Plywood sheet
- Jigsaw for shaping
- Sandpaper
- Non-toxic kids paint
- Wall mounting hardware
How to Make It:
- Draw your chosen headboard shape on the plywood — house, arch, castle, or simple rectangle with a scalloped top.
- Cut the shape with a jigsaw and sand all edges completely smooth.
- Paint with non-toxic paint in bright colors and allow to dry fully.
- Add the child’s name, stars, or other details with a small paintbrush.
- Mount to the wall behind the bed at the right height.

Kids Headboard DIY
Fun shaped kids headboard — great ready made option or blueprint for a custom DIY kids room build.
Start Your 30-Day Home Reset
Stop waiting for a "perfect" free weekend. Grab the 30-day plan and start feeling lighter in your own home by tomorrow.
View the 30-Day Plan Printable PDF · Instant download6. Mount a Headboard with the Right Hardware
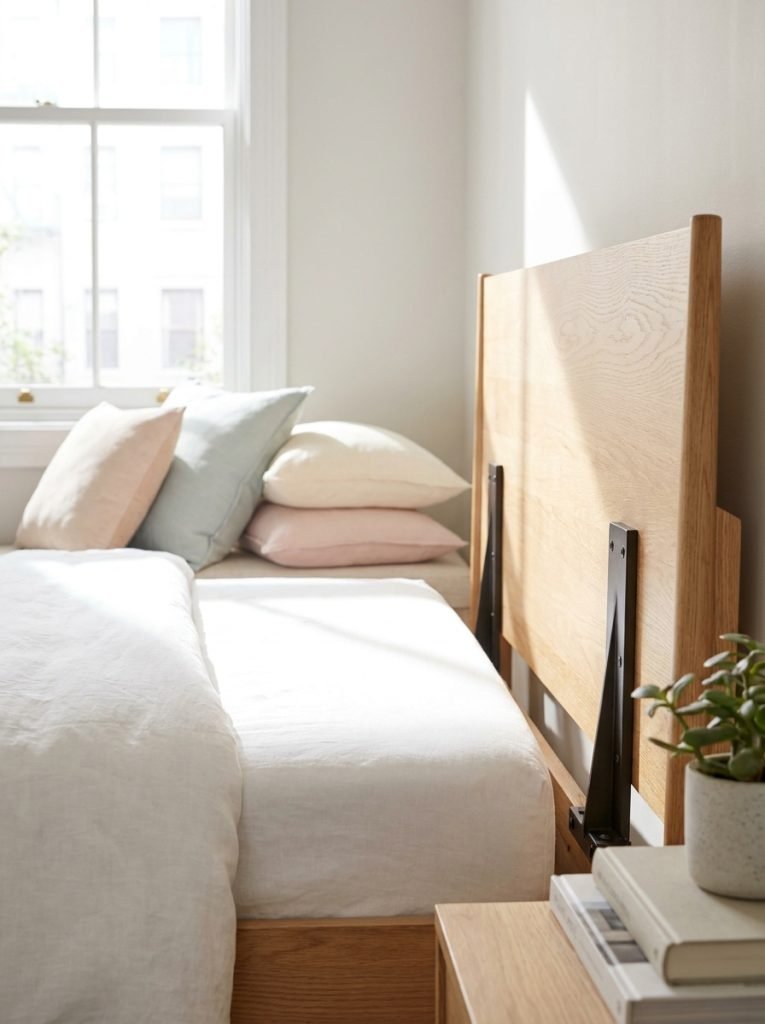
The most overlooked part of any DIY headboard build is the mounting. A headboard that wobbles or falls off the wall is a safety issue and a daily frustration. These headboard mounting hardware brackets attach the headboard directly to the bed frame rather than the wall which is more stable for most builds. Use wall mounting with a French cleat for very heavy headboards or those positioned in front of a window.
Materials Needed:
- Headboard mounting brackets
- Drill and appropriate screws
- Level
- Measuring tape
How to Make It:
- Attach the bracket plates to the back of the headboard at the standard bolt hole positions.
- Attach the corresponding bracket receivers to the bed frame uprights.
- Slot the headboard brackets into the bed frame receivers and tighten the bolts firmly.
- Check that the headboard sits level and does not wobble before placing the bed against the wall.

Headboard Mounting Hardware
Universal mounting brackets that attach any DIY headboard securely to a standard bed frame.
Check Price on Amazon7. Build a Pallet Wood Headboard
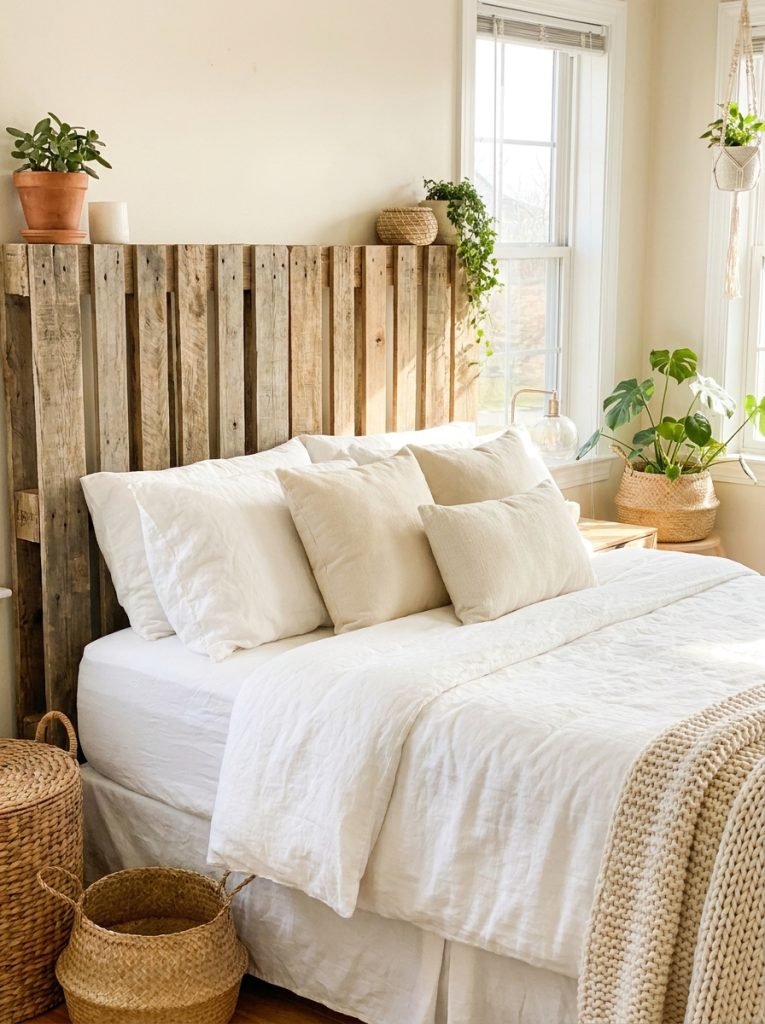
Pallet wood headboards have a warm rustic texture that looks especially good against white or neutral bedding. Disassemble a pallet carefully, sand the boards well, and arrange them in your chosen pattern — all horizontal, all vertical, or a herringbone layout. This pallet wood headboard shows the finished style. Seal or wax the wood before mounting to protect it and bring out the natural grain.
Materials Needed:
- Wooden pallet (free sourced)
- Pry bar for disassembly
- Sandpaper
- Wood wax or sealant
- Plywood backing panel
- Mounting hardware
How to Make It:
- Disassemble the pallet carefully and sand all boards smooth.
- Cut a plywood backing panel to your desired headboard dimensions.
- Arrange pallet boards on the backing panel in your chosen pattern and cut to fit.
- Glue and nail each board to the backing panel.
- Wax or seal all surfaces and mount behind the bed.

Pallet Wood Headboard
Rustic pallet wood headboard with natural texture — great inspiration for a free DIY pallet build.
Check Price on Amazon8. Add LED Lights Behind the Headboard
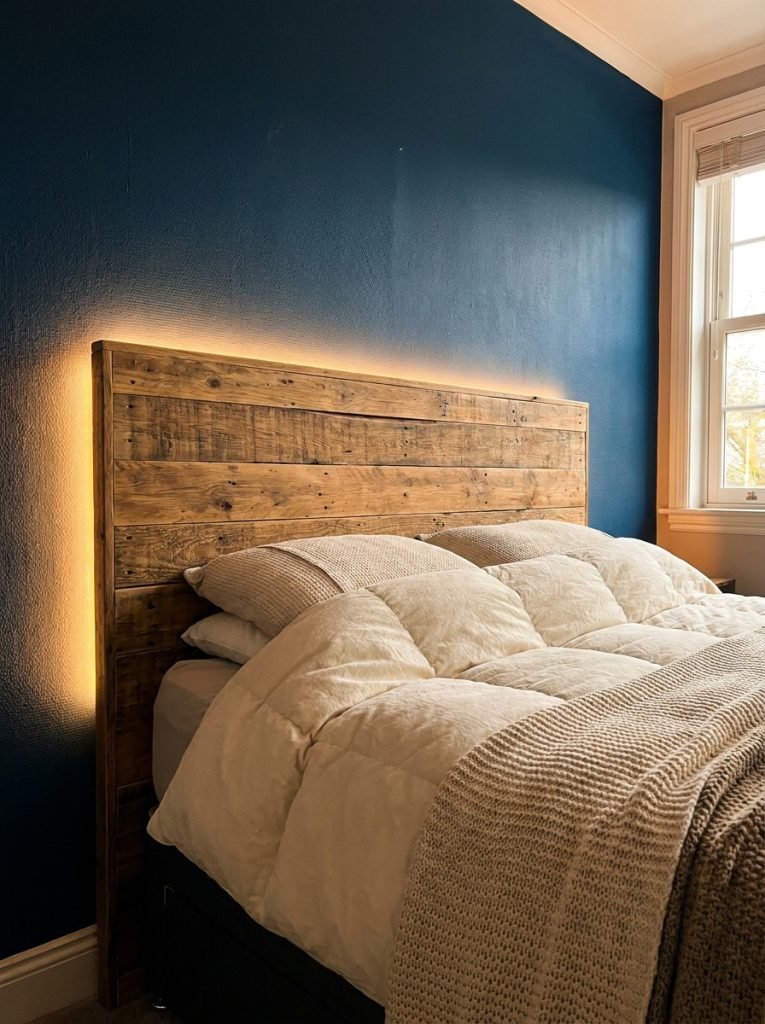
LED strip lights mounted behind a headboard create a soft floating backlight effect that makes any bedroom feel more luxurious and relaxing. Mount the headboard slightly away from the wall — about 2 inches — and run LED strips along the back edge. This headboard LED light strip is dimmable and has warm white tones that work perfectly for bedroom ambiance. It works on any headboard style and is one of the easiest upgrades to add.
Materials Needed:
- LED strip lights
- Headboard with 2 inch standoff from wall
- Small standoff brackets or wood blocks
- Timer or smart plug (optional)
How to Make It:
- Mount the headboard 2 inches away from the wall using small wood block standoffs at each mounting point.
- Run LED strip lights along the back edges of the headboard — top and both sides.
- Tuck the power cable behind the headboard and down the wall to the nearest outlet.
- Test the light effect from the bed and adjust the strip position if any hot spots are visible.

Headboard LED Lights
Dimmable LED strip lights that create a soft floating backlight effect behind any headboard.
Check Price on Amazon9. Make a Pool Noodle Headboard
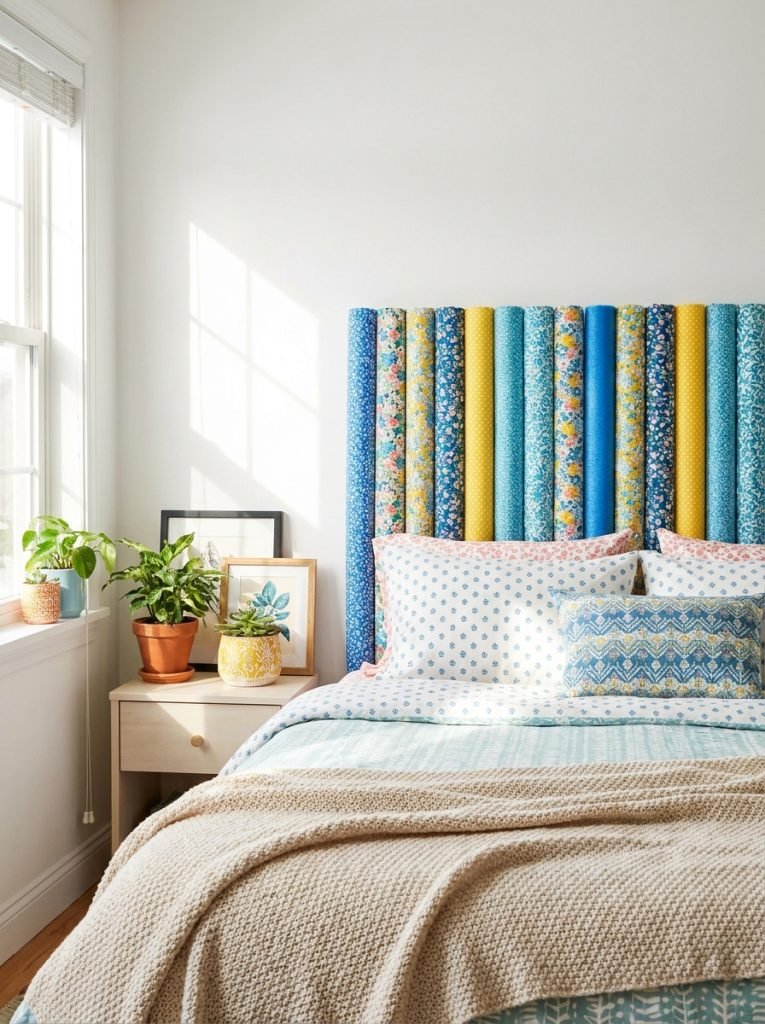
Pool noodles wrapped in fabric make a surprisingly convincing padded headboard for almost no money. Cut them to the same length, wrap each one in fabric secured with hot glue, and mount them vertically side by side on the wall behind the bed. The result looks like a tufted upholstered headboard and costs under twenty dollars. A brilliant cheap headboard hack that works especially well in kids rooms and rentals.
Materials Needed:
- Pool noodles (6 to 8 depending on bed width)
- Upholstery or craft fabric
- Hot glue gun
- Command strips or small nails for wall mounting
How to Make It:
- Cut all pool noodles to the same length — your desired headboard height.
- Cut fabric strips wide enough to wrap around each noodle with overlap.
- Wrap each noodle tightly in fabric and secure with hot glue along the seam.
- Mount noodles side by side on the wall behind the bed using command strips or small nails through the center.
- Space them evenly and check that the row sits level across the full width.
10. Build a Cheap Easy Headboard from 2x4s
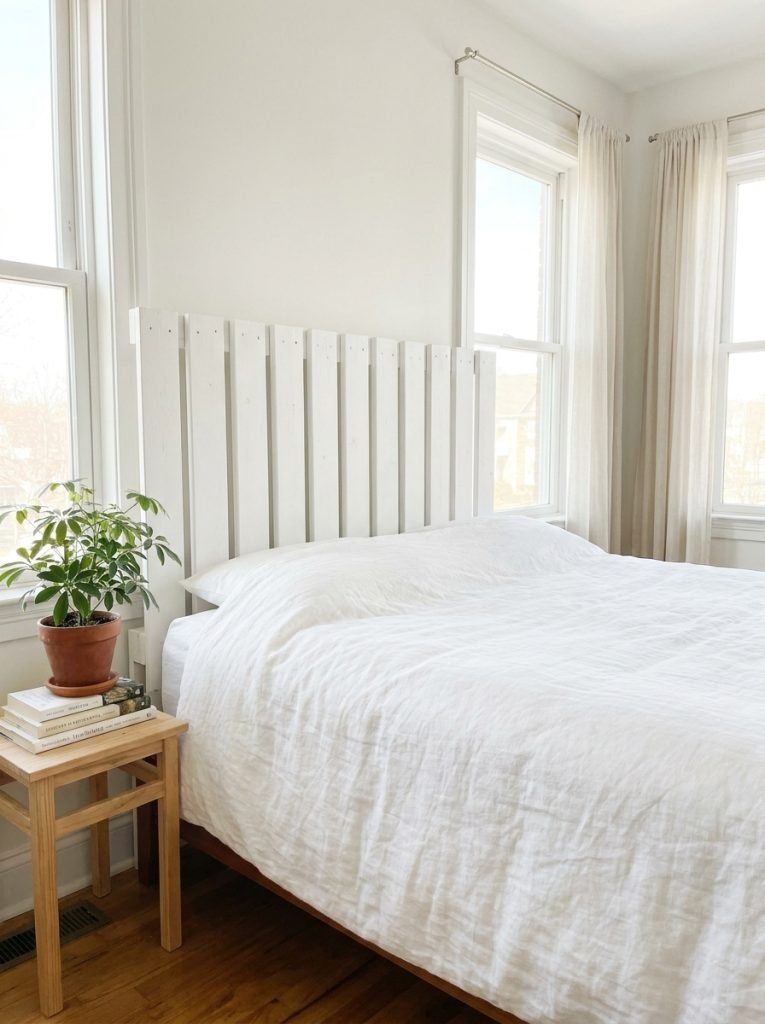
A headboard built entirely from 2×4 lumber is the cheapest proper wood build on this list. All straight cuts, no complex joinery, and the chunky proportions look intentional rather than makeshift when painted well. Paint white for a clean modern look or stain for a farmhouse feel. A queen size headboard costs under thirty dollars in materials and takes about two hours to build and paint.
Materials Needed:
- 2×4 lumber
- Wood screws and drill
- Sandpaper
- Paint or stain
- Mounting hardware
How to Make It:
- Cut 2x4s to your desired headboard height for the vertical pieces.
- Cut horizontal 2x4s to the full bed width for the top, bottom, and middle rails.
- Screw the vertical pieces to the horizontal rails to build the headboard frame.
- Fill any screw holes with wood filler, sand smooth, and paint or stain.
- Mount to the bed frame or wall using appropriate hardware.
11. Use Wallpaper as a Headboard
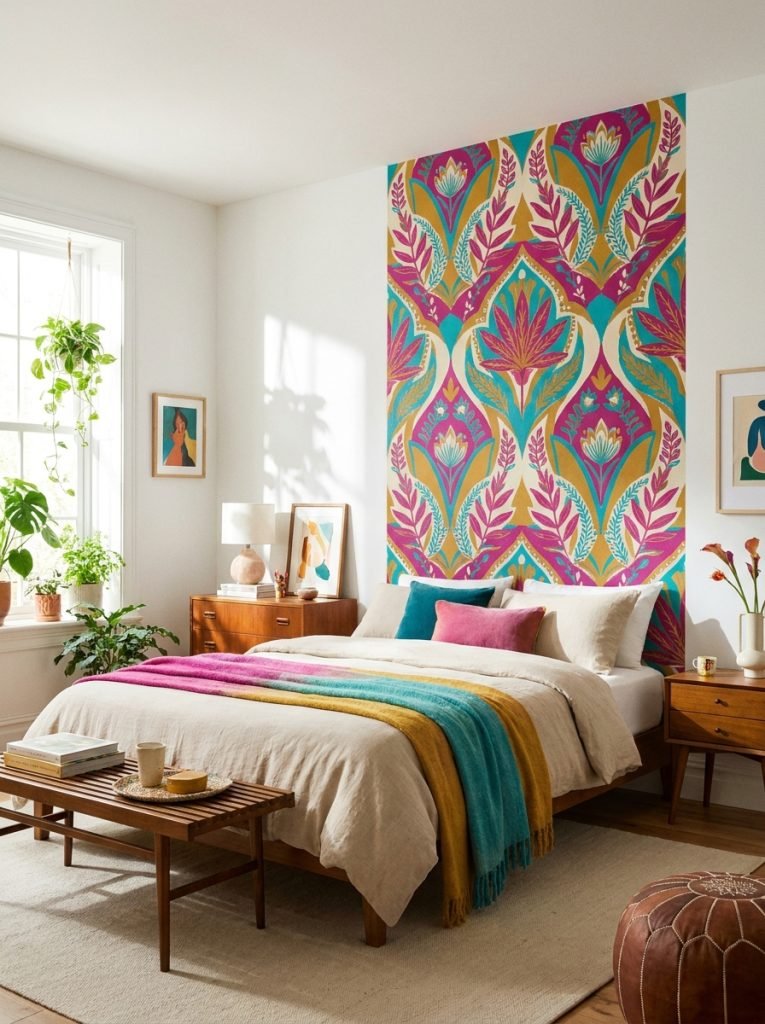
A rectangle of peel and stick wallpaper applied directly to the wall behind the bed creates a headboard effect with zero construction. Choose a bold pattern, a botanical print, or a textured grasscloth look and apply it to the wall in the exact dimensions of a headboard. It is completely renter friendly with peel and stick versions and looks incredibly intentional for no cost or effort. For more bedroom wall ideas check out these boho bedroom ideas.
Materials Needed:
- Peel and stick wallpaper
- Measuring tape and level
- Smoothing tool
How to Make It:
- Measure and mark the headboard rectangle on the wall using a pencil and level.
- Cut wallpaper panels to fit the marked rectangle.
- Apply peel and stick panels carefully from top to bottom smoothing out air bubbles as you go.
- Trim any excess at the edges with a sharp craft knife.
- Step back and adjust if needed — peel and stick can be repositioned before fully pressed down.
12. Build a Unique Arched Headboard
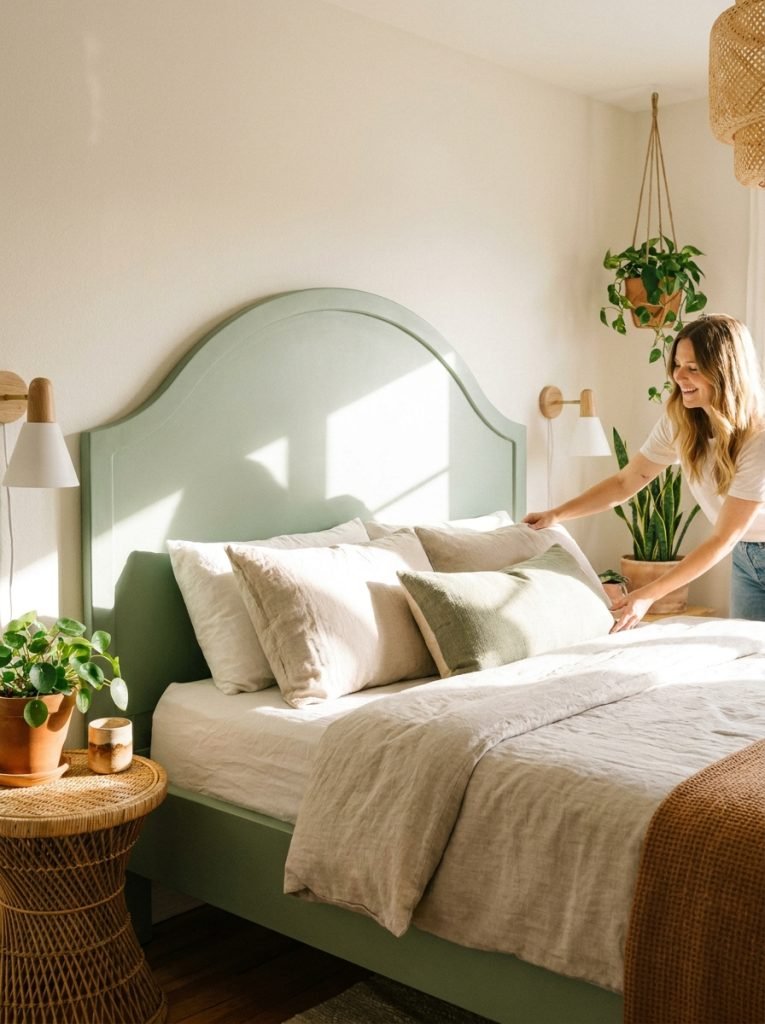
An arched headboard has a softness that a straight rectangular headboard does not. The curved top makes the whole bedroom feel more architectural and considered. Cut the arch shape from plywood with a jigsaw, sand the curved edge completely smooth, paint in any color, and mount behind the bed. Sage green, terracotta, deep navy, or classic white all look great in an arch shape. One of the most design-forward DIY headboard builds with relatively simple construction.
Materials Needed:
- Plywood sheet (full headboard size)
- Jigsaw for arch cut
- Sandpaper
- Paint in your chosen color
- Mounting hardware
How to Make It:
- Mark the arch shape on the plywood using a piece of string as a compass for an even curve.
- Cut the arch with a jigsaw following the marked line.
- Sand the curved edge until completely smooth with no rough spots.
- Paint the entire headboard in your chosen color with two coats for full coverage.
- Mount to the wall using a French cleat for even weight distribution.
13. Build a Headboard for a King Bed
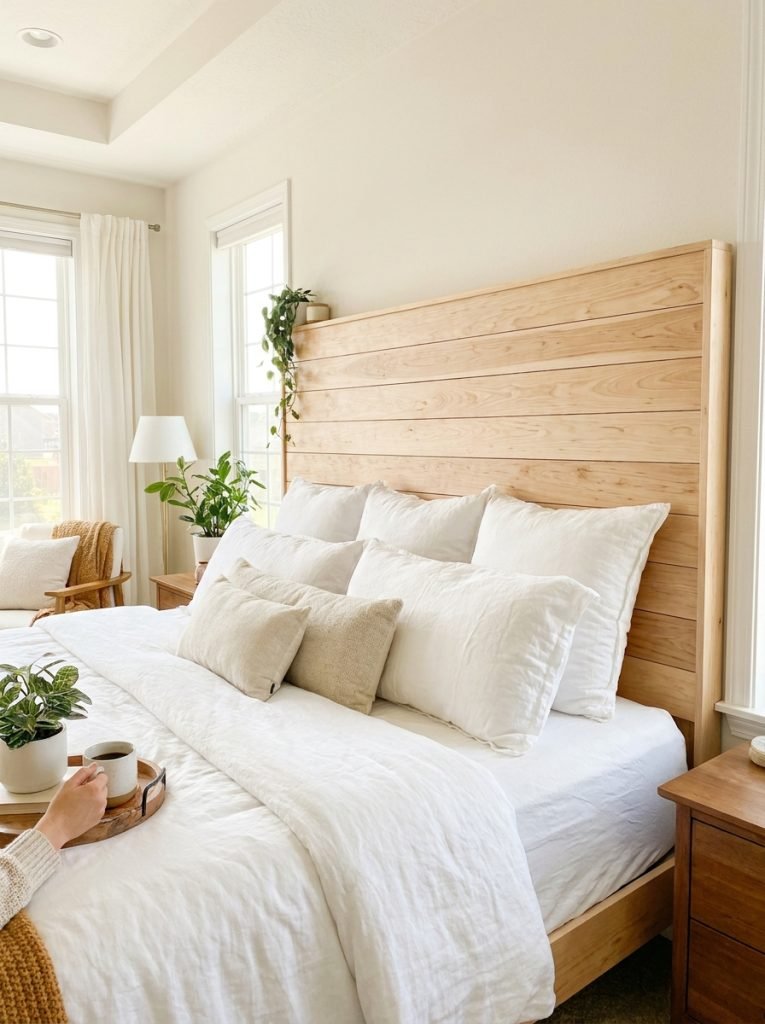
A king size headboard needs to be wide enough to look proportional — typically 80 to 84 inches across. The build is the same as a standard headboard but the extra width requires proper bracing at the back to prevent warping or sagging in the middle. Use a center support bracket when mounting and connect all boards with at least three horizontal cleats across the back for a king size build that stays flat and sturdy for years.
Materials Needed:
- 1×6 boards cut to 80 to 84 inches
- Three horizontal cleats for backing
- Wood screws and drill
- Sandpaper and finish
- Heavy duty wall mounting hardware
How to Make It:
- Cut all plank boards to 80 to 84 inches for a king size width.
- Lay boards side by side and attach three horizontal cleats across the back — top, middle, and bottom.
- Sand smooth and apply your chosen finish.
- Use heavy duty wall anchors or mount into studs — a king headboard is significantly heavier than a single or queen.
- Add a center wall support bracket in addition to the two side mounts for extra stability.
14. Build a Headboard for a Small Bedroom
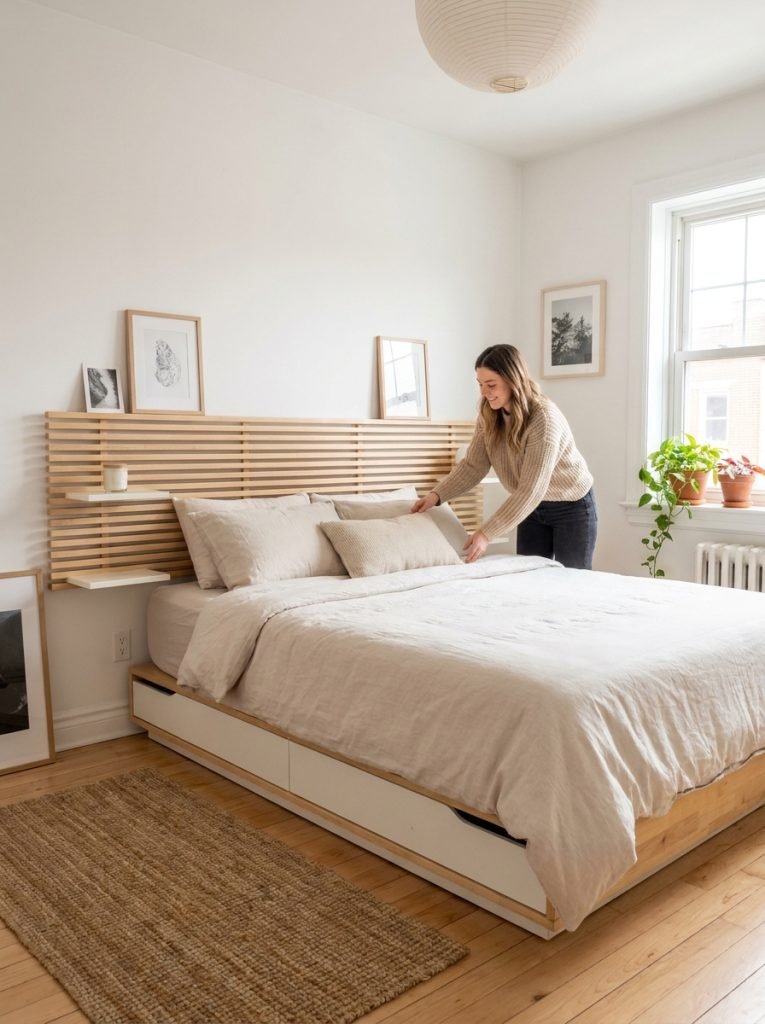
Small bedrooms need headboards that do not take up floor space or make the room feel crowded. A slim wall mounted panel headboard — no legs, no frame, just a panel attached directly to the wall — keeps the floor clear and the room feeling bigger. Keep the headboard low rather than tall and choose a light color that blends with the wall. The result is a bedroom that feels open and airy rather than cramped.
Materials Needed:
- Thin plywood panel
- Upholstery foam and fabric (optional)
- French cleat for wall mounting
- Sandpaper and paint
How to Make It:
- Cut plywood to your desired headboard width and a moderate height — 24 to 30 inches works well for small rooms.
- Wrap in foam and fabric for an upholstered look or simply paint for a clean flat panel.
- Mount directly to the wall using a French cleat so there are no legs extending onto the floor.
- Position at the right height so pillows sit naturally against it when the bed is made.
15. Place a Headboard in Front of a Window
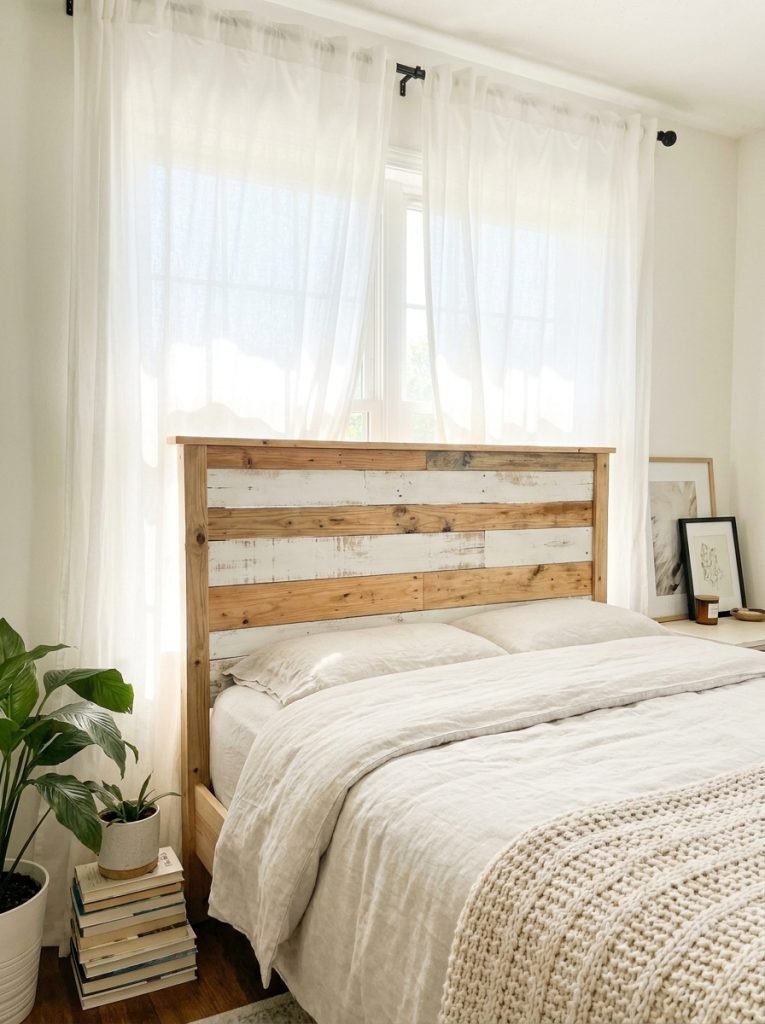
Placing the bed in front of a window with the headboard against the glass is a layout that works better than most people expect. Keep the headboard below the window sill height so light still enters the room above it. Use a slim flat panel headboard that does not block the window entirely and hang sheer curtains behind it so light filters softly around the edges. It looks intentional and beautiful in the right bedroom layout.
Materials Needed:
- Slim flat panel headboard
- Sheer curtain panels
- Curtain rod above the window
- Wall mounting hardware
How to Make It:
- Build or choose a headboard that is shorter than the window sill height.
- Install a curtain rod above the window and hang sheer panels.
- Mount the headboard directly against the wall below the window.
- Position the bed so the headboard sits centered under the window with curtains framing both sides.
16. Build a Boho Easy Cheap Headboard
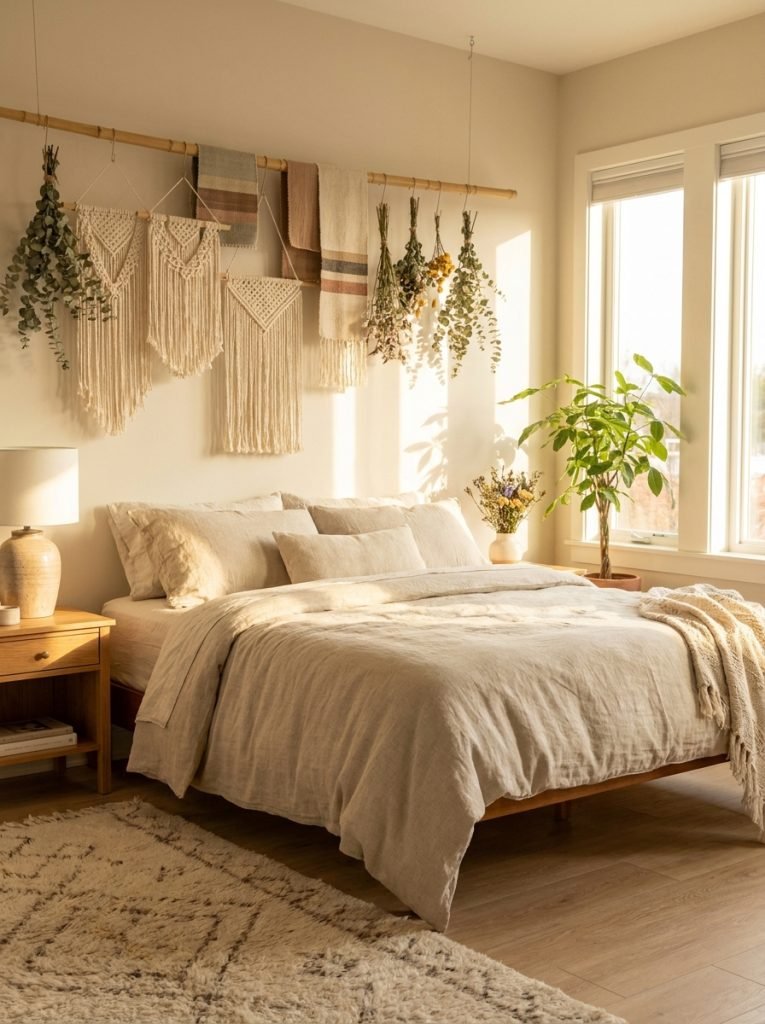
A boho headboard does not need to be complicated or expensive. A thick bamboo or wooden dowel rod mounted on the wall with fabric panels, macrame pieces, dried grass, and woven wall hangings draped or tied from it creates a full layered boho headboard for almost no money. Collect pieces gradually and add or rearrange them whenever you want a change. It is the most flexible and lowest cost headboard on this list. These boho bedroom ideas have more ways to complete the look around it.
Materials Needed:
- Thick bamboo or wooden dowel rod
- Two wall hooks
- Fabric panels, macrame pieces, dried grass
- Twine for tying elements
How to Make It:
- Mount two wall hooks behind the bed at equal heights.
- Rest the bamboo rod across both hooks.
- Drape fabric panels over the rod and tie macrame pieces from it at varying lengths.
- Tuck dried grass bunches between the layers and adjust the arrangement until it looks balanced.
- Add or remove elements anytime for an easy seasonal refresh.
17. Build a Unique Geometric Headboard
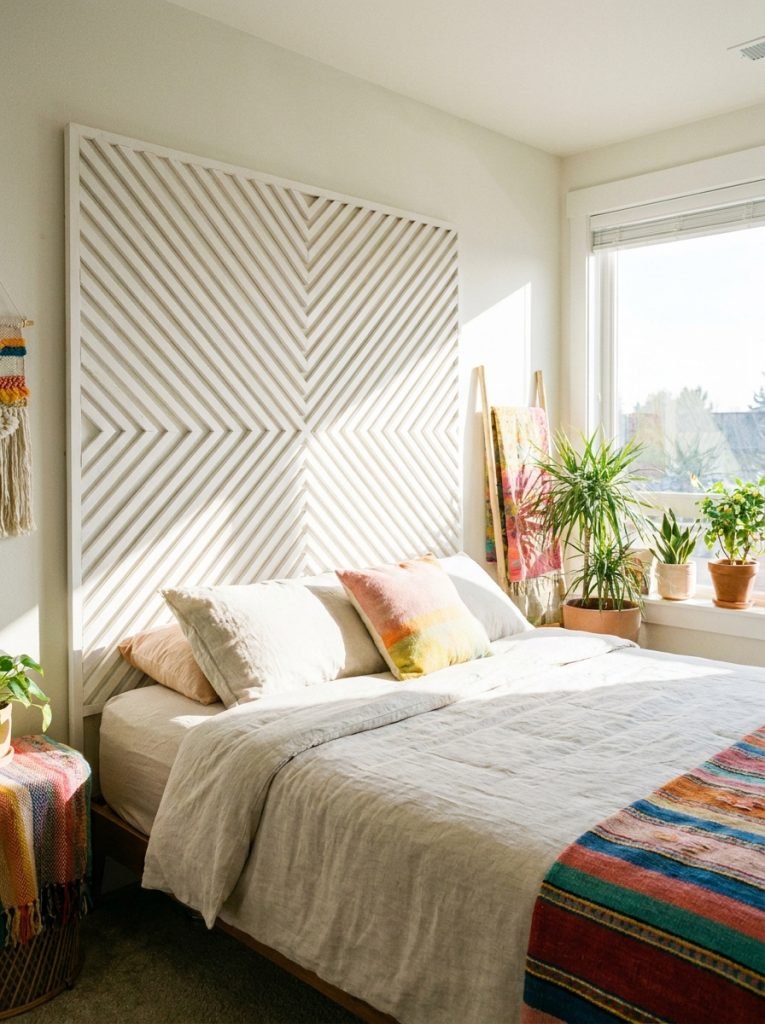
A geometric headboard made from thin wood strips arranged in a diamond, chevron, or sunburst pattern is one of the most striking DIY bedroom projects. Cut thin strips from 1×2 lumber, arrange them in your chosen geometric pattern on a plywood backing, and secure with wood glue and small nails. Paint the whole thing white or a single bold color for a clean graphic look. It photographs exceptionally well and is genuinely unique in any bedroom.
Materials Needed:
- 1×2 lumber strips
- Plywood backing panel
- Wood glue and small finish nails
- Sandpaper and paint
How to Make It:
- Cut a plywood backing panel to your desired headboard dimensions.
- Plan your geometric pattern on paper first — diamond, chevron, or sunburst.
- Cut 1×2 strips to the angles required for your pattern using a miter saw.
- Glue and nail each strip to the backing panel following your planned layout.
- Fill any gaps, sand smooth, paint in your chosen color, and mount behind the bed.
18. Build a Wooden Storage Headboard
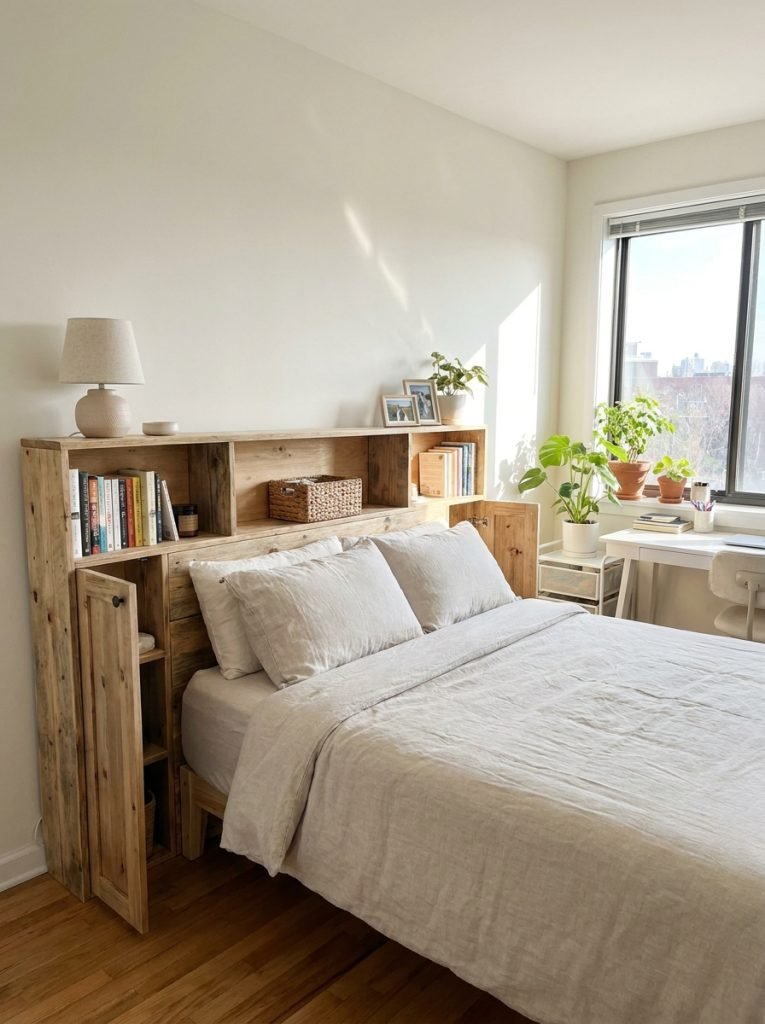
A wooden storage headboard with enclosed compartments is the most functional headboard on this list. Small doors or open cubbies on each side hold everything you keep at the bedside — books, chargers, reading glasses, medicine — completely out of sight. Build the main panel from plywood with box compartments on each side and add small hinged doors for a clean finished look. For more bedroom organization ideas check out these closet shelf organization ideas.
Materials Needed:
- Plywood for main panel and compartments
- Piano hinges for small doors
- Wood screws and drill
- Sandpaper and paint
- Magnetic catches for doors
How to Make It:
- Build a central headboard panel from plywood at your desired height.
- Construct two box compartments from plywood — one for each side of the headboard.
- Attach the boxes to the sides of the central panel firmly with screws.
- Cut small door panels for each box and attach with piano hinges.
- Add magnetic catches to keep doors closed and paint the whole unit in one finish.
19. Build a Simple Cheap Headboard for Any Bed
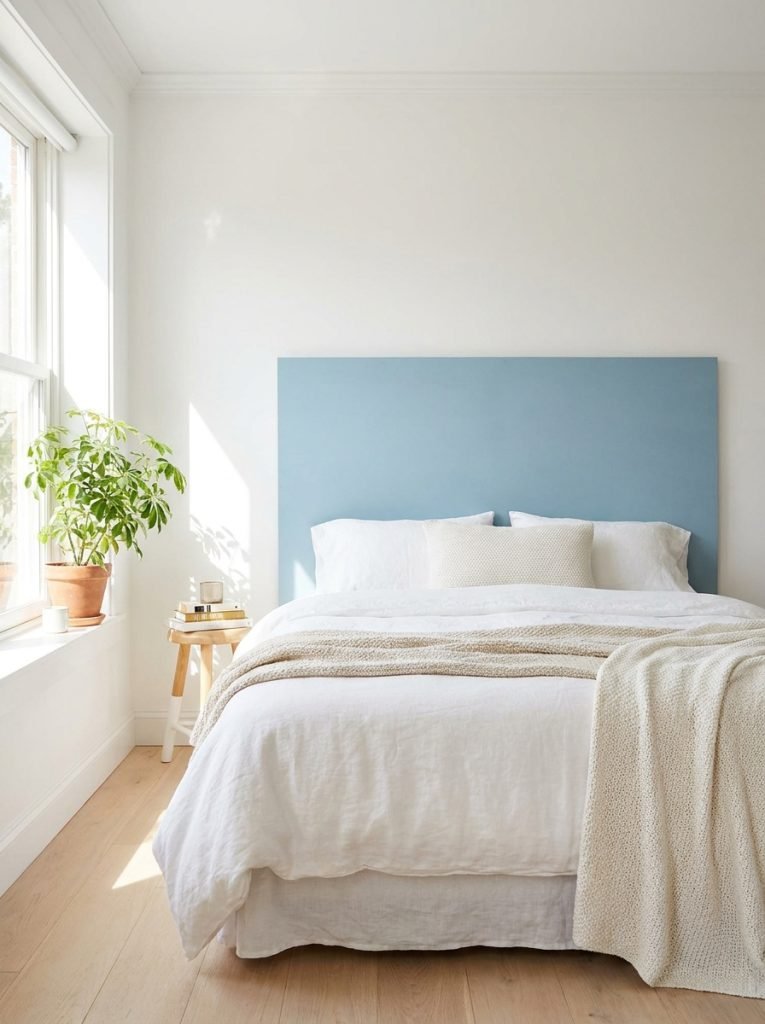
The cheapest headboard you can build is a single piece of plywood cut to size, sanded smooth, and painted. One sheet of plywood, one can of paint, one afternoon. It looks clean and intentional, especially in a bold or deep color, and costs under fifteen dollars. Shape the top edge with a jigsaw for an arch or scallop if you want something more interesting than a straight rectangle. Simple, cheap, effective.
Materials Needed:
- One plywood sheet
- Sandpaper
- Paint in your chosen color
- Wall mounting hardware
How to Make It:
- Cut the plywood to your desired headboard dimensions.
- Optionally shape the top edge with a jigsaw for an arch or decorative profile.
- Sand all surfaces and edges completely smooth.
- Paint with two coats in your chosen color and allow to dry fully.
- Mount to the wall behind the bed using appropriate anchors.
20. Build an Adjustable Headboard for Any Bed Size
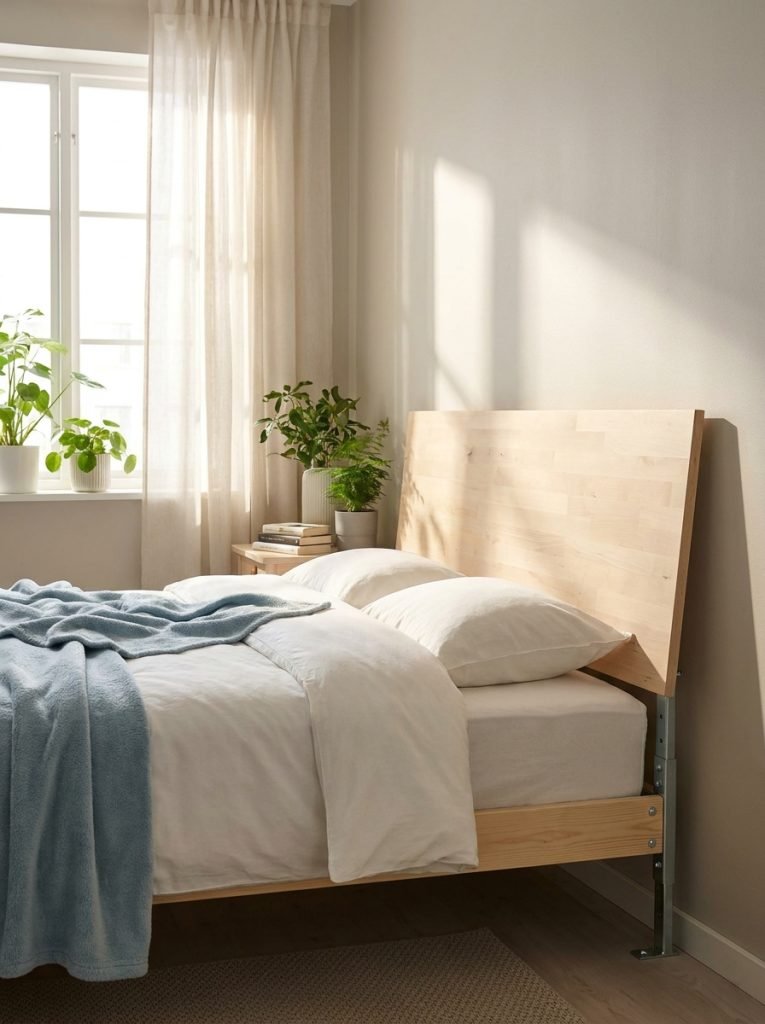
An adjustable headboard uses slotted leg brackets that can be raised or lowered to fit different bed frame heights — useful if you change mattresses, add a box spring, or move the headboard to a different bed. Build a standard headboard panel and attach adjustable slotted legs rather than fixed ones. This way one headboard works across multiple bed setups without any rebuilding.
Materials Needed:
- Headboard panel (any build)
- Slotted adjustable headboard legs
- Bolts and nuts for leg attachment
- Drill
How to Make It:
- Build your chosen headboard panel from any of the builds on this list.
- Attach slotted adjustable legs to the back lower corners of the panel with bolts.
- Slot the legs into the bed frame uprights at your desired height.
- Tighten the leg bolts firmly at the correct height for your mattress setup.
- Readjust by loosening the bolts, moving the leg to a new slot, and retightening.
Final Thoughts on DIY Headboard Ideas
A headboard is one of the highest impact changes you can make to a bedroom for the least amount of money and effort. Whether you build a simple plywood panel this weekend, wrap pool noodles in fabric, or put together a full storage headboard with shelves and compartments — the result is a bedroom that feels finished, intentional, and completely yours. Pick the build that fits your style and skill level and get started.


Amir Ali is the founder and site administrator of HomeDecorEdge, a modern home decor and interior design platform. Since starting the site, he has combined his passion for interior design, practical styling, and color coordination with hands-on content strategy and site management. He guides authors, curates high-quality articles, and ensures readers have access to actionable, visually inspiring, and user-focused home decor advice for apartments, small rooms, and family homes.