
I’m Amir — and one of the first things we did when we moved into our current home was figure out how to get some privacy in the backyard without spending a fortune. Neighbours on both sides, a busy road at the back — it felt like everyone could see everything. These 18 DIY privacy fence on a budget ideas are the ones that actually work — cheap enough to build without breaking the bank and creative enough that they become a proper garden feature rather than just a barrier.
This post contains affiliate links. If you purchase through these links I may earn a small commission at no extra cost to you.

1. Privacy Fence Panels Backyard
Ready-made privacy fence panels are the most efficient budget option for a full backyard fence — buy panels, install posts, attach panels, and you have a complete private space in a single weekend. No cutting, no complicated construction. These privacy fence panels come pre-made and simply attach to fence posts — the fastest DIY privacy fence on a budget solution available.

Privacy Fence Panels Outdoor
Ready-made privacy fence panels — simply attach to posts for instant backyard privacy on a budget
Check Price on AmazonMaterials Needed:
- Privacy fence panels
- Fence posts
- Concrete mix for setting posts
- Post level
- Drill and screws
How to Make It:
- Mark fence line with string and stakes
- Dig post holes every 2.4m — 60cm deep minimum
- Set posts in concrete and check level — let cure 24 hours
- Attach fence panels to posts with screws
- Check each panel is level before fixing permanently
- Stain or paint fence for weather protection and color
2. Bamboo Fence Roll Privacy Backyard
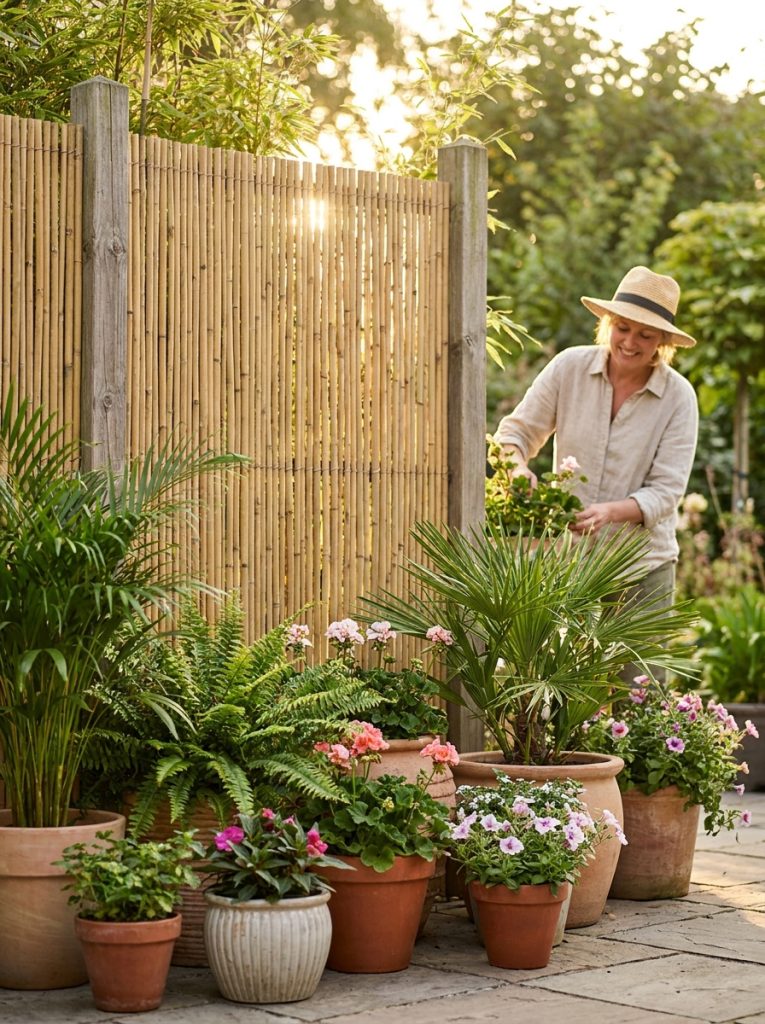
A bamboo roll fence is genuinely the cheapest and quickest DIY privacy fence on a budget — unroll along existing posts or fence rails and attach with cable ties or wire. Done in about an hour. This bamboo fence roll creates instant natural privacy and the warm bamboo color looks beautiful in any garden. Layer two rolls for maximum privacy or use a single roll to add privacy to an existing low fence.

Bamboo Fence Roll Privacy
Natural bamboo fence roll — unroll and attach to existing posts for instant cheap privacy in any garden
Check Price on AmazonMaterials Needed:
- Bamboo fence roll
- Existing fence posts or new posts
- Cable ties or galvanised wire
- Wire cutters
How to Make It:
- Measure total fence length needed
- Unroll bamboo along fence line
- Attach to top fence rail with cable ties every 30cm
- Attach to middle and bottom rails the same way
- Trim any excess with wire cutters
- Apply bamboo sealant for longer outdoor lifespan
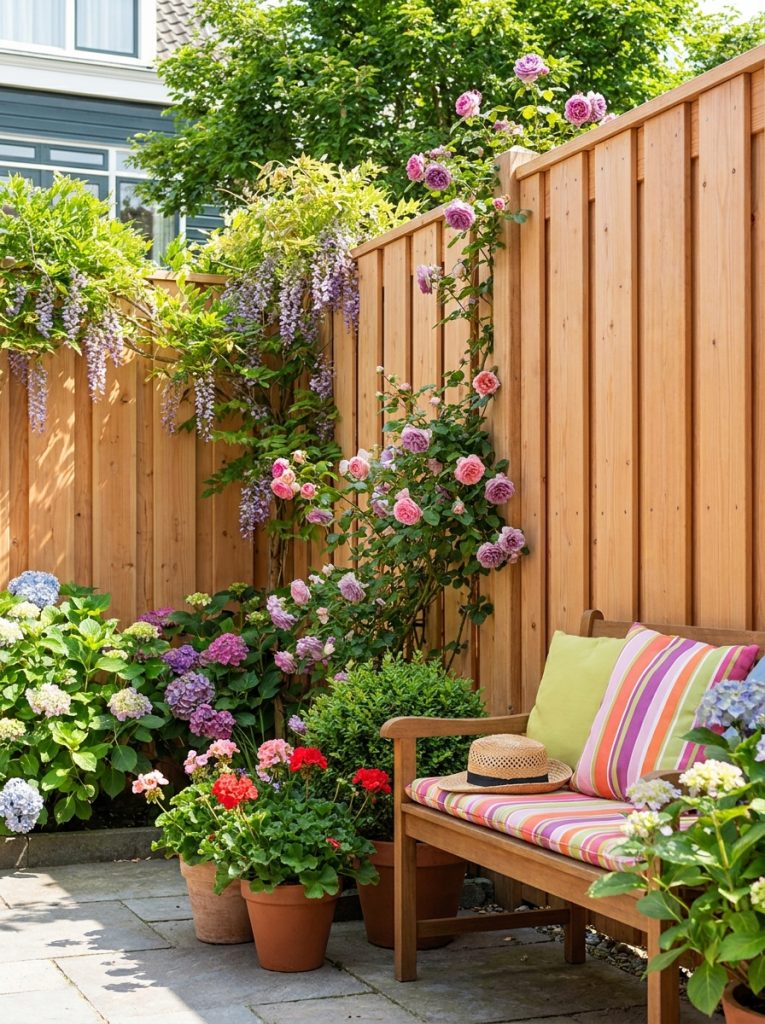
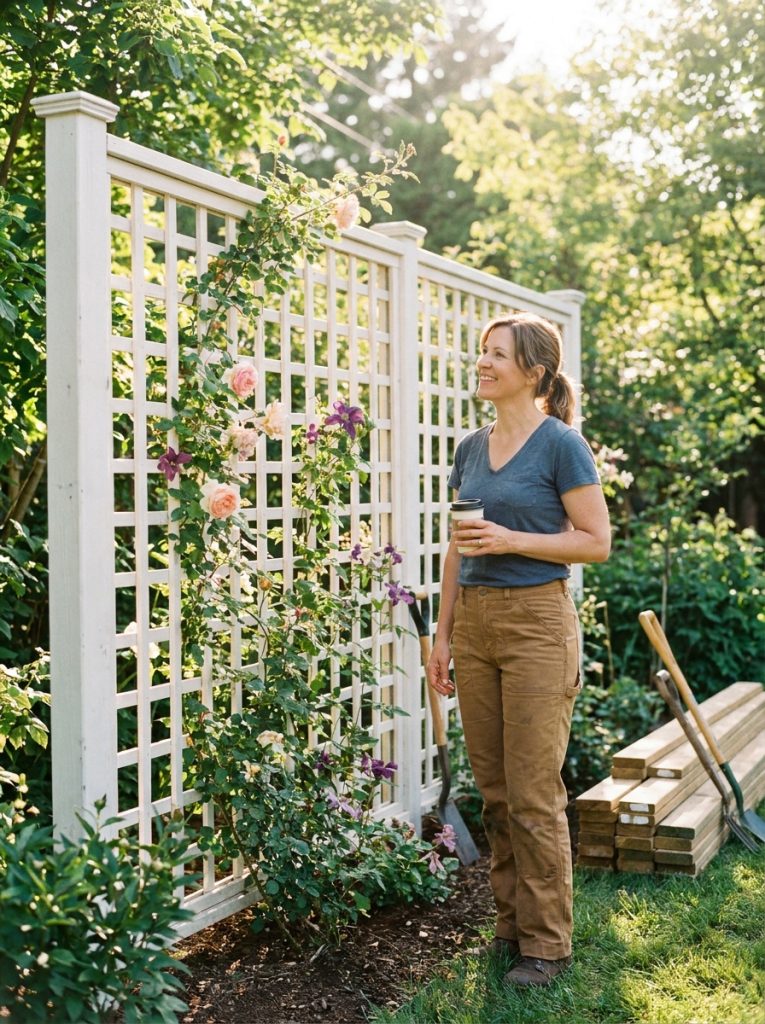
3. Lattice Fence Panels Garden Privacy
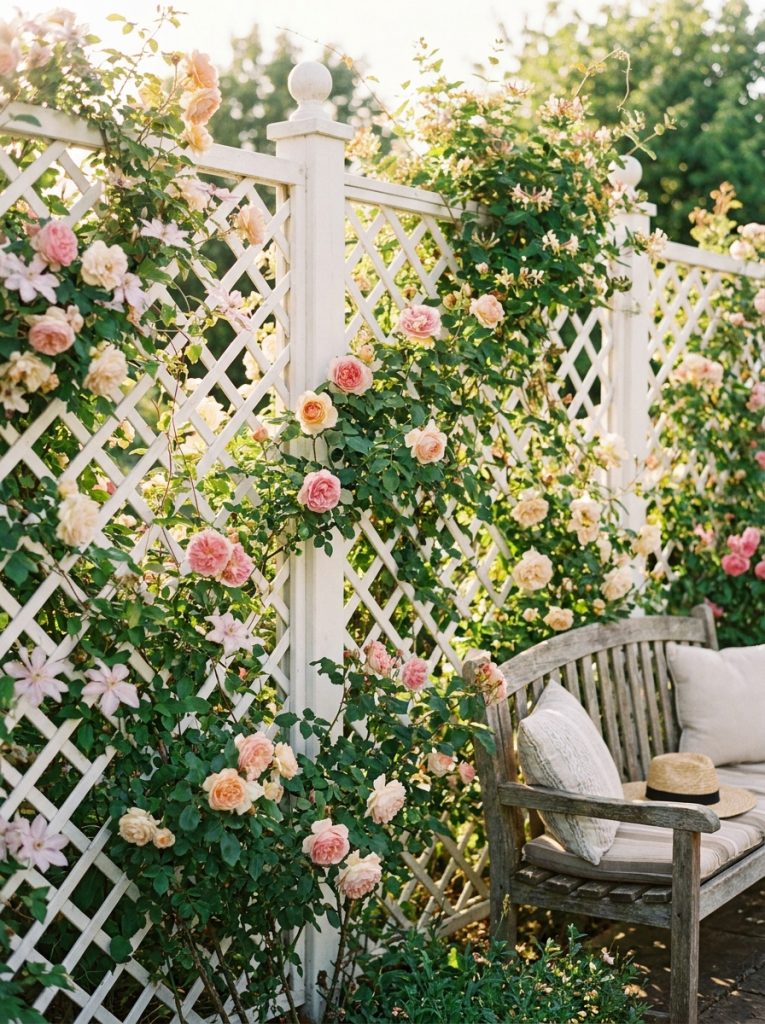
Lattice panels are the most elegant DIY privacy fence on a budget option — the open grid structure lets light and air through while climbing plants fill the gaps over one season for complete natural privacy. These lattice fence panels attach to existing posts and climbing roses, jasmine, or clematis grow through them quickly. The combination of lattice and flowering climbers is genuinely beautiful and gets better every year.

Lattice Fence Panels Garden
Garden lattice fence panels — perfect for climbing plants and creating beautiful private garden boundaries
Check Price on AmazonMaterials Needed:
- Lattice fence panels
- Fence posts with post anchors
- Climbing plants — roses, jasmine, clematis
- Plant ties for training climbers
- Screws and drill
How to Make It:
- Install fence posts at 1.8m intervals using post anchors
- Attach lattice panels to posts with screws
- Plant one climbing plant at the base of each panel
- Train first shoots through lattice with plant ties
- Feed and water plants regularly — full coverage in one season
- Paint or stain lattice panels for color and weather protection
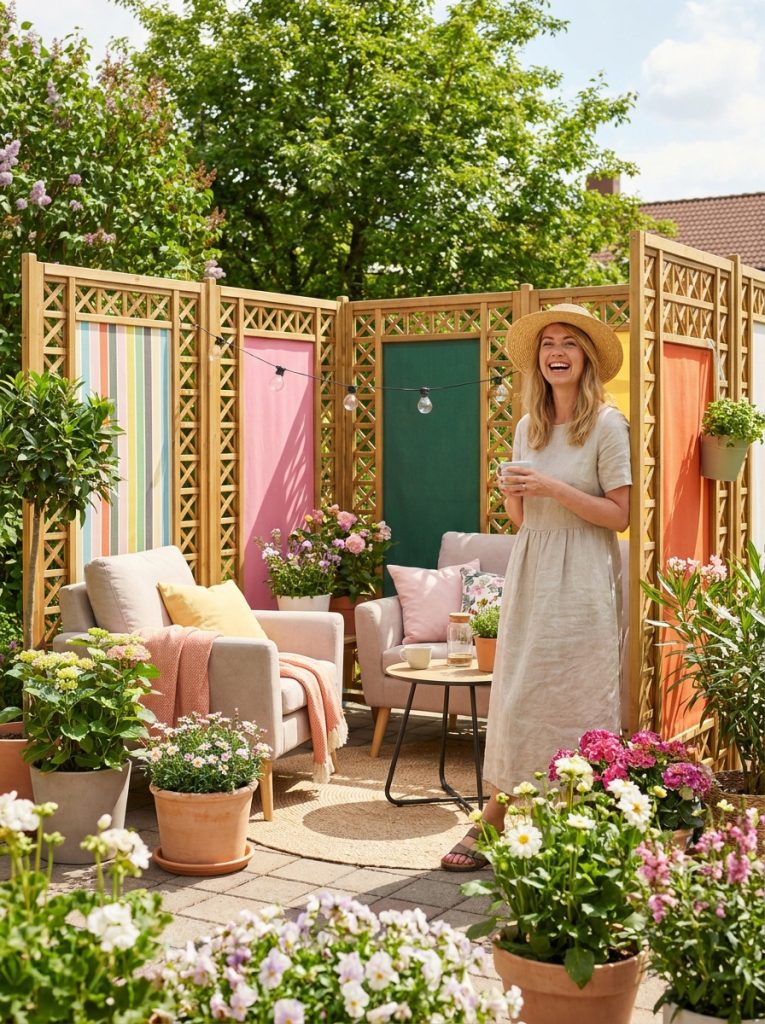
4. Outdoor Privacy Screen Patio Budget
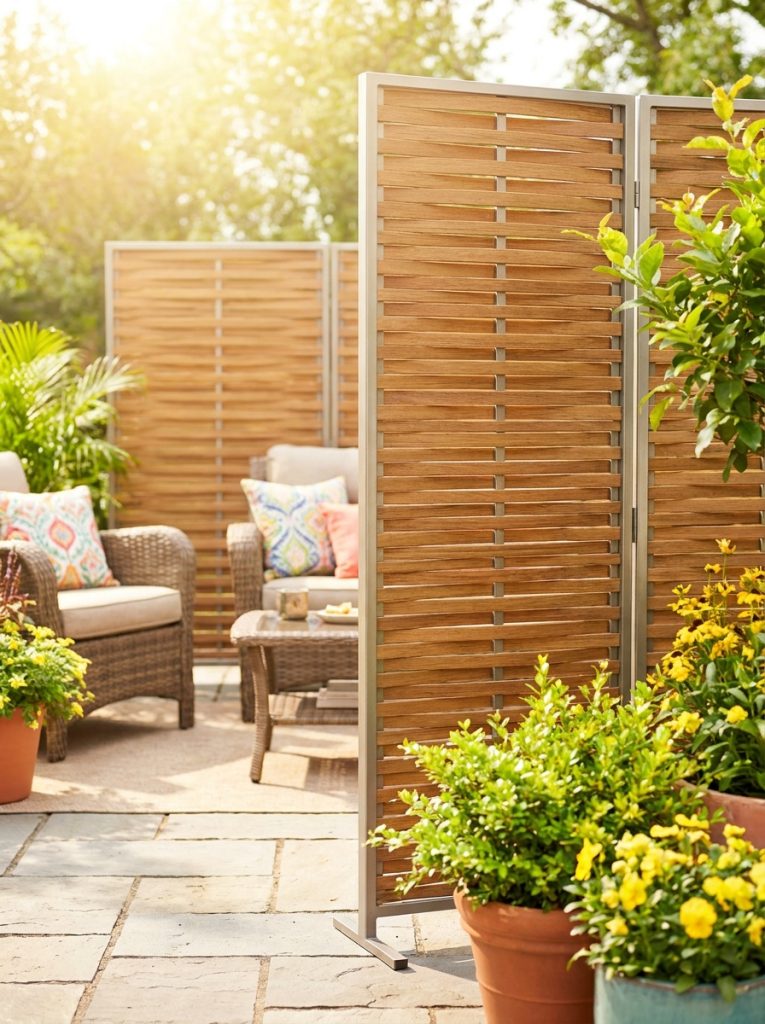
A freestanding outdoor privacy screen is the most flexible DIY privacy fence on a budget solution for a patio — no installation, no posts, no concrete. Move it wherever you need privacy and take it with you if you move. This outdoor privacy screen creates an instant private outdoor room and looks genuinely stylish rather than temporary. Perfect for renters who cannot install permanent fences.
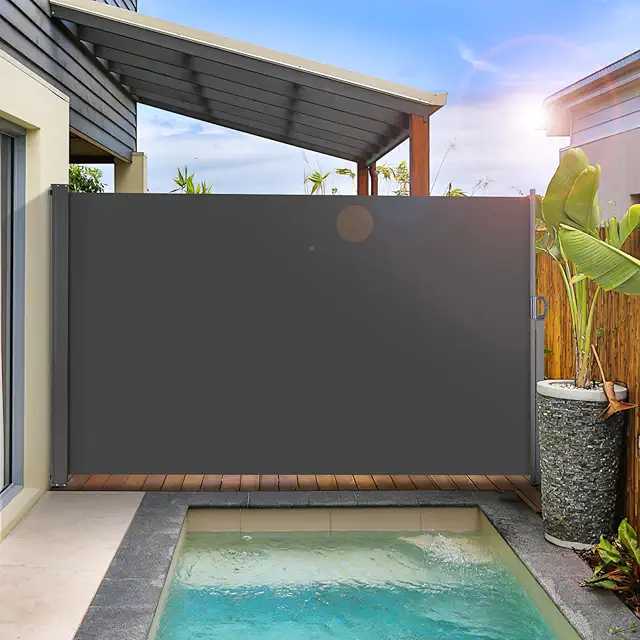
Outdoor Privacy Screen Patio
Freestanding outdoor privacy screen — no installation needed, moveable, perfect for renters and patios
Check Price on Amazon- Freestanding outdoor privacy screen
- Patio or outdoor space
- Outdoor furniture to complete the private area
How to Make It:
- Position screen to block sightlines from neighbours
- Angle panels to maximise privacy coverage
- Add potted plants on both sides to anchor the look
- Place outdoor furniture behind screen for private seating area
- Weight base with sandbags in windy areas for stability
- Move and reposition as needed throughout the season
5. DIY Pallet Wood Privacy Fence Backyard
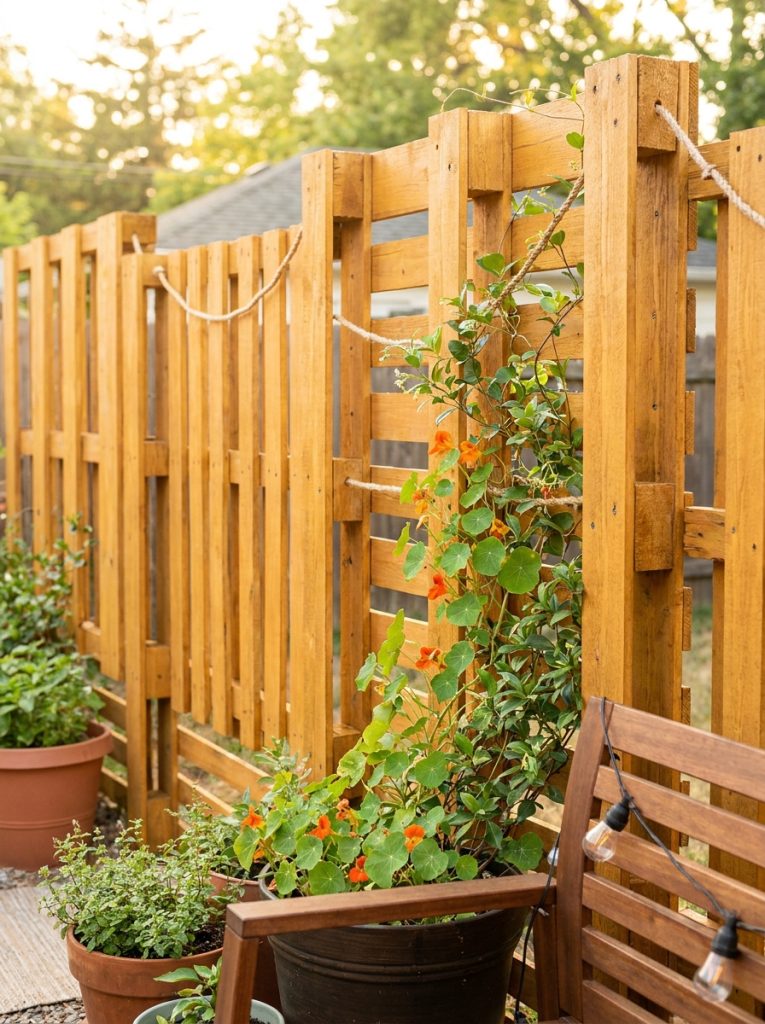
Free pallets from local businesses build a solid DIY privacy fence on a budget for almost nothing — stand pallets upright side by side, secure together with screws, and paint or stain for a weather-resistant finish. The solid pallet structure blocks sight lines completely and the rough wood texture looks brilliant painted in dark grey, black, or a warm earthy tone. Source pallets locally from supermarkets, furniture stores, or online marketplaces. Our garden enclosure ideas post has more brilliant ways to define and enclose your outdoor space.
Materials Needed:
- Free wooden pallets — same size for best result
- Long screws for joining pallets
- Fence posts or post anchors for stability
- Outdoor paint or wood stain
- Sandpaper
How to Make It:
- Source pallets of similar size — sand smooth any rough edges
- Stand first pallet upright and secure to post anchor in ground
- Stand next pallet alongside and screw together at joining edges
- Continue along fence line securing each pallet to the previous
- Add additional post anchors every 3-4 pallets for stability
- Paint or stain entire fence for weather protection and color
6. Fence Post Anchor Ground Installation Budget
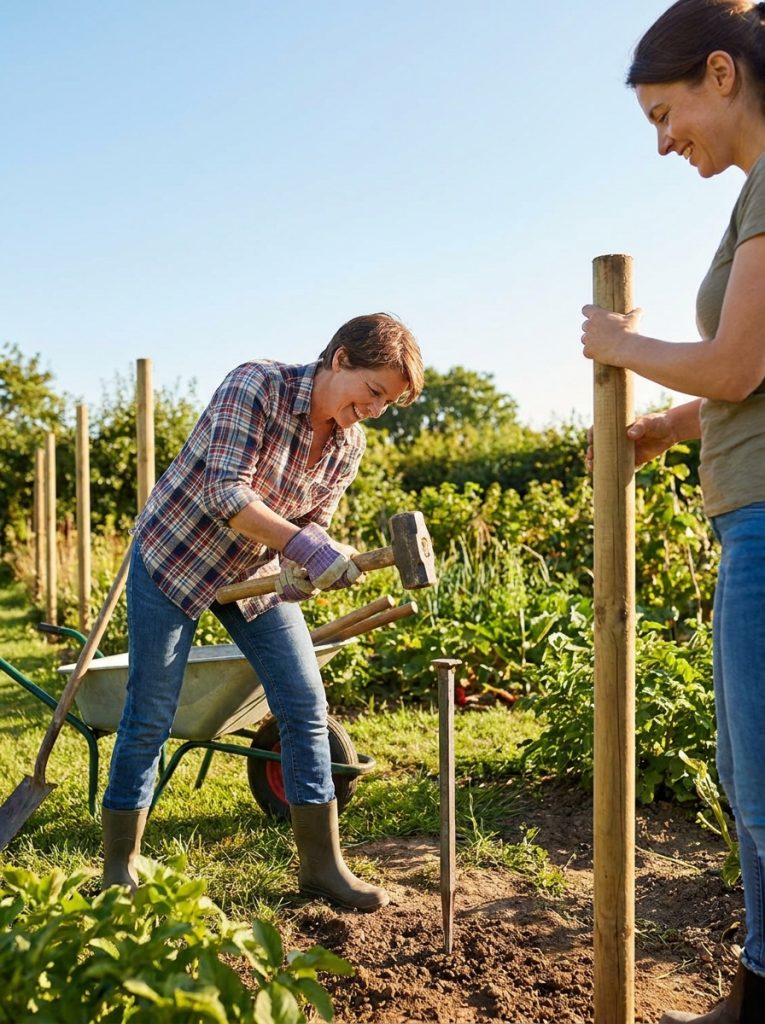
Post anchors are the biggest budget and time saver in any DIY privacy fence on a budget build — no digging, no concrete mixing, no waiting 24 hours for concrete to cure. These fence post anchors hammer straight into the ground with a sledgehammer and hold posts rock solid. Install ten posts in an hour instead of an entire day. The most underrated tool in any DIY fence project.
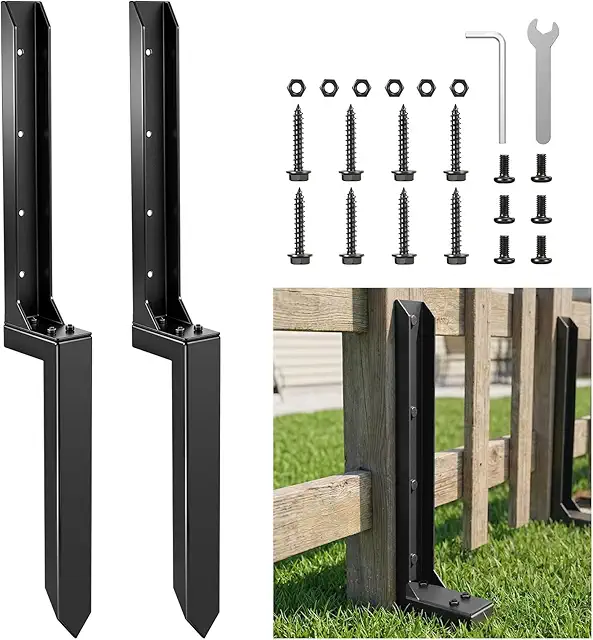
Fence Post Anchor Ground
Ground spike post anchors — no digging or concrete needed, hammer in and slide post in for instant fence build
Check Price on AmazonMaterials Needed:
- Ground spike post anchors
- Fence posts
- Sledgehammer
- Post level
- Offcut wood block to protect anchor top while hammering
How to Make It:
- Mark post positions with stakes and string line
- Place anchor spike on mark and check it is vertical
- Place offcut wood block on top of anchor to protect it
- Drive anchor into ground with sledgehammer
- Check vertical with post level and adjust if needed
- Slide fence post into anchor socket and secure with bolts
7. Reed Fence Roll Privacy Side Yard
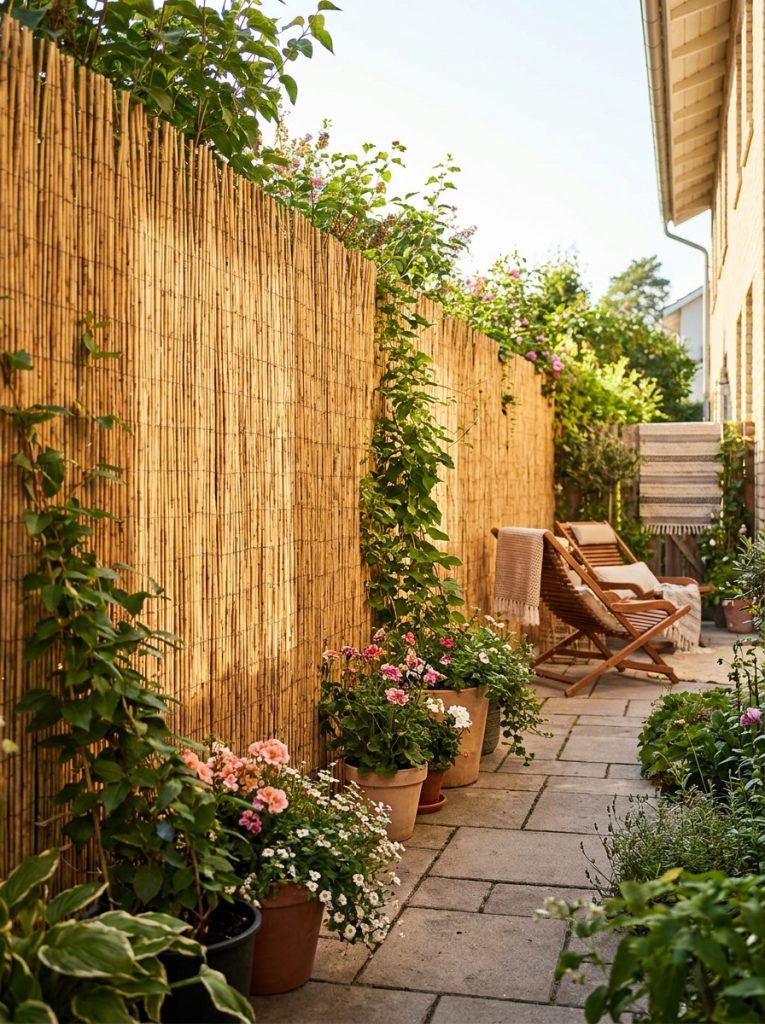
Reed fence rolls work brilliantly in side yards where the narrow space makes traditional fence installation awkward — simply attach to existing walls or lightweight posts and the natural reed creates complete privacy quickly and cheaply. This outdoor reed fence roll has a beautiful warm natural tone that suits every garden style and the lightweight material makes installation a genuinely one-person job.

Outdoor Reed Fence Roll Privacy
Natural reed fence roll — lightweight and easy to install, perfect for side yards and narrow spaces
Check Price on AmazonMaterials Needed:
- Reed fence roll
- Lightweight timber posts or existing wall
- Cable ties or galvanised staples
- Wire cutters
How to Make It:
- Measure side yard length and order correct amount of reed roll
- Install lightweight timber posts if no existing structure
- Unroll reed along fence line
- Attach to posts with cable ties every 30cm top middle and bottom
- Trim any excess length with wire cutters
- Apply reed sealant to extend outdoor lifespan
8. Renter Friendly Temporary Privacy Fence Ideas
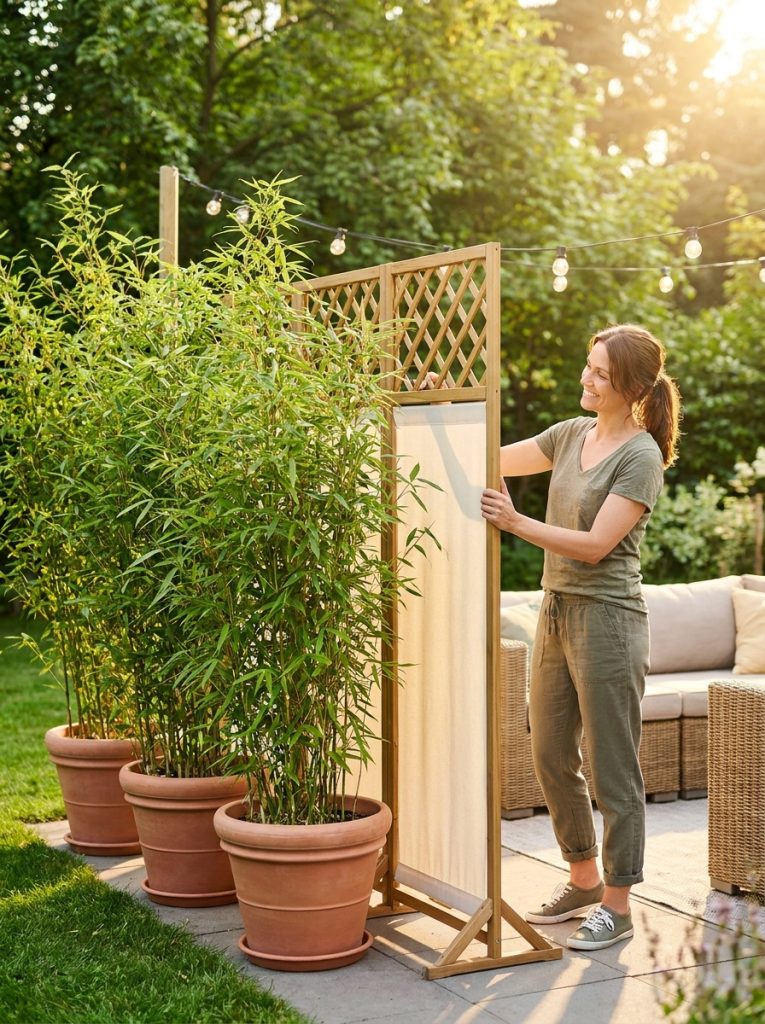
Renters need privacy fence solutions that leave no permanent marks and can be taken when you move — large potted bamboo plants in a row, freestanding privacy screens, and temporary panel systems all create genuine privacy without any installation. Three or four large bamboo plants in heavy pots create a beautiful natural privacy wall that moves with you to the next home. The bamboo grows and fills in over one season for complete coverage.
Materials Needed:
- Large heavy pots or planters
- Bamboo plants or tall grasses
- Potting compost
- Freestanding privacy screens for gaps
- Pot feet to prevent waterlogging
How to Make It:
- Source large deep pots — at least 45cm diameter for stability
- Fill with heavy potting compost mixed with sand for ballast
- Plant one bamboo or tall grass per pot
- Position pots in a row along fence line — leave no gaps
- Fill any gaps with freestanding privacy screen sections
- Water regularly — bamboo grows quickly and fills in fast
9. DIY Privacy Fence Ideas for Dog Owners

A DIY privacy fence for dogs needs two things above everything else — no gaps at the bottom where dogs can squeeze through and a gate latch they cannot figure out. Build solid timber panels with boards going right down to ground level, bury chicken wire 30cm underground along the base to prevent digging, and fit a self-closing gate with a proper latch. A secure dog fence also gives you complete privacy and the peace of mind of knowing your dog is safe.
Materials Needed:
- Solid timber fence panels or boards
- Fence posts and post anchors
- Chicken wire for underground barrier
- Self-closing gate with secure latch
- Screws and drill
How to Make It:
- Install posts at 2m intervals with post anchors
- Dig a narrow trench 30cm deep along fence base
- Lay chicken wire in trench and bend outward at base to prevent digging
- Backfill trench and compact
- Attach solid fence panels with no gaps at bottom
- Install self-closing gate with dog-proof latch mechanism
10. Backyard Landscaping Privacy with Tall Plants
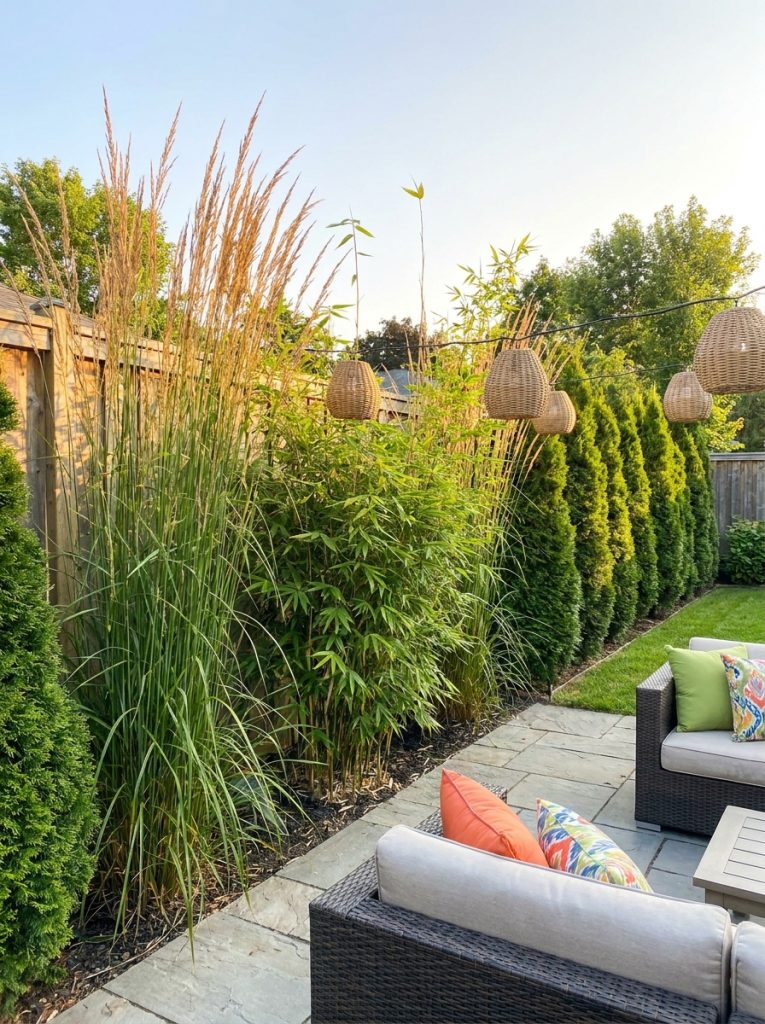
A living privacy screen of tall plants is the most beautiful long-term DIY privacy fence on a budget — bamboo, ornamental grasses, photinia, and laurel all grow quickly into dense natural screens that are genuinely more beautiful than any fence. Plant in a single row along the boundary, feed and water regularly for the first season, and within two years you have complete year-round privacy that costs less than timber fencing. Our 25 DIY bird bath ideas post shows how to complete the natural garden feel with a beautiful wildlife feature alongside your living screen.
Materials Needed:
- Tall privacy plants — bamboo, photinia, laurel, or ornamental grasses
- Compost for planting
- Slow release fertiliser
- Mulch for moisture retention
- Garden wire for initial support if needed
How to Make It:
- Measure boundary length and calculate plants needed — 1 per metre for quick coverage
- Dig planting trench or individual holes along boundary
- Improve soil with compost in each planting hole
- Plant at same depth as nursery pot — firm in well
- Water thoroughly and apply thick mulch layer
- Feed monthly for first season — plants establish quickly
11. Front Yard Privacy Fence on a Budget
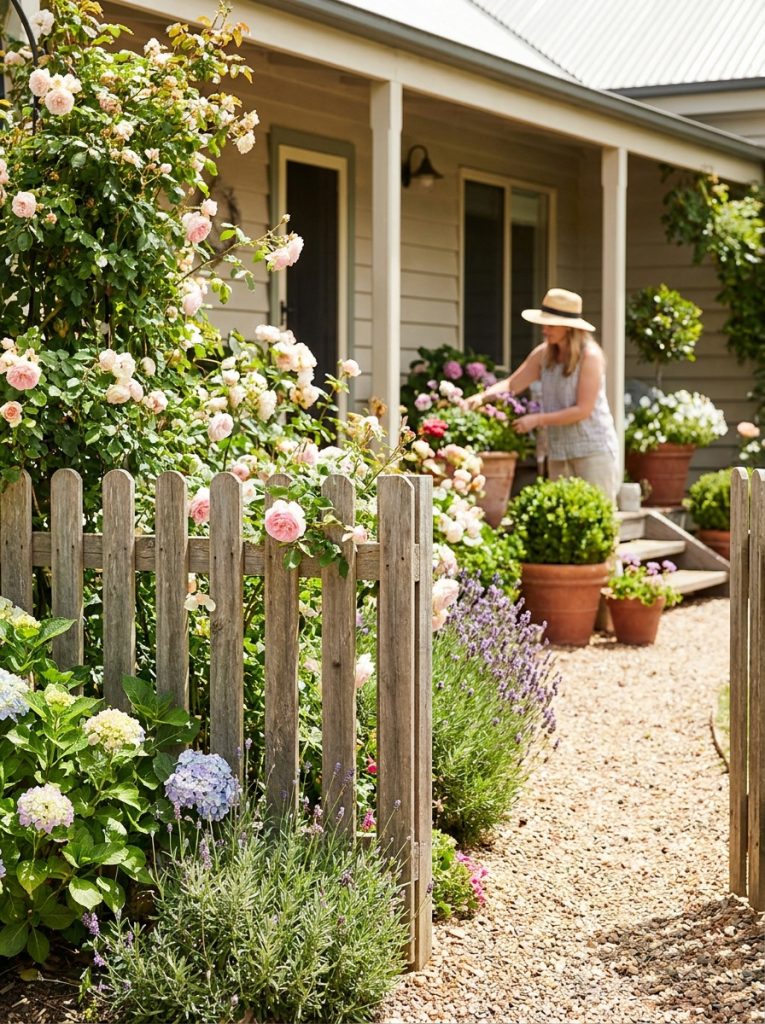
A front yard privacy fence needs to balance privacy with curb appeal — you want to screen the house from the street without creating an unfriendly fortress. A medium-height timber fence with flowering plants trained along it achieves both perfectly. Build it yourself from basic timber boards, paint in a classic color, and plant roses or climbing plants along the inside. The result adds real value to the property and looks completely beautiful from both sides.
Materials Needed:
- Timber fence boards and posts
- Post anchors for easy installation
- Outdoor paint in chosen color
- Climbing or flowering plants for alongside
- Gate if access needed from front
How to Make It:
- Plan fence height and design — check local regulations on front yard fence height
- Install posts with ground anchors at 2m intervals
- Attach horizontal rails between posts at top middle and bottom
- Fix vertical fence boards to rails — leave small consistent gaps
- Paint entire fence in chosen color — two coats
- Plant climbing roses or flowering shrubs along fence inside
12. Balcony Privacy Screen DIY Budget Ideas
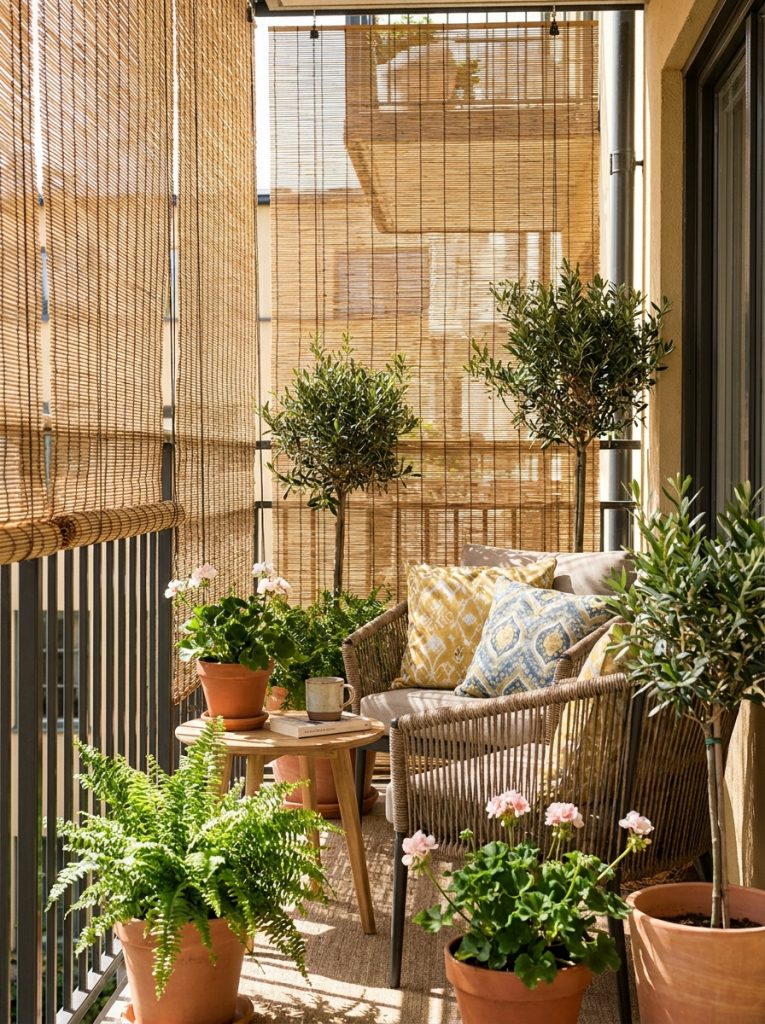
Apartment balconies are the easiest DIY privacy fence on a budget project — bamboo or reed rolls attached to existing railings with cable ties create complete privacy in under an hour with no tools and no drilling. The natural material looks beautiful against any balcony style and the whole thing removes in minutes when needed. Add potted plants and comfortable seating behind and the balcony transforms into a genuinely private outdoor room.
Materials Needed:
- Bamboo or reed fence roll
- Cable ties
- Wire cutters
- Potted plants for behind screen
How to Make It:
- Measure balcony railing length and order correct roll size
- Unroll bamboo or reed along inside of railing
- Attach to top railing with cable ties every 20cm
- Attach to bottom railing the same way
- Trim any excess at ends with wire cutters
- Add potted plants in front for extra coverage and decoration
13. Deck Privacy Fence DIY Budget Ideas
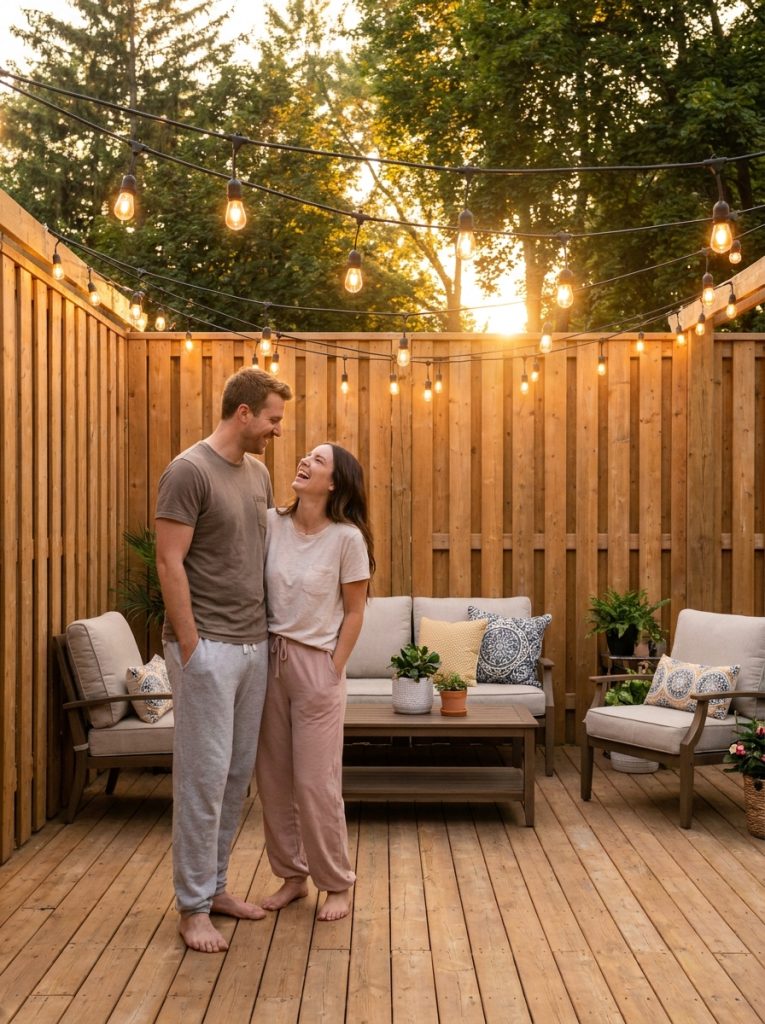
A privacy fence around a deck is the upgrade that makes a deck genuinely usable — without privacy an exposed deck rarely gets used properly. Build simple vertical timber board walls on the most exposed sides, add string lights above for evening atmosphere, and the deck becomes a proper outdoor room you actually want to spend time in. The construction is basic — posts, horizontal rails, vertical boards — and can be done in a single weekend. For more ways to make your outdoor space beautiful check out our 46 outdoor garden decor ideas post.
Materials Needed:
- Timber fence posts and boards
- Post anchors for deck attachment
- Horizontal rails
- Screws and drill
- Outdoor wood stain or paint
How to Make It:
- Identify which sides of deck need privacy
- Attach post anchors to deck frame or joists
- Set fence posts in anchors and check vertical
- Fix horizontal rails between posts at top middle and bottom
- Screw vertical timber boards to rails — consistent spacing
- Stain or paint fence to match deck finish
14. Cheap Outdoor Spaces Privacy Fence Ideas
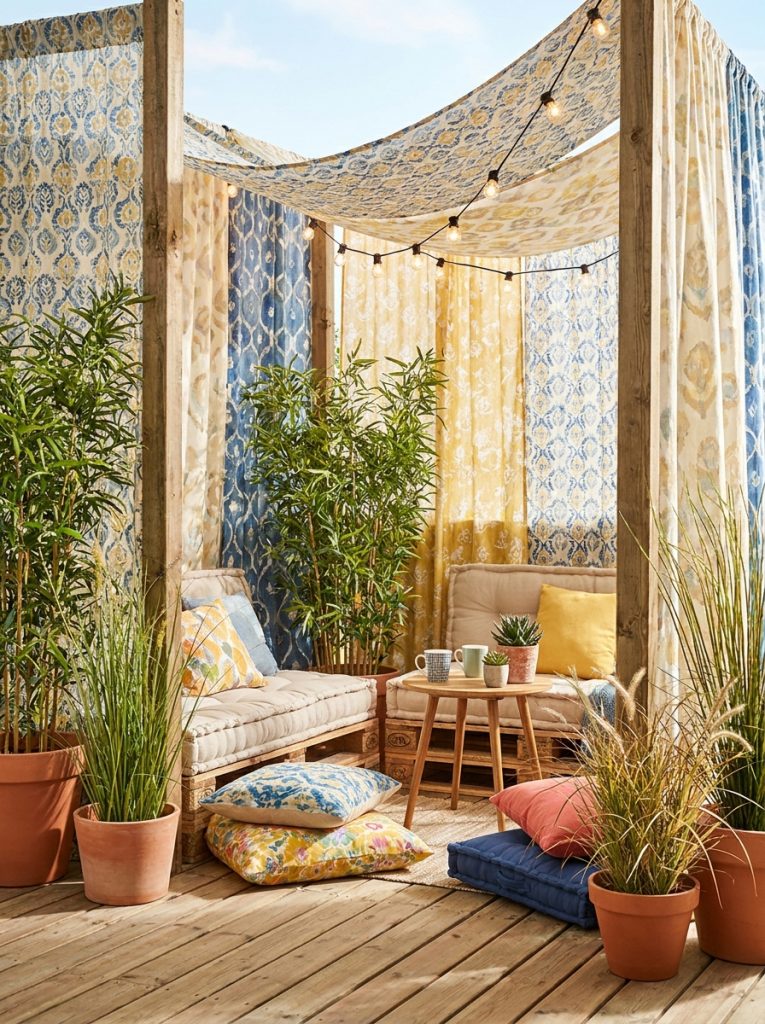
Outdoor fabric panels hung between simple posts are the cheapest of all DIY privacy fence on a budget ideas for a seating area — buy outdoor-rated fabric or canvas, cut to size, add grommets, and hang between timber posts with rope. The panels move gently in the breeze, create genuine privacy, and the whole setup costs almost nothing. Choose a natural canvas tone or a bold pattern depending on the outdoor space style.
Materials Needed:
- Outdoor fabric or canvas
- Grommets and grommet tool
- Timber posts and post anchors
- Rope or bungee cord for hanging
- Scissors and sewing machine or fabric glue for hems
How to Make It:
- Install timber posts at intervals matching fabric panel width
- Cut fabric to size with 5cm hem allowance on all edges
- Fold and sew or glue hems to prevent fraying
- Add grommets along top edge every 30cm
- Thread rope through grommets and tie to posts
- Add grommets along bottom and weight with small rocks in pockets to prevent billowing
15. Friendly Neighborhood Privacy Fence DIY
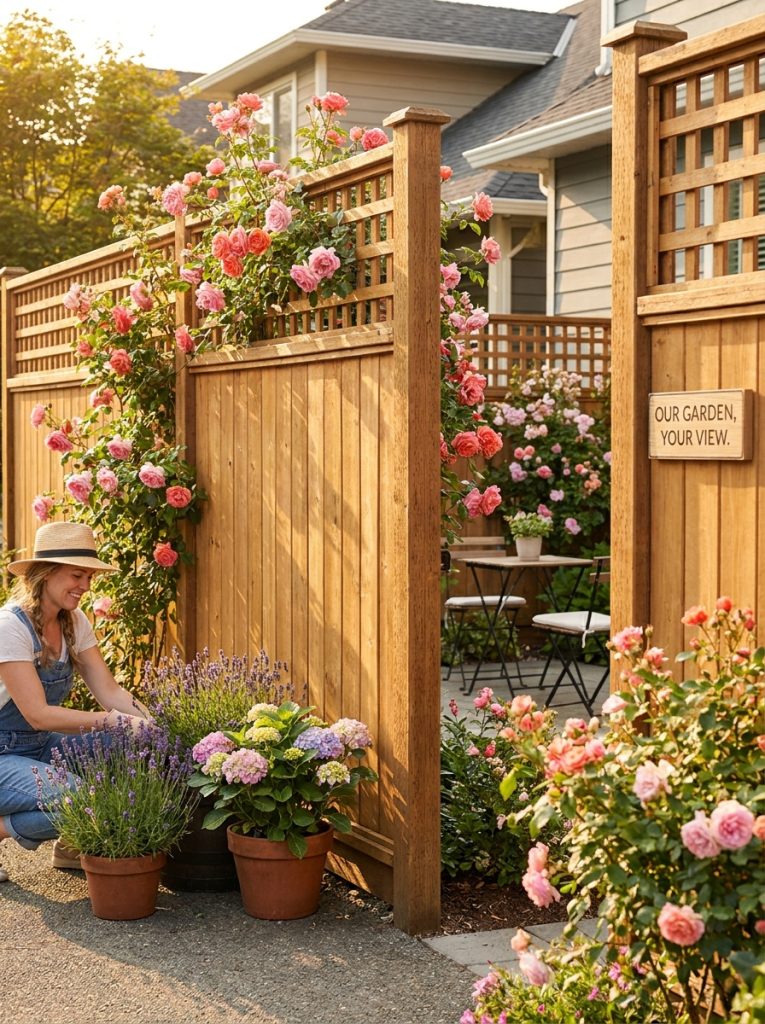
A good neighbour fence looks just as attractive from their side as from yours — build a solid timber lower section for privacy with a decorative lattice or trellis top section, plant climbing roses on the neighbour-facing side, and the fence is genuinely beautiful from both directions. This approach prevents any tension over new fencing and often results in neighbours asking who built it so they can get the same.
Materials Needed:
- Solid timber fence boards for lower section
- Lattice or trellis panels for upper section
- Fence posts and post anchors
- Climbing roses for neighbour-facing side
- Paint or stain
How to Make It:
- Install posts with ground anchors at 2m intervals
- Attach solid timber boards for lower 1.2m of fence height
- Attach decorative lattice panels for upper 60cm section
- Paint or stain both sections in coordinating colors
- Plant climbing roses at base on neighbour-facing side
- Train rose shoots through lattice with plant ties
16. Outdoor Spaces Temporary Rental Privacy Screen
Modular freestanding privacy screens are the perfect rental solution — no drilling, no post holes, no concrete, no landlord conversations needed. Set them up in any configuration to create a private corner, a screened seating area, or a full garden boundary. They pack flat for moving and can be repositioned any time the outdoor space needs changing. The most flexible DIY privacy fence on a budget solution for anyone who does not own their home.
Materials Needed:
- Modular freestanding privacy screen panels
- Flat stable ground surface
- Sandbags for stability in wind
- Potted plants to anchor display
How to Make It:
- Plan the privacy area and measure how many panels needed
- Connect panels together per system instructions
- Position in chosen configuration — L-shape, U-shape, or straight line
- Weight bases with sandbags in exposed windy spots
- Add potted plants on both sides for a finished look
- Reconfigure or reposition anytime — fully flexible system
17. DIY Privacy Fence Ideas to Build Yourself Cheap
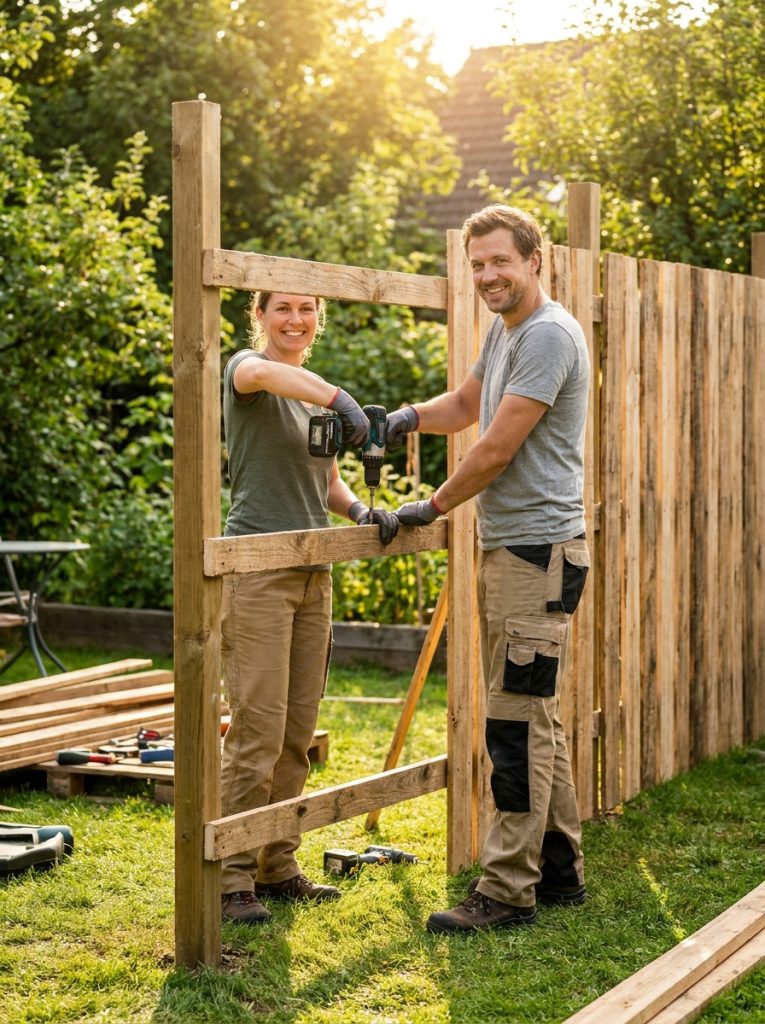
The most cost-effective DIY privacy fence to build yourself uses the simplest possible construction — posts, horizontal rails, vertical boards. No special skills, no complicated joints, no expensive materials. Basic timber from the hardware store, post anchors to avoid concrete, and a drill. A full 10-metre backyard fence costs a fraction of professional installation when you build it yourself and the build takes one focused weekend.
Materials Needed:
- 100x100mm fence posts
- 75x50mm horizontal rails
- 150mm wide timber fence boards
- Ground spike post anchors
- 75mm outdoor screws
- Outdoor wood stain
How to Make It:
- Install post anchors every 2.4m along fence line
- Set posts in anchors and check vertical both ways
- Screw horizontal rails to posts at top middle and bottom
- Starting at one end screw fence boards vertically to rails
- Use spacer block for consistent gaps between boards
- Apply two coats outdoor wood stain when complete
18. Lattice and VS Professional Installation Budget Comparison
The honest budget comparison — professional fence installation for an average backyard costs several thousand dollars when you factor in labour. The same fence built yourself costs the materials only — typically 60 to 80 percent less. The skills required are genuinely basic — marking a line, driving post anchors, attaching panels. If you can use a drill and a level you can build a professional looking privacy fence yourself. Start with one section to build confidence and the rest follows naturally. Our garden enclosure ideas post shows more ways to create defined private spaces in any garden.
Materials Needed:
- Your chosen fence system — panels, bamboo, lattice, or timber boards
- Basic tools — drill, level, measuring tape
- Weekend of time
- Willingness to learn as you go
How to Make It:
- Research and choose fence type for your specific situation
- Calculate materials needed and order with 10 percent extra for waste
- Watch installation video for chosen fence type before starting
- Start at one corner and work methodically along the fence line
- Check level and vertical constantly as you build — correct early errors
- Step back every few panels to check the overall line looks straight
Final Thoughts on DIY Privacy Fence on a Budget
There you have it — 18 DIY privacy fence on a budget ideas for every outdoor space from backyards to balconies, renters to homeowners, and complete beginners to confident DIYers. The right privacy fence transforms how much you actually use and enjoy your outdoor space — and building it yourself saves so much money that the materials practically pay for themselves in how much more time you spend outside. Pick the approach that fits your space and budget and get started this weekend.

Amir Ali is the founder and site administrator of HomeDecorEdge, a modern home decor and interior design platform. Since starting the site, he has combined his passion for interior design, practical styling, and color coordination with hands-on content strategy and site management. He guides authors, curates high-quality articles, and ensures readers have access to actionable, visually inspiring, and user-focused home decor advice for apartments, small rooms, and family homes.