

There is a moment on a winter evening when plain glass jars stop looking like recycling and start looking like lanterns. Epsom salt is the trick: brushed glue plus a roll in coarse crystals, and any jar turns frosted, sparkly and softly glowing, like it was left out in the first snow.
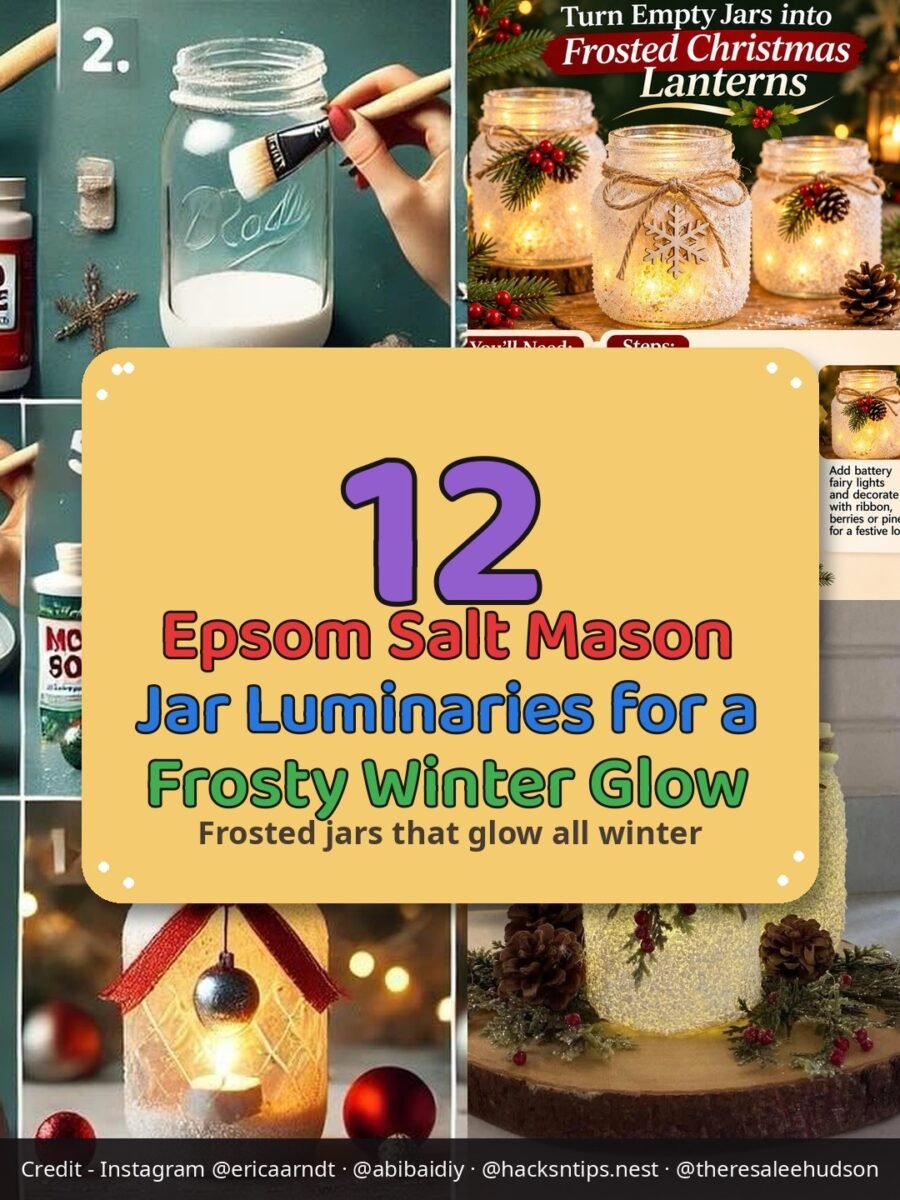
This list collects twelve epsom salt mason jar luminaries, starting with the classic recipe and its two best variations as full builds, then nine more ways to style, paint and group them around the house. They sit happily beside the snowmen from our diy snowman decor ideas, and the whole winter shelf comes together.
The supplies could not be simpler: clean jars, white glue or Mod Podge, a bag of epsom salt and something that glows. Battery lights are the safe default, especially anywhere near twine, greenery or children.
Make the classic jar first. Once you see that first frosted glow, the other eleven will plan themselves.
Quick Picks
- Start here: The Classic Epsom Salt Luminary (idea 1)
- Best no flame option: Frosted Lanterns With Battery Fairy Lights (idea 2)
- Best for the table: The Wood Slab Centerpiece Trio (idea 3)
1. The Classic Epsom Salt Luminary
BuildAbout 20 minutes plus dryingBeginner friendly
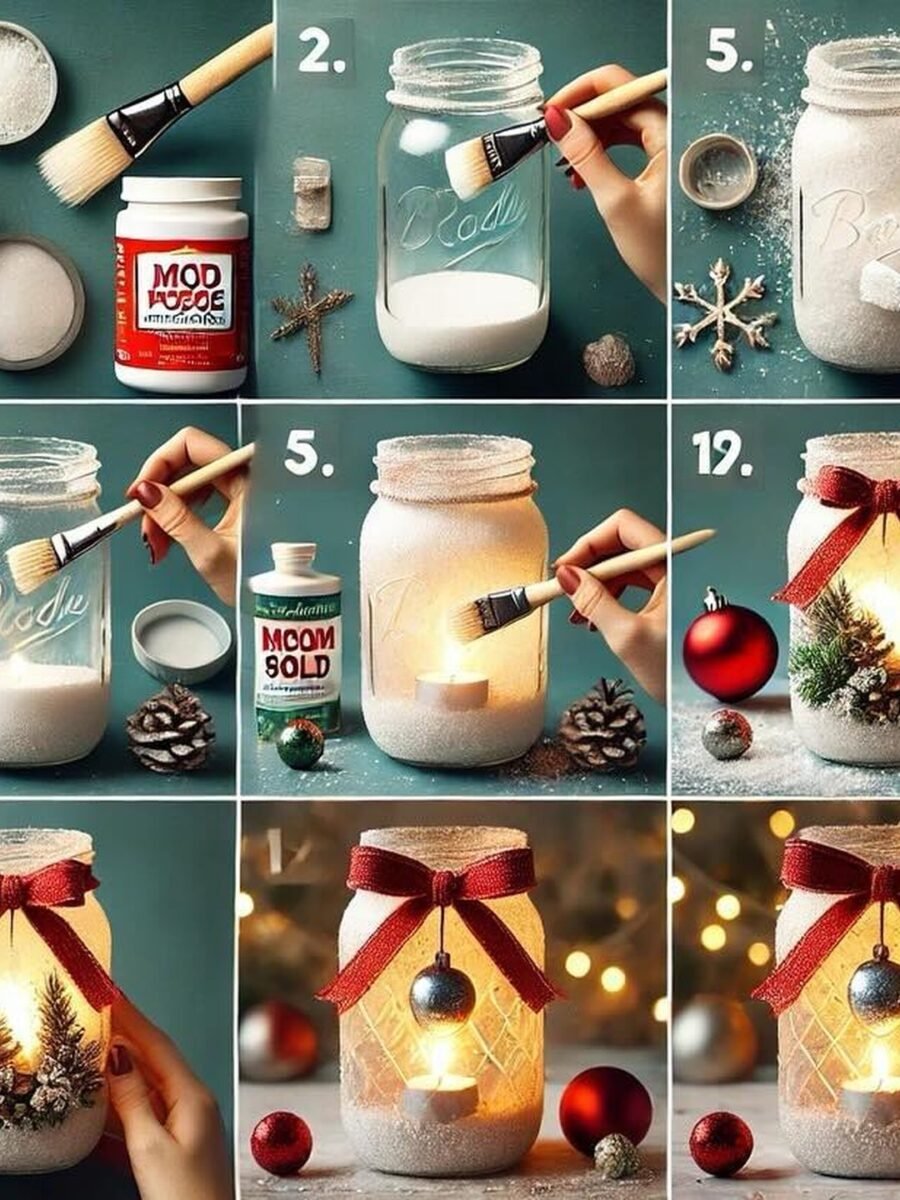
This is the original recipe everything else on this page grows from. Glue plus epsom salt gives plain glass that thick, frosted, just snowed look, and the crystals sparkle exactly like real frost when a candle glows behind them. Make one first to learn the coating, then batch the rest.
Materials Needed
- Clean mason jars, any size
- Mod Podge or white craft glue
- Epsom salt, about 1 cup per jar
- Foam brush
- Battery tea lights or real tea lights
- Twine, ribbon and small greenery for finishing
How to Make It
- Wash the jars and dry them completely; any grease stops the glue holding.
- Brush a thin, even coat of Mod Podge over the outside of the jar, working one side at a time.
- Hold the jar over a tray and sprinkle or roll it in epsom salt until fully covered, then press the crystals lightly with your palm.
- Stand the jar upright and let it dry for at least two hours; the glue turns clear as it sets.
- Add a second patchy coat anywhere the glass shows through, then let it dry again.
- Tie twine or ribbon around the neck, tuck in a sprig of greenery, and drop in a tea light.
Tip: Salt sheds a little as it dries. Work over a baking tray so the loose crystals pour straight back into the bag for the next jar.
2. Frosted Lanterns With Battery Fairy Lights
BuildAbout 25 minutes plus dryingNo flame, kid safe
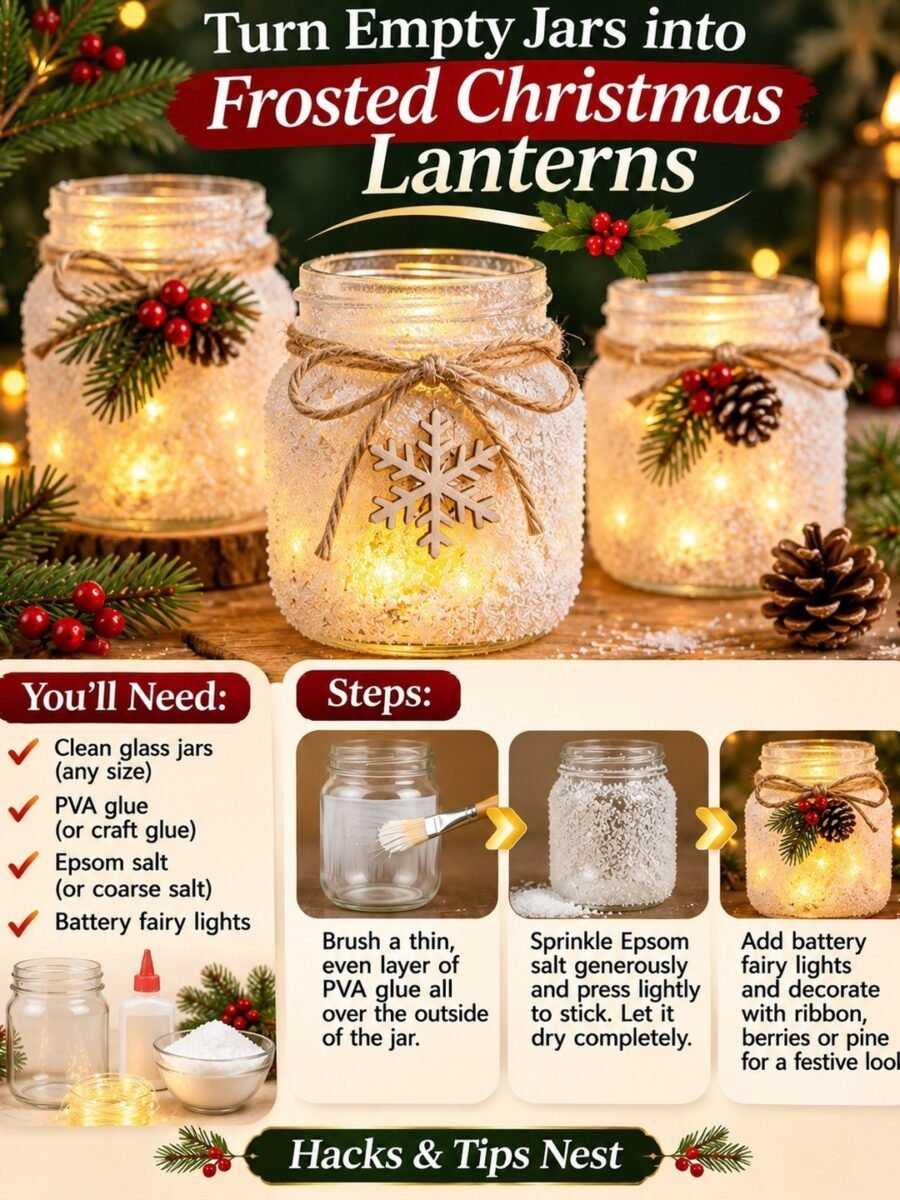
If you prefer glow without flames, this is your build. The salt goes on the outside, battery fairy lights go inside, and the whole jar turns into a lantern you can leave on a porch step, a windowsill or a child’s bedroom shelf with zero worry.
Materials Needed
- Empty glass jars with lids off
- PVA glue or Mod Podge
- Epsom salt or coarse salt
- Battery fairy lights, one string per jar
- Twine bows, pine sprigs, red berries and pinecones
- A tray for catching loose salt
How to Make It
- Brush a thin layer of glue over the whole outside of each clean, dry jar.
- Sprinkle epsom salt generously over the glue and press lightly so it sticks in a thick, frosty coat.
- Let the jars dry completely, at least two hours, before handling them.
- Coil a string of battery fairy lights inside each jar, hiding the battery pack at the back.
- Tie a twine bow at the neck and tuck in pine, berries or a wooden snowflake.
- Line them along a step or shelf and switch on at dusk.
Tip: Warm white fairy lights make the salt look golden and frosty. Cool white lights make it look blue and icy. Pick one temperature for the whole set so they match.
3. The Wood Slab Centerpiece Trio
BuildAbout 10 minutes once jars are dryTable ready
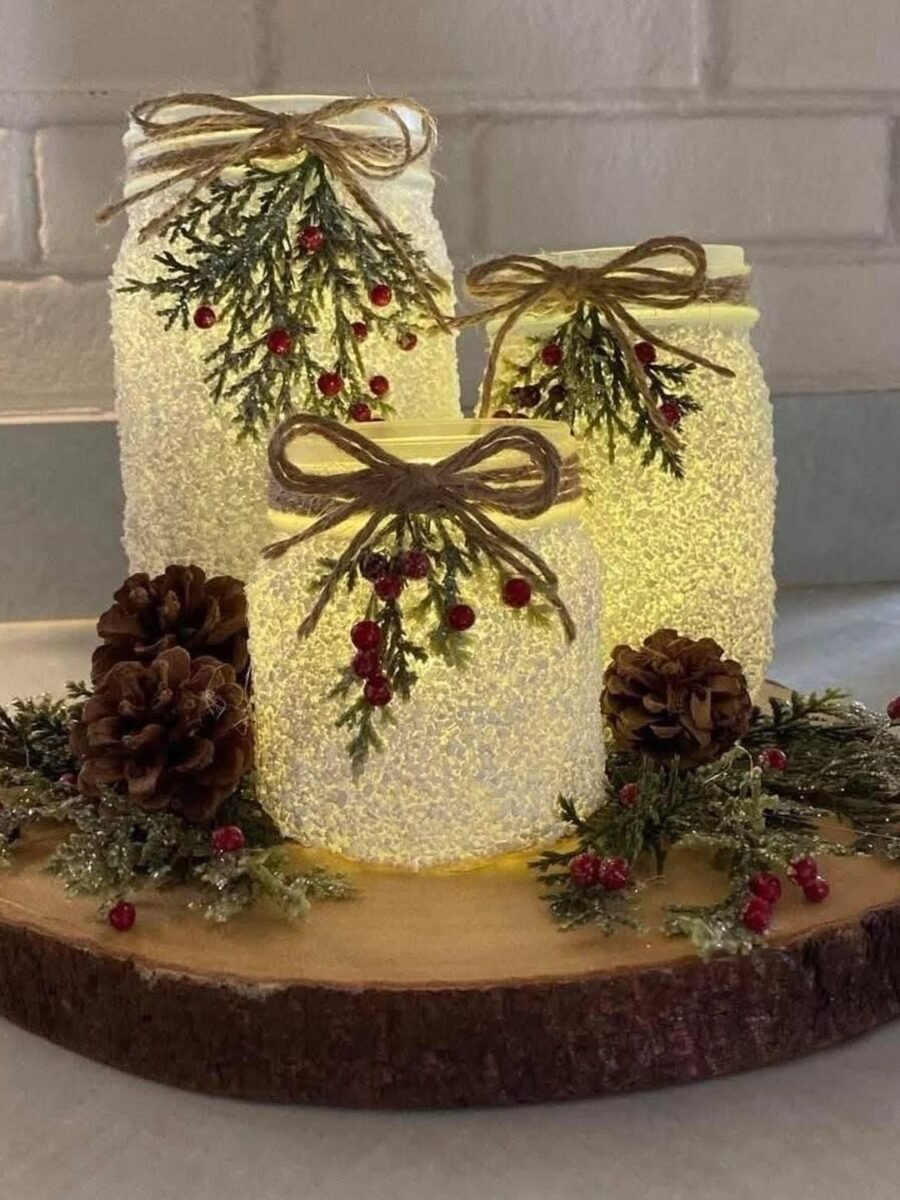
Three finished luminaries become a centerpiece the moment they stand on something. A wood slab, a cake stand or a tray gathers them into one display with pinecones and berries doing the rest. It takes five minutes once the jars are dry, and it lifts off the table in one piece when dinner is served. For more table looks, see our diy christmas centerpiece ideas.
Materials Needed
- Three epsom salt luminaries in two heights
- A wood slab, tray or cake stand
- Pinecones, red berries and evergreen sprigs
- Extra loose epsom salt or faux snow for scattering
- Battery tea lights
How to Make It
- Make or gather three luminaries, two tall and one short, using the classic recipe above.
- Set the wood slab in the center of the table and dust it lightly with loose salt or faux snow.
- Place the two tall jars at the back and the short jar in front, slightly off center.
- Tuck pinecones, berries and greenery into the gaps so the jars look nestled, not parked.
- Drop in battery tea lights, switch on, and scatter a pinch more salt around the base.
Tip: Odd numbers and uneven heights are the whole trick. Three jars at three heights always look styled; four in a row always look stored.
4. Mantel Jars With Tiny Trees Inside
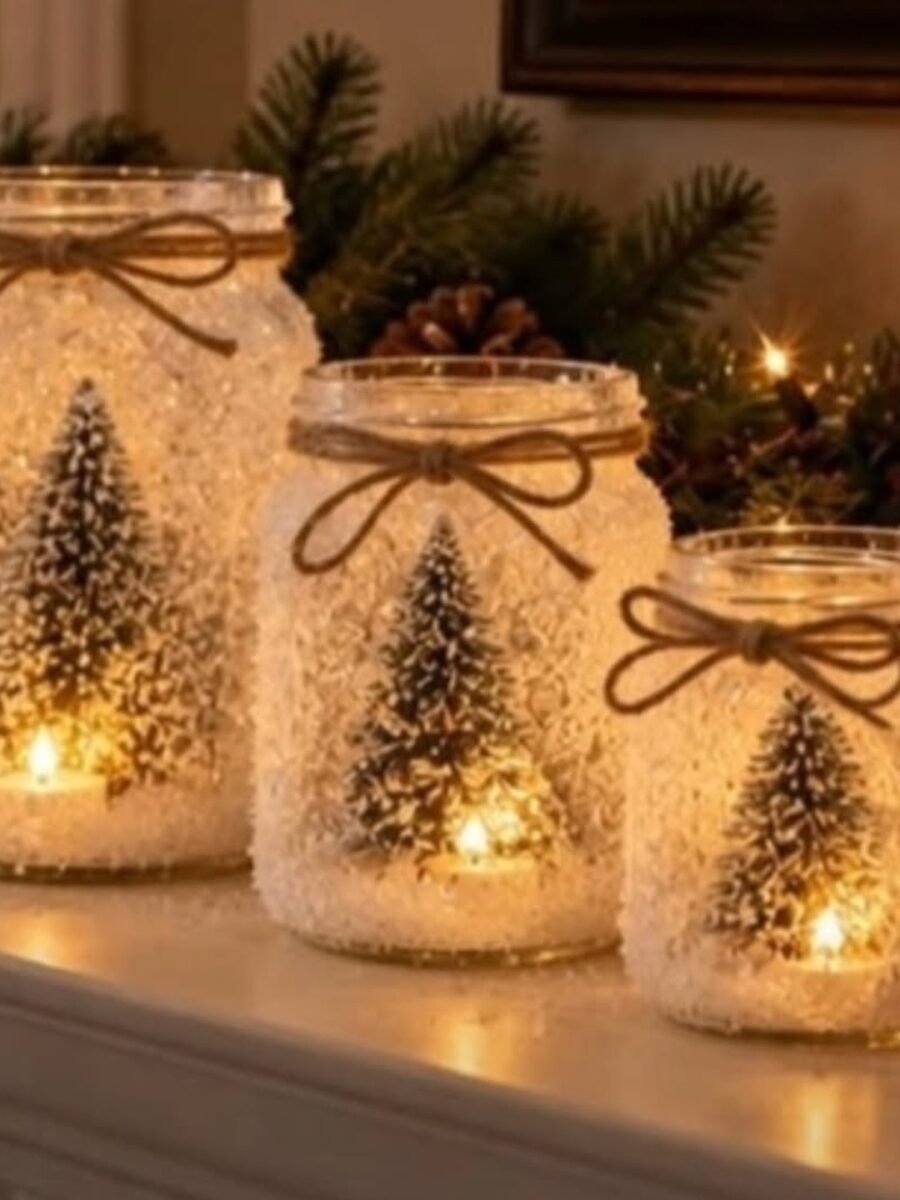
Coat the jars as usual, then stand a tiny frosted tree inside each one before the light goes in. On a mantel with garland behind them, the trees glow through the salt like a forest in fog. Vary the jar sizes and tree heights, and keep the twine bows simple so the silhouettes do the showing off.
You’ll need: three frosted jars, mini bottle brush trees, twine, and battery tea lights.
Best for: Mantels and shelves that need soft light
5. Snowflake Luminaries Down the Dining Table
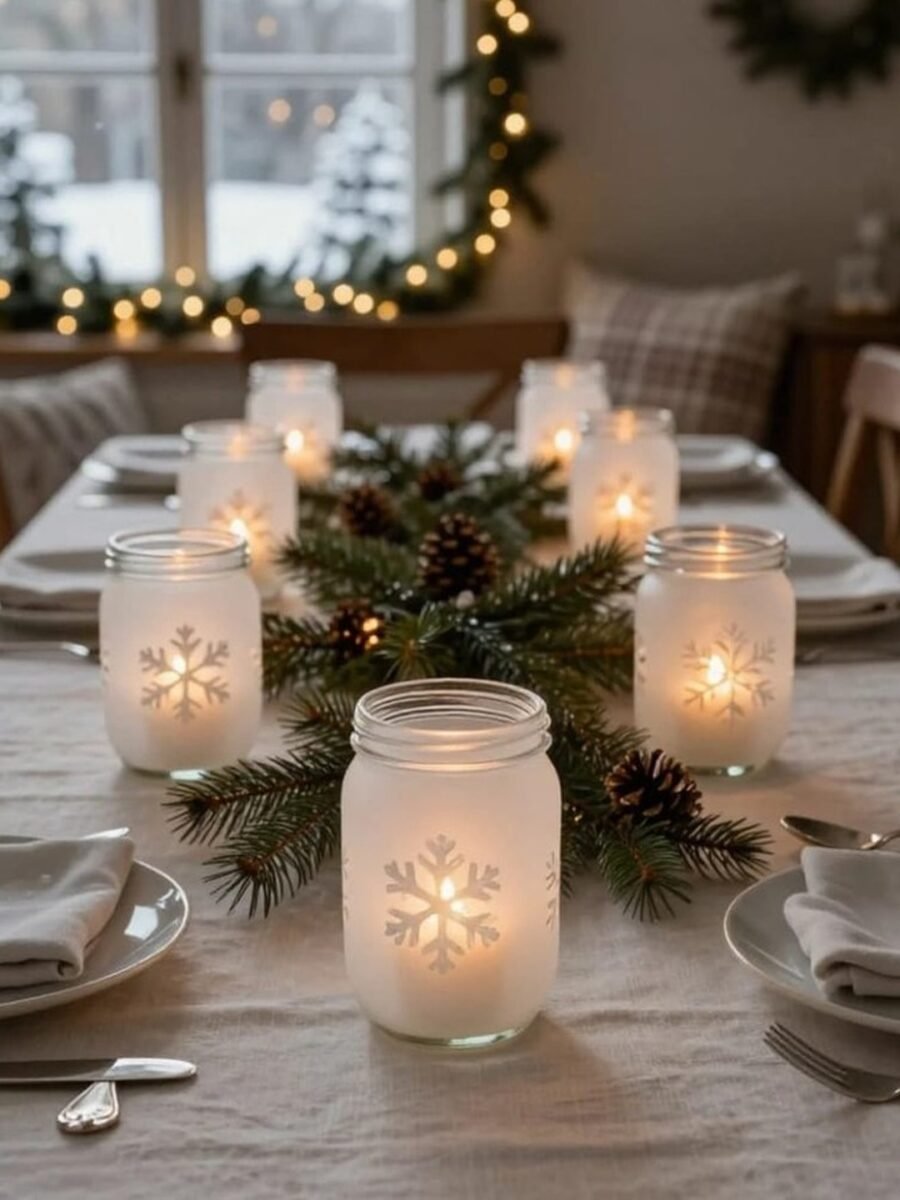
Leave a snowflake shaped window in the salt, or press a paper snowflake against the glow, and a plain jar becomes a lantern with a picture in it. Run five or six down a runner of pine branches and the whole table lights itself. Battery candles keep the greenery safe and the glow steady all evening.
You’ll need: frosted jars, paper snowflake cutouts or stickers, an evergreen runner, and pinecones.
Best for: Dinner parties and long winter evenings
6. Nativity Silhouette Jars
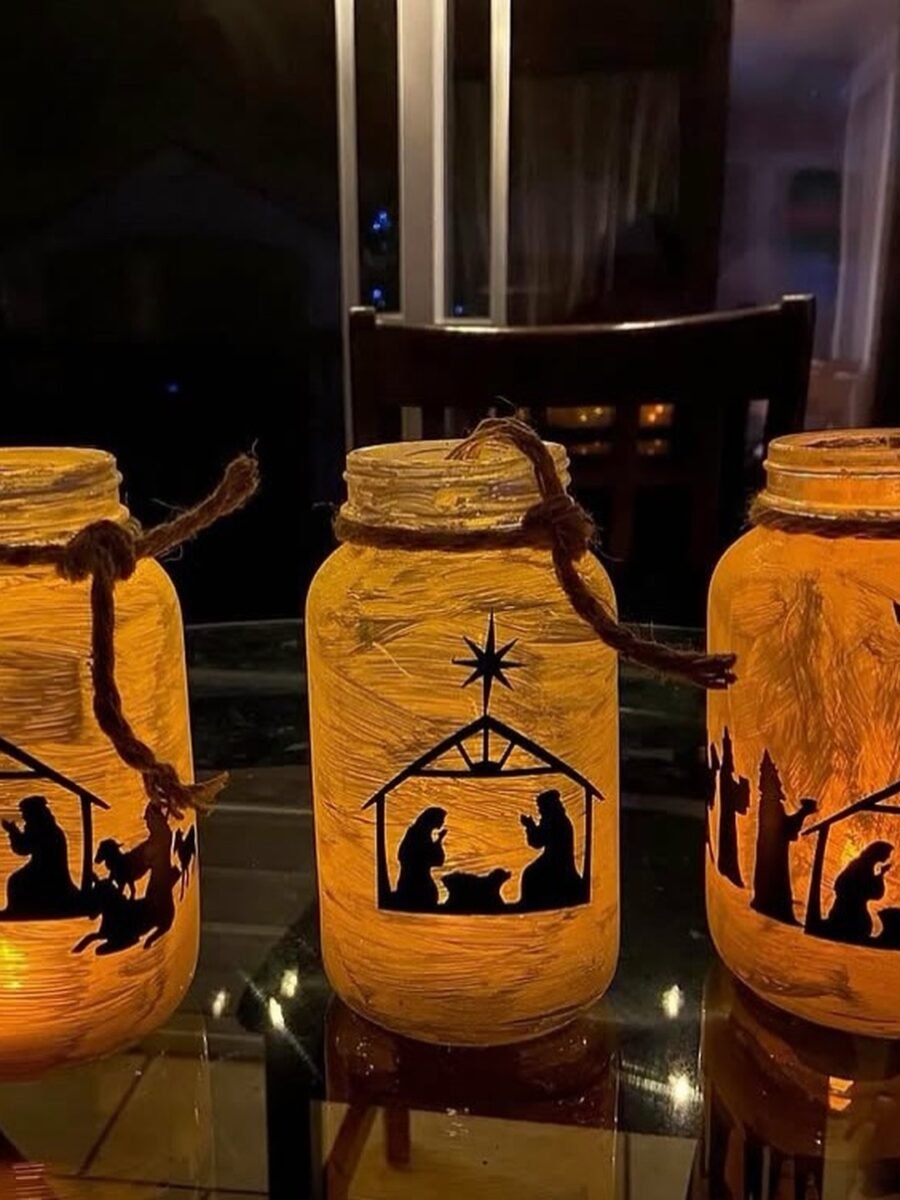
Paint the jar in a warm translucent wash, fix a black silhouette scene to the inside or outside, and light it from behind. The figures stand out like a shadow play: the manger, the star, the wise men arriving. Our mason jar painting ideas show more painted jar techniques in the same spirit. Group three jars so the story reads left to right.
You’ll need: jars, translucent amber paint or tissue, black silhouette cutouts, twine, and tea lights.
Best for: A quiet, meaningful Christmas Eve display
7. A Silent Night Row of Seven
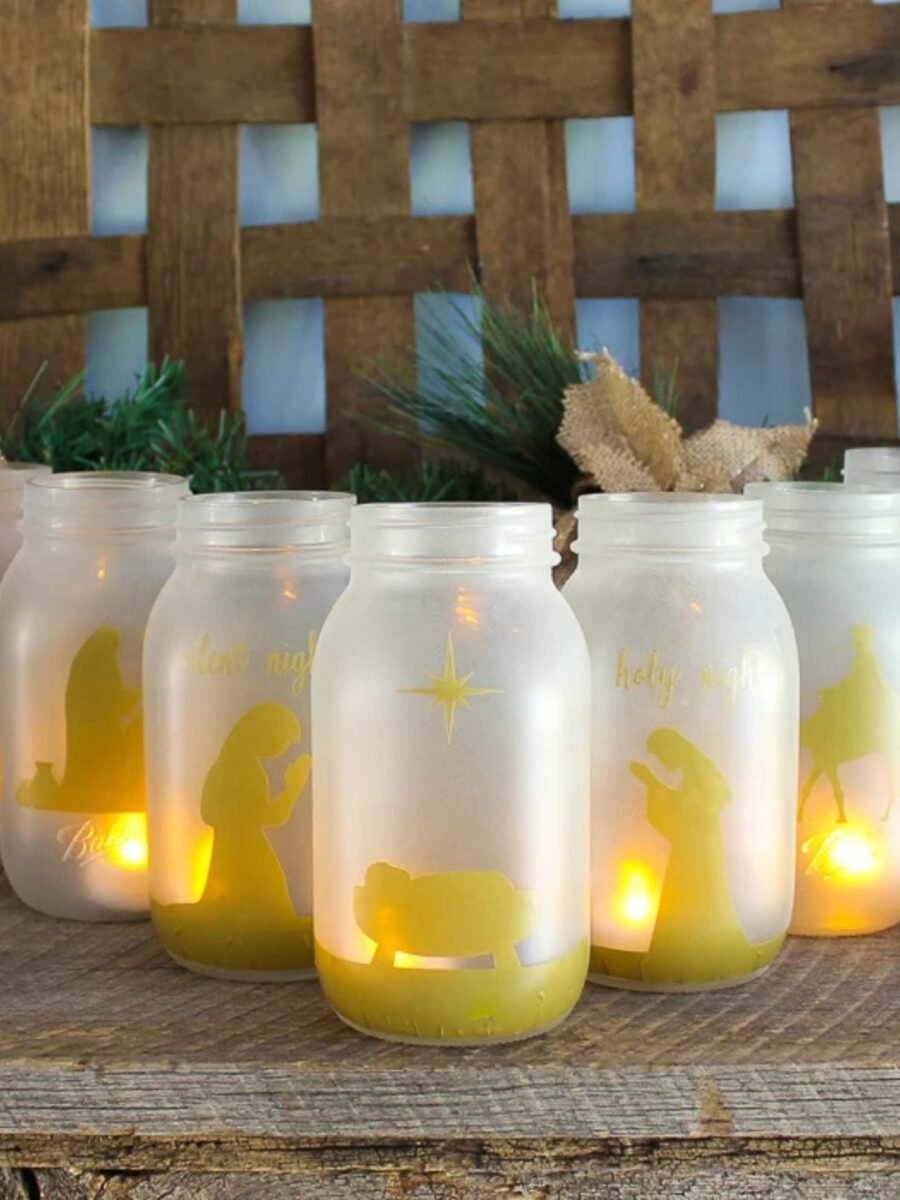
One jar is a lantern; seven in a row are an installation. This set carries gold silhouettes and the words silent night and holy night across frosted glass, glowing against a woven backdrop. A matched row works best with jars of one size and lights of one warmth, so the eye reads the story instead of the jars.
You’ll need: seven jars of similar size, gold silhouette decals or paint, and a steady row of battery lights.
Best for: Entry tables, church halls and big shelves
8. The Dressed Up Single Jar
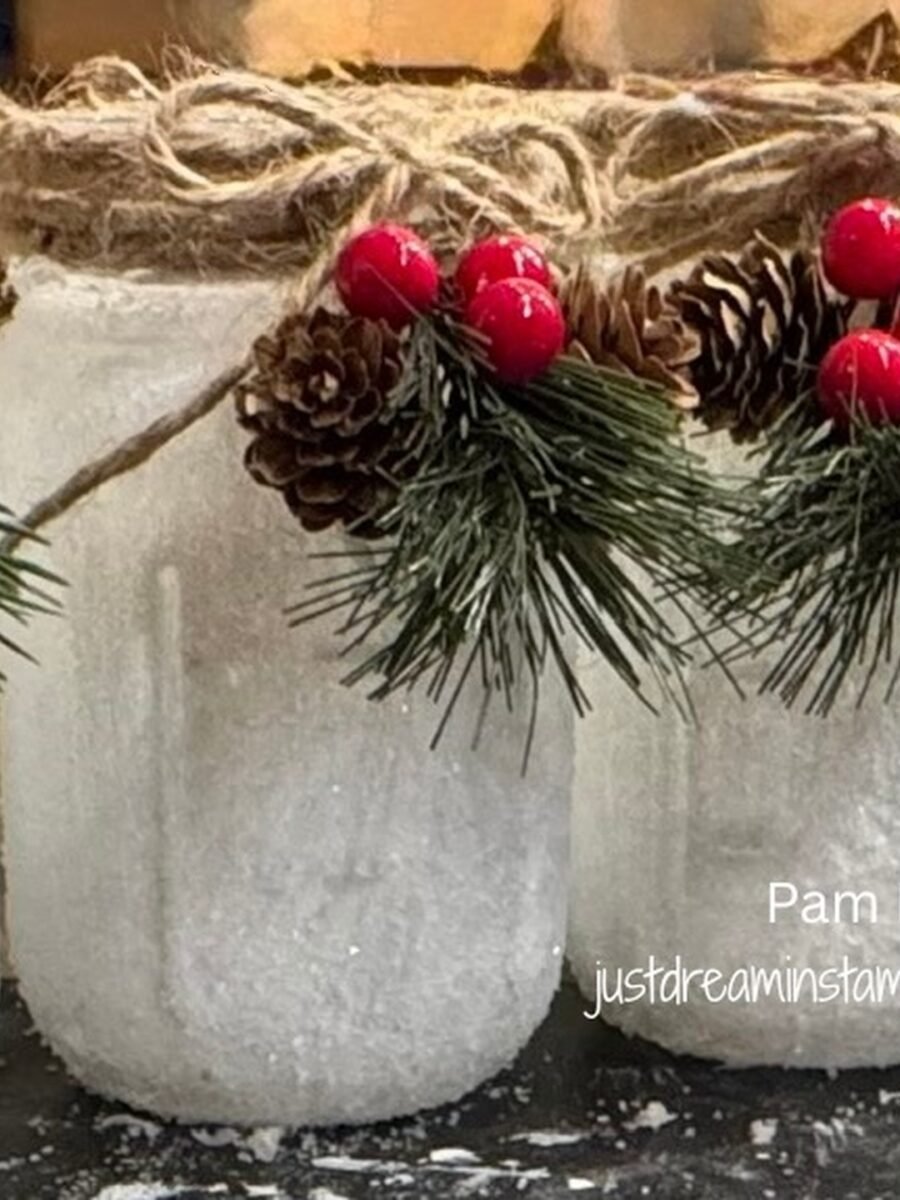
Not every jar needs a group. One thick coated jar, wrapped in twine and dressed with berries, pine and a pinecone at the neck, holds its own on a side table or bathroom shelf. The dressing takes two minutes and makes the difference between a craft project and a decoration.
You’ll need: one frosted jar, chunky twine, berries, a pine sprig, a pinecone, and a glue dot or two.
Best for: Single accents on side tables and shelves
9. Three Finishes, One Recipe
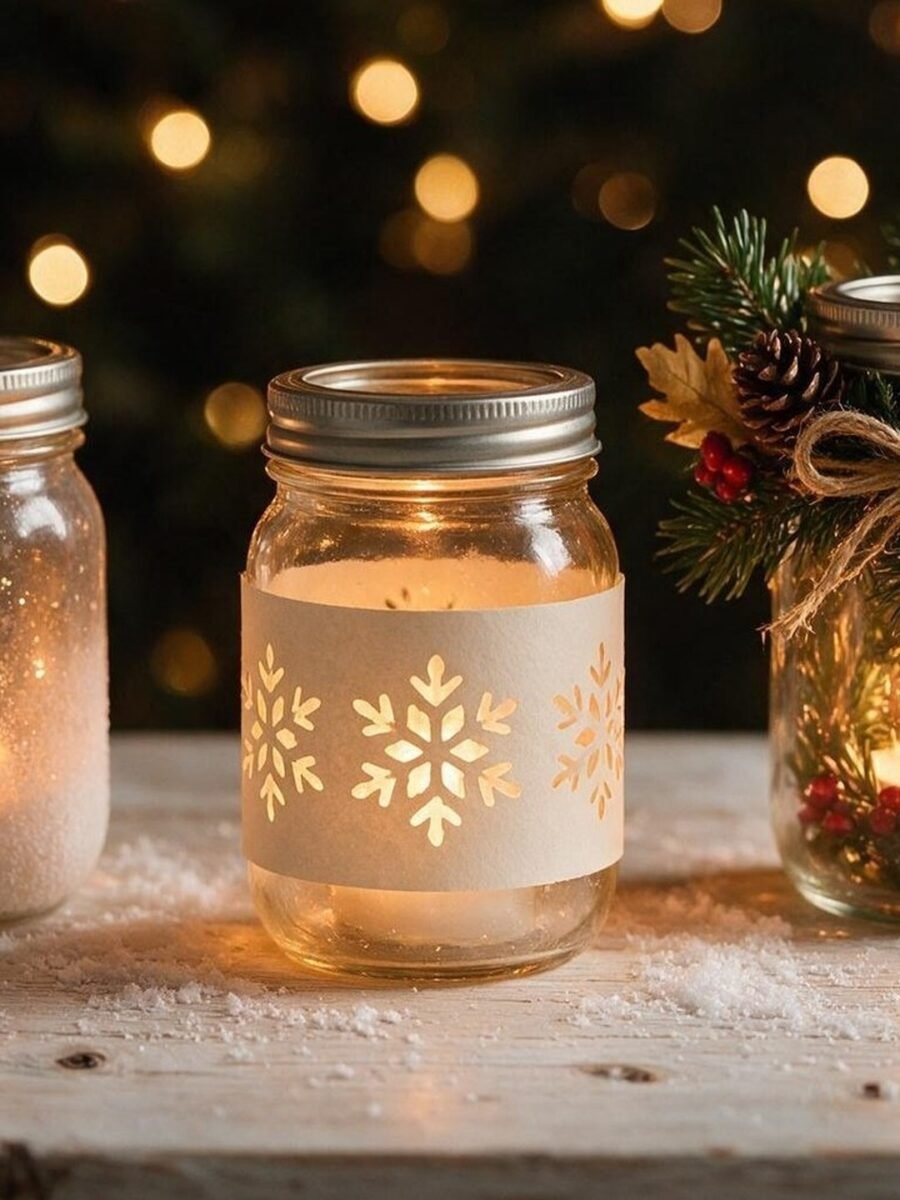
Same jars, same salt, three personalities: one fully frosted, one wearing a paper snowflake band over clear glass, one dressed with pine and berries. Displayed together on a dusting of faux snow, they prove how far one bag of epsom salt can stretch. Make all three and let guests pick a favorite.
You’ll need: three jars, salt, a paper snowflake band, pine sprigs, berries and twine.
Best for: Showing beginners the range of one recipe
10. Blue Glass and Reindeer Silhouettes
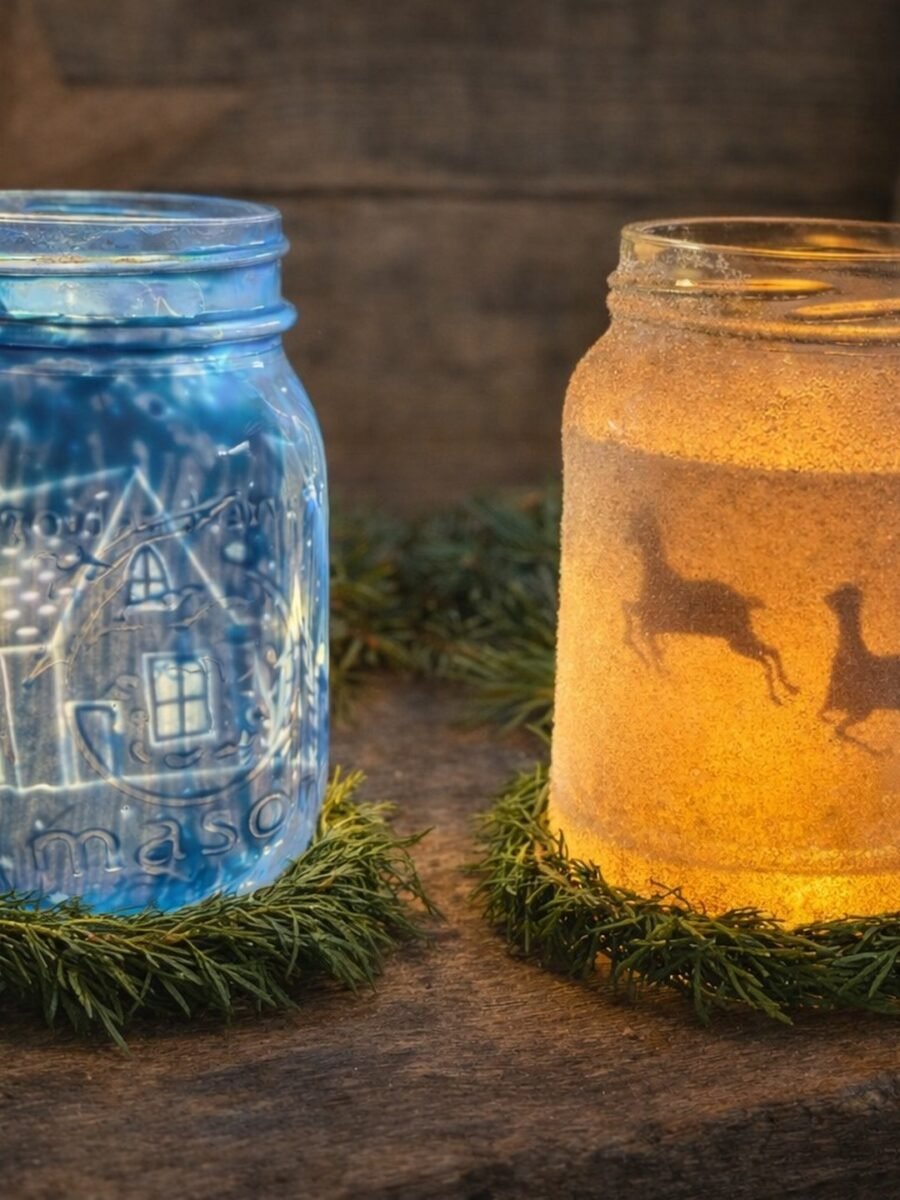
Frost is not the only finish. A blue tinted jar with a lit house window beside a frosted jar with leaping reindeer gives the pair a storybook, deep winter feel. The contrast of cool blue and warm gold is what makes this set, so keep the lights warm in both jars.
You’ll need: one blue tinted jar or blue glass paint, one frosted jar, reindeer silhouettes, and warm lights.
Best for: A cooler, woodland winter look
11. Paper Wrapped Votives for Kids
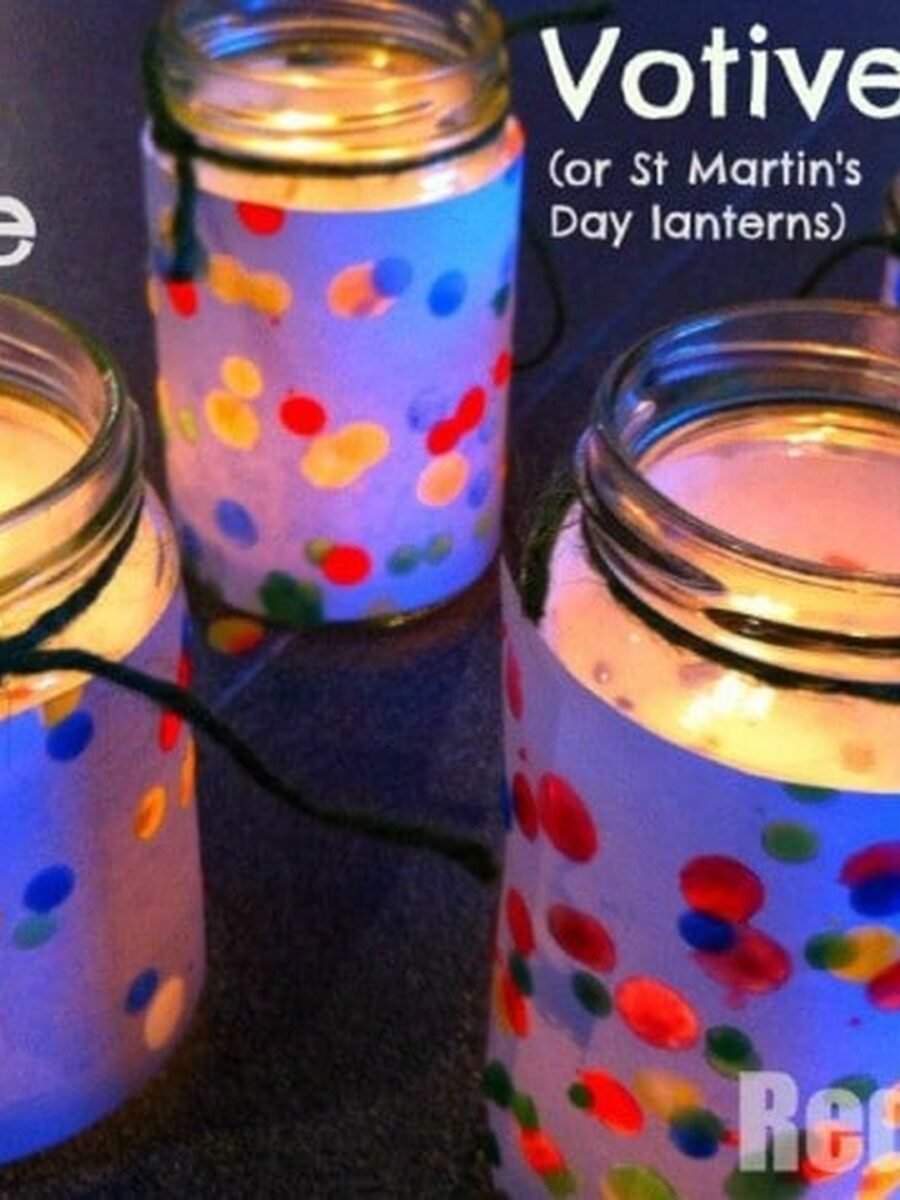
For small hands, swap salt for paper. Wrap the jar in white paper, let the kids dot it with every color they own, tie twine at the rim and use battery candles only. They glow like little stained glass windows, nobody touches glue covered salt, and each child takes home a lantern that is unmistakably theirs.
You’ll need: small jars, white paper, paint for dots, glue, twine, and battery candles only.
Best for: Craft afternoons with children
12. Snowy Jar Centerpieces as Gifts

A single small luminary on a wood slice, with a mini tree and a plaid bow, becomes a gift people actually keep. The panels show the simple assembly: coat, dress, set on the slice, light. Make them in a batch of six on a Sunday and your December gift list quietly takes care of itself.
You’ll need: small jars, salt coating, mini trees, plaid ribbon, wood slices and battery candles.
Best for: A last minute gift that looks planned
Frequently Asked Questions
Will epsom salt luminaries last more than one season?
The salt itself does not melt, but the glue softens with steam and repeated washing. Keep finished luminaries dry, dust them with a soft brush, and store them upright in a box. If a patch sheds after a season, brush on a little glue and sprinkle fresh salt over the bare spot.
Are real candles safe inside epsom salt jars?
Battery lights, every time, for anything dressed with twine, greenery or paper. The salt coating insulates the glass, and dried decorations near an open flame are a risk not worth taking. If you do use a real tea light, keep the jar plain, never leave it unattended, and keep it away from curtains and little hands.
How much epsom salt does one jar need?
A standard 16 ounce mason jar takes roughly three quarters of a cup for a thick coat, and most of what falls off goes back in the bag. A four pound bag, which costs very little, covers a full set of eight to ten jars with plenty left for repairs.
Can I use any glass jar, or only mason jars?
Yes, that is the beauty of it. Spaghetti sauce jars, jam jars and pickle jars all work. Different heights and shapes actually look better grouped than a matched set. Just remove labels with warm soapy water and dry the glass fully before gluing.
Why is my salt coating flaking off?
It usually means the glue coat was too thick or the jar was handled before it dried. Let jars cure a full two hours, longer in humid weather, and lift them by the rim. A very light mist of clear sealer spray over the dry salt stops most shedding for good.
Is epsom salt safe to use around the house?
Plain epsom salt is a mineral, magnesium sulfate, and the offcuts can go in the garden or a foot soak. Keep decorated jars away from food prep surfaces while you work, wash hands after crafting, and store the salt bag out of reach of small children and pets, like any household mineral.
Final Thoughts on Epsom Salt Mason Jar Luminaries
A bag of epsom salt, a bottle of glue and a shelf of saved jars: that is the whole supply list for a house that glows all winter. Make the classic luminary first, then let the variations carry you from the mantel to the table to the porch steps.
Start with three jars this weekend. By next weekend, you will be coating every empty jar that comes out of the kitchen, and nobody in the house will complain about it.

