

Paper quilling turns the humblest craft supply, a thin strip of paper, into art that looks far more delicate than it is. Roll a strip into a coil, pinch it into a petal, glue a few together, and suddenly you have a flower, a butterfly or a whole mandala. These paper quilling ideas are made for real beginners and patient makers alike, with simple shapes, cheap supplies and results worth framing.
The twelve ideas below cover the whole craft, from a first flower card to a framed tree of life. Start with the flowers, because they teach the three shapes every other project uses, then try the butterfly and the mandala, then move on to gifts and wall art. If you love paper crafts in general, our DIY paper decor craft ideas pair well with the quilling projects here.
You do not need special supplies. A pack of quilling strips in a few colors, a slotted quilling tool, clear drying craft glue, tweezers and some card cover almost every idea on this page. One habit matters more than any other: let the glue dry fully between stages, because a piece moved too soon slides apart and takes its coils with it.
Work on a clean, flat surface with good light, and keep a small dish of glue and a cocktail stick nearby for tiny dots of glue. Start tonight with one flower, add a card tomorrow, and by the end of the week you will have a handmade gift that no shop could match.
Quick Picks
- Best place to start: Quilled Flowers on a Card (idea 1)
- Biggest wow for the effort: A Quilled Monarch Butterfly (idea 2)
- Easiest gift to make: A Quilled Heart Greeting Card (idea 5)
1. Quilled Flowers on a Card
BuildAbout 1 hourBeginner friendly
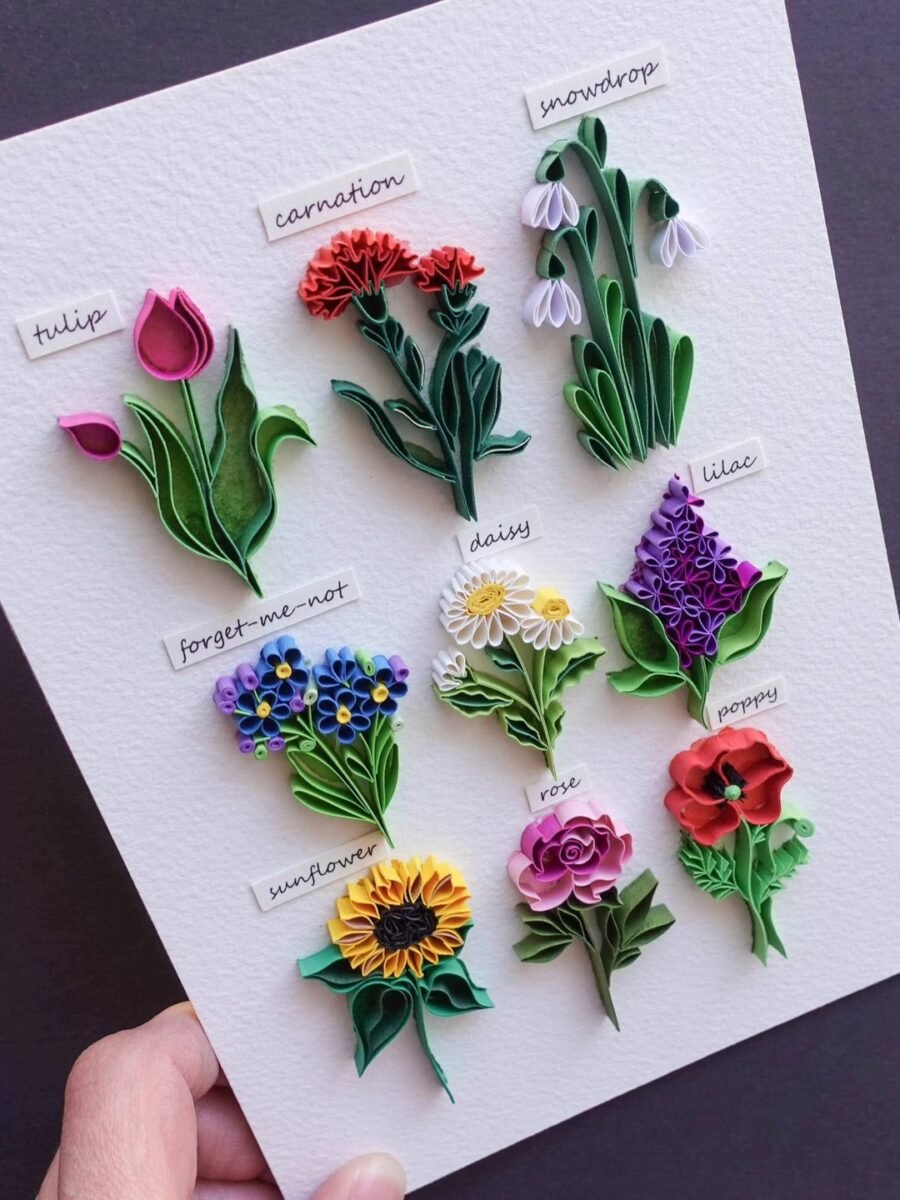
Nine little flowers on one card, each one rolled from paper strips, is the best first quilling project there is. You learn the three shapes that run through almost all quilling, the tight coil, the teardrop and the marquise, and by the ninth flower your hands know the rhythm. Start with one flower type, a daisy or a sunflower, and repeat it until the coils feel even, then move on to the next. Our paper flowers DIY ideas pair well with these quilled blooms if you want a mixed paper flower display.
Materials Needed
- Quilling paper strips in pink, red, white, yellow, blue and purple, 3mm or 5mm wide
- A slotted quilling tool
- Clear drying craft glue and a cocktail stick for applying it
- White card stock for mounting the flowers
- Tweezers and a circle sizing board, or a piece of card with holes drawn on it
- Small labels and a fine pen, if you want to name each flower
How to Make It
- Roll one strip into a tight coil for the flower center, glue the end, and slip it off the tool.
- Roll five or six strips into loose coils, pinch one end of each to make teardrop petals, and glue them around the center.
- Make a stem from a folded green strip and two small leaf shapes, then glue the whole flower onto the card.
- Repeat the same flower three or four times before trying a new shape, so your coils stay even.
- Label each flower under it in pencil first, then pen, and leave the card flat until the glue is fully dry.
Tip: Roll every petal on the same circle of your sizing board, because petals rolled to the same size look like a real flower, and petals rolled freehand look lopsided.
2. A Quilled Monarch Butterfly
BuildAbout 2 hoursSome practice helps
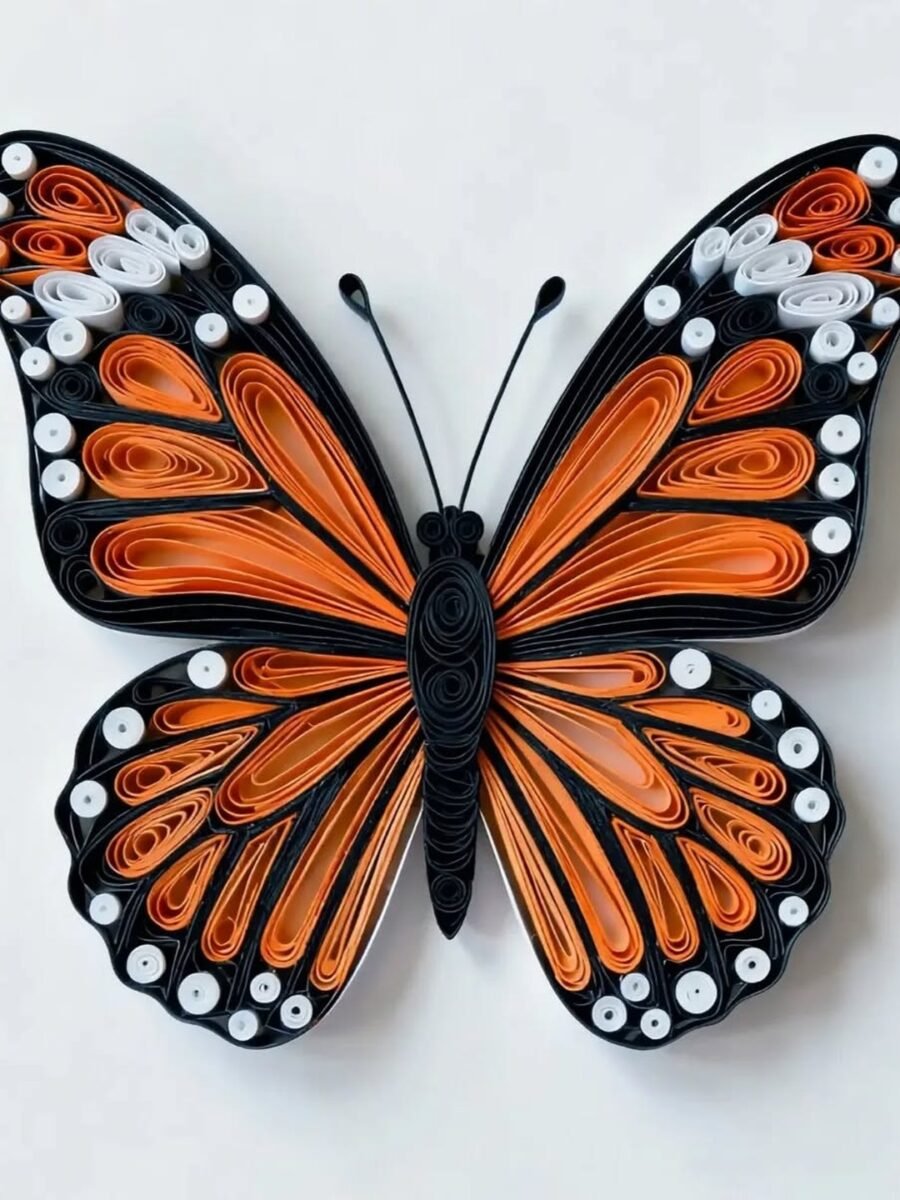
A monarch butterfly is quilling showing off, because the wings are just rows of the same teardrop shapes in different sizes, and the color does all the work. Orange, black and white strips are all you need, and the finished butterfly looks far harder than it is. Keep the two wings the same by making every shape in pairs, one for the left wing and one for the right, before you glue anything down.
Materials Needed
- Quilling paper strips in orange, black and white
- A slotted quilling tool and a circle sizing board
- Clear drying craft glue
- White card or a small canvas as the backing
- Tweezers for placing the small white dots
- A printed butterfly outline to work over, optional
How to Make It
- Roll the wing shapes in pairs, large teardrops for the upper wings and smaller ones for the lower wings, in orange with black edges.
- Roll a long slim coil for the body and two thin curled strips for the antennae.
- Lay the shapes out on the backing without glue first, and check the wings mirror each other.
- Glue the body down the center, then glue the wing shapes on one side, then match them on the other side.
- Add tiny white coils as the spots along the wing edges, and leave the butterfly flat overnight so every coil sets.
Tip: Make the black outline shapes first and fill the orange inside them, because a dark edge around each wing section is what makes the butterfly read as a monarch from across the room.
3. A Quilled Mandala

BuildAbout 3 hoursRelaxing and repetitive
A mandala is the most relaxing quilling project you can make, because it is the same few shapes repeated in a circle until a pattern appears. There is no drawing skill needed, only patience, and the slow repetition is half the pleasure. Work from the center outward in rings, and finish one full ring before you start the next, so the pattern stays even all the way around.
Materials Needed
- Quilling paper strips in pastel mint, pale yellow, cream, white and mustard
- A slotted quilling tool and a circle sizing board
- Clear drying craft glue
- A round piece of card or a wooden disc as the base
- A compass or a plate to draw the center circle
- Tweezers for placing the smallest coils
How to Make It
- Draw a light center circle on the base and glue one tight coil right in the middle as the starting point.
- Build the first ring from eight identical teardrop shapes, spaced evenly around the center coil.
- Add a ring of small tight coils between the teardrops, then a ring of marquise shapes, keeping the counts the same in each ring.
- Change color with each ring, so the pattern reads clearly even before the mandala is finished.
- Work outward until the mandala reaches the edge of the base, then seal the outer ring with a thin line of glue and leave it flat to dry.
Tip: Count your shapes out loud as you make each ring, because eight in one ring and nine in the next is the mistake that makes a mandala look wonky, and counting is the only fix.
4. A Quilled Monogram Letter

A single quilled letter is the most personal piece on this page, because it turns an initial into art. Draw the letter large on card first, then fill it with tight coils and teardrops in the colors of your choice, working from the edges inward so the outline stays crisp. A monogram makes a lovely gift for a new baby, a wedding or a housewarming, and it is one of the few quilling projects that looks finished even when the coils are still a little uneven.
You’ll need: quilling strips in several colors, a slotted tool, glue, and a piece of card to mount the letter on.
Best for: Personal gifts and nursery or bedroom walls
5. A Quilled Heart Greeting Card

A quilled heart on a plain card beats any shop bought card, because the person opening it can see the hours in it. Roll a heart outline from one long strip, then fill it with a flowering vine of small coils and leaves, keeping the colors warm and close together. Write your message inside only after the front is fully dry, so the pen never smudges against a damp coil, and send it in a padded envelope so the coils arrive uncrushed.
You’ll need: a blank card, quilling strips in red, orange and yellow, a slotted tool, and glue.
Best for: Birthdays and thank you notes that feel handmade
6. Quilled Mandala Wall Art

A quilled mandala in a frame is the easiest wall art you will ever make, and it suits a hallway or a reading corner perfectly. Build the mandala on the backing board first, working from the center outward in rings, then drop it into the frame and hang it where a spotlight or a lamp catches the coils. The glass keeps dust off the paper and makes the colors look richer, and a single framed mandala can hold a whole wall on its own.
You’ll need: a square frame with glass, a backing board, quilling strips in warm colors, and a small bead for the center.
Best for: A small bare wall that needs one striking piece
7. Quilled Lilies in a Picture Frame
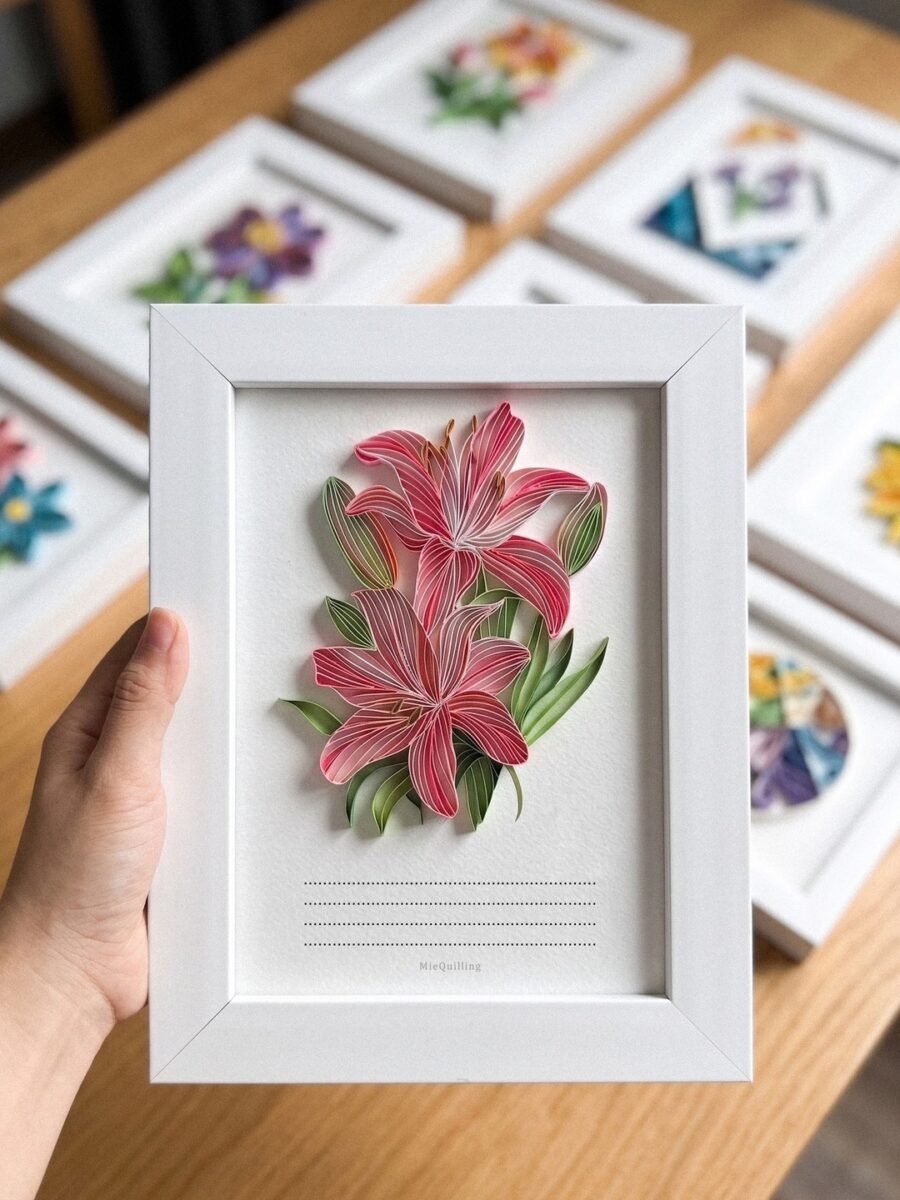
Two quilled lilies in a small frame look like a botanical print until you step closer and see the coils. Roll long teardrops for the petals, with a slight curl at the tip, and add slim green leaves and a bent stem so the flowers feel alive. Frame a single stem for a desk or a bedside table, or make three matching frames in different flower colors and hang them in a row for a quiet, pretty wall.
You’ll need: a small white frame, quilling strips in pink and green, glue, and white card for the backing.
Best for: A shelf, desk or bedside table display
8. Quilled Paper Earrings
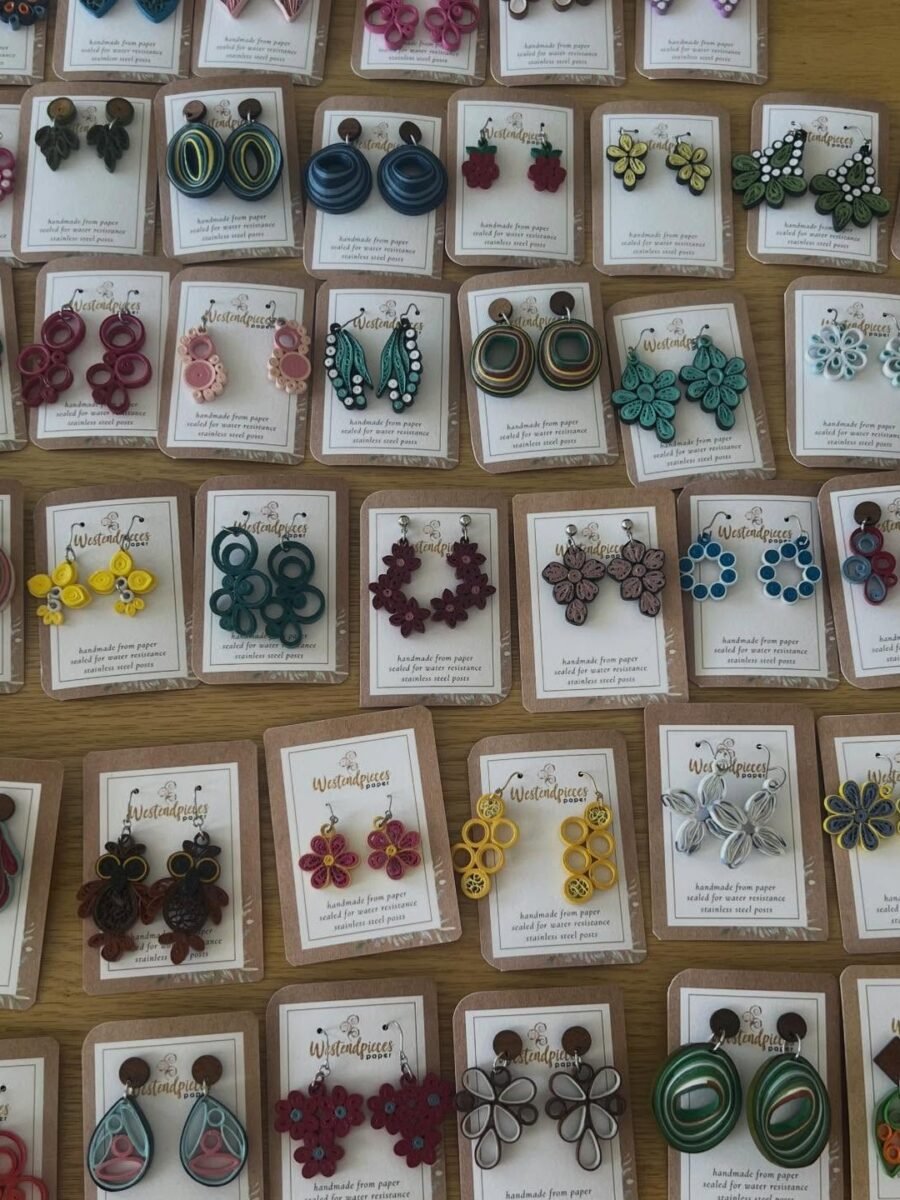
Quilled earrings are feather light, which is exactly why people love wearing them. Roll small tight coils and teardrops into flowers, circles or leaves, glue each pair to match, and seal them with two thin coats of clear sealant so they survive a splash of rain. Make a few pairs at once in different colors, because the shapes are small and quick, and a set of three pairs in a little box makes a gift that feels far more special than its cost.
You’ll need: thin quilling strips, a slotted tool, glue, earring hooks, and clear sealant to protect the paper.
Best for: Lightweight handmade jewellery and small gifts
9. A Quilled Flower Bookmark
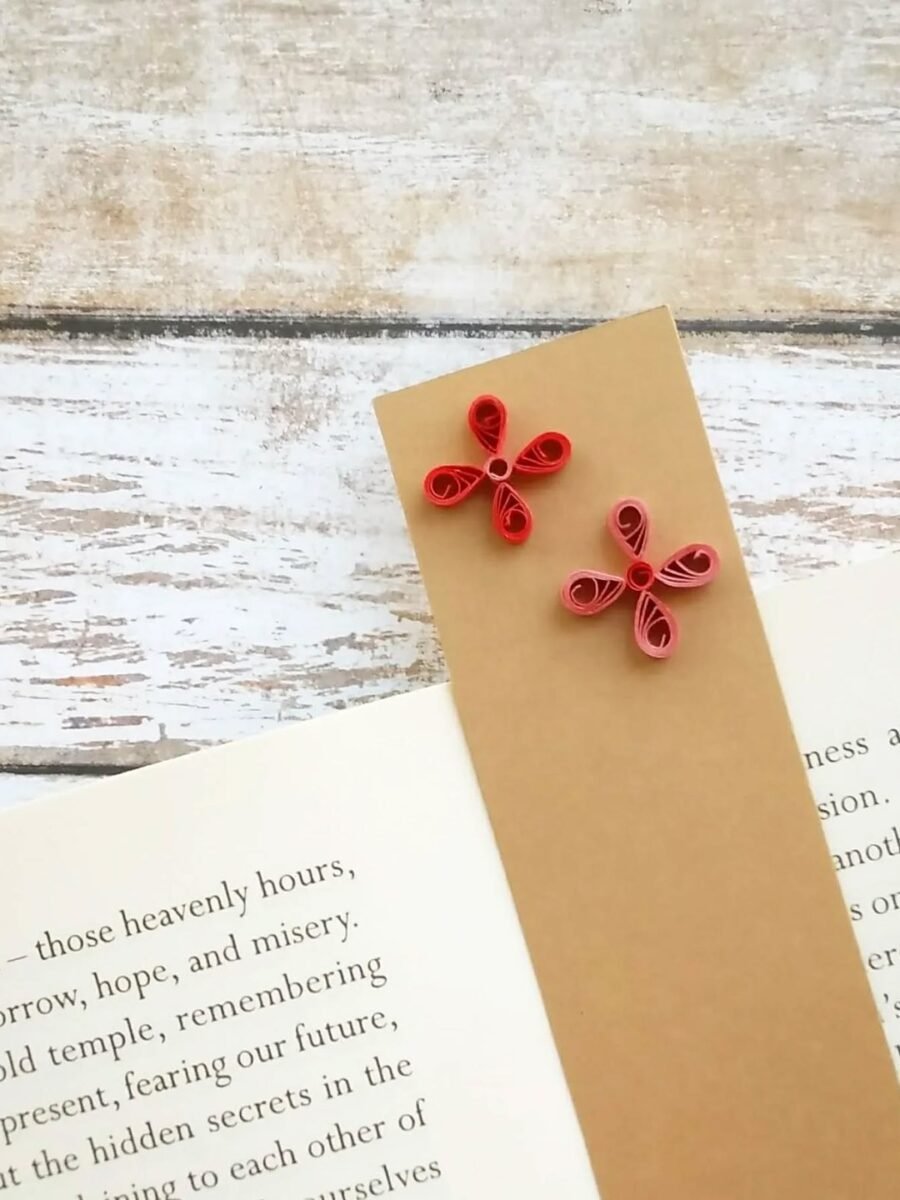
A bookmark needs only two small quilled flowers and ten minutes, which makes it the fastest project on this page. Glue the flowers near the top of the card, where they show above the pages, and keep the rest of the bookmark plain so it slides easily into a book. Punch a hole at the top, thread a ribbon through it, and you have a gift for any reader, made from scraps that would otherwise go in the bin.
You’ll need: a strip of thick card for the bookmark, small quilling strips in red and pink, glue, and a hole punch with ribbon or tassel.
Best for: Book lovers and quick handmade gifts
10. Quilled Snowflakes for Winter

Quilled snowflakes are the prettiest winter paper craft, because the same coil shapes that make flowers also make perfect six pointed flakes. Roll six identical arms from teardrops and tight coils, join them at the center, and add tiny coils at the tips for sparkle. Hang them in a window where the light shines through the paper, or glue one onto a plain gift tag for a winter present that needs no other decoration.
You’ll need: quilling strips in blues and white, a slotted tool, glue, and ribbon or thread if you want to hang them.
Best for: Winter windows, walls and handmade gift tags
11. A Quilled Owl
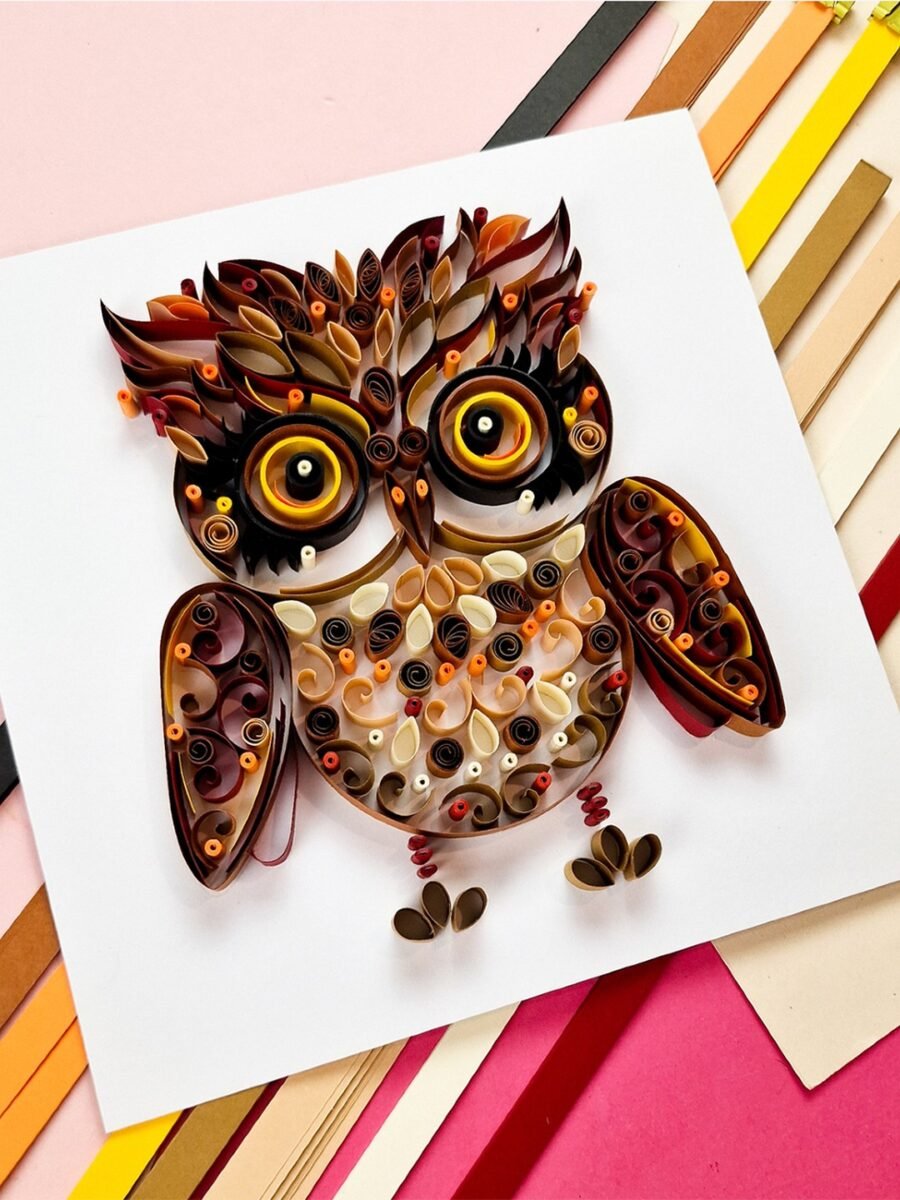
An owl is the most charming animal to quill, because its big round eyes are just two tight coils, and its patterned feathers are rows of teardrops. Build the body first from warm brown coils, then add the wings in darker shades, and finish with the eyes, using black coils ringed in yellow so they look wide awake. An owl suits a child bedroom wall or a gift for someone who loves woodland creatures, and it is a good project for a rainy afternoon.
You’ll need: quilling strips in browns, oranges, yellows and black, a slotted tool, glue, and white card for the backing.
Best for: A child bedroom wall or a nature loving friend
12. A Quilled Tree of Life
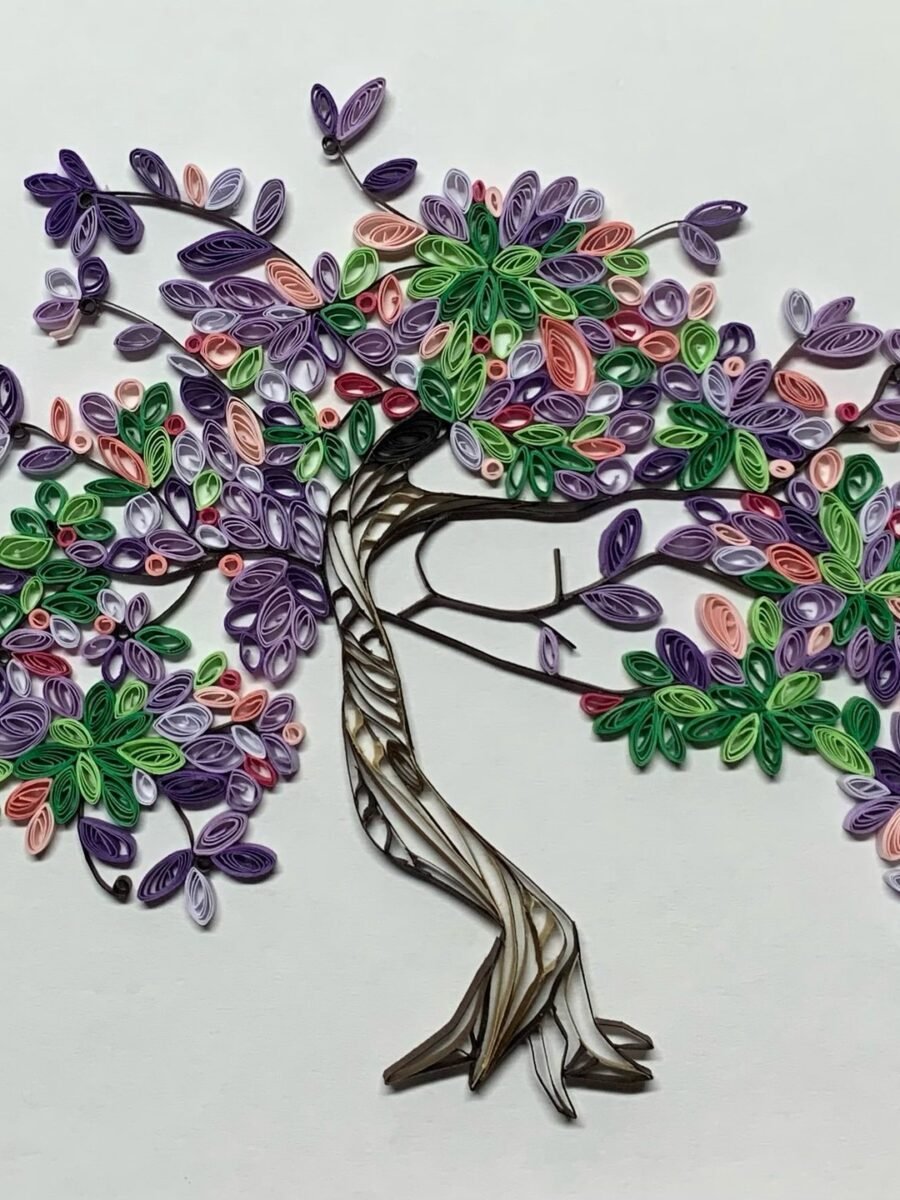
A tree of life is the grandest quilling project on this page, and it is worth the slow build. Twist brown strips into a trunk and branches first, then fill the canopy with hundreds of small coils in purples, greens and reds, packing them close so no backing shows through. Frame it large and hang it where people will stop and look, because a tree of life rewards a close look more than any other quilled piece, with a new coil to notice every time.
You’ll need: quilling strips in purple, green, peach and red, a slotted tool, glue, and a large piece of card or a canvas.
Best for: A framed centerpiece for a living room or hallway
Frequently Asked Questions
What is paper quilling?
Paper quilling is the craft of rolling thin strips of paper into coils, then pinching and shaping those coils into flowers, animals, letters and patterns, and gluing them onto card or into frames. All you need to start is a pack of quilling strips, a slotted tool, glue and some card. Most people make their first flower in under half an hour.
What paper strips should I use for quilling?
Use proper quilling strips, sold in packs in many colors, in 3mm width for fine detail and 5mm width for beginners, because wider strips are easier to roll and hold their shape. Standard printer paper cut into strips works in a pinch, but it is stiffer and the edges fray, so buy a strip pack for your first few projects.
Do I need a quilling tool to start?
You can start without one, using a cocktail stick or a needle to roll the strips, but a slotted quilling tool costs very little and makes the work faster and neater. The slot holds the strip end while you turn, so your coils come out tight and even. If you plan to quill more than once, buy the tool.
How long does a quilling project take?
A single flower or a bookmark takes about 30 minutes, a greeting card takes about an hour, and a mandala or a framed wall piece takes two to three hours spread over a sitting or two. Quilling is a slow craft, so work in short sessions and let the glue dry between stages instead of rushing the whole piece in one go.
Is paper quilling good for beginners?
Yes, quilling is one of the friendliest crafts for a complete beginner. Start with a flower card or a bookmark, because both use only the tight coil and the teardrop, and both forgive small mistakes. Save the mandala and the butterfly for your second or third project, once your coils are coming out even.
How do I protect finished quilling from damage?
Keep finished quilling under glass or in a frame, away from damp and direct sun, because paper fades and softens with moisture. For pieces that will be handled, like earrings or bookmarks, brush on a thin coat of clear sealant or a layer of Mod Podge, let it dry fully, and add a second thin coat. Sealed quilling lasts for years on a shelf or a wall.
Final Thoughts on Paper Quilling Ideas
Twelve ideas, and the pattern is simple: learn three shapes, the tight coil, the teardrop and the marquise, and you can make almost everything on this page. Flowers and bookmarks teach the shapes, the butterfly and the mandala stretch them, and the monogram, the tree and the owl show how far the same coils can go. You do not need all twelve, because one finished card beats a drawer of half started strips. If you want more paper projects once the quilling bug bites, our 50 paper crafts DIY ideas to beautify your home has plenty to try next.
Start tonight with one flower and a strip pack, and roll until the coils feel even. By the end of the week you will have a card worth giving away, and by the end of the month you will be looking at every spare strip as the start of the next piece.

