

My first clay cat looked like a potato with ears.
I loved it anyway. And that’s the thing about polymer clay. It’s soft, it forgives mistakes and you can squish it back into a ball and try again.
A few small cat shapes can become earrings, keychains, magnets and even tiny figurines. You only need a few colors, a basic tool and an oven.
Here are 12 polymer clay cat project ideas for beginners and anyone who loves cats. Three of them come with full step by step build cards.
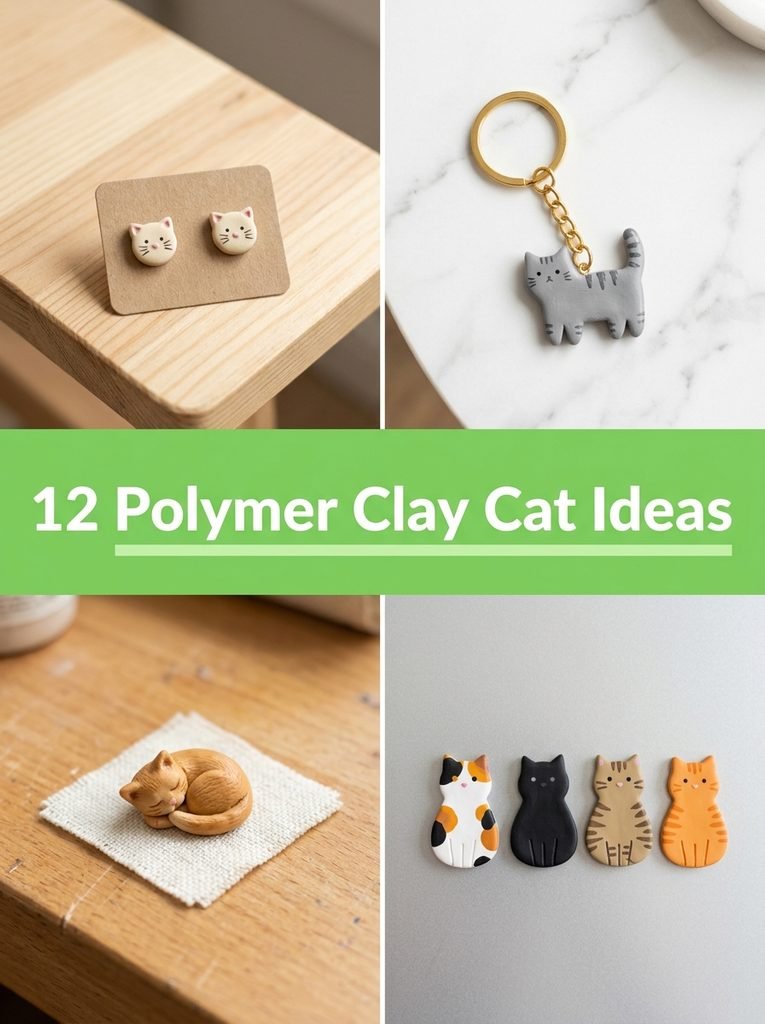
Quick Picks
- Start here: Cat Face Charm Tutorial (idea 1)
- Quickest gift: Cat Stud Earrings (idea 2)
- Cutest figurine: Sleeping Cat Figurine (idea 7)
- Best for Christmas: Christmas Cat Ornaments (idea 12)
1. Cat Face Charm Tutorial
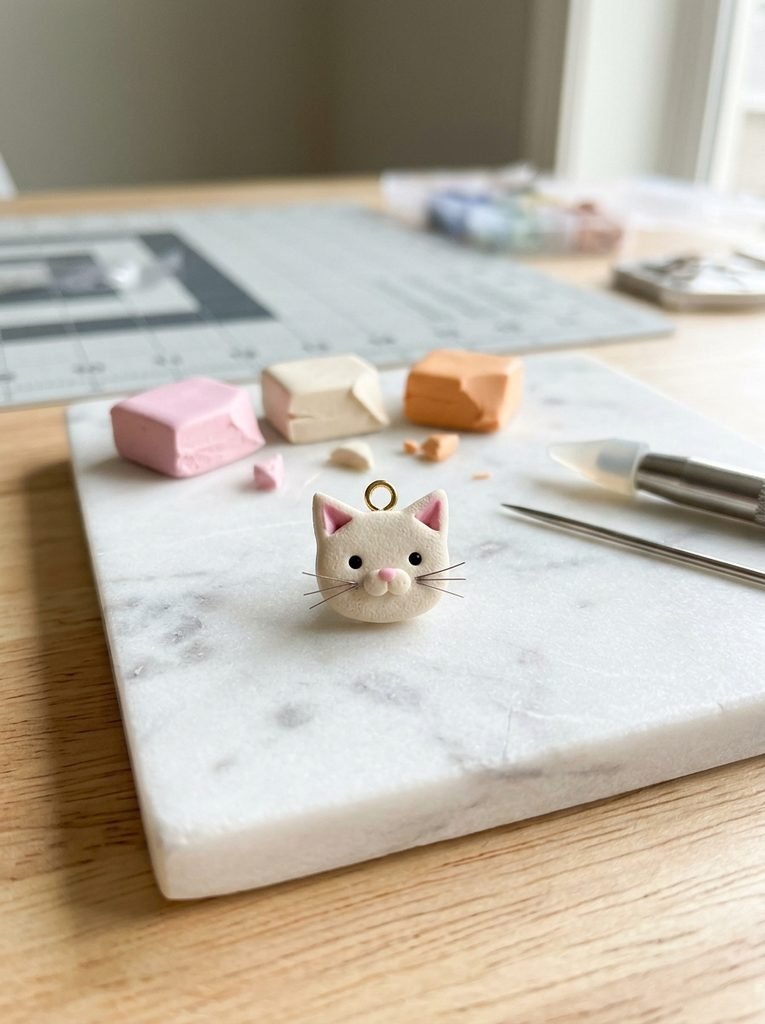
Start here. A simple cat face is the base for almost every project in this list, and once you can make one, you can make them all.
Keep it small and keep it simple. A round head, two triangle ears and dot eyes are enough, because the cute comes from the spacing. Place the eyes low and wide apart, and the face looks instantly sweet.
⏱ 1 hour💲 Low🛠 Easy
Materials Needed
- Polymer clay starter set, assorted colors
- Clay sculpting tool set
- Gold jump rings and eye pins
- Water based gloss glaze
- A ceramic tile or baking paper, and a dedicated oven tray
How to Make It
- Roll a cream clay ball about the size of a large grape and flatten it slightly into a round face.
- Pinch two small triangle ears and press them gently onto the top of the head.
- Add tiny pink triangles inside the ears and a small pink nose in the center.
- Press two small black clay dots for eyes, low and wide apart, then draw whiskers with a needle tool.
- Push in an eye pin at the top, bake following your clay package, let it cool and brush on glaze.
Tip: Always follow the temperature on your clay package, and never use the same tray for food. Bake in a well ventilated room.
2. Cat Stud Earrings
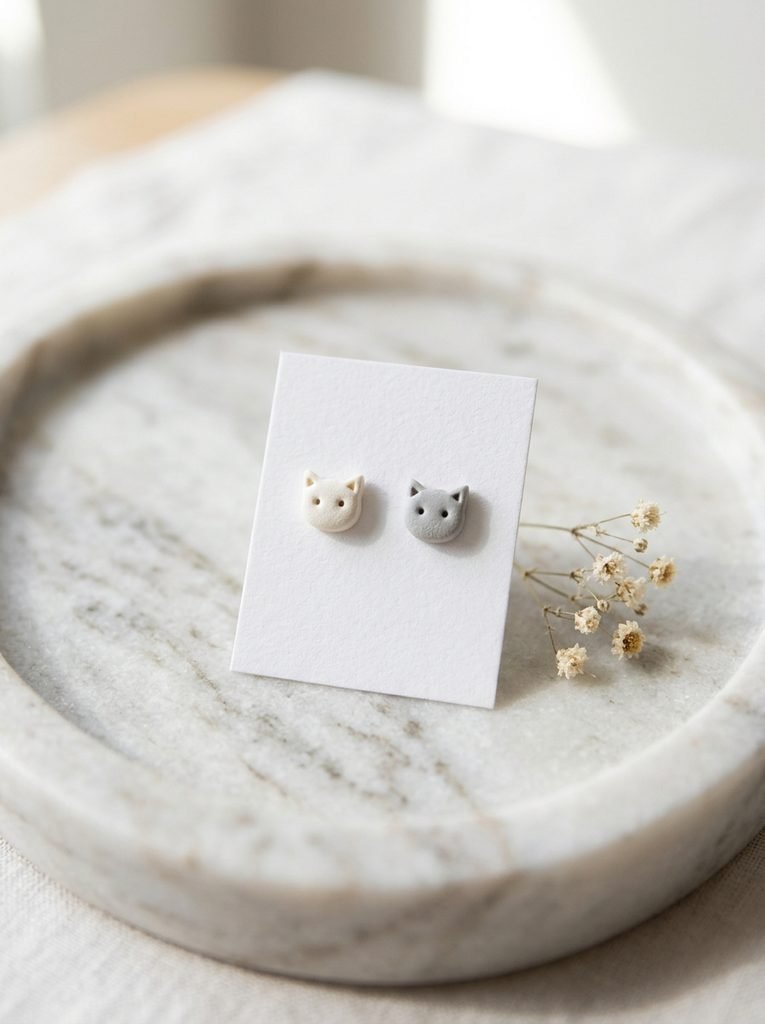
Mini cat earrings are the cutest thing you can make in a single afternoon. They’re light, quick and they make a lovely gift for any cat lover.
Keep each cat to about the size of a pea so the earrings stay comfortable. Make both faces at the same time, side by side, so they match. Use nickel free posts, because many people react to cheap metal.
⏱ 2 hours💲 Low🛠 Easy
Materials Needed
- Polymer clay in cream, gray and black
- Nickel free stud earring posts and backs
- Strong clear jewelry glue
- A needle tool and a small round cutter
How to Make It
- Roll cream clay out about 1/8 inch thick and cut two small circles with the round cutter.
- Pinch two tiny triangle ears onto each circle and press them on gently.
- Add dot eyes and a tiny pink nose with the tip of a needle tool.
- Bake following your clay package, then let the pieces cool completely.
- Glue a stud post to the back of each cat and let the glue dry for a full day.
Tip: Tiny earrings are small parts. Keep them away from young children and away from your cat, who may try to bat them off a table.
3. Cat Pendant Necklace
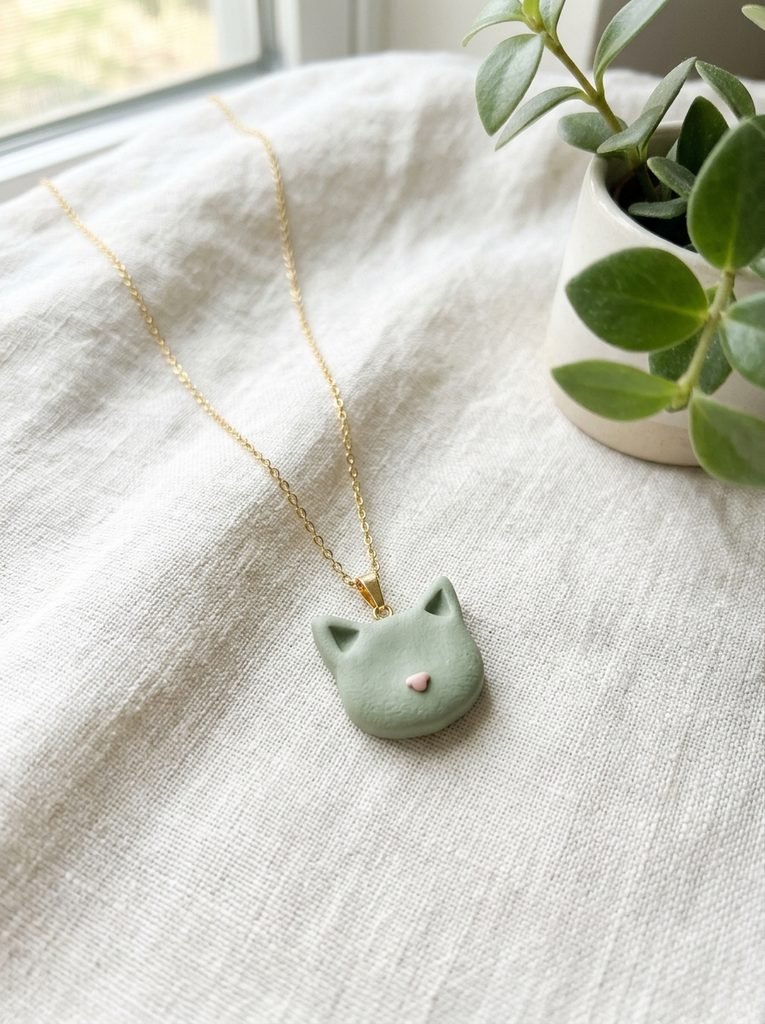
A clay cat on a thin chain is simple jewelry that looks store bought. Make the pendant slightly larger than an earring, about the size of a coin, so the face has room for details.
Pick a soft color, like sage, blush or cream. Poke the hole before baking, because drilling a baked piece is hard, and add a coat of glaze for a smooth, shiny finish.
You’ll need: gold plated necklace chains, 18 inch
Best for: gift makers and jewelry lovers
4. Cat Keychain
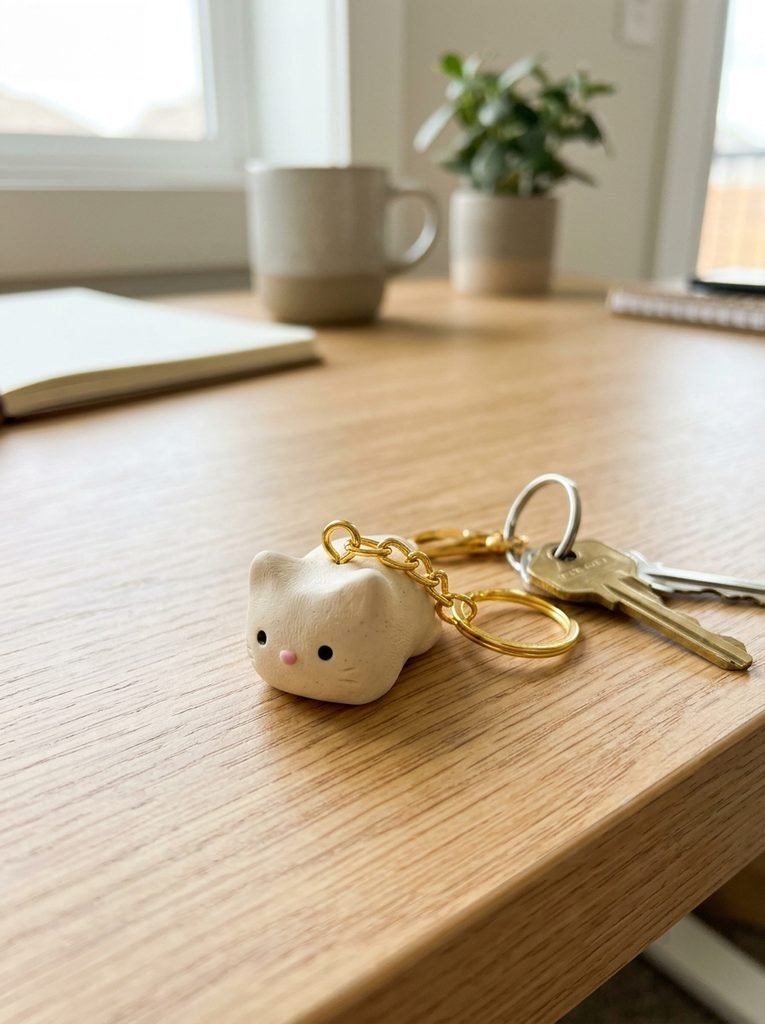
A keychain is the easiest way to show off your clay cat every day. It’s also a great beginner project because the hole and the hardware are so simple.
Make it a little thicker than a charm, about 1/4 inch, so it can take some knocks in a bag. Seal it with glaze and check the ring every few weeks to keep it tight.
You’ll need: keychain hardware with ring and chain
Best for: beginners and everyday carry
5. Cat Fridge Magnets
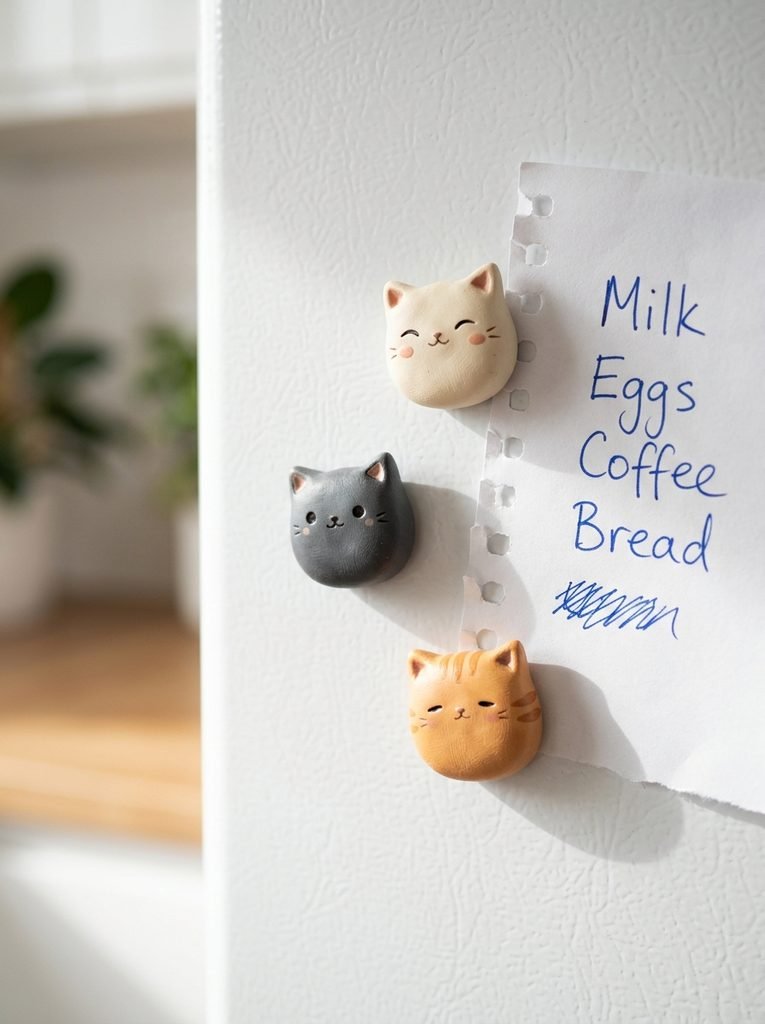
Magnets are small, quick and fun. Make a little family of cats, each with a different color and a different mood, and line them up on the fridge.
Press a strong magnet into the back with a dab of glue after baking. Make sure the magnet is deep enough that nothing sticks out, and keep the cats flat on the back so they sit flush.
You’ll need: strong round craft magnets, 10 mm
Best for: kitchens and quick gifts
6. Cat Worry Stone
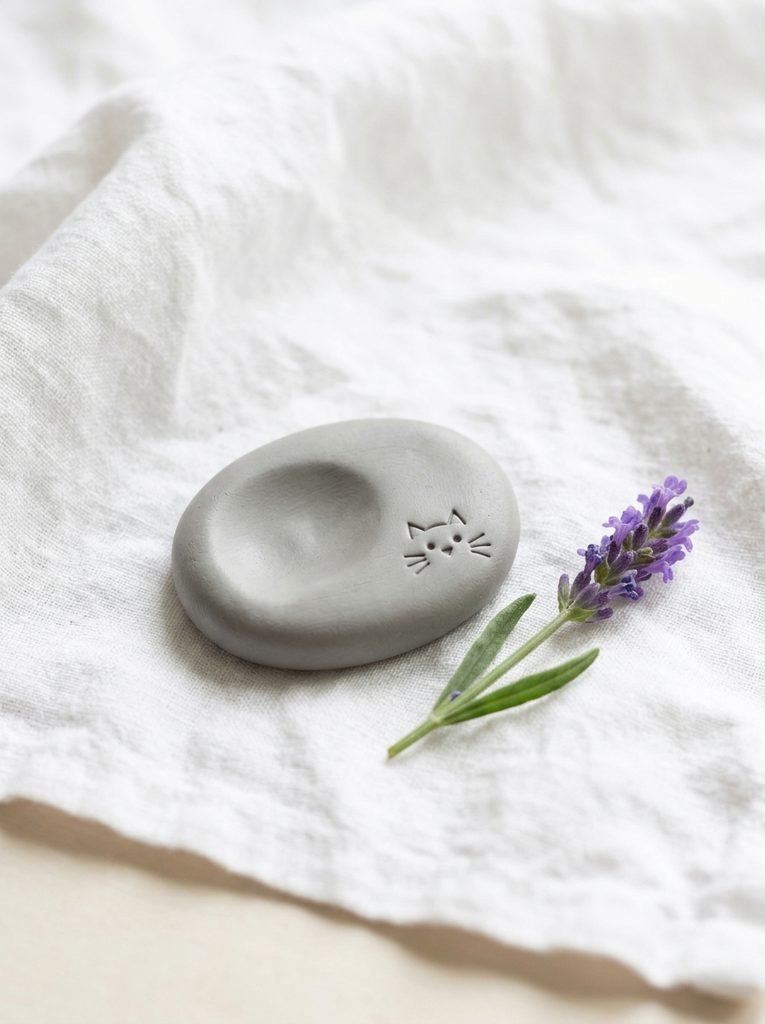
A worry stone is a small smooth piece you rub with your thumb. A tiny cat face pressed into the surface makes it a sweet pocket keepsake.
Shape a smooth oval about the size of a bar of soap and press a gentle dip for your thumb. Sand it after baking until it feels silky. Keep it away from small children and from your cat.
You’ll need: wet and dry sandpaper, 400 to 2000 grit
Best for: calm pockets and thoughtful gifts
7. Sleeping Cat Figurine
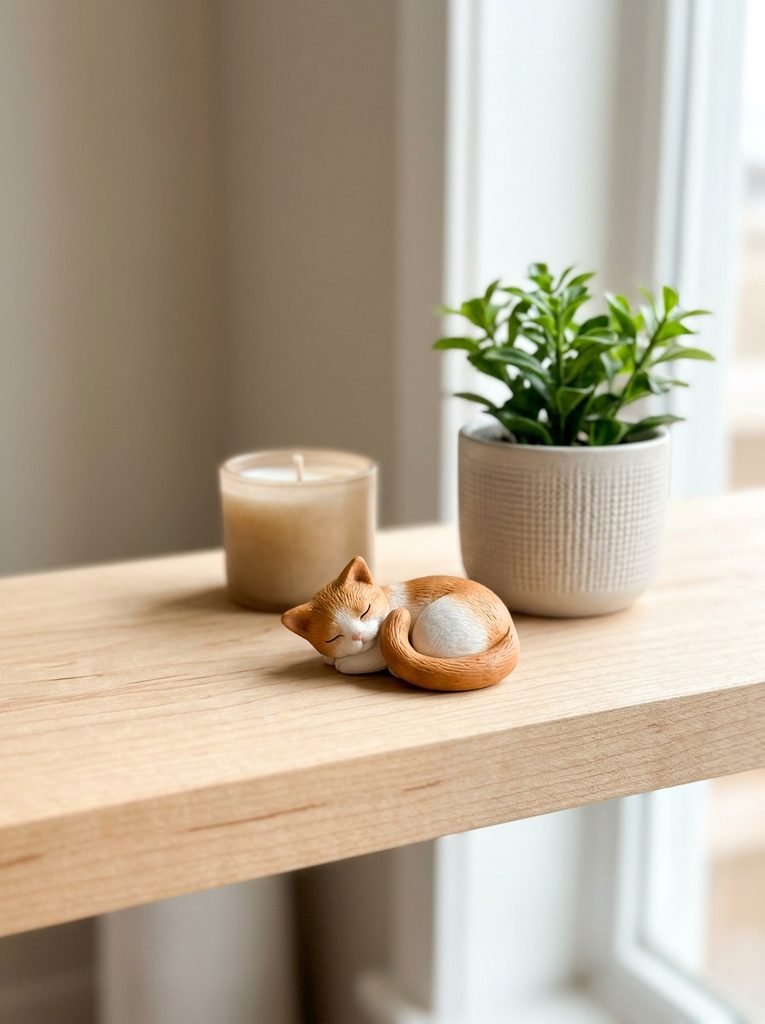
A curled up cat is the easiest figurine to sculpt, because there are no legs to balance. It’s just one soft bean shape with ears and a tail.
Build it from foil first. Wrap a small ball of aluminum foil, then cover it with clay. That makes the figurine lighter, helps it bake evenly and saves a lot of clay.
⏱ 3 hours💲 Medium🛠 Medium
Materials Needed
- Polymer clay in ginger, white and brown
- Fine tip acrylic paint pens
- Oven thermometer
- Aluminum foil and clay tools
How to Make It
- Crumple foil into an egg shaped core, about 2 inches long.
- Cover the foil with a smooth layer of ginger clay and press out any air bubbles.
- Add a rounded head, two small ears and a long tail curled around the front.
- Draw closed eyes and a tiny nose with a needle tool and add pink inside the ears.
- Bake following your clay package, using an oven thermometer, then cool slowly and add details with paint pens.
Tip: Check your oven temperature with a thermometer. Many ovens run hot, and burnt clay can give off unpleasant fumes.
8. Cat Head Sculpture
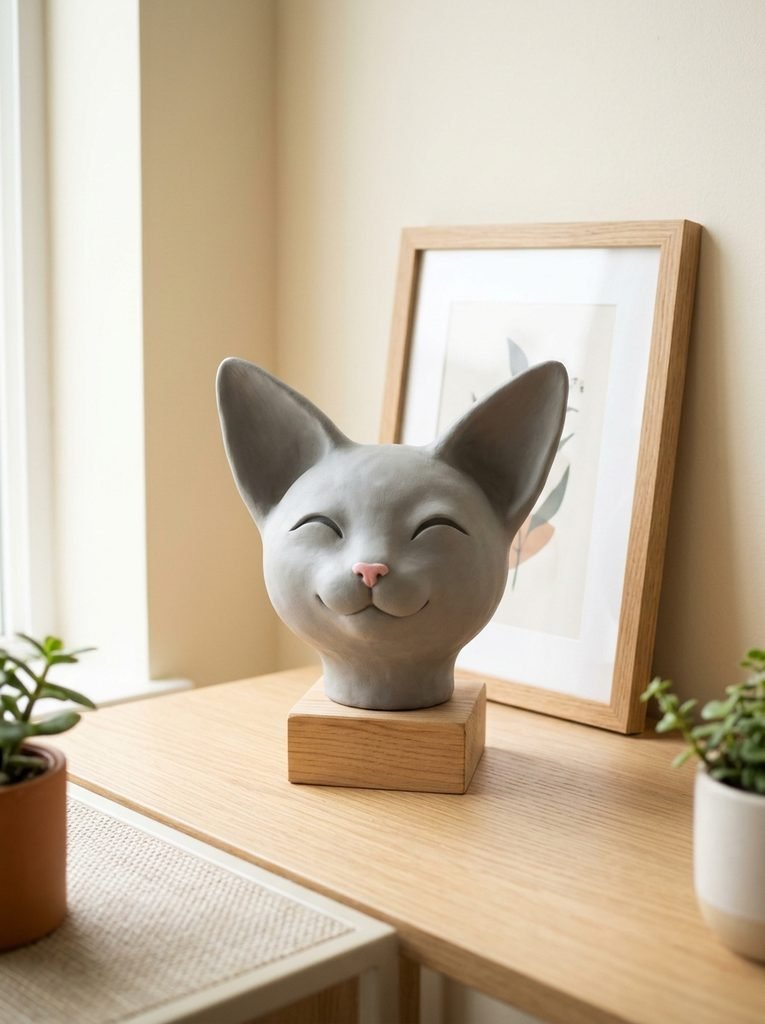
Once you’ve made the face charm, try a bigger head. A cat head sculpture sits on a shelf like a tiny piece of art, and the extra size lets you shape the cheeks, the brow and the muzzle.
Build it around a foil core, so it stays light, and sculpt the face from the middle out. Press the muzzle on first, then the nose and eyes, then the ears. Step back often to check the shape.
You’ll need: ball stylus clay shaping tools
Best for: shelf decor and bigger projects
9. Hippie Style Mini Cat Doll
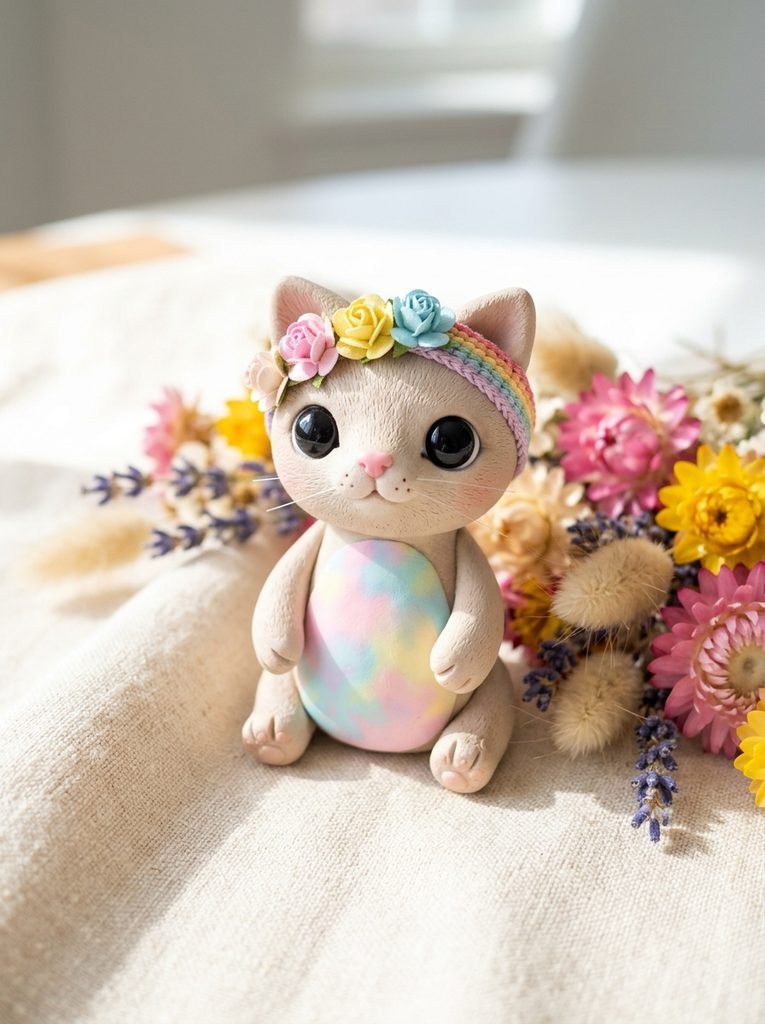
This cat has a flower crown, a rainbow headband and a tie dye tummy. It’s a mini doll with a lot of personality.
Make the body from a foil core, add stubby arms and legs, and press tiny clay flowers around the head. Swirl a few colors together for the tie dye belly before you bake.
You’ll need: small clay acrylic paint set
Best for: cute gifts and colorful collectors
10. Cat Ring Holder
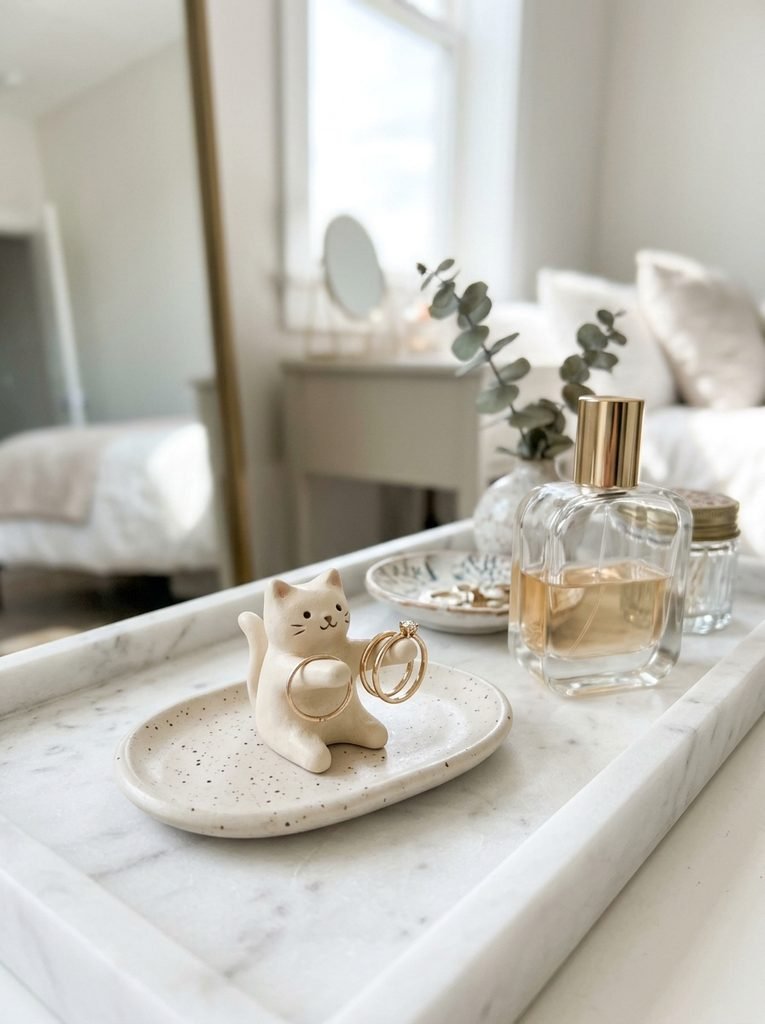
A cat with its paws out is a perfect ring holder. Your rings sit right on the arms, and the cat watches over them on your dresser.
Make the arms about 1/2 inch wide so rings slide on easily. Seal the finished piece with matte varnish to protect it from scratches, and make the base wide and flat so it never tips over.
You’ll need: matte water based clay varnish
Best for: vanity trays and gift sets
11. Paw Print Cat Ring
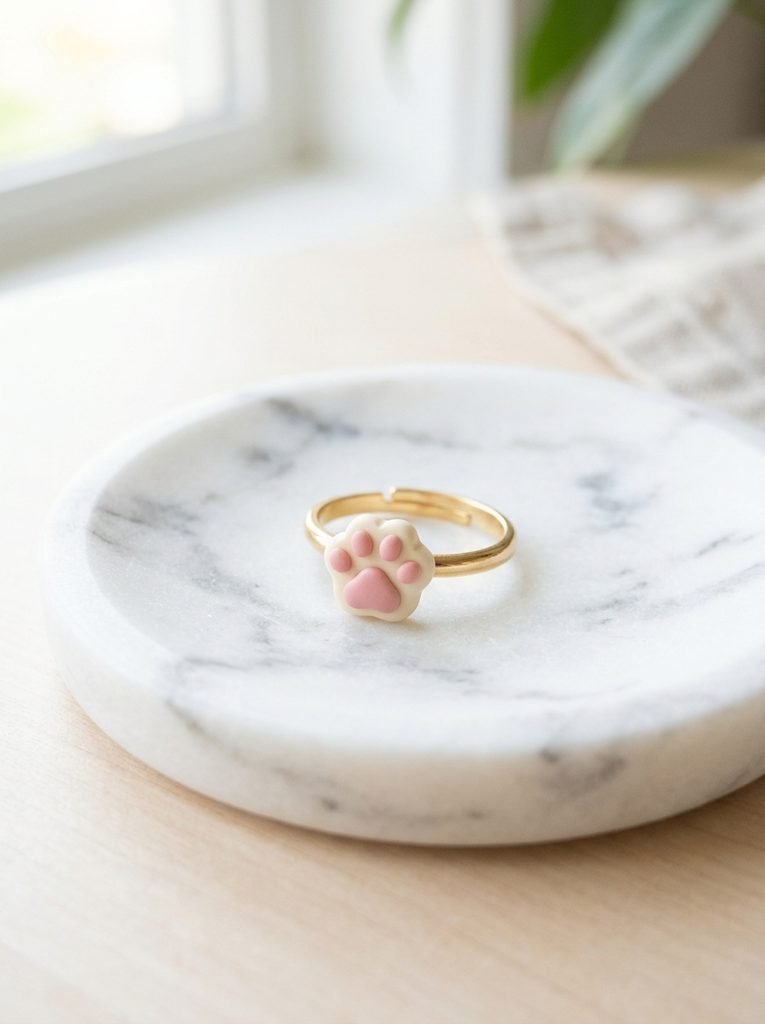
A tiny paw on a ring is such a sweet detail. Roll a small cream disc, press on four toe beans and one larger pad, and bake it into a mini charm for your finger.
Start with an adjustable ring blank, so one size fits everyone. Glue the paw on firmly and let it cure for a full day. Take the ring off for dishes, showers and swimming.
You’ll need: adjustable ring blanks with flat pad
Best for: cat lovers and quick gifts
12. Christmas Cat Ornaments
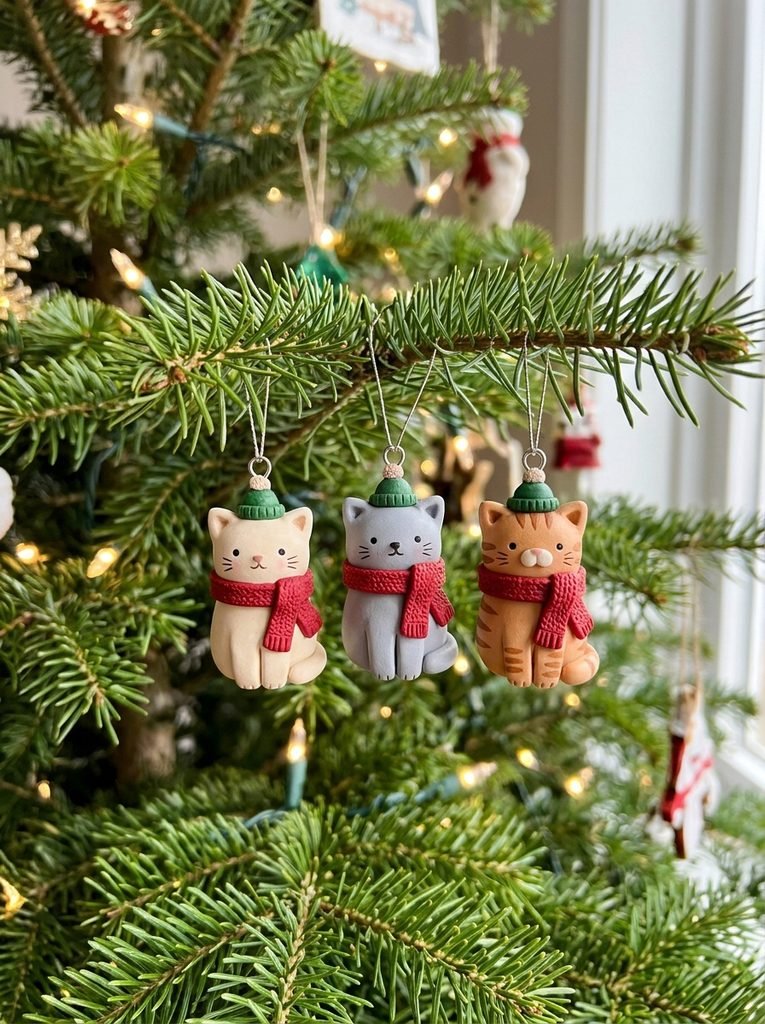
Little clay cats look great on a Christmas tree. Add a tiny scarf, a Santa hat or a bow, and each one becomes a keepsake you’ll hang every year.
Make a hole at the top before baking so the ribbon can go through. Flat ornaments hang better and bake more evenly. Keep them high on the tree if your cat likes to bat things down.
You’ll need: red velvet ribbon, narrow
Best for: holiday gifts and tree decor
Frequently Asked Questions
Do I need a special oven for polymer clay?
No. A normal home oven works. Use an oven thermometer, bake on a dedicated tray and keep the room ventilated.
Is polymer clay safe for food or cat bowls?
No. Polymer clay is not food safe. Use it only for decor, jewelry and keepsakes.
How long do I bake polymer clay?
Follow the package. Most clays bake at about 265 to 275 degrees F for about 15 minutes per quarter inch of thickness.
How do I avoid fingerprints on my clay?
Wash your hands first, use a little cornstarch on the surface and smooth the clay with a soft brush. A coat of glaze after baking hides the rest.
Can I use air dry clay instead?
For decor, yes, but air dry clay is more fragile and not waterproof. Polymer clay is stronger and better for jewelry.
How do I make cute cat eyes?
Place two small dots low and wide apart on the face. The lower and farther apart they are, the cuter the cat looks.
Final Thoughts on Polymer Clay Cat Project
Start with a simple cat face and let your hands learn the shape. Every cat you make will look a little different, and that’s part of the charm. Pick one project, bake it and share it with someone who loves cats.


Amir Ali is the founder and site administrator of HomeDecorEdge, a modern home decor and interior design platform. Since starting the site, he has combined his passion for interior design, practical styling, and color coordination with hands-on content strategy and site management. He guides authors, curates high-quality articles, and ensures readers have access to actionable, visually inspiring, and user-focused home decor advice for apartments, small rooms, and family homes.