
A sewing room layout directly affects how efficiently and comfortably you work. The placement of furniture machines and storage determines how smoothly projects move from cutting to stitching and finishing. A well-designed sewing room reduces wasted motion prevents clutter and supports long creative sessions without fatigue. Whether you are working in a small room or planning a dedicated studio layout decisions matter more than decor alone. These 40 sewing room layout ideas focus on function first while still supporting style and creativity.
This post contains affiliate links. If you purchase through these links I may earn a small commission at no extra cost to you.

A smart sewing room layout transforms creativity into a smooth stress-free process — and it starts with knowing where to put things.
For complete sewing room inspiration explore our full sewing room ideas guide covering every style and budget.
1. Functional Sewing Room Layout with Clear Work Zones
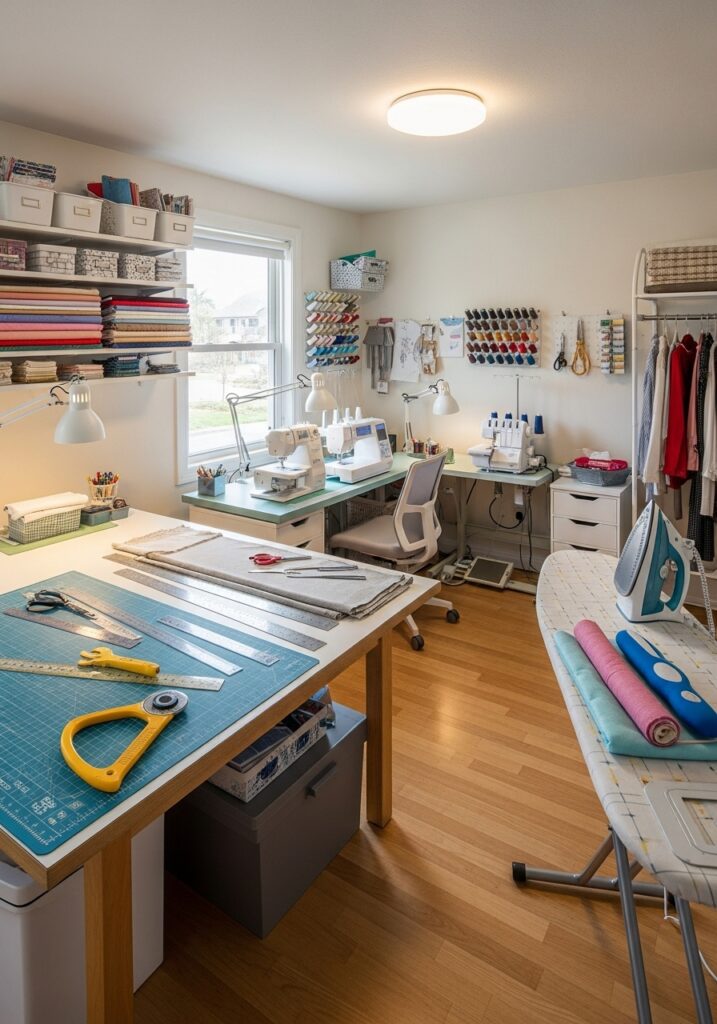
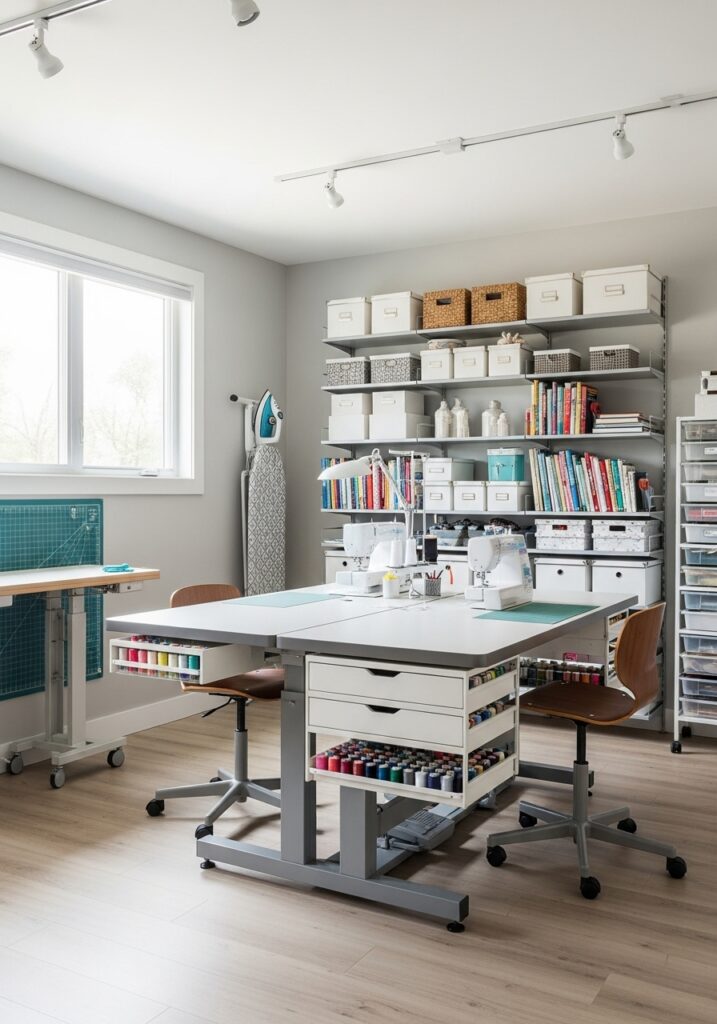
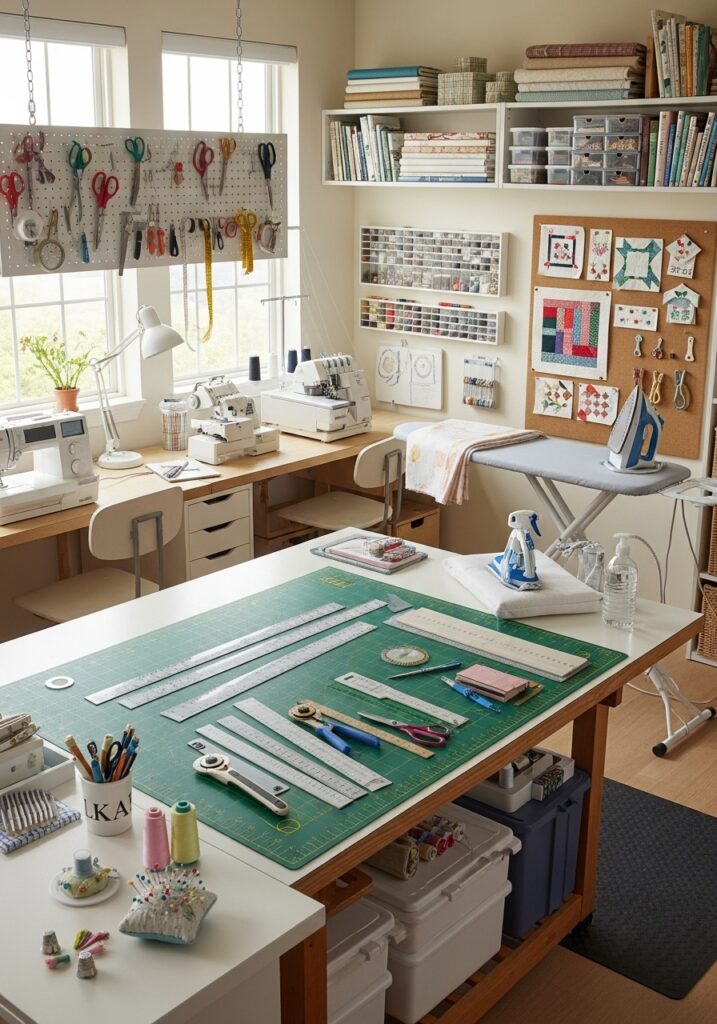
A functional sewing room layout clearly separates cutting sewing and finishing areas. Zoning reduces unnecessary movement and improves workflow efficiency. When each task has a dedicated area projects move smoothly from one stage to the next. Clear zones also help keep tools organized and easy to locate. A sewing machine table with storage drawers anchors the sewing zone perfectly — built-in storage keeps everything at the machine without spilling onto other zones.
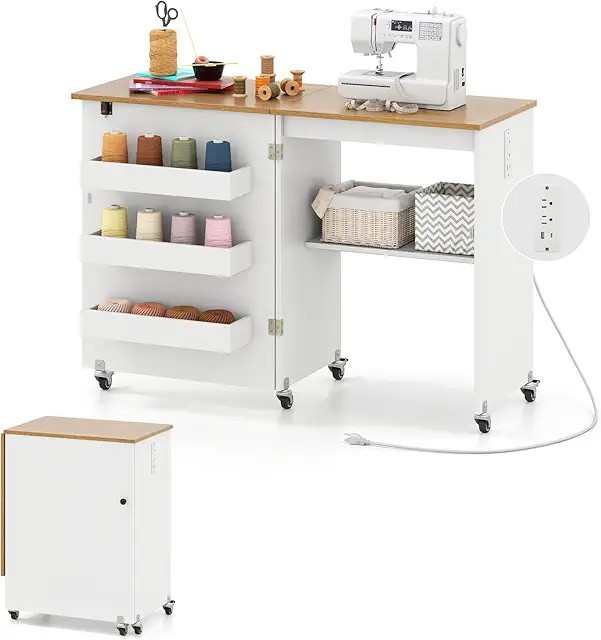
Sewing Machine Table with Storage
Anchors your sewing zone with built-in storage — keeps tools and notions within reach without cluttering surrounding work areas.
Check Price on Amazon2. Small Sewing Room Layout Optimized for Movement

In small sewing rooms layout efficiency is essential for maintaining comfort and productivity. Furniture placement should allow easy movement without crowding the space. Narrow walkways slow down workflow and lead to frustration quickly. Compact layouts focus on accessibility rather than excessive storage that overwhelms the room. Vertical storage solutions help keep the floor area open ensuring machines and tables never block each other. For design inspiration our sewing room design ideas guide shows how small rooms can function smoothly.
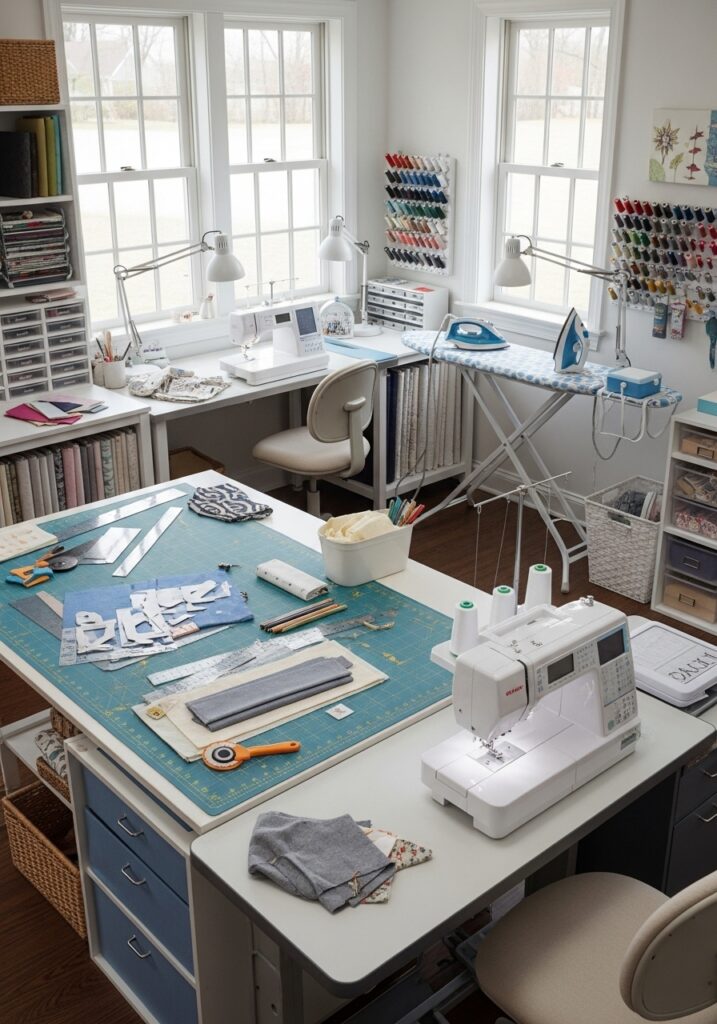
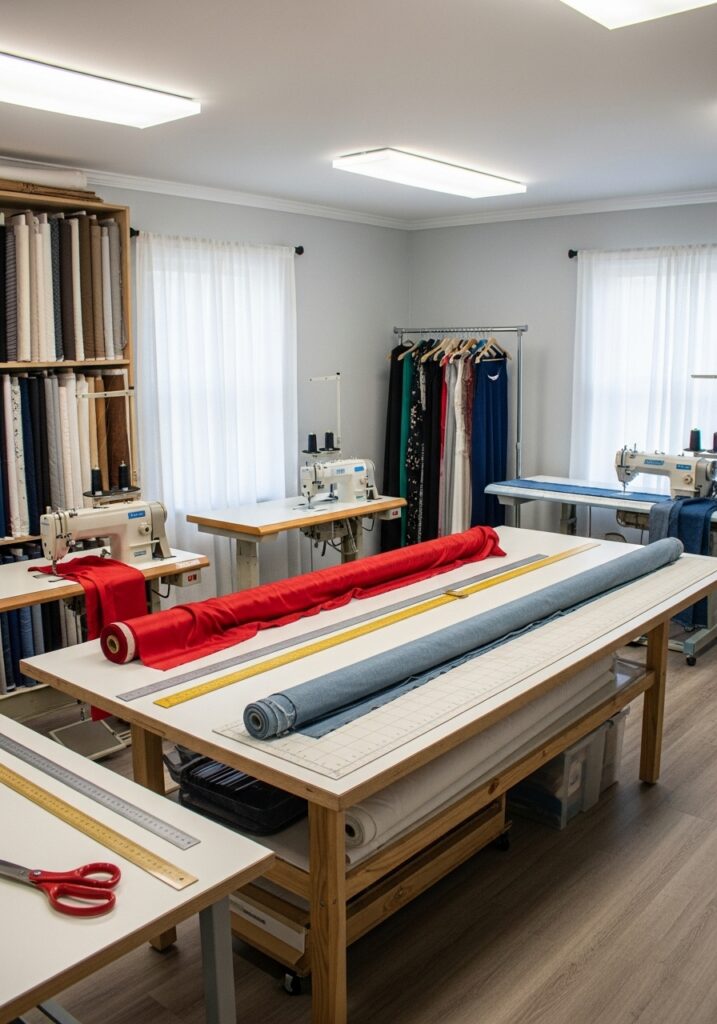
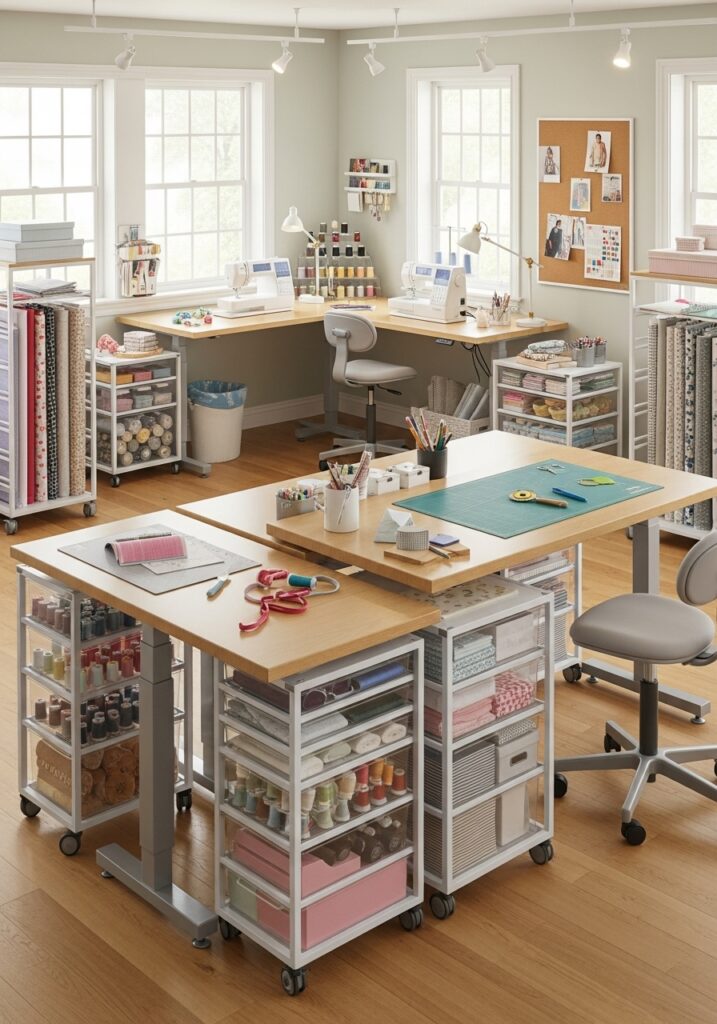
3. Sewing Room Layout Centered Around a Cutting Table
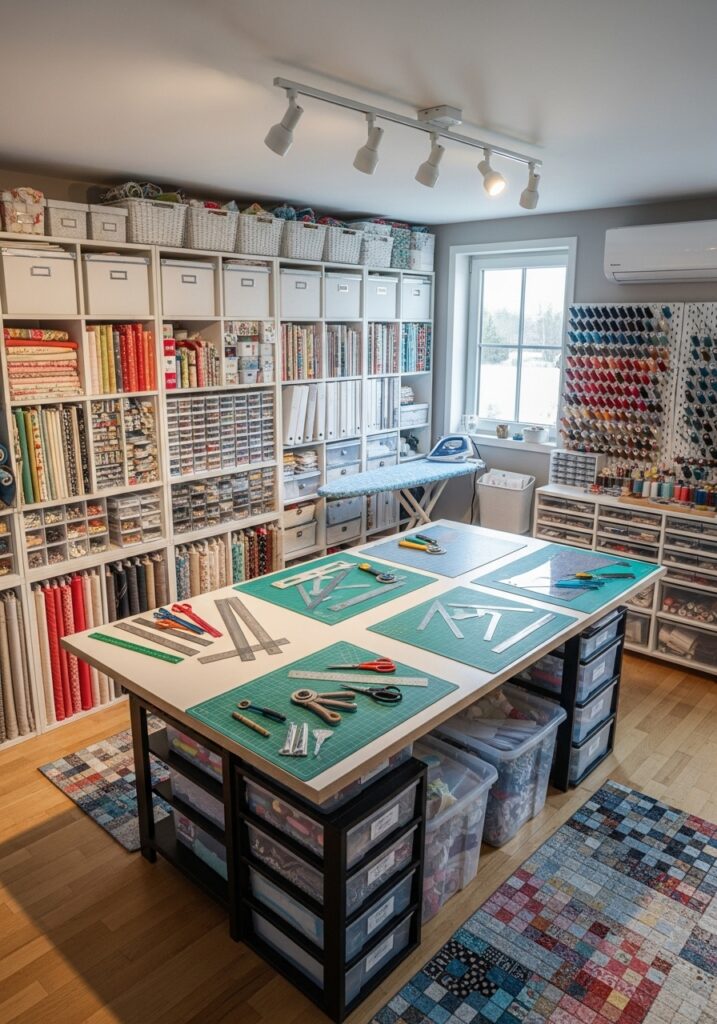
Placing the cutting table at the center of the room improves efficiency dramatically. Fabric can be accessed from all sides without repositioning. This layout works especially well for garment sewing where large pieces of fabric need room to breathe. A large self-healing cutting mat on the central table protects the surface and the measuring grid makes every cut precise.

Large Self-Healing Cutting Mat
Protects your central cutting table and keeps every cut precise — the measuring grid eliminates extra measuring steps completely.
Check Price on Amazon4. Modern Sewing Room Layout with Clean Circulation Paths
Modern sewing room layouts emphasize clear circulation paths that support focused uninterrupted work. Open walkways allow smooth movement between sewing machines cutting tables and storage areas. Furniture is positioned carefully to avoid both visual and physical clutter. Neutral tones enhance clarity and storage solutions remain streamlined and often concealed to maintain a clean look.
5. Sewing Room Layout with Measured Planning
Layouts based on accurate measurements prevent overcrowding and improve overall functionality. Knowing table heights clearance space and walking distances makes a noticeable difference in daily comfort. Proper spacing reduces physical strain during long sewing sessions and supports better posture. Measured layouts encourage ergonomic movement between machines and work surfaces.
6. Efficient Sewing Room Layout for High Productivity

Efficient sewing room layouts minimize wasted steps by keeping essential tools and supplies close to their point of use. This thoughtful arrangement improves both speed and accuracy during sewing sessions. A rolling craft storage cart between stations moves supplies wherever they are needed eliminating unnecessary walking across the room mid-project.

Rolling Craft Storage Cart
Moves supplies between cutting sewing and ironing stations — eliminates unnecessary walking and keeps workflow fast and uninterrupted.
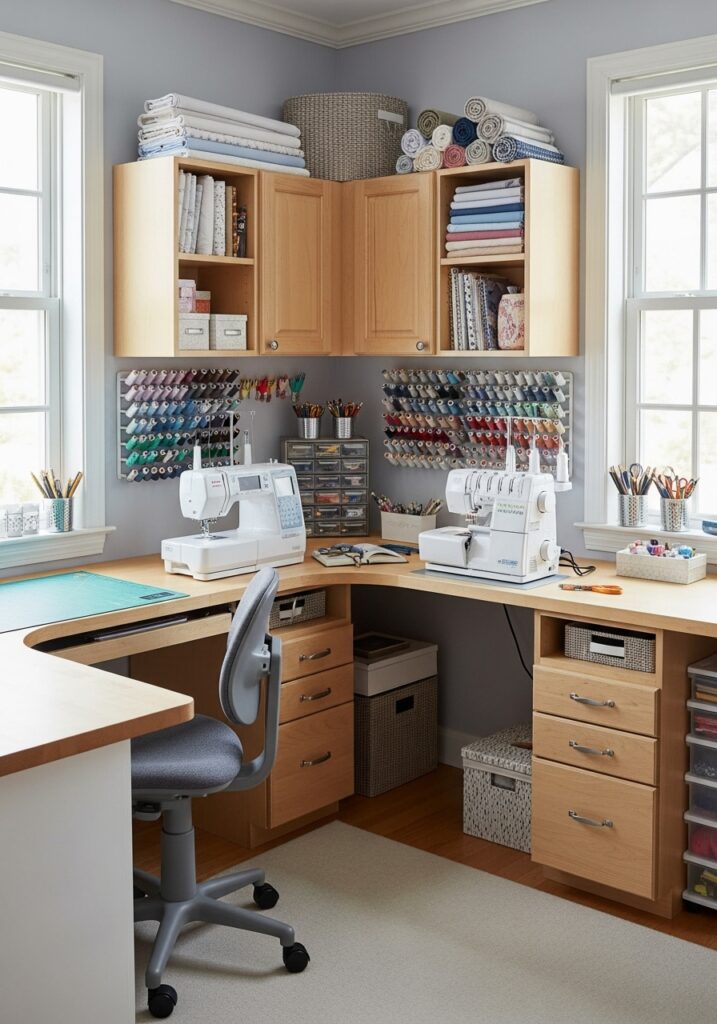
Check Price on Amazon7. L-Shaped Sewing Room Layout for Corner Spaces
L-shaped layouts make excellent use of corner areas turning often-overlooked spaces into functional work zones. They allow clear separation between cutting and sewing areas which supports smoother transitions between tasks. Corner-based designs save valuable wall space while keeping tools within reach. The L-shape improves organization accessibility and overall efficiency in rooms of all sizes.
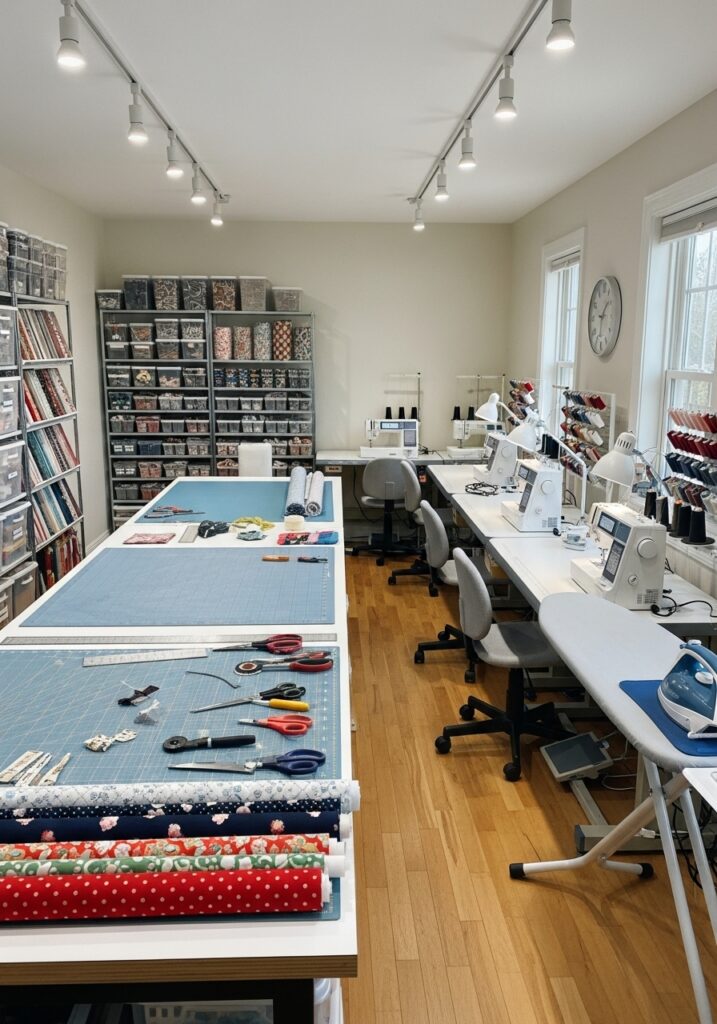
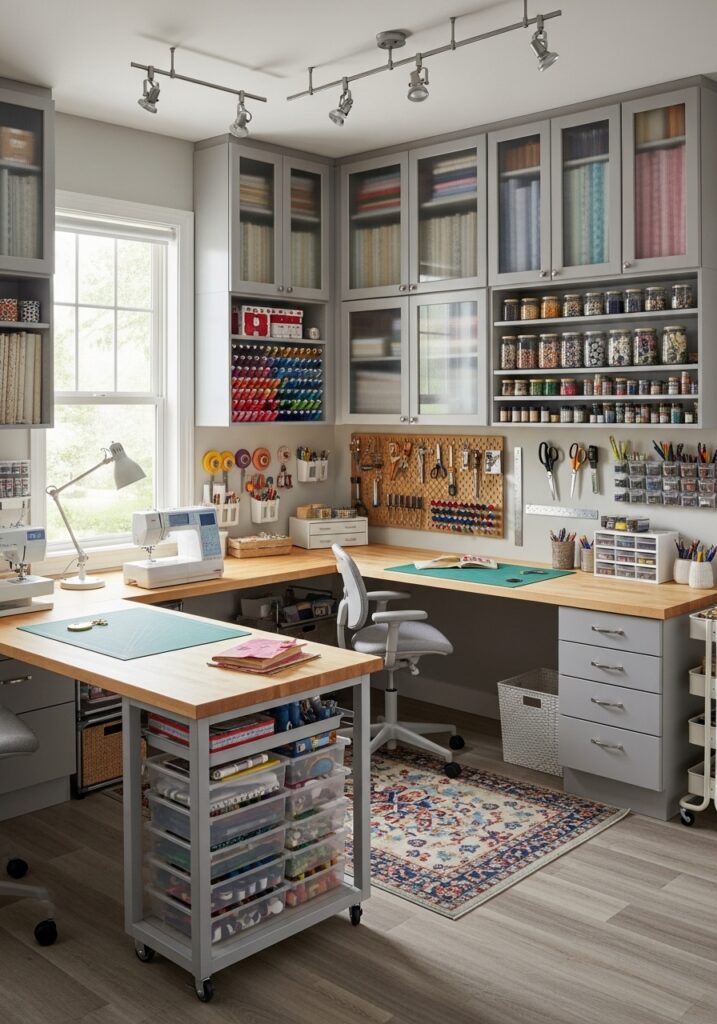
8. Sewing Room Layout with Wall-to-Wall Storage
Wall-to-wall storage layouts maximize capacity without crowding floors. Cabinets and shelves line the perimeter central space remains open for work and the layout supports large supply collections. For storage system ideas our sewing room storage solutions guide covers every storage option from fabric bins to overhead cabinets.
9. Sewing Room Layout with Dedicated Pressing Area
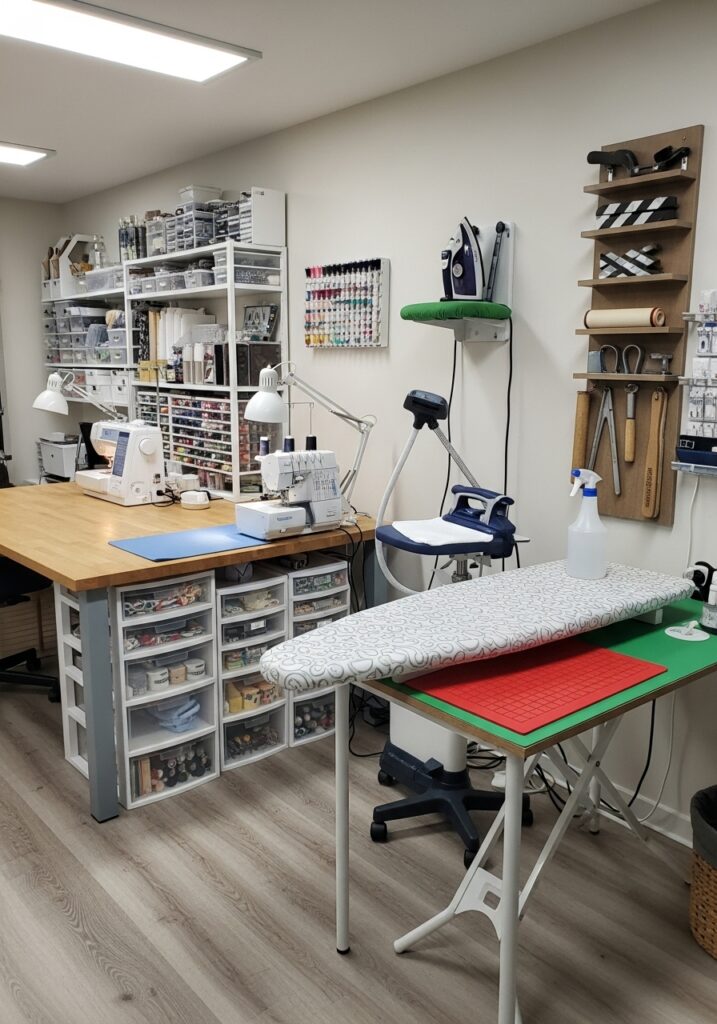
A dedicated pressing area improves garment quality significantly. Keeping ironing separate prevents surface clutter and the layout supports professional finishing. Tools stay organized near the pressing zone workflow remains uninterrupted and pressing becomes quicker and safer. A defined pressing zone is the difference between amateur and professional sewing results.
10. Sewing Room Layout Designed for Natural Light Flow

Layouts that follow window placement feel brighter and more comfortable. Positioning workstations near light sources reduces eye strain and natural light improves both accuracy and mood. Furniture should never block windows — light is one of the most valuable assets in any sewing room. A adjustable LED desk lamp supplements natural light during evening sessions.
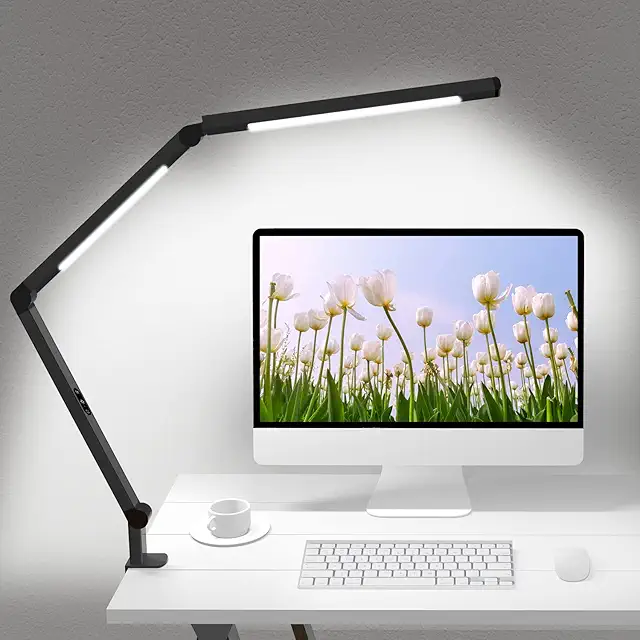
Adjustable LED Desk Lamp
Supplements natural light for evening sewing — focused bright light reduces eye strain and keeps color accuracy high during detailed work.
Check Price on Amazon11. Sewing Room Layout with Ergonomic Work Triangle
An ergonomic sewing room layout follows the work triangle concept between sewing machine cutting table and pressing area. This arrangement minimizes unnecessary walking and saves time during projects. When each key station is within easy reach workflow becomes smooth and predictable. Proper spacing reduces physical strain on shoulders and back making long sessions significantly more comfortable.
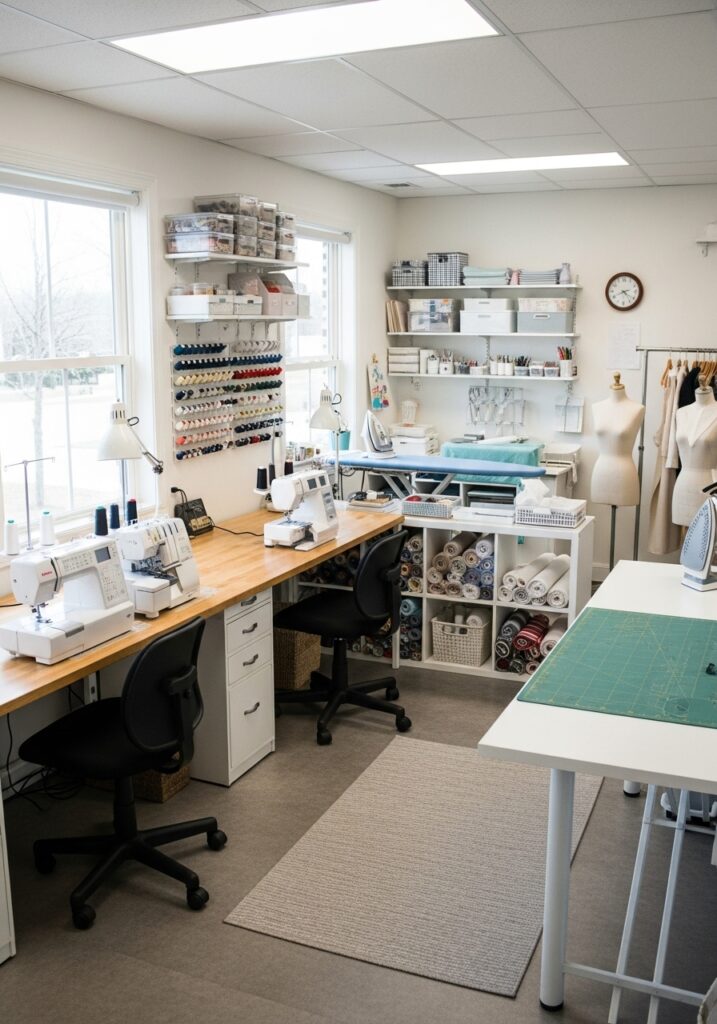
12. Sewing Room Layout with Parallel Workstations
Parallel workstation layouts place sewing tables and cutting surfaces side by side. This design works well in rectangular rooms and allows easy switching between tasks without crossing the room. Storage placed along the walls keeps supplies accessible clear walkways prevent congestion and the layout supports fast-paced sewing with multiple steps repeated throughout the day.
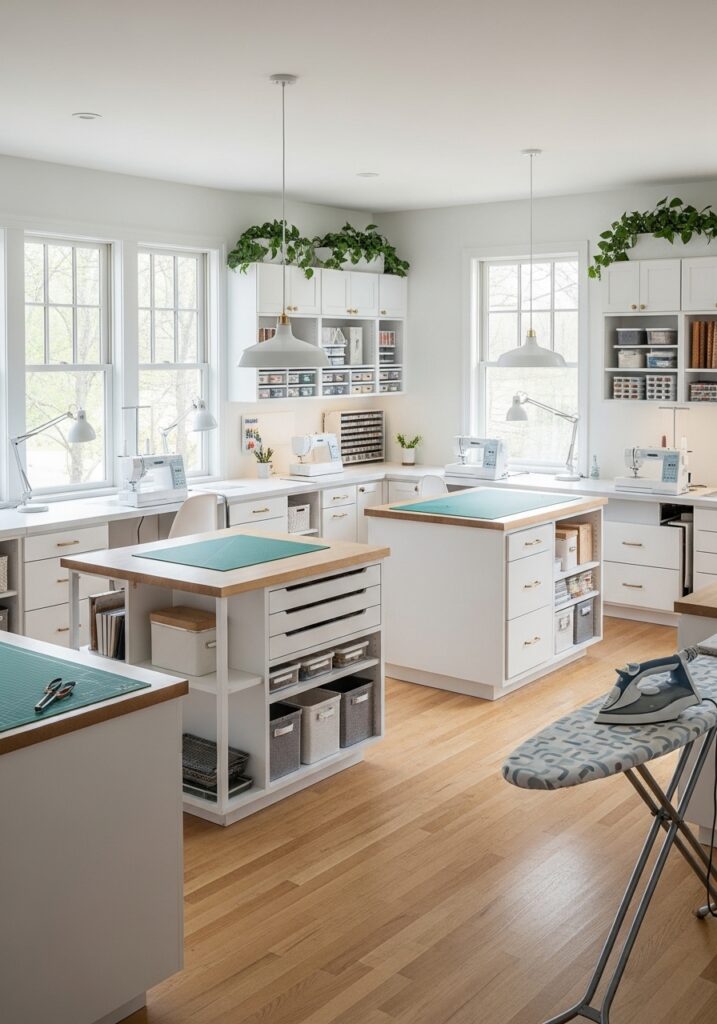
13. Sewing Room Layout with Central Island and Perimeter Storage
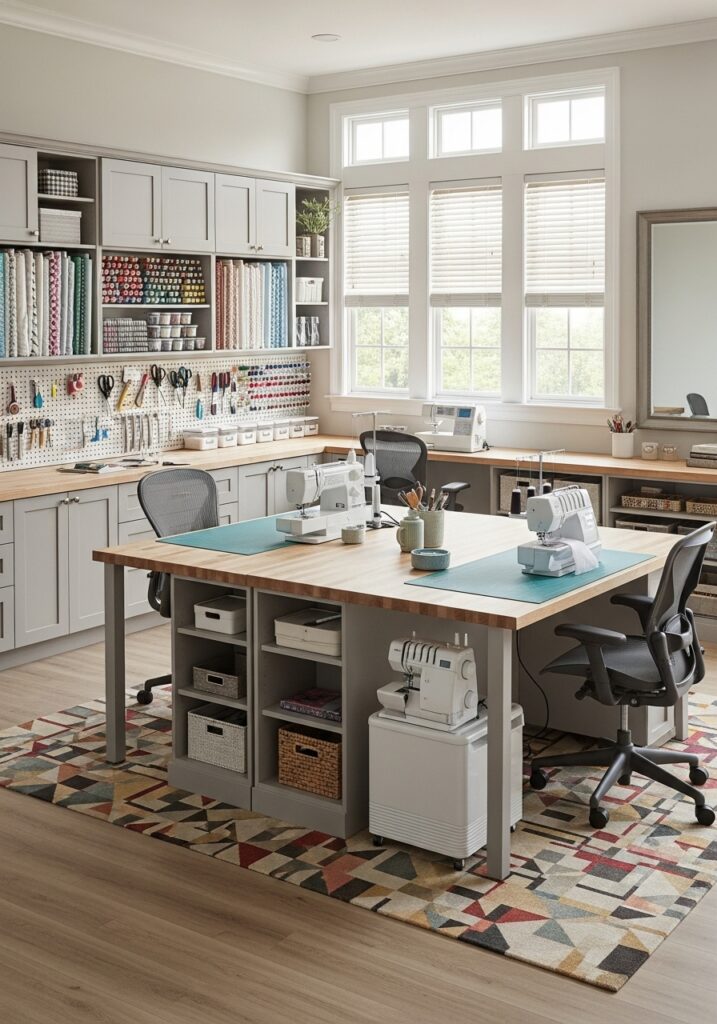
This layout combines a central island with wall-based storage. The island supports cutting and layout work while perimeter cabinets hold tools and materials. This keeps the center functional and the edges organized. Movement remains fluid around the room large projects become easier to manage and the layout balances openness with serious storage capacity.
14. Sewing Room Layout for Long Fabric Handling
Some sewing projects require handling long fabric lengths without folding or dragging. This layout prioritizes uninterrupted surfaces by aligning tables end to end. Walkways are kept completely clear so fabric flows naturally. This design supports garment making and quilting reduces fabric distortion and makes long projects significantly more manageable and accurate.
15. Sewing Room Layout with Window-Aligned Workstations
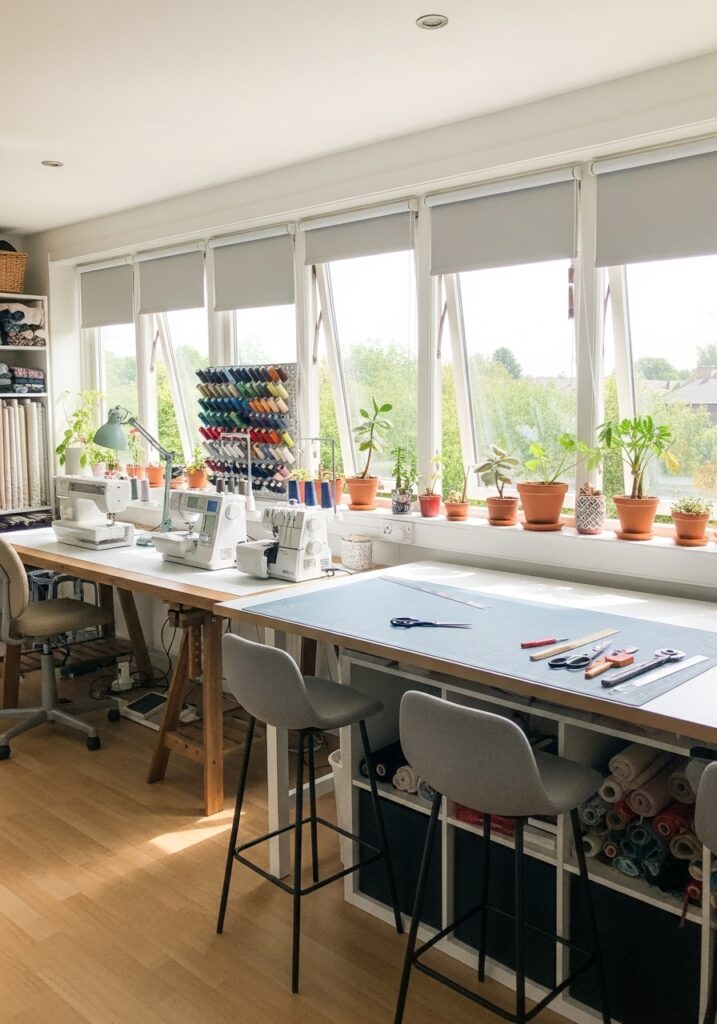
Aligning workstations with windows improves visibility and comfort throughout the sewing session. Natural light enhances fabric color accuracy sewing machines placed near windows reduce eye fatigue and cutting tables benefit from daylight clarity. Furniture placement should always avoid blocking light — the natural resource that costs nothing but improves everything.
16. Sewing Room Layout with Compact Circulation Loop

A circulation loop layout allows movement in a continuous path. You move from cutting to sewing to pressing without ever backtracking. This design prevents bottlenecks especially helpful in medium-sized rooms. Tools remain accessible from multiple points workflow feels natural and efficient and sewing sessions feel significantly less tiring.
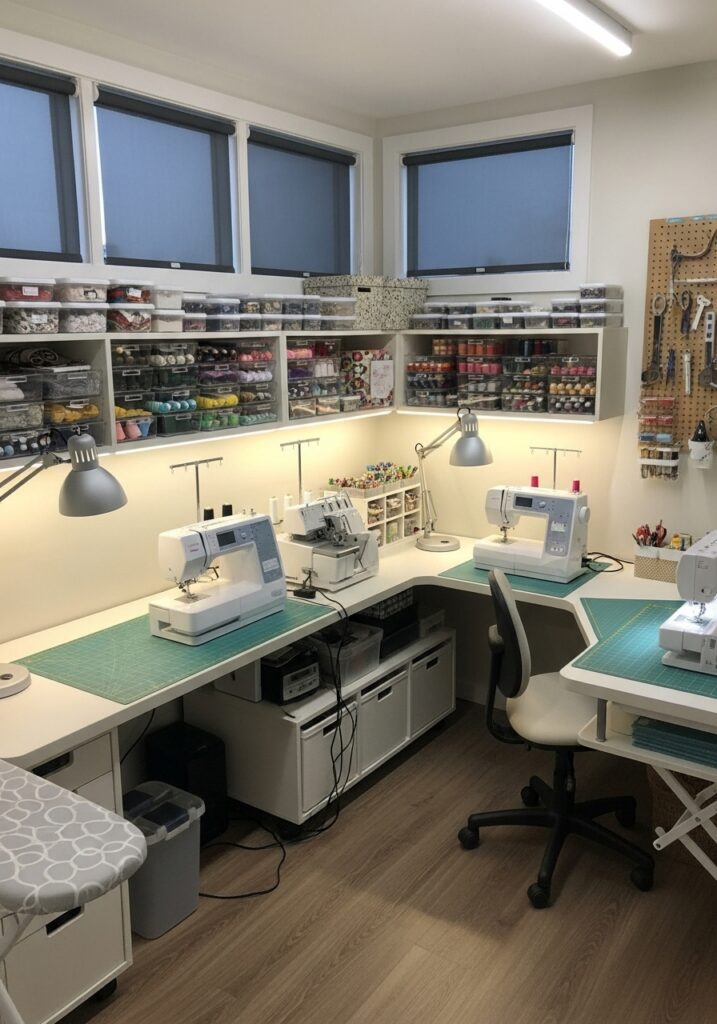
17. Sewing Room Layout with Vertical Zoning
Vertical zoning separates storage and work areas by height. Lower zones handle sewing and cutting. Upper zones store supplies and tools. This pegboard organizer kit fills the middle zone perfectly — tools hang visible and accessible at exactly the right height between working surfaces and overhead storage.
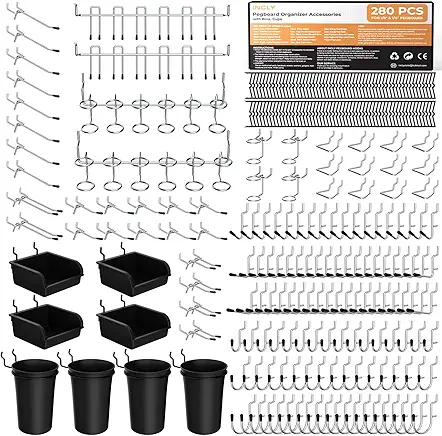
Pegboard Organizer Kit with Hooks
Perfect for the middle vertical zone — keeps tools visible and accessible at the right height between work surfaces and overhead storage.
Check Price on Amazon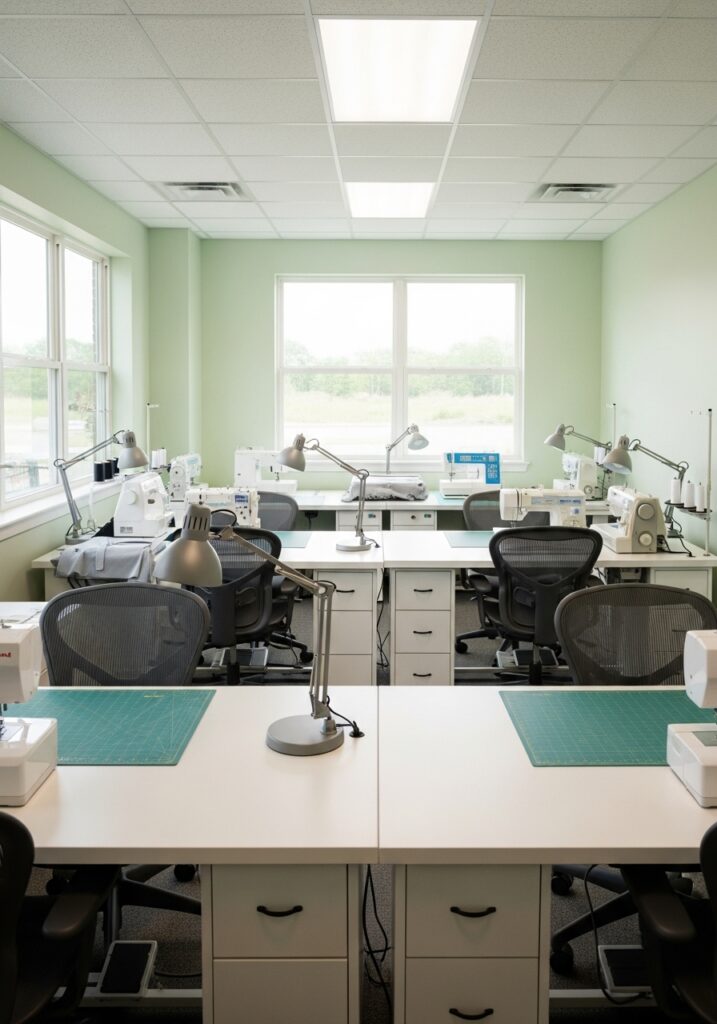
Some sewing rooms are shared between users. This layout allows multiple people to work simultaneously with separate stations that reduce interference. Clear pathways prevent collisions and shared storage positioned centrally keeps supplies accessible to everyone. This setup also supports teaching or content creation where visibility across all stations matters.
19. Sewing Room Layout with Mobile Furniture
Mobile furniture adds flexibility that fixed layouts cannot provide. Tables and carts can be repositioned easily supporting changing project needs. Mobile layouts adapt to room size instantly storage follows the workflow and cleaning becomes significantly easier when furniture rolls out of the way. This layout is ideal for evolving sewing spaces that need to serve multiple purposes.
20. Sewing Room Layout with Clear Sightlines
Clear sightlines reduce visual clutter and stress. When you can see all work zones at once spatial awareness improves tools are easier to locate and the room feels larger and calmer. Clear layouts support focused sewing and visual simplicity genuinely enhances creative concentration during detailed precision work.
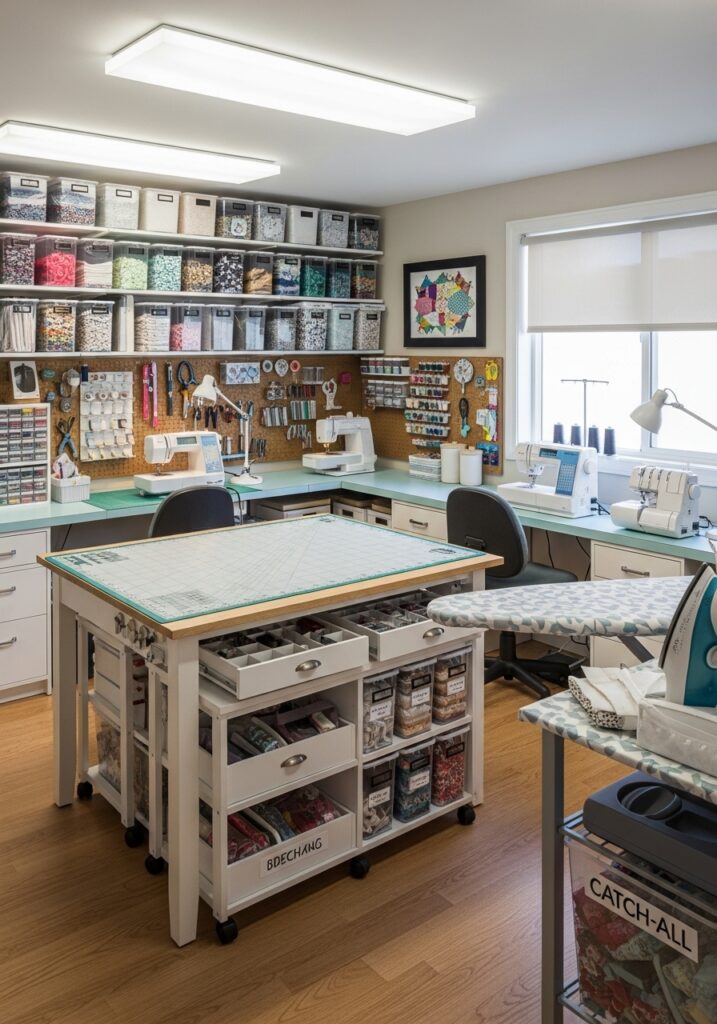
21. Sewing Room Layout Designed Around Storage First
This layout prioritizes storage planning before furniture placement. Cabinets define the room’s structure and workstations fit naturally between storage zones. Supplies stay organized from the very beginning preventing overcrowding later. For complete storage system planning our sewing room storage solutions guide covers everything from fabric bins to built-in cabinets.
22. Sewing Room Layout with Minimal Obstructions
Layouts with minimal obstructions allow smooth movement and reduce accidents during sewing sessions. Furniture stays aligned to walls central areas remain open and fabric handling becomes significantly easier when there is nothing to navigate around. Clean open layouts support efficiency and make the room feel genuinely spacious regardless of its actual size.
23. Sewing Room Layout with Dedicated Finishing Zone
Finishing zones support hemming pressing and final inspection. Keeping this area separate improves garment quality and tools stay organized near the finishing station. Workflow becomes more professional this layout reduces clutter at the main sewing table and projects feel complete and polished rather than rushed.
24. Sewing Room Layout with Balanced Proportions

Balanced layouts distribute furniture evenly throughout the room. No area feels overcrowded workstations feel accessible and storage does not dominate any single section. This balance improves comfort significantly the room feels visually calm and sewing sessions become more enjoyable when the physical environment feels proportional and considered.
25. Sewing Room Layout Built for Long-Term Growth

A growth-focused layout allows future expansion. Extra space is planned intentionally modular furniture supports upgrades and storage systems adapt over time. This layout prevents frequent redesigns — sewing rooms evolve with skills and long-term planning saves both time and cost. The space stays functional for years without needing a complete overhaul.
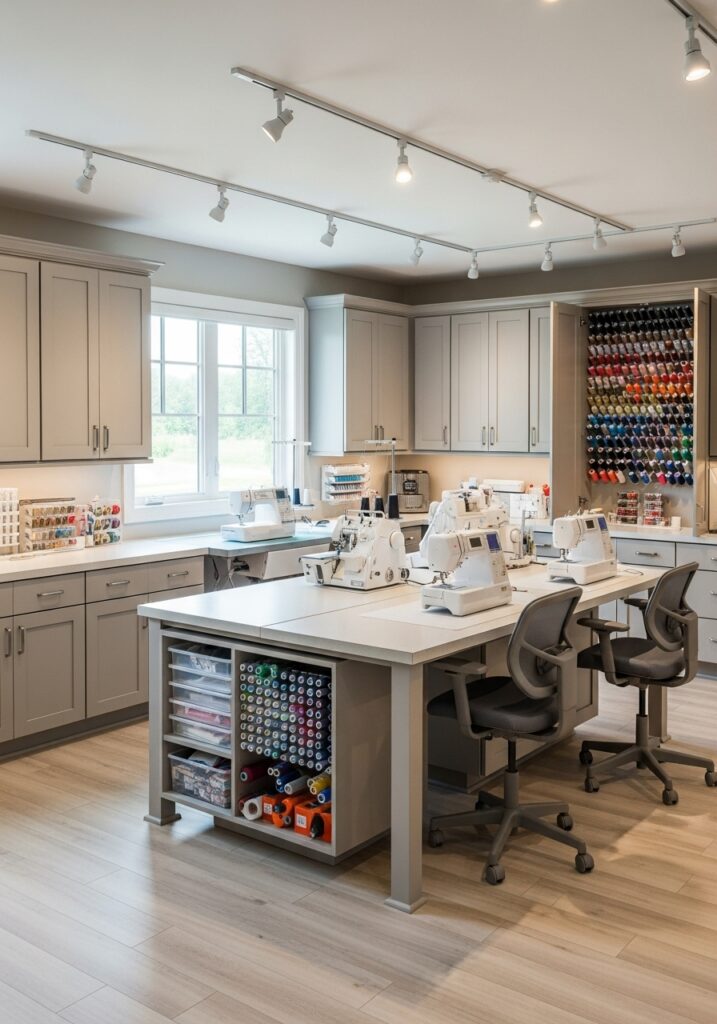
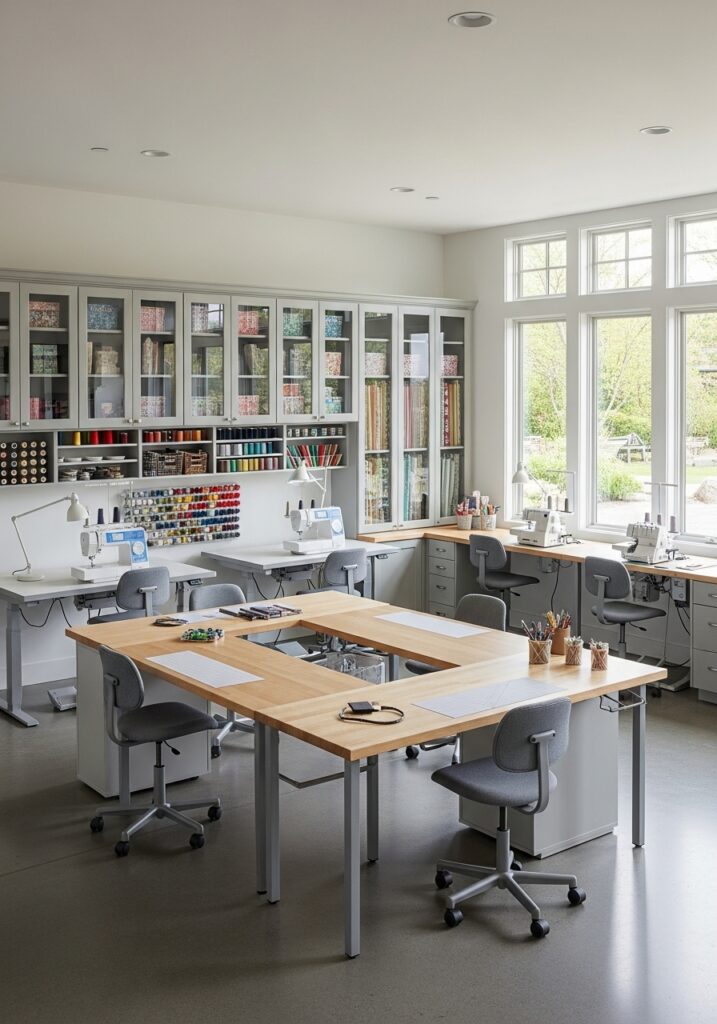
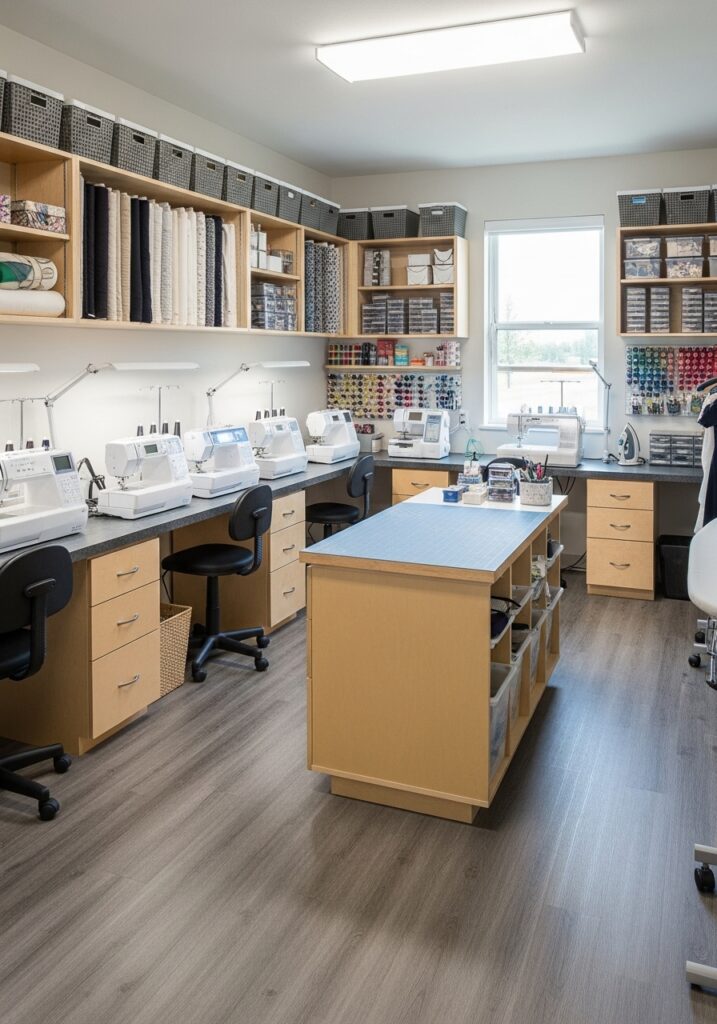
26. Sewing Room Layout with U-Shaped Workflow
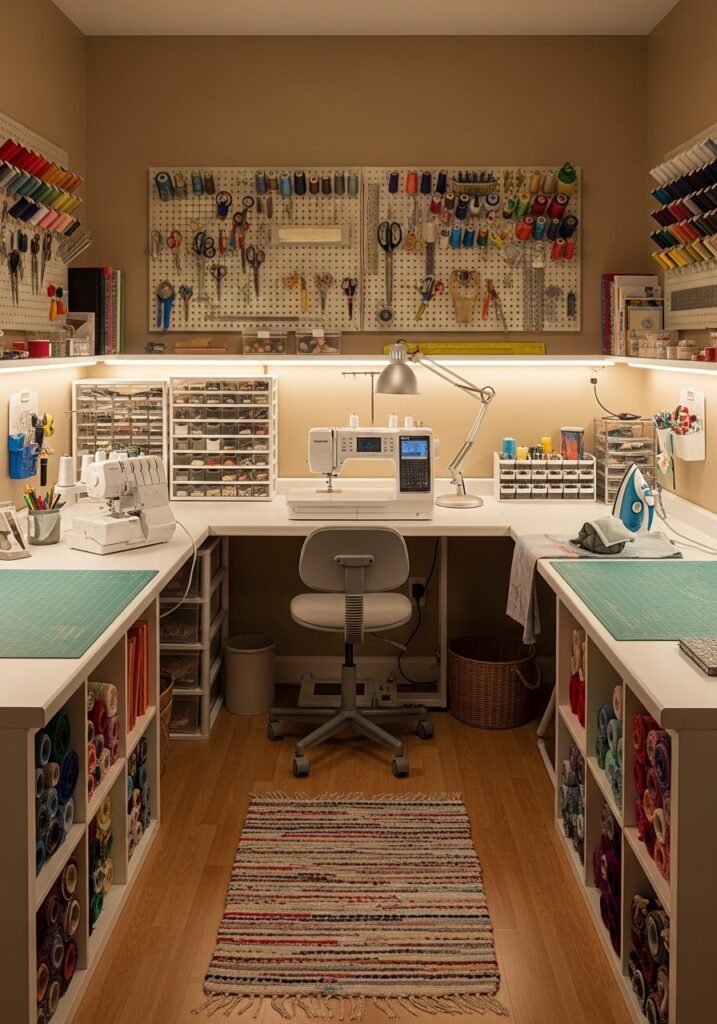
A U-shaped sewing room layout surrounds the user with work surfaces on three sides. This reduces excessive movement and keeps tools within arm’s reach. Cutting sewing and storage zones remain closely connected the layout supports efficient multitasking and it works especially well in medium to large rooms where perimeter walls can all be utilized.
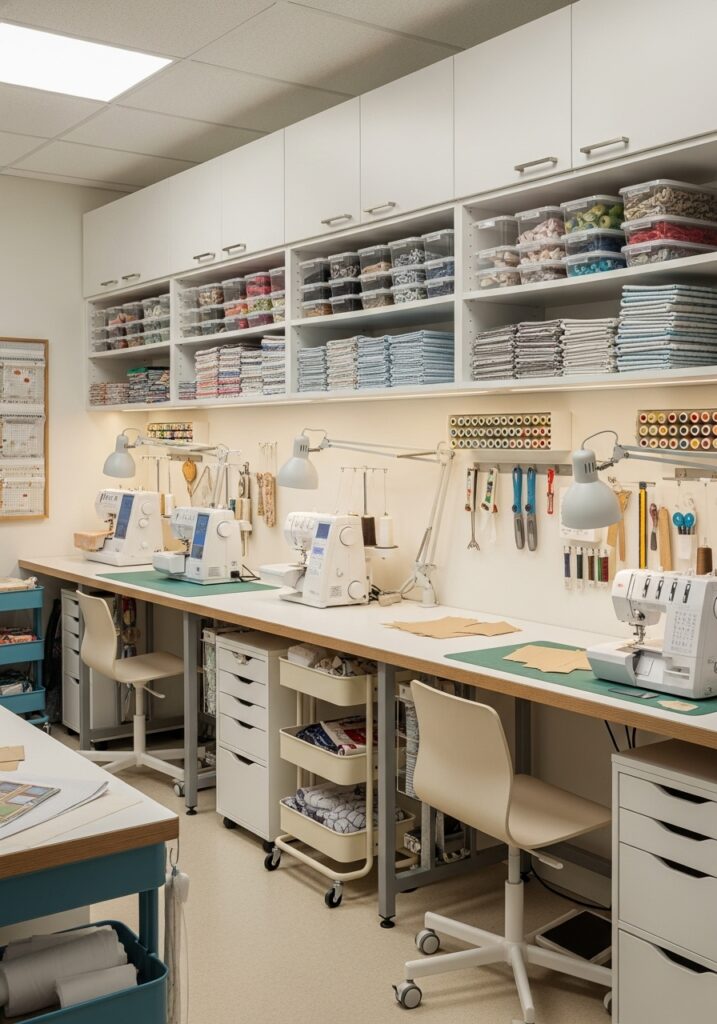
27. Sewing Room Layout with Separate Machine Stations
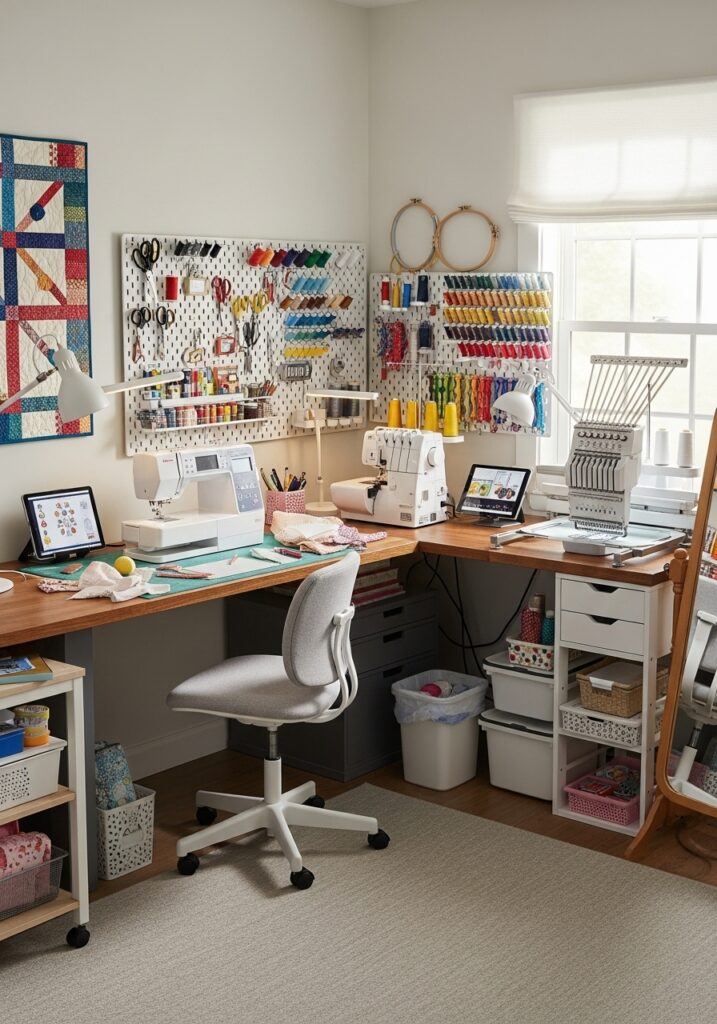
This layout assigns different machines to dedicated stations. Sewing serging and embroidery machines each have their own space preventing constant machine shifting. Workflow becomes faster and smoother electrical planning improves safety and the room feels professional and structured. This layout suits advanced sewists with multiple tools who need each machine permanently set up and ready.
28. Sewing Room Layout Focused on Straight-Line Workflow

Straight-line layouts move projects from one end of the room to the other. Cutting leads into sewing then pressing and finishing. This layout mimics professional studios reduces backtracking and movement feels logical and efficient throughout. This design suits narrow rooms especially well where the length of the space becomes a productive asset rather than a limitation.
29. Sewing Room Layout with Compact Corner Workstations
Corner-based layouts utilize underused spaces efficiently. Workstations fit neatly into corners storage wraps around edges and central floor space remains completely open. This layout suits small rooms where every square foot matters. Corners that would otherwise be dead space become the most functional zones in the room.
30. Sewing Room Layout with Adjustable Work Surfaces

Adjustable tables allow height customization supporting cutting sewing and standing tasks. Ergonomics improve significantly when surfaces adapt to the task rather than forcing the sewist to adapt. The layout benefits from flexibility shared spaces work better for multiple users and comfort increases during long sessions. Adjustable layouts genuinely future-proof the sewing room.
31. Sewing Room Layout with Clear Entry and Exit Flow
Clear entry layouts reduce disruption and improve safety. Storage is placed away from doorways workstations never block access and movement feels intuitive from the moment you walk in. The room feels welcoming and organized immediately — a small layout decision that makes a significant difference in how the space functions every single day.
32. Sewing Room Layout Designed for Teaching or Tutorials
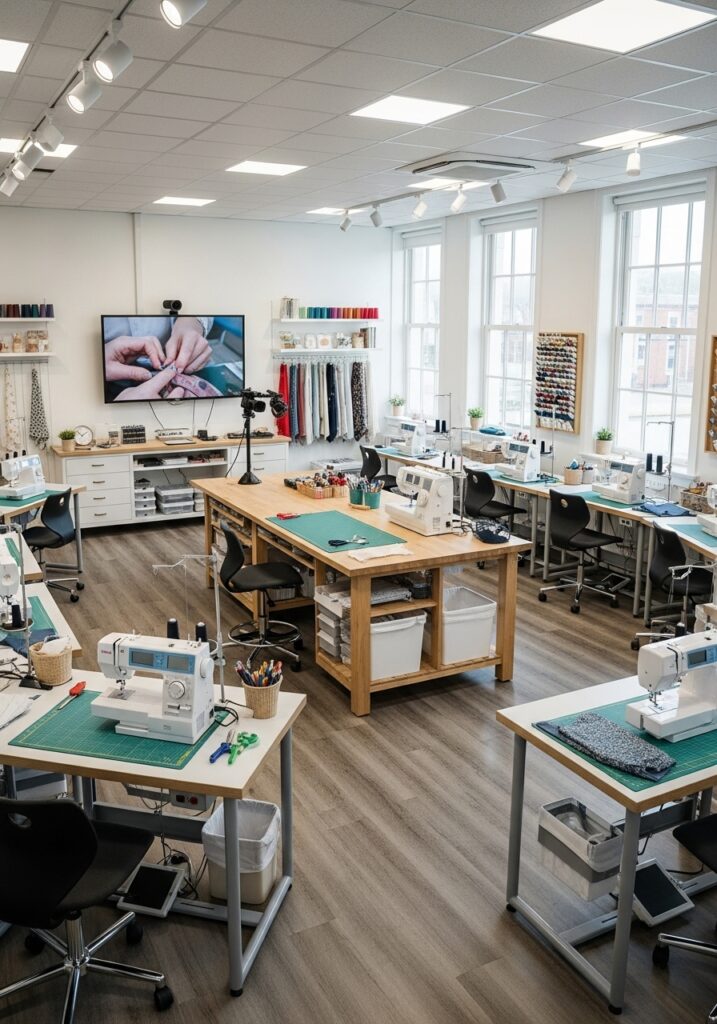
Teaching-focused layouts allow visibility across stations. Demonstration tables face learners storage stays accessible but unobtrusive and camera angles remain clear. This setup suits sewing classes content creation and tutorial filming where the instructor needs to be visible from multiple positions and the room needs to support both teaching and sewing simultaneously.
33. Sewing Room Layout with Minimalist Storage Strategy
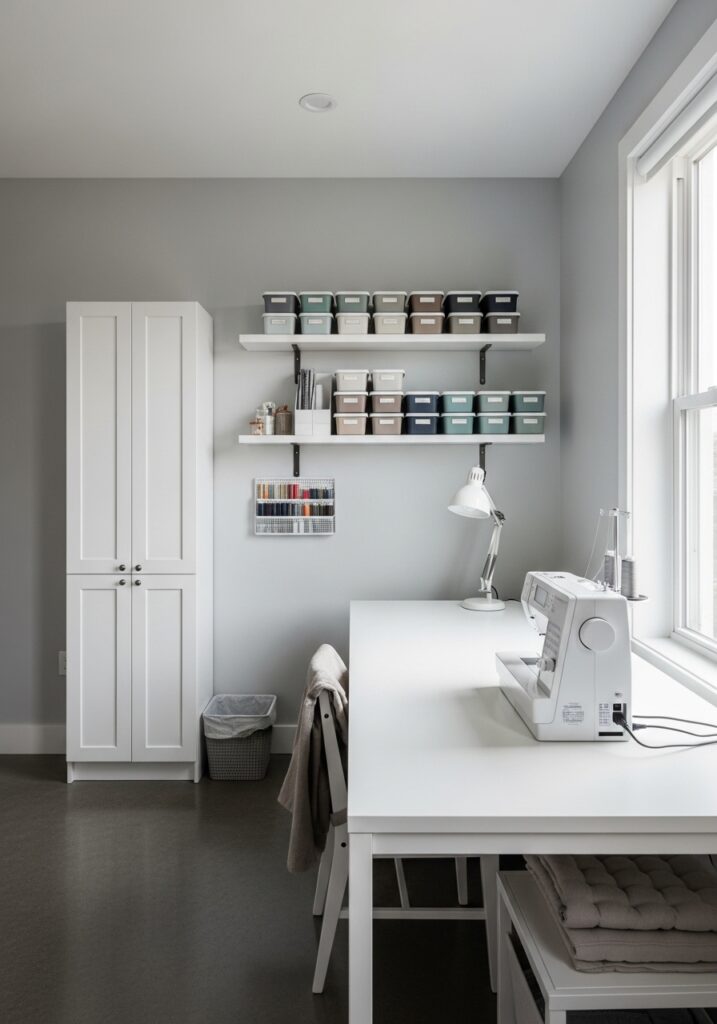
Minimalist layouts reduce storage to essentials only. This prevents clutter accumulation open shelving is carefully curated and work surfaces stay completely clear. Focus remains entirely on sewing and the space supports mental clarity that busy cluttered rooms simply cannot. These drawer organizers help keep the minimal storage that does exist perfectly sorted.

Drawer Organizer for Sewing Notions
Keeps minimal storage perfectly sorted — zippers elastic buttons and notions separated and instantly findable without clutter.
Check Price on Amazon34. Sewing Room Layout with Fabric Flow Priority

Fabric-flow layouts prevent unnecessary folding and lifting. Tables align to guide fabric movement and cutting areas connect directly to sewing stations. This reduces errors fabric handling becomes smoother and the layout supports garment accuracy in a way that random furniture placement cannot. Efficiency improves noticeably when fabric moves logically through the space.
35. Sewing Room Layout with Balanced Lighting Zones

Lighting-based layouts assign brightness by task. Cutting areas receive strong light sewing zones get focused task lighting and ambient lighting balances the overall room. Eye strain reduces significantly when lighting matches the demands of each work zone. Layout and lighting work together — a sewing room that is both correctly arranged and correctly lit performs at a completely different level.
36. Sewing Room Layout with Wall-Driven Design

Wall-driven layouts keep furniture aligned to walls. Central space remains completely open storage stays accessible and this layout improves circulation dramatically. It suits rectangular rooms particularly well and the room feels genuinely spacious. Sewing remains uninterrupted and movement between tasks feels natural and effortless.
37. Sewing Room Layout with Tool Proximity Planning
This layout places every tool near its point of use. Scissors near cutting pins near sewing pressing tools near ironing. This reduces wasted movement workflow speeds up and fatigue decreases over long sessions. The thread storage rack mounted near the sewing machine keeps every spool within reach without leaving the station.

Wall Mount Thread Storage Rack
Mounts near the sewing machine so every thread color is within reach — eliminates leaving the station to find the right spool.
Check Price on Amazon38. Sewing Room Layout Designed for Noise Control
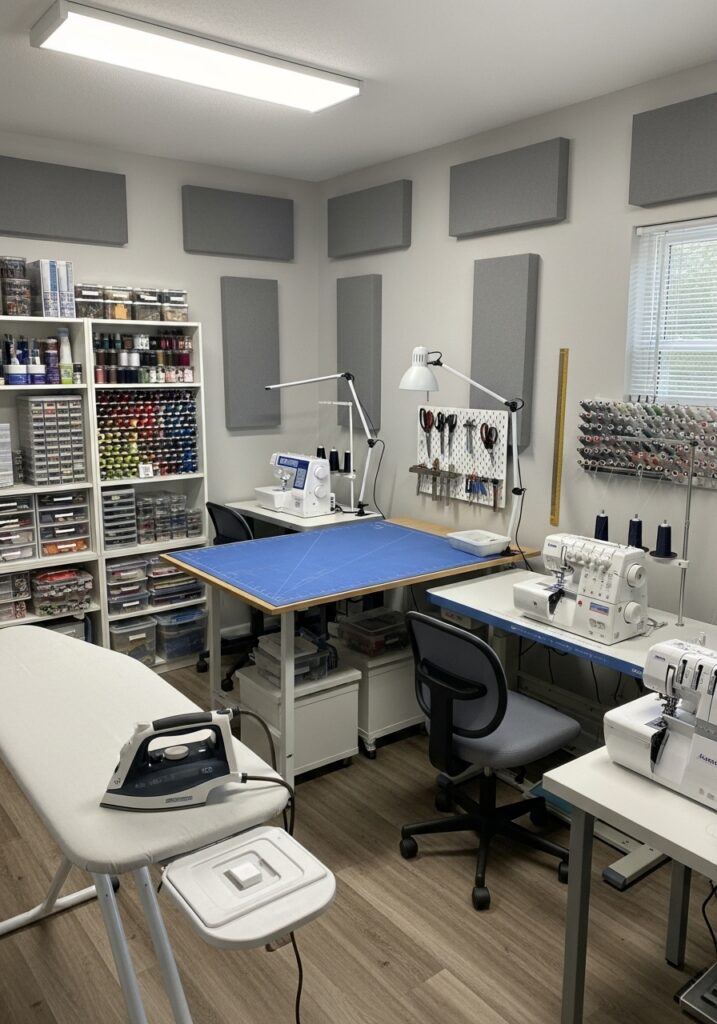
Noise-aware layouts place machines away from walls to prevent sound amplification. Soft furnishings absorb machine noise area rugs reduce vibration and pressing areas are isolated from main work zones. Sewing feels calmer long sessions become more comfortable and this layout suits shared homes where machine noise can disturb other family members.
39. Sewing Room Layout with Flexible Expansion Zones
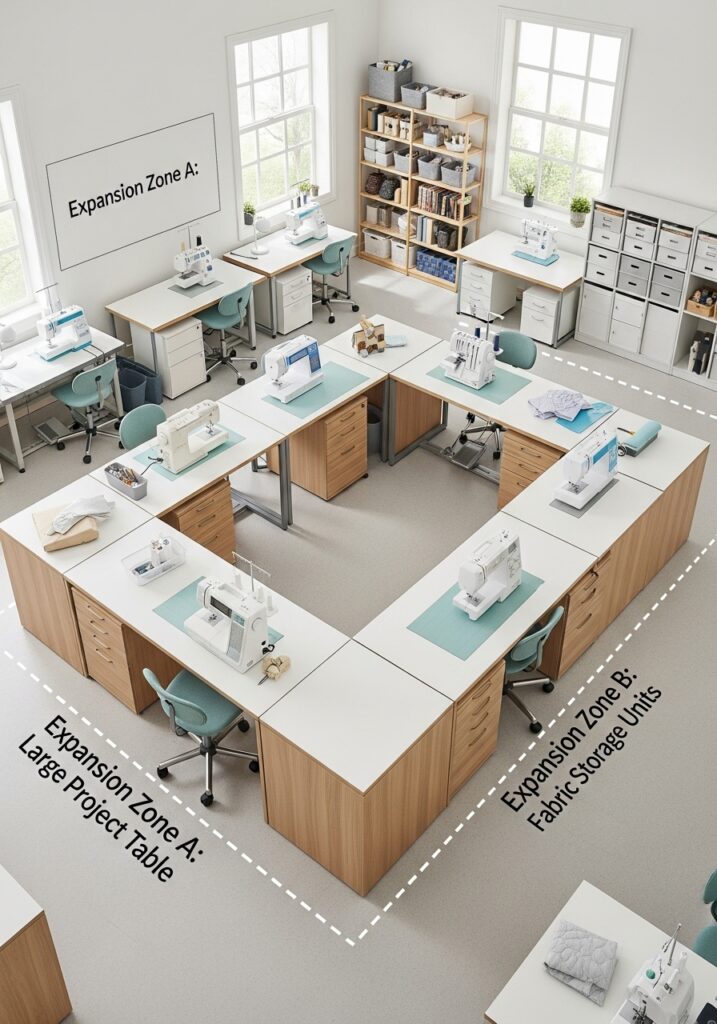
Expansion zones allow future upgrades without disruption. Empty wall sections are planned intentionally modular furniture supports growth and storage systems expand easily. This prevents redesign stress as skills and supplies grow. The layout evolves with skill level and long-term usability improves dramatically when growth is planned rather than reactive.
40. Fully Optimized Sewing Room Layout for Long-Term Use
A fully optimized layout balances workflow storage comfort and lighting. Every zone serves a purpose movement feels effortless storage remains organized long-term and the room supports professional-level sewing. Creativity flows naturally when the physical environment stops being an obstacle and starts being an asset. For more sewing room inspiration explore our complete sewing room ideas guide covering 45 ideas for every style and budget.
Design Your Sewing Room Layout with Purpose
These 40 sewing room layout ideas prove that thoughtful planning can completely transform how you sew. From small-space layouts to professional studio designs the right setup improves efficiency comfort and creative flow. Clear zoning ergonomic movement and intentional storage reduce fatigue and frustration over time.
Start with what you have plan with purpose and allow your sewing room to evolve as your skills grow. For storage planning explore our sewing room storage solutions guide and for design inspiration visit our sewing room design ideas guide. A well-designed layout turns sewing into a seamless enjoyable and deeply satisfying creative process.

Amir Ali is the founder and site administrator of HomeDecorEdge, a modern home decor and interior design platform. Since starting the site, he has combined his passion for interior design, practical styling, and color coordination with hands-on content strategy and site management. He guides authors, curates high-quality articles, and ensures readers have access to actionable, visually inspiring, and user-focused home decor advice for apartments, small rooms, and family homes.