
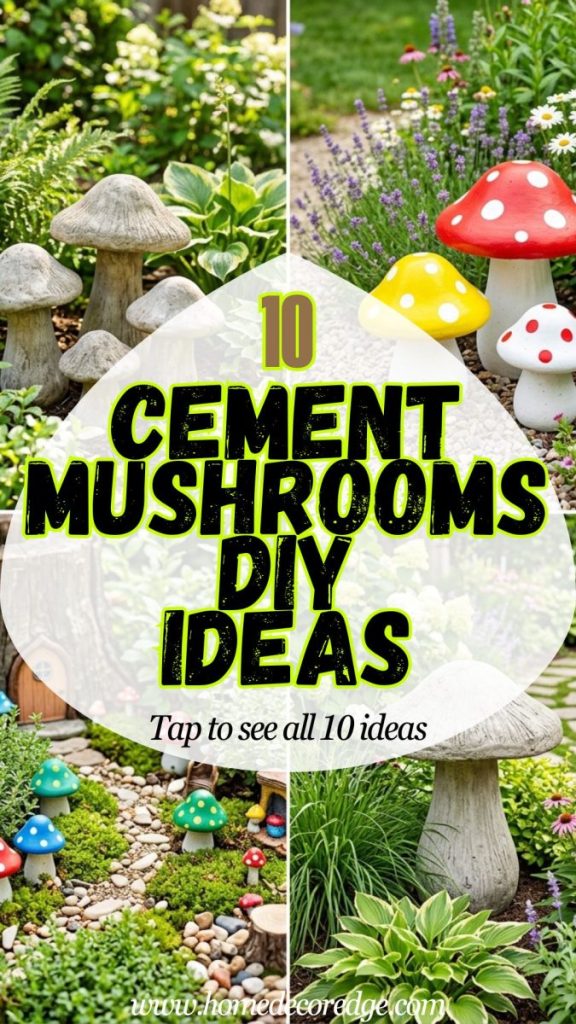
I’m Amir — and cement mushroom garden decorations are one of those garden DIY projects where the finished result looks genuinely magical and far more impressive than the simple materials suggest. A cluster of handmade concrete mushrooms nestled among garden plants creates an instantly whimsical and enchanting garden atmosphere that transforms any ordinary planting bed into something that looks like a fairy tale setting. We made our first set of cement mushrooms last autumn and positioned them at the base of a large tree in the garden — they look completely as though they grew there naturally. These 10 cement mushrooms DIY ideas cover every technique from basic concrete casting to painted colorful designs large statement pieces and complete fairy garden arrangements.
This post contains affiliate links. If you purchase through these links I may earn a small commission at no extra cost to you.
1. Cement Mushrooms DIY Basic Concrete Mix Easy
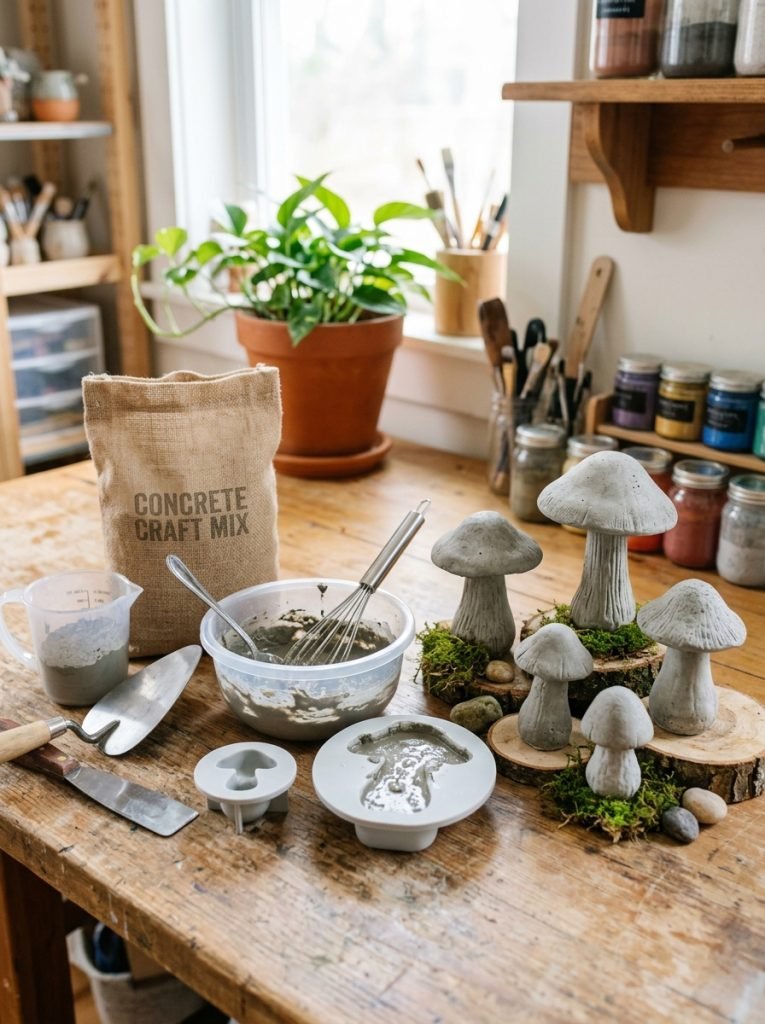
Quality concrete craft mix is the foundation of beautiful cement mushroom results — this cement concrete craft mix produces the perfect consistency for mushroom casting with enough detail capture for beautiful cap and stem shapes and enough strength for lasting outdoor garden durability. The right concrete to water ratio creates a smooth workable mix that flows into molds capturing fine surface detail beautifully.

Cement Concrete Mix Craft
Quality concrete craft mix — perfect consistency for mushroom casting with lasting outdoor garden durability
Check Price on AmazonMaterials Needed:
- Concrete craft mix
- Water and mixing bucket
- Mushroom mold or improvised mold
- Release spray
- Gloves and protective equipment
How to Make It:
- Mix concrete to smooth yogurt consistency — not too wet or dry
- Spray mold interior with release agent to prevent sticking
- Pour concrete into mushroom cap mold first filling completely
- Tap mold firmly to remove air bubbles from mix
- Allow cap to set for 24 hours before demolding carefully
- Cast stem separately and attach to cap with fresh concrete mix
2. Silicone Mold Cement Mushrooms DIY Easy
Silicone mushroom molds create the most precisely shaped and detailed cement mushroom results — these silicone mushroom molds capture beautiful mushroom cap curves gills and stem details in concrete with impressive precision. The flexible silicone releases set concrete cleanly without damage and the reusable molds produce multiple identical mushrooms for creating beautifully matched mushroom clusters.

Mushroom Mold Silicone Garden
Reusable silicone mushroom molds — captures beautiful cap curves gills and stem details in concrete precisely
Check Price on AmazonMaterials Needed:
- Silicone mushroom molds in multiple sizes
- Concrete craft mix
- Release spray
- Mixing bucket and tools
- Wire for reinforcement in larger pieces
How to Make It:
- Spray silicone mold interior lightly with release agent
- Mix concrete to smooth consistent texture
- Pour into mushroom cap mold and tap to remove air bubbles
- Insert short wire or rod for stem reinforcement if making large mushroom
- Allow to cure 48 hours before carefully flexing mold to release
- Cast matching stems and attach when both pieces are fully cured
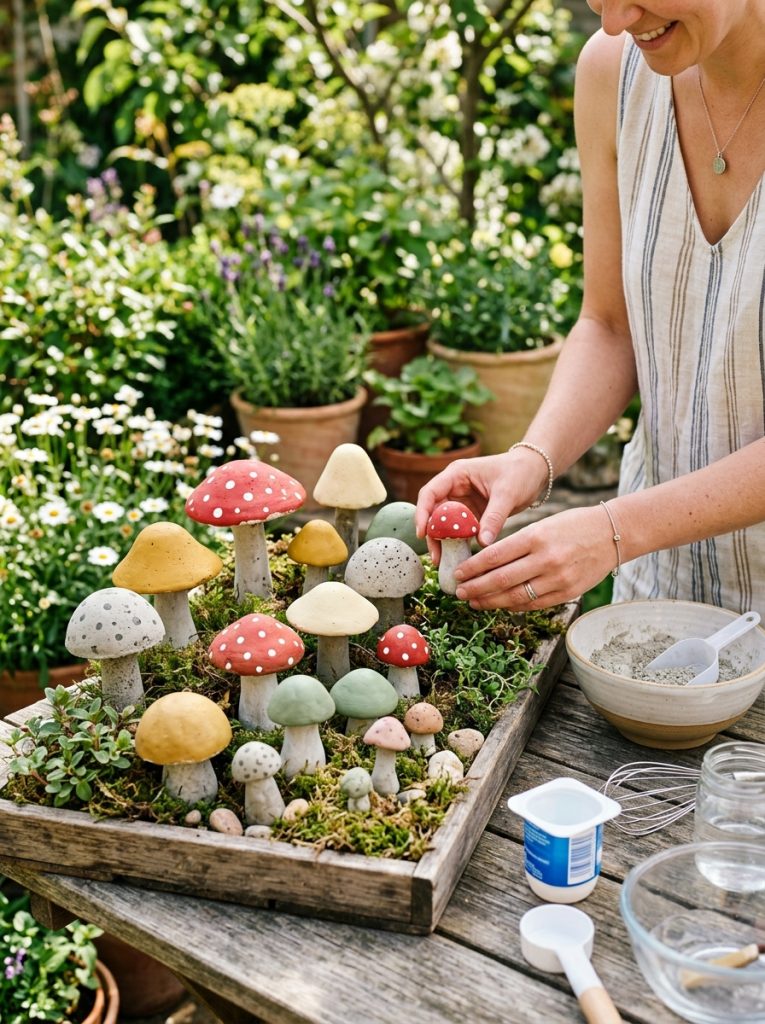
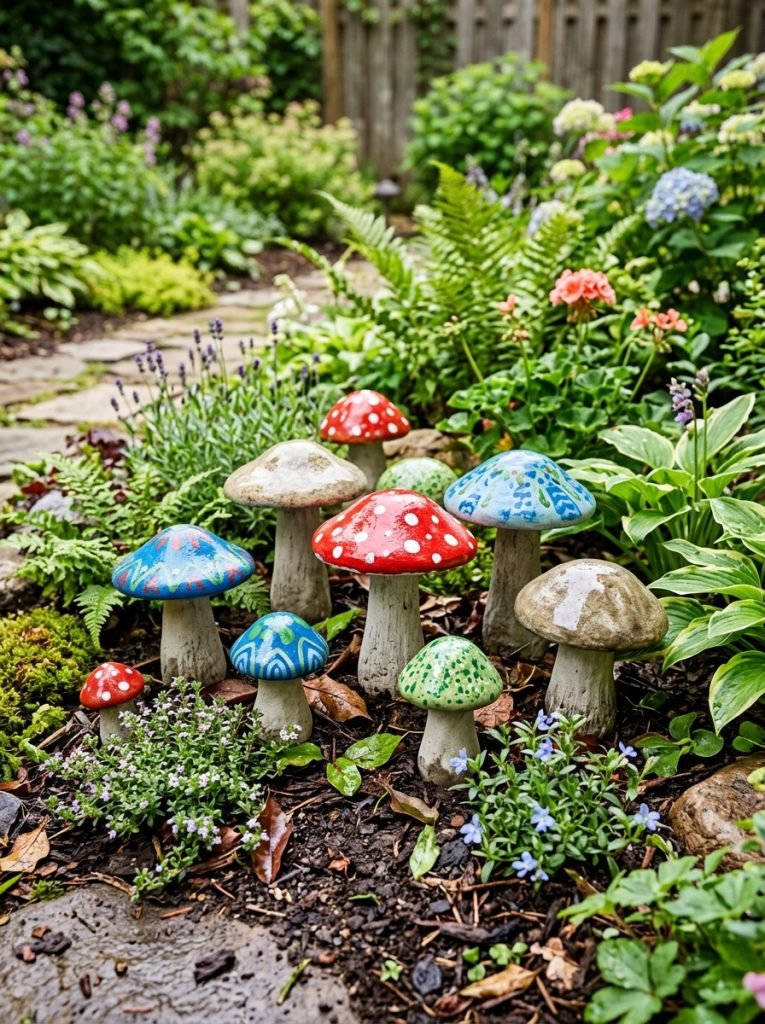
3. Painted Cement Mushrooms DIY Colorful Garden
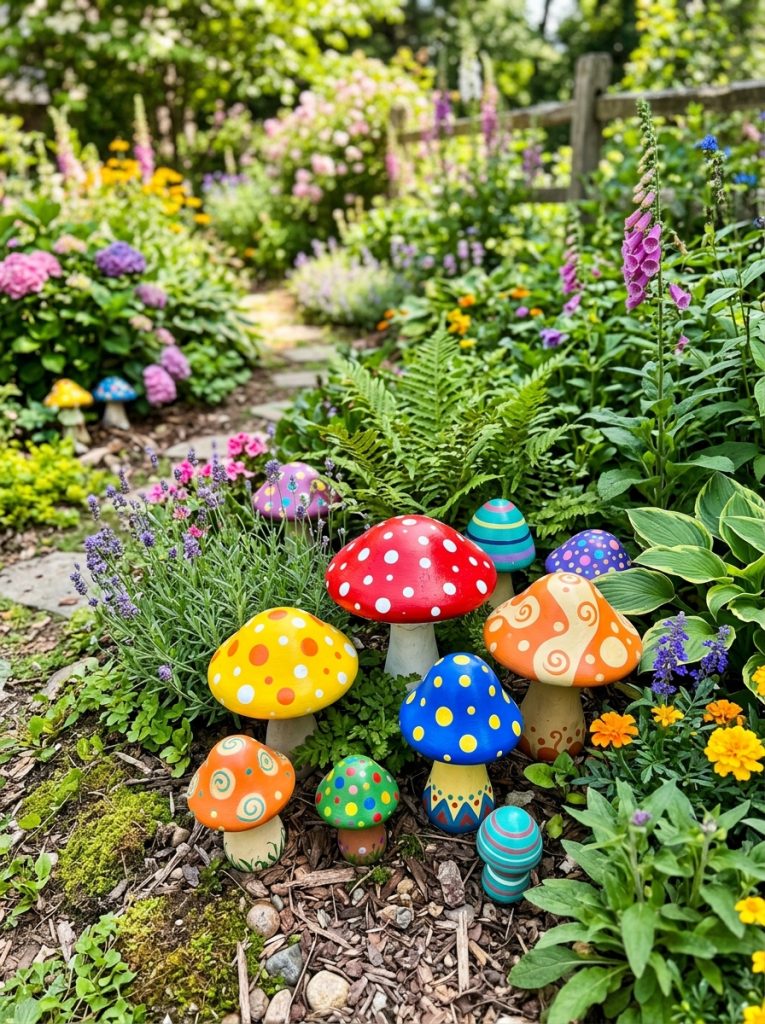
Painted cement mushrooms create the most vibrant and whimsical garden decoration — this acrylic paint set has the perfect outdoor-appropriate colors for classic red and white spotted mushroom designs bright yellow caps and creative blue spotted variations. The rich acrylic pigments cover concrete beautifully and sealed with outdoor sealer the painted designs last for many garden seasons.

Acrylic Paint Set
Rich pigmented acrylic paint — perfect outdoor colors for classic spotted mushroom and colorful garden designs
Check Price on AmazonMaterials Needed:
- Cured cement mushroom pieces
- Acrylic paint in mushroom colors
- Paintbrushes flat and round
- White paint for spots
- Outdoor sealer spray
How to Make It:
- Apply white primer coat to cement mushroom surface
- Paint mushroom cap in chosen base color — red yellow or blue
- Allow base coat to dry completely before adding spots
- Paint white spots in irregular scattered pattern across cap
- Paint stem in cream or white with subtle green moss detail
- Seal completely with outdoor sealer for lasting colorful results
4. Large Cement Mushrooms DIY Statement Garden
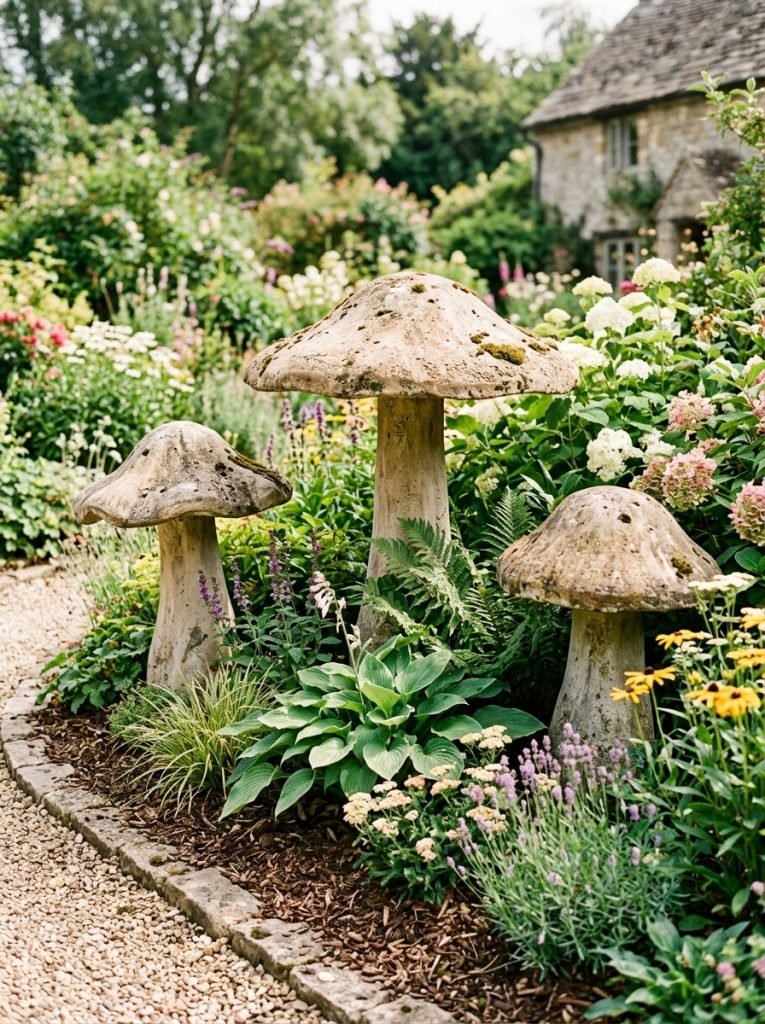
Large cement mushrooms create the most impressive and magical garden statement pieces — oversized concrete mushrooms positioned as garden focal points among large plants and shrubs create a genuinely enchanting garden atmosphere that makes any outdoor space feel completely magical. Large mushrooms require wire reinforcement within the concrete for structural strength and should be cast in sections that are assembled after individual curing.
Materials Needed:
- Large mushroom mold or improvised large bowl mold
- Concrete craft mix — larger quantity
- Steel wire mesh for reinforcement
- Strong adhesive for assembly
- Outdoor sealer
How to Make It:
- Create large mushroom cap mold from large bowl lined with plastic
- Press wire mesh into concrete cap pour for internal reinforcement
- Cast thick stem section with central steel rod for strength
- Allow both pieces to cure fully for 72 hours minimum
- Attach cap to stem with strong concrete adhesive
- Allow joint to cure before positioning in garden as permanent feature
5. Easy Cement Mushrooms DIY No Mold Simple
Easy no-mold cement mushrooms use simple household items as improvised casting forms — plastic bowls create beautiful rounded mushroom caps plastic cups form stems and balloons create perfect dome-shaped caps when concrete is draped over them. The improvised mold approach produces genuinely charming mushroom shapes with natural variation that makes each piece completely unique and often more beautiful than perfectly mold-cast alternatives.
Materials Needed:
- Plastic bowls and cups as improvised molds
- Concrete craft mix
- Petroleum jelly as release agent
- Fabric or burlap for texture
- Outdoor sealer
How to Make It:
- Coat plastic bowl interior with petroleum jelly as release agent
- Press concrete mix firmly into bowl covering all surfaces evenly
- Allow to set until firm but not fully hard — approximately 2 hours
- Carefully remove from bowl and shape edges by hand while workable
- Cast cup-shaped stem and attach to inverted cap with fresh mix
- Allow full cure and seal before garden placement
6. Fine Detail Cement Mushrooms DIY Painted
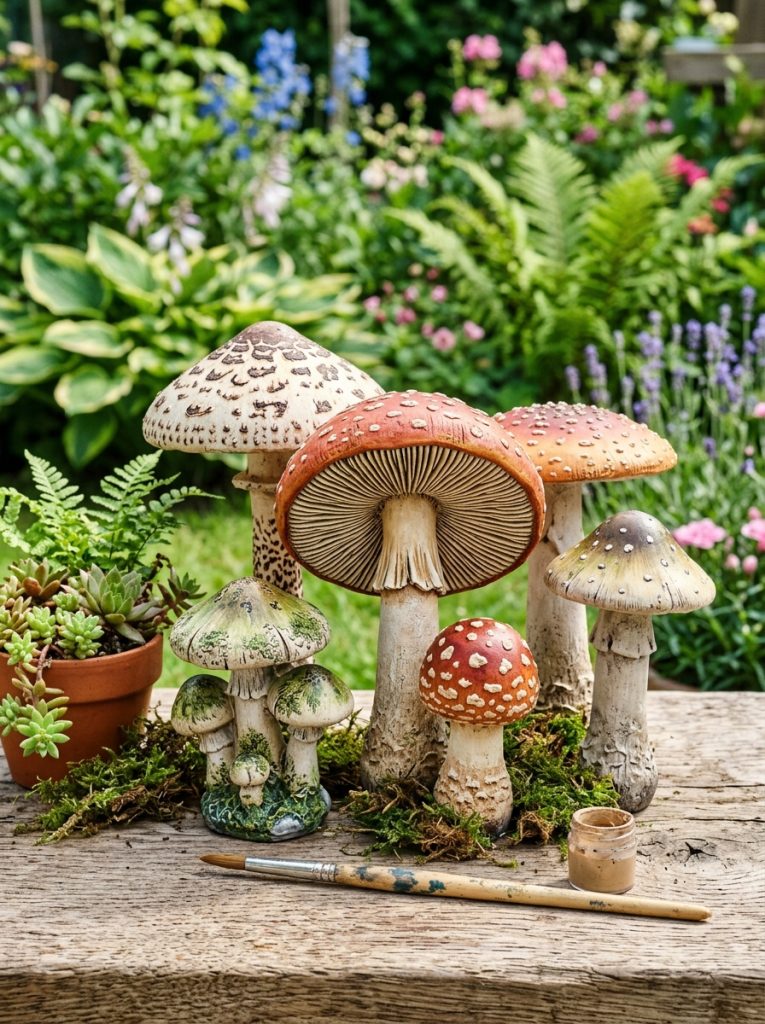
Fine detail painting transforms cement mushrooms from basic garden craft into genuine garden art — this fine tip brush set provides the precise control needed for painting realistic gill details under mushroom caps delicate spot patterns and subtle texture gradients that make painted cement mushrooms look genuinely like natural mushrooms rather than painted concrete.

Fine Tip Paint Brush Set
Fine tip brushes — precise control for gill details spot patterns and realistic texture on cement mushrooms
Check Price on AmazonMaterials Needed:
- Cured cement mushroom
- Fine tip brush set
- Acrylic paint in natural mushroom tones
- Reference photos of real mushrooms
- Outdoor sealer
How to Make It:
- Study real mushroom photos before starting for realistic color reference
- Apply warm brown base coat to cap surface
- Use fine brush to paint radiating gill lines under cap in darker tone
- Add lighter highlight areas on cap top where light would hit naturally
- Paint stem with subtle vertical fiber texture in cream and tan
- Add moss and lichen detail at stem base for the most natural result
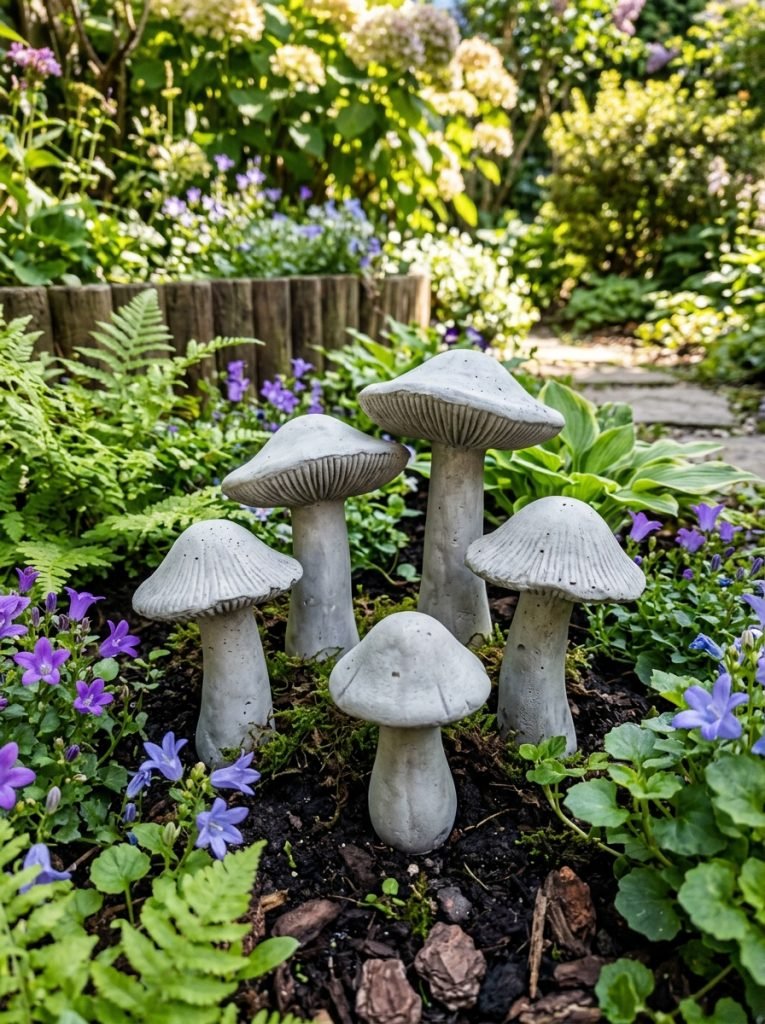
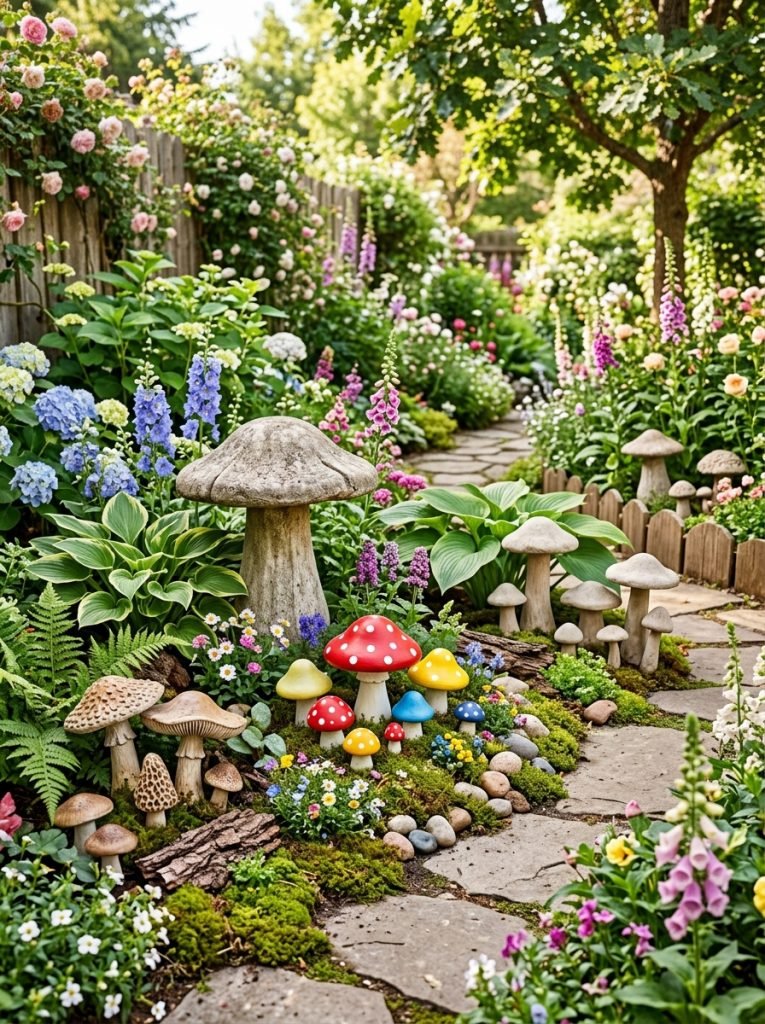
7. Garden Decor Cement Mushrooms DIY Cluster

A cluster of cement mushrooms in different sizes creates the most natural and magical garden decoration — mixing large medium and small mushrooms in a natural grouping among moss rocks and low garden plants creates a scene that looks completely as though the mushrooms grew there naturally. The variety of sizes and the natural arrangement removes any artificial quality and the cluster becomes one of the most talked about features in any garden.
Materials Needed:
- Multiple cement mushrooms in three different sizes
- Garden positioning tools
- Moss for surrounding decoration
- Small rocks and pebbles
- Low ground cover plants
How to Make It:
- Cast mushrooms in three sizes — large medium and small
- Plan cluster arrangement on garden surface before positioning permanently
- Position largest mushroom as cluster anchor
- Add medium mushrooms at natural grouping distance around anchor
- Tuck smallest mushrooms into gaps between larger ones
- Add real moss rocks and low plants around cluster base for natural effect
8. Concrete Garden Mushrooms DIY Weatherproof
Proper weatherproofing ensures cement mushroom garden decorations last for decades in outdoor conditions — this outdoor sealer spray creates a clear durable protective coating that protects both painted designs and natural concrete finishes through rain frost UV exposure and all garden conditions. Without proper sealing painted mushrooms fade and concrete surfaces develop unsightly staining within a single outdoor season.

Outdoor Sealer Spray
Clear outdoor sealer — protects painted designs and concrete finish through all weather for decades
Check Price on AmazonMaterials Needed:
- Completed cement mushroom decorations
- Outdoor clear sealer spray
- Clean dry cloth
- Well ventilated outdoor space
How to Make It:
- Ensure cement mushroom is fully cured and completely dry
- Clean surface of any dust or debris before sealing
- Apply first sealer coat in smooth even strokes
- Allow first coat to dry fully — approximately 30 minutes
- Apply second coat for maximum weather and UV protection
- Allow full 24 hour cure before positioning permanently in garden
9. Fairy Garden Cement Mushrooms DIY Small
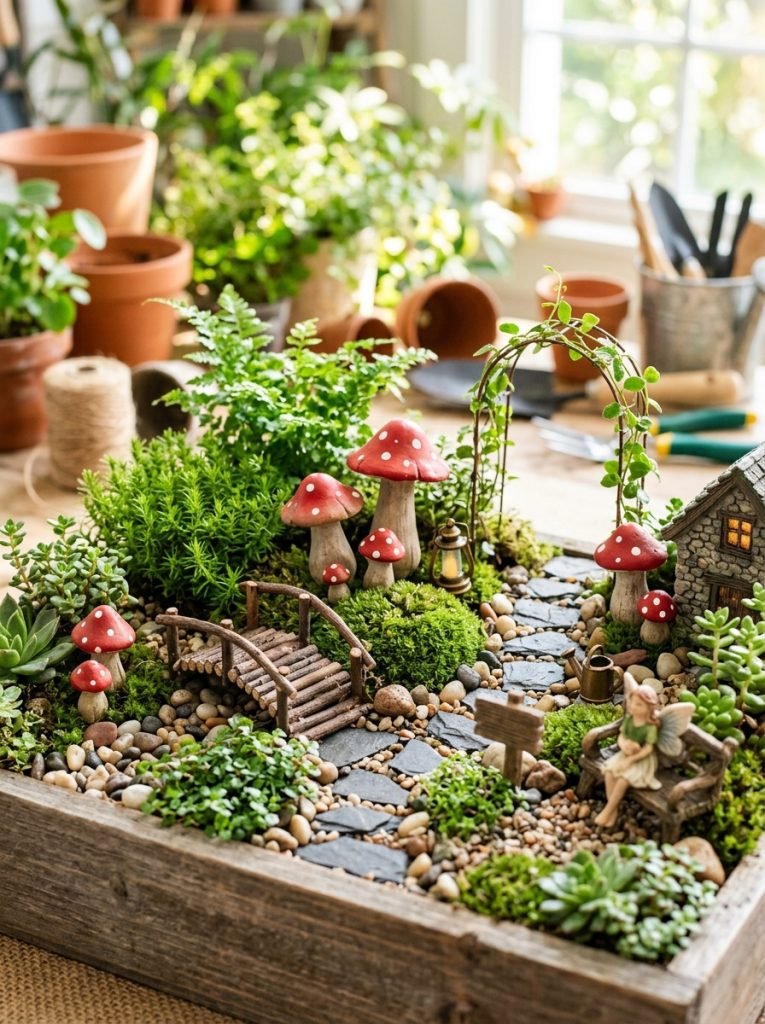
Small fairy garden cement mushrooms create the most enchanting and magical miniature garden scenes — tiny concrete mushrooms in perfect fairy garden scale arranged with miniature plants small pebbles fairy garden accessories and fine moss create genuinely magical miniature worlds of extraordinary charm. Fairy garden cement mushrooms are permanently weatherproof unlike plastic alternatives and the concrete material gives them a beautiful natural quality that suits the fairy garden aesthetic perfectly. For more fairy garden ideas check our 20 fairy garden ideas for kids post.
Materials Needed:
- Small silicone mushroom molds
- Concrete mix — small quantity
- Miniature fairy garden accessories
- Fine moss and small pebbles
- Small container for fairy garden display
How to Make It:
- Cast multiple tiny mushrooms using small silicone molds
- Paint in classic fairy garden colors — red white and pastel tones
- Seal all painted mushrooms with outdoor sealer
- Choose container or garden corner for fairy garden display
- Arrange moss as ground cover in fairy garden area
- Position tiny mushrooms naturally among moss and miniature accessories
10. Complete Cement Mushrooms DIY Garden Collection
A complete cement mushroom garden collection distributed throughout the garden creates the most genuinely magical outdoor space imaginable — a large natural finish statement mushroom at the garden entrance, a colorful painted cluster beside the path, tiny fairy garden mushrooms in the shaded corner, and realistic detailed pieces among the flower beds all together transform any garden into a genuinely enchanting space where every corner holds a delightful discovery. For more garden decor ideas check our diy yard decor and flower pot faces diy posts for more beautiful garden decoration inspiration.
Final Thoughts on Cement Mushrooms DIY
There you have it — 10 cement mushrooms DIY ideas from basic concrete casting and silicone mold techniques to colorful painted designs large statement pieces and magical fairy garden arrangements. Cement mushroom garden decorations are genuinely one of the most rewarding outdoor craft projects because the finished pieces are simultaneously beautiful to look at permanently weatherproof and completely unique to each garden. Start with one simple mushroom casting and discover how quickly the magical collection grows from there.

Amir Ali is the founder and site administrator of HomeDecorEdge, a modern home decor and interior design platform. Since starting the site, he has combined his passion for interior design, practical styling, and color coordination with hands-on content strategy and site management. He guides authors, curates high-quality articles, and ensures readers have access to actionable, visually inspiring, and user-focused home decor advice for apartments, small rooms, and family homes.