

Old magazines pile up in every home: last season’s issues, the ones nobody finished, the stack by the sofa that never gets smaller. These craft ideas with magazines turn that pile into bowls, beads, flowers, and wall art, all from pages you already own.
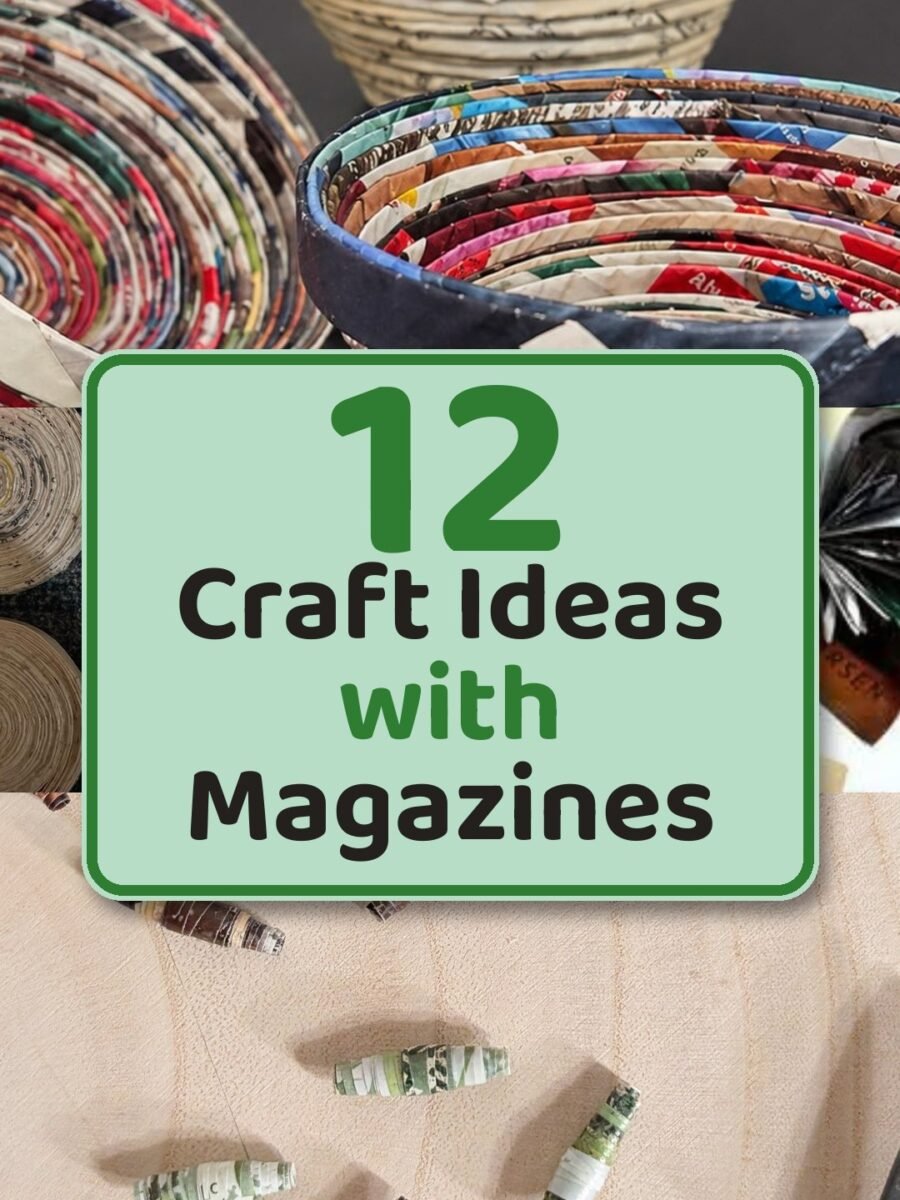
Magazines are not newspaper. The pages are glossy, the colours are bright, and they roll into tight coils that hold their shape beautifully. That is the whole difference, and it is why magazine crafts look so cheerful. Our newspaper craft ideas use the same rolling and coiling on softer grey newsprint, so the two lists sit nicely side by side.
You need almost nothing to start: old magazines, scissors, white glue, and a wooden skewer for rolling. A bowl to shape over, a heavy book to press under, and a bottle of clear varnish cover the rest. No special tools, no shopping trip, and no craft room required.
The first three ideas are full builds with materials and steps, so start there and learn the rolling and coiling. The other nine are quicker ideas that use the same skills in new ways. Pick the one that catches your eye, clear the table, and start with the magazine on top of the pile.
Quick Picks
- Start here: Coiled Magazine Bowls (idea 1)
- Easiest win: Rolled Paper Beads (idea 2)
- Best wall piece: Rainbow Tube Art (idea 11)
1. Coiled Magazine Bowls

BuildAbout 1 hour plus dryingThe classic first magazine project
A coiled magazine bowl is the project to make first. You cut the glossy pages into strips, roll them into tight coils, and glue the coils edge to edge until a flat spiral becomes a bowl. The colours do the decorating for you, because every page brings its own print, and no two bowls ever look alike.
Materials Needed
- Old magazines, glossy pages in colours you like
- A wooden skewer or a thin knitting needle for rolling
- White glue
- Scissors
- A small bowl to use as a shaping form
- Clothespins or small clips to hold the coils
- Clear varnish or diluted white glue for sealing
How to Make It
- Cut the magazine pages into strips about 1 inch wide, tearing along the page edge keeps them straight.
- Roll one strip around the skewer into a tight coil, glue the end, and slide it off. Make at least a dozen coils before you start building.
- Glue the coils edge to edge in a flat spiral on the table. This is the base of the bowl, so press it flat and let it set for ten minutes.
- Keep adding coils around the edge, lifting each new ring slightly higher so the sides rise. Work in rings, not one coil at a time, so the wall stays even.
- Set the bowl over your shaping form while the glue is still soft, and press the sides gently against it so the curve holds.
- Let the bowl dry upside down overnight so the base stays flat and the walls keep their shape.
- Brush on a coat of diluted glue or clear varnish. It stiffens the paper, stops the coil ends lifting, and makes the bowl wipeable.
Tip: Roll every coil the same tightness. Loose coils make a floppy bowl, and tight coils make one that holds its shape for years.
2. Rolled Paper Beads
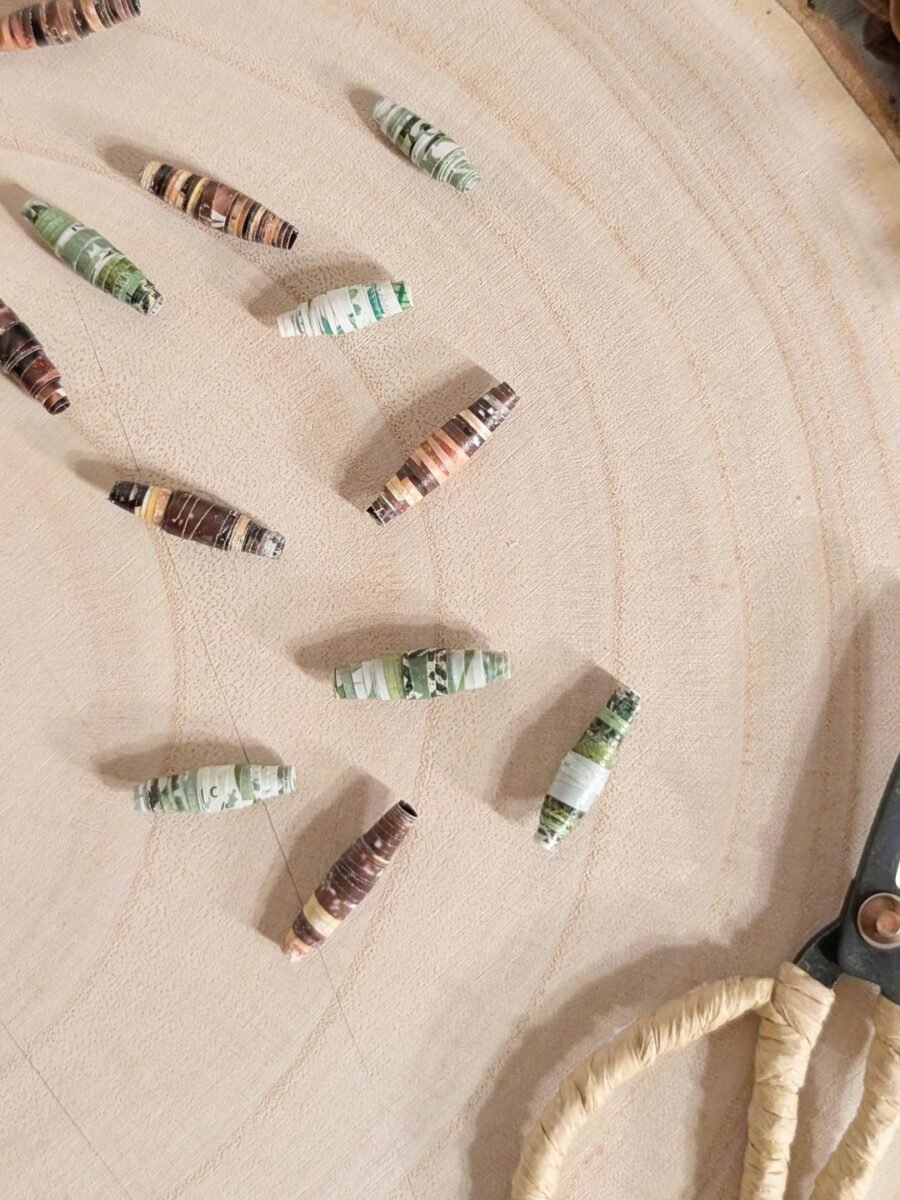
BuildAbout 45 minutesOne magazine becomes a whole bead jar
Rolled paper beads turn a single magazine into a whole jar of beads. You cut the pages into long triangles, roll each one around a skewer, and the printed colours wind into stripes you could never paint by hand. String them into a necklace, a bracelet, or a curtain tieback, or just keep a jar of them on a shelf, because they look beautiful even before they become anything.
Materials Needed
- Glossy magazine pages in bright colours
- A wooden skewer, a toothpick, or a thin knitting needle
- White glue
- Scissors
- Clear varnish
- Cord, wire, or elastic for stringing
How to Make It
- Cut each magazine page into long thin triangles, with the wide end about 1 inch across and the point at the far end.
- Lay the skewer across the wide end and roll the triangle up tight, keeping the edges lined up so the bead stays even.
- Glue the pointed tip down and hold it for a few seconds, then slide the bead off the skewer.
- Roll a dozen beads before you stop, mixing wide triangles for fat beads and narrow ones for slim beads.
- Brush every bead with clear varnish and stand them on a skewer stuck into a cup to dry, so they do not stick to the table.
- When the varnish is fully dry, string the beads on cord or elastic, knotting between beads if you want them spaced out.
Tip: The wide end of the triangle sets the bead shape. A wide triangle makes a fat round bead, and a narrow one makes a long slim bead, so cut both and mix them on one string.
3. Coiled Magazine Coasters
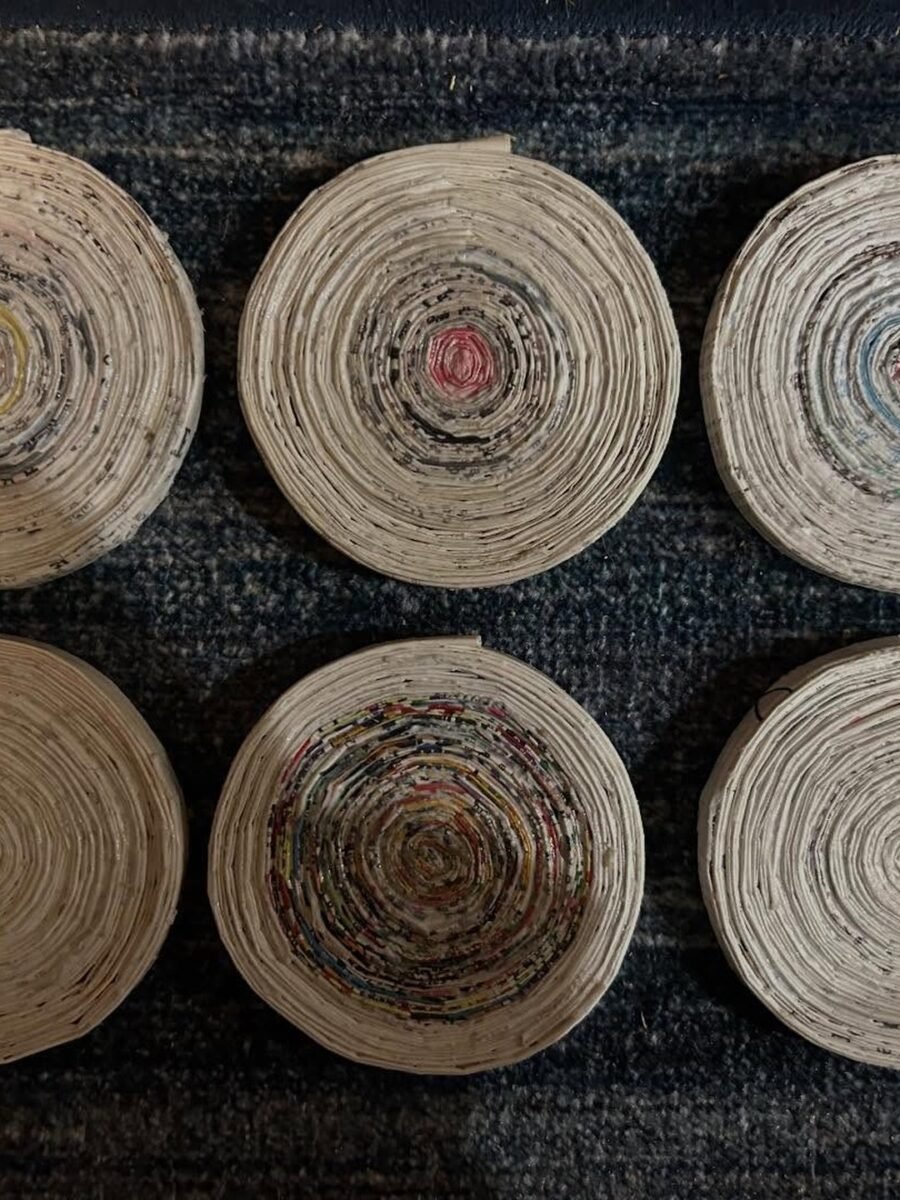
BuildAbout 30 minutes eachThe most useful thing here
Coiled coasters are the most useful thing in this whole list. The same rolling and gluing as the bowls, pressed flat instead of built up, makes a thick disc that protects a table and shows off the magazine colours. Make a set of six in an evening, mix the colours boldly, and stack them in a little pile by the sofa.
Materials Needed
- Old magazines, glossy pages in colours you like
- A wooden skewer or a thin knitting needle
- White glue
- Scissors
- A sheet of cork or felt for backing
- Clear varnish
How to Make It
- Cut the magazine pages into strips about half an inch wide.
- Roll one strip into a tight coil around the skewer, glue the end, and slide it off.
- Keep rolling coils and gluing them edge to edge in a flat spiral until the disc is about 4 inches across.
- Press the disc flat under a heavy book for an hour so it dries perfectly level.
- Cut a circle of cork or felt the same size and glue it to the back, so the coaster grips the table and never scratches it.
- Brush the top with clear varnish so drips wipe off and the colours stay bright.
Tip: Glue each coil to its neighbour as you go, not after the disc is finished. Coils glued late leave gaps, and gaps let a mug wobble.
4. Folded Magazine Flowers
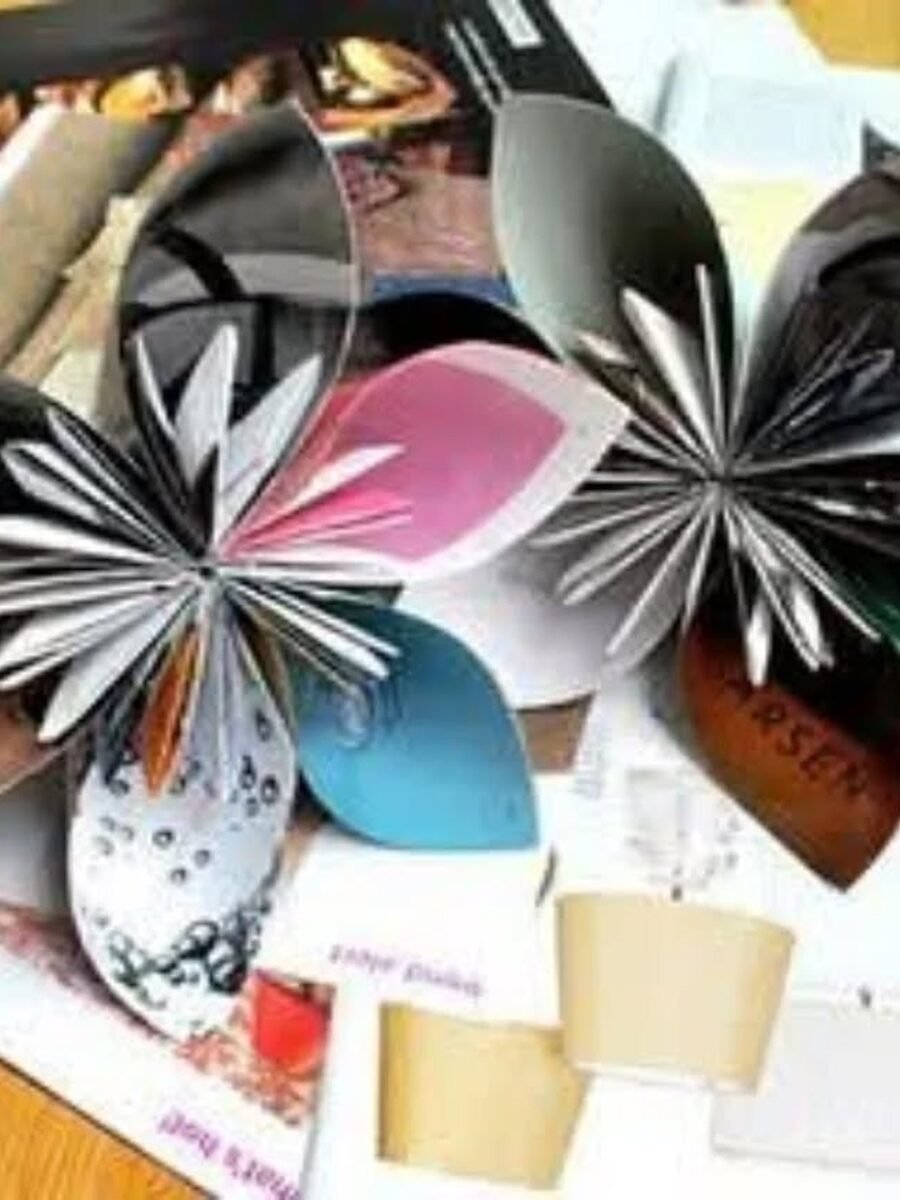
Folded magazine flowers use the pages exactly as they are, no rolling, no coiling. Fold each page into petals, fan them out, and pin the centre, and a flat magazine becomes a flower with real depth. The print shows through the folds, so a fashion page makes a silver bloom and a food page makes a pink one. Stand them in a jar, glue them to a card, or lay them on a shelf. If you love paper blooms, our paper flowers diy guide has smaller everyday versions too.
You’ll need: old magazines, scissors, and glue dots or a glue stick.
Best for: A quick flower that needs no vase water
5. Wildflower Collage Art
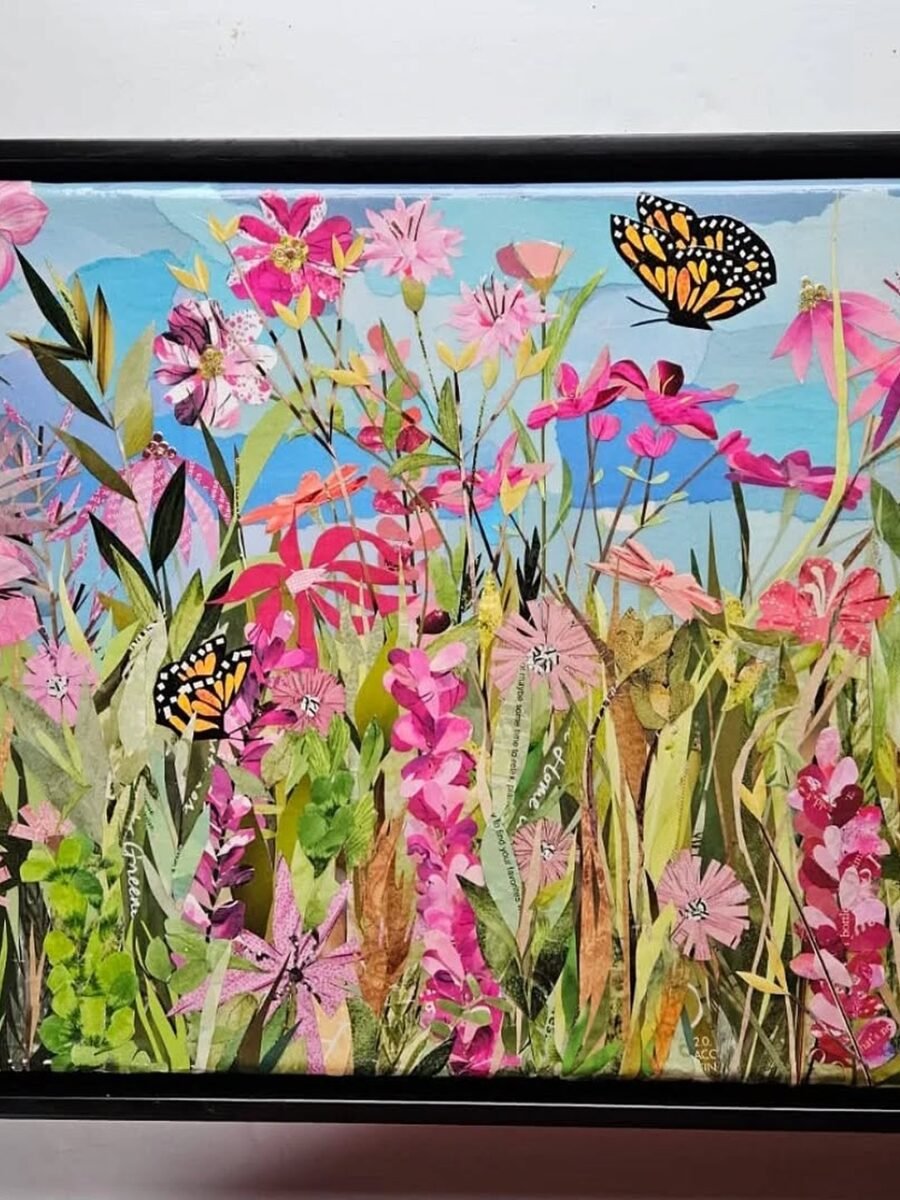
A wildflower collage is the most forgiving art project here, because there is no wrong shape for a flower. Cut petals and leaves from the brightest magazine pages you can find, layer them over a painted sky, and add a butterfly or two cut from a glossy advert. The meadow builds itself as you go, and the frame makes it look finished even while it is still loose and playful. Hang it where the light hits it in the morning.
You’ll need: magazine pages in greens and pinks, scissors, a glue stick, and a frame or canvas board.
Best for: The prettiest wall piece in the list
6. Rolled-Page Bouquet

This bouquet is made the same way as the beads, only bigger. Roll whole magazine pages into cones, fan them into a circle, and tie the bundle with twine so it holds its shape. A few small twine flowers in the centre hide the join, and a braided handle finishes it. It never wilts, it never needs water, and it makes a lovely gift for someone who has everything, because nobody else will have one like it.
You’ll need: old magazines, twine, white glue, and ribbon for the handle.
Best for: A handmade gift that costs nothing
7. Paper-Coil Mirror Frame

A plain round mirror becomes a feature when you frame it with paper coils. Roll the magazine pages into short tight tubes, cut them to matching lengths, and glue them around the edge so the colours ring the glass. The frame in the photo uses dark pages with bright edges, which suits a hallway or a bedroom. The little coiled bowl below it is the same skill on a smaller scale, so make both together and keep them as a pair.
You’ll need: a plain round mirror, magazine pages, a glue gun, and scissors.
Best for: A plain mirror that needs a personality
8. Woven Magazine Baskets

Woven baskets work exactly like the newspaper version, only the magazine colours do more of the work. Roll the pages into tubes, weave them over and under a star of spokes, and bend the spokes up to form the walls. A coat of paint on one basket, like the pink and purple one in the photo, makes a set look deliberate instead of accidental. Use them for keys, fruit, or the remote controls that always go missing.
You’ll need: magazine pages, white glue, scissors, and paint if you want colour.
Best for: The classic weave, in magazine colours
9. Paper Flowers in Coiled Bowls
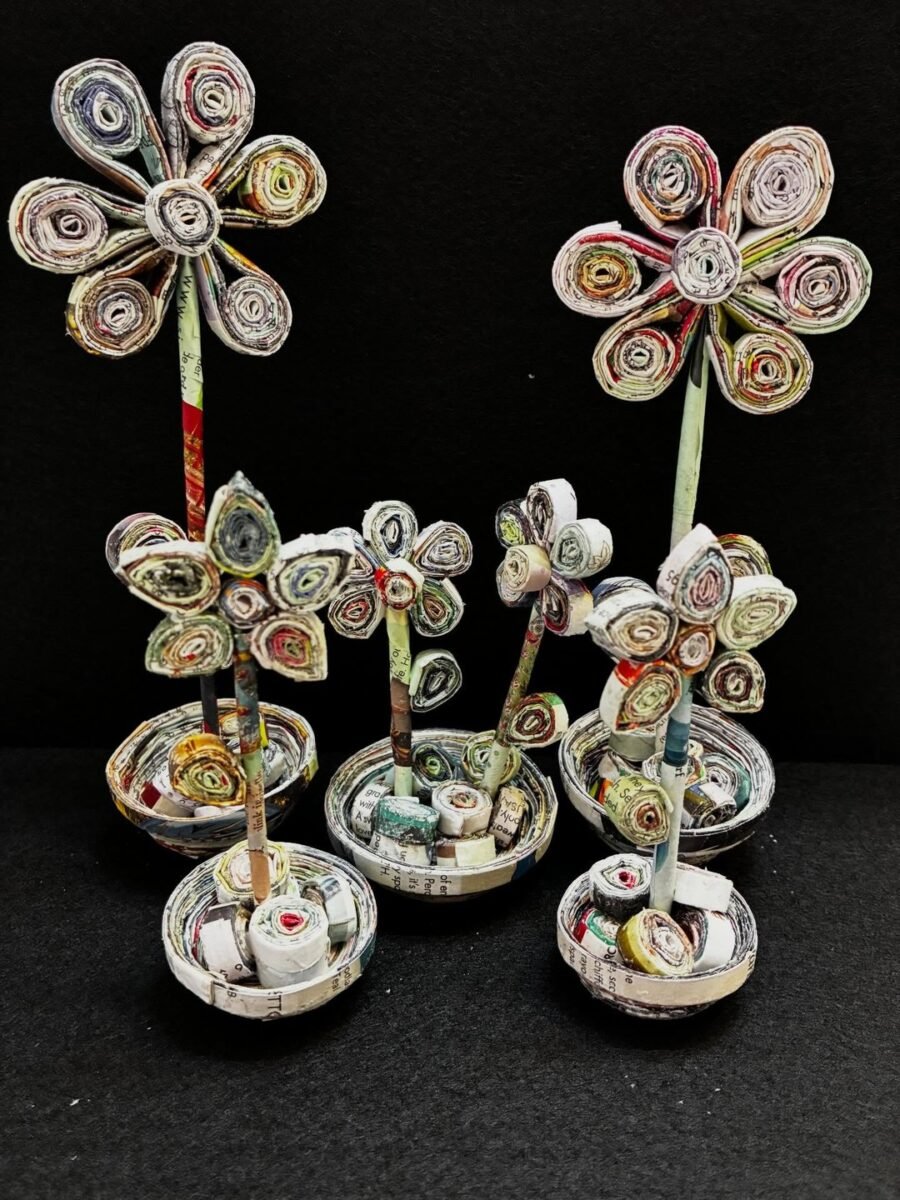
These flowers pair two skills from this list at once: spiral petals rolled like the beads in idea 2, standing in little coiled bowls like the ones in idea 1. Each flower is a cluster of rolled coils glued into petals, set on a skewer stem, and planted in its own tiny bowl. Group five or six together and they make a centrepiece with real height. They photograph beautifully against a dark background, so try them on a sideboard or a dining table.
You’ll need: magazine pages, wooden skewers, white glue, and small bowls or jars.
Best for: A table centrepiece with real height
10. Rolled-Strip Heart Wall Art
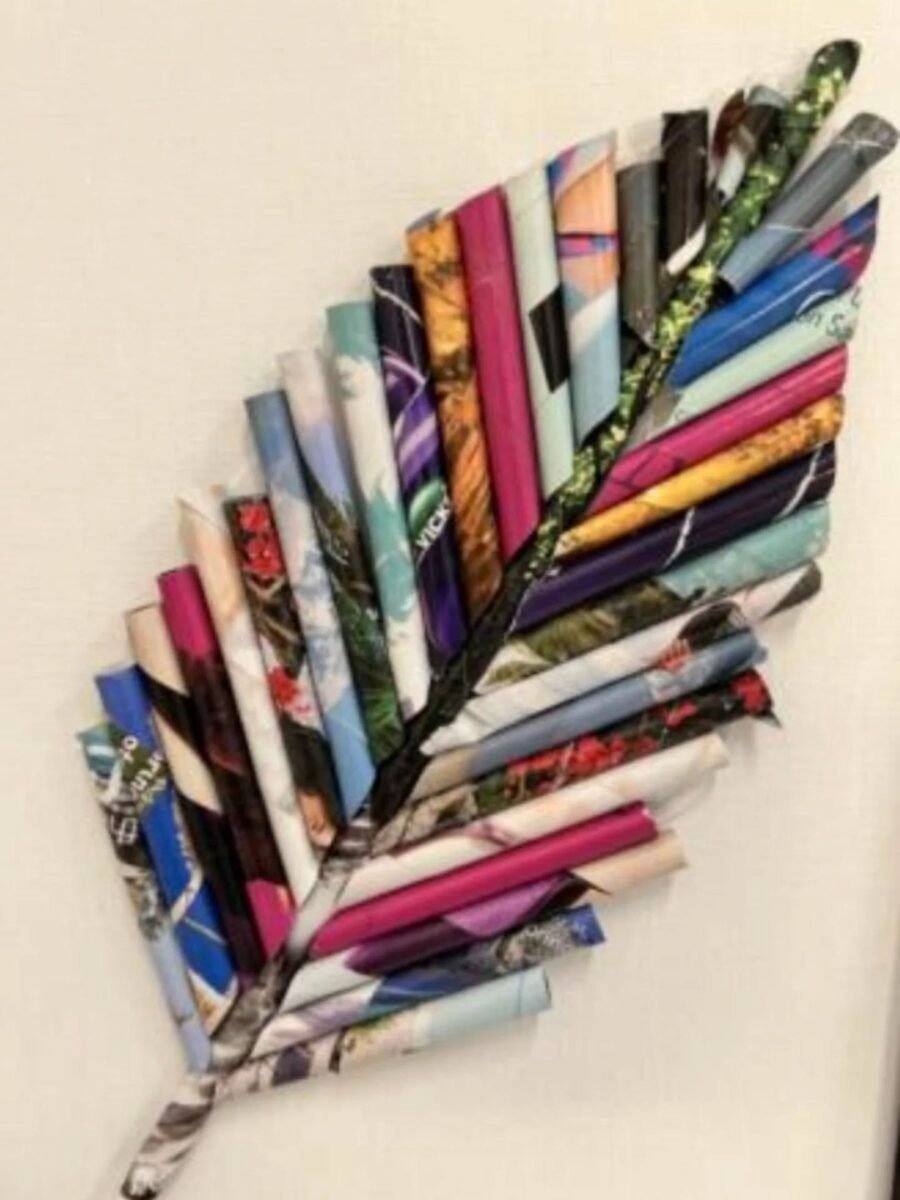
This heart is just rolled magazine strips, fanned out in a symmetrical pattern and glued to a board. The strips graduate from short to long, so the shape builds itself as you work outward from the centre, and the mixed prints give it a stained glass feel. It is the boldest wall piece in this list, and it takes one afternoon. Our diy paper decor craft ideas round up more wall pieces in the same spirit.
You’ll need: magazine pages, white glue, scissors, and a board or canvas to mount it on.
Best for: A bold wall piece from one afternoon
11. Rainbow Tube Art
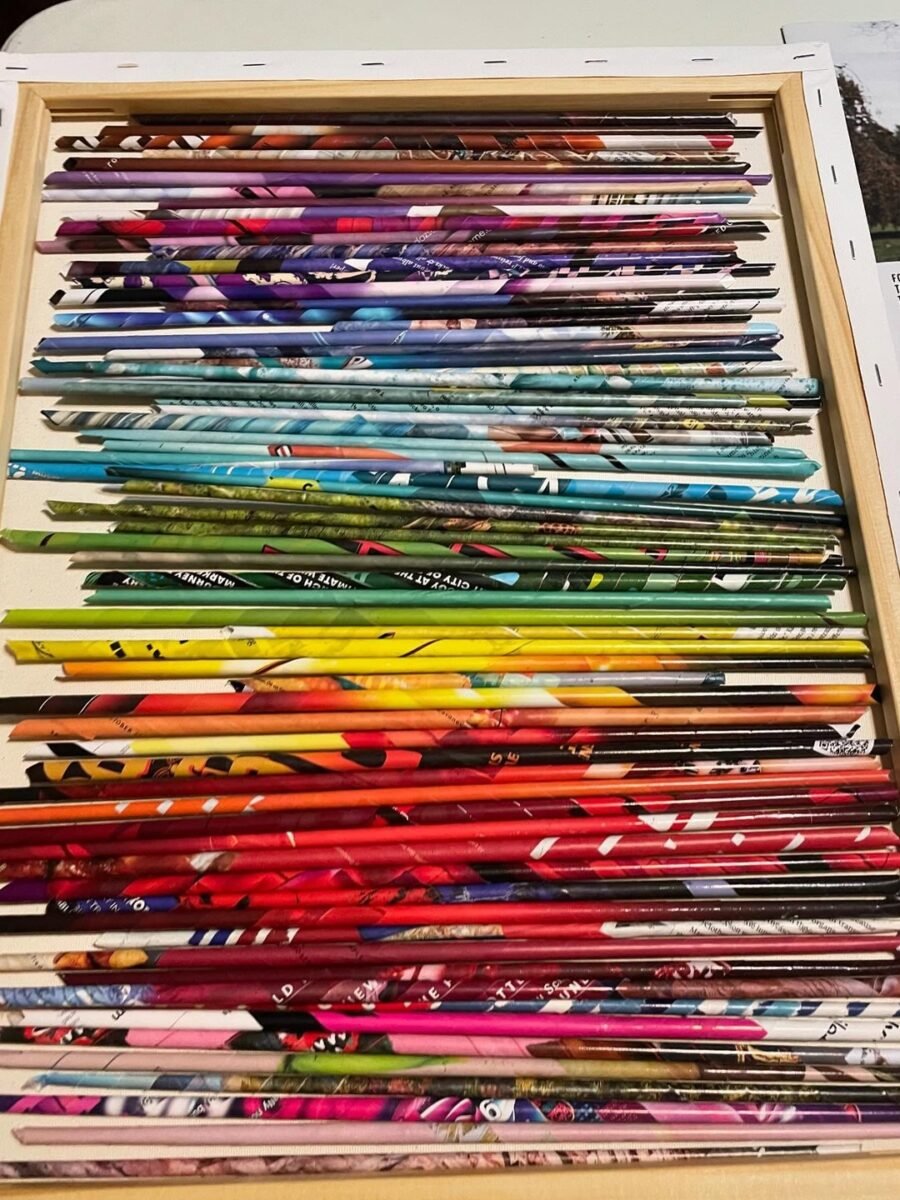
Rainbow tube art is the most satisfying project in this list to look at, and the simplest to explain. Roll magazine pages into tubes, sort them by colour, and lay them side by side in a frame from red through violet. The gradient does all the work, so the making is just rolling and sorting. It suits a child’s room, a craft room, or any plain wall that needs colour without a picture competing for attention.
You’ll need: magazine pages, white glue, scissors, and a shallow wooden tray or frame.
Best for: The most satisfying colour project here
12. Paper-Coil Vase
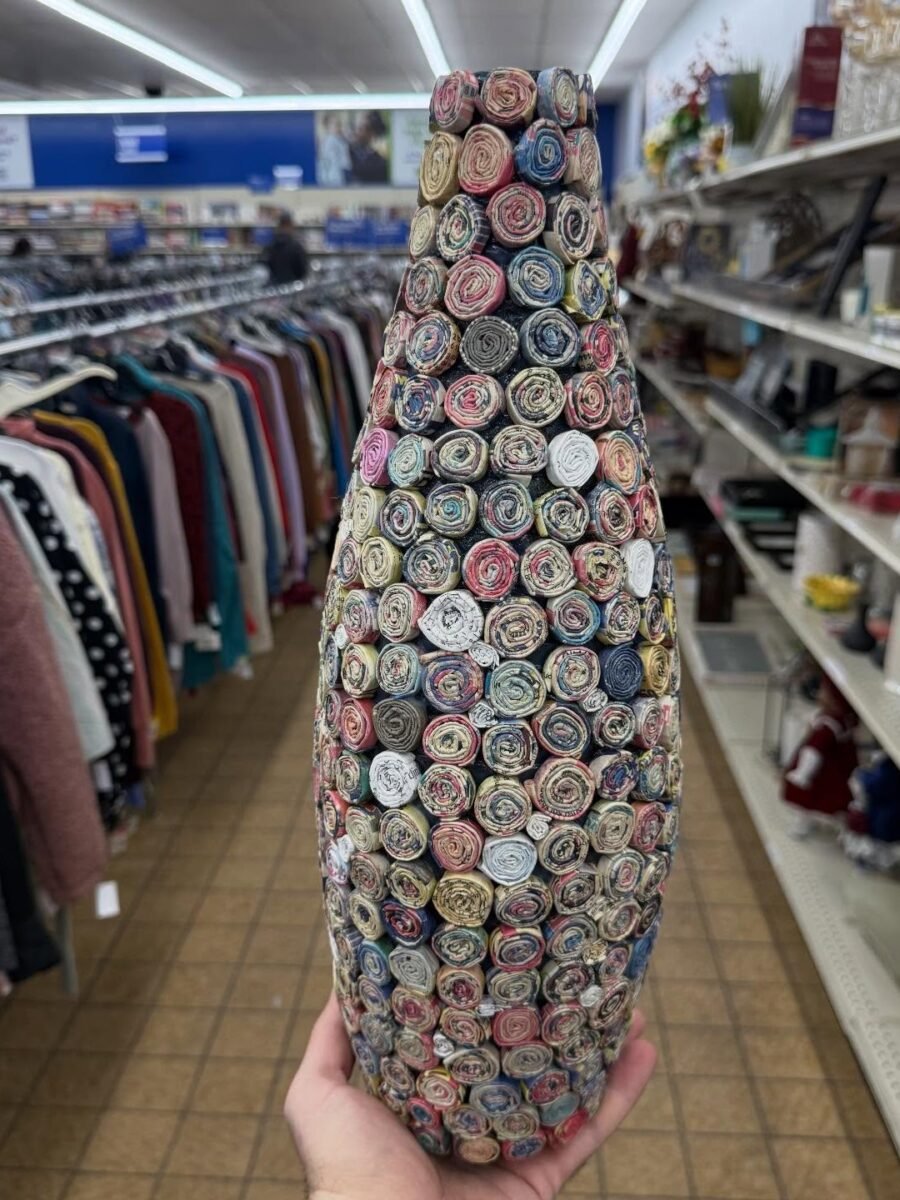
A plain vase, or even an old bottle, disappears under a mosaic of rolled magazine paper. Glue short coils all over the surface, edge to edge, until no glass shows, then seal it with varnish so it wipes clean. The vase in the photo was found in a thrift store, which is the perfect source, because the shape matters more than the finish. Fill it with dried stems or the paper flowers from idea 9, and nobody will guess what it started as.
You’ll need: a plain vase or bottle, magazine pages, white glue, and clear varnish.
Best for: A thrifted vase, made unrecognisable
Frequently Asked Questions
Can you use any magazine for these crafts?
Almost any magazine works, but glossy pages are the best. The coated paper rolls into tight coils, holds its colour, and takes varnish beautifully. Thin catalogue pages work too, though they make softer coils. Very thick card pages are hard to roll, so save those for the collage in idea 5 instead.
Do I need special glue for magazine crafts?
Plain white glue does almost everything here. It dries clear, it holds rolled paper well, and you can thin it with water to make a sealing coat. A glue stick is handy for flat collage work, and a hot glue gun helps only where you need an instant hold, like the mirror frame in idea 7. You do not need any special craft glue.
How do I stop rolled magazine paper from unravelling?
Two things stop unravelling: glue the very end of every roll properly, and press the finished piece flat while it dries. A dab of glue on the tip, held for a few seconds, is usually enough. For bowls and coasters, the sealing coat of diluted glue or varnish locks every end in place, so nothing lifts later.
Are magazine crafts safe for kids?
Yes, with normal supervision. Rolling beads and coiling strips are perfect for older children, and the mess is just paper and glue. Keep scissors and hot glue guns for adults only, and skip the varnish step for young children, or let the piece dry and varnish it yourself after they finish.
How do I seal a magazine craft so it lasts?
Brush on one or two coats of clear varnish, or white glue thinned half and half with water, and let each coat dry fully. The seal stiffens the paper, keeps the colours bright, and makes bowls and coasters wipeable. Keep finished pieces out of direct rain and away from wet windowsills, because no seal makes paper waterproof.
What is the difference between magazine crafts and newspaper crafts?
The paper is the difference. Magazines are glossy and full of colour, so they roll into bright coils and bold beads. Newspaper is soft grey newsprint, so it makes quieter, more rustic pieces. The skills are the same, and our newspaper craft ideas use the same rolling and coiling on softer paper, so try both and keep whichever look suits your home.
Final Thoughts on Craft Ideas With Magazines
Twelve ideas, and they all start the same way: a pile of old magazines, a pair of scissors, and a bottle of glue. The three builds give you the skills, rolling, coiling, and gluing, and the other nine ideas are just new ways to use them. Nothing here needs buying, and nothing needs talent, only an evening and a clear table.
Start tonight with the beads in idea 2, because one magazine makes a whole jar of them. By the weekend you will have coasters on the table, a bowl by the door, and a much smaller pile of old magazines. If you enjoy giving old things a second life, our upcycle decor projects round up more ideas in the same spirit.

