

Every piece in this list was once somebody’s rubbish: a honey colored dresser nobody wanted, a ladder with paint on its rungs, snack cans in the recycling, pallets behind a shop. Upcycling is simply the habit of looking at that pile twice.
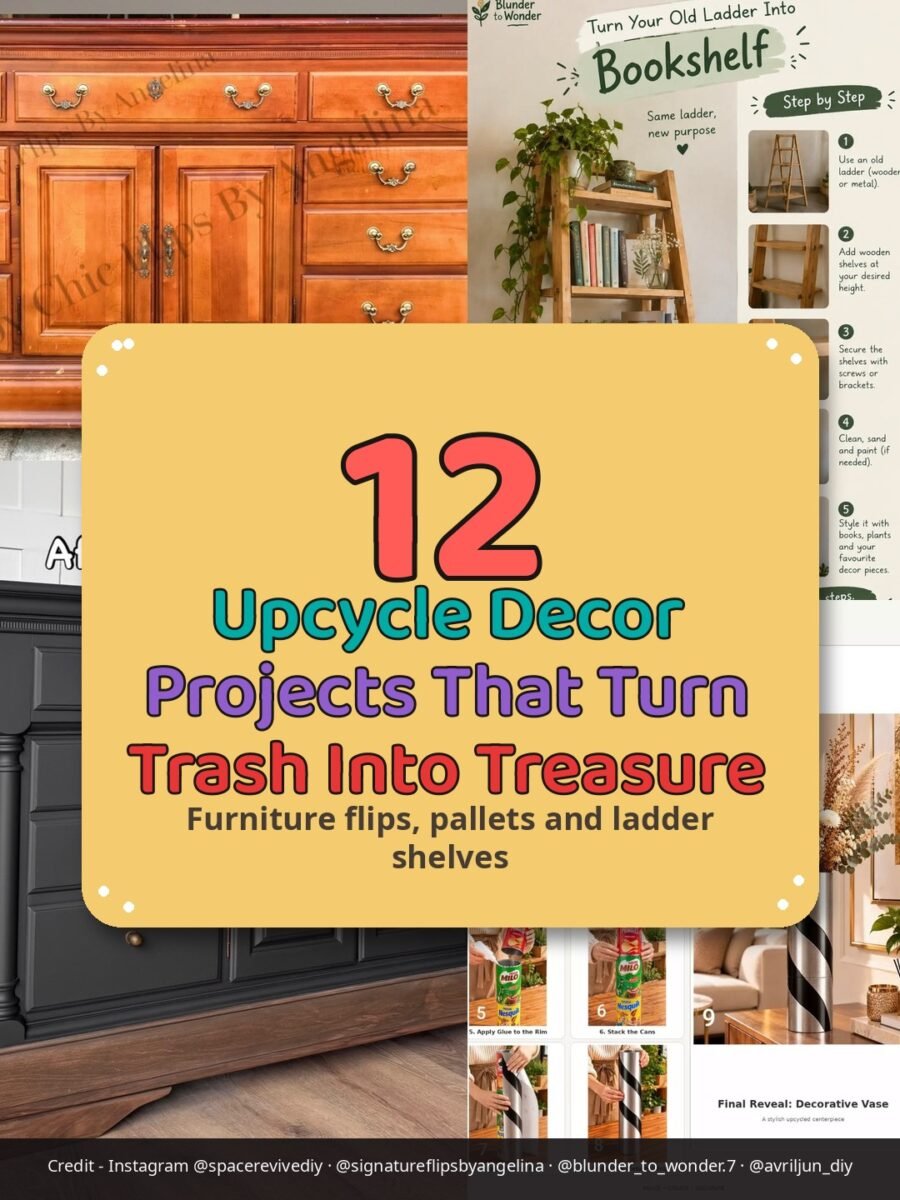
These twelve upcycle decor projects start with three builds: the classic thrifted dresser flip, a ladder turned bookshelf, and a tall vase stacked from tin cans. After that come pallets three ways, an ironing board that holds mugs now, and a gumball machine growing a succulent.
You do not need a workshop. You need a degreaser, sandpaper, paint, and the patience to let coats dry. Solid wood and honest wear are what to hunt for; wobble and water damage are what to walk past.
Pick the project whose starting object you already own. Most of us are one garage corner away from the first one.
Quick Picks
- Start here: The Upcycled Can Vase (idea 3)
- Biggest transformation: The Thrifted Dresser Flip (idea 1)
- Most charming: An Old Ladder Into a Bookshelf (idea 2)
1. The Thrifted Dresser Flip
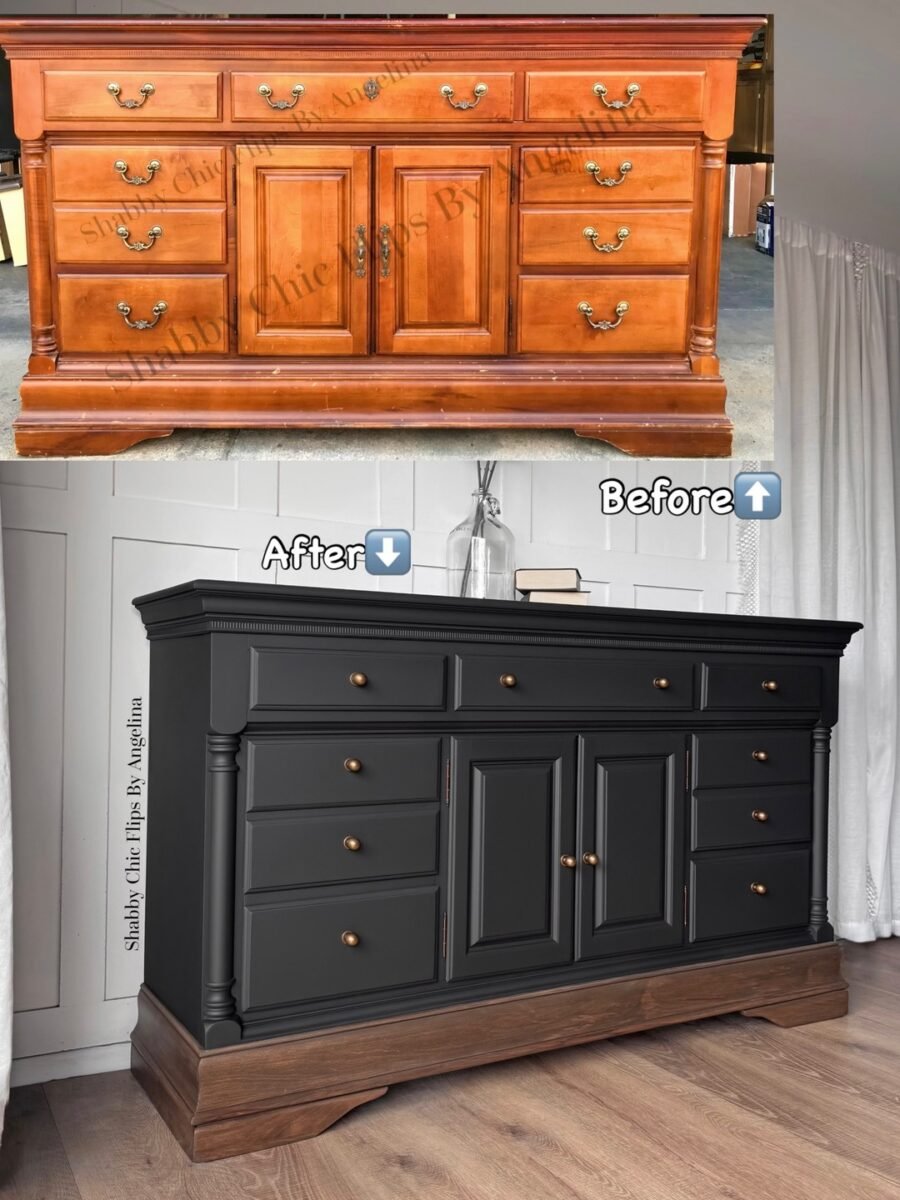
BuildOne weekendThe gateway upcycle
The furniture flip is the gateway upcycle: one solid old dresser, a weekend, and paint. This honey brown buffet went matte black and looks like it cost ten times the thrift store price. The method below is the same for almost any wooden piece you rescue.
Materials Needed
- A solid wood thrifted dresser or sideboard
- Degreaser and a cloth
- Sandpaper, 120 and 220 grit, or an orbital sander
- Primer made for glossy surfaces
- Furniture paint in your color
- New knobs or pulls
- A clear topcoat
How to Make It
- Clean the whole piece with degreaser; thrift furniture carries decades of polish and kitchen air.
- Remove the hardware and fill any dings or old holes with wood filler.
- Sand until the shine is gone and the surface feels matte, then wipe away every speck of dust.
- Prime, especially over dark stain or any knots that might bleed through.
- Paint two thin coats, letting each dry fully; thin coats are what look professional.
- Fit new hardware, the single fastest style change a dresser can get.
- Seal with a topcoat on the top surface at least, where cups and keys will land.
Tip: Keep the wood top. Painting the body and sanding the top back to natural wood gives the expensive two tone look and saves paint.
2. An Old Ladder Into a Bookshelf
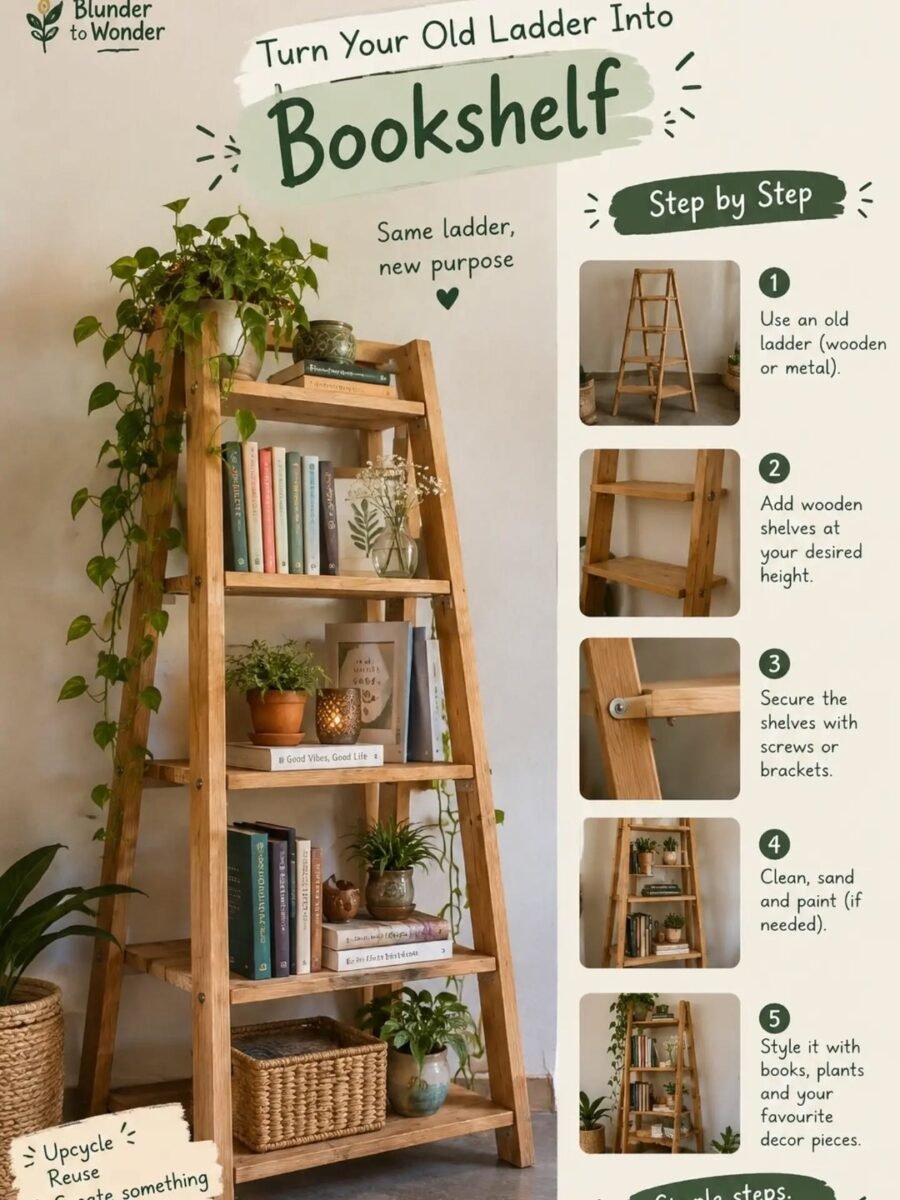
BuildAbout 1 hourGarage find to furniture
An old wooden ladder already looks like a shelf that lost its wall. Stand it up, add boards across the rungs, and it becomes the most charming bookshelf in the house for the price of a few planks.
Materials Needed
- An old wooden ladder, A frame or straight
- Wooden planks cut to rung widths
- Screws and a drill
- Sandpaper
- Wood stain or paint
- Brackets if wall mounting a straight ladder
How to Make It
- Clean the ladder and check every rung for wobbles; tighten or glue any loose joints.
- Sand rough spots and splinters, keeping the worn character.
- For an A frame ladder: open it, level it, and lay planks across the matching rungs on both sides.
- For a straight ladder: fix it to the wall with brackets at a slight lean, then rest planks across the rungs.
- Screw the planks down so nothing slides when books lean.
- Stain or paint the planks to match the ladder, or contrast them on purpose.
- Style it: heavy books low, plants and baskets up high.
Tip: A frame ladders stand on their own and move rooms easily. Straight ladders against a wall hold more. Choose by the space, not the ladder.
3. The Upcycled Can Vase
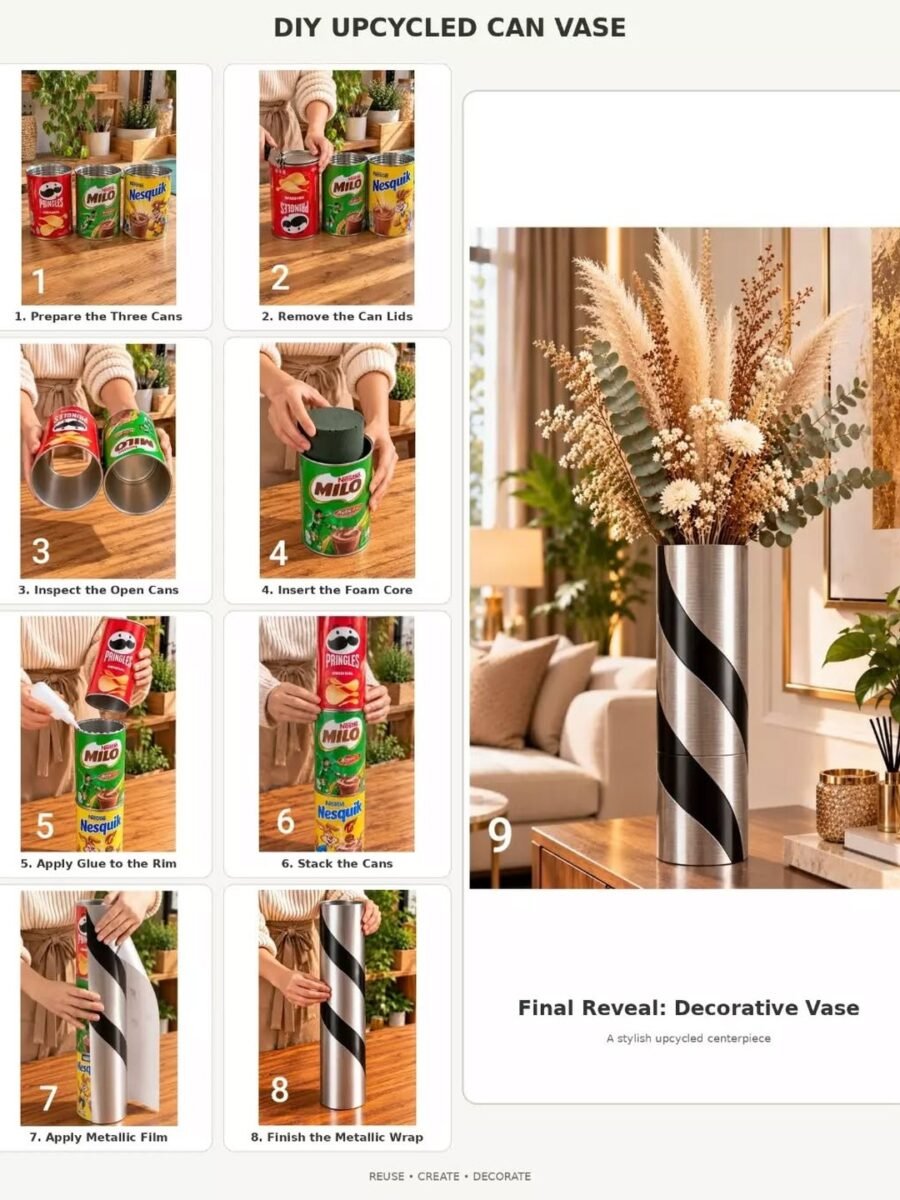
BuildAbout 30 minutesRecycling bin to statement vase
Three empty snack cans, stacked and wrapped, become a tall striped vase that nobody believes started in the recycling bin. The height is the trick: stacked cans give you a statement vase size that costs nothing.
Materials Needed
- Three empty cans of similar width, washed and dried
- Strong craft glue or a glue gun
- A piece of foam or cardboard for the inside base
- Metallic wrap, contact paper or fabric
- Scissors
- Dried stems or pampas for styling
How to Make It
- Wash and dry the cans thoroughly and remove the labels.
- Check the rims for sharp edges and fold any sharp lip inward with pliers.
- Glue the cans together in a stack, mouth to base, and let the join set fully.
- Add foam or a cardboard disc inside the top can to hold stems at the right height.
- Wrap the whole stack tightly in metallic film, contact paper or fabric, smoothing bubbles as you go.
- Trim the wrap neatly at the top rim and base.
- Fill with tall dried stems; height is what makes the vase read expensive.
Tip: Weight the bottom can with a handful of pebbles before stacking. A tall vase that cannot tip is a vase that survives.
4. A Pallet Shelf for the Bathroom
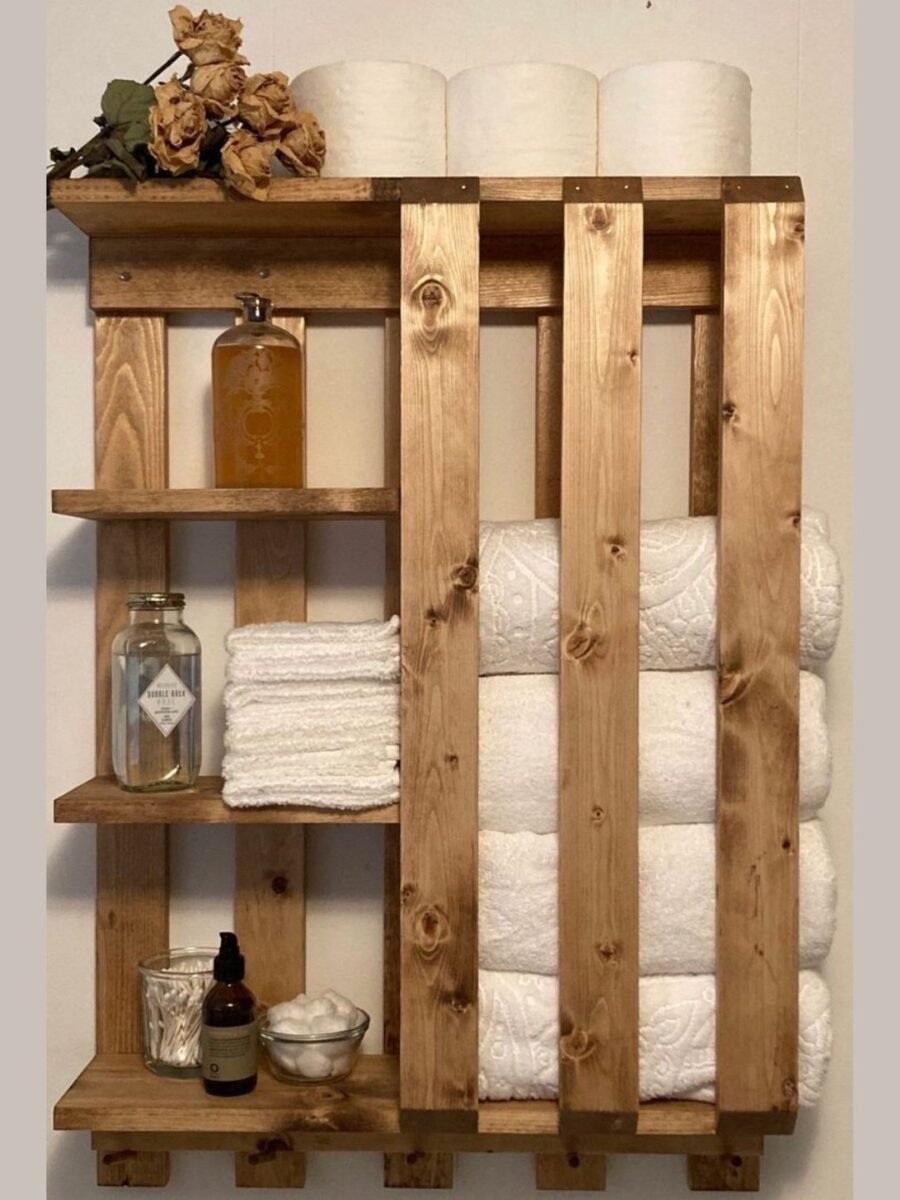
A pallet already has shelves hiding in it; stand it against the bathroom wall and the gaps hold towels, rolls and bottles in rustic rows. Sand it well, bathrooms and splinters should never meet. For more ways to use the same wood, see our diy pallet bed ideas, pallets scale up beautifully.
You’ll need: one heat treated pallet, sandpaper, screws, and wall fixings.
Best for: Small bathrooms with zero storage
5. A Bookshelf From Pallet Wood
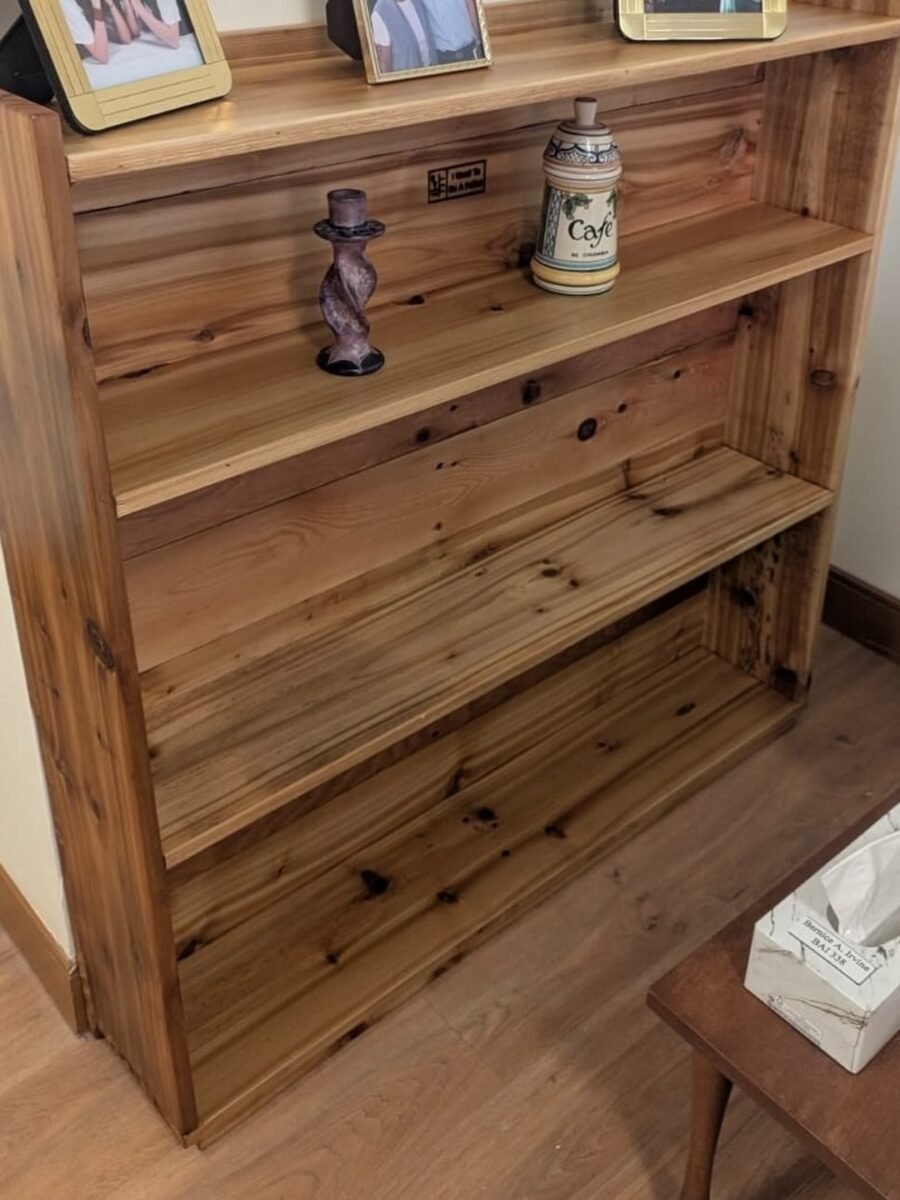
Pallet wood, pulled apart and rebuilt, makes a bookshelf with more character than any flat pack. The boards arrive pre weathered, so the finish is mostly sanding. Take pallets apart with a pry bar and forgive the odd split board; there is always another pallet.
You’ll need: two or three pallets, a pry bar, nails or screws, and patience.
Best for: Renters who need a bookcase for free
6. An Ironing Board That Holds Mugs Now
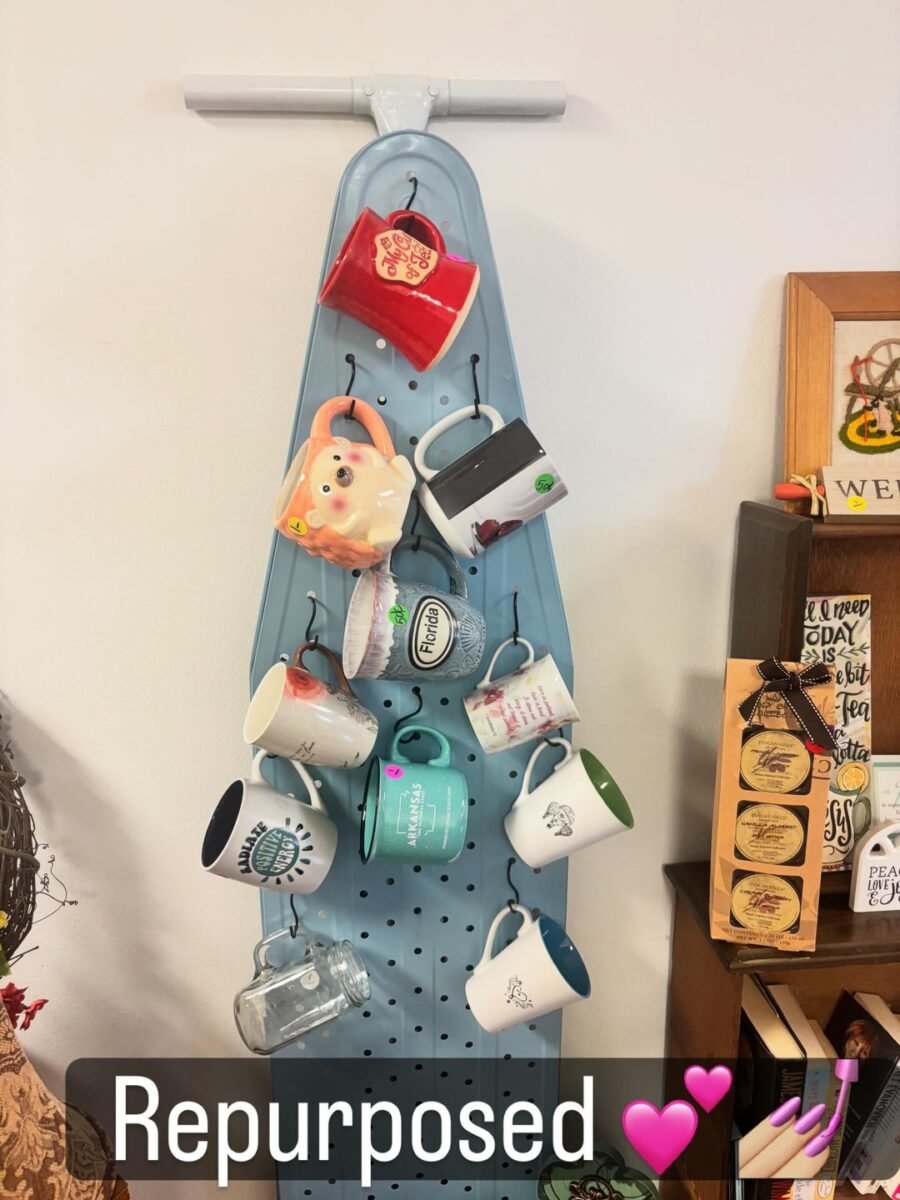
The perforated top of a metal ironing board is a pegboard that was hiding in the laundry room. Mount it vertically, add hooks through the holes, and a mug collection becomes kitchen art. It is the kind of upcycle that makes visitors laugh, then ask where you found it.
You’ll need: a vintage metal ironing board, hooks, and strong wall fixings.
Best for: Mug collectors and small kitchens
7. Painted Bottles With Dried Stems
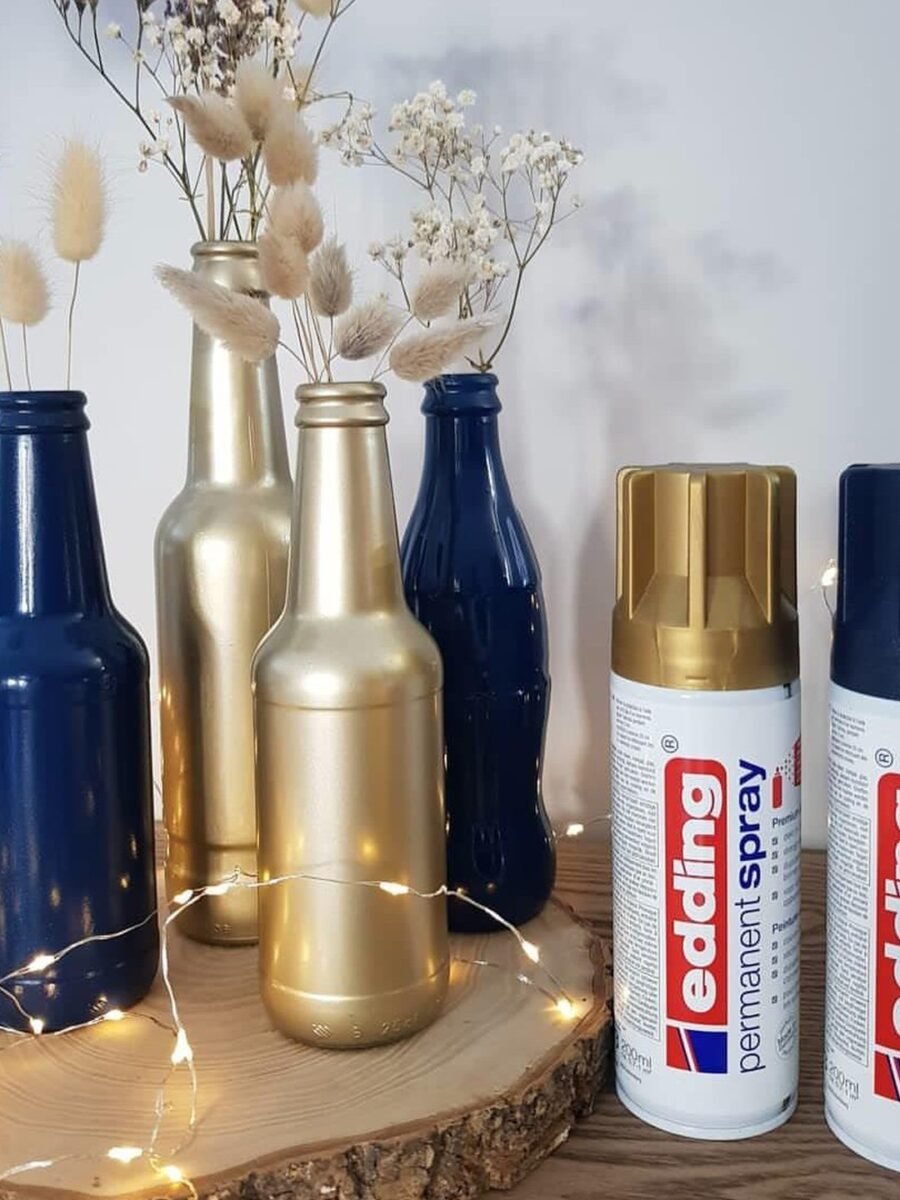
Spray paint turns mismatched bottles into a set: gold and navy here, standing on a wood slice with fairy lights. Group bottles in odd numbers, vary the heights, and add dried stems. The same painting patience makes jars glow too, as our epsom salt mason jar luminaries show.
You’ll need: empty glass bottles, spray paint in two colors, and dried grasses.
Best for: Tables that need height and shine
8. A Gumball Machine Terrarium
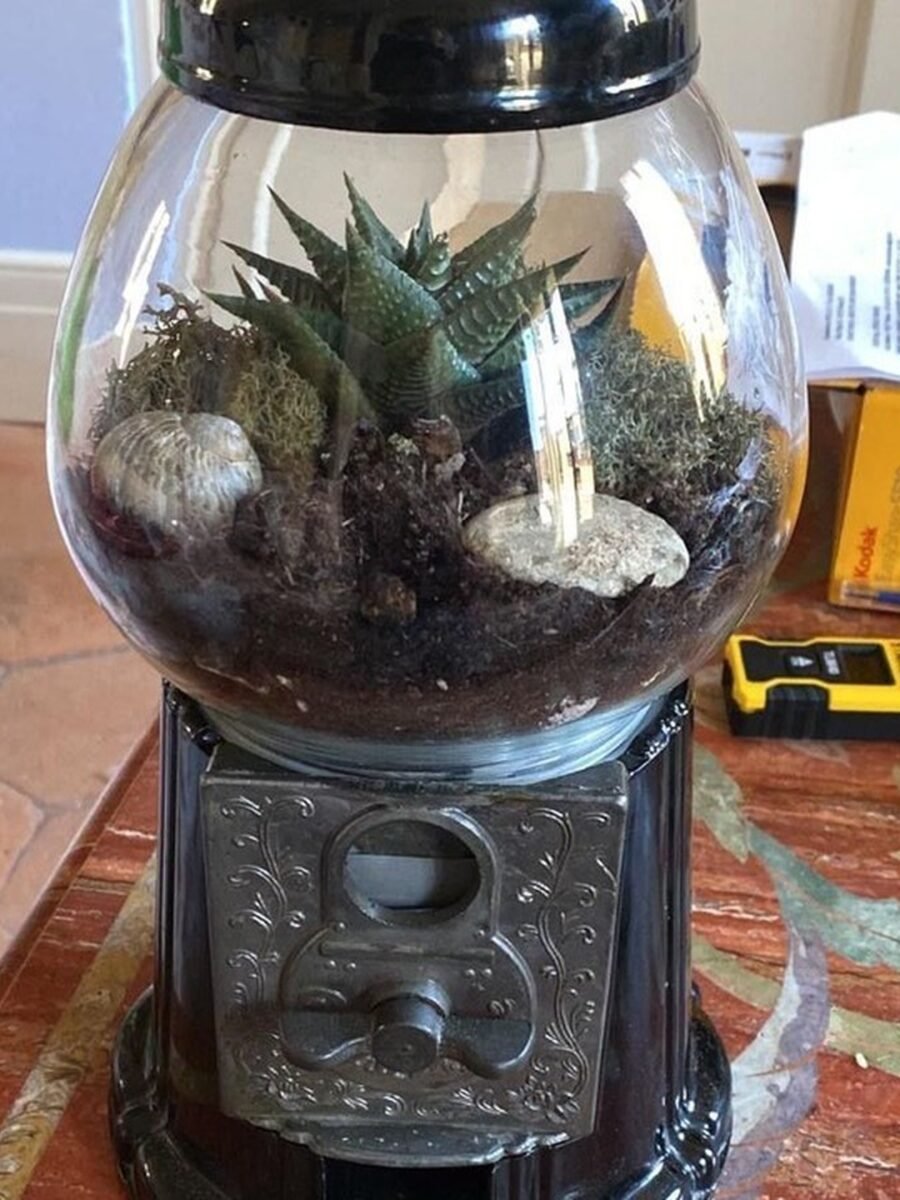
The glass globe of an old gumball machine is a terrarium waiting for soil. A succulent, moss and two stones later, the coin slot is pure decoration. Keep it out of strong sun, the globe magnifies light, and water with a spoon; this garden drinks very little.
You’ll need: a vintage gumball machine, soil, moss, stones, and one small succulent.
Best for: Desks, shelves and plant people with humor
9. A Jewelry Box Flip
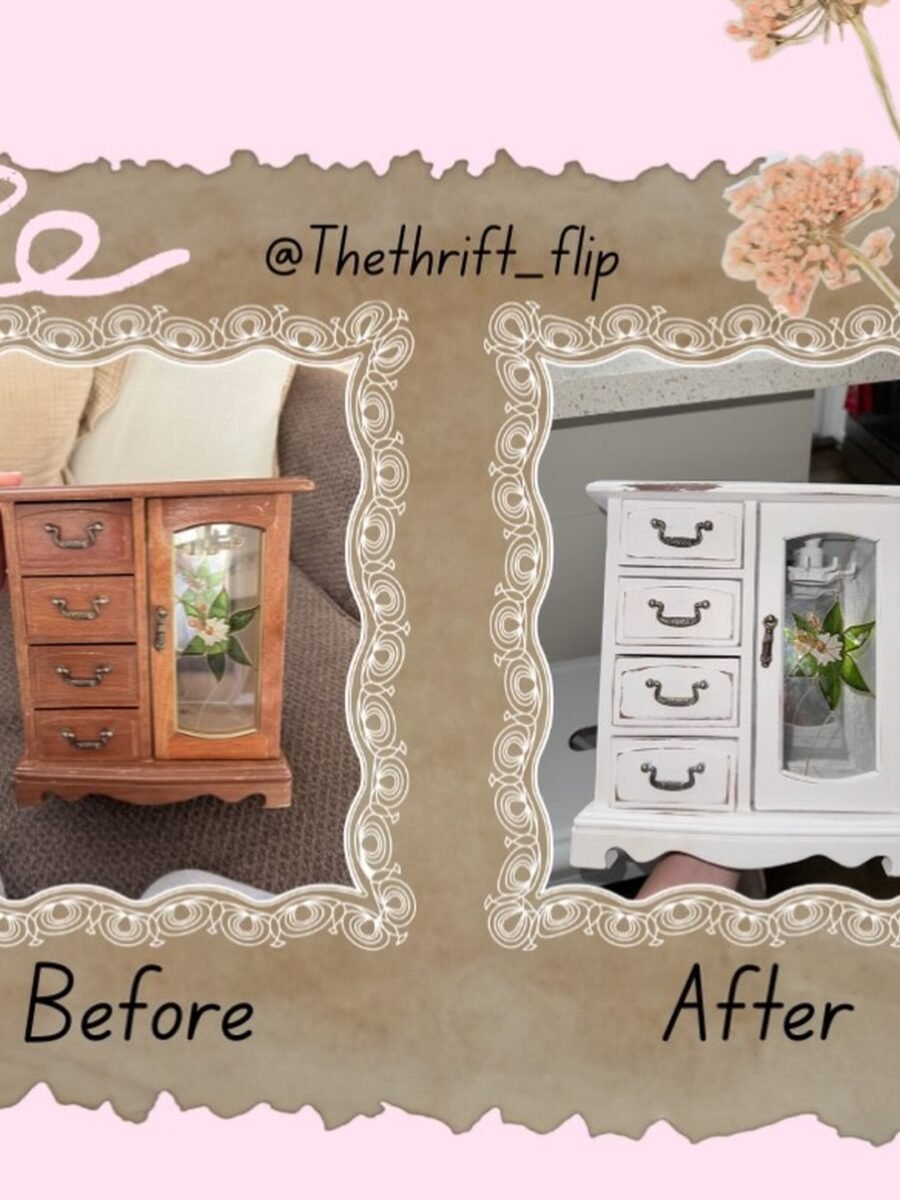
Small flips teach big skills. This wooden jewelry box went from medium brown to distressed white in an afternoon, handles kept, character kept. If the dresser flip tempts you but the size scares you, flip three of these first; the method is identical, the courage required is not.
You’ll need: a thrifted jewelry box, sandpaper, paint, and an hour.
Best for: A first flip in a single afternoon
10. Their Very First Flip
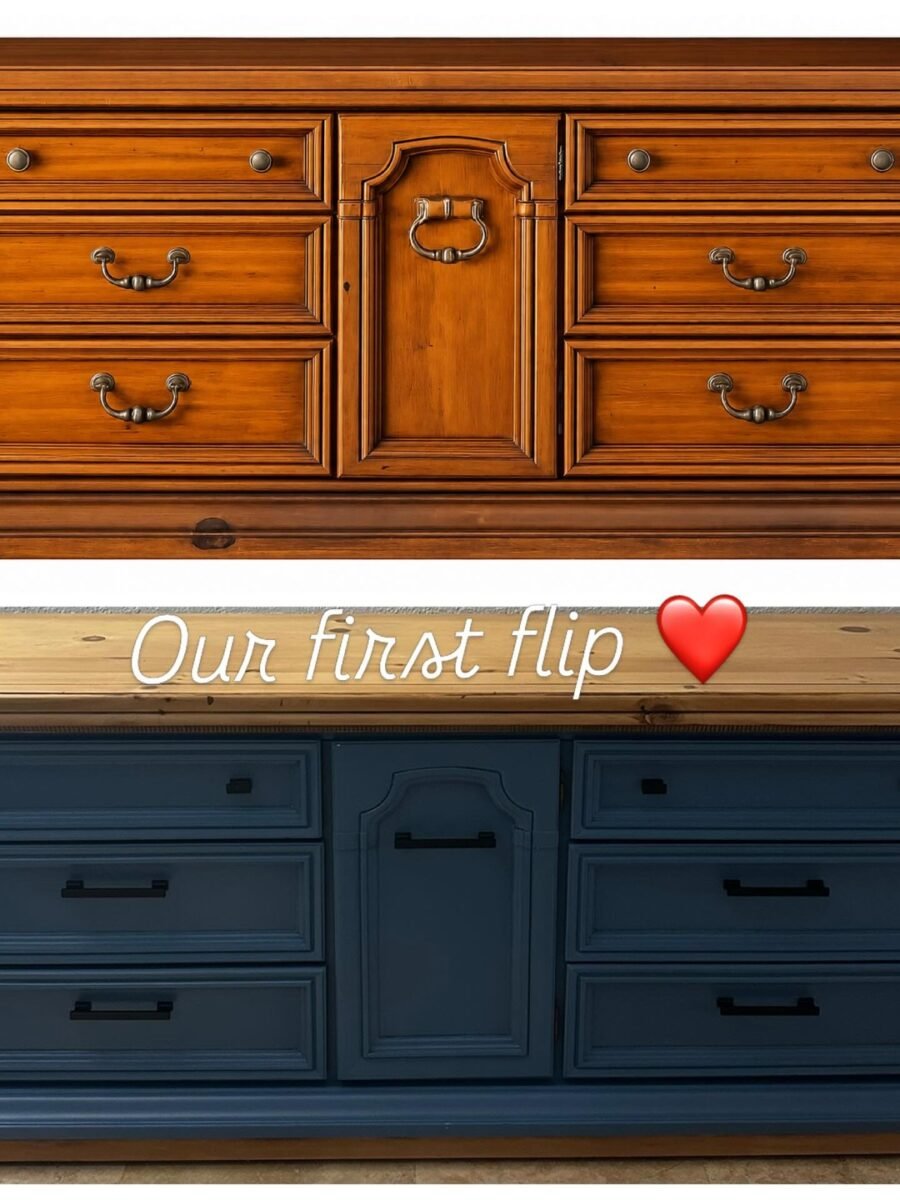
Every flipper has a first piece, and this honey pine dresser, now navy with black pulls, is exactly what a first flip should be: solid, dated, and transformed by color and hardware alone. The before and after sit side by side in the photo. Yours will too, so take the before picture before you touch anything.
You’ll need: one dated dresser, navy paint, black pulls, and nerve.
Best for: Anyone attempting flip number one
11. Asymmetrical Shelves From Reclaimed Planks
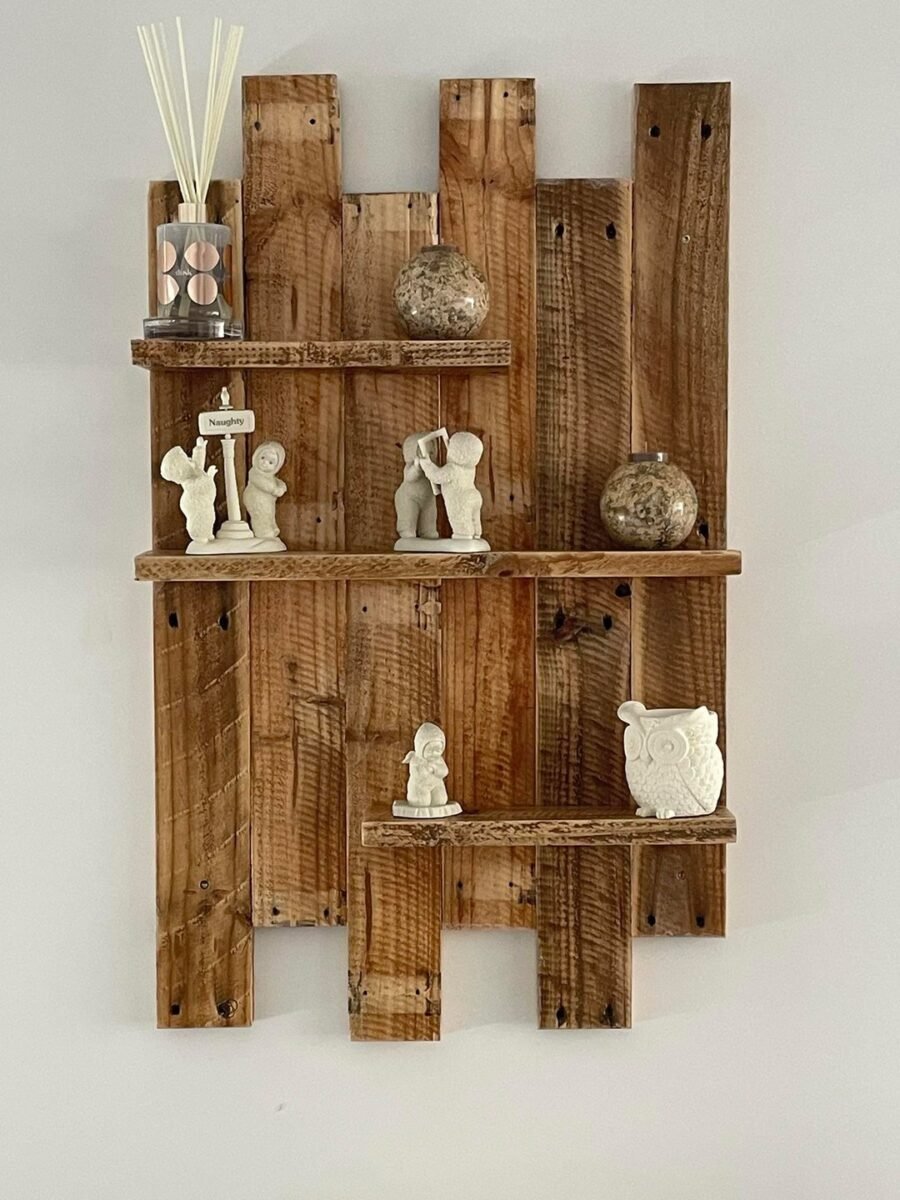
Mixed length planks, mounted asymmetrically, turn a lumber pile into the most interesting wall in the room. The uneven rhythm is the design, so there is nothing to match and nothing to waste. Style each shelf sparsely; reclaimed wood is already busy.
You’ll need: reclaimed planks in mixed lengths, brackets, and a level.
Best for: Bare walls and leftover lumber piles
12. Tall Shelving Built From Pallets
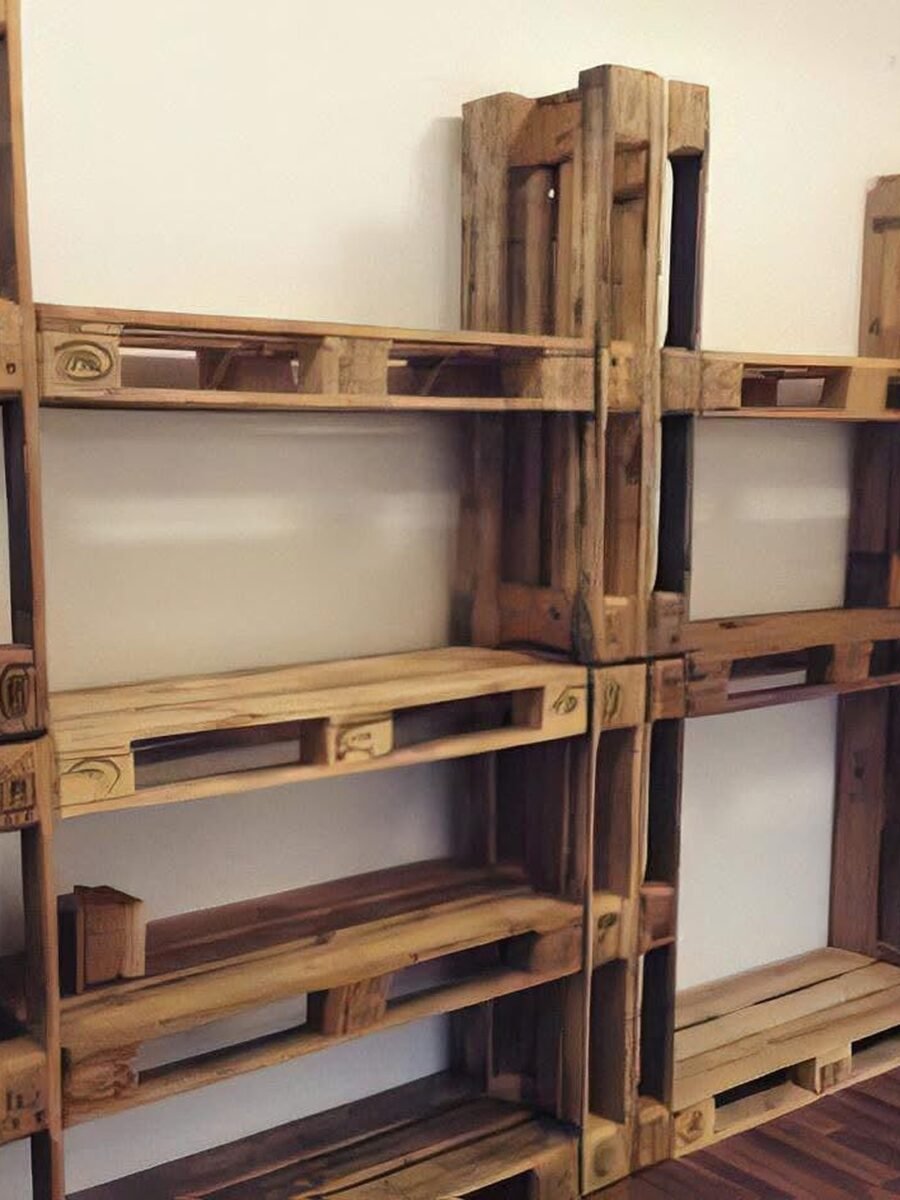
Stack and join pallets and the shelving builds itself, level by level. Left raw, it suits garages, studios and plant corners; painted, it walks straight into a living room. Anchor tall units to the wall, always. Pallet towers are sturdy right up until they are not.
You’ll need: several pallets, screws, sandpaper, and a wall to anchor to.
Best for: Garages, studios and plant corners
Frequently Asked Questions
What can I safely upcycle for home decor?
Solid wood furniture, pallets in good condition, glass bottles and jars, ladders, tin cans, old frames and wooden crates are the reliable starters. Avoid anything with mold, strong chemical smells, crumbling particleboard or, for pallets, chemical treatment stamps: choose heat treated (HT) pallets only.
What paint works for furniture flips?
Paint is the classic flip finish: clean, sand, prime, two thin coats. Stain suits good wood grain. Peel and stick paper, fabric and metallic wrap cover surfaces paint cannot fix. Whatever you choose, preparation decides the result far more than the product does.
Where should a beginner start with upcycling?
Start where the mistakes are cheap: a small end table, a jewelry box, a ladder shelf or a can vase. Small pieces teach cleaning, sanding and painting in one afternoon, and they sell or gift easily when they work. Save the big dresser for your second or third project.
How do I spot a good thrift store piece to flip?
Solid wood, dovetail drawers, dovetailed or mortise joints, a maker’s mark, and weight. Heavy usually means real wood. Wobbly legs and small dings are fine; warped frames, deep water damage and missing drawers are walks away, unless the piece is nearly free and you want the practice.
Can upcycled furniture actually sell?
Yes, when it is done well, and the marketplaces are full of flippers proving it. Solid wood pieces in current colors with good photos sell best. Start with pieces for your own home, and let selling grow out of the extras, so the hobby pays you back slowly instead of pressuring you.
How do I get smells out of thrifted furniture?
Clean everything with degreaser and a day of fresh air; sunlight is a kind sanitizer. A wipe of white vinegar helps with musty drawers, and an open box of baking soda inside a closed piece absorbs smells over a few days. If a smell survives all that, paint seals in more than color.
Final Thoughts on Upcycle Decor Projects
Upcycling is the rare decor skill that makes your home better and your street cleaner at the same time. Every piece on this list was headed for a bin, a bonfire or a lifetime in a garage, and every one of them is now the interesting thing in somebody’s room.
Start with one piece this week. The thrift store is full of furniture having a bad decade; you can give it a better one.

