

There is something special about a tree dressed in ornaments you made yourself. Every one of them carries a memory, a small handprint, an afternoon at the kitchen table, a walk that ended with a pocket full of pinecones. These diy christmas ornaments are all makeable at home with simple supplies and an evening to spare.
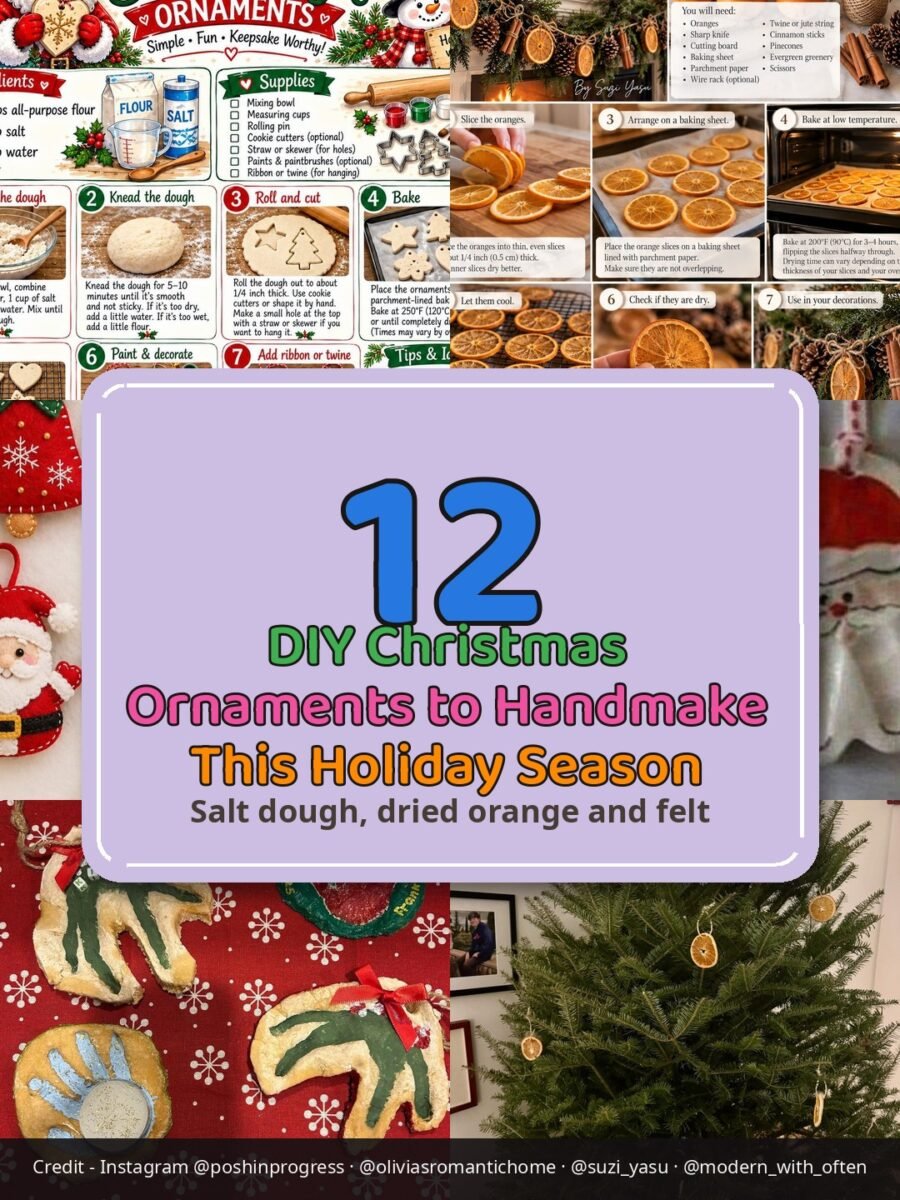
This list starts with three full builds, classic salt dough ornaments, dried orange slice ornaments, and stitched felt ornaments, then nine more ideas from handprint keepsakes to clear baubles. If you like making things for the season generally, our cozy diy christmas candle ideas bring the same handmade feeling to the mantel and table.
A few practical notes before you start. Salt dough bakes low and slow, dried orange slices must be fully dry before you store them, and felt ornaments need only a needle and thread. None of these ornaments are edible, and salt dough in particular should be kept away from dogs, who can get very sick from eating it.
Start with the salt dough. Once you have a tray of shapes baking, the rest of the list is mostly painting, stitching and threading, and your tree will look handmade in the best possible way.
Quick Picks
- Start here: Salt Dough Christmas Ornaments (idea 1)
- Best for kids: The Santa Handprint Keepsake (idea 4)
- Best natural look: Dried Orange Slices on the Tree (idea 6)
1. Salt Dough Christmas Ornaments
BuildAbout 30 minutes plus bakingGreat for kids
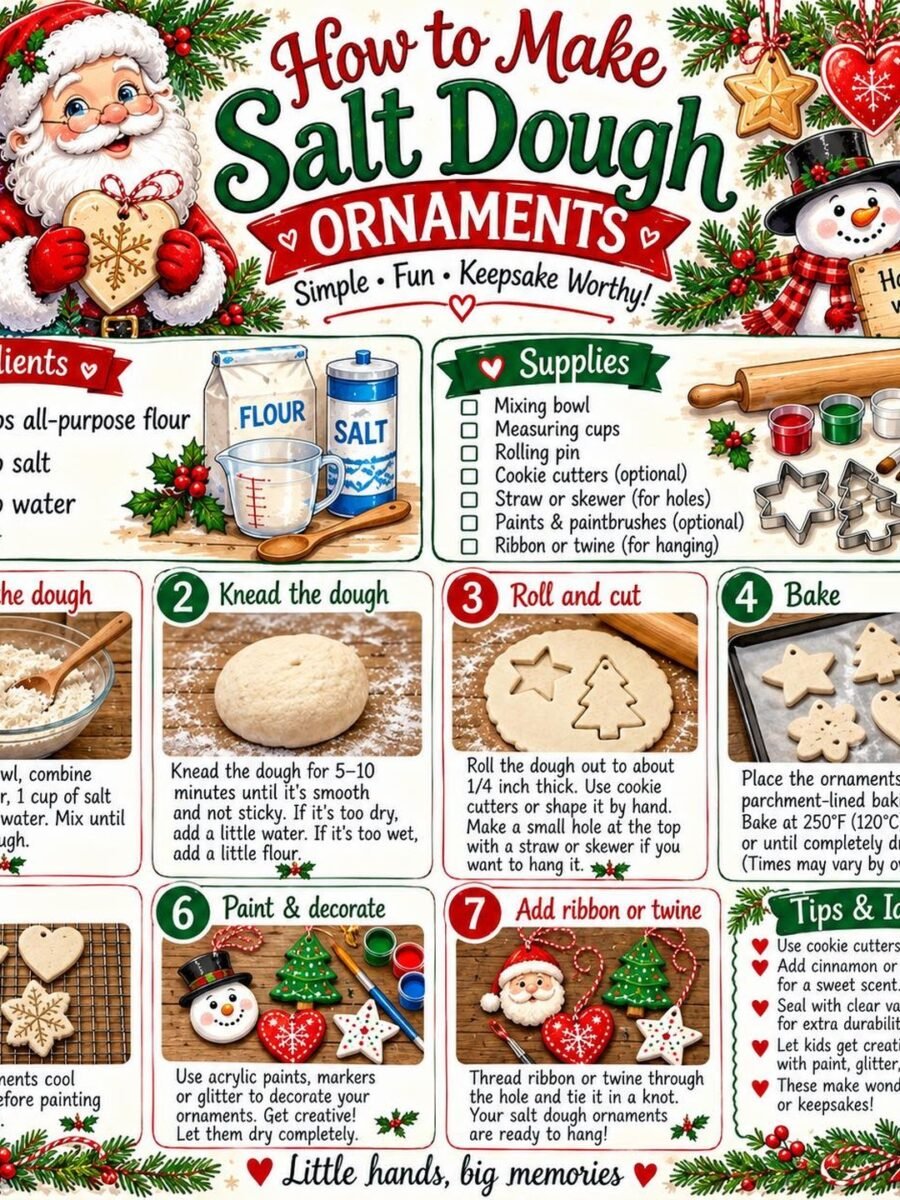
The classic, and still the best first ornament to make. Flour, salt and water become a dough you roll, cut and bake, then paint however you like. For more salt dough inspiration, see our salt dough christmas ornaments collection.
Materials Needed
- 2 cups all purpose flour
- 1 cup salt
- 1 cup water
- A mixing bowl, measuring cups and a rolling pin
- Cookie cutters in Christmas shapes
- A straw for poking hanging holes
- Paints, ribbon and a sealant such as clear varnish
How to Make It
- Mix the flour, salt and water in a bowl until a firm dough forms, then knead it on a floured surface for about five minutes.
- Roll the dough to about a quarter inch thick and cut shapes with cookie cutters.
- Poke a hole near the top of each shape with a straw, big enough for ribbon to pass through later.
- Bake at 250 degrees F for 2 to 3 hours, until the ornaments are dry all the way through.
- Let them cool completely on a wire rack before you touch them.
- Paint the fronts, let the paint dry, then seal with clear varnish so the colors last.
- Thread ribbon through the holes and hang.
Tip: Bake low and slow. A hot oven puffs and cracks salt dough, while 250 degrees F dries it evenly. If an ornament still feels cool or soft in the middle, give it another 30 minutes.
2. Dried Orange Slice Ornaments
BuildAbout 20 minutes plus dryingNo sewing needed
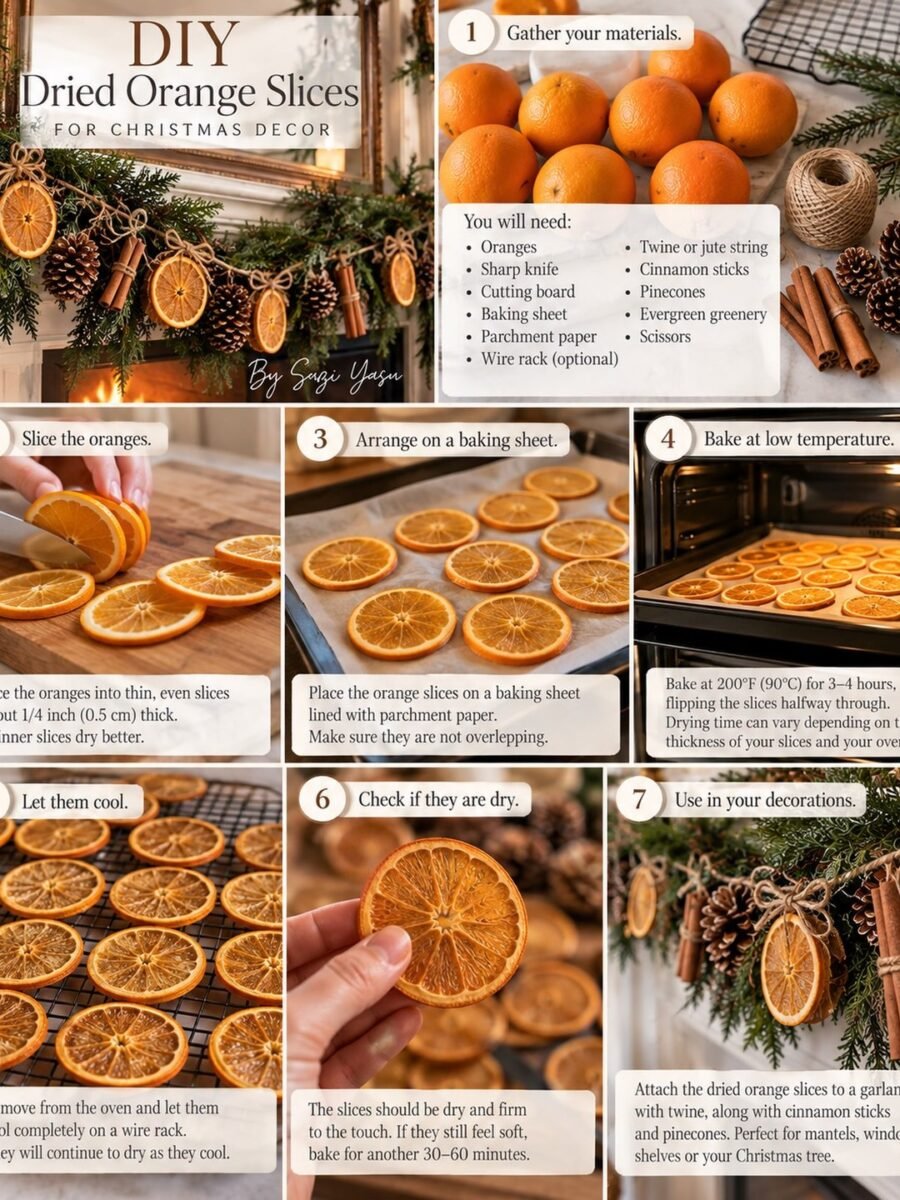
Dried orange slices glow like stained glass when the tree lights hit them, and they cost almost nothing. Slice, bake low, cool, and you have ornaments that smell faintly of Christmas for weeks.
Materials Needed
- Fresh oranges
- A sharp knife and a cutting board
- A baking sheet lined with parchment
- A wire cooling rack
- Twine or ribbon for hanging
- Cinnamon sticks, pinecones and evergreen sprigs for decorating
How to Make It
- Slice the oranges into thin rounds, about a quarter inch thick, and pat them dry with a towel.
- Arrange the slices on the parchment lined baking sheet without overlapping.
- Bake at 200 degrees F for 3 to 4 hours, flipping the slices halfway through.
- Check that the slices are dry and firm, with no soft or damp spots.
- Cool completely on a wire rack.
- Thread twine through the center of each slice, or tie a cinnamon stick to the back with twine.
- Hang on the tree, or use the slices in garlands and wreaths.
Tip: Slices that feel even slightly soft will mold in storage. If in doubt, bake them longer. Fully dried slices keep for a season or more in a dry box with tissue paper.
3. Felt Christmas Ornaments

BuildAbout 30 minutes eachBeginner friendly
Felt ornaments are soft, unbreakable and endlessly repeatable. Cut two matching shapes, stitch the edges, stuff lightly and add a hanger, and you have a set that survives small children, pets and many Christmases.
Materials Needed
- Felt sheets in red, green, white and cream
- Embroidery thread in matching and contrast colors
- A needle and sharp scissors
- A small amount of polyester stuffing
- Ribbon or twine for hangers
- Buttons, beads or sequins for faces and details
How to Make It
- Cut two matching shapes from felt for each ornament, a star, bell, tree, mitten or gingerbread person.
- Stitch the face and details onto the front piece first, while it is still flat and easy to hold.
- Pin the two pieces together, wrong sides facing in.
- Sew around the edge with a blanket stitch, leaving a small gap at the top.
- Stuff lightly through the gap, just enough to give the ornament shape, then sew it closed.
- Add a ribbon loop at the top and hang.
Tip: Use a blanket stitch around the edge instead of a running stitch. It looks neat, it shows off a contrast thread color, and it keeps the felt edges from fraying.
Printable Bundle
Christmas Printable Bundle
Christmas planner, 24 advent activity cards, 36 gift tags, handmade labels, Santa letter and family games.
4. The Santa Handprint Keepsake
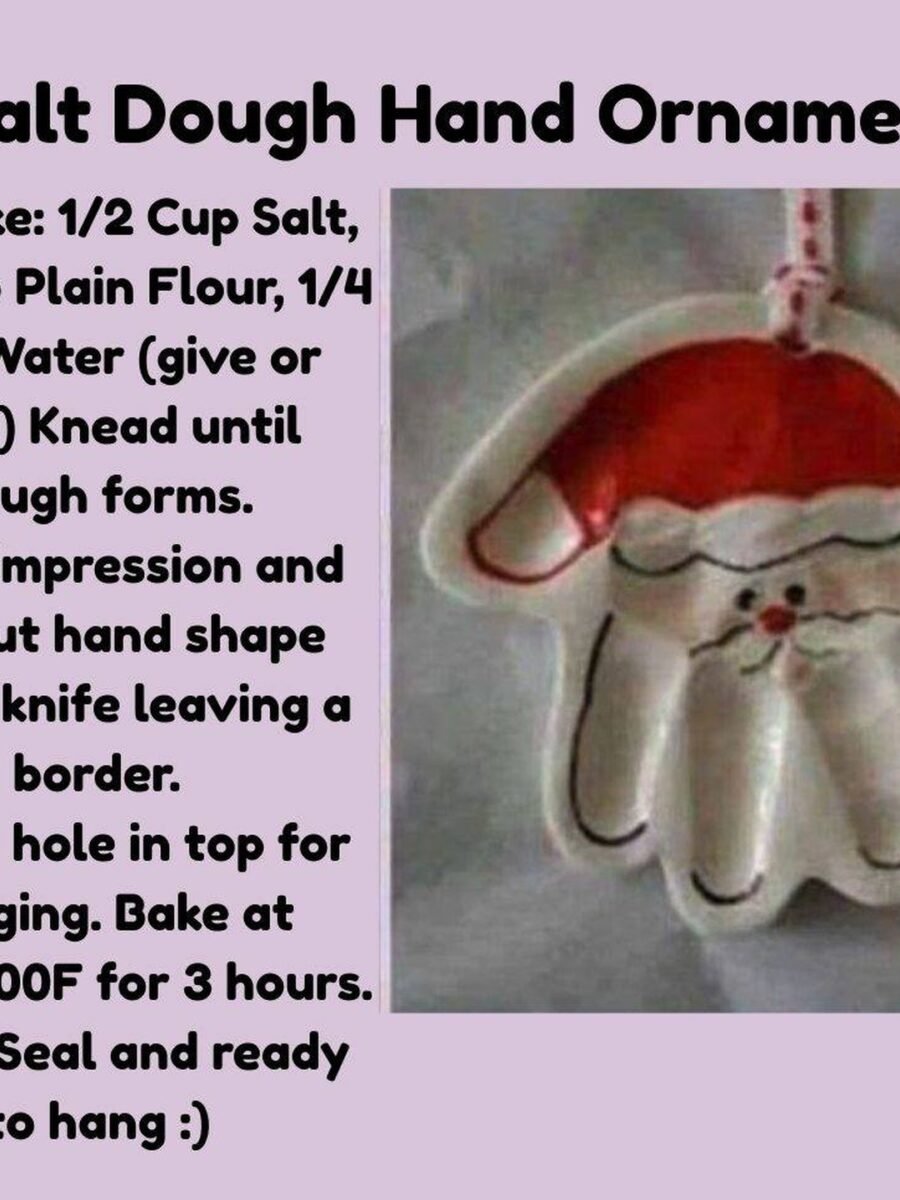
Press a small hand into salt dough, cut around it, and paint the handprint into Santa: red hat on the fingers, white beard on the palm, two black eyes and a tiny red nose. It bakes at 200 degrees F for about three hours, then gets sealed and hung. Every year the handprint is a little smaller than the child who made it, which is exactly why grandparents love it.
You’ll need: salt dough, red and white paint, a brush, a sealant and ribbon.
Best for: A baby’s first Christmas and grandparents’ gifts
5. Handprint Ornaments on Red Fabric
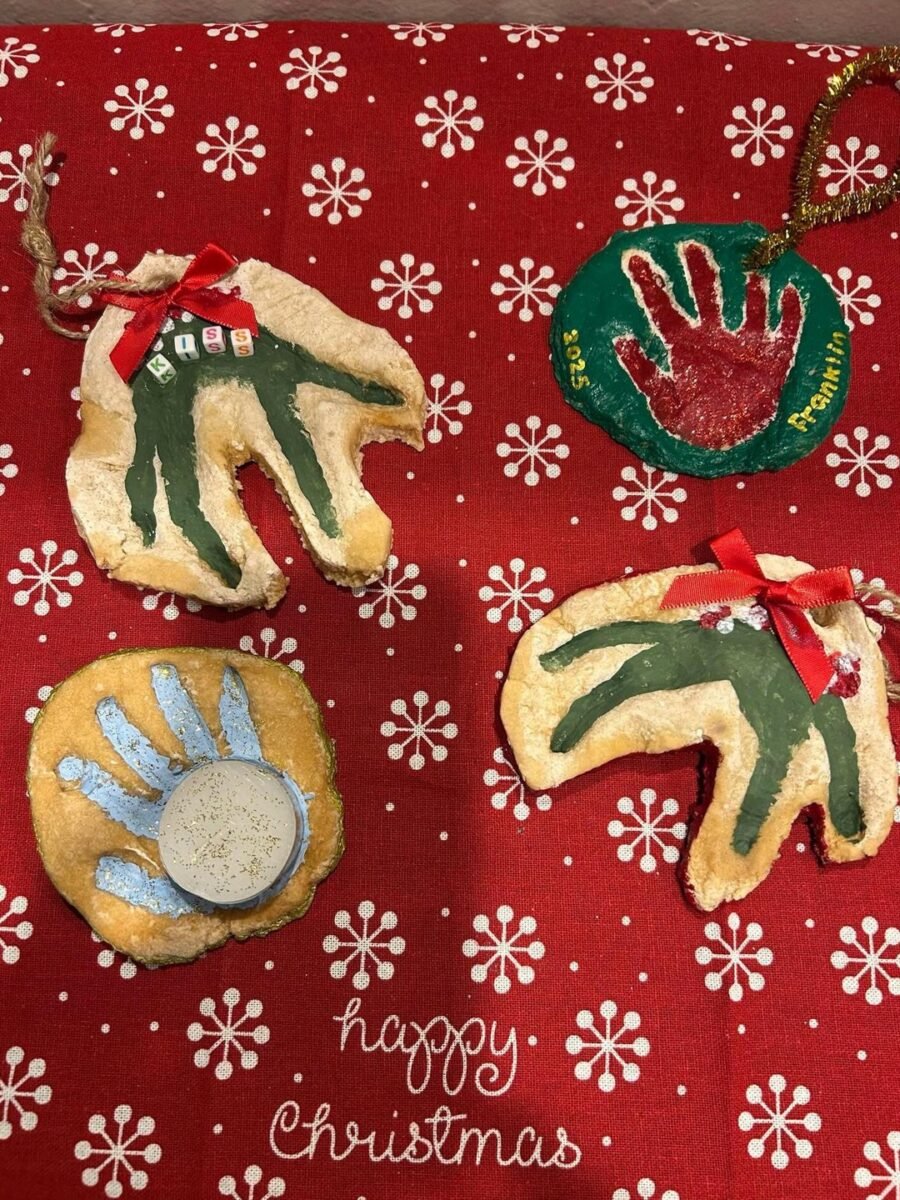
A set of handprint ornaments, each one dated and named in gold or glitter paint, is the kind of decoration that comes out of the box first every December. Make one per child per year and the tree slowly fills with a timeline. Photograph each one before it goes on the tree, because the paint does fade a little over the years.
You’ll need: salt dough, paint and glitter, ribbon, and a marker for names and years.
Best for: Family keepsakes with names and years
6. Dried Orange Slices on the Tree

Sometimes the simplest tree is the prettiest. A plain green tree, warm white lights, and dried orange slices hung from thin strings, nothing else. The slices catch the light and add a warm amber glow that glass baubles never quite manage. Use the drying steps from idea 2 and make a big batch, because a sparse tree needs more slices than you think.
You’ll need: a batch of dried orange slices and thin string or fishing line.
Best for: Minimal, natural trees
7. A Backlit Dried Orange Slice
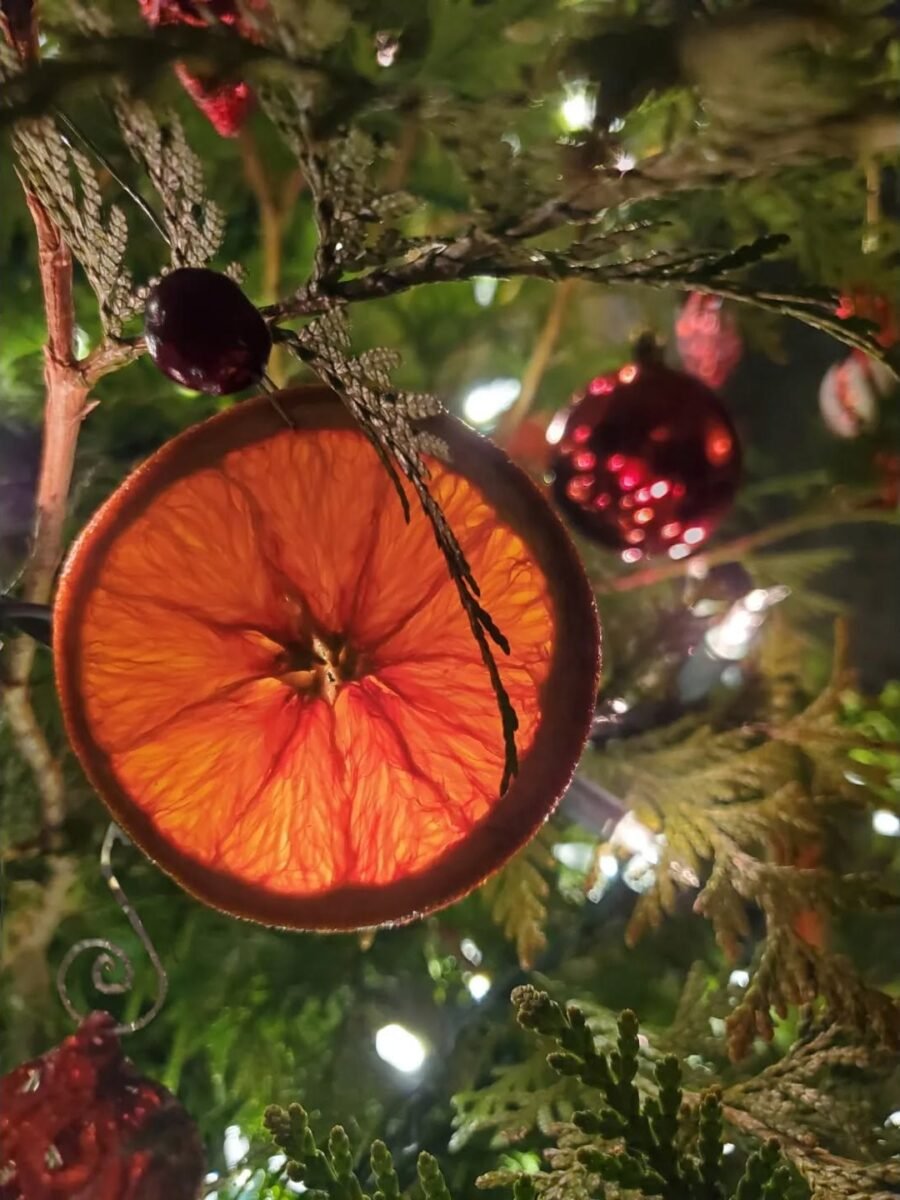
Hang one dried orange slice right in front of a string of lights and it turns into a little lantern, the segments glowing orange and red through the translucent flesh. Place these near the lights, not buried deep in the branches, so the glow shows. One or two per branch is plenty, and they look best next to plain red baubles.
You’ll need: one dried orange slice and twine per ornament.
Best for: Trees with warm white lights
Printable Games
Christmas Party Games Pack
9 fun games for family, friends and office parties: trivia, charades, gift swap and more.
8. Orange Slice and Cinnamon Bundles

Tie a dried orange slice to a cinnamon stick, add a star anise pod, a bay leaf and a small jingle bell, and you have an ornament that smells as good as it looks. These are lovely on the tree, but they are even better tied to wrapped gifts as a topper the recipient can keep. Make them in a batch of five or ten and the whole house smells faintly of spice.
You’ll need: dried orange slices, cinnamon sticks, star anise, bay leaves, twine and small jingle bells.
Best for: Rustic mantels and gift toppers
9. Felt Reindeer and Mittens
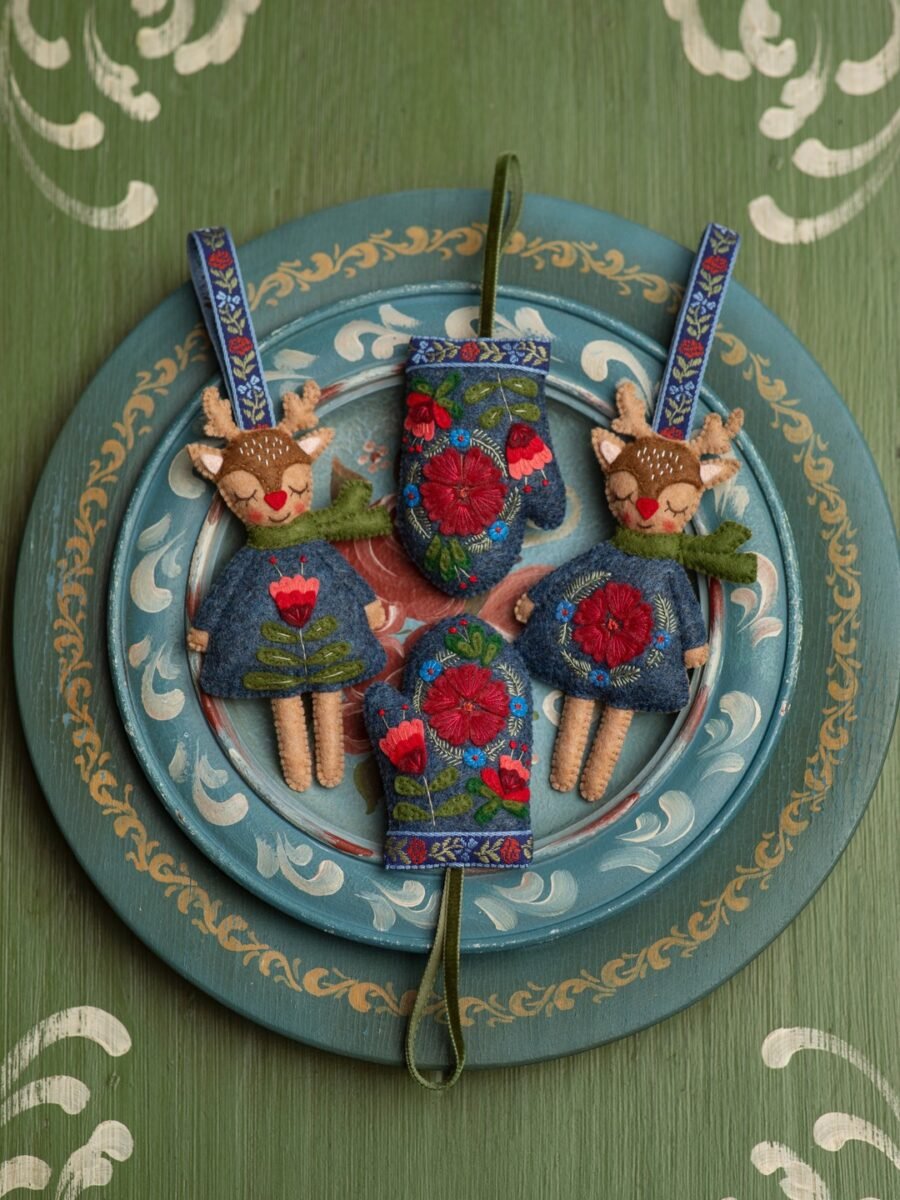
Embroidered felt reindeer with green scarves and blue mittens covered in red flowers look like they came from a craft fair, and they are just the felt build from idea 3 with fancier stitching. Keep the embroidery simple, a few French knots and lazy daisy petals go a long way, and let the felt colors do the talking. Our knitted christmas projects have more yarn and stitch ideas for the tree in the same handmade spirit.
You’ll need: felt, embroidery thread and needle, ribbon hangers, and a little patience for the stitching.
Best for: Heirloom style trees
10. Needle-Felted Folk Ornaments
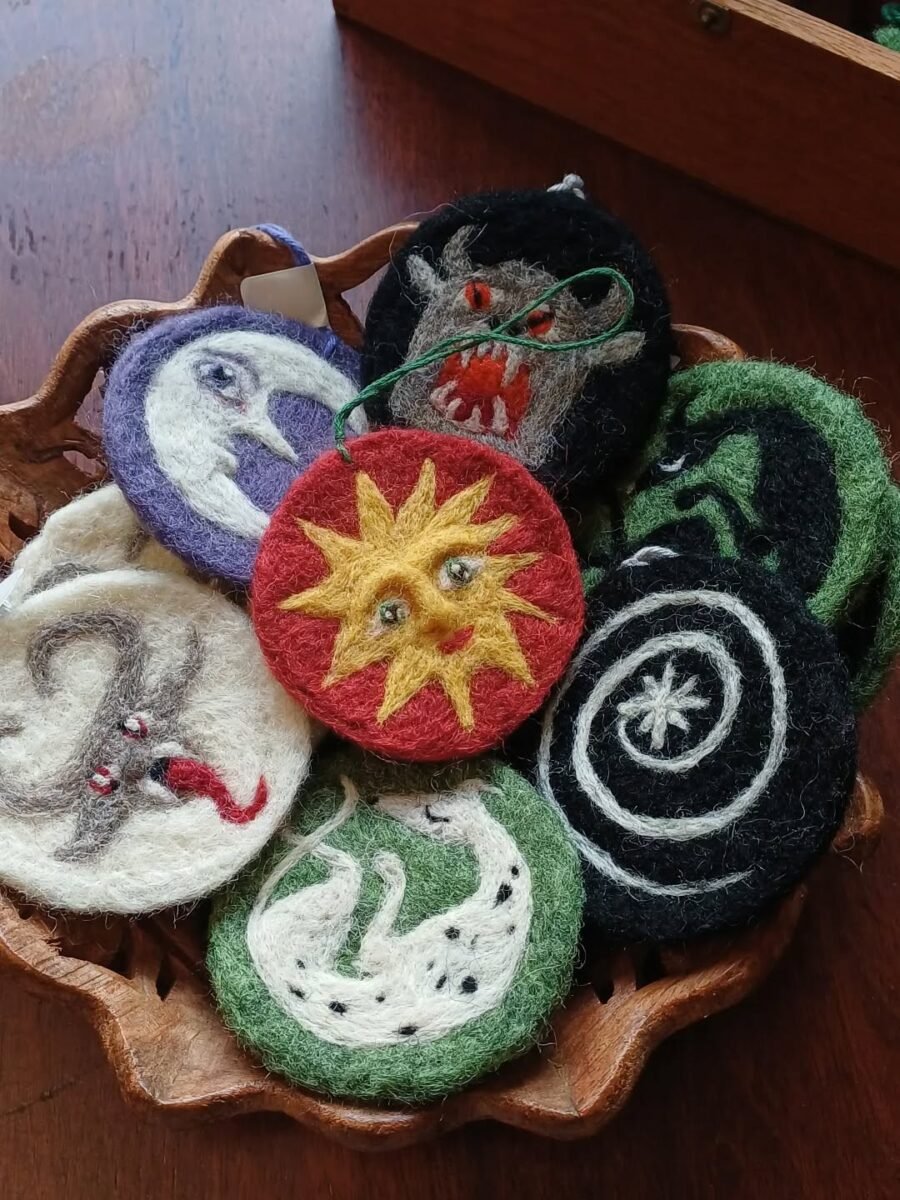
Needle felting turns loose wool into firm little discs you can embroider with suns, moons and folk patterns. They are heavier than flat felt ornaments, so hang them on sturdy branches and keep the embroidery bold and simple so it reads from across the room. A bowl of them on the coffee table looks wonderful even before they reach the tree.
You’ll need: wool roving, a felting needle and mat, embroidery thread and yarn loops.
Best for: Folk art and boho trees
11. A Clear Bauble Winter Scene

Fill a clear bauble with a tiny winter scene and the tree gets a snow globe that never needs shaking. A gingerbread man, two candy canes, a pinch of white pom-pom snow, and the bauble is done. Use a wide neck bauble so little hands can help, and glue the cap on so the scene stays put when the tree gets bumped.
You’ll need: a clear bauble, a gingerbread mini, candy canes, faux snow or white pom-poms, and glue for the cap.
Best for: Kids’ trees and gift ornaments
12. Painted Pinecone Ornaments

Pinecones are free, and a little white paint on the tips turns them into snowy ornaments. Glue on wooden beads and pearl beads, add a red bow, and hang them from the tree. Collect the pinecones early in the season, bake them at 200 degrees F for 30 minutes to open the scales and drive out any bugs, and let them cool before you paint.
You’ll need: pinecones, white paint, wooden and pearl beads, red ribbon, twine and a hot glue gun.
Best for: Rustic trees and nature lovers
Frequently Asked Questions
How do you make salt dough ornaments?
Mix 2 cups of flour, 1 cup of salt and 1 cup of water into a firm dough, knead for five minutes, roll to a quarter inch thick and cut shapes. Poke a hanging hole with a straw, bake at 250 degrees F for 2 to 3 hours until dry all the way through, cool completely, then paint and seal with clear varnish.
How long do dried orange slice ornaments last?
Fully dried slices last a whole season on the tree and often longer in storage. The key is drying them completely, no soft or damp spots, and storing them in a dry box with tissue paper between layers. If a slice ever feels soft or smells musty, throw it away, it has absorbed moisture.
Are salt dough ornaments safe around pets and kids?
Salt dough is not edible and it is dangerous for dogs, who can get salt poisoning from eating even a small amount. Hang salt dough ornaments well out of reach of pets, supervise children while they make and paint them, and never let anyone eat the dough, raw or baked.
How do you keep felt ornaments from flopping?
Use stiff craft felt rather than soft floppy felt, stuff the ornament lightly so it holds its shape, and sew the edge with a blanket stitch, which is firmer than a running stitch. For larger shapes, add a second layer of felt inside as a stiffener.
Can I make Christmas ornaments without an oven?
Yes. The felt ornaments, the painted pinecones and the clear bauble scenes in this list need no oven at all. Salt dough can also air dry, but it takes several days and the ornaments may crack, so for oven free making, start with felt, pinecones or baubles.
How do I store handmade ornaments so they last?
Wrap each ornament in tissue paper, store them in separate compartments or small boxes so they do not rub together, and keep the box somewhere dry. Dried orange slices need extra dryness, so add a silica gel packet if you have one, and keep salt dough ornaments away from damp rooms.
Final Thoughts on Diy Christmas Ornaments
Twelve ornaments, one handmade tree. Start with the salt dough, add the dried orange slices while the oven is warm, and stitch the felt set on a quiet evening. By Christmas Eve the tree will be full of things no shop could sell you.
When the tree is dressed, keep the handmade feeling going around the house. Our diy snowman decor ideas bring the same make it yourself spirit to the porch and mantel.

