
A console table fills the spaces that other furniture cannot — the entryway wall, the stretch behind the sofa, the narrow gap in a hallway. These DIY console table ideas cover every style and function from a simple flat top with legs to a full storage build with drawers, shelves, and cabinet doors. Most of them can be done in a weekend with basic tools and a modest materials budget.
This post contains affiliate links. If you purchase through these links I may earn a small commission at no extra cost to you.
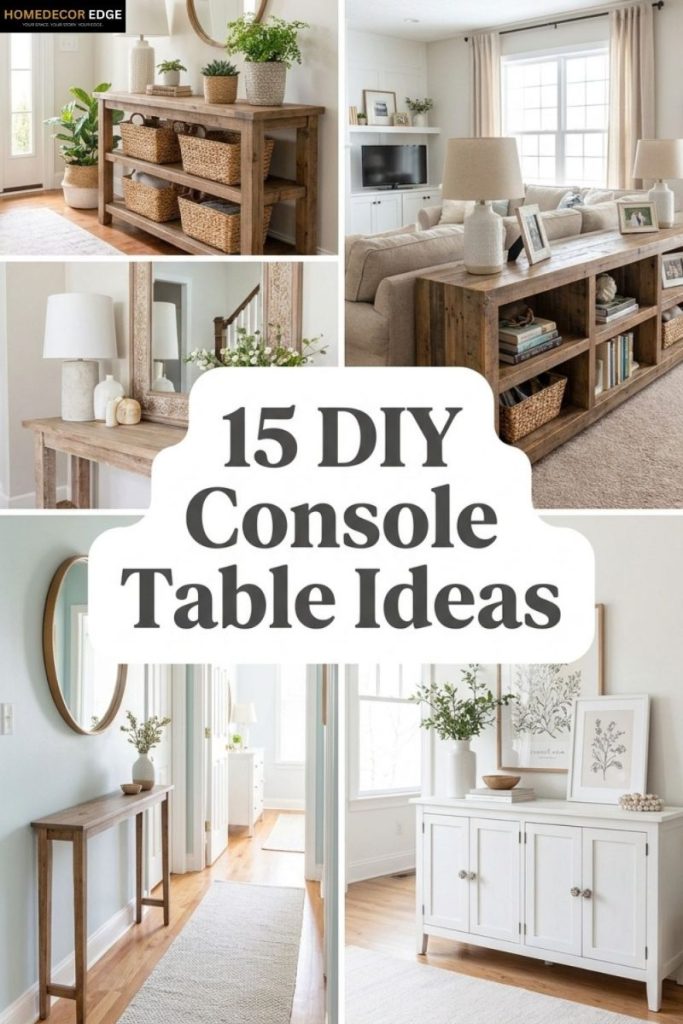
The right console table makes every space it goes into work harder.
1. Build a Simple Wood Console Table
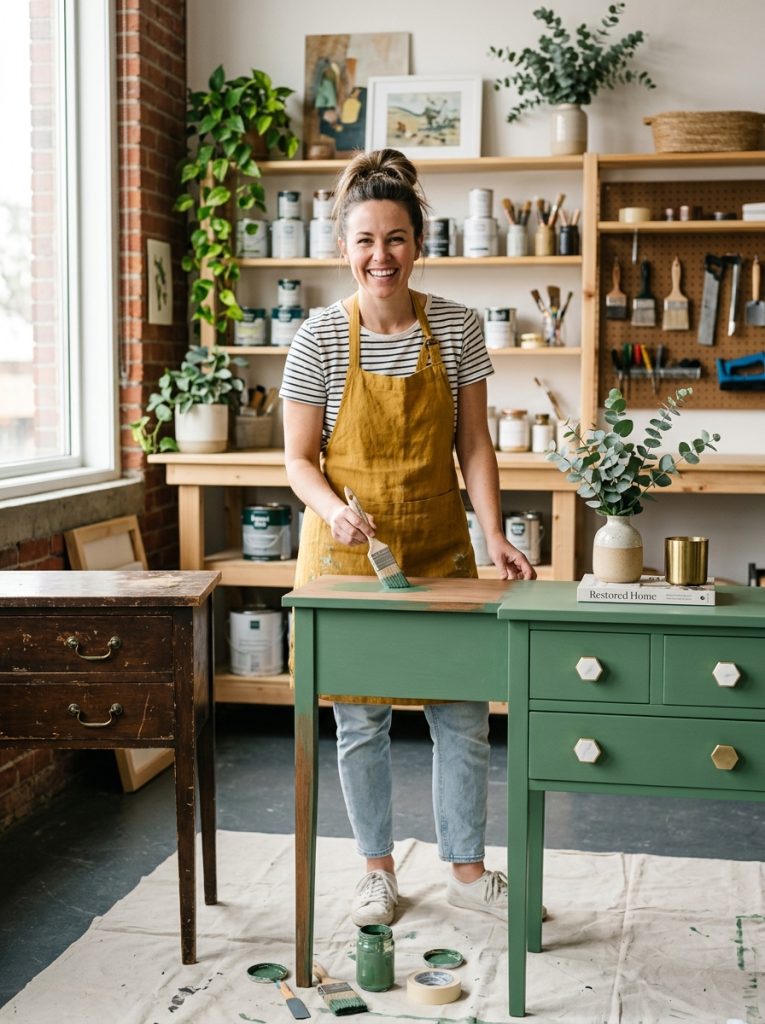
A simple four leg wood console table is the most versatile build on this list. Cut a top from a wide board or glue up narrower boards, attach four legs, sand smooth, and finish with stain or paint. It works in an entryway, behind a sofa, in a hallway, or anywhere a flat surface at table height is needed. This wood console table with shelves shows the finished style to aim for. One weekend build that looks like furniture store quality when done well.
Materials Needed:
- 1×10 or 1×12 pine or oak boards for top
- 4×4 posts or pre-made table legs
- Wood screws and drill
- Sandpaper
- Wood stain or paint
How to Make It:
- Cut the top board to your desired table length — typically 48 to 60 inches for a standard console.
- Attach four legs to the underside of the top using corner brackets or pocket hole screws.
- Add a lower stretcher rail between each pair of legs for stability.
- Sand all surfaces smooth and apply stain or paint.
- Allow to dry fully before placing in position and styling.

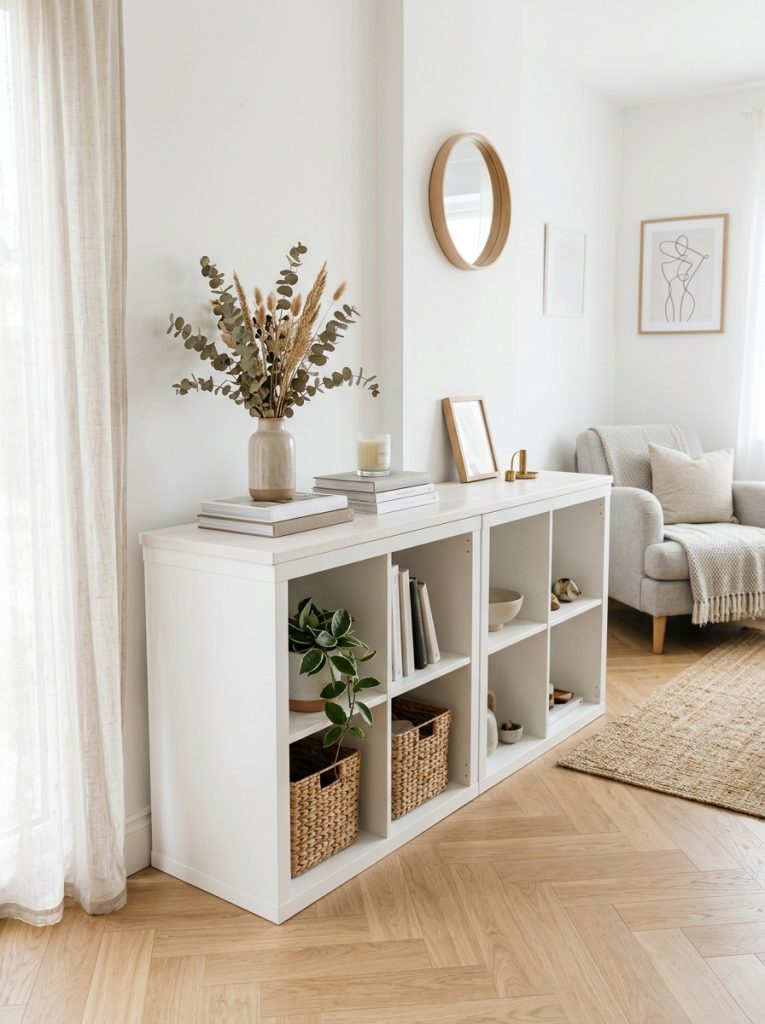
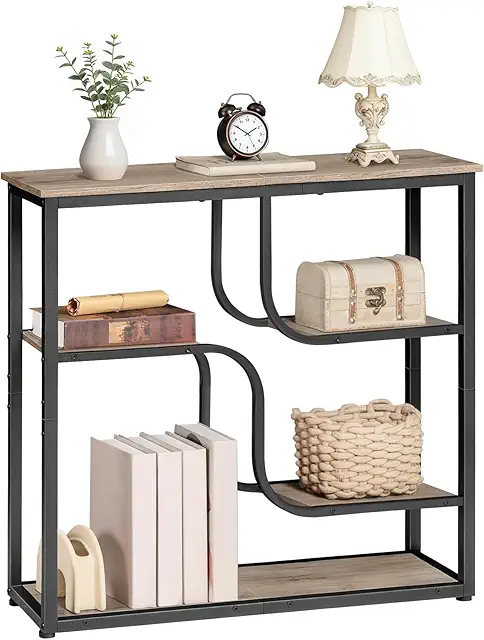
Console Table with Shelves Wood
Wood console table with open shelves — great ready made option or blueprint for your own DIY build.
Check Price on Amazon2. Add Drawers for Hidden Storage
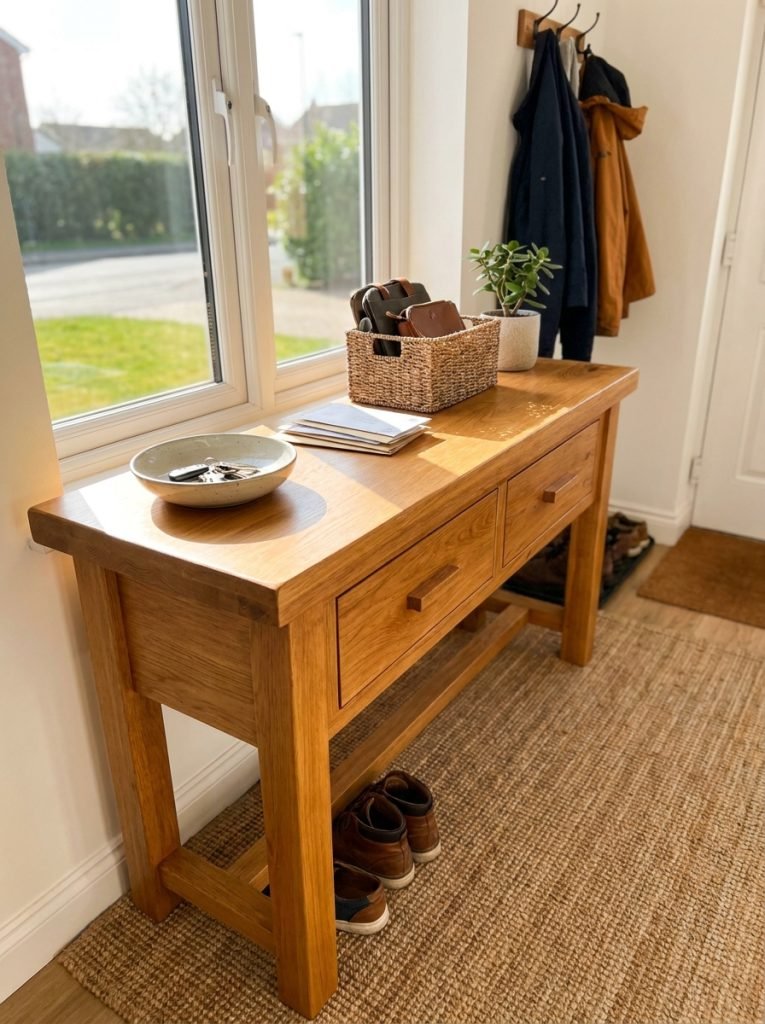
A console table with drawers keeps the surface clear and everything essential hidden inside. Keys, mail, chargers, sunglasses — all out of sight but within arm’s reach by the door. This console table with drawers storage shows the finished layout to reference. Build drawer boxes from plywood and add simple wooden drawer fronts that match the table finish. Soft close slides make the drawers feel high quality for a small extra cost.
Materials Needed:
- Table frame (built from 2×4 and 1×6 lumber)
- Plywood for drawer boxes
- Drawer slides
- Drawer pulls hardware
- Wood screws and drill
How to Make It:
- Build the console table frame with a front apron that has openings sized for your drawer boxes.
- Cut plywood drawer boxes to fit the openings with a small gap on each side for the slides.
- Install drawer slides inside the openings and attach to the drawer boxes.
- Cut drawer fronts to size and attach to the drawer boxes with screws from inside.
- Add drawer pulls and check that each drawer opens and closes smoothly.

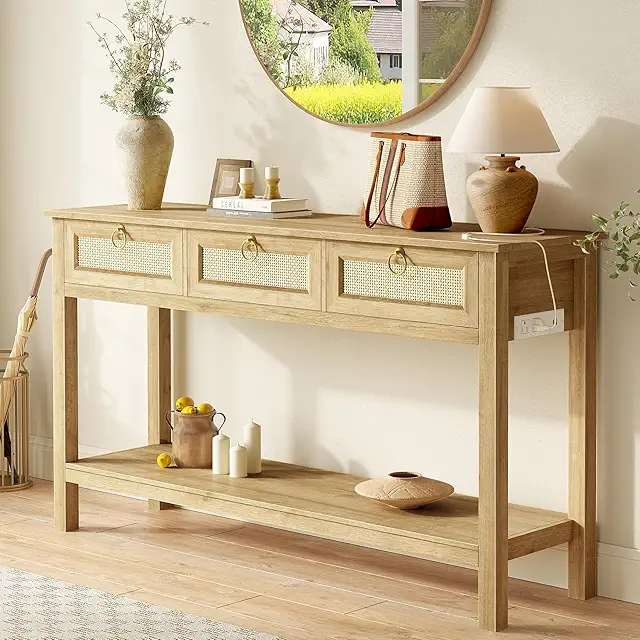
Console Table with Drawers Storage
Console table with drawers that keeps entryway essentials hidden and the surface clear.
Check Price on Amazon3. Build a Narrow Entryway Console Table

Entryways are almost always tight on space and a narrow console table — 10 to 12 inches deep — gives you a proper surface without blocking the hallway. This narrow console table entryway is the ready made version at the right depth. Build your own by keeping the top board narrow and using slim legs that take up as little visual space as possible. Paint white or in a light color to keep a narrow entry feeling open. For more entryway ideas check out these entryway ideas.
Materials Needed:
- 1×12 board cut to 10 to 12 inch depth
- Slim hairpin legs or tapered wood legs
- Wood screws and drill
- Sandpaper and paint
How to Make It:
- Cut the top board to your desired length and the narrow 10 to 12 inch depth.
- Sand all edges completely smooth — narrow tables are handled closely and rough edges show.
- Attach four slim legs to the underside corners with leg mounting plates.
- Paint in a light color to keep the narrow space feeling open.
- Style with a small mirror above and minimal decor on top.

Narrow Console Table Entryway
Slim narrow console table that fits tight entryways without blocking the hallway.
Check Price on Amazon4. Add Cabinet Doors for a Clean Look
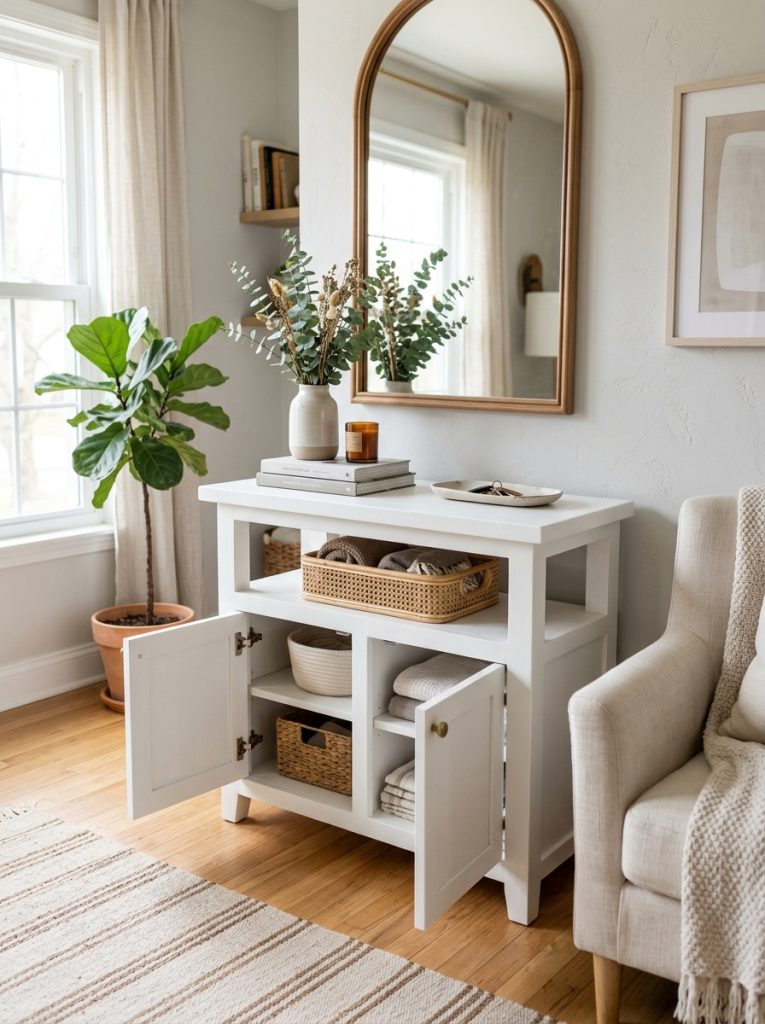
Cabinet doors on a console table keep everything stored inside completely out of sight. It looks cleaner than open shelves and works especially well in an entryway where clutter accumulates fast. This console table with cabinet doors is the finished version to reference for proportions. Build the cabinet section from plywood, hang small doors on piano hinges, and add simple knobs for a built-in furniture look.
Materials Needed:
- Plywood for cabinet box and doors
- Piano hinges
- Cabinet knobs or pulls
- Wood screws and drill
- Sandpaper and paint
How to Make It:
- Build a rectangular cabinet box from plywood sized to fit below the console top.
- Cut two door panels to cover the cabinet opening with a small gap around each.
- Attach doors to the cabinet box with piano hinges on the inside.
- Add a shelf inside the cabinet for better organization of stored items.
- Paint the whole unit including doors in one consistent finish and add knobs.

Console Table with Cabinet Doors
Console table with cabinet doors that keeps stored items completely out of sight for a clean look.
Check Price on Amazon5. Try an IKEA Hack Console Table
IKEA hacks make excellent console tables because the base pieces are affordable, well made, and sized consistently. Two KALLAX units side by side with a wooden top across them makes a solid console with built in cubby storage underneath. This IKEA style console table shows the clean minimal look to aim for. Add hairpin legs to an IKEA top for a different approach or stack two LACK side tables for an ultra simple and cheap version.
Materials Needed:
- IKEA KALLAX or LACK units
- Wooden board for top (if adding)
- Hairpin legs (optional)
- Paint for customizing
- Screws for connecting units
How to Make It:
- Place two KALLAX units side by side and level on the floor.
- Connect them at the back with a wood board screwed to both for stability.
- Cut a wood top panel to span across both units with a slight overhang.
- Attach the top with screws from below into the KALLAX frames.
- Paint the entire assembly in one color for a cohesive built-in look.
IKEA Style Console Table
Clean minimal console table in the IKEA style — great for a Scandinavian inspired entryway or living room.
Check Price on Amazon6. Add a Built-In Outlet and Charging Station
A console table with a built-in outlet transforms it from furniture into a functional charging hub. Cut a small opening in the top surface, drop in a recessed outlet, and route the cord through a hole in the back leg to a wall socket. This console table outlet charging station is the ready made version. For a DIY build route the outlet before applying the top finish and the result looks completely intentional rather than added as an afterthought.
Materials Needed:
- Console table build (any style)
- Recessed desk outlet with USB ports
- Drill and hole saw for outlet cutout
- Cable management clips
How to Make It:
- Mark the outlet position on the table top — typically near one end for easy reach.
- Cut the outlet opening with a hole saw to the exact size of the recessed outlet.
- Drill a cable routing hole through the back of a rear leg near the floor.
- Feed the outlet cord through the routing hole and plug into the wall socket.
- Snap the recessed outlet into the top cutout — most clip in without any screws.

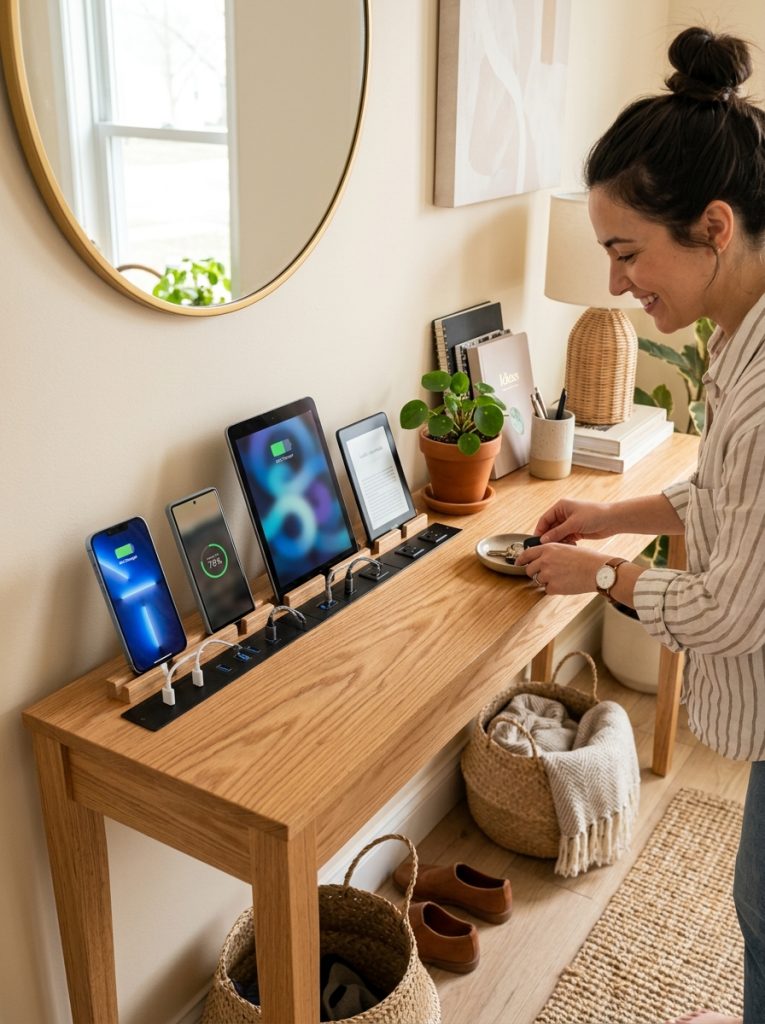
Console Table Outlet Charging Station
Recessed outlet with USB ports that drops into a console table top for a built-in charging station.
Check Price on Amazon7. Build a Console Table Behind the Couch
A console table behind the couch is one of the most practical living room additions — it holds a lamp, books, remotes, and decorative objects at exactly the right height to be useful without being intrusive. This console table with storage behind couch shows the right proportions. Build it the same length as the sofa and at sofa-back height — typically 28 to 30 inches tall — so it sits flush with the top of the cushions. For more living room ideas check out these living room design ideas.
Materials Needed:
- 1×12 boards for top
- 4×4 legs or hairpin legs
- Lower shelf boards (optional)
- Wood screws and drill
- Stain or paint
How to Make It:
- Measure the sofa length and cut the top board to match or slightly longer.
- Set the table height at 28 to 30 inches to align with the sofa back.
- Attach four legs to the underside with corner brackets.
- Add a lower shelf at mid-leg height for extra storage.
- Finish with stain or paint and position directly behind the sofa.
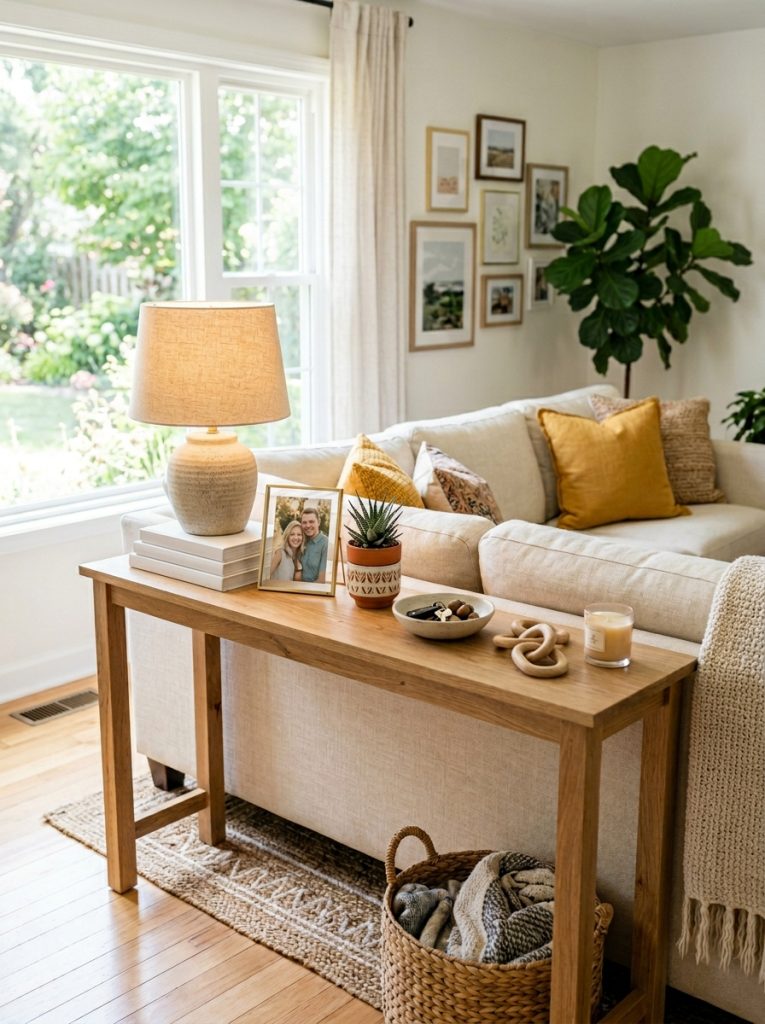
Console Table Behind Couch Storage
Console table sized for behind the sofa — holds a lamp and decor at perfect sofa-back height.
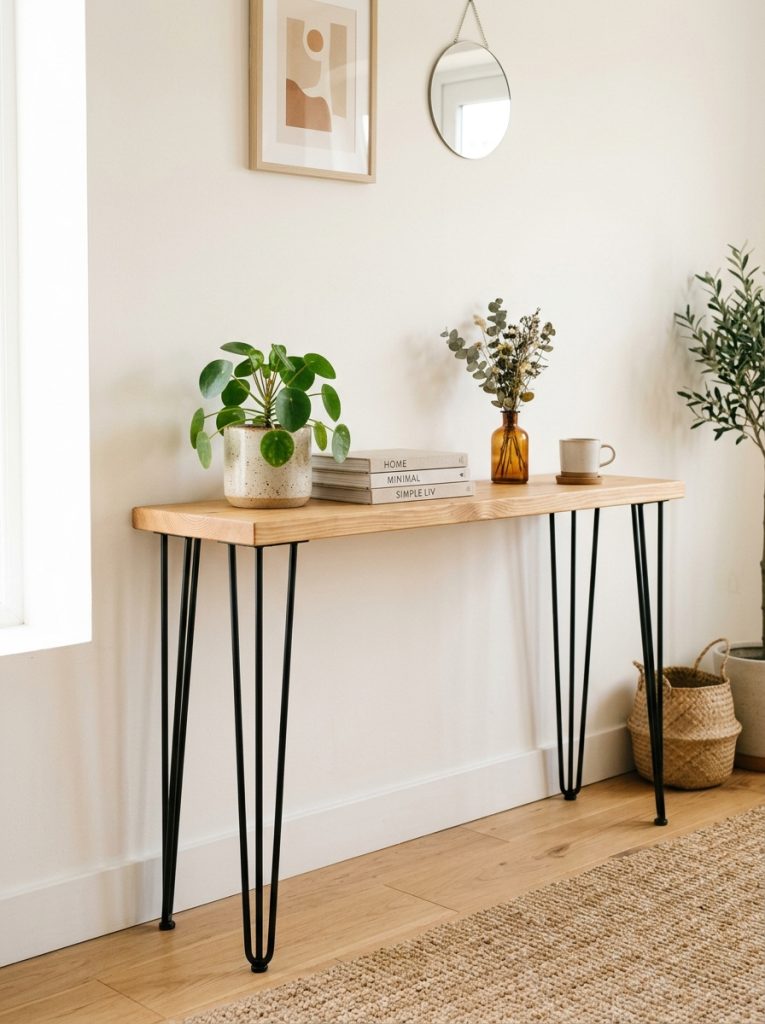
Check Price on Amazon8. Use DIY Table Legs for a Custom Look
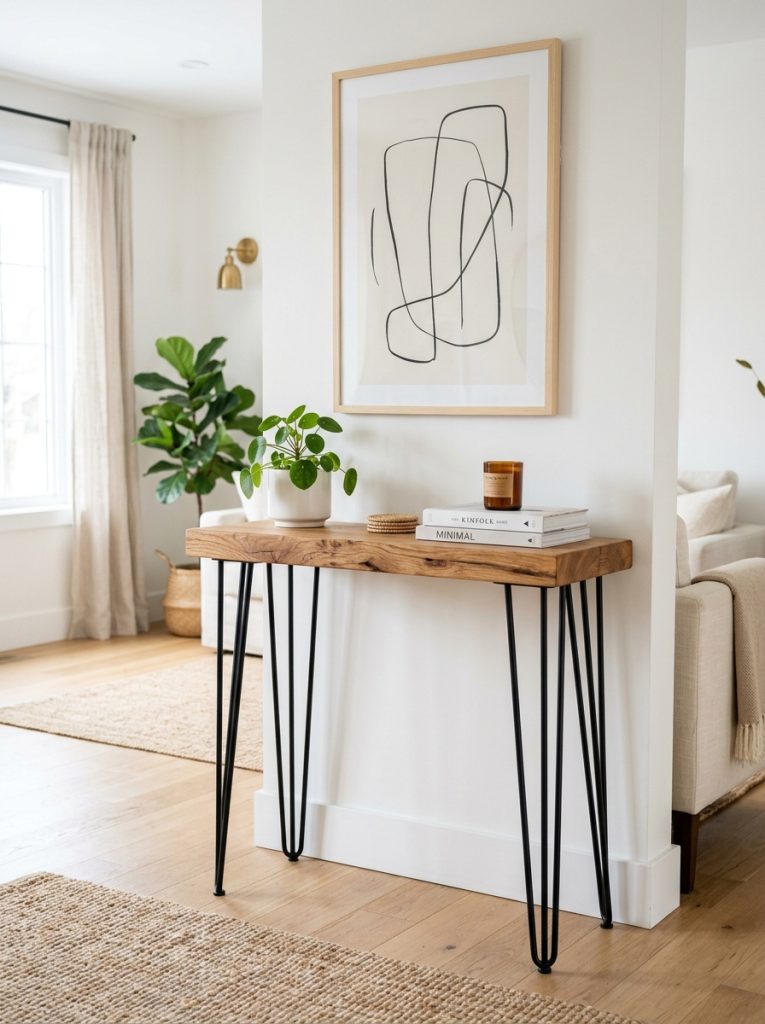
The leg style defines the whole look of a DIY console table more than almost anything else. Hairpin legs read modern and industrial, tapered wood legs read mid-century, chunky square legs read farmhouse. This console table legs hardware kit includes everything needed to attach metal legs to any wood top — just cut the top, screw on the legs, and the table is done. No complex joinery, no complicated frame build required.
Materials Needed:
- Wide wood board or butcher block for top
- Metal or wood table legs with mounting plates
- Screws included with legs
- Sandpaper and finish for top
How to Make It:
- Cut or buy a wide wood board in your desired table length and depth.
- Sand smooth and apply stain, oil, or paint in your chosen finish.
- Mark leg positions on the underside — typically 2 inches in from each corner.
- Attach mounting plates to the underside of the top with screws.
- Screw legs into the mounting plates and check that all four sit level.

Console Table Legs Hardware DIY
Table leg hardware kit that attaches to any wood top — the fastest way to build a custom console table.
Check Price on Amazon9. Build a Console Table with Open Shelves
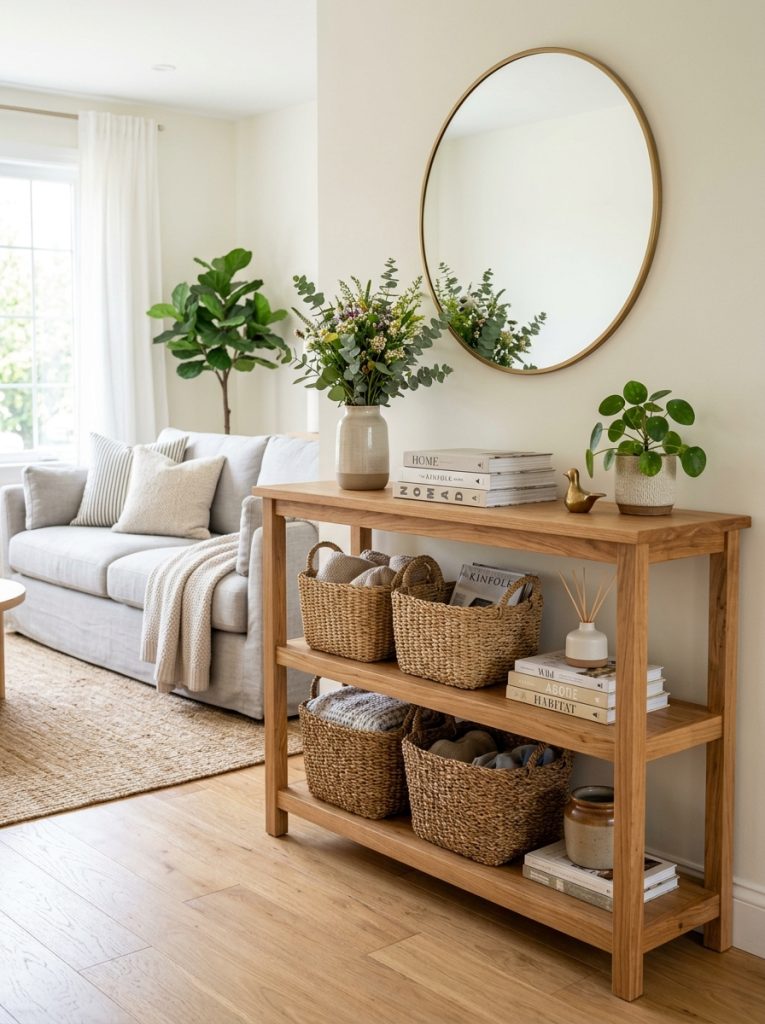
Open shelves below the console top add storage without the bulk of cabinet doors. Baskets on the lower shelf hide smaller items while books and decorative objects on the upper shelf add visual interest. Build two horizontal shelves between the legs at even heights and the whole table becomes a proper storage piece. A lower shelf also adds structural stability to the table frame which is an added bonus on longer builds.
Materials Needed:
- 1×10 boards for top and shelves
- 2×4 legs
- Pocket hole screws and drill
- Sandpaper and finish
How to Make It:
- Build the four leg frame first with top and bottom rails connecting each pair of legs.
- Cut shelf boards to fit between the legs at your desired shelf heights.
- Attach shelves to the side rails with pocket hole screws or shelf pins.
- Attach the top board across the top rails.
- Sand everything smooth and apply a consistent finish across all surfaces.
10. Build a Cheap Console Table for Under $50
A console table does not need expensive materials to look good. Basic 2×4 lumber for the frame and a 1×12 for the top costs under thirty dollars at any hardware store. Sand well, paint in a solid color, and the cheap materials completely disappear. The quality of the finish is what makes a budget build look expensive — take time on the sanding and painting steps and the result looks nothing like its price tag.
Materials Needed:
- 2×4 lumber for legs and frame
- 1×12 board for top
- Wood screws and drill
- Sandpaper — 80, 120, 220 grit
- Primer and paint
How to Make It:
- Cut 2x4s to leg height and frame rail lengths.
- Assemble the frame with legs and connecting rails using wood screws.
- Attach the 1×12 top board across the frame.
- Sand through 80, 120, and 220 grit for a smooth paintable surface.
- Prime, paint two coats, and allow to cure fully before use.
11. Give a Console Table a Makeover
A console table makeover is faster and cheaper than building from scratch. Find an old console at a thrift store or garage sale, strip or sand the existing finish, paint in a bold color, and swap the hardware for something modern. New legs can be added if the originals are dated. The whole makeover costs under twenty dollars and the result looks completely custom. For more makeover and decor ideas check out these DIY room decor ideas.
Materials Needed:
- Thrift store console table
- Sandpaper and deglosser
- Chalk paint in bold color
- New hardware pulls
- Clear wax or varnish
How to Make It:
- Clean the table thoroughly and sand or degloss the existing finish.
- Apply chalk paint in your chosen color — chalk paint adheres to most surfaces without priming.
- Apply two coats allowing to dry between coats.
- Swap old hardware for new modern pulls — pre-drill new holes if needed.
- Seal with clear wax or varnish for durability.
12. Add a Skirt to a Console Table
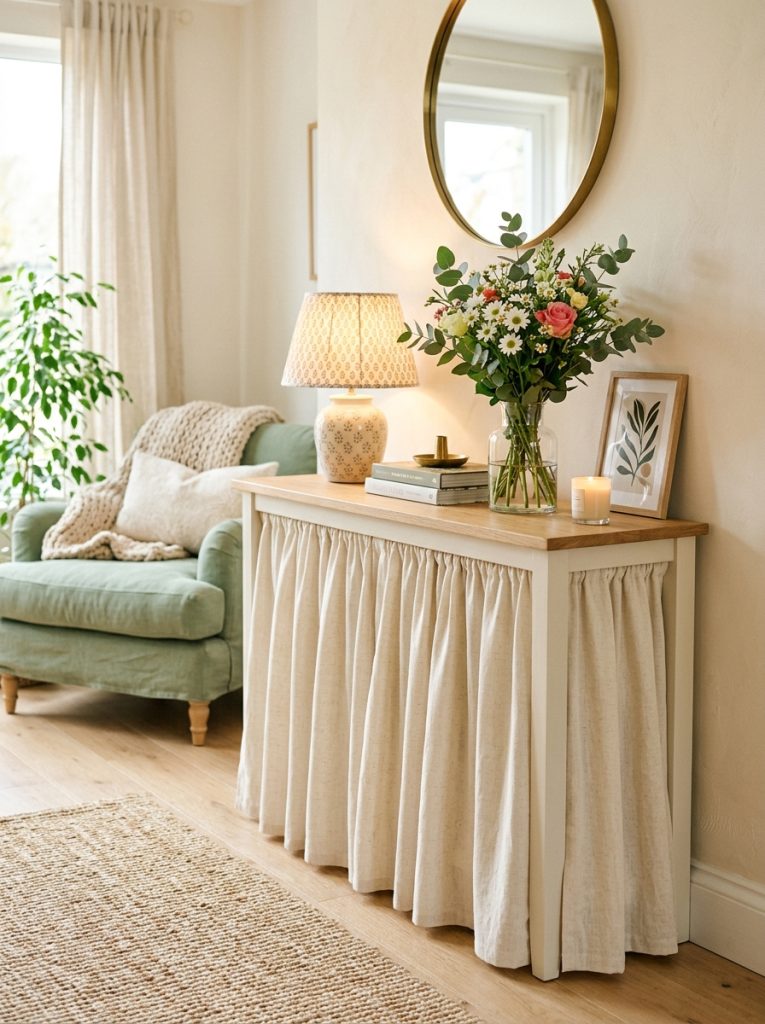
A skirted console table hides whatever is stored underneath while adding softness and elegance to the room. Attach a curtain rod or tension wire around the table perimeter just below the top surface and hang fabric panels that reach the floor. Choose a fabric that suits the room — linen for a casual look, velvet for something more formal, a printed fabric for a bold statement. Everything stored underneath disappears completely.
Materials Needed:
- Console table (any style)
- Tension wire or thin curtain rod
- Fabric panels long enough to reach the floor
- Clip rings or fabric hooks
- Command hooks for attaching wire to table
How to Make It:
- Attach small command hooks around the table apron just below the top surface.
- Thread tension wire through the hooks to create a hanging rail around the perimeter.
- Hang clip rings at even intervals along the wire.
- Attach fabric panels to the clip rings so the fabric falls evenly to the floor.
- Adjust gathers evenly and tuck edges neatly at the corners.
13. Build a Console Table with a Shelf

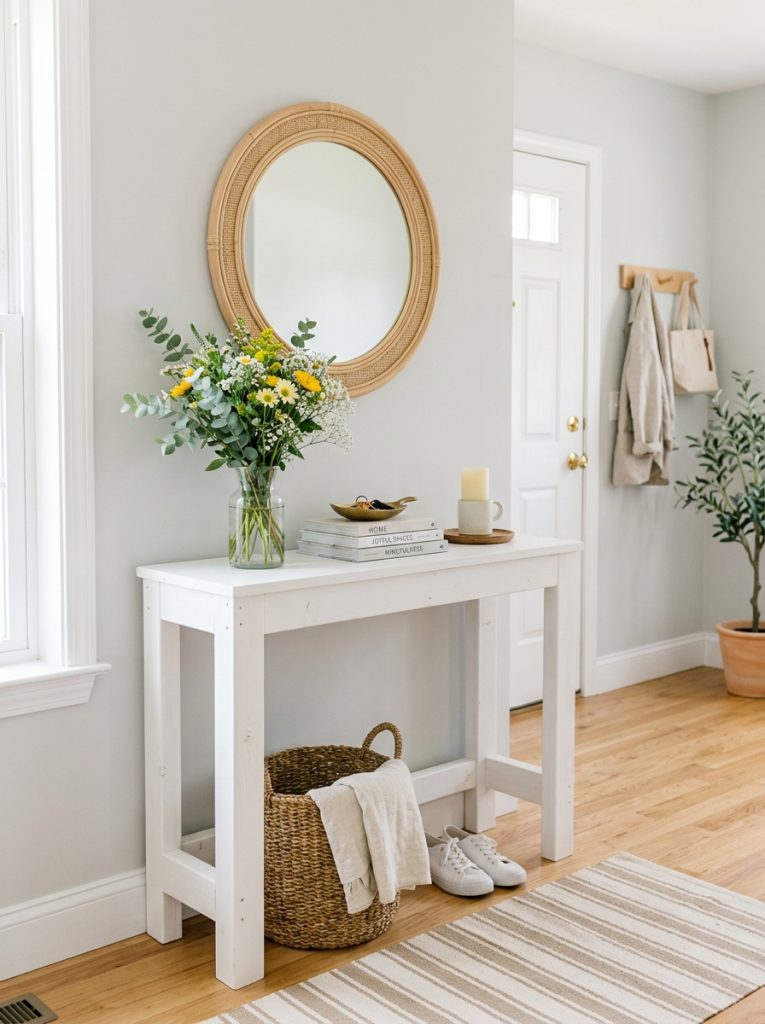
A single lower shelf is the simplest storage addition to any console table build. It takes one extra board and adds meaningful storage without any complexity. Place woven baskets on the shelf for a styled look that also hides items inside, or stack books for a more casual feel. The shelf also lowers the visual weight of the table making it feel more grounded and substantial in the space.
Materials Needed:
- Console table frame (any build)
- One extra board for the shelf
- Shelf pins or pocket hole screws
- Sandpaper and matching finish
How to Make It:
- Build the console table frame with lower rails on each side at shelf height.
- Cut the shelf board to fit between the legs with a snug fit.
- Rest the shelf on the lower rails or attach with pocket hole screws for a permanent fit.
- Sand and finish the shelf to match the rest of the table.
- Style with baskets or books once in position.
14. Build a Cardboard Console Table for Renters
A cardboard console table sounds impractical but honeycomb cardboard panels are genuinely strong enough for a lightweight surface. Layer and glue multiple cardboard sheets, reinforce the corners, coat in gesso and paint, and the result holds decorative items and lighter objects perfectly well. It costs almost nothing, leaves no marks on floors or walls, and moves out with you when you leave. A clever renter-friendly solution for adding a console without any permanent installation.
Materials Needed:
- Honeycomb cardboard panels or thick corrugated sheets
- Strong craft glue or wood glue
- Gesso primer
- Paint and varnish
- Box cutter and cutting mat
How to Make It:
- Cut cardboard panels to your desired table dimensions — top, sides, and legs.
- Layer four to six sheets of cardboard per panel and glue together firmly.
- Assemble the table shape with glued and taped joints at all connection points.
- Coat all surfaces with two layers of gesso to seal and stiffen the cardboard.
- Sand lightly, paint two coats, and seal with varnish for a durable surface.
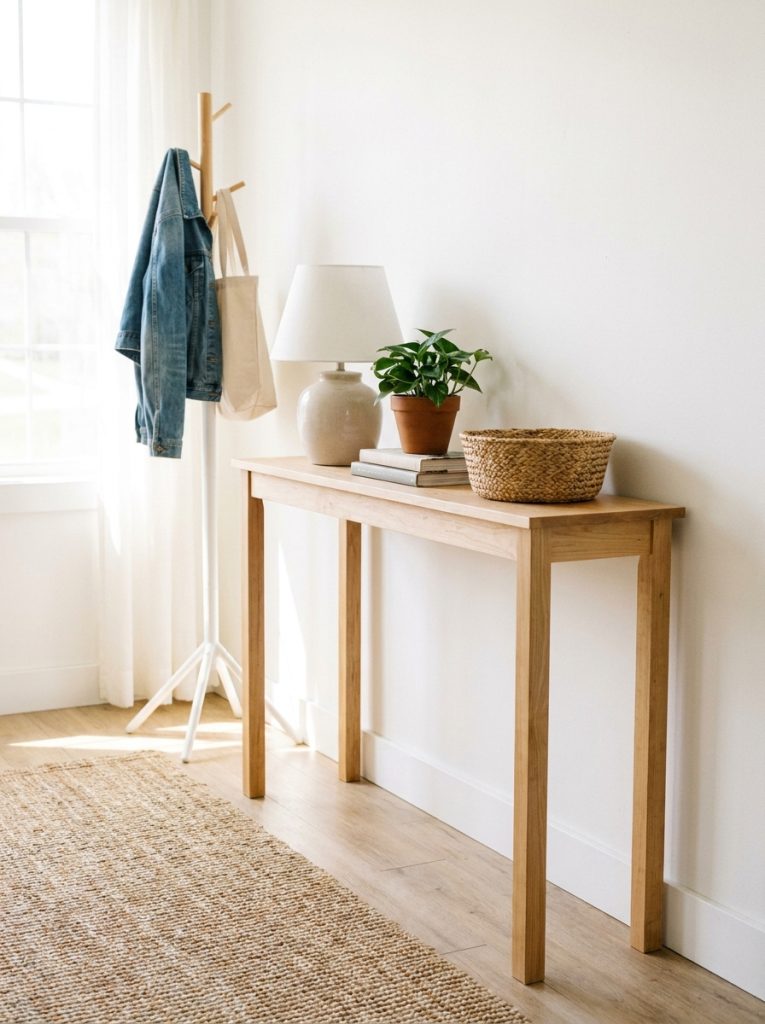
15. Keep It Simple — Board and Legs Done
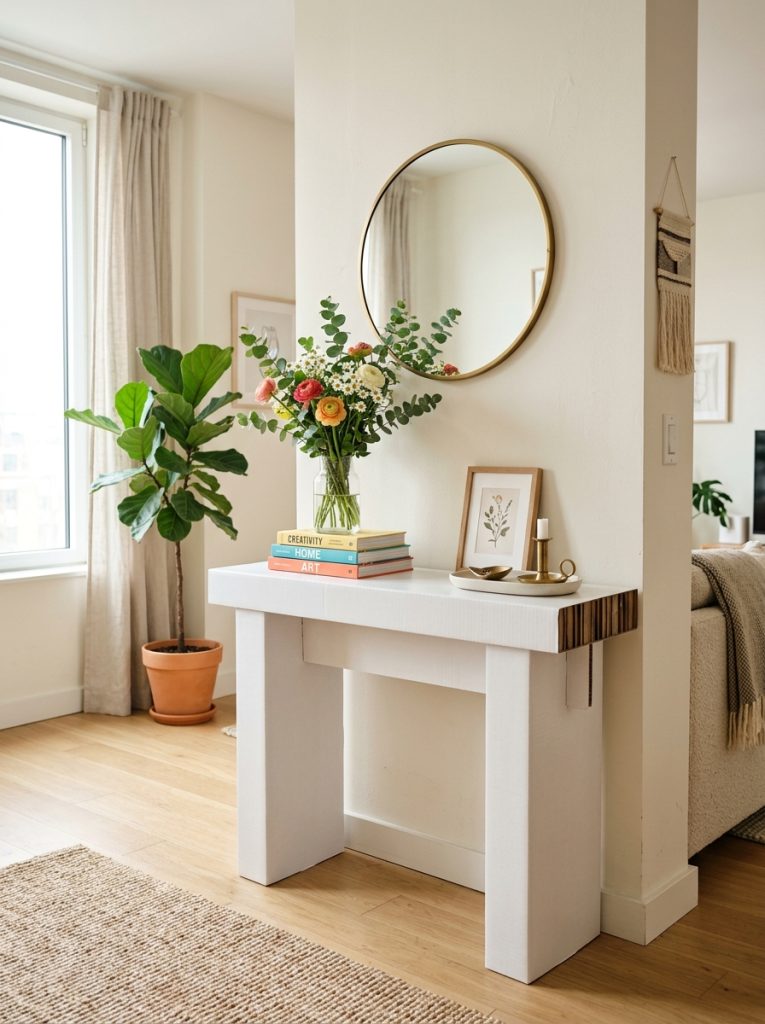
The simplest DIY console table build is one wide board and four legs. Buy a butcher block offcut or a single wide pine board, sand it smooth, oil or paint it, screw four legs onto the underside, and the table is done. No frame, no joinery, no complicated cuts. It takes under an hour and looks clean and intentional in any room. Start here if you have never built furniture before — the result is always better than expected for the time it takes.
Materials Needed:
- One wide board (butcher block, pine slab, or edge-glued panel)
- Four table legs with mounting plates
- Sandpaper
- Wood oil or paint
- Drill
How to Make It:
- Cut or buy a wide board at your desired table length.
- Sand smooth through 120 and 220 grit for a clean finish.
- Apply wood oil or paint and allow to cure completely.
- Mark leg positions 2 inches in from each corner on the underside.
- Attach mounting plates and screw legs in — the table is done.
Final Thoughts on DIY Console Table
A console table is one of the most useful pieces of furniture you can add to any home and one of the most satisfying DIY builds because the result is immediately visible and functional. Whether you build a simple board-and-legs version this weekend or take on a full storage build with drawers and cabinet doors, the effort is always worth it. Pick the plan that fits your space and skill level and get building.

Amir Ali is the founder and site administrator of HomeDecorEdge, a modern home decor and interior design platform. Since starting the site, he has combined his passion for interior design, practical styling, and color coordination with hands-on content strategy and site management. He guides authors, curates high-quality articles, and ensures readers have access to actionable, visually inspiring, and user-focused home decor advice for apartments, small rooms, and family homes.