
A cork board is one of the most useful things you can put on a wall and one of the easiest DIY projects to personalize. Plain cork boards from the store look fine but a DIY version covered in fabric, set in a custom frame, or built from wine corks becomes a real decor piece that organizes and decorates at the same time. These DIY cork board ideas cover every style from a cute pink office board to a full wall tile installation.
This post contains affiliate links. If you purchase through these links I may earn a small commission at no extra cost to you.
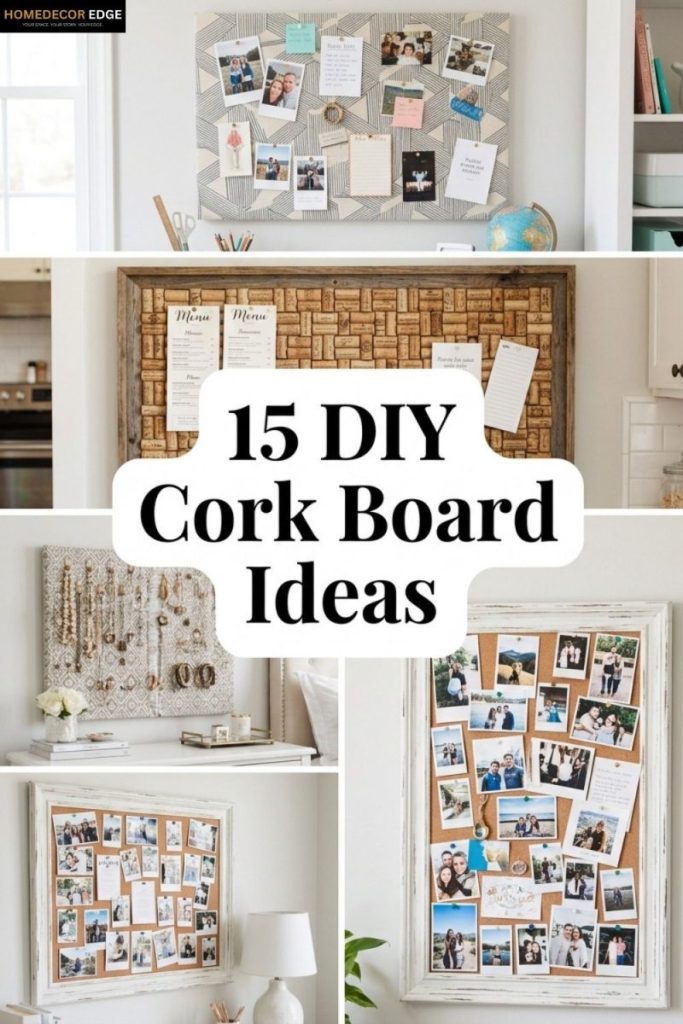
One covered cork board changes a blank wall into something worth looking at.
1. Cover a Cork Board in Fabric
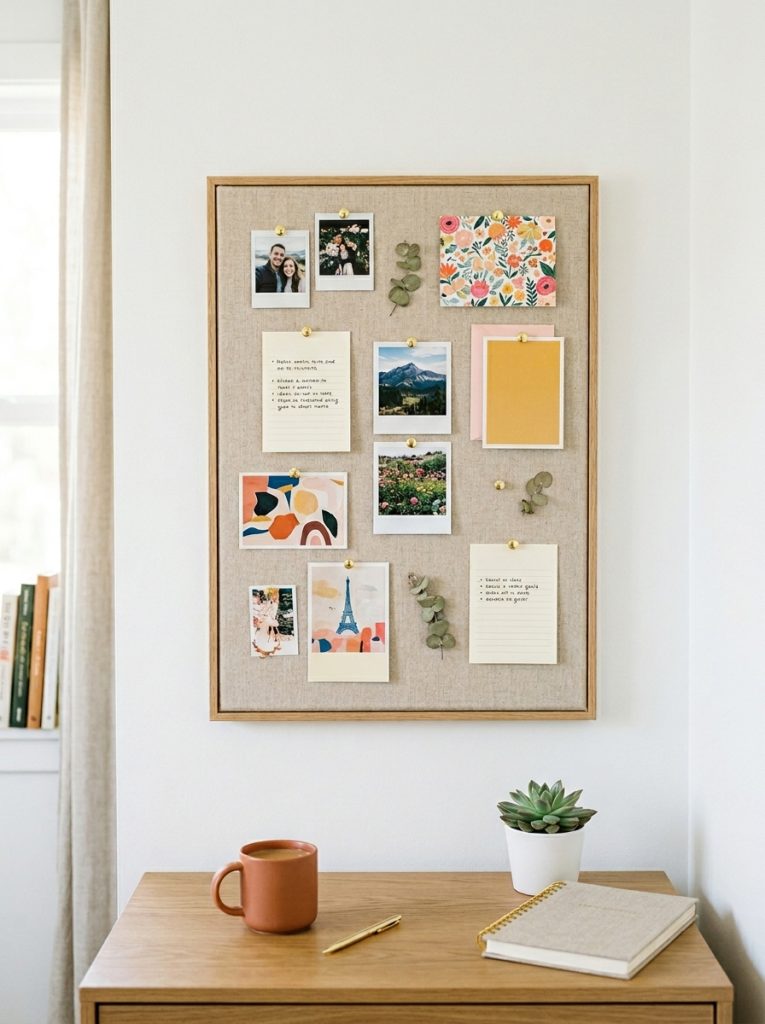
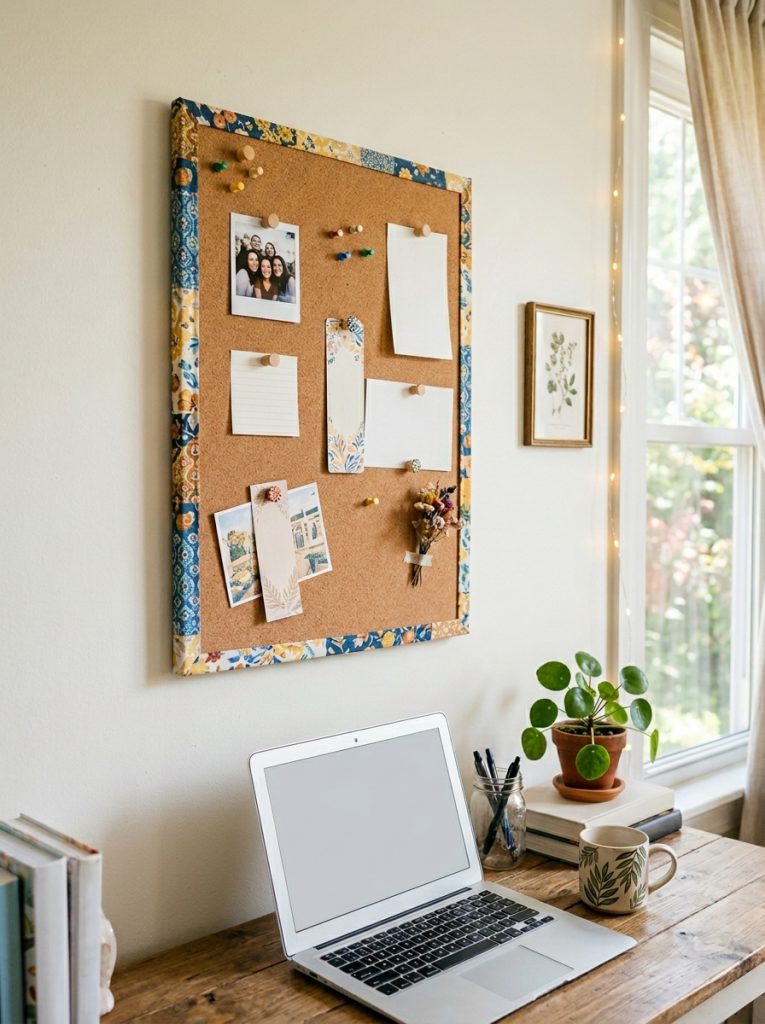
A fabric covered cork board is the most popular DIY upgrade because it immediately makes a plain board look intentional and designed. Wrap the board in any fabric — linen for a neutral minimal look, a bold print for a statement piece, or velvet for something more luxurious. This fabric covered cork board is a ready made version in the style to aim for. Make your own by stretching fabric over any standard cork board and securing with a staple gun on the back. For more office and organization ideas check out these shelf styling ideas.
Materials Needed:
- Standard cork board
- Fabric of your choice
- Staple gun and staples
- Scissors
- Optional: batting for extra softness
How to Make It:
- Cut fabric to the size of the cork board plus 3 inches on each side for wrapping.
- Lay fabric face down and center the cork board on top.
- Pull fabric up over one long side and staple to the back of the board frame.
- Pull the opposite side taut and staple, then repeat on the short sides.
- Fold corners neatly like wrapping a gift and staple flat — the front should be completely smooth.

Fabric Covered Cork Board
Ready made fabric covered cork board — great reference for your own DIY fabric covered version.
Check Price on Amazon2. Build a Large Framed Cork Board
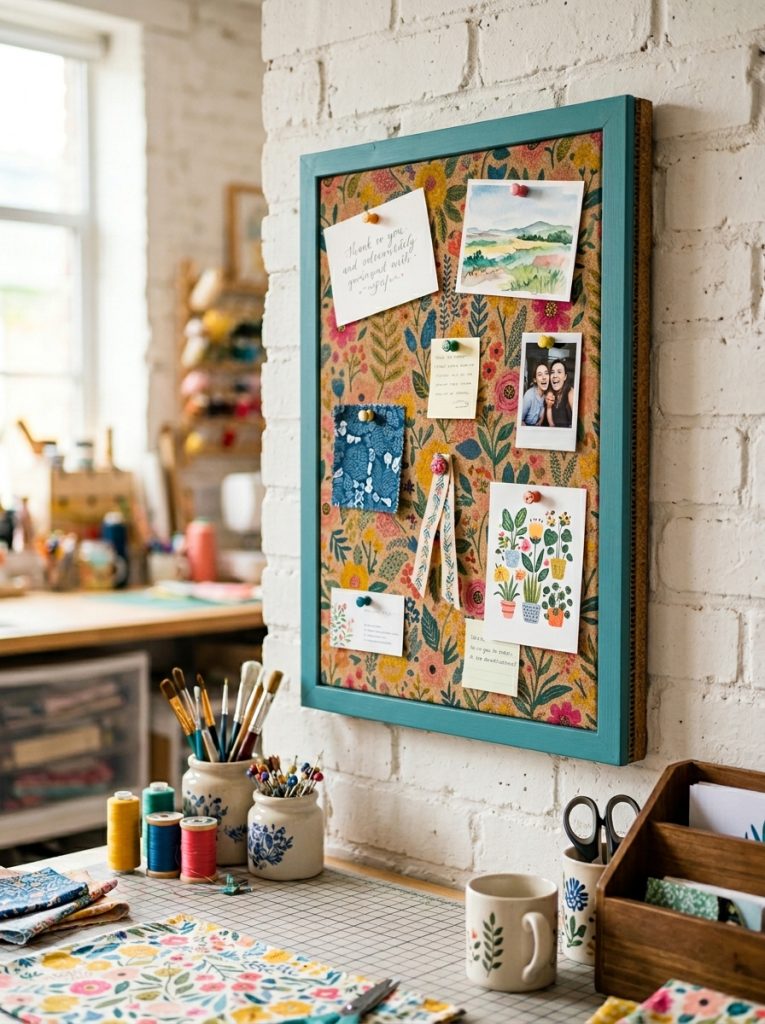
A large framed cork board looks far more finished than a bare board with metal clips. Build a simple wood frame from 1×3 or 1×4 boards, miter the corners, paint or stain, and attach the cork sheet inside. This large framed cork board shows the right proportions to aim for — wide enough to hold a real collection of photos, notes, and to-do items without feeling cramped. A large framed cork board centered on a home office or bedroom wall becomes a proper decor piece.
Materials Needed:
- Cork sheet cut to size
- 1×3 or 1×4 pine boards for frame
- Miter saw for corner cuts
- Wood glue and finish nails
- Paint or stain
How to Make It:
- Cut cork sheet to your desired board dimensions.
- Cut four frame boards with 45 degree mitered corners to fit around the cork sheet.
- Glue and nail the frame corners together and allow to cure.
- Attach the cork sheet to the back of the frame with construction adhesive.
- Paint or stain the frame and hang on the wall.

Large Framed Cork Board
Large framed cork board with clean wide frame — great reference for sizing your own DIY framed build.
Check Price on Amazon3. Make a Cork Board Jewelry Organizer
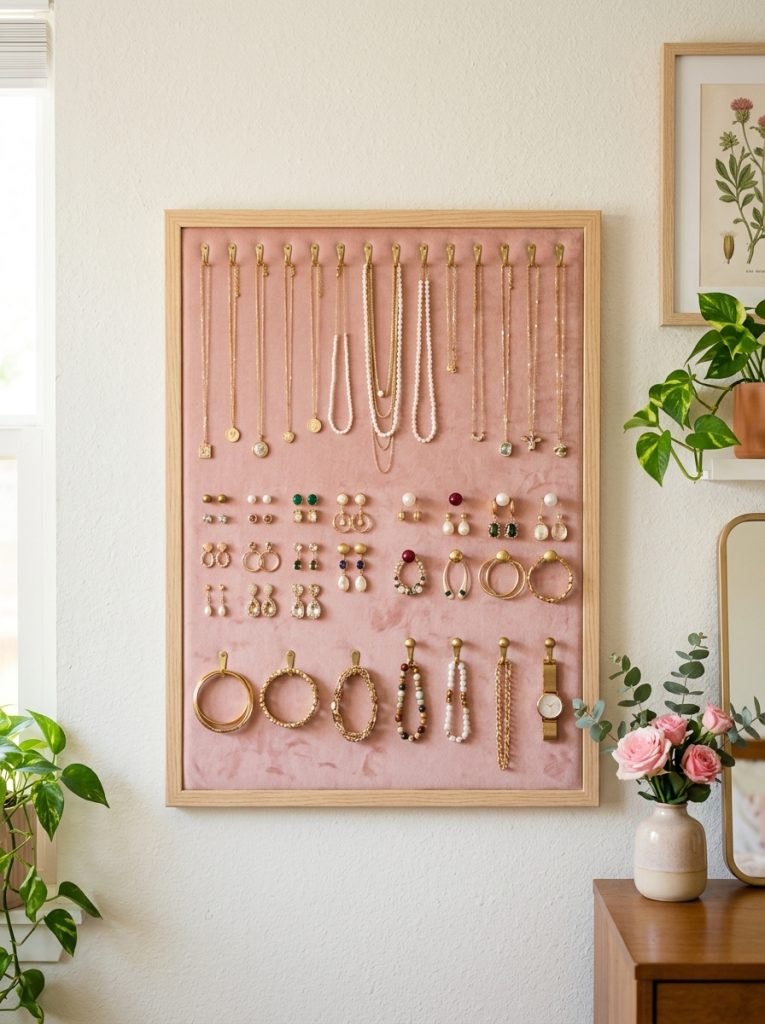
A cork board makes a perfect jewelry organizer because you can push pins and small hooks anywhere you need them and rearrange as your collection changes. Cover it in velvet for a luxurious jewelry display look, add S hooks on pins for necklaces, small hooks for bracelets, and earring holders made from lace or mesh stretched across a section. This cork board jewelry organizer shows the finished style. For more bedroom organization ideas check out these bedroom inspiration ideas.
Materials Needed:
- Cork board
- Velvet or fabric for covering
- Small S hooks and push pins
- Lace or mesh for earring holder section
- Staple gun
How to Make It:
- Cover the cork board in velvet fabric secured with a staple gun on the back.
- Push small S hooks on pin bases into the cork at even intervals for necklaces.
- Staple a section of lace or mesh to one area of the board for dangling earrings.
- Add larger hooks on pins for bracelets and chunky necklaces.
- Hang on the bedroom wall at a comfortable height for daily use.

Cork Board Jewelry Organizer
Cork board jewelry organizer with hooks and display options — great reference for a DIY velvet version.
Check Price on Amazon4. Tile a Full Wall with Cork Tiles

Cork wall tiles let you create a full wall pinboard without being limited to one board size. Install them edge to edge across an entire wall section and every inch becomes a pinnable surface. This cork board tile set installs with peel-and-stick backing or construction adhesive — no drilling required. A full wall of cork tiles in a home office or college dorm creates a functional feature wall that is also genuinely useful every day.
Materials Needed:
- Cork board tiles (peel and stick)
- Level and measuring tape
- Pencil for layout marks
- Construction adhesive (optional for permanent install)
How to Make It:
- Measure the wall area and calculate how many tiles are needed.
- Mark a level horizontal starting line at the bottom of the installation area.
- Peel backing and press the first tile firmly into the bottom corner.
- Work across the row then move up row by row keeping tiles aligned.
- Cut edge tiles with a sharp knife and straight edge for clean borders.

Cork Board Tiles Wall Set
Peel and stick cork tiles for creating a full pinnable wall surface without drilling.
Check Price on Amazon5. Build a Wine Cork Board
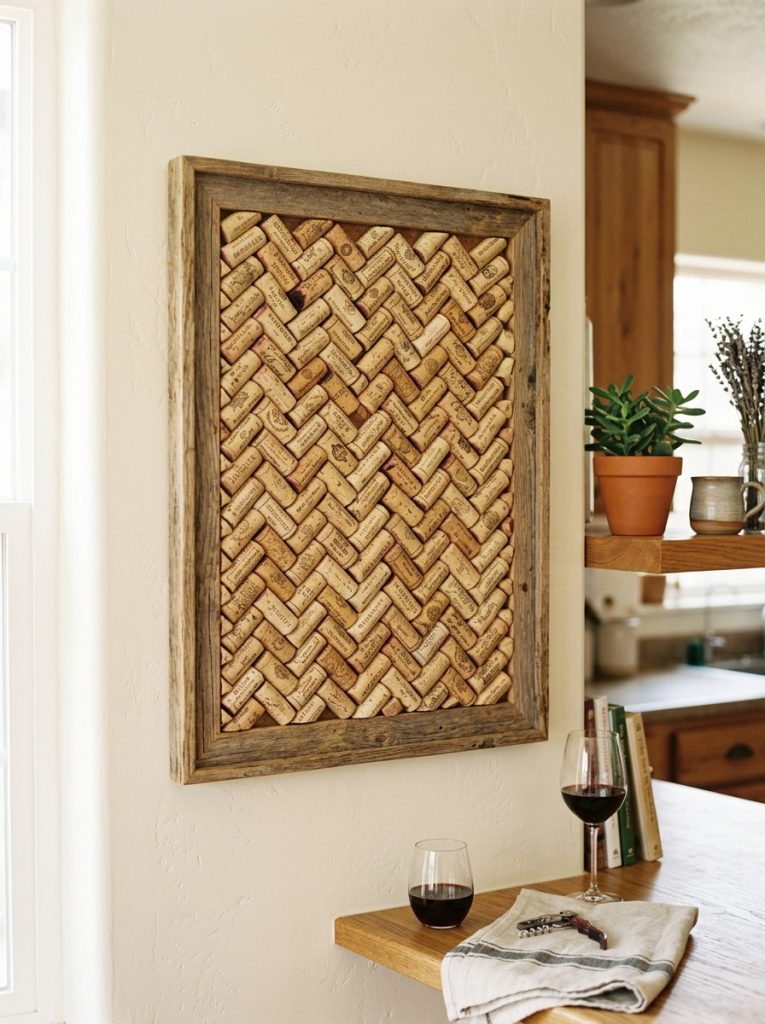
A wine cork board built from actual wine corks is one of those projects that looks impressive but is genuinely simple. Collect corks over time or buy them in bulk, arrange them in a herringbone, diagonal, or simple grid pattern inside a shadow box frame, and glue them in place. This wine cork bag for DIY projects provides enough corks for a standard frame. The finished board is thick enough to hold push pins and the natural cork texture looks beautiful on a kitchen or bar wall.
Materials Needed:
- Wine corks (50 to 100 depending on frame size)
- Shadow box frame or DIY wood frame
- Strong craft glue or hot glue
- Ruler for layout planning
How to Make It:
- Lay corks out in the frame without glue first to plan the pattern and count needed.
- Choose a pattern — herringbone looks best but straight rows work too.
- Apply craft glue to the back of each cork and press firmly into position.
- Work section by section allowing glue to set before moving to the next area.
- Allow full cure before hanging — wine cork boards are heavier than they look.

Wine Corks for DIY Cork Board
Bulk wine corks for building a DIY wine cork board — enough for a standard shadow box frame.
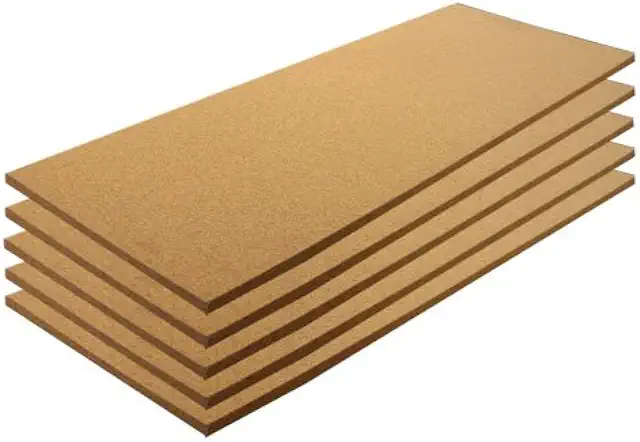
Check Price on Amazon6. Use a Cork Sheet Roll for Custom Sizes

A cork sheet roll is the most versatile starting material for any DIY cork board project because you can cut it to any size and shape. Long horizontal boards, irregular shapes, or boards that fill an exact wall space are all possible with a roll. This cork board sheet roll cuts cleanly with scissors or a craft knife and is thick enough for standard push pins. Use it as the base for a fabric covered board, cut it into strips for a pattern wall, or frame it in a custom built frame.
Materials Needed:
- Cork sheet roll
- Sharp scissors or craft knife and cutting mat
- Ruler and straight edge
- Frame or direct wall mounting strips
How to Make It:
- Measure the desired cork board dimensions carefully before cutting.
- Mark cut lines on the cork sheet with a pencil and straight edge.
- Cut with a sharp craft knife in one clean pass — ragged edges show on the finished board.
- Sand any rough edges lightly with fine sandpaper.
- Mount in a frame or directly on the wall with heavy duty adhesive mounting strips.
Cork Board Sheet Roll
Cork sheet roll that cuts to any custom size — perfect base material for any DIY cork board project.
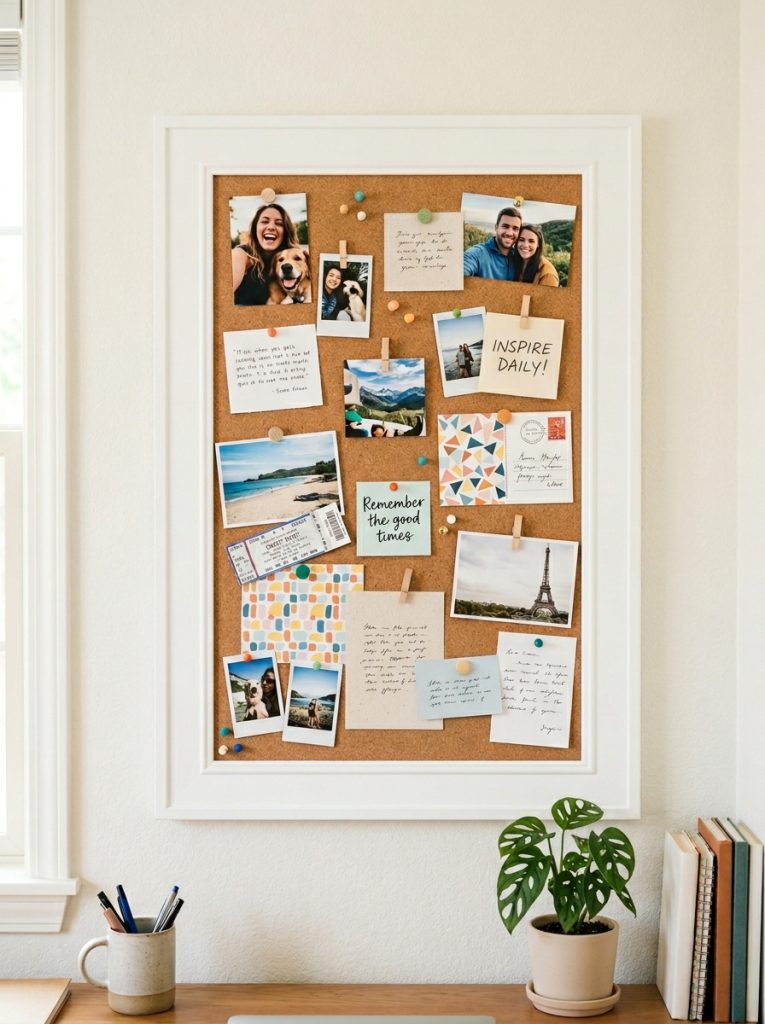
Check Price on Amazon7. Make a Photo Collage Cork Board
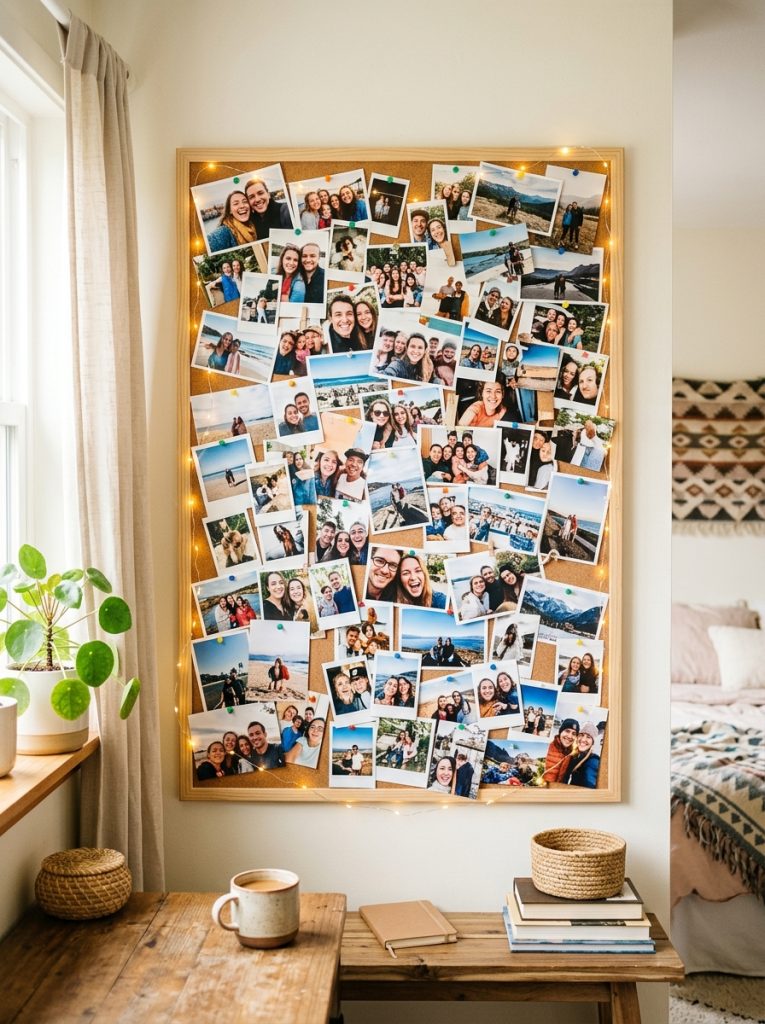
A photo collage cork board is one of the most personal home decor projects you can make. Print your favorite photos in different sizes, mix square and rectangular formats, and pin them overlapping across the board at slightly different angles. Add fairy lights draped across the board for a warm evening glow. The key is variety in photo size and never making the arrangement look too perfectly symmetrical — the casual overlapping pinned look is what makes it feel alive and personal.
Materials Needed:
- Large cork board or cork tiles
- Printed photos in various sizes
- Colorful or gold push pins
- Fairy lights (battery operated for flexibility)
- Optional: washi tape for decorative pin accents
How to Make It:
- Start with the largest photos placed first to anchor the composition.
- Fill gaps with medium and small photos overlapping naturally.
- Vary the angle of each photo slightly — nothing perfectly straight.
- Add small notes, ticket stubs, or cards between photos for a personal memory board feel.
- Drape battery operated fairy lights across the board before hanging for a cozy finishing touch.
8. Make a Cute Pink Cork Board
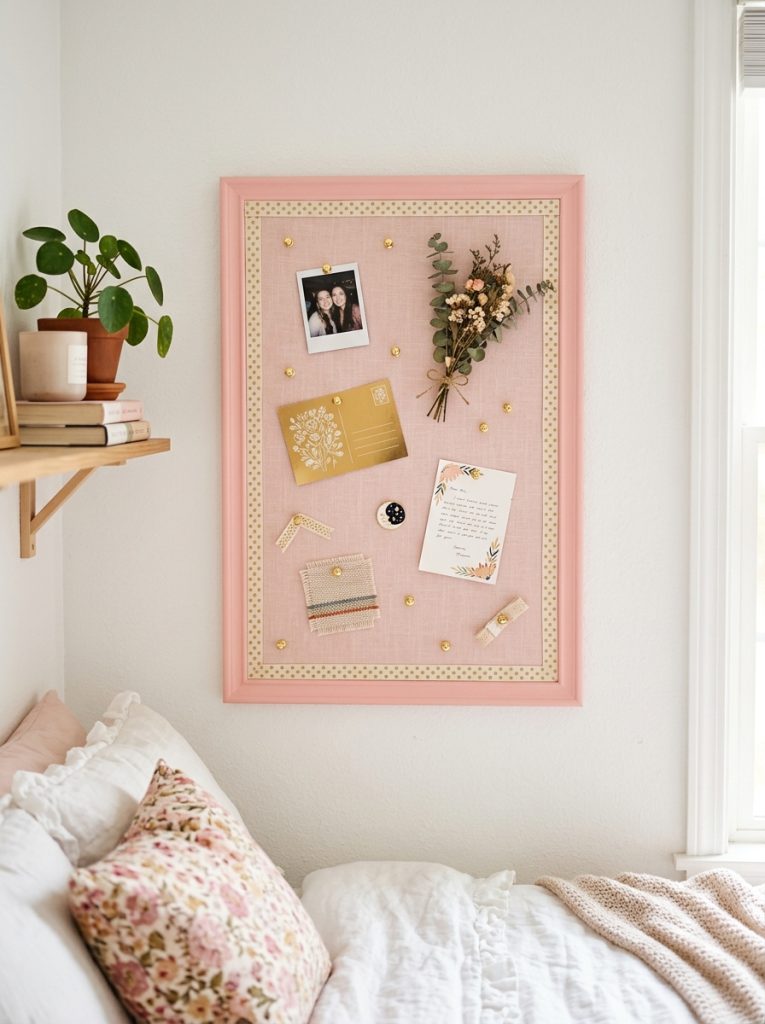
A pink cork board is one of the most popular bedroom and dorm room decor projects because it manages to be both functional and genuinely pretty. Cover a standard board in pale pink or blush fabric, paint the frame in a matching or complementary pink, add gold push pins, and hang ribbon or lace along the bottom edge as trim. The whole thing costs under fifteen dollars and looks like something from a boutique stationery store. For more bedroom decor ideas check out these boho bedroom ideas.
Materials Needed:
- Standard cork board with frame
- Pale pink or blush fabric
- Pink chalk paint for frame
- Gold push pins
- Ribbon or lace for trim
- Staple gun
How to Make It:
- Remove the cork from the frame if possible — paint the frame pink first.
- Cover the cork in pink fabric with a staple gun on the back.
- Reattach the covered cork to the painted frame.
- Hot glue ribbon or lace along the bottom frame edge as decorative trim.
- Hang with gold push pins already placed for an immediately styled look.
9. Build a Foam Board Cork Board
Foam board makes an excellent lightweight base for a DIY cork board — it is inexpensive, easy to cut, and light enough to hang without heavy wall hardware. Glue a cork sheet to the foam board face, cover in fabric if desired, and the finished board is surprisingly sturdy for push pin use. Perfect for renters and dorm rooms where wall damage is a concern — foam board cork boards hang with command strips and come down clean.
Materials Needed:
- Thick foam board
- Cork sheet roll
- Fabric (optional)
- Craft glue
- Command strips for hanging
How to Make It:
- Cut foam board to your desired cork board dimensions.
- Cut cork sheet to the same dimensions and glue to the foam board face.
- Press firmly and allow to cure flat under heavy books for 24 hours.
- Cover in fabric if desired using the same technique as a standard fabric covered board.
- Hang with large command strips rated for the weight.
10. Make a Cardboard Cork Board
Cardboard is the cheapest possible base material for a DIY cork board and when layered four to six sheets thick it is genuinely rigid enough for push pin use. Glue sheets together, cover the face with cork sheet, wrap in fabric, and the finished board looks identical to a standard cork board from the front. A completely free build if you have cardboard boxes at home — perfect for a temporary office setup or a first dorm room board.
Materials Needed:
- Thick corrugated cardboard (4 to 6 sheets)
- Cork sheet roll
- Fabric for covering
- Strong craft glue
- Staple gun
How to Make It:
- Cut four to six cardboard sheets to identical dimensions.
- Glue all sheets together firmly and allow to dry completely under weight.
- Glue cork sheet to the front face of the layered cardboard.
- Cover with fabric using a staple gun on the back edges.
- Hang with large command strips or adhesive hooks.
11. Make an Office Cork Board
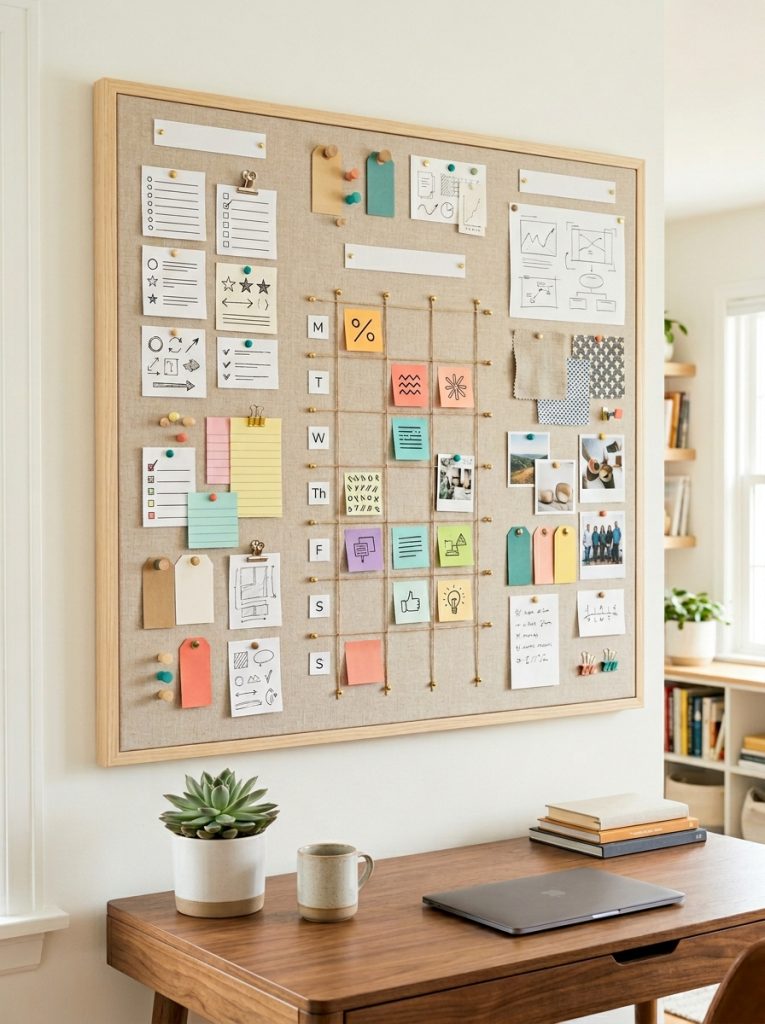
An office cork board works best when it is organized into zones — a to-do section, a calendar section, a reference section, and a current projects area. Use washi tape or ribbon pinned across the board to divide it into sections and label each zone. A linen or neutral fabric cover looks professional in a home office without being as stark as bare cork. Keep the board directly in the line of sight from the desk so it is used rather than ignored.
Materials Needed:
- Large cork board (at least 24×36 inches for office use)
- Linen or neutral fabric
- Washi tape or ribbon for section dividers
- Label tags
- Staple gun
How to Make It:
- Cover the board in neutral fabric using a staple gun on the back.
- Pin ribbon or washi tape horizontally and vertically to divide the board into zones.
- Label each zone with a small tag pinned at the top — To Do, This Week, References, Ideas.
- Hang directly above or beside the desk at eye level when seated.
- Start each week by resetting the board so sections stay current and useful.
12. Make a College Dorm Cork Board
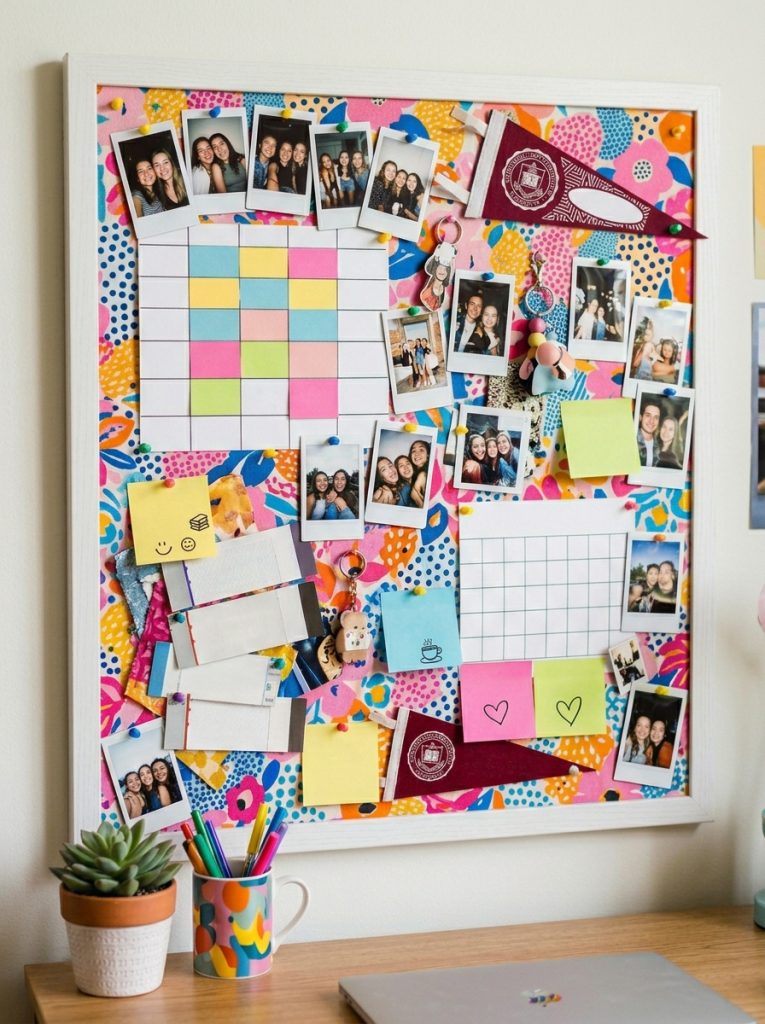
A college dorm cork board has to do a lot — hold a class schedule, display photos from home, pin important deadlines, and still look good in a small room. Cover it in a bold or patterned fabric that matches the dorm room bedding color scheme, use colorful push pins to make pinning feel intentional, and divide it into a photo section and an academic section. Command strip mounting means no damage to dorm walls and the board comes home at the end of the year.
Materials Needed:
- Standard cork board
- Bold patterned fabric
- Colorful push pins
- Command strips for wall mounting
- Staple gun
How to Make It:
- Cover the cork board in bold patterned fabric with a staple gun.
- Mount on the dorm room wall with command strips rated for the board weight.
- Pin class schedule and academic deadlines on one side.
- Fill the other side with photos, postcards, and personal mementos.
- Use different colored push pins for different categories — academic in one color, personal in another.
13. Make a Canvas Cork Board

A stretched canvas frame makes an excellent base for a cork board because it already has a hanging system built in and the frame has a clean finished edge. Glue cork sheet across the canvas surface, paint a decorative border around the edges if desired, and the finished board has a gallery-quality look that standard cork boards never achieve. The canvas depth also means push pins go in at a slight angle which actually holds items more securely.
Materials Needed:
- Stretched canvas frame
- Cork sheet roll
- Craft glue
- Paint for border decoration (optional)
- Push pins
How to Make It:
- Cut cork sheet to the exact canvas dimensions.
- Apply craft glue evenly across the canvas surface and press the cork sheet down firmly.
- Allow to cure completely flat under weight for at least 24 hours.
- Paint a decorative border around the cork edge if desired.
- Hang using the existing canvas hanging hardware on the back.
14. Make a Map Cork Board
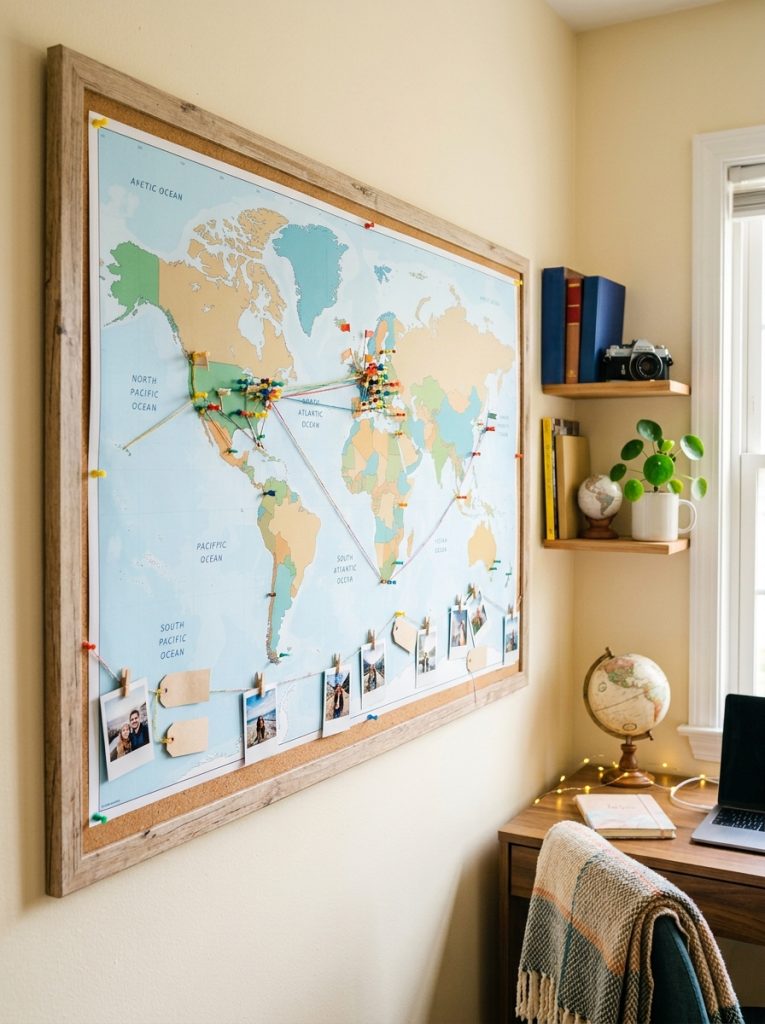
A map cork board combines travel inspiration with a functional pinboard. Print a large world or country map on paper, mount it across the cork surface with a thin layer of decoupage medium, and add push pins to mark places visited, places to go, or places that mean something. The cork underneath still holds regular push pins so the board is fully functional while also being a personal travel display. One of the most meaningful cork board ideas for a bedroom or home office wall.
Materials Needed:
- Cork board or cork tiles
- Large format printed map
- Decoupage medium (Mod Podge)
- Foam brush
- Colored push pins for location marking
How to Make It:
- Print or buy a large map sized to fit your cork board.
- Apply a thin even coat of Mod Podge to the cork surface with a foam brush.
- Lay the map on the wet Mod Podge and smooth out from the center to remove air bubbles.
- Apply a topcoat of Mod Podge over the map and allow to dry completely.
- Add colored push pins to mark visited and wishlist locations.
15. Paint a Cork Board for a Unique Look
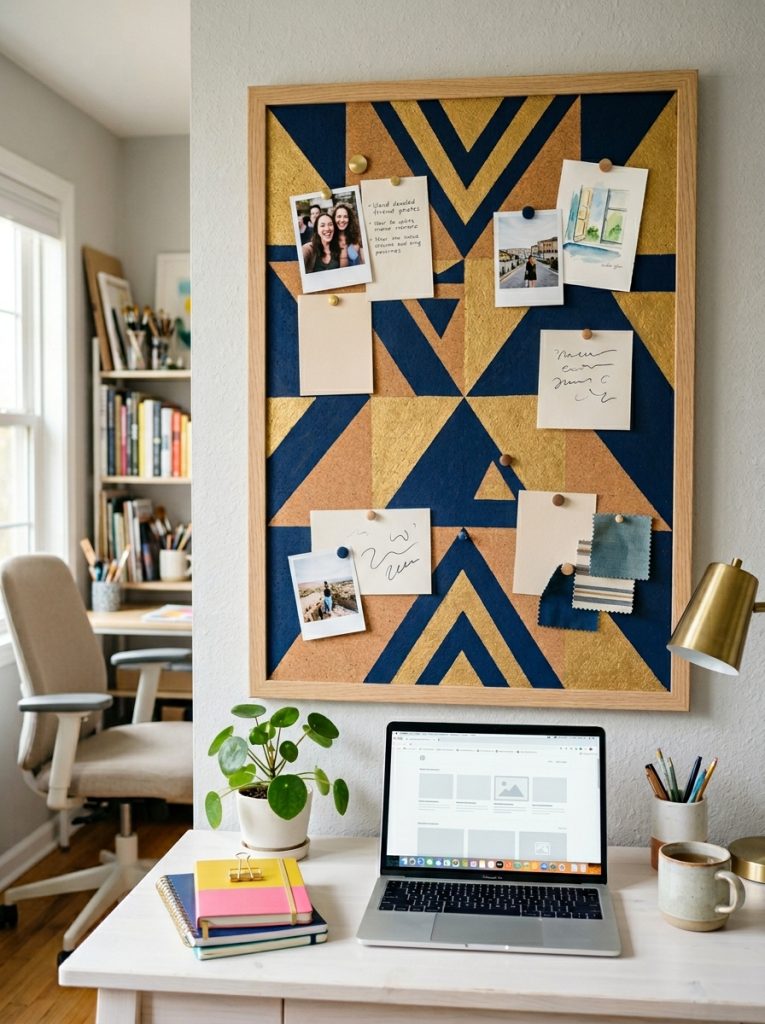
Painting directly on a cork board creates a completely unique look that no fabric cover can replicate — the cork texture shows through the paint in a way that looks deliberately artistic. Paint bold geometric shapes, abstract color blocks, or a simple ombre gradient across the cork surface. Use acrylic paint thinned slightly so it soaks into the cork texture rather than sitting on top. Items still pin through painted cork perfectly and the design becomes the decor even when the board is empty. These DIY room decor ideas have more creative wall projects to pair with a painted cork board.
Materials Needed:
- Cork board
- Acrylic paint in chosen colors
- Painter’s tape for geometric edges
- Foam brush or small roller
- Matte sealer spray
How to Make It:
- Apply painter’s tape to mask off geometric sections or border areas.
- Apply acrylic paint with a foam brush working the paint into the cork texture.
- Remove tape before the paint is fully dry for clean edges.
- Allow to dry completely and apply additional colors in other sections.
- Seal with a light coat of matte sealer spray to protect the painted surface.
Final Thoughts on DIY Cork Board
A DIY cork board is one of those projects that takes an afternoon and pays off every single day. Whether you cover it in fabric, fill it with wine corks, build it from a canvas frame, or tile an entire wall, the finished board becomes a functional and personal part of every room it goes in. Pick the style that fits your space and start with whatever materials you already have at home.

Amir Ali is the founder and site administrator of HomeDecorEdge, a modern home decor and interior design platform. Since starting the site, he has combined his passion for interior design, practical styling, and color coordination with hands-on content strategy and site management. He guides authors, curates high-quality articles, and ensures readers have access to actionable, visually inspiring, and user-focused home decor advice for apartments, small rooms, and family homes.