
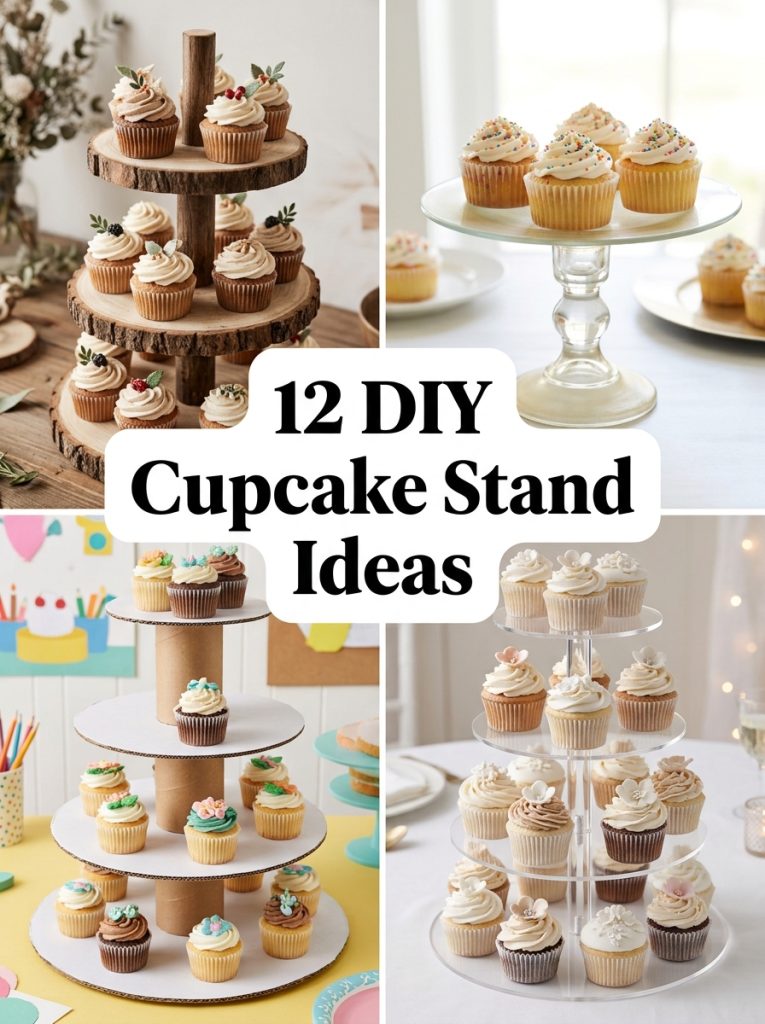
A tiered cupcake stand instantly elevates a dessert table from a plain platter of treats into a genuine display piece, and most versions cost a fraction of what a store bought stand would. These DIY cupcake stand ideas cover every budget and occasion, from a five minute dollar tree build to a polished wood tiered stand worth keeping for years of future parties.
This post contains affiliate links. If you purchase through these links I may earn a small commission at no extra cost to you.
A tiered stand turns ordinary cupcakes into the centerpiece of the whole dessert table.
1. Build a Rustic Wood Tiered Stand
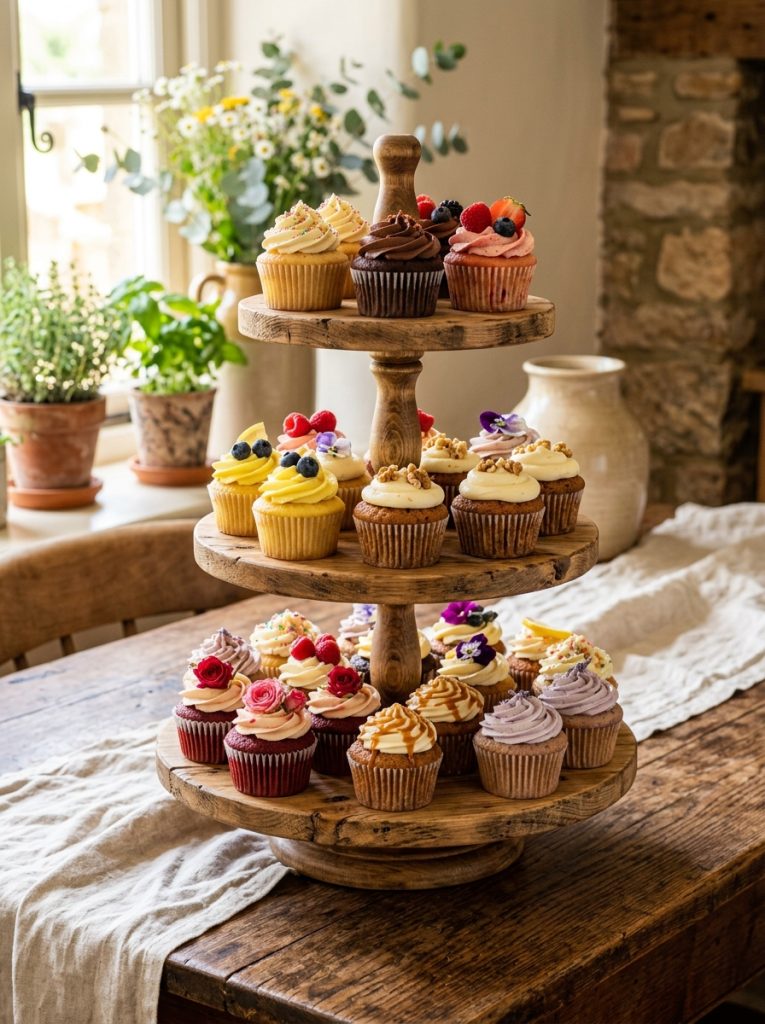
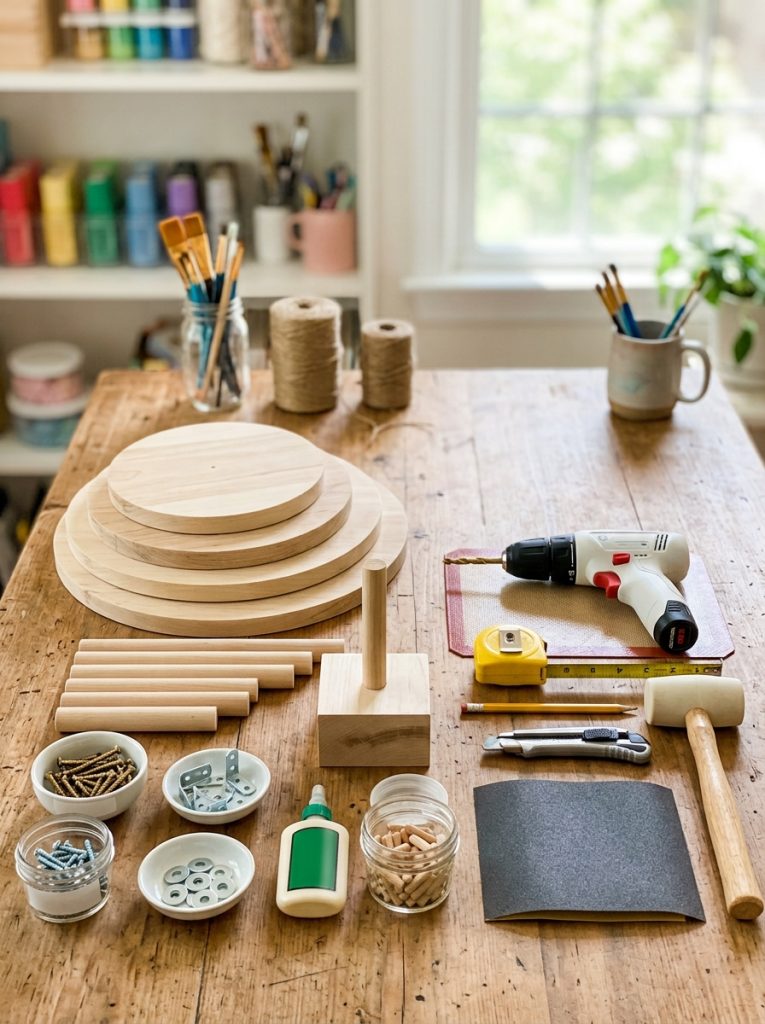
A rustic wood tiered stand has the kind of lasting quality that makes it worth reusing for years of birthdays and gatherings rather than something thrown away after one event. This cupcake stand wood rustic tiered shows the warm natural finish to aim for when building your own. Stack circular wood rounds connected with dowels or a central rod, sand every edge smooth, and the finished piece works for both casual farmhouse parties and more polished rustic wedding tables.
Materials Needed:
- Wood rounds or circular boards in graduated sizes
- Wood dowels or a threaded center rod
- Wood glue
- Sandpaper
- Wood stain or sealant
How to Make It:
- Cut or source wood rounds in three graduated sizes for the tiers.
- Drill a center hole through each round if using a threaded rod design.
- Stack the rounds with spacers or a center rod, largest at the bottom.
- Secure with wood glue at each connection point.
- Sand all surfaces and apply a wood stain or clear sealant before use.

Rustic Wood Tiered Cupcake Stand
Rustic wood tiered stand with a warm natural finish — great reference for building a reusable version.
Check Price on Amazon2. Create an Elegant Wedding Tiered Display
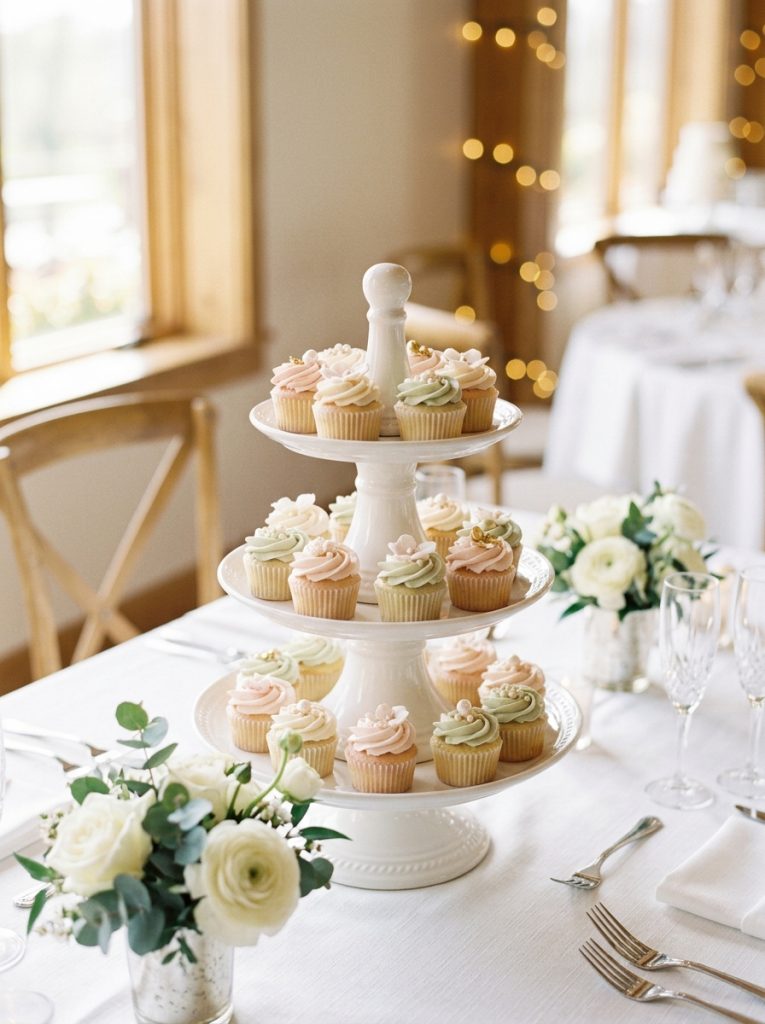
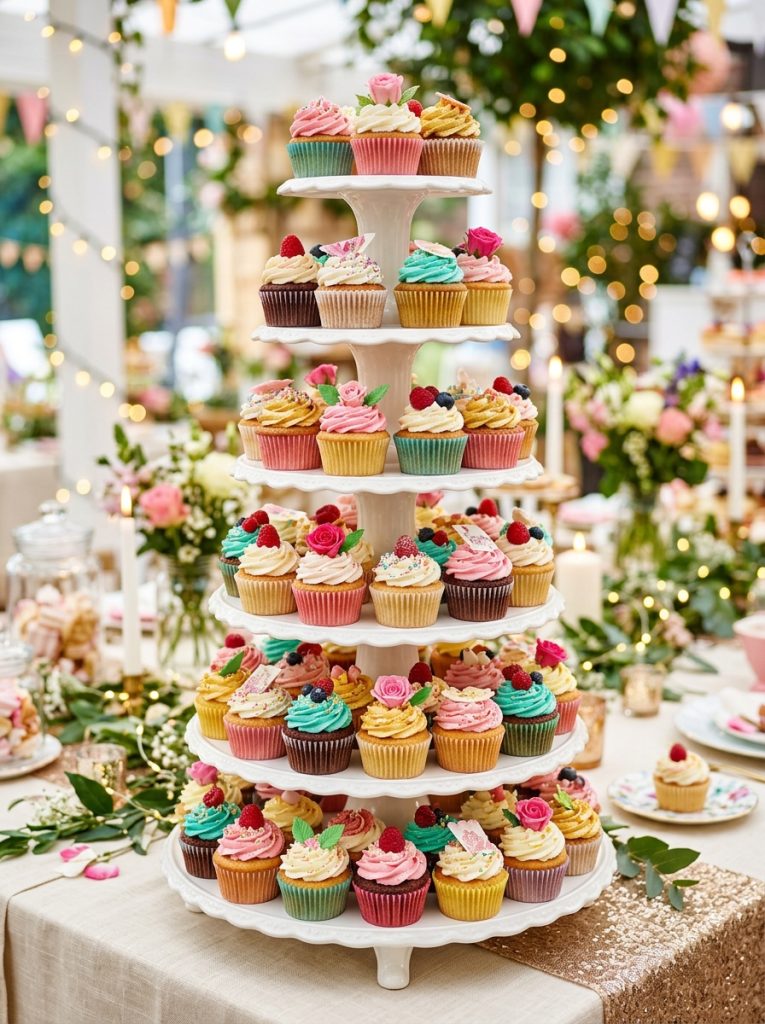
A wedding dessert table calls for a more polished tiered display than a casual birthday party would, with clean lines and a finish that matches the overall event color scheme. This cupcake stand wedding tiered shows the elegant white finish style to aim for. Paint a basic wood or foam core tiered build in white or gold, add a simple ribbon trim around each tier edge, and the result looks intentional enough for even a formal reception.
Materials Needed:
- Foam core boards or thin plywood circles
- Center support rod or stacked risers
- White or metallic spray paint
- Ribbon trim
- Hot glue gun
How to Make It:
- Cut foam core or plywood into graduated circle sizes for each tier.
- Build risers or use a center rod to create proper spacing between tiers.
- Paint every surface in white or a metallic tone matching the wedding palette.
- Glue ribbon trim around the edge of each tier for a finished look.
- Allow paint and glue to fully dry before loading with cupcakes.

Elegant Wedding Tiered Cupcake Stand
Polished white tiered stand style — great reference for a formal wedding dessert table build.
Check Price on Amazon3. Stack Acrylic Plates for a Modern Look
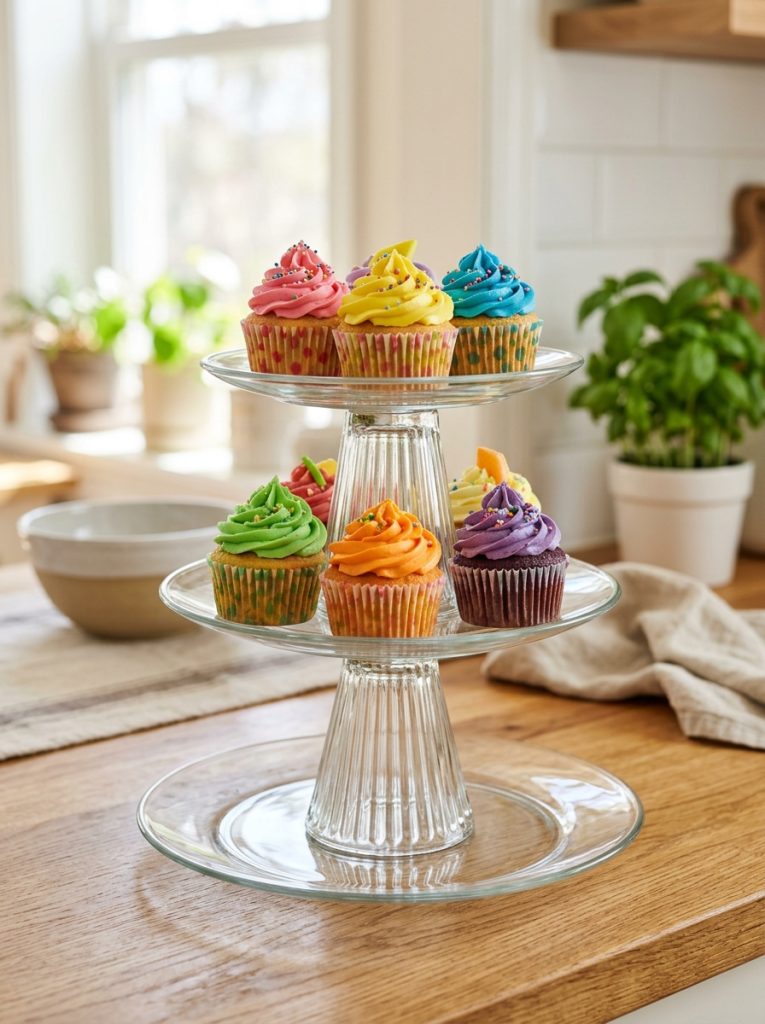
Clear acrylic plates stacked with simple spacers create a tiered stand that lets the cupcakes themselves be the only visual focus, since the stand essentially disappears against any background. This cupcake stand acrylic plates shows the clean modern aesthetic this approach achieves. Use crystal candle holders, glass tumblers, or purpose made acrylic risers as spacers between plate tiers for a build that looks genuinely sleek rather than improvised.
Materials Needed:
- Clear acrylic or glass plates in graduated sizes
- Glass or acrylic riser spacers
- Strong adhesive or removable adhesive dots
How to Make It:
- Choose plates in three graduated sizes, largest for the base.
- Select riser spacers tall enough to create visible separation between tiers.
- Secure the largest plate to the base riser with adhesive dots if a permanent stand is wanted.
- Stack the next plate on top of a second riser set on the first plate.
- Repeat for the top tier and load with cupcakes once fully assembled.

Acrylic Plate Cupcake Stand
Clear acrylic plate style — great reference for a sleek modern tiered cupcake display.
Check Price on Amazon4. Build a Budget Cardboard Stand
A cardboard tiered stand costs almost nothing and works perfectly for a one-time party where buying or building a permanent wood version is not worth the investment. This cupcake stand cardboard kit shows the style to aim for. Cut graduated circles from sturdy cardboard, cover in coordinating wrapping paper or cardstock, and stack with cardboard tubes or small boxes as spacers between tiers.
Materials Needed:
- Sturdy cardboard
- Patterned paper or cardstock
- Cardboard tubes or small boxes for spacers
- Hot glue gun
- Scissors or craft knife
How to Make It:
- Trace and cut three graduated circles from sturdy cardboard.
- Cover each circle in patterned paper or cardstock, gluing edges underneath.
- Cut cardboard tubes to the desired height for spacers between tiers.
- Glue spacers to the center of each lower tier circle.
- Stack and glue the next tier on top of each spacer, working up to the smallest top tier.

Cardboard Cupcake Stand Kit
Cardboard tiered stand style — great reference for a budget friendly one-time party build.
Check Price on Amazon5. Build a Donut and Cupcake Combo Tower

Combining donuts and cupcakes on one tiered tower gives guests more dessert variety than a single-treat stand while still looking like one cohesive display piece. This donut cake tower stand shows the dowel system used to hold donuts upright alongside flat tiers for cupcakes. Build a central wood base with vertical dowels for donuts and attach circular plate tiers at varying heights around them for the cupcakes.
Materials Needed:
- Wood base board
- Wood dowels for donuts
- Plate tiers for cupcakes
- Wood glue and drill
- Paint or stain
How to Make It:
- Drill holes into the wood base for the dowels in a pattern that leaves room for plate tiers.
- Glue dowels into the drilled holes and allow to set.
- Attach plate tiers around the dowels at staggered heights using risers.
- Paint or stain the visible wood base and dowels.
- Slide donuts onto the dowels and arrange cupcakes on the plate tiers.

Donut and Cupcake Tower Stand
Combo tower style with dowels for donuts — great reference for a mixed dessert display build.
Check Price on Amazon6. Try a Dollar Tree Style Pedestal Stand
The classic dollar store cupcake stand build glues a plate to an upside down candle holder or small vase, creating an instant pedestal stand for under five dollars in materials. This cupcake stand pedestal dollar tree style shows the finished pedestal look this method achieves. Paint the candle holder base in a color matching the party theme, and stack two or three of these single pedestals at different heights for a layered dessert table effect without building a true tiered structure.
Materials Needed:
- Dollar store plates
- Dollar store candle holders or small vases
- Strong adhesive (E6000 or hot glue)
- Spray paint (optional)
How to Make It:
- Clean the surfaces of both the plate and candle holder thoroughly.
- Apply strong adhesive to the top of the upside down candle holder.
- Center and press the plate firmly onto the glued surface.
- Allow to cure fully according to the adhesive instructions before use.
- Paint the pedestal base if a color other than the original finish is wanted.

Dollar Tree Style Pedestal Cupcake Stand
Classic dollar store pedestal build — great reference for an instant budget friendly stand.
Check Price on Amazon7. Build a Stand for 50 to 60 Cupcakes
A larger gathering needs a stand built with genuine capacity in mind rather than a small three-tier piece designed for a dozen cupcakes. Plan for four or five tiers with wider plate diameters at each level, and calculate roughly 12 to 15 cupcakes per tier depending on plate size to comfortably hold 50 to 60 total. Building this larger scale stand from plywood circles rather than thin cardboard ensures the structure stays sturdy under the additional weight.
Materials Needed:
- Plywood circles in five graduated sizes
- Wood dowels or threaded center rod
- Wood screws and drill
- Paint or stain
- Wood glue
How to Make It:
- Cut five plywood circles in graduated sizes, with the largest at least 16 inches wide.
- Drill center holes through each circle for the support rod or dowels.
- Assemble with spacers between each tier, checking stability at each stage.
- Reinforce connection points with wood glue and screws for the added weight capacity.
- Finish in paint or stain and test load capacity before the actual event.
8. Make a Graduation Themed Stand

A graduation party cupcake stand benefits from a color scheme matching the school colors and a few simple themed touches rather than an elaborate redesign. Build a basic tiered stand in white or a neutral tone, then add small printed graduation cap toppers or a banner draped across one tier. Display cupcakes in the school’s colors on each tier for a display that reads as celebratory without needing custom built elements specific to graduation.
9. Style a Baby Shower Dollar Tree Stand
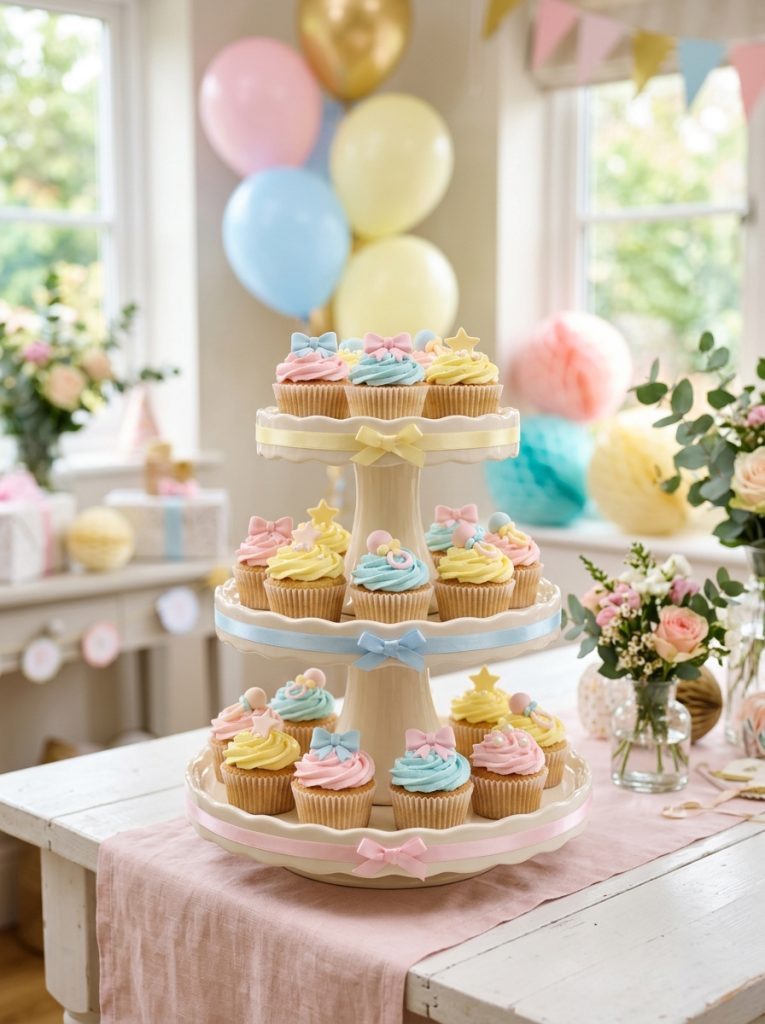
A baby shower cupcake stand built from dollar tree materials works beautifully in soft pastel tones that match typical baby shower color schemes — pale pink, blue, mint, or yellow depending on the theme. Paint a basic dollar store plate and pedestal stand in the chosen pastel, then add a simple ribbon trim around the plate edge for a finished touch. This budget approach means the stand can match an exact theme color precisely rather than settling for whatever finish a store bought option happens to offer.
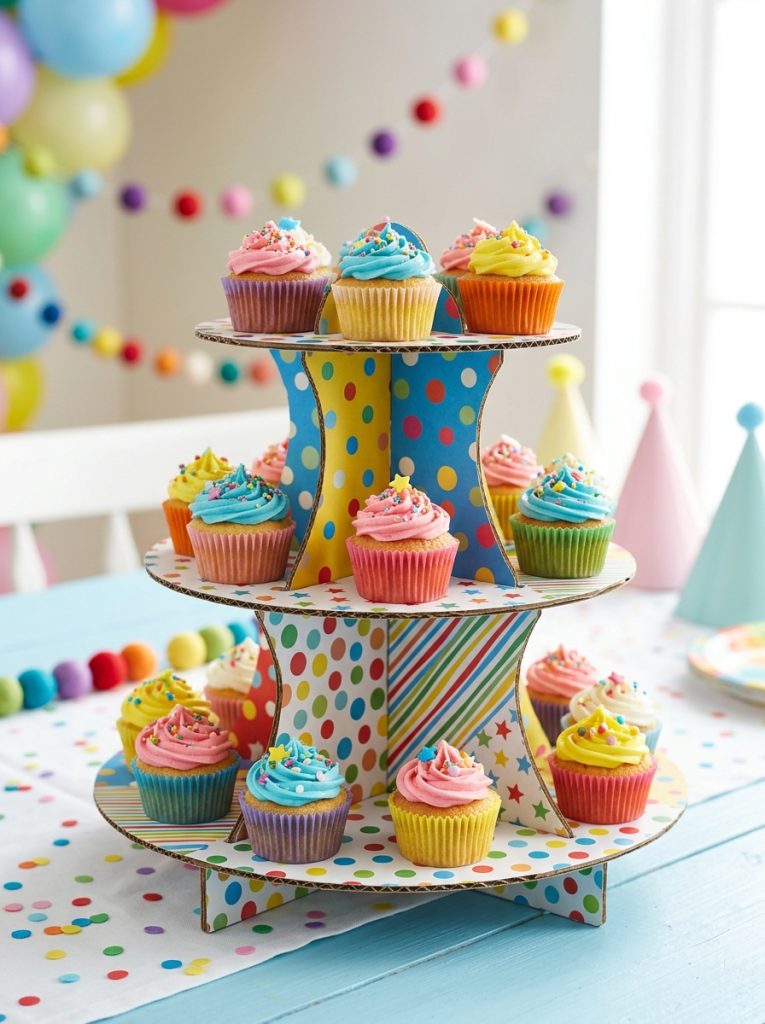
10. Build a Birthday Party Tiered Stand

A birthday party stand has the most flexibility for bold color and playful styling compared to more formal occasions, so this is the build where bright primary colors, glitter accents, or a fun painted pattern genuinely work. Build the basic tiered structure using any method from this list and paint in colors matching the birthday theme rather than a neutral tone. A birthday stand is also the easiest to reuse across multiple kids’ parties since playful color schemes suit almost any birthday theme with minor adjustments.
11. Calculate the Right Measurements for Your Cupcakes
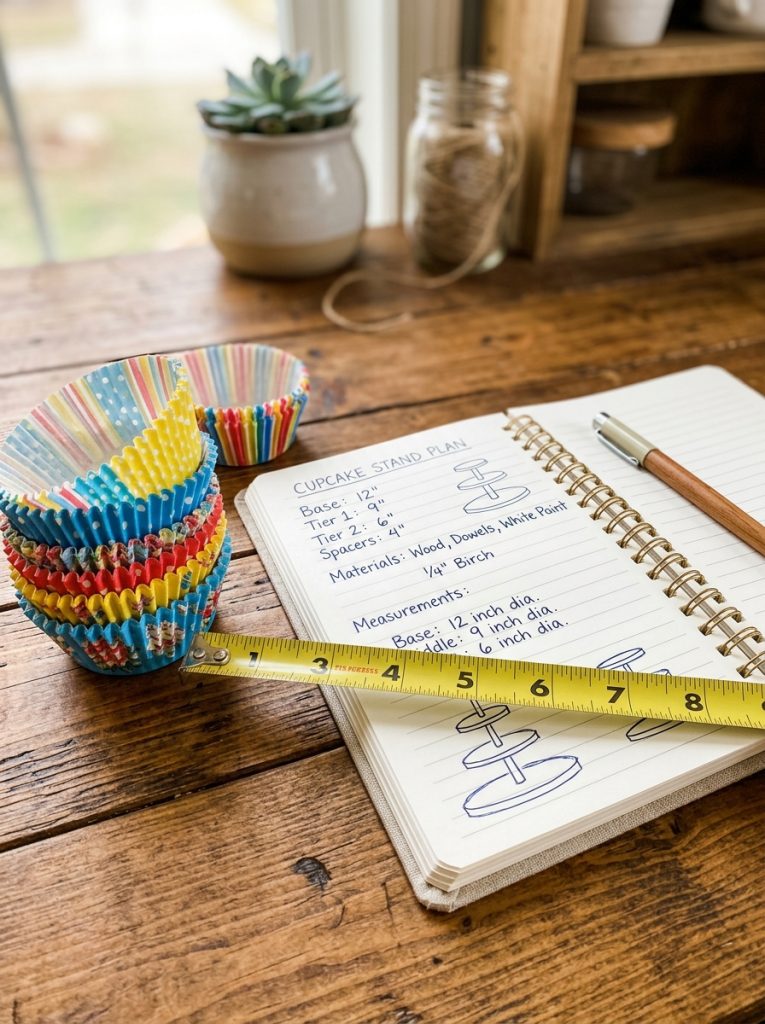
Getting tier spacing and plate diameter right matters more than any decorative choice, since a poorly measured stand either crowds cupcakes together or wastes plate space with gaps. Measure the actual diameter of your cupcake liners, including the paper wrapper, and plan roughly two inches of clearance between each cupcake for visual breathing room. Vertical spacing between tiers should clear the height of a frosted cupcake by at least an inch so the next tier does not crush the frosting below it.
Materials Needed:
- Tape measure
- A sample cupcake with frosting
- Notebook for recording measurements
How to Make It:
- Measure the diameter of a fully wrapped cupcake liner.
- Measure the height of a frosted cupcake from base to the top of the frosting.
- Calculate plate diameter needed based on how many cupcakes per tier and the clearance desired.
- Calculate riser height needed to clear the frosted cupcake height with margin.
- Use these confirmed measurements throughout the entire stand build.
12. Watch a Video Tutorial Before Starting Your Build
Watching a full video tutorial before starting a tiered stand build helps catch assembly order issues and structural details that a written list of steps alone can miss, especially for a first attempt at this kind of project. Look specifically for tutorials matching your chosen material — wood, cardboard, or dollar store plates — since the assembly technique differs significantly between methods. Gathering every material listed in the tutorial before starting also prevents a frustrating mid-build trip back to the store. For more party decor ideas check out these gift basket ideas and these DIY paper craft ideas.
Final Thoughts on DIY Cupcake Stand
A tiered cupcake stand is one of the easiest party projects to scale to any budget, from a five dollar dollar tree build to a polished wood piece meant to last for years of future celebrations. Whether the occasion is a wedding, birthday, baby shower, or graduation, the right stand style and color scheme turns a simple plate of cupcakes into the centerpiece everyone notices first. Pick the build that matches your event and start this week.

Amir Ali is the founder and site administrator of HomeDecorEdge, a modern home decor and interior design platform. Since starting the site, he has combined his passion for interior design, practical styling, and color coordination with hands-on content strategy and site management. He guides authors, curates high-quality articles, and ensures readers have access to actionable, visually inspiring, and user-focused home decor advice for apartments, small rooms, and family homes.