
A loft bed turns wasted vertical space into genuine square footage, opening up an entire floor area underneath for a desk, storage, or play space that a standard bed could never offer. These DIY loft bed plans cover every age and room size, from a simple twin frame for a kid’s first big bed to a full size adult version built for a small apartment.
This post contains affiliate links. If you purchase through these links I may earn a small commission at no extra cost to you.
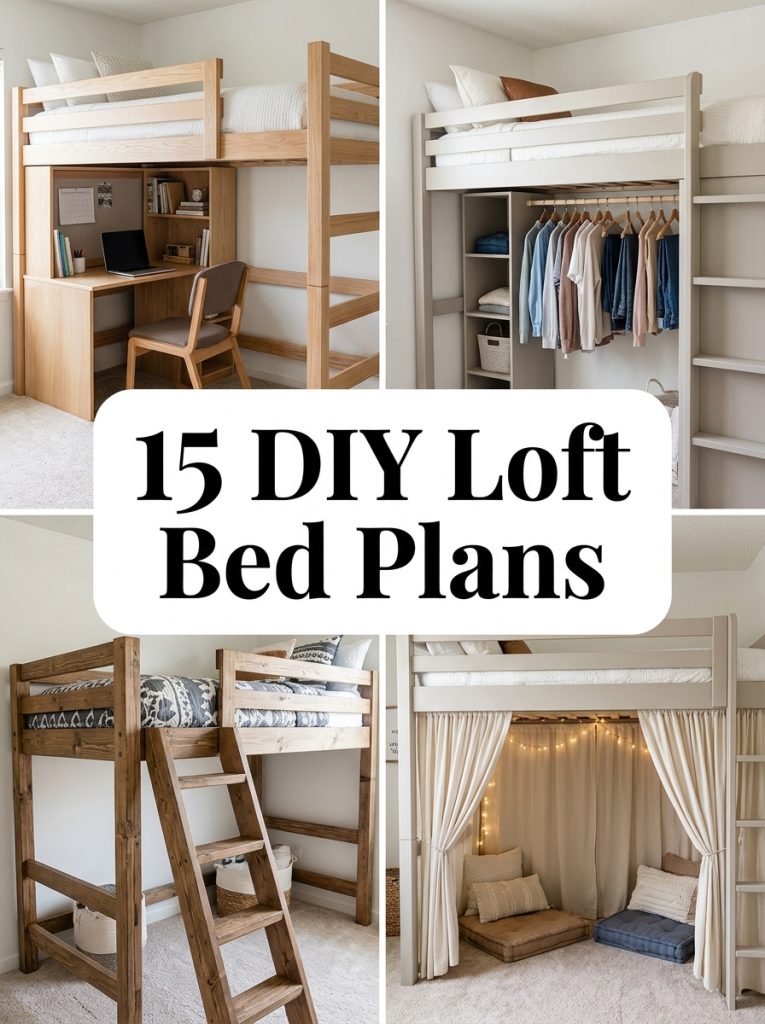
A loft bed gives a room an entire second floor without adding a single square foot.
1. Build a Basic Twin Wood Frame
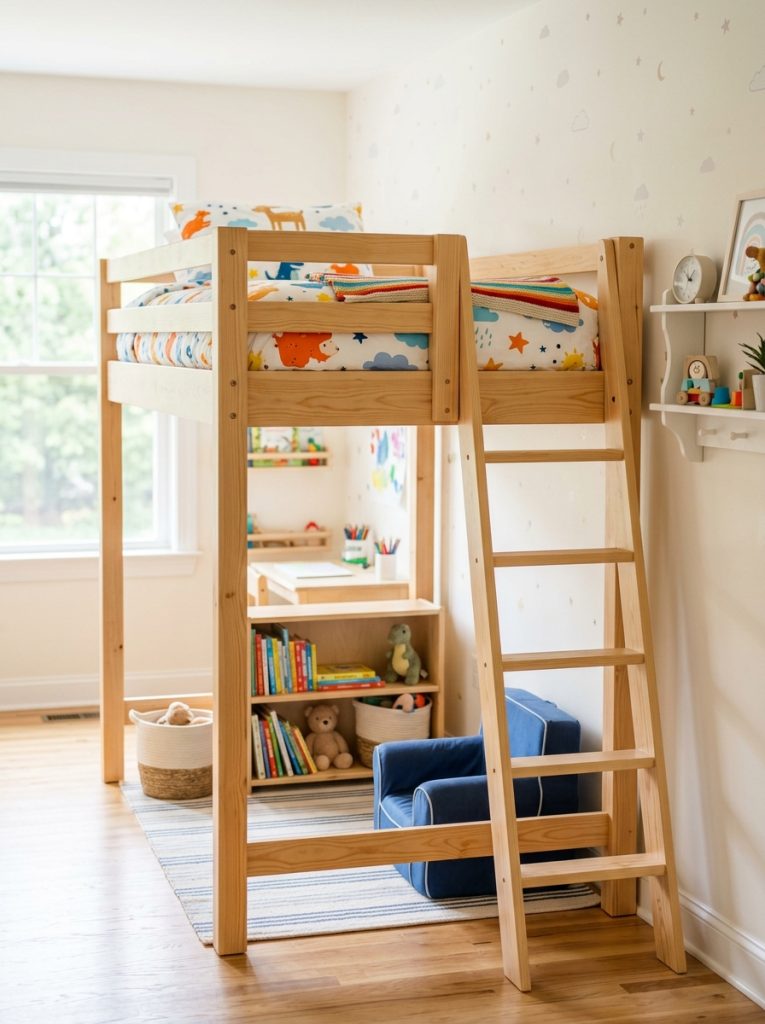
A basic twin frame is the right starting point for a first loft bed build, since the simpler structure teaches the core joinery and weight support principles every other variation builds on. This loft bed frame twin wood shows the proportions and leg spacing to aim for. Build the four corner posts first, square the frame with cross supports, and add slats before mounting the mattress platform at the planned height.
Materials Needed:
- 4×4 posts for corner legs
- 2×6 boards for the bed frame
- 2×4 boards for slats and cross supports
- Wood screws and drill
- Wood stain or paint
How to Make It:
- Cut four 4×4 posts to the desired loft height.
- Build the rectangular frame from 2×6 boards sized to a twin mattress.
- Attach the frame to the posts at the planned mattress height using lag bolts.
- Install 2×4 slats across the frame to support the mattress.
- Add diagonal cross bracing between the legs for stability before sanding and finishing.

Twin Wood Loft Bed Frame
Simple twin frame style — great reference for proportions and leg spacing on a first loft bed build.
Check Price on Amazon2. Add a Desk Underneath for Studying
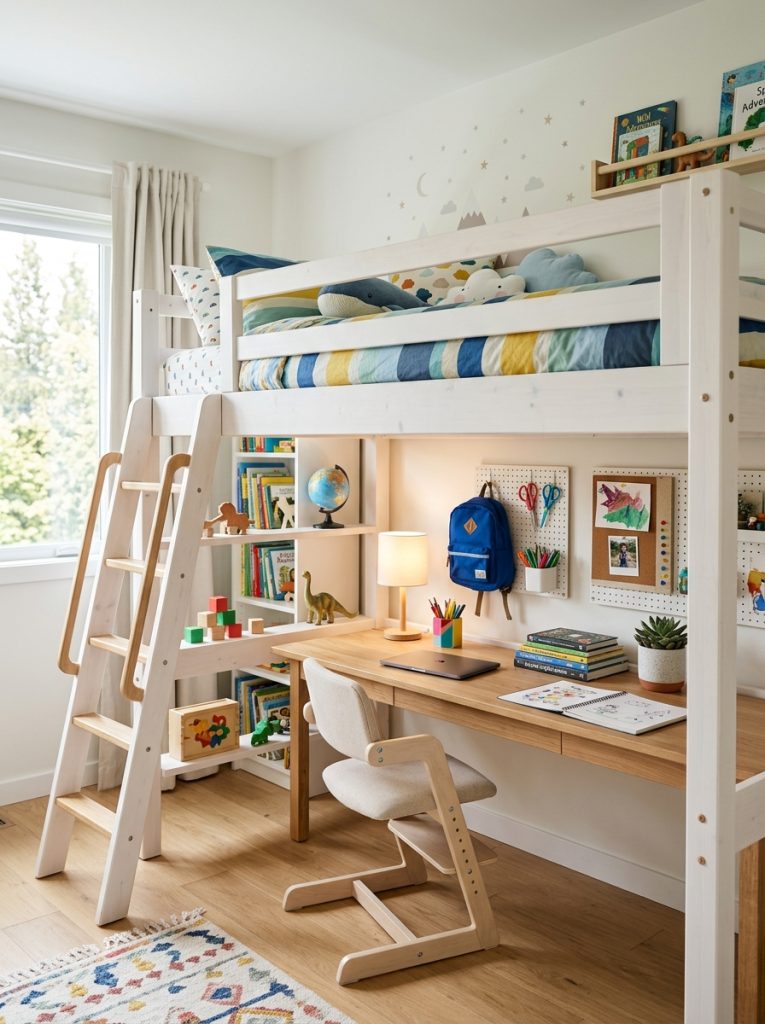
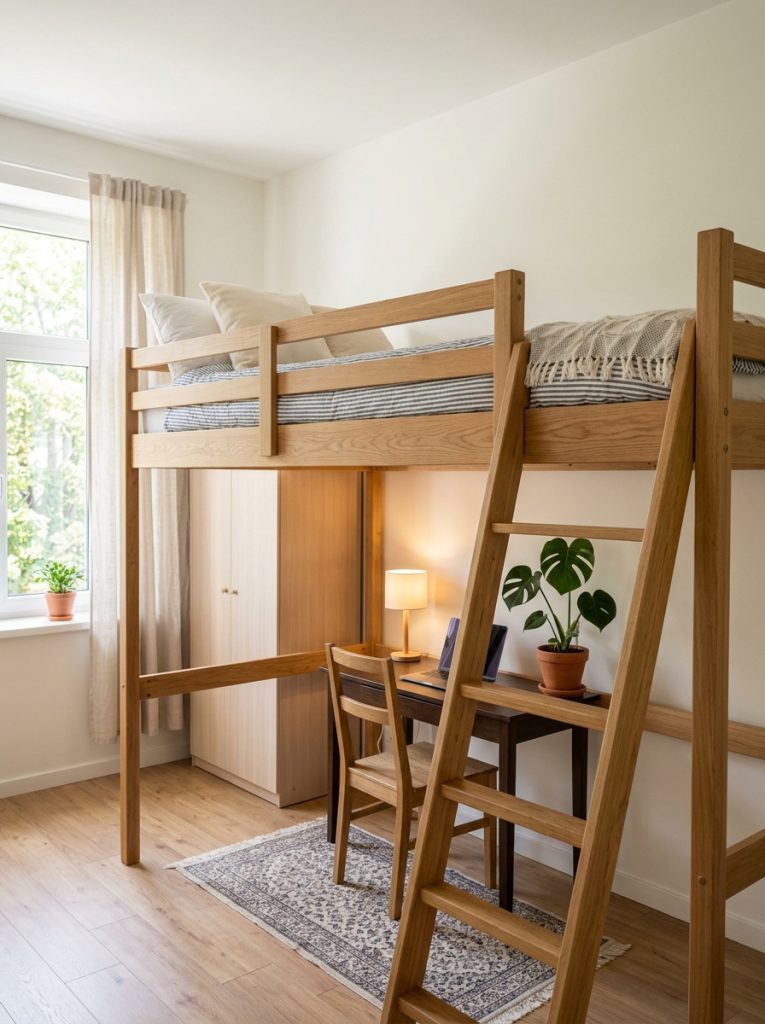
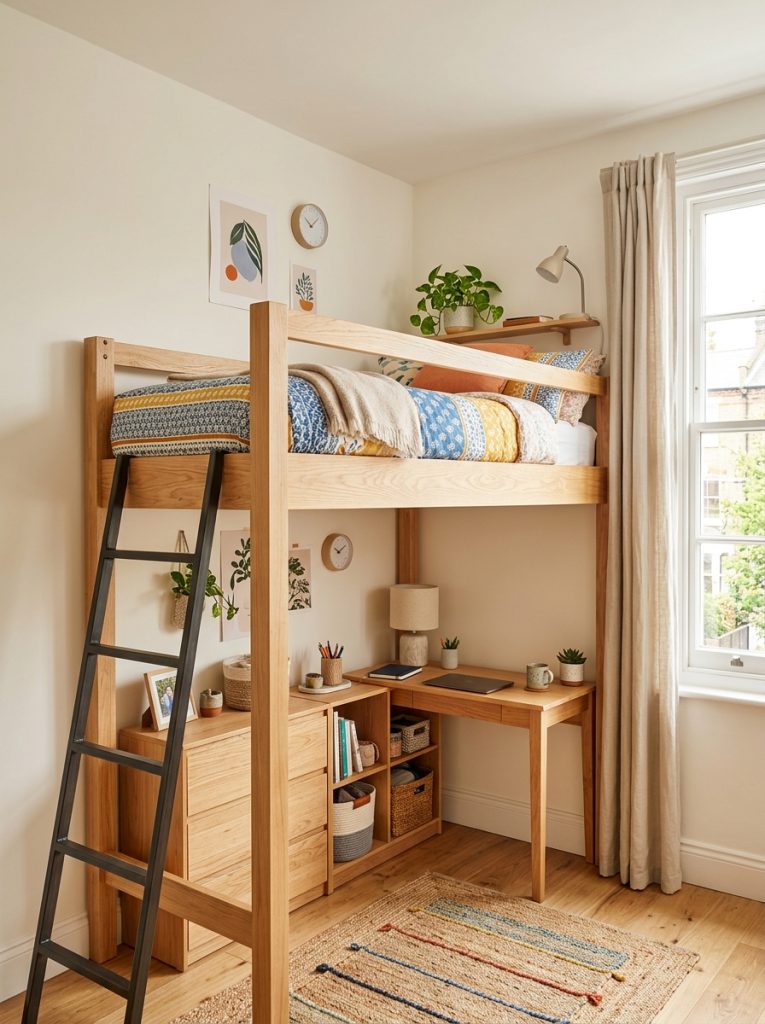
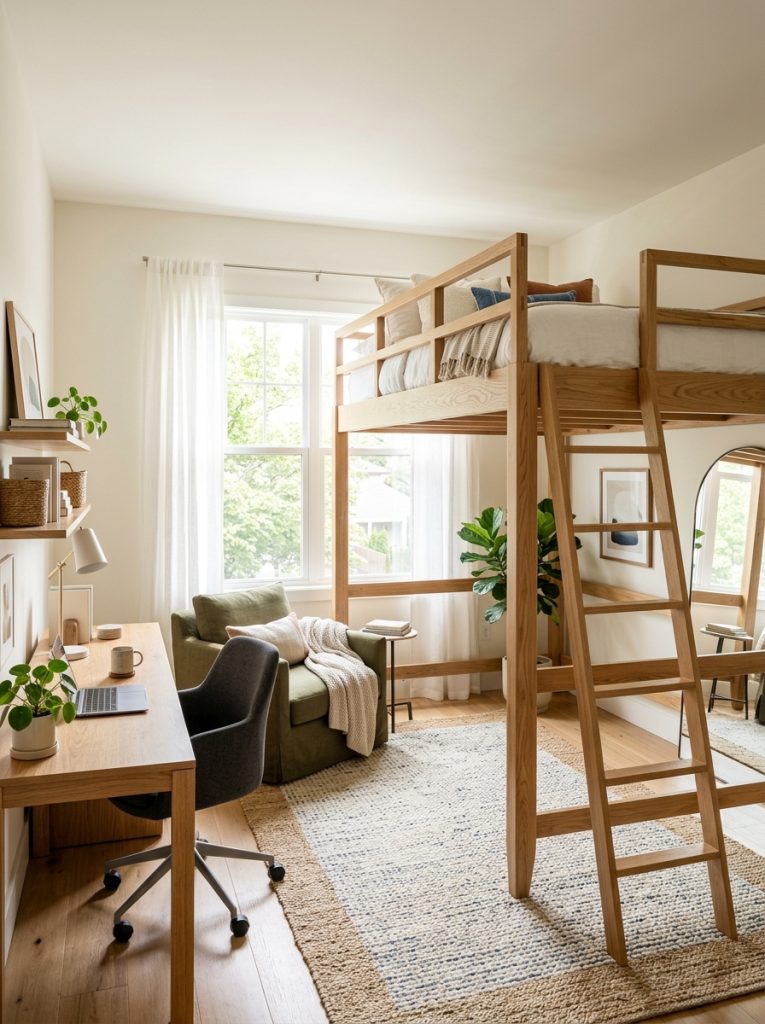
Building a desk into the space underneath the loft bed turns one piece of furniture into both a sleeping and studying solution, which matters enormously in a small bedroom with no room for separate pieces. This loft bed with desk underneath shows the layout to aim for — desk surface, a chair clearance zone, and the loft structure overhead supported by posts positioned around the desk rather than through it.
Materials Needed:
- Loft bed frame (from plan above)
- Plywood for desk surface
- 2×4 legs or desk support brackets
- Wood screws and drill
- Paint or stain to match the bed frame
How to Make It:
- Build the loft bed frame with leg posts positioned to leave a clear desk zone underneath.
- Cut a plywood desk surface sized to fit the available footprint.
- Attach desk legs or wall brackets to support the desk surface at standard desk height.
- Secure the desk to the loft bed posts for added stability if needed.
- Finish in a matching color and add desk accessories.

Loft Bed with Desk Underneath
Combined loft bed and desk layout — great reference for positioning posts around a study zone.
Check Price on Amazon3. Build a Sturdy Wood Ladder

A well built ladder is the single most important safety component on any loft bed, since this is the part that gets the most repeated daily stress from climbing up and down. This loft bed ladder wood shows the proper rung spacing and angle for safe, comfortable climbing. Angle the ladder slightly rather than building it perfectly vertical, since a slight lean is both more comfortable to climb and structurally more stable than a straight vertical ladder.
Materials Needed:
- 2×4 boards for ladder rails
- 1×4 boards for rungs
- Wood screws and drill
- Wood glue
- Sandpaper
How to Make It:
- Cut two 2×4 rails to the height needed between the floor and the loft bed frame.
- Mark even rung spacing along both rails, roughly 10 to 12 inches apart.
- Cut 1×4 rungs and attach between the rails at each marked position with glue and screws.
- Attach the top of the ladder securely to the loft bed frame.
- Sand all edges smooth and test the ladder’s stability before regular use.

Wood Loft Bed Ladder
Sturdy wood ladder style — great reference for proper rung spacing and safe climbing angle.
Check Price on Amazon4. Add Curtains for a Canopy Feel
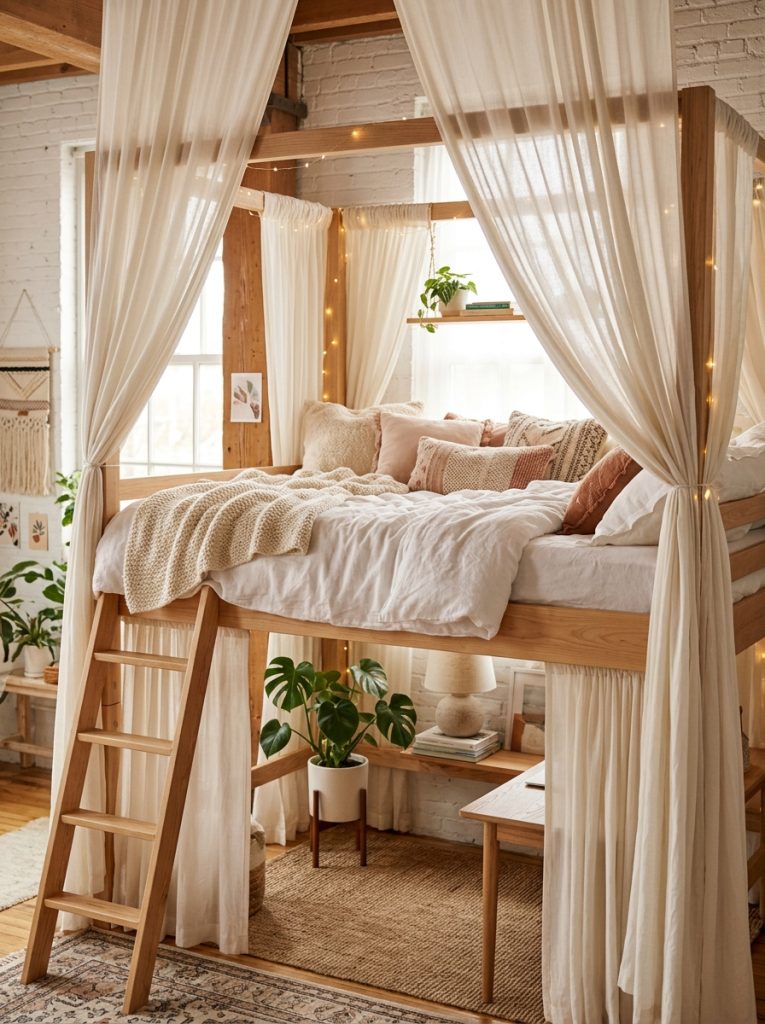
Curtains hung around the loft bed frame turn the elevated sleeping area into a genuinely cozy enclosed nook, giving a sense of privacy that an open loft platform does not naturally have. This loft bed curtain canopy shows the flowing style to aim for. Mount a curtain rod or tension wire around the perimeter of the loft frame and the fabric can be drawn closed for a private reading nook or pulled back during the day.
Materials Needed:
- Curtain rod or tension wire
- Lightweight curtain panels
- Mounting brackets
- Drill
How to Make It:
- Measure the perimeter of the loft bed frame where curtains will hang.
- Install curtain rod brackets or tension wire mounts along the frame edges.
- Hang lightweight curtain panels from the installed rod or wire.
- Adjust panel length so curtains do not drag on the floor or mattress.
- Style with tiebacks for daytime use when fully open.
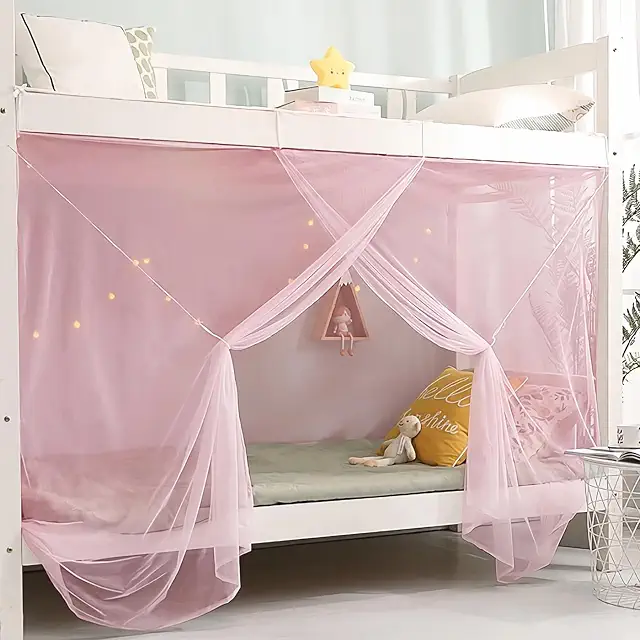
Loft Bed Curtain Canopy
Flowing curtain canopy style — great reference for adding a cozy enclosed feel to a loft bed.
Check Price on Amazon5. Build a Closet Underneath for Extra Storage
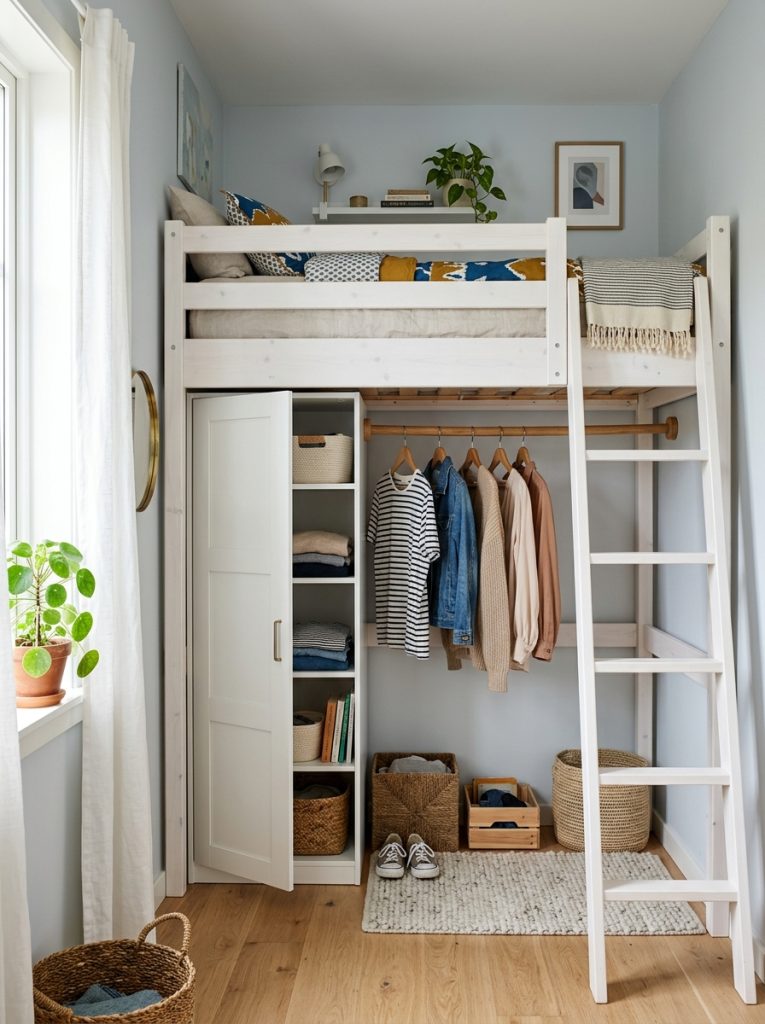
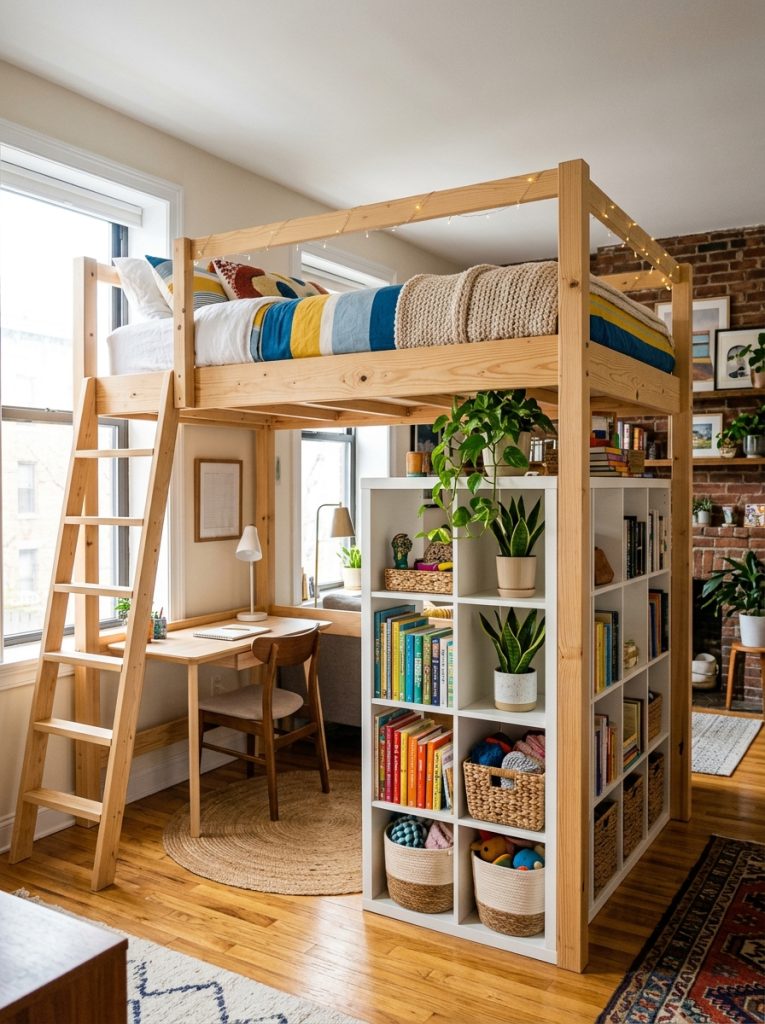
Building a full closet into the space underneath a loft bed solves two small-room problems with one structure — sleeping space above and genuine hanging storage below. This loft bed storage closet underneath shows the layout to aim for, with a hanging rod and shelving fitted into the footprint beneath the mattress platform. This combination works especially well in a small bedroom with no separate closet or limited existing storage. For more closet organization ideas check out these closet shelf organization ideas.
Materials Needed:
- Loft bed frame (from plan above)
- Closet rod and brackets
- Plywood for shelving
- Wood screws and drill
- Paint or stain
How to Make It:
- Build the loft bed frame with clearance for a closet section underneath.
- Install a closet rod across the planned hanging space using brackets mounted to the frame posts.
- Build plywood shelves above or beside the hanging rod for folded items.
- Finish all surfaces to match the loft bed frame.
- Add a curtain or simple door if a closed closet look is preferred over open storage.

Loft Bed with Storage Closet Underneath
Closet and hanging rod layout underneath — great reference for combining sleep and storage space.
Check Price on Amazon6. Build a Full Size Loft Bed for Adults

An adult loft bed needs a heavier duty frame than a kids version, built with thicker lumber and reinforced joints to handle the additional weight safely over years of use. This loft bed full size adult shows the more substantial proportions appropriate for adult use. This style works particularly well in a small studio apartment where the floor space underneath becomes a living room or office area instead of being lost to a standard bed footprint. For more small space ideas check out these small kitchen storage ideas.
Materials Needed:
- 4×4 posts (thicker than kids version)
- 2×8 boards for the frame
- 2×6 boards for slats
- Heavy duty lag bolts
- Wood stain or paint
How to Make It:
- Cut four 4×4 posts sized for full size mattress height and adult weight capacity.
- Build a reinforced frame from 2×8 boards for the mattress platform.
- Attach the frame to the posts using heavy duty lag bolts at every joint.
- Install 2×6 slats with closer spacing than a kids version for additional support.
- Add full diagonal bracing on all four sides before finishing and testing load capacity.

Full Size Adult Loft Bed
Heavy duty full size frame — great reference for the reinforced construction adult loft beds need.
Check Price on Amazon7. Build a Renter Friendly Loft Bed
A renter friendly loft bed stands entirely on its own four legs with zero attachment to walls or ceiling, which matters in any rental where modifying the structure is not allowed. Build the frame with extra wide leg footprints and full cross bracing on all sides for stability without relying on a wall anchor point. This design also has the advantage of being fully portable to a new apartment without leaving any damage behind.
Materials Needed:
- 4×4 posts with wide leg spacing
- 2×6 frame boards
- Cross bracing lumber on all sides
- Wood screws and drill
- Furniture pads for floor protection
How to Make It:
- Build the frame with a wider leg stance than a wall-anchored version for independent stability.
- Add full cross bracing on all four sides rather than relying on just two.
- Attach furniture pads to the base of each leg to protect rental flooring.
- Test the completed frame for any wobble before adding the mattress.
- Disassemble in sections if a future move is planned, keeping all hardware labeled.
8. Build a Slide Feature for a Fun Kids Loft
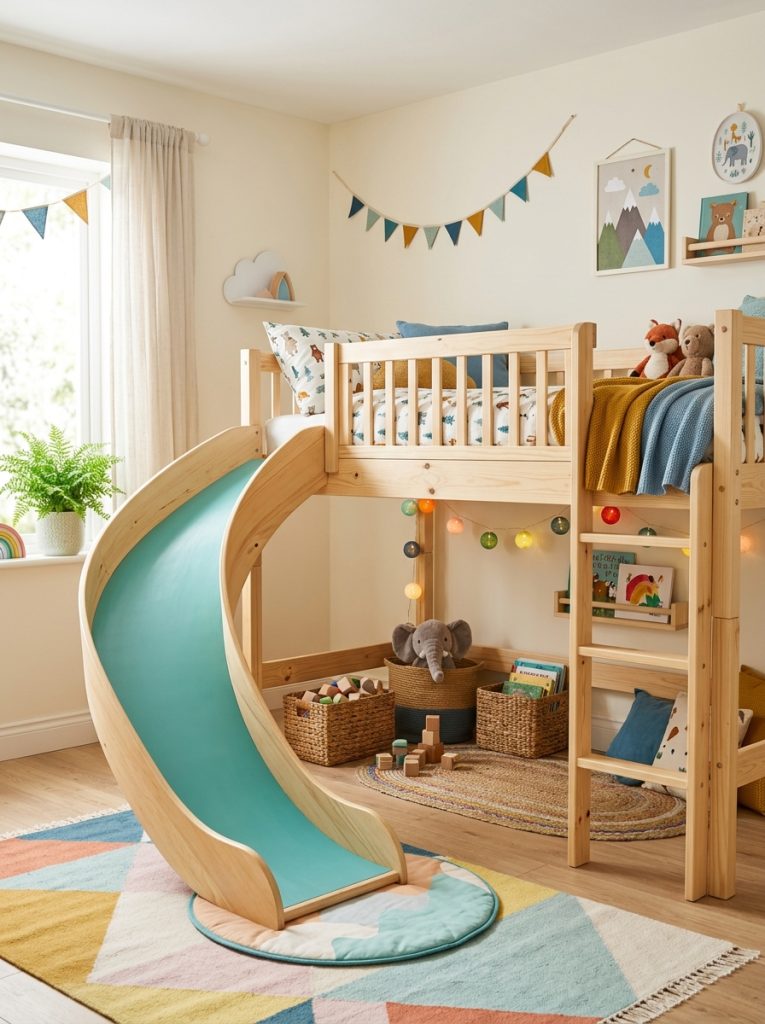
Adding a slide instead of a standard ladder turns a kids loft bed into a genuine play feature rather than purely functional furniture, giving the bed an adventurous quality that makes bedtime more appealing. Build a simple plywood slide panel angled down from the loft platform on one side, sanded extremely smooth and finished with a slick paint or sealant for easy sliding. Keep a proper ladder on the opposite side for climbing up, since the slide should only ever be used for the descent.
Materials Needed:
- Plywood for slide surface
- 2×4 frame supports for the slide
- Smooth sealant or slide-specific paint
- Wood screws and drill
How to Make It:
- Build a 2×4 frame angled from the loft platform height down to the floor.
- Attach a plywood panel to the frame, sanded thoroughly smooth.
- Apply a slick sealant or specialty slide paint for smooth sliding.
- Add side rails along the slide edges to keep kids safely on the surface.
- Secure the slide structure firmly to the main loft bed frame.
9. Maximize a Small Room Layout
Positioning a loft bed in the corner of a small room rather than against a single wall opens up the most usable floor space underneath for a desk, seating, or play area. Plan the room layout before building, measuring the available corner footprint and planning the loft height to clear furniture placed below comfortably. A corner placement also means only two sides of the loft need ladder or curtain treatment rather than all four. For more small space organization ideas check out these small kitchen storage ideas.
10. Build with IKEA Hack Components
Combining IKEA shelving units or bed frame components with custom lumber framing creates a loft bed build that benefits from professionally manufactured parts alongside fully custom elements. Use a KALLAX shelf unit as one structural support leg that doubles as storage, paired with custom built framing for the rest of the loft structure. This hybrid approach saves significant building time on the storage component while still allowing full customization of the loft height and bed size.
11. Build a Teen Loft Bed with Lounge Space
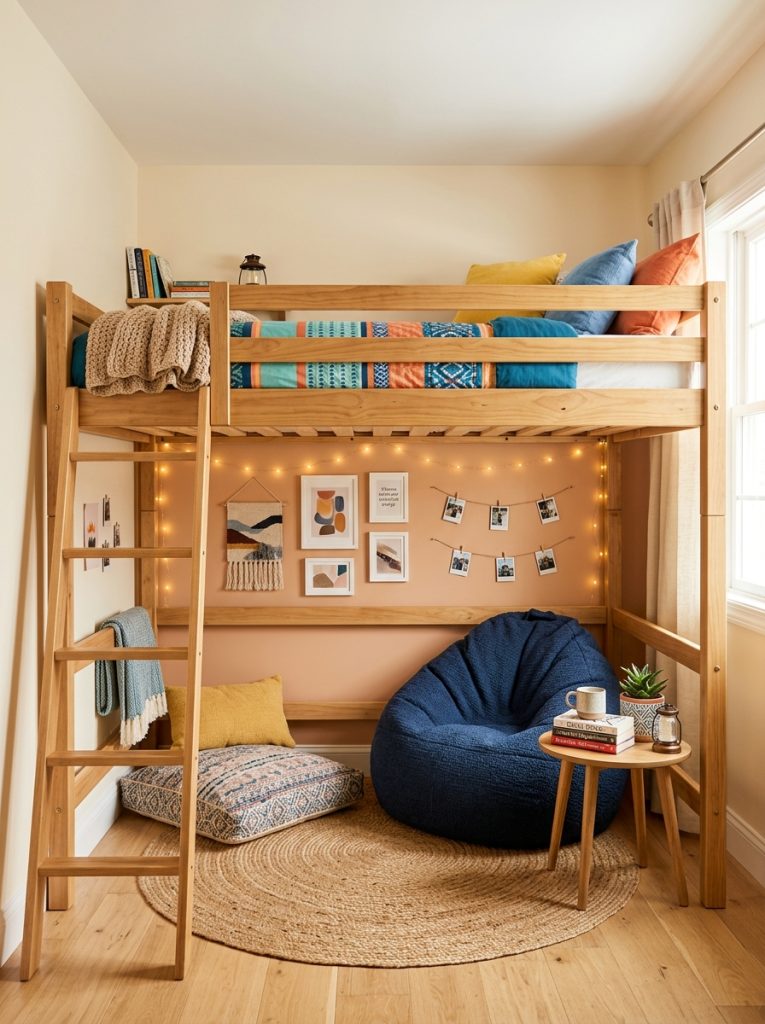
A teen bedroom often benefits more from a casual lounge space underneath the loft than a formal desk, since teens frequently want a hangout spot for friends separate from a study zone. Build the space below with a small loveseat or floor cushions, a side table, and maybe a string light setup rather than desk furniture. This configuration suits a teen who already has a desk elsewhere in the room or house and wants the under-loft space dedicated to relaxing instead.
12. Build a Toddler Friendly Low Loft Bed
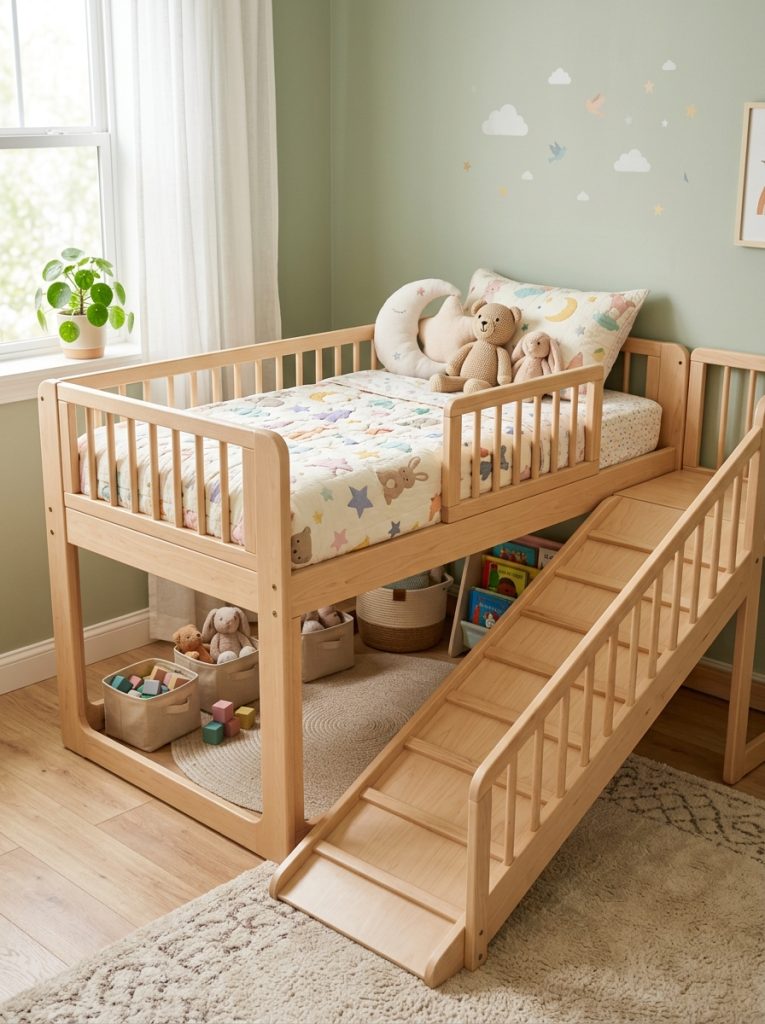
A toddler loft bed needs significantly lower height than a kids or teen version, with the mattress platform positioned close enough to the floor that a fall poses minimal risk while the child adjusts to climbing in and out independently. Replace a standard ladder with a gentle ramp or very wide, low steps for safer access at this age. This style works as a transitional bed between a toddler bed and a full height loft bed once the child is older and more coordinated.
13. Add Floating Shelves Around the Loft

Floating shelves mounted on the wall beside the loft bed frame add display and storage space that integrates visually with the loft structure rather than requiring separate furniture. Position shelves within easy reach from the mattress platform for books, a lamp, or a small alarm clock. This addition works well alongside any of the other loft styles in this list since it adds function without requiring changes to the main frame itself. For more floating shelf ideas check out these DIY floating shelf ideas.
14. Build a Queen Size Loft for a Primary Bedroom
A queen size loft bed brings this space saving concept into a primary bedroom rather than limiting it to kids rooms or studio apartments, freeing up substantial floor space below for a home office, reading nook, or additional storage furniture. Build with significantly reinforced framing given the larger mattress size and weight, using doubled support beams across the center span where a queen frame needs more structural support than a twin or full would require.
15. Plan Your Loft Bed Build with a Video Tutorial
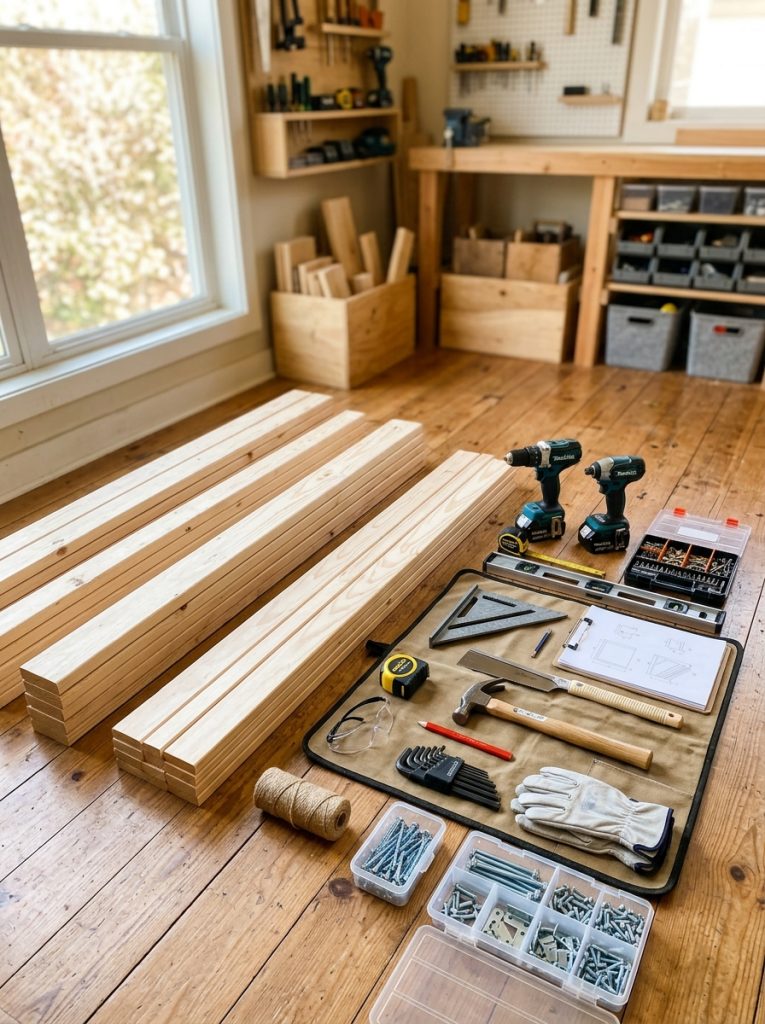
Watching a complete video walkthrough before starting a loft bed build helps catch structural details and assembly order that written plans alone sometimes miss, especially important given the safety considerations involved in building furniture meant to support a sleeping person well above the floor. Look for tutorials matching your chosen style and size closely, since load-bearing requirements differ significantly between a toddler loft and a full adult version. Gather every tool and material listed before starting to avoid a mid-build trip back to the hardware store.
Final Thoughts on DIY Loft Bed
A loft bed is one of the highest impact furniture builds available for any room running short on floor space, turning unused vertical height into a desk, closet, or lounge area underneath. Whether built for a young child’s first big bed, a teen’s hangout space, or a full adult bedroom in a small apartment, the right plan matches the room size and the builder’s intended use for the space below. Pick the design that fits your space and start building this season.

Amir Ali is the founder and site administrator of HomeDecorEdge, a modern home decor and interior design platform. Since starting the site, he has combined his passion for interior design, practical styling, and color coordination with hands-on content strategy and site management. He guides authors, curates high-quality articles, and ensures readers have access to actionable, visually inspiring, and user-focused home decor advice for apartments, small rooms, and family homes.