

Three cabinets. That’s all my first kitchen had. Plates, bowls, mugs and pans all fought for the same few shelves, and every time I needed a dinner plate I had to lift out a stack of bowls first.
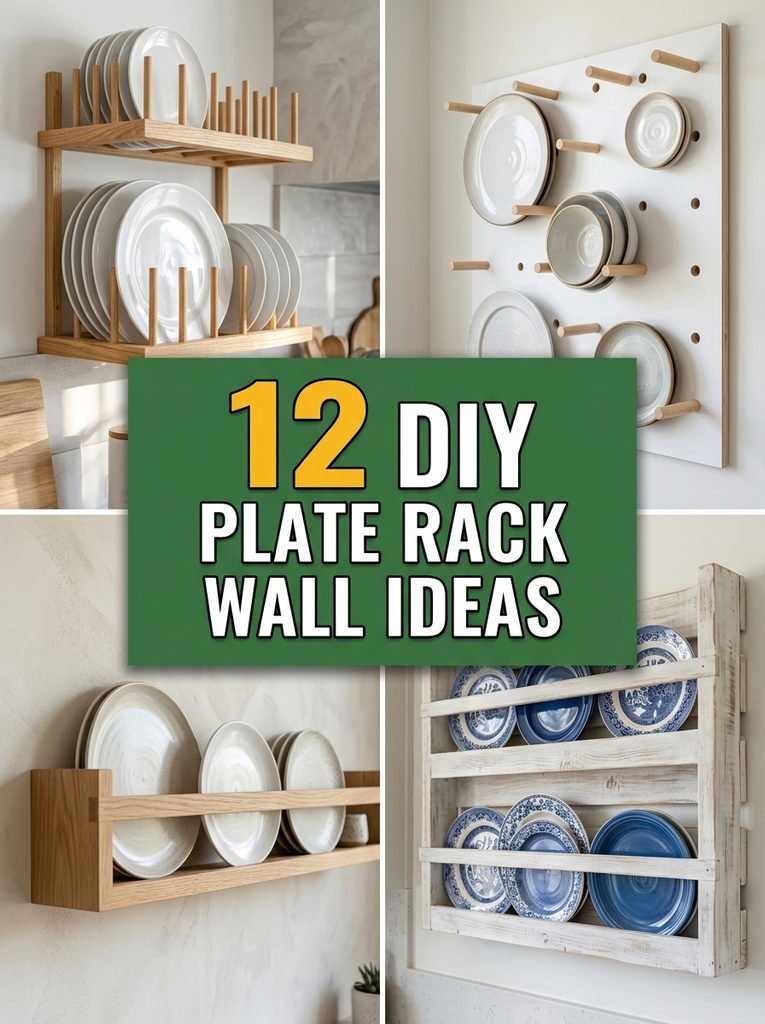
A plate rack on the wall fixed that in one weekend. It freed up a whole cabinet, and honestly, my everyday plates looked better on the wall than they ever did behind a door. Below are 12 DIY plate rack wall ideas, from easy dowel racks to pegboard, pallet wood and renter friendly options, so you can build one that fits your kitchen and your style.
1. Classic Dowel Plate Rack
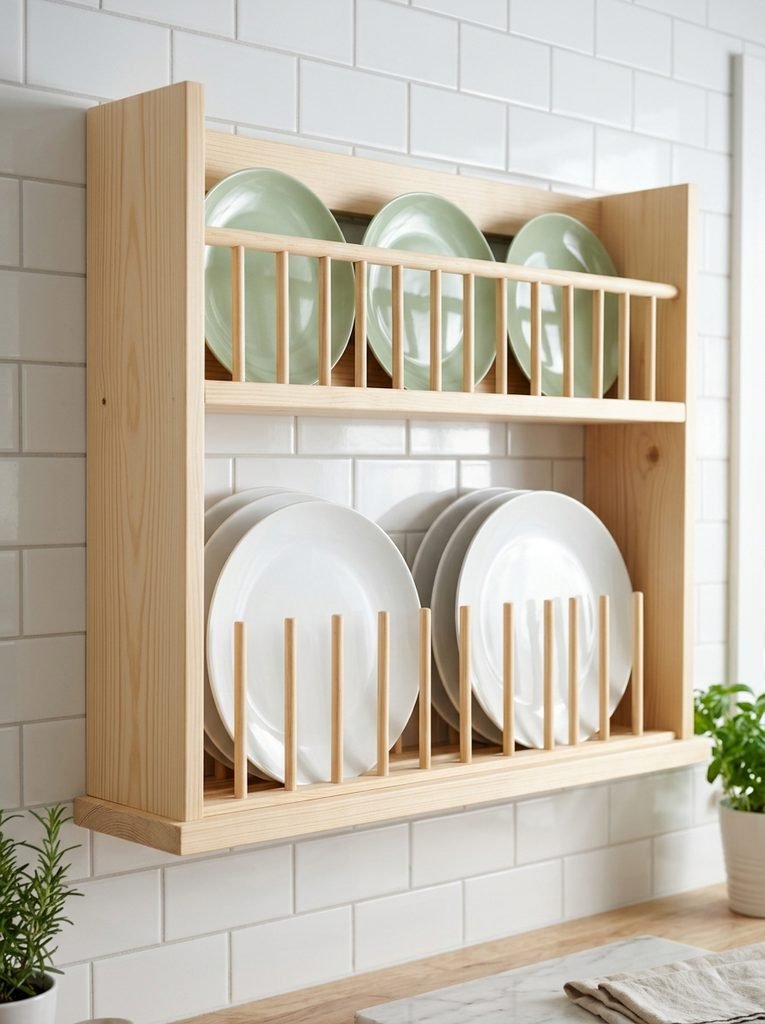
This is the plate rack most people picture, and it’s the best place to start. Two side boards hold rows of dowels, and the plates slot in between them, standing on their edges. It holds a lot in a small space, and plates dry nicely if you put them away a little damp.
I built mine from pine and finished it with a light stain so it matched my cutting boards. The whole thing took one weekend, with most of that time spent waiting for the finish to dry.
Materials Needed: Two 1×4 pine boards about 16 inches long for the sides, one 1×4 board for the bottom ledge, eight to twelve 1/2 inch wooden dowels cut to 22 inches, a drill with a 1/2 inch spade bit, wood glue, wood screws, sandpaper, stain or paint, and two heavy duty D ring hangers or a French cleat.
How to Make It:
- Stack the two side boards together and mark your dowel holes about 1 1/2 inches apart, in two rows, one near the front edge and one near the back.
- Drill the holes about halfway into each board, using tape on the bit as a depth guide so you don’t go all the way through.
- Sand every piece until smooth, paying extra attention to the dowels so they won’t scratch plates.
- Add a little glue into each hole and tap the dowels into one side board, then fit the other side board on top.
- Screw the bottom ledge between the two side boards so the plates have something to stand on.
- Stain or paint the rack, let it dry fully, then hang it into wall studs with D rings or a French cleat.
A tip I picked up: measure your biggest dinner plate before you drill. Your dowel rows need to be close enough to hold the plate but far enough apart that it slides in easily.
2. Pegboard Plate Wall
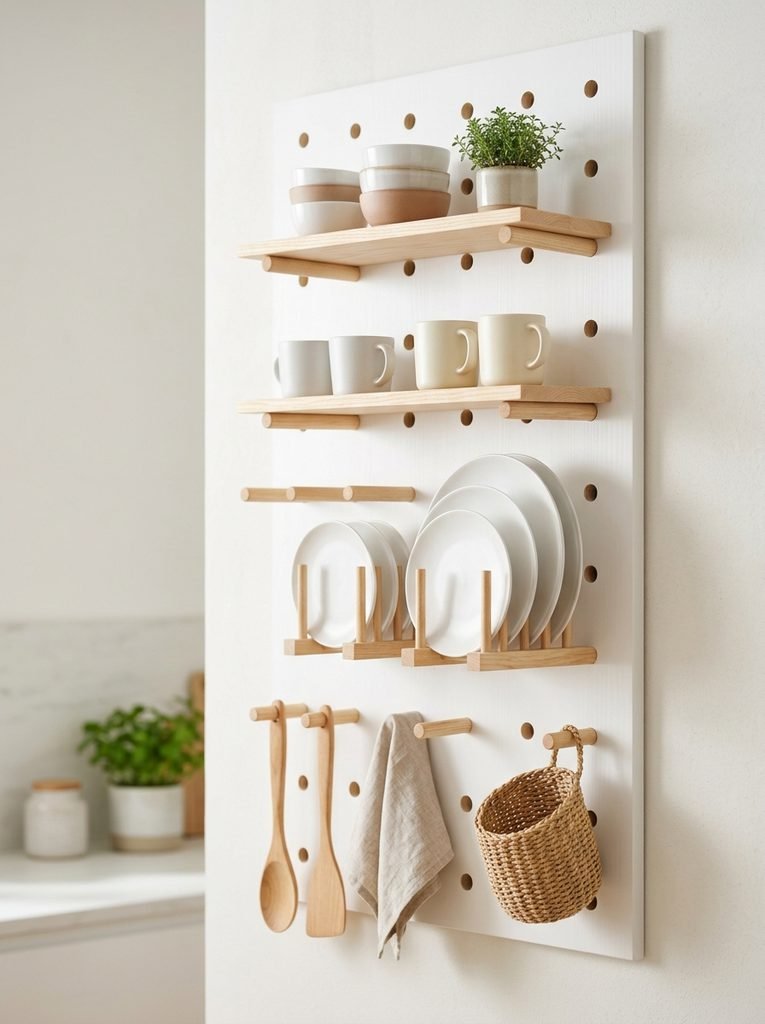
A pegboard plate wall is the most flexible idea on this list. Wooden pegs slot into a grid of holes, so you can move them around whenever you get new dishes or want a fresh look. Plates sit between pairs of pegs, and you can add little shelves for bowls and mugs.
I love that nothing is permanent. If you change your plates next year, you just move a few pegs.
Materials Needed: A 1/2 inch thick plywood board cut to your wall size, a drill with a 1/2 inch bit, a drilling template or a pencil and ruler, 1/2 inch hardwood dowels cut into 4 inch pegs, two small boards for shelves, sandpaper, paint or finish, 1×2 strips for spacers, and wall screws.
How to Make It:
- Mark a grid on the plywood with holes about 2 inches apart in every direction.
- Drill all the holes straight through, with a scrap board underneath so the back doesn’t splinter.
- Sand both sides of the board and every peg, then paint or seal them.
- Screw 1×2 strips to the back edges so the board sits about an inch away from the wall.
- Screw the board into wall studs through the spacer strips.
- Push the pegs into place, setting pairs about 1 inch apart to hold plates upright, and rest shelves across pegs where you want bowls.
Keep the pegs snug. If a hole feels loose, wrap a single layer of tape around the end of the peg before pushing it in.
3. Floating Shelf with a Plate Rail
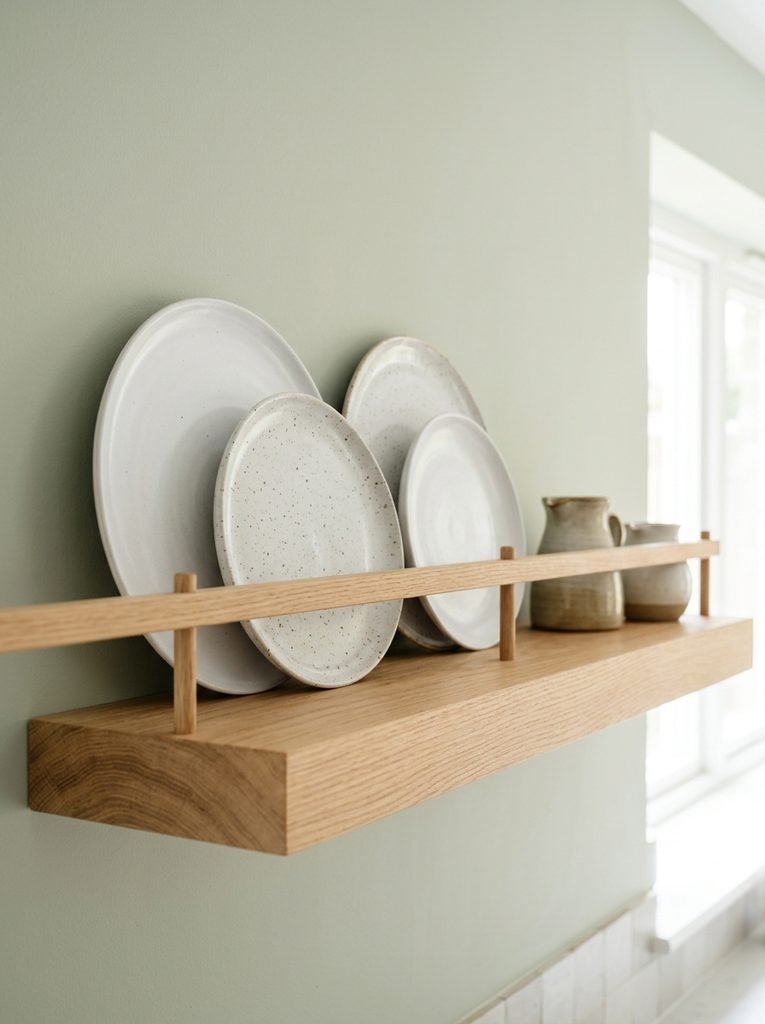
This one looks clean and modern. A floating shelf gets a thin rail along the front edge, and plates lean upright against the wall behind it. The rail stops them from sliding forward, so they stay put even when you grab one.
It’s perfect if you want your plates on display but don’t want a full rack. In my experience, it also works great above a coffee station or a small sink.
Materials Needed: A floating shelf with hidden bracket, a 1×2 strip of wood the same length as the shelf, a 1/4 inch wide strip of wood or a small dowel for a groove guide, wood glue, small finishing nails, sandpaper, a stud finder, and stain or paint.
How to Make It:
- Install the floating shelf bracket into wall studs, checking it with a level.
- Sand the 1×2 strip and stain or paint it to match the shelf.
- Glue the strip along the front edge of the shelf so it sticks up about 1 1/2 inches above the shelf surface.
- Tack it in place with small finishing nails and let the glue dry.
- Glue a thin strip or dowel along the back of the shelf, about 2 inches from the wall, to stop the bottom of the plates from slipping.
- Slide the shelf onto the bracket and lean your plates between the back strip and the wall.
Pick a shelf at least 8 inches deep. Anything shallower and the plates lean too far back.
4. Pallet Wood Plate Rack
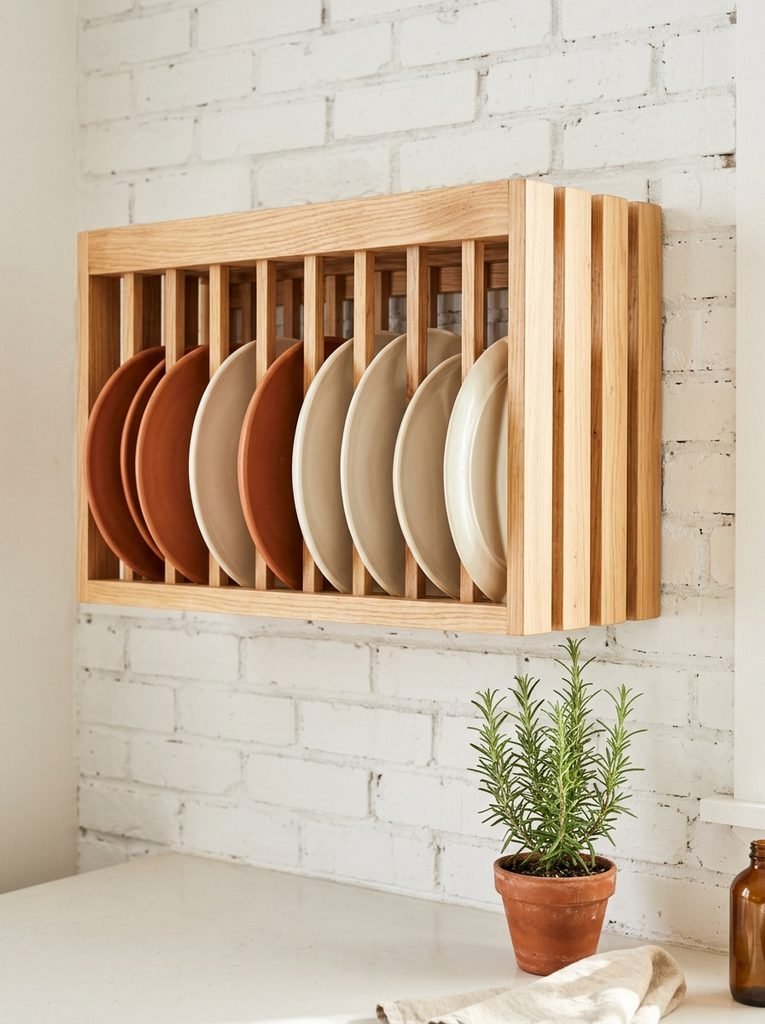
If you love a rustic look, pallet wood makes a plate rack full of character, and it costs next to nothing. Take apart a pallet, sand the boards well and use the slats as both the back and the dividers.
Only use pallets stamped “HT,” which means heat treated, not chemically treated. And sand until the wood feels smooth to the touch.
You’ll need: one heat treated pallet, a pry bar, sandpaper, wood screws, a clear food safe finish and heavy duty wall hangers.
To build it, screw three or four slats side by side for the back, then screw thinner slats upright along the front, spaced just wider than a plate’s thickness.
5. Wire Plate Rack
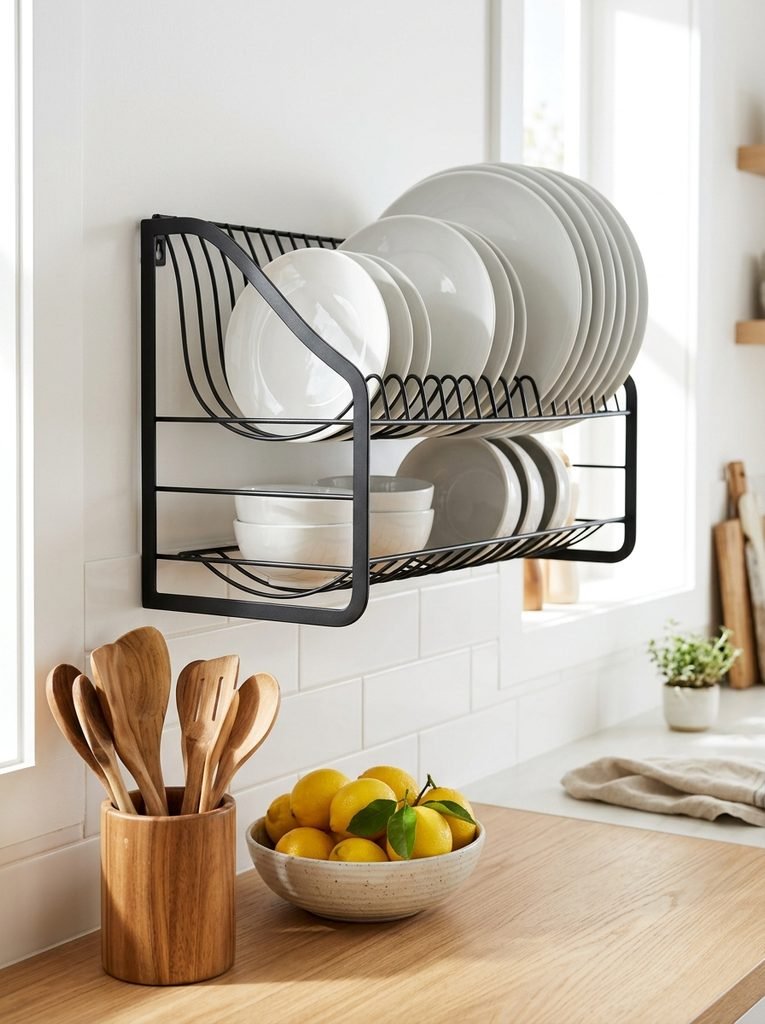
A wire rack feels light and airy, so it’s a good pick for small kitchens where wood can feel heavy. You can buy a simple wire dish rack and wall mount it, or bend your own from thick wire if you’re feeling crafty.
Start Your 30-Day Home Reset
Stop waiting for a "perfect" free weekend. Grab the 30-day plan and start feeling lighter in your own home by tomorrow.
View the 30-Day Plan Printable PDF · Instant downloadHonestly, I’d go with a ready made dish rack and just add wall brackets. It’s quicker and looks cleaner.
You’ll need: a metal wire dish rack, two pipe clips or wall brackets, wall anchors and a screwdriver.
Mount it above the sink if you can. Wet plates drip straight down and dry in place.
6. Slim Vertical Rack for Narrow Walls
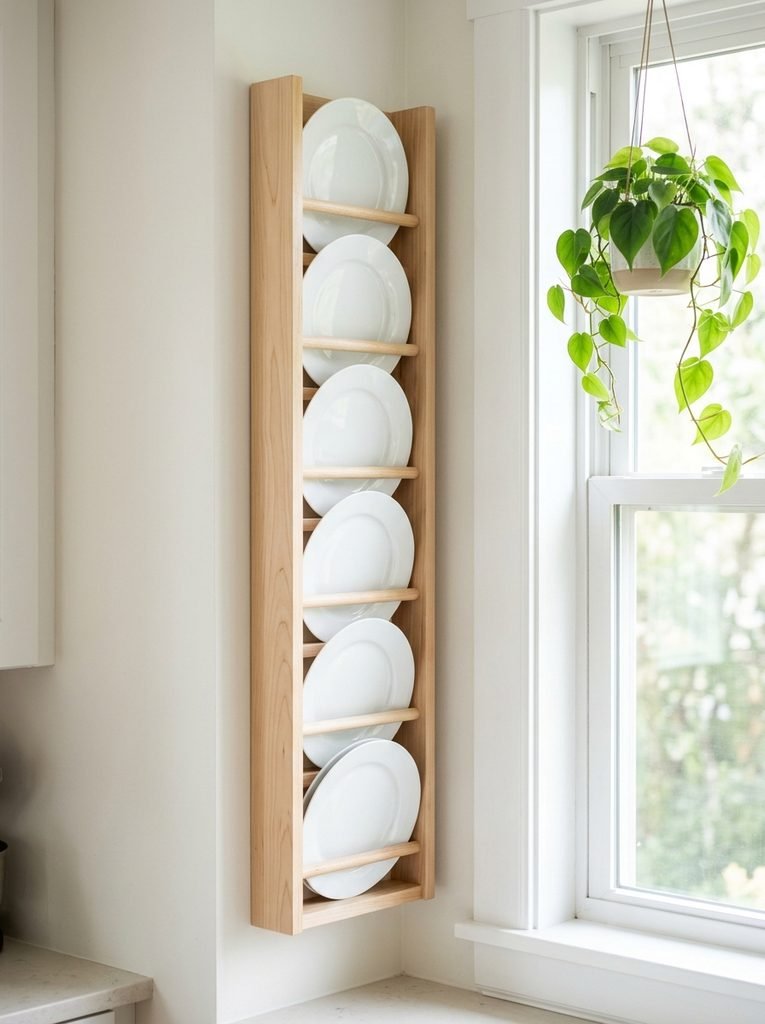
Most kitchens have one awkward strip of wall, beside a window, at the end of the cabinets or next to the fridge. A tall slim plate rack fits right in there. Instead of plates side by side, they stack upright one above the other in their own slots.
I love this because it uses a space nothing else fits in.
You’ll need: two tall 1×3 boards, short dowels, a drill, wood glue and wall screws.
Build it like the dowel rack in idea 1, but turn the design on its side so it’s tall and only one plate wide.
7. Corner Plate Shelves
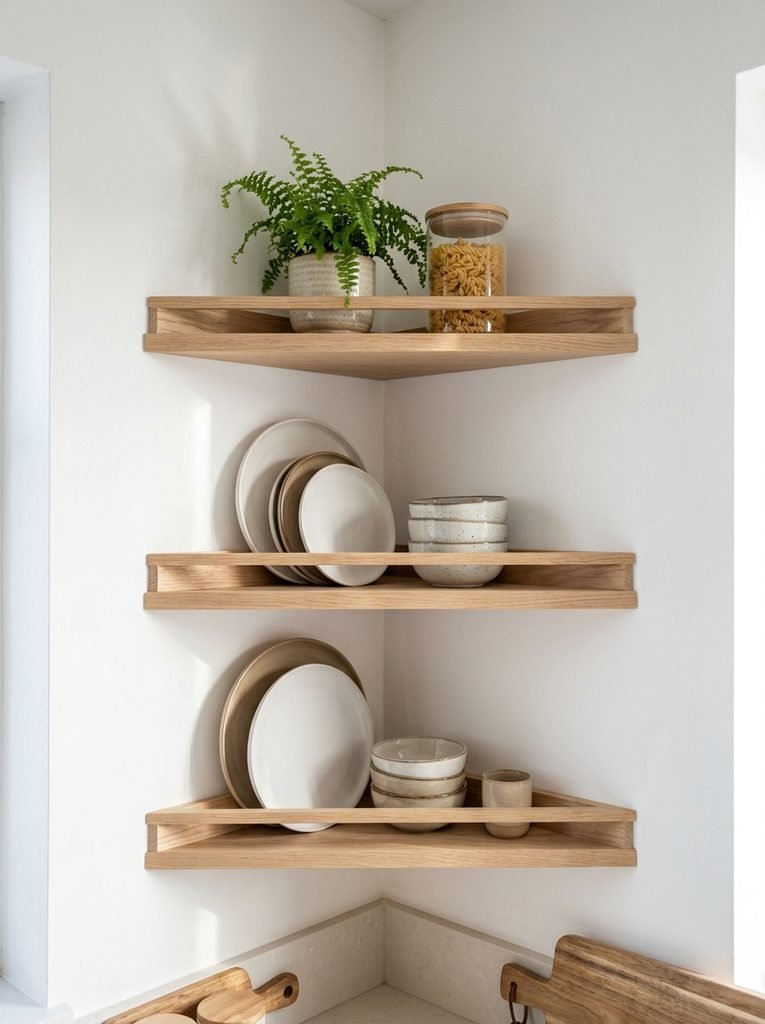
Corners are hard to use for anything, but they’re great for plates. Triangle shelves with a small front lip let plates lean back into the corner, and you can stack bowls on the same shelf.
A tip I picked up: put the shelf you’ll use most at shoulder height, not eye level. It’s much easier to reach without stretching.
You’ll need: one wood board cut into triangles, thin wood strips for the lips, hidden brackets or cleats, wood glue and wall anchors.
Fix cleats along both walls, glue the lips onto each triangle, then set the shelves on the cleats.
8. Farmhouse Plate Rack with Cup Hooks
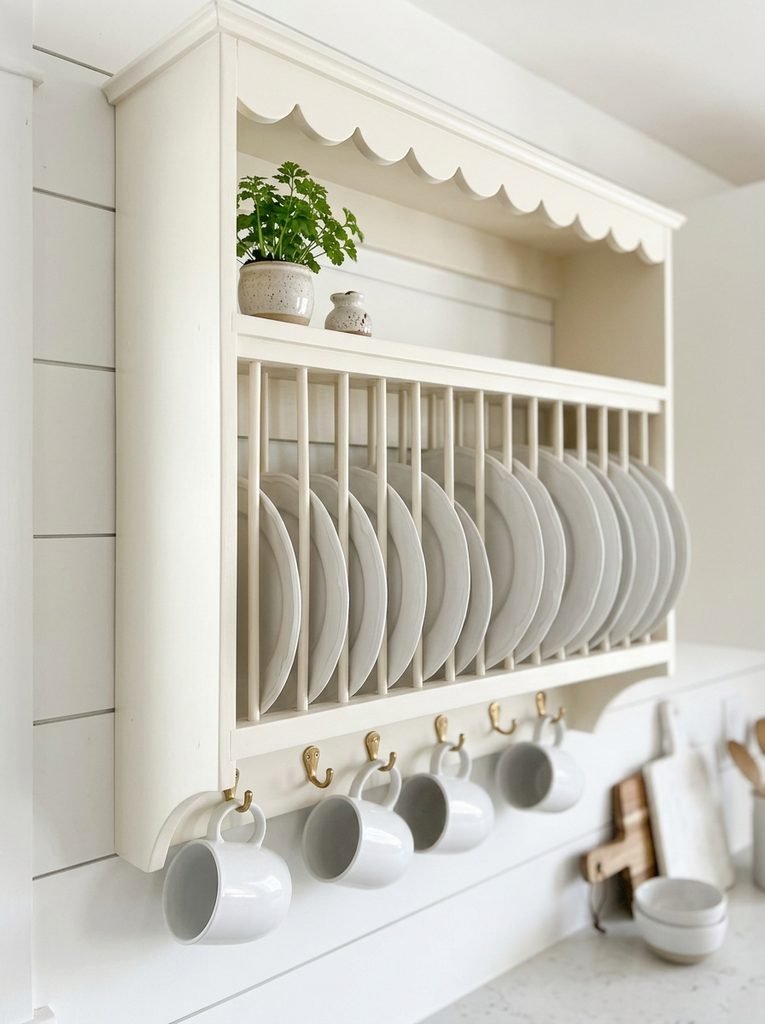
For a farmhouse kitchen, combine a dowel rack with a small top shelf and a row of cup hooks underneath. Plates sit in the middle, mugs hang below, and the top shelf holds a plant or a little jar.
Creamy white paint and brass hooks give it that cozy farmhouse look while still feeling fresh.
You’ll need: the materials from idea 1, plus one extra board for the top shelf, six brass cup hooks and cream paint.
Add the top shelf before you hang the rack, then twist the cup hooks into the bottom ledge.
9. Whitewashed Coastal Plate Rack
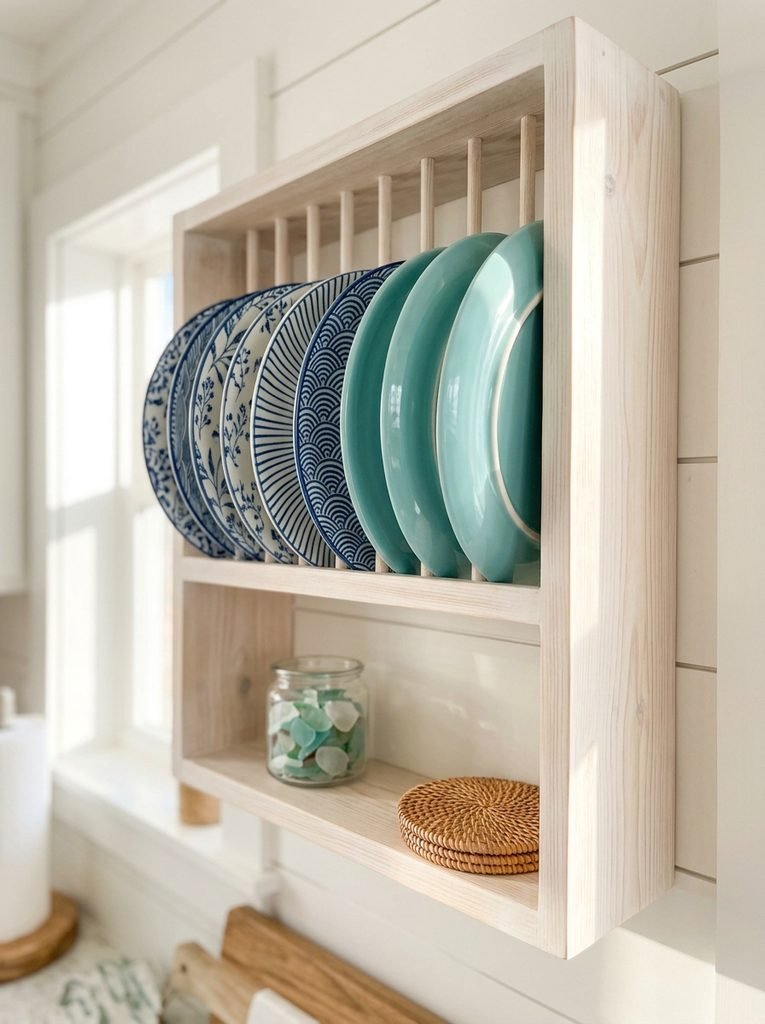
A whitewash finish turns a plain pine rack into something that feels like a beach house. It lets the wood grain show through while keeping everything light and bright. Fill it with blue and white plates and it looks instantly coastal.
I mix one part white paint with two parts water, brush it on, then wipe it off right away with a rag.
You’ll need: a finished pine plate rack, white paint, water, a brush and a lint free rag.
10. Boho and Eclectic Plate Wall
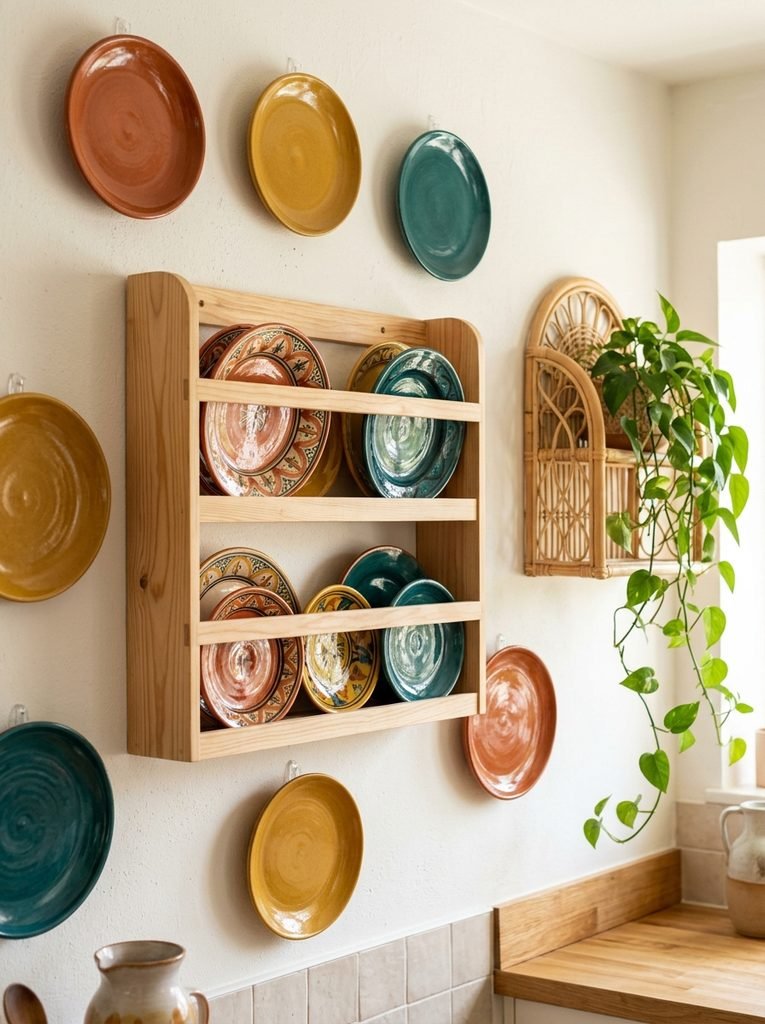
If your style is boho or eclectic, let your plates be the art. Mix a simple wood rack for everyday plates with a few special plates hung directly on the wall around it. Different patterns, colors and sizes all work together when they share one or two colors.
I lay everything out on the floor first. It’s so much easier to move plates around there than to fill the wall with nail holes.
You’ll need: a simple wood plate rack, clear wire plate hangers, small picture hooks and a pencil.
11. Renter Friendly Plate Rack
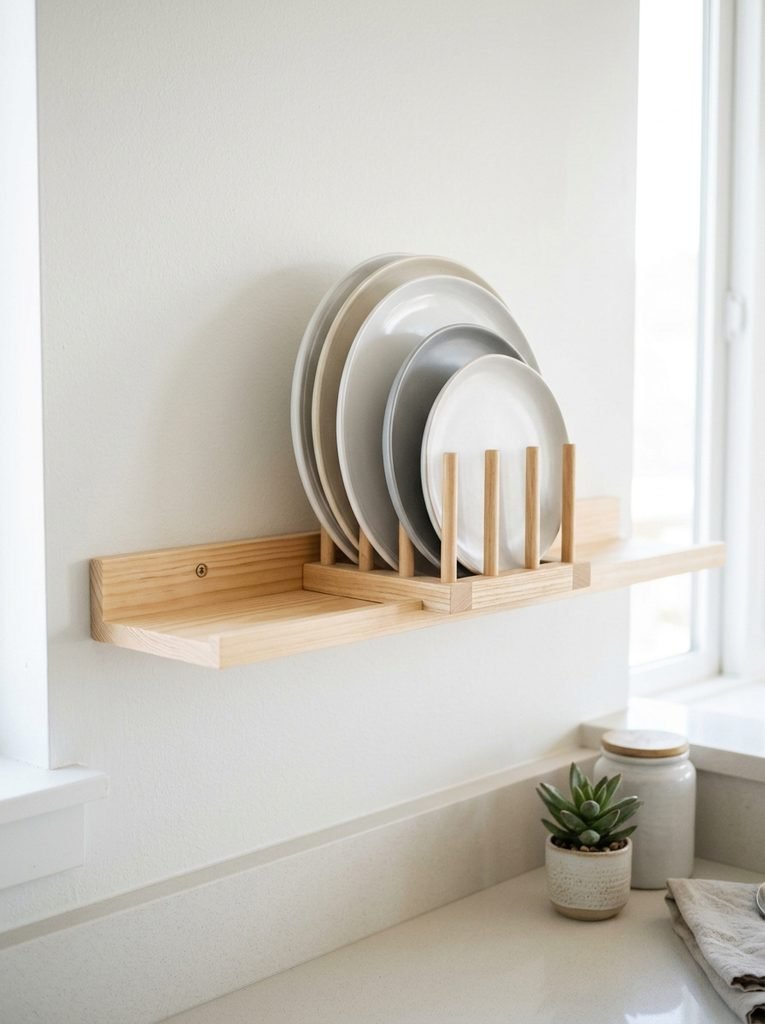
Renting doesn’t mean you can’t have a plate rack. Set a free standing plate rack on a slim picture ledge. The ledge needs only two small screws, and the rack sits on it with no holes of its own. When you move, you fill two tiny holes and you’re done.
I’d still keep heavy dinner plates on the lowest level and lighter side plates up top.
You’ll need: a free standing countertop plate rack, a picture ledge, two screws with anchors and a small piece of museum putty to stop the rack sliding.
12. Outdoor Kitchen Plate Rack in Cedar
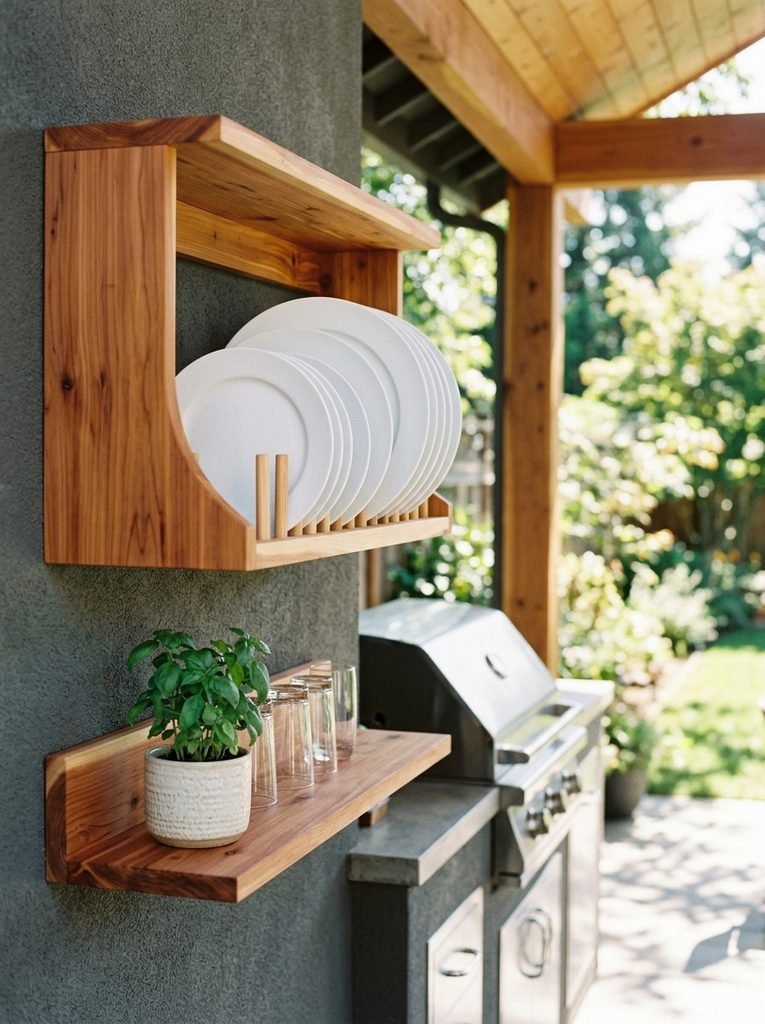
An outdoor kitchen needs storage too, and a plate rack keeps plates right where you serve. Cedar is the best wood for outside because it handles rain and sun without rotting.
Honestly, I’d use melamine or enamel plates outdoors. They’re light, they won’t break if they fall, and they don’t mind the weather.
You’ll need: cedar boards, cedar or stainless steel dowels, outdoor wood glue, stainless steel screws and an outdoor wood sealer.
Build it like the dowel rack in idea 1, then seal it twice before hanging it under a covered area.
Final Thoughts on DIY Plate Rack Wall Ideas
A DIY plate rack wall frees up cabinet space and turns everyday dishes into decor. Start simple with a dowel rack or a floating shelf rail, then add your own touches like cup hooks, whitewash or a mix of special plates. Whatever you build, hang it into studs or strong anchors, because plates add up to a lot of weight.


Amir Ali is the founder and site administrator of HomeDecorEdge, a modern home decor and interior design platform. Since starting the site, he has combined his passion for interior design, practical styling, and color coordination with hands-on content strategy and site management. He guides authors, curates high-quality articles, and ensures readers have access to actionable, visually inspiring, and user-focused home decor advice for apartments, small rooms, and family homes.