

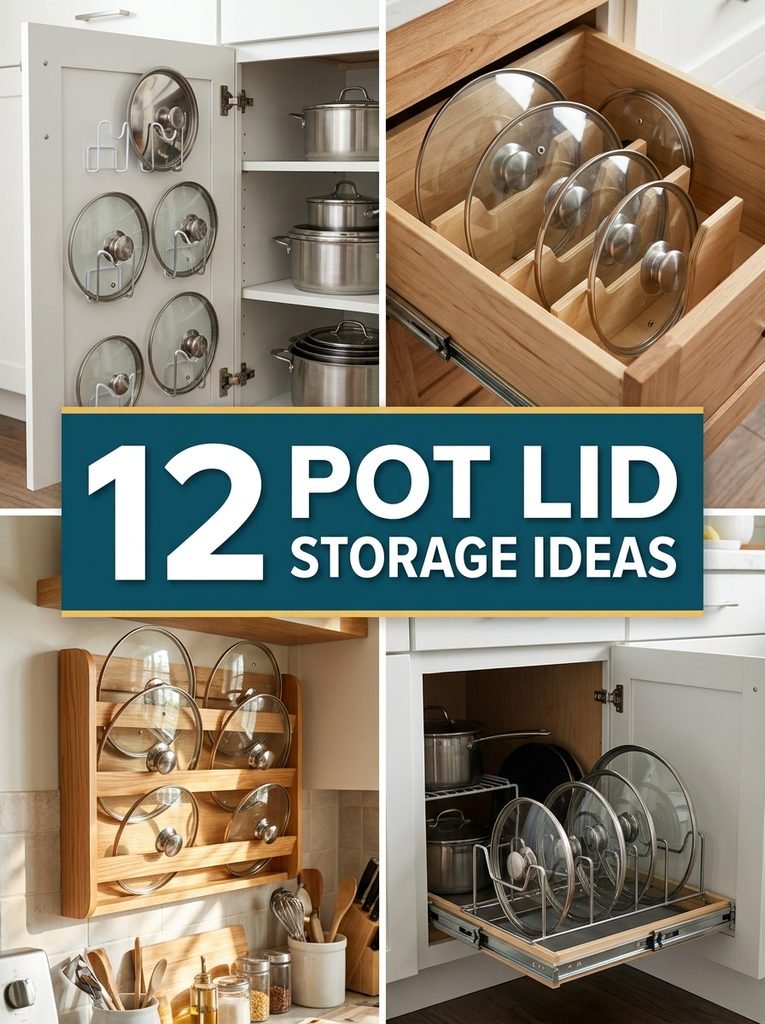
Every kitchen has that one cabinet. You open it, reach for a lid, and three others slide out and clatter onto the floor. In my kitchen, it was the lids that broke me. Pots stack nicely, but lids are awkward, slippery and never the right shape for anything. The good news is that fixing it is cheap and quick. These 12 pot lid storage ideas use space you already have, like cabinet doors, drawers, walls and the sides of an island. Pick the one that suits your kitchen and you’ll never dig for a lid again.
1. Inside Cabinet Door Lid Rack With Adhesive Hooks
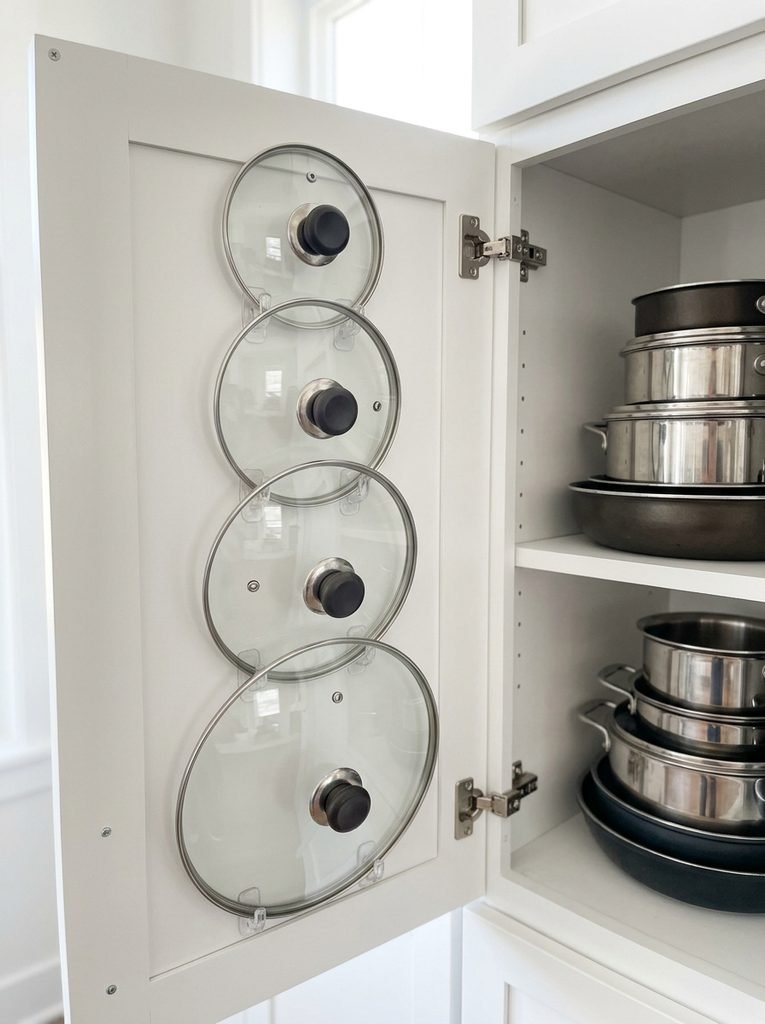
This is the quickest fix on the list, and it costs almost nothing. The inside of a cabinet door is wasted space in most kitchens, and it’s the perfect spot for lids.
Materials Needed: Small adhesive utility hooks rated for the weight of your lids, rubbing alcohol, a clean cloth, a pencil, and a tape measure.
How to Make It: Open the cabinet and check how much space there is between the door and the shelves when it closes, so the lids won’t bump into anything. Clean the inside of the door with rubbing alcohol and let it dry. Hold a lid against the door where you want it and mark two points under its rim, one on each side. Stick a hook on each mark, pressing firmly, and wait the full time on the package before hanging anything. Rest the lid’s rim on the two hooks. Repeat for each lid, putting the biggest lids at the bottom. A tip I picked up: glass lids are heavier than they look, so check the weight rating on the hooks and use the bigger size for large glass lids.
2. DIY Wooden Wall Lid Rack
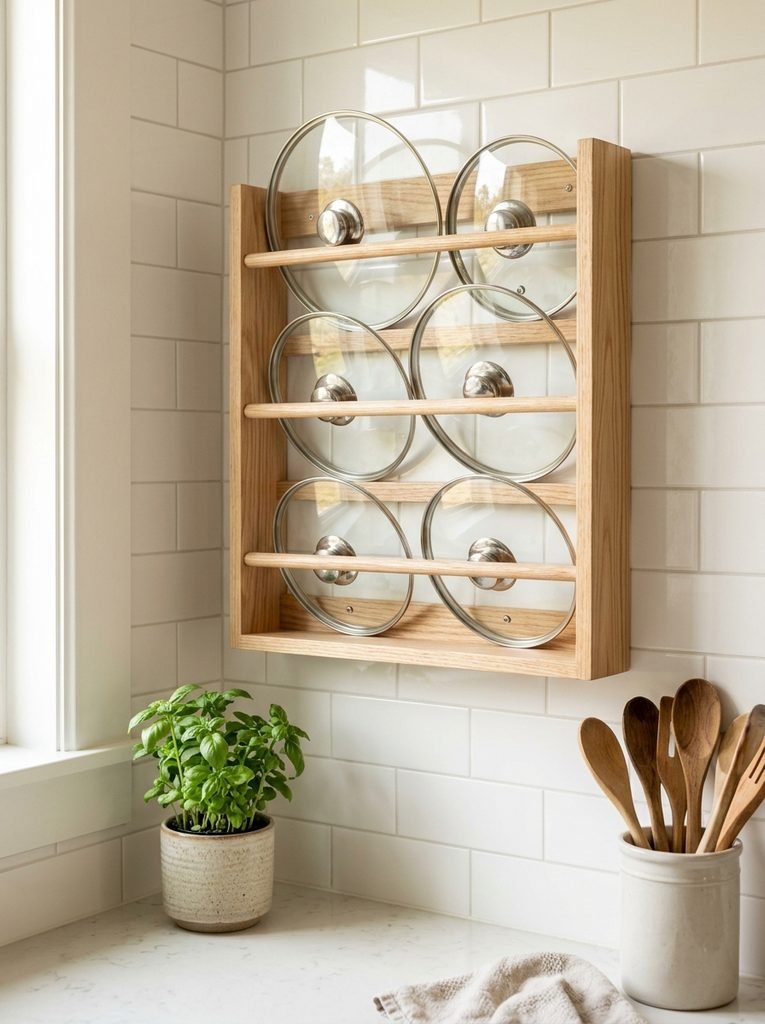
A wall rack keeps lids right where you cook, and it looks great when it’s made from warm wood. It’s a simple weekend build.
Materials Needed: A wooden board about 24 inches long for the back, three thin wooden strips or small dowels for the rails, wood glue, small screws, sandpaper, a wood finish or paint, a drill, a stud finder, and wall screws or heavy duty anchors.
Overwhelmed by Clutter?
15 minutes a day for 30 days, and your home feels calm again.
How to Make It: Sand the back board and the rails smooth. Lay the board flat and mark three rows, leaving enough space between them for your tallest lid to lean. Glue and screw the rails across the board at each row, so they stick out about an inch to catch the bottom of each lid. Seal or paint the rack and let it dry. Find a stud on the wall and screw the rack in securely, or use heavy duty wall anchors. Lean each lid on a rail with its handle facing out. In my experience, screwing into a stud is worth the extra minute. A full rack of glass lids gets heavy fast.
3. Drawer Lid Dividers
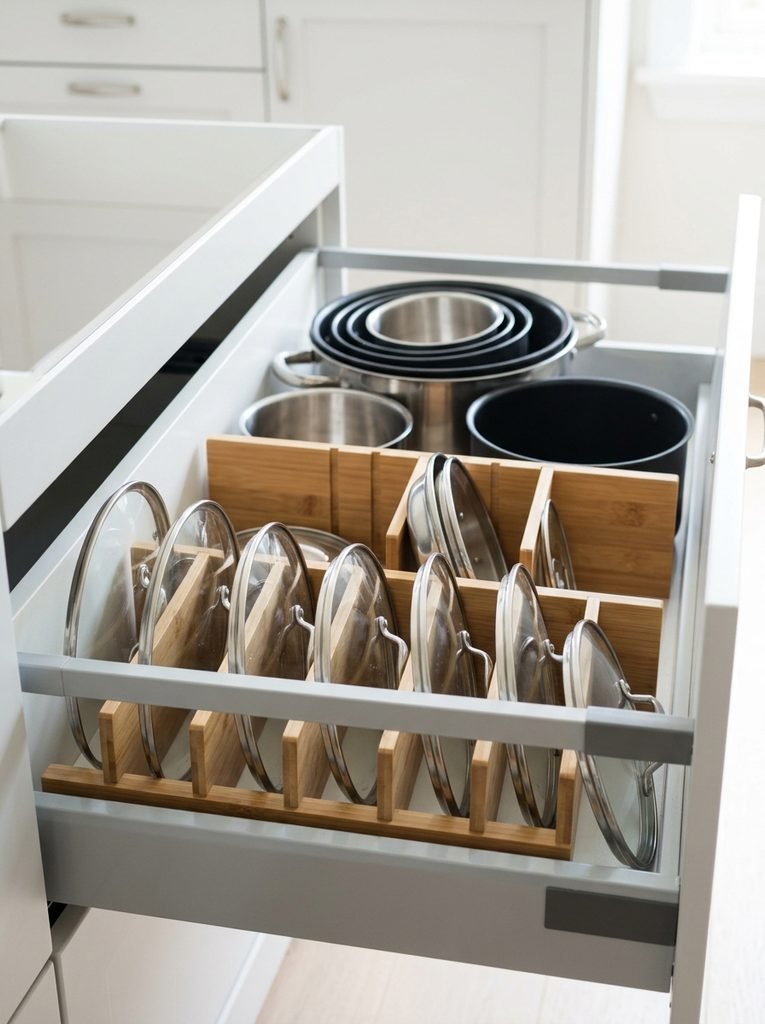
If you have deep drawers, standing lids on their edges is a game changer. You can see every lid at a glance and pull out exactly the one you need.
Materials Needed: Adjustable spring loaded bamboo drawer dividers or thin plywood strips, a tape measure, and non slip drawer liner.
How to Make It: Empty the drawer and lay down a non slip liner so the lids don’t slide. Measure the drawer from side to side and buy dividers that adjust to that width. Stand your lids on their edges and space the dividers so each slot fits one or two lids snugly. Put the biggest lids at the back and the smallest at the front. If you’d rather build your own, cut thin plywood strips to the drawer’s depth and glue them into small wooden slots along the sides. Honestly, this works best in drawers at least 8 inches deep, so the lids stand without tipping.
Inside the 30-Day Declutter Challenge
- Daily 15 minute tasks
- Room checklists
- Printable labels
4. Vertical Pull Out Lid Organizer
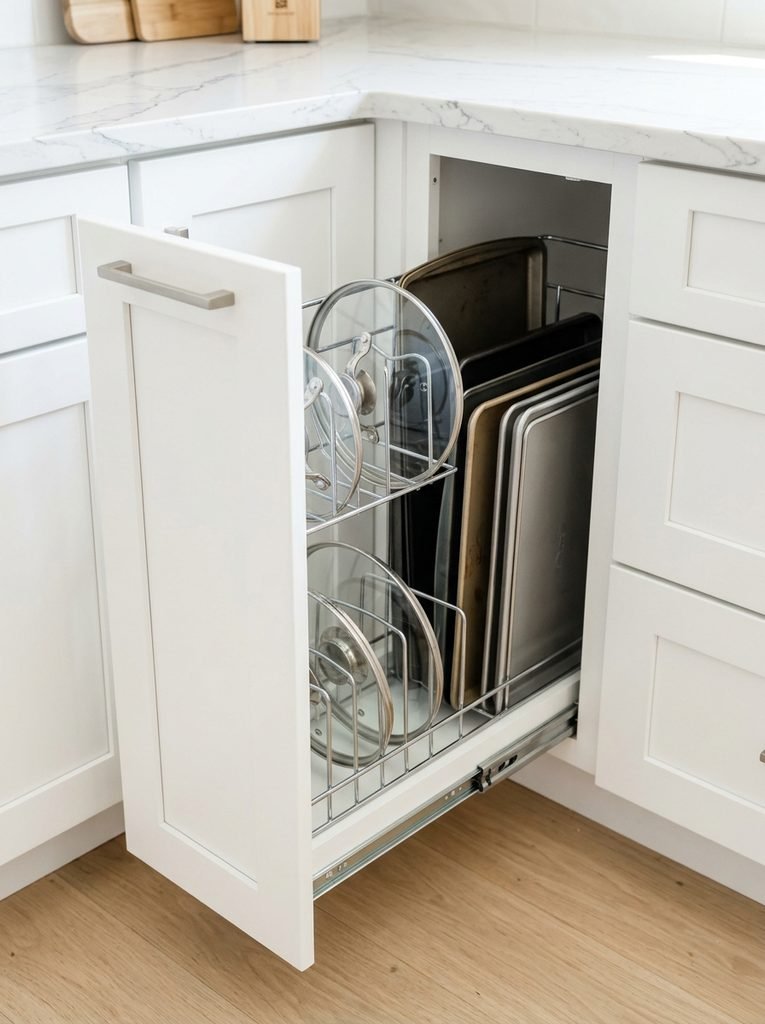
A vertical pull out organizer turns a narrow cabinet into a neat lid station. It slides out like a drawer, so nothing gets lost at the back. It’s especially helpful in small kitchens where every inch counts. Measure the cabinet opening carefully before you buy, including the door hinges. I like using the same organizer for baking sheets and cutting boards too. Honestly, it’s one of the best upgrades for a cabinet next to the stove.
You’ll need: a pull out vertical organizer that fits your cabinet width, a tape measure, a drill, and the screws that come with the organizer.
5. Tension Rod Dividers in a Cabinet
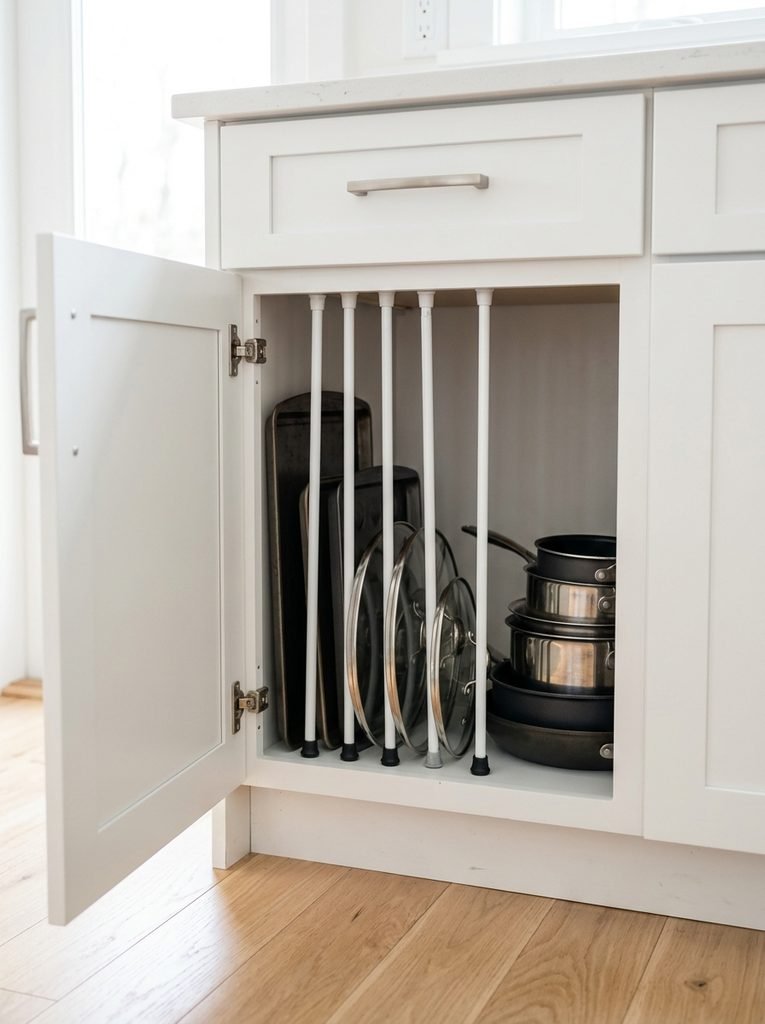
Small tension rods are a renter friendly hack that turns any cabinet into a lid organizer. Fit them vertically between the shelves, a few inches apart, and slide the lids in between. There’s no drilling, and you can move them whenever you like. Use a short rod for each slot so they hold firmly. In my experience, rods with rubber ends grip much better and don’t slip when you pull a lid out.
You’ll need: small spring tension rods with rubber ends and a tape measure.
6. Dollar Store File Sorter Hack
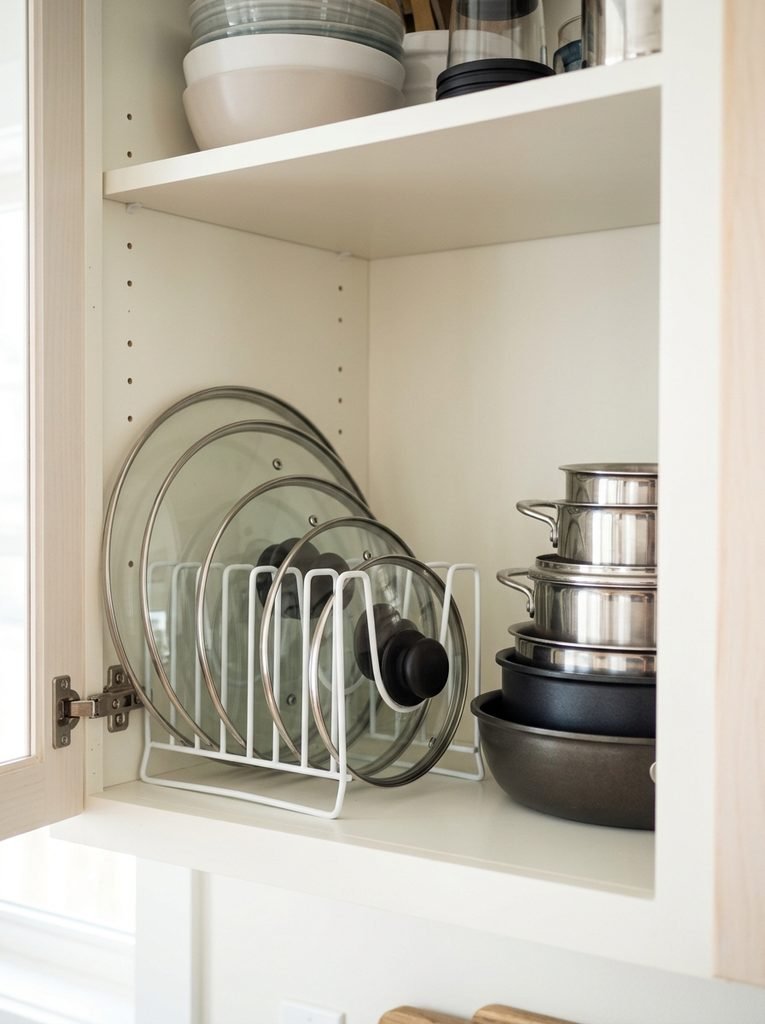
This is one of my favourite cheap hacks. A metal desk file sorter, the kind meant for folders, holds pot lids upright perfectly. Just place it inside a cabinet or on a pantry shelf and slide the lids into the slots. Look for a sturdy metal one rather than plastic, because lids are heavy. Honestly, for just a few dollars, it does the same job as an expensive lid organizer.
You’ll need: a sturdy metal file sorter from the dollar store and a non slip liner for the shelf.
7. Flip Lids Upside Down on the Pots
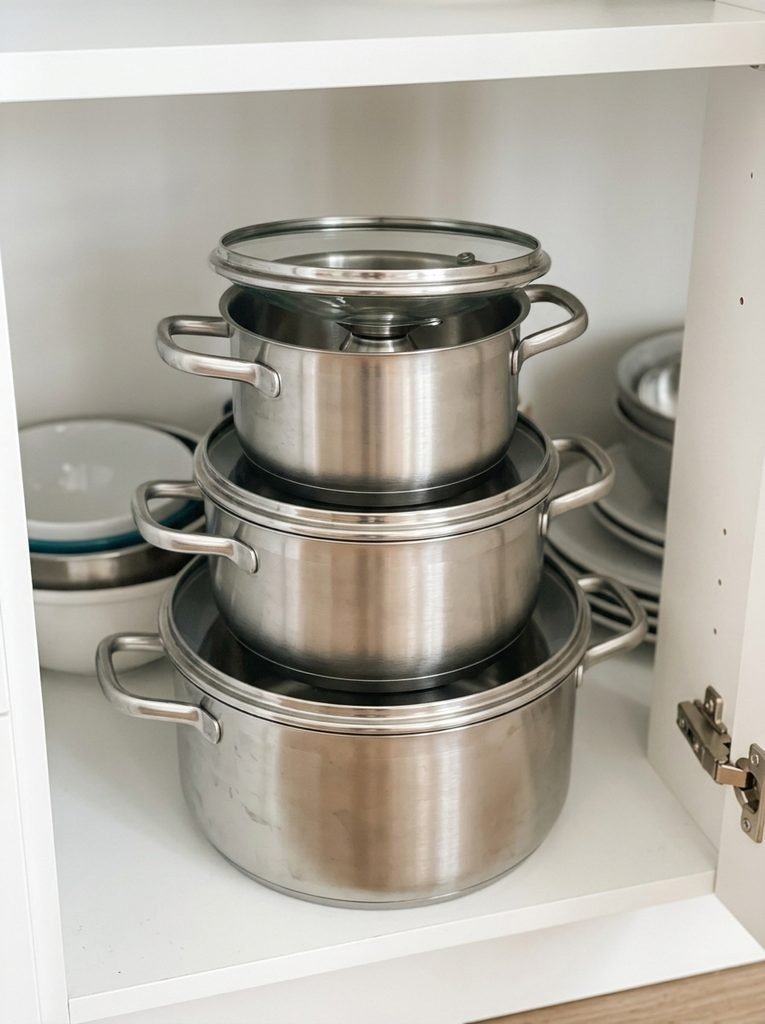
This hack costs nothing at all. Flip each lid upside down and set it on its matching pot, so the handle sits inside. Now the lid lies flatter, and you can stack another pot on top. Best of all, every lid stays with the pot it belongs to. In my experience, it works best with pots that have flat lid handles. It’s the perfect quick fix if you don’t have space for anything else.
8. Pantry Door Rack
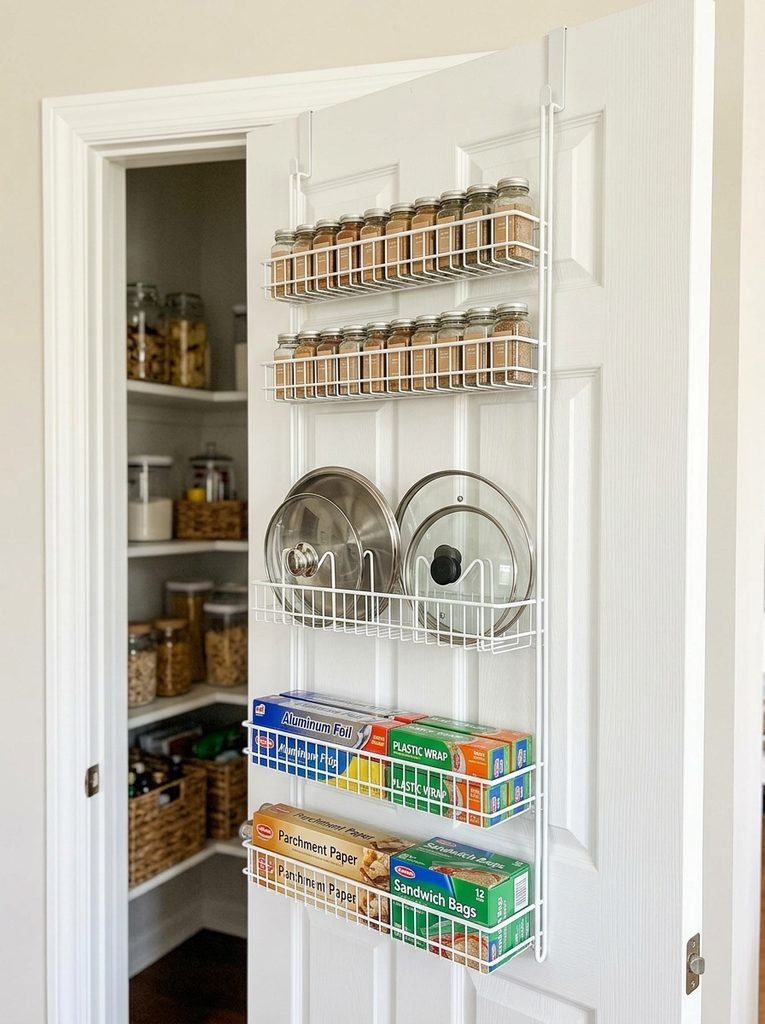
If your cabinets are full, look at the pantry door. An over the door rack with shallow baskets holds lids upright and keeps them out of the way. Use one or two tiers for lids and the rest for spices, foil and wraps. Check that the rack doesn’t stop the door from closing. I’d suggest putting the lids on a lower tier, where they’re easy to grab without reaching.
You’ll need: an over the door rack with shallow baskets and a tape measure.
Start Your 30-Day Home Reset
Stop waiting for a "perfect" free weekend. Grab the 30-day plan and start feeling lighter in your own home by tomorrow.
View the 30-Day Plan Printable PDF · Instant download9. Lazy Susan in a Corner Cabinet
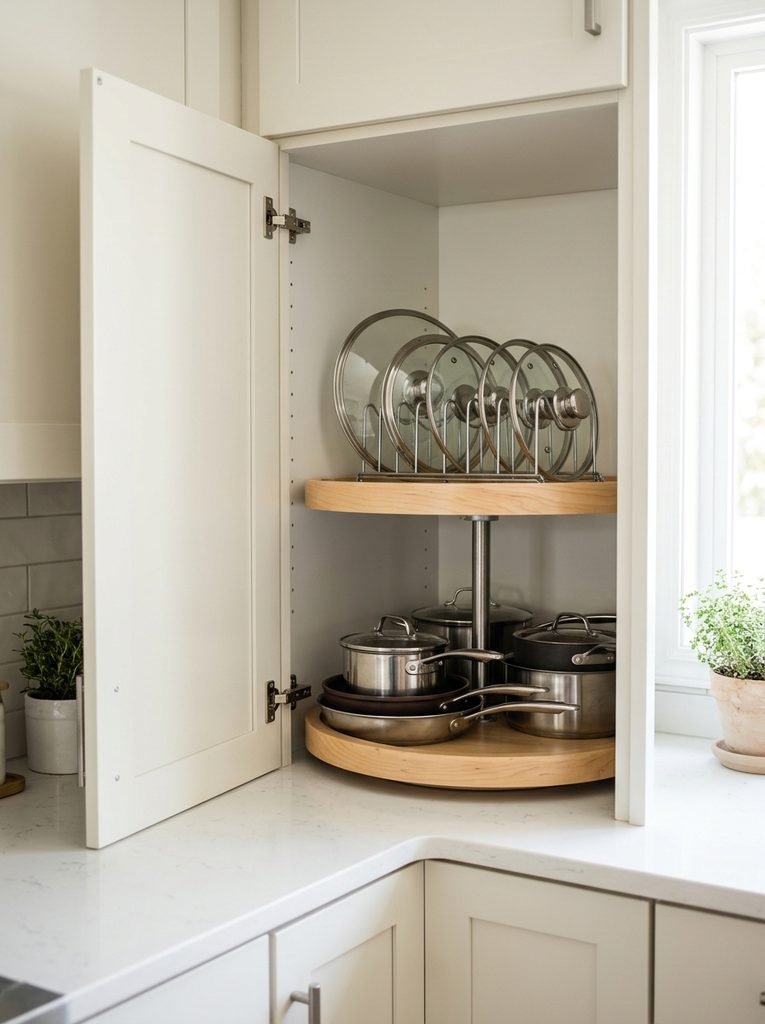
Corner cabinets are notorious for swallowing lids. A lazy susan solves that, because one spin brings everything to the front. Stack pots on the bottom tier and stand the lids in a small round holder on the top. Measure the cabinet opening, not just the inside, so the turntable fits through the door. Honestly, it’s one of the easiest ways to stop losing lids in the back corner.
You’ll need: a two tier lazy susan sized for your corner cabinet and a small round lid holder.
10. Rack on the Open End of a Kitchen Island
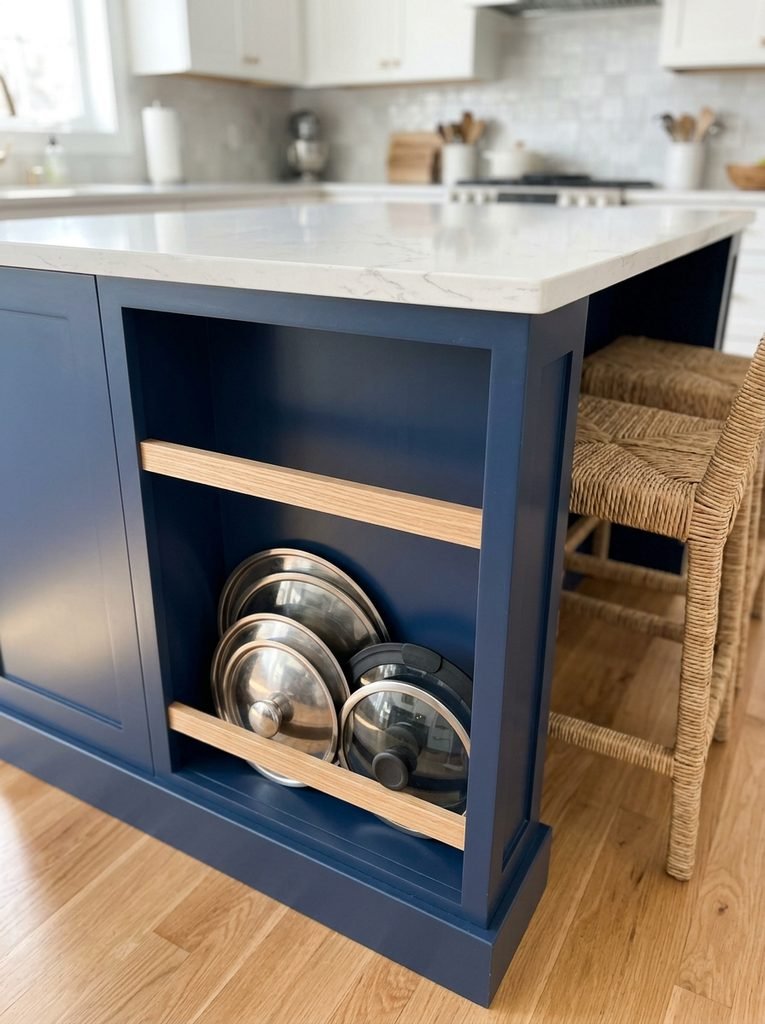
The plain end of a kitchen island is often wasted space. A few slim rails turn it into a handy lid rack, right next to where you cook. Keep it to the side away from the walkway, so nobody bumps into it. Wooden rails painted to match the island look built in. I like this idea because it keeps lids in reach without taking any cabinet space at all.
You’ll need: thin wooden rails, wood screws, paint or stain to match the island, and a drill.
11. Lid Stand on Open Shelving
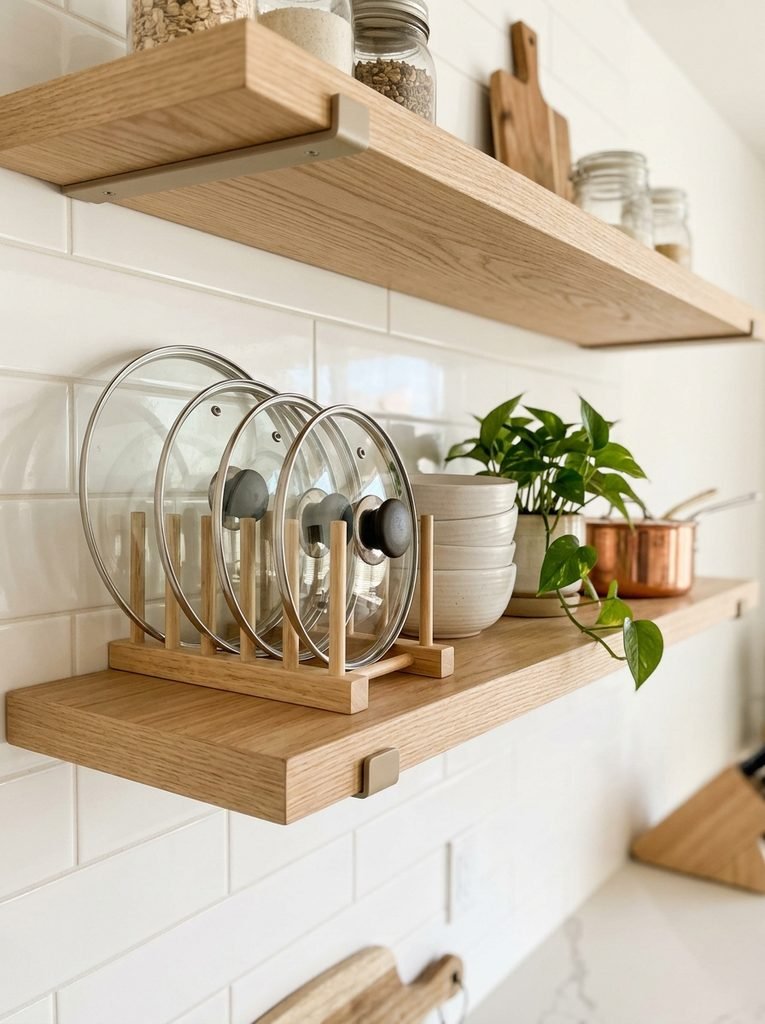
If you have open shelving, a wooden plate stand makes a pretty lid holder. Lids stand upright in the slots, and matching lids even look decorative. It works best when your lids are all the same style, like glass with stainless rims. Keep the stand near the stove so the lids are handy. Honestly, it’s storage that doubles as decor.
You’ll need: a wooden plate stand or dish rack wide enough for your lids.
12. Pegboard Wall for Pots and Lids
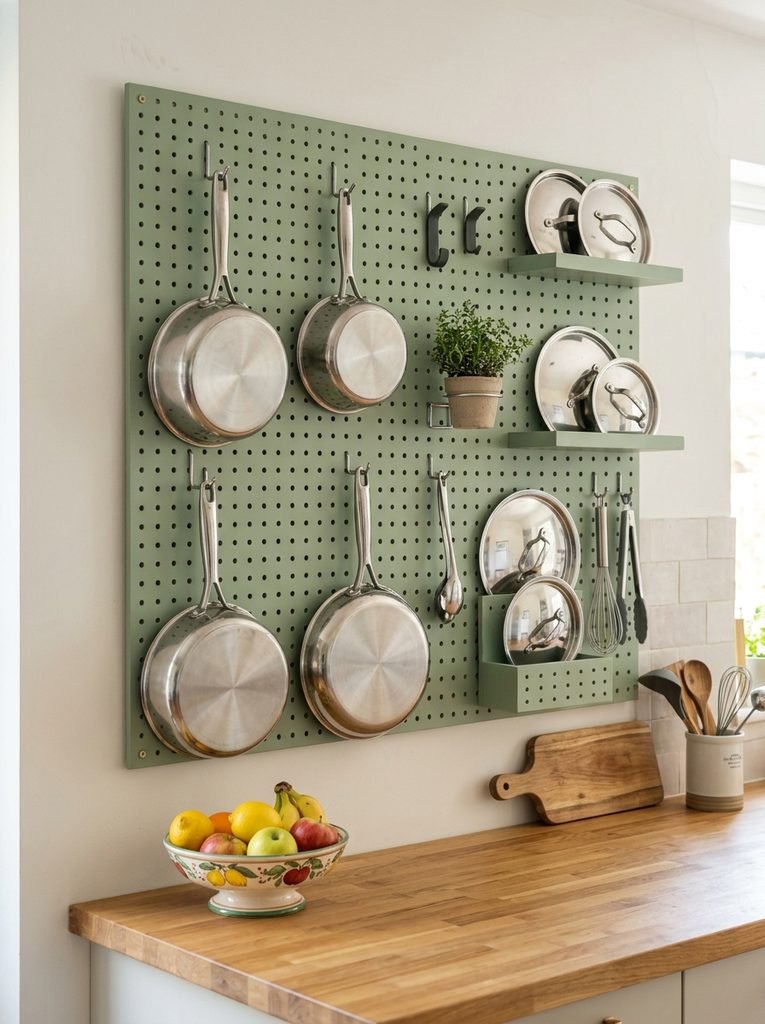
A pegboard wall gives pots and lids their own spot, and you can move the hooks any time. Hang pots by their handles, and use small shelves or pairs of hooks for the lids. Paint the pegboard a color that suits your kitchen, like sage, navy or white. Mount it on spacers so the hooks can slide in behind. In my experience, it’s the most flexible option if your cookware collection keeps changing.
You’ll need: a pegboard panel, spacers, wall screws or anchors, pegboard hooks and small pegboard shelves, and paint.
Final Thoughts on Pot Lid Storage
Good pot lid storage is all about using space you already have, like a cabinet door, a deep drawer or a bare wall. Start with the cheapest fix that fits your kitchen, whether that’s adhesive hooks or a file sorter. Honestly, once your lids have a home, cooking feels so much calmer.


Amir Ali is the founder and site administrator of HomeDecorEdge, a modern home decor and interior design platform. Since starting the site, he has combined his passion for interior design, practical styling, and color coordination with hands-on content strategy and site management. He guides authors, curates high-quality articles, and ensures readers have access to actionable, visually inspiring, and user-focused home decor advice for apartments, small rooms, and family homes.