
A storage bench is one of the most versatile pieces of furniture you can build because it solves two problems at once — seating and storage — without taking up any more space than seating alone would. These DIY storage bench plans cover every room and use case, from a simple entryway bench with hooks above to a full hinged lid bench for the foot of the bed or a covered outdoor patio.
This post contains affiliate links. If you purchase through these links I may earn a small commission at no extra cost to you.
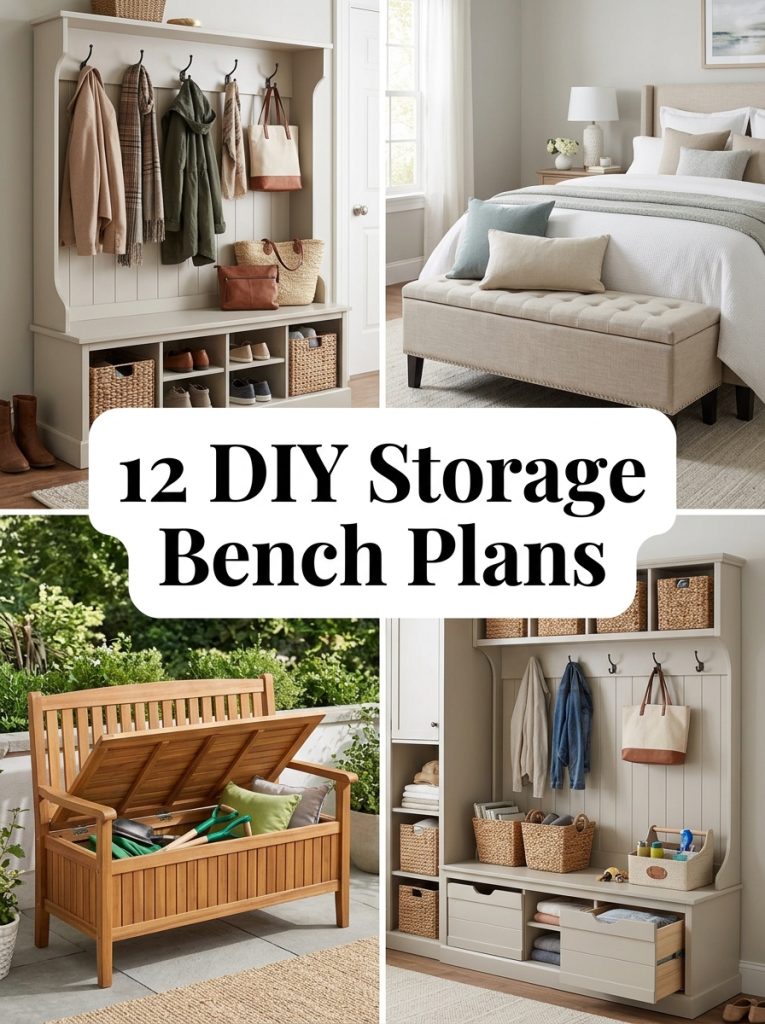
A storage bench earns its place in any room by doing double duty every single day.
1. Build a Simple Entryway Bench with Hooks
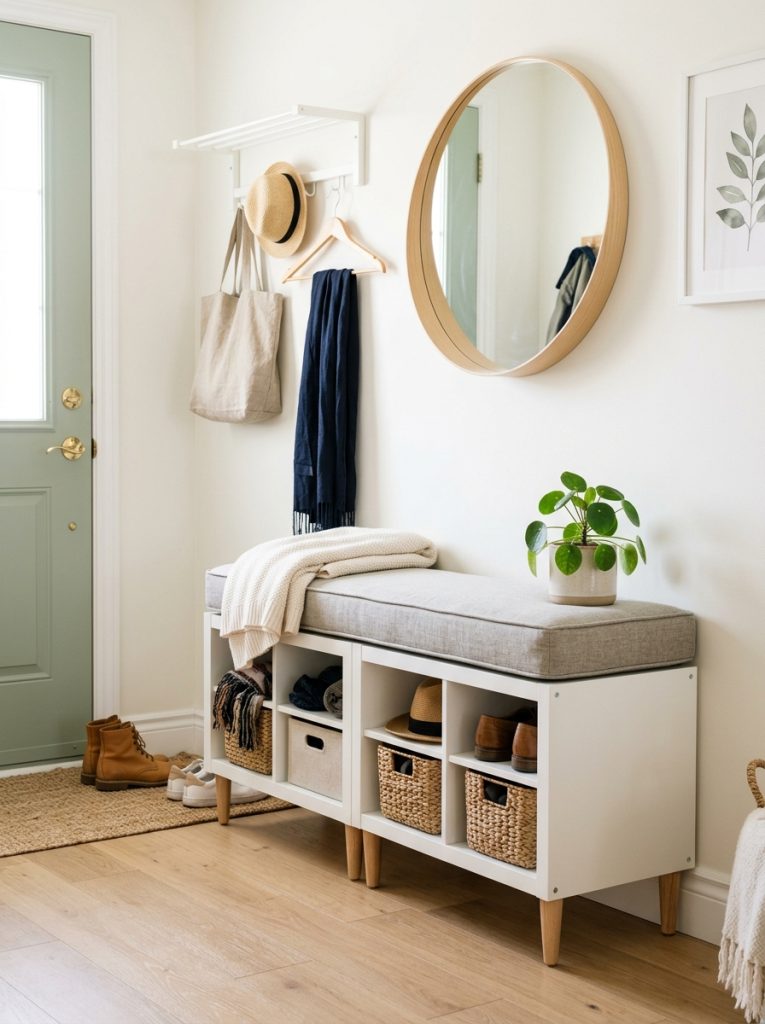
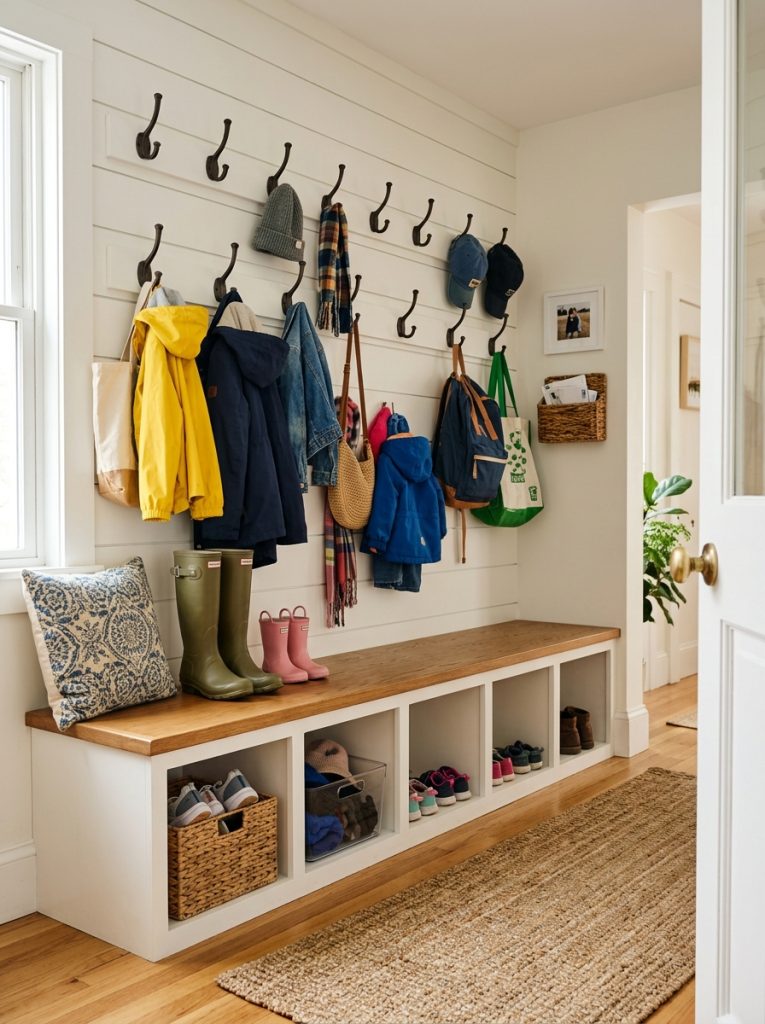
An entryway bench with hooks mounted above gives every household member a dedicated spot to sit while removing shoes and a place to hang a coat or bag the moment they walk in. This storage bench entryway hooks shows the finished style to aim for — bench seat with hidden storage below and hooks within easy reach above. Build the bench box from plywood, add a hinged seat lid, and mount the hook rail directly to the wall behind it.
Materials Needed:
- Plywood for bench box
- Piano hinge for seat lid
- Wall mounted hook rail
- Wood screws and drill
- Cushion for the seat top
How to Make It:
- Build a rectangular bench box from plywood sized to your entryway space.
- Cut a seat lid panel and attach it to the back top edge of the box with a piano hinge.
- Mount a hook rail to the wall directly above the bench at coat hanging height.
- Sand and finish the bench in a color that matches your entryway.
- Add a cushion to the seat top and load the box with shoes or seasonal items.

Storage Bench Entryway with Hooks
Entryway storage bench with hooks mounted above — great reference for sizing your own DIY build.
Check Price on Amazon2. Add a Comfortable Seat Cushion
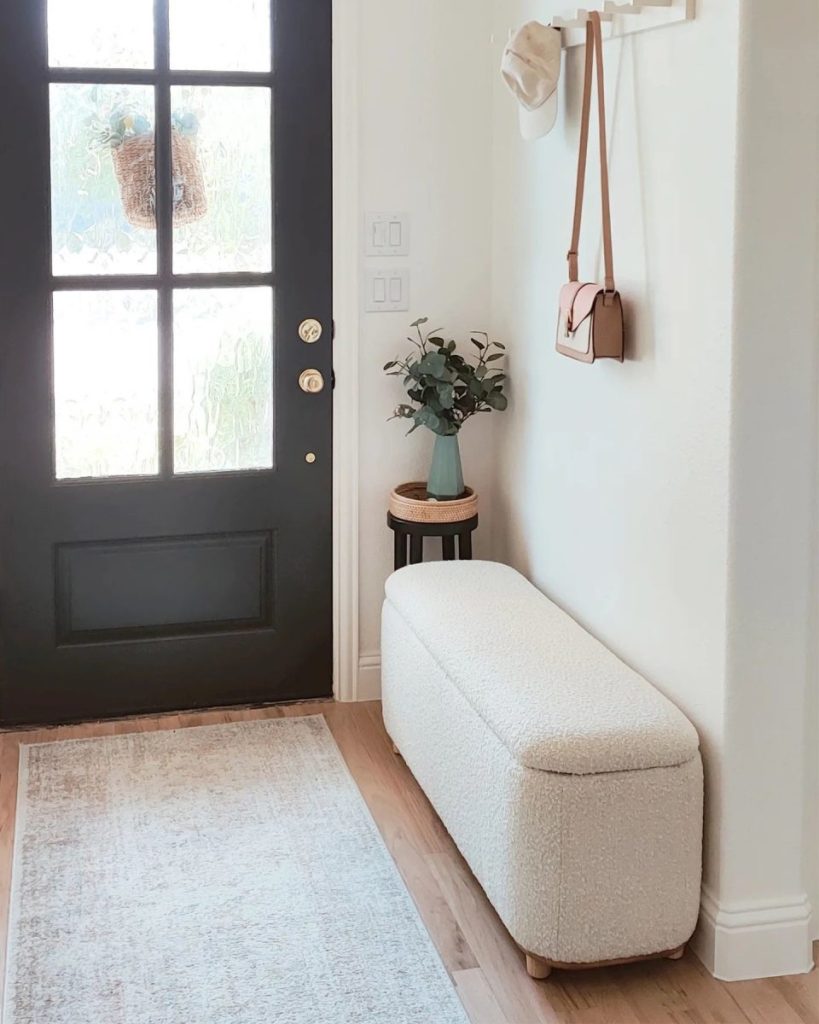
A thick seat cushion is what turns a plain storage box into a genuinely comfortable bench worth sitting on every day. This storage bench seat with cushion shows the right cushion thickness and fabric finish to aim for. Cut foam to the exact dimensions of your bench top, wrap in fabric using a no-sew or simple sewn method, and secure with ties or velcro so the cushion stays in place when the lid is lifted.
Materials Needed:
- High density foam cut to bench size
- Upholstery fabric
- Staple gun or sewing supplies
- Velcro strips or ties (optional)
How to Make It:
- Measure the bench top and cut foam to those exact dimensions.
- Cut fabric to the foam size plus extra for wrapping underneath.
- Wrap the foam in fabric and secure on the underside with a staple gun.
- Attach velcro strips to the cushion bottom and bench top to keep it in place.
- Set the finished cushion on the bench seat.

Storage Bench Seat with Cushion
Cushioned storage bench seat that shows the right thickness and finish for a comfortable DIY build.
Check Price on Amazon3. Build a Bench for the Foot of the Bed
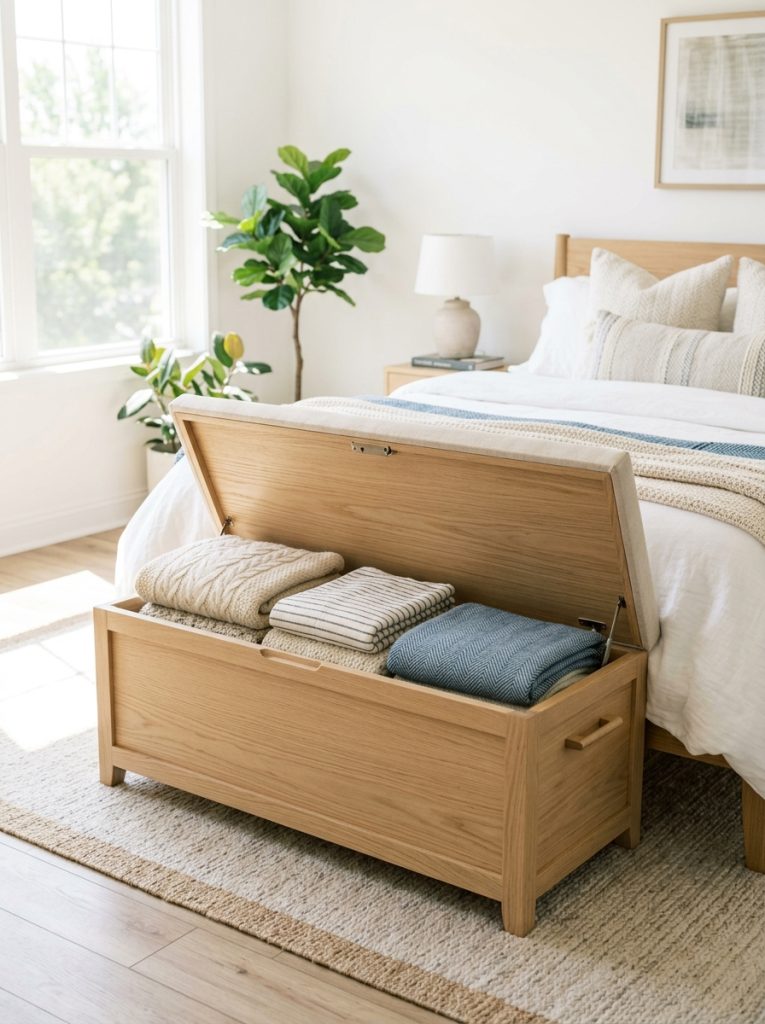
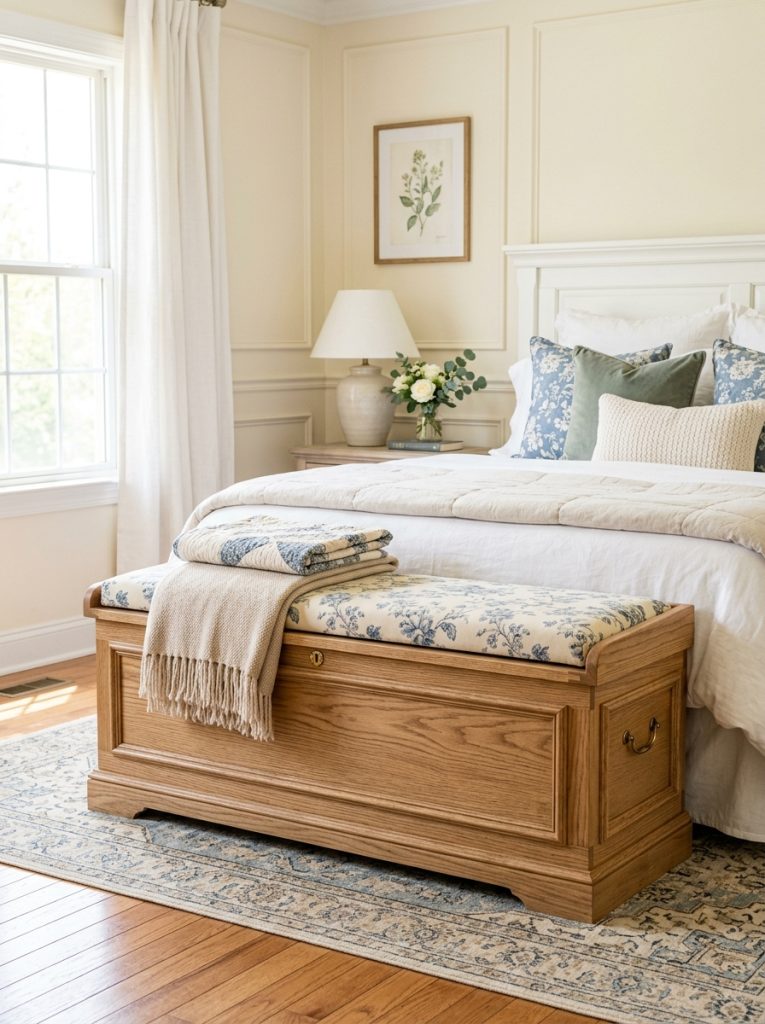
A bench at the foot of the bed adds both a spot to sit while getting dressed and hidden storage for extra blankets, pillows, or off-season bedding. This storage bench foot of bed shows the right proportions for this specific placement — long enough to match the bed width but low enough to not block the view or feel oversized in the room. Build from plywood with a fabric covered lid that matches the bedroom palette.
Materials Needed:
- Plywood for bench box
- Piano hinge for lid
- Wood screws and drill
- Fabric and foam for lid cushion
- Paint or stain to match bedroom decor
How to Make It:
- Measure the bed width and build the bench box to roughly two thirds that length.
- Keep the bench height lower than the mattress top so it does not block the bed view.
- Attach a hinged lid with foam and fabric for a cushioned top.
- Finish in a color or fabric that complements the bedroom design.
- Position at the foot of the bed and fill with extra bedding.

Storage Bench Foot of Bed
Bedroom bench sized for the foot of a bed — great reference for proportions and fabric finish.
Check Price on Amazon4. Build a Weatherproof Outdoor Bench
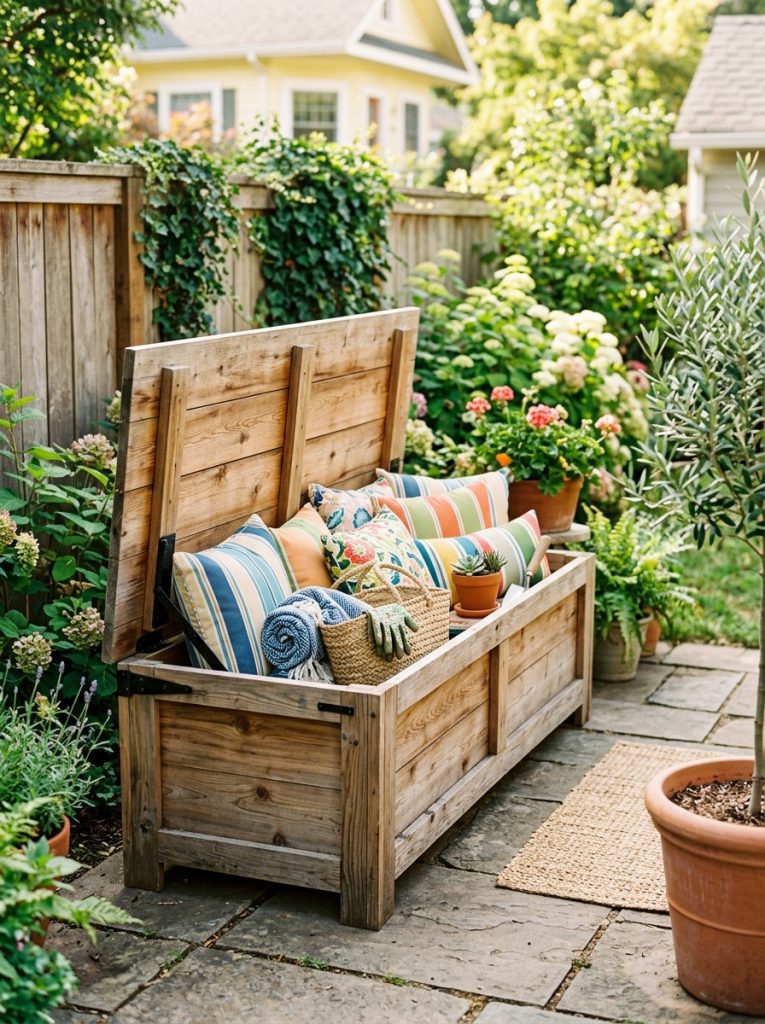
An outdoor storage bench needs weather resistant materials and a properly sealed hinged lid to keep stored items dry through rain. This storage bench outdoor hinged lid shows the right outdoor construction style. Build from cedar or pressure treated lumber, seal every surface thoroughly, and add a lid that overhangs slightly on all sides so water runs off rather than pooling on top.
Materials Needed:
- Cedar or pressure treated lumber
- Exterior screws and drill
- Outdoor rated hinges
- Exterior wood sealant or paint
- Weatherproof lid seal (optional)
How to Make It:
- Build the bench box from cedar or pressure treated lumber with exterior screws at every joint.
- Cut a lid panel slightly larger than the box opening so it overhangs on all sides.
- Attach the lid with outdoor rated hinges.
- Seal every surface, inside and out, with exterior wood sealant.
- Allow to cure fully before placing on the patio and loading with outdoor cushions or supplies.
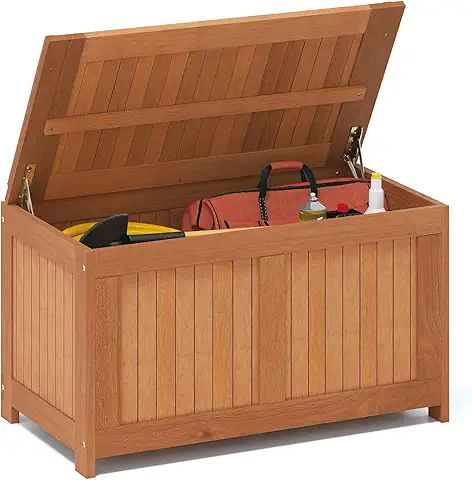
Outdoor Storage Bench with Hinged Lid
Weatherproof outdoor bench with hinged lid — great reference for sealing and construction details.
Check Price on Amazon5. Add Pull Out Drawers Instead of a Lid
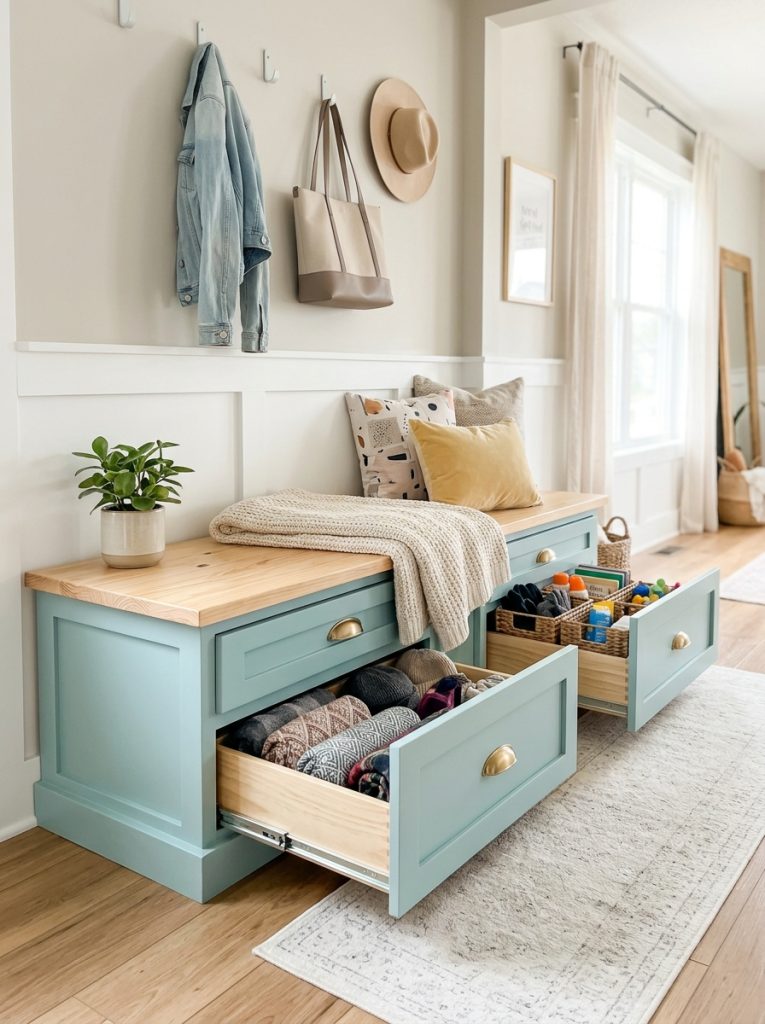
A bench with pull out drawers instead of a hinged lid keeps the seat surface always available since you never need to remove anything from on top to access storage. This storage bench with drawers shows the drawer configuration style to build toward. Install drawer slides inside the bench frame and build simple drawer boxes that pull forward from the front face rather than lifting from the top.
Materials Needed:
- Plywood for bench frame and drawer boxes
- Drawer slides
- Wood screws and drill
- Drawer pulls
- Paint or stain
How to Make It:
- Build the bench frame with front openings sized for your planned drawers.
- Install drawer slides inside each opening.
- Build drawer boxes from plywood sized to fit the openings with clearance for the slides.
- Attach drawer fronts and pulls.
- Build a fixed seat top across the whole frame since the top no longer needs to lift.

Storage Bench with Drawers
Bench with pull out drawers — great reference for drawer configuration instead of a hinged lid.
Check Price on Amazon6. Build an Upholstered Storage Ottoman
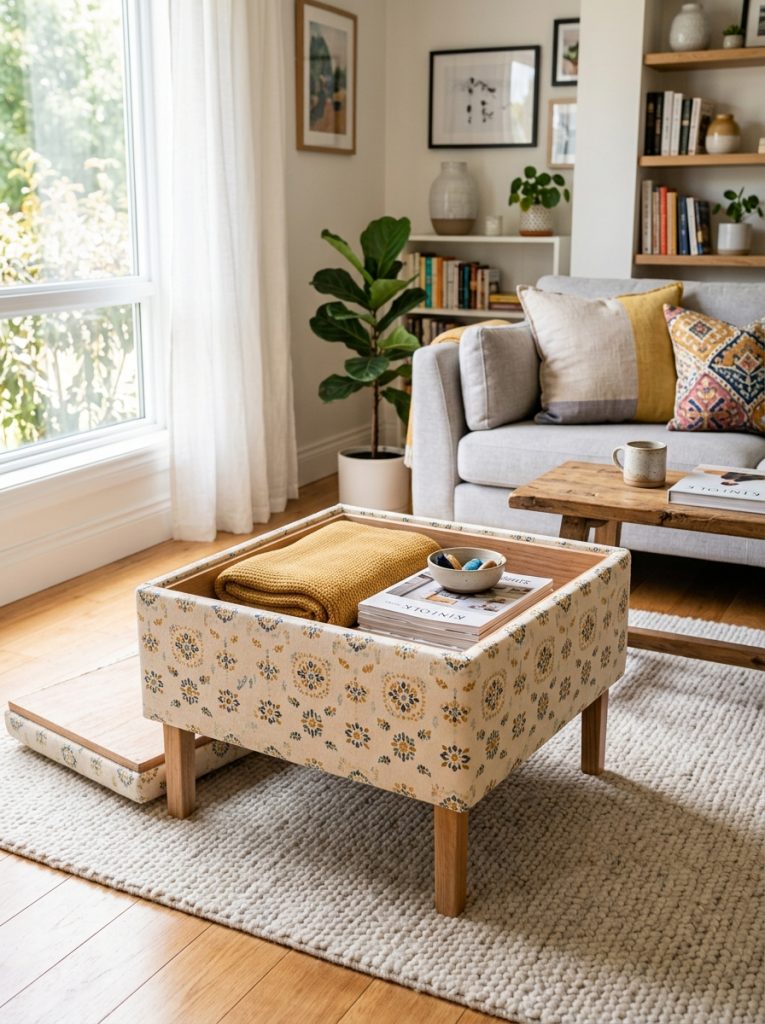
An upholstered storage ottoman works as a coffee table, extra seating, and hidden storage all in one piece, which makes it one of the most useful builds for a living room. This storage bench ottoman shows the fully upholstered finish to aim for — wrap the entire box and lid in fabric using foam padding for a soft, furniture-grade result rather than a raw wood box.
Materials Needed:
- Plywood for box frame
- High density foam for padding
- Upholstery fabric
- Staple gun
- Wood screws and drill
How to Make It:
- Build a plywood box frame to your desired ottoman size.
- Pad the box exterior with thin foam and wrap in fabric, stapling on the underside.
- Build a separate lid panel padded with thicker foam for the cushioned top.
- Wrap the lid in matching fabric and staple underneath.
- Set the lid on top of the box — it lifts off completely for full access to storage inside.

Upholstered Storage Bench Ottoman
Fully upholstered storage ottoman — great reference for a furniture-grade fabric wrapped finish.
Check Price on Amazon7. Build a Bedroom Hope Chest Style Bench
A hope chest style bench has more depth than a standard storage bench, designed for storing larger items like quilts, keepsakes, or seasonal clothing rather than just small accessories. Build the box taller and deeper than a typical bench, add decorative trim or molding around the edges for a traditional furniture look, and finish in a wood stain rather than paint for that classic hope chest aesthetic. The extra depth makes it function as genuine long term storage furniture.
Materials Needed:
- Plywood for a deep box frame
- Decorative trim molding
- Piano hinge for lid
- Wood stain
- Wood screws and drill
How to Make It:
- Build a deeper box frame than a standard bench, at least 18 inches tall.
- Attach decorative trim molding around the front and side panels.
- Build a lid sized to the box opening and attach with a piano hinge.
- Sand thoroughly and apply wood stain for a traditional finish.
- Use for storing quilts, keepsakes, or seasonal items that need real depth.
8. Try an IKEA Hack Storage Bench
IKEA furniture hacks make excellent storage bench bases because the pieces are affordable, structurally sound, and designed for easy modification. Two KALLAX cube units placed side by side with a custom cushioned top built across them creates a bench with built-in cubby storage in a fraction of the time a from-scratch build would take. Paint or leave natural depending on your room style, and the modular cubbies underneath stay fully accessible.
Materials Needed:
- IKEA KALLAX or similar cube storage units
- Wood board for the seat top
- Foam and fabric for cushion
- Screws to connect units
- Paint (optional)
How to Make It:
- Position two KALLAX units side by side and connect with screws through the back panels.
- Cut a wood board to span across the top of both units with a slight overhang.
- Pad the board with foam and wrap in fabric for a cushioned seat.
- Attach the cushioned top to the connected units.
- Use the cube openings below for baskets or open storage.
9. Build a Kitchen Banquette Seating Bench
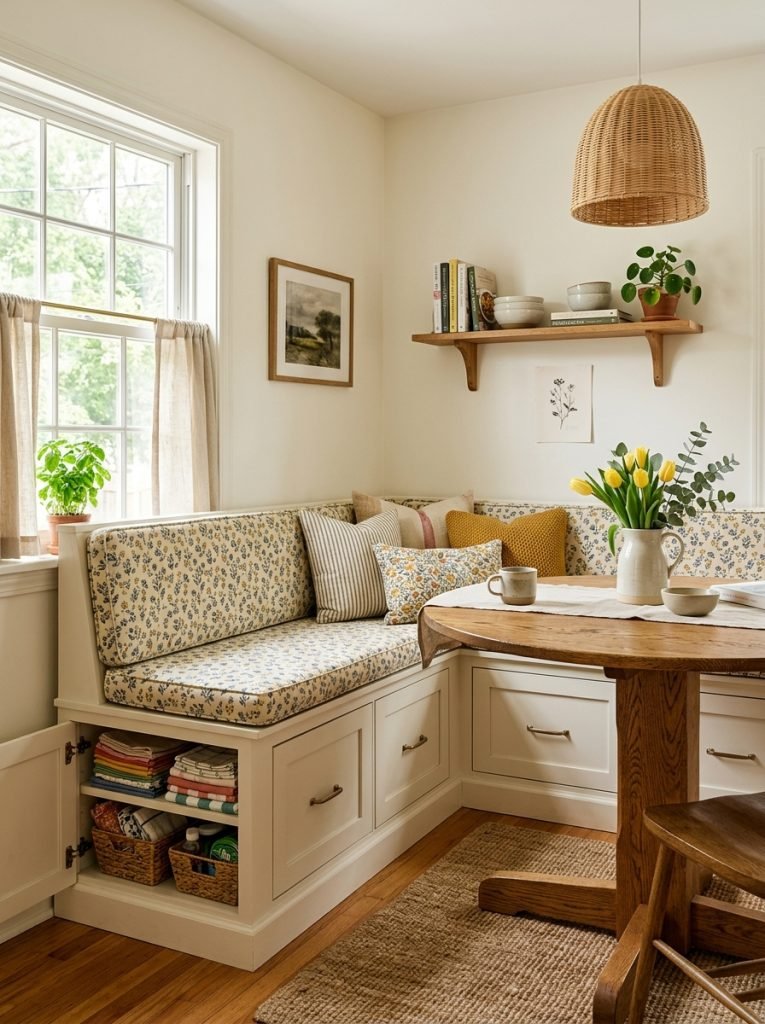
A kitchen banquette bench built into a corner dining nook combines seating for a breakfast area with significant hidden storage for linens, extra dishware, or pantry overflow. Build an L-shaped bench frame fitted to the exact corner dimensions, with hinged lids along each section for full access to the storage below. This built-in approach makes the most of a kitchen corner that would otherwise just hold a regular chair taking up more floor space.
Materials Needed:
- Plywood for L-shaped frame
- Piano hinges for each lid section
- Wood screws and drill
- Cushions for the seat
- Paint or stain to match kitchen cabinetry
How to Make It:
- Measure the exact corner dimensions where the banquette will be built.
- Construct an L-shaped box frame from plywood fitted to those measurements.
- Divide the lid into two or three sections, each with its own piano hinge for access.
- Finish in a color matching the kitchen cabinetry.
- Add cushions along the full seat length and a small table to complete the dining nook.
10. Make a Simple Easy Weekend Bench
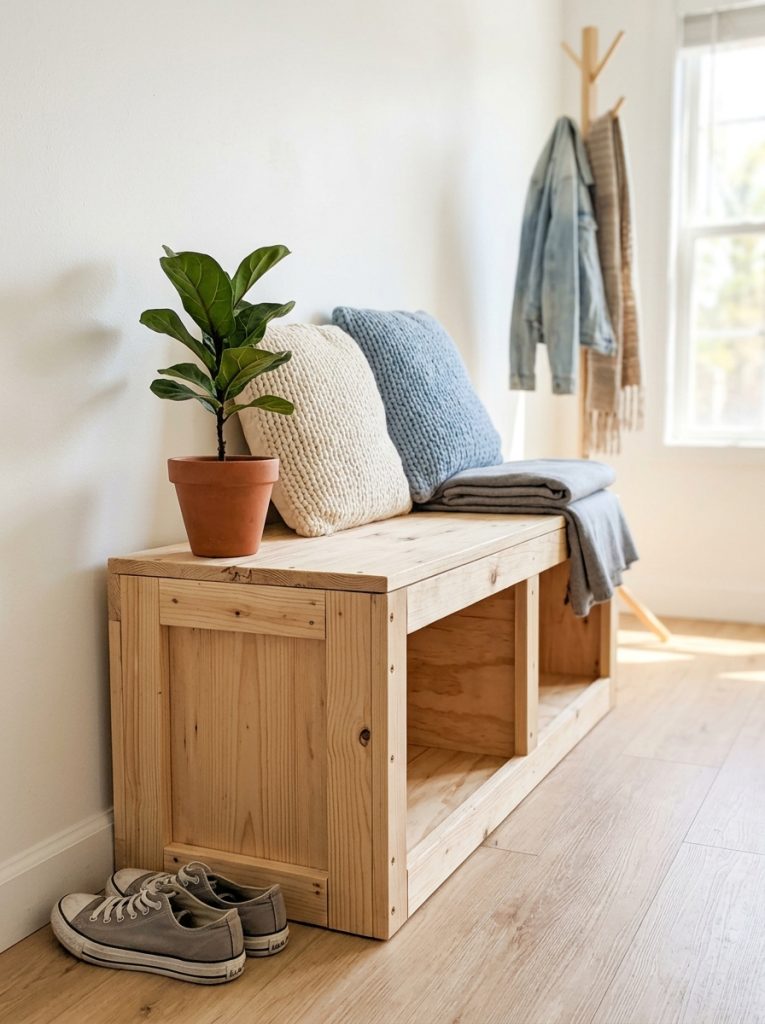
A storage bench does not need complicated joinery to function well — a simple box built from basic 2×4 framing and plywood panels can be completed in a single weekend by a true beginner. Keep the design as a plain rectangular box with a flat hinged lid, skip any decorative trim, and focus on solid square corners and a properly working hinge. This straightforward approach is the best starting point for anyone building their first storage bench.
Materials Needed:
- 2×4 lumber for frame
- Plywood for panels
- Piano hinge
- Wood screws and drill
- Paint or stain
How to Make It:
- Build a simple rectangular frame from 2×4 lumber.
- Attach plywood panels to the front, back, sides, and bottom of the frame.
- Cut a lid panel and attach with a piano hinge at the back.
- Sand all surfaces smooth.
- Paint or stain in your chosen finish and allow to dry before use.
11. Build a Bench with Tapered Storage Legs
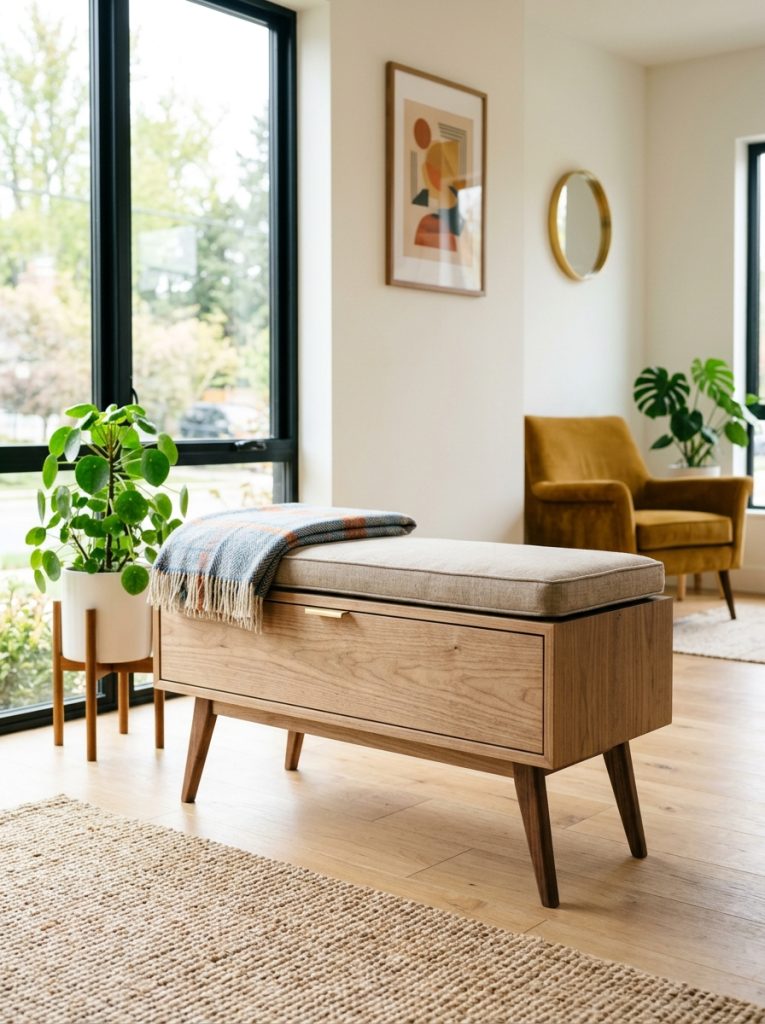
Tapered wood legs give a storage bench a lighter, more furniture-like appearance compared to a solid box sitting flush on the floor. Build the storage compartment as a slim box and attach four angled tapered legs to the bottom corners using leg mounting plates. The raised profile this creates makes the bench look intentionally designed as furniture rather than purely as a storage container with a seat bolted onto it.
Materials Needed:
- Plywood for slim storage box
- Tapered wood legs with mounting plates
- Wood screws and drill
- Cushion for seat top
- Wood finish
How to Make It:
- Build a slim storage box, keeping the depth shallower than a standard bench.
- Attach leg mounting plates to the underside of the box at each corner.
- Screw tapered legs into the mounting plates.
- Finish the box in a color or stain that complements the leg material.
- Add a cushion to the top and check the bench sits level on all four legs.
12. Build a Multi Hook Storage Bench for Mudrooms
A mudroom serving multiple family members needs a bench with enough hooks for everyone and enough storage length to handle boots, bags, and seasonal gear all at once. Build a long bench — at least four feet — with two or three rows of hooks above spaced for both adult and child heights. Divide the storage below into separate cubby sections if multiple people need their own designated spot rather than one shared open compartment.
Materials Needed:
- Plywood for long bench frame
- Multiple hook rails
- Wood screws and drill
- Optional cubby dividers
- Paint or stain
How to Make It:
- Build a long bench frame, at least four feet, sized to your mudroom space.
- Add internal dividers if separate cubbies per family member are wanted.
- Mount two or three rows of hooks above at varying heights for different family members.
- Add a hinged or fixed lid depending on whether drawer-style or lid-style access is preferred.
- Finish to match the mudroom and assign hooks and cubbies to each person.
Final Thoughts on DIY Storage Bench
A storage bench is one of the most practical furniture builds available because it solves a seating need and a storage need with a single project. Whether built for the entryway, the foot of the bed, a covered patio, or a busy mudroom, the right bench design matches the specific demands of where it will live. Pick the plan that fits your space and start building this weekend.

Amir Ali is the founder and site administrator of HomeDecorEdge, a modern home decor and interior design platform. Since starting the site, he has combined his passion for interior design, practical styling, and color coordination with hands-on content strategy and site management. He guides authors, curates high-quality articles, and ensures readers have access to actionable, visually inspiring, and user-focused home decor advice for apartments, small rooms, and family homes.