

Hats are tricky. They’re not flat like shirts, they don’t stack like sweaters, and if you squash them in a drawer they never look the same again. So most of us end up with caps piled on a closet shelf, a sun hat hanging off a doorknob and beanies scattered across three different coat pockets.
Here’s what I’ve figured out: every hat needs a slightly different home. Caps love racks, cowboy hats need to rest on their crown, felt hats like boxes, and beanies are happiest in a basket. Once you match the hat to the storage, the clutter just goes away. These 15 hat storage ideas cover all of them, from easy DIY racks to closet tricks and pretty wall displays.

1. DIY Baseball Cap Rack
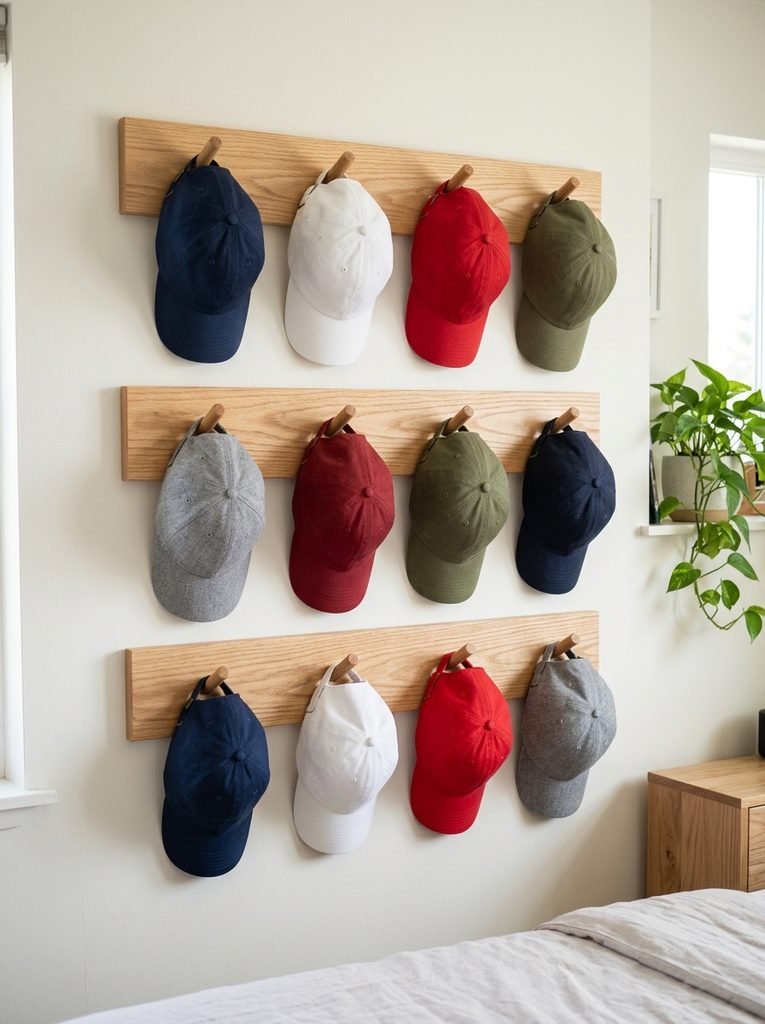
If you own more than five caps, a wall rack is the best thing you can do for them. Caps hang by the back strap, the brims stay straight, and you can see every single one. It also turns your collection into a pretty cool wall display.
I built mine with three boards and a row of wooden pegs on each. It holds 12 caps in about the same space as a poster.
Materials Needed: Three 1×4 boards cut to 30 inches, about 12 wooden pegs or 1/2 inch dowels cut to 3 inches, a drill with a 1/2 inch bit, wood glue, sandpaper, stain or paint, a level, a stud finder, and wall screws with anchors.
How to Make It:
- Mark four peg spots on each board, about 7 inches apart, centered on the board.
- Drill each hole at a slight upward angle so the caps won’t slide off the pegs.
- Sand the boards and pegs until smooth, then stain or paint them.
- Glue the pegs into the holes and let them dry overnight.
- Mark three lines on the wall about 9 inches apart and check each with a level.
- Screw each board into the wall, using studs or anchors, and hang a cap on every peg.
A tip I picked up: hang caps by the back strap, not the brim. The brim keeps its curve and the front never gets dented.
2. DIY Cowboy Hat Rack
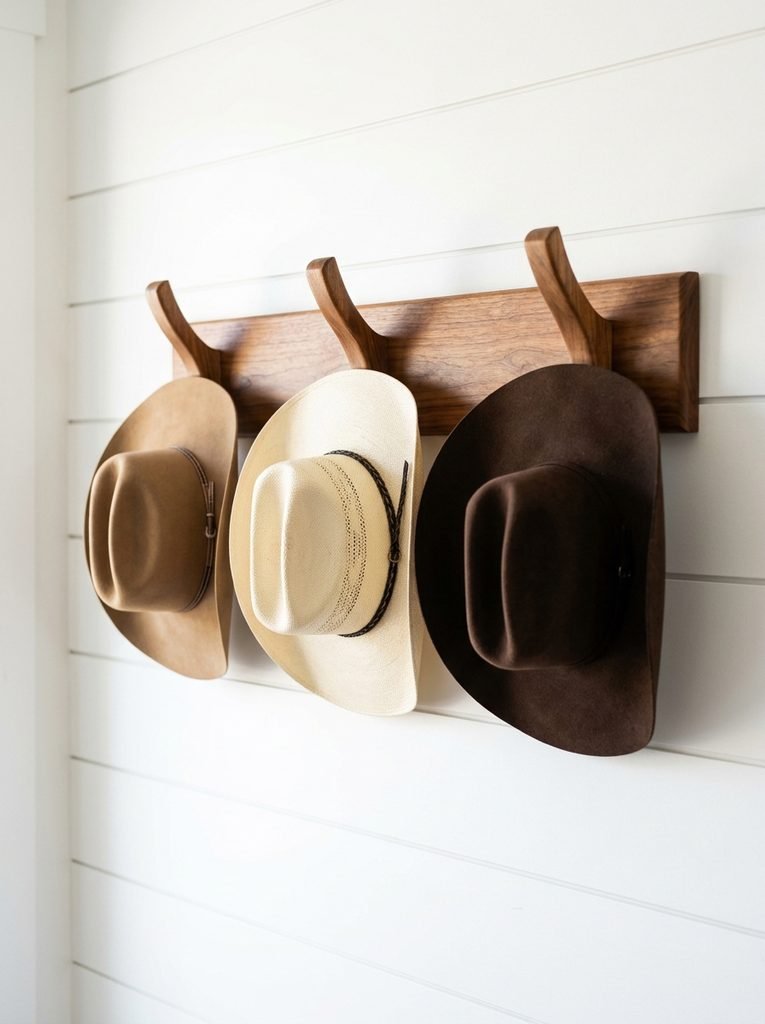
Cowboy and cowgirl hats should never sit on their brims. The weight bends the brim flat over time. Instead, they should rest on their crown or hang upside down from a hook inside the crown. This rack does exactly that, and it looks great with a western or farmhouse style.
In my experience, a wide hook with a smooth rounded top is key. Thin metal hooks can poke into the sweatband.
Materials Needed: One 1×6 board about 36 inches long, three wide wooden hat hooks or thick 1 inch dowels cut to 6 inches, a drill with a 1 inch bit, wood glue, sandpaper, wood stain, two heavy duty D ring hangers, and wall anchors.
How to Make It:
- Mark three spots on the board about 12 inches apart so the brims won’t overlap.
- Drill each hole at a steep upward angle so the dowel points up toward the ceiling.
- Round the top end of each dowel with sandpaper so it’s smooth and won’t mark the sweatband.
- Glue the dowels into the holes and let them dry fully.
- Stain the whole rack in a warm wood tone and let it dry.
- Attach D rings to the back, hang it on the wall, and set each hat upside down with the dowel inside the crown.
Keep cowboy hats out of direct sun. Felt fades and straw dries out if it sits in a sunny window.
3. DIY Wooden Peg Hat Display Wall
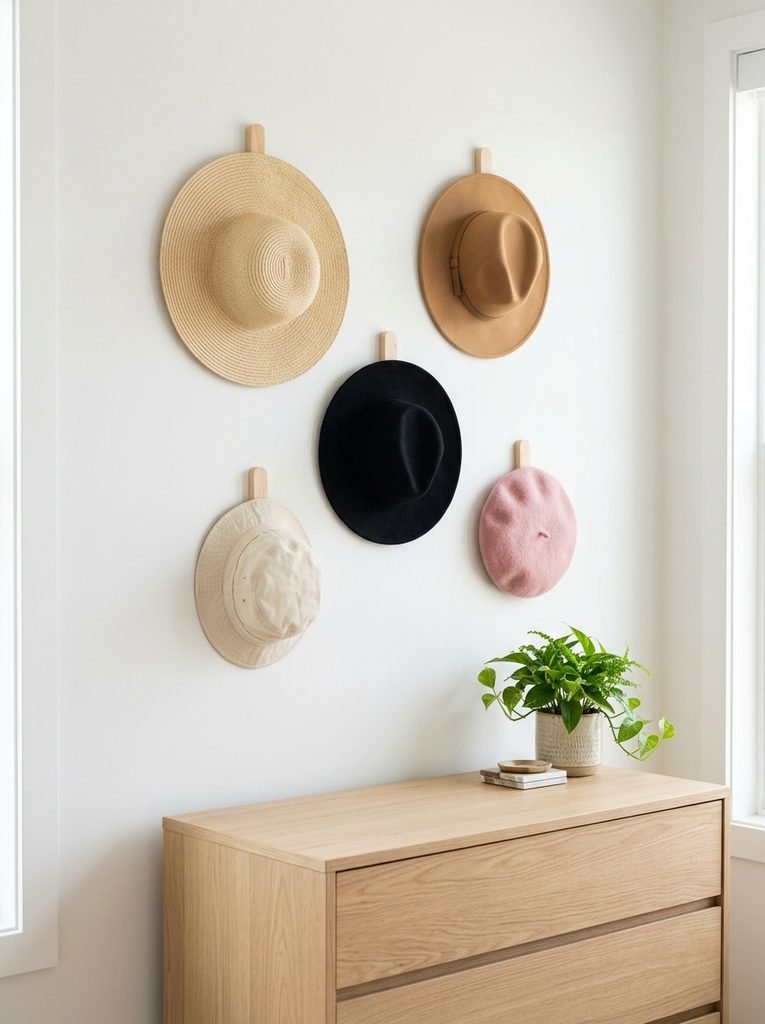
A peg wall turns your hats into art. Each hat gets its own peg, set in a loose pattern across the wall, so it looks styled instead of stored. It’s perfect for women’s hats with wide brims that need room to breathe.
I love how easy it is to change. Swap a summer straw hat for a winter felt one and the whole wall feels new.
Materials Needed: Six to ten wooden pegs with screws on the back or Shaker pegs, a drill, wall anchors, a pencil, painter’s tape, paper, and scissors.
How to Make It:
- Trace each hat’s outline on paper and cut out the shapes.
- Tape the paper shapes on the wall and move them around until the layout looks balanced.
- Mark a small dot where each peg should go, just under the top edge of each paper shape.
- Remove the paper and drill a pilot hole at each dot, adding an anchor where there’s no stud.
- Screw each peg into place.
- Hang one hat on each peg, keeping the biggest hats toward the bottom and the sides.
Leave at least 4 inches between brims. When hats overlap, the wall looks cluttered instead of curated.
4. Over the Door Cap Organizer
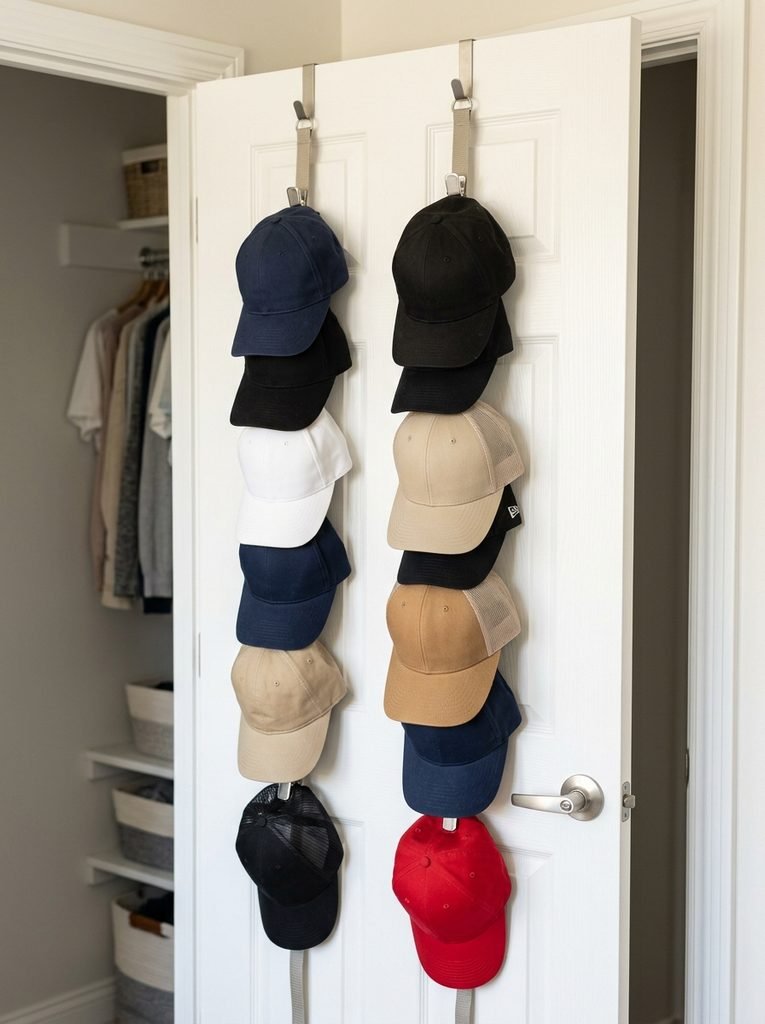
The back of a closet door is wasted space in most homes. An over the door cap organizer with clips or pockets holds a dozen or more caps without taking a single inch of shelf space.
Honestly, this is the easiest idea on the list. There’s nothing to install, so it’s great for renters too.
You’ll need: an over the door cap organizer with clips or hooks.
5. Hat Boxes for Fedoras and Women’s Hats
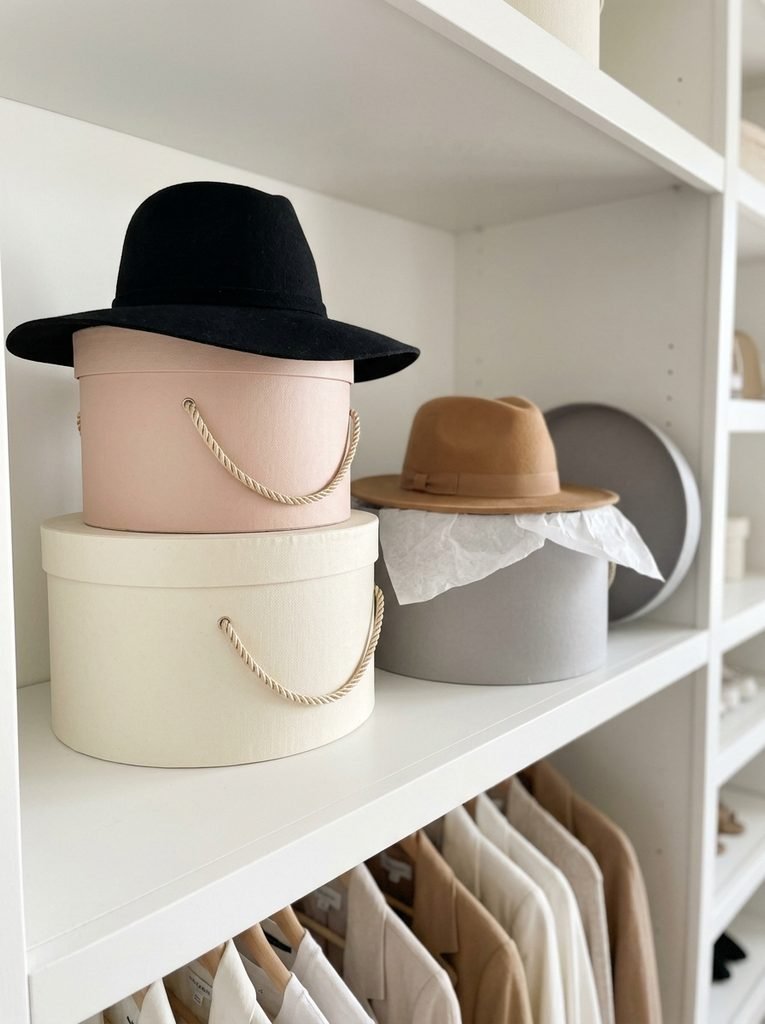
Felt hats like fedoras keep their shape best in a round hat box. The box protects them from dust and stops anything from getting stacked on top. Line each box with acid free tissue and rest the hat on its crown.
A tip I picked up: stuff the crown lightly with tissue too. It holds the shape perfectly while the hat is stored.
Start Your 30-Day Home Reset
Stop waiting for a "perfect" free weekend. Grab the 30-day plan and start feeling lighter in your own home by tomorrow.
View the 30-Day Plan Printable PDF · Instant downloadYou’ll need: round hat boxes a little wider than your hats and acid free tissue paper.
6. Clear Shelf Bins for Fitted Caps
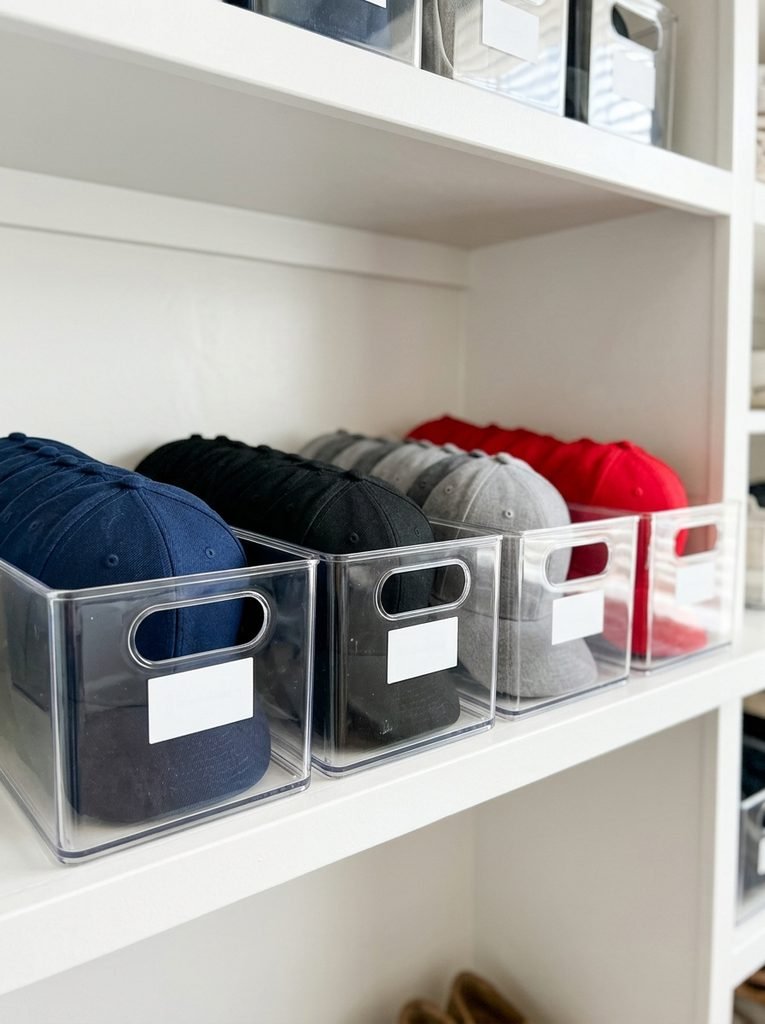
Fitted caps nest inside each other perfectly. Stack them front to back in a row, then set the row into a long clear bin. You can see every cap, they stay dust free and the brims keep their shape.
I keep each stack to five caps. More than that and the crowns start to crush.
You’ll need: long clear acrylic bins and small labels.
7. Beanie Baskets and Drawer Bins
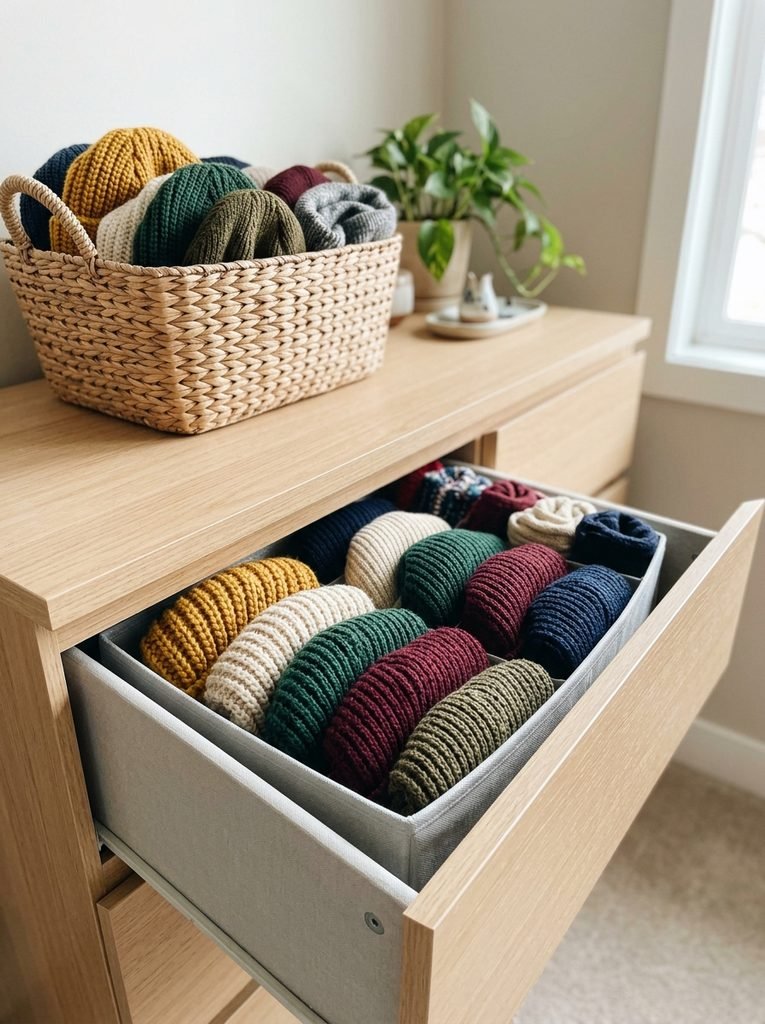
Beanies are soft and don’t mind being squished, so a basket or drawer bin works great. Roll each beanie up and stand them in rows. You can see every color, and grabbing one doesn’t mess up the rest.
I keep one basket by the front door in winter and the rest in a drawer. It saves a lot of hunting on cold mornings.
You’ll need: a fabric drawer bin or a small woven basket.
8. Glove and Mitten Bins by the Entry
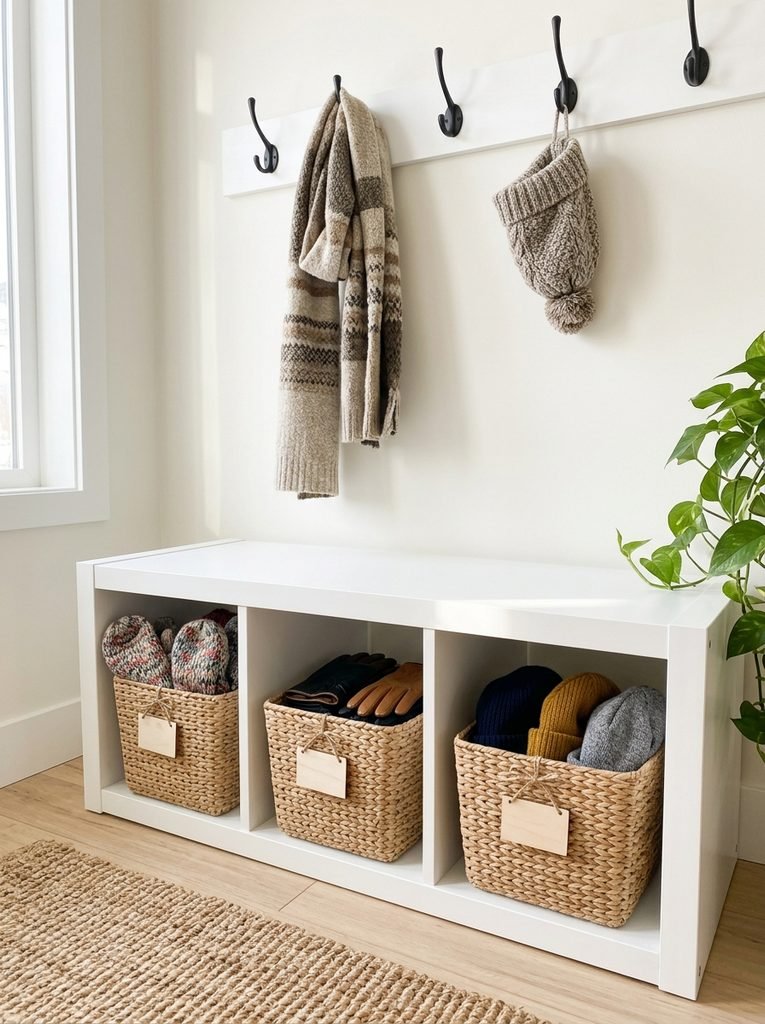
Hats, gloves and mittens all leave the house together, so keep them together. A few labeled baskets under an entry bench give each one a spot. Everyone knows where to drop them when they come in.
Give each family member their own basket if you have space. It ends the “who took my gloves” argument.
You’ll need: an entry bench or cubby shelf and three or four small baskets with tags.
9. Sun Hat Wall Display with Hooks
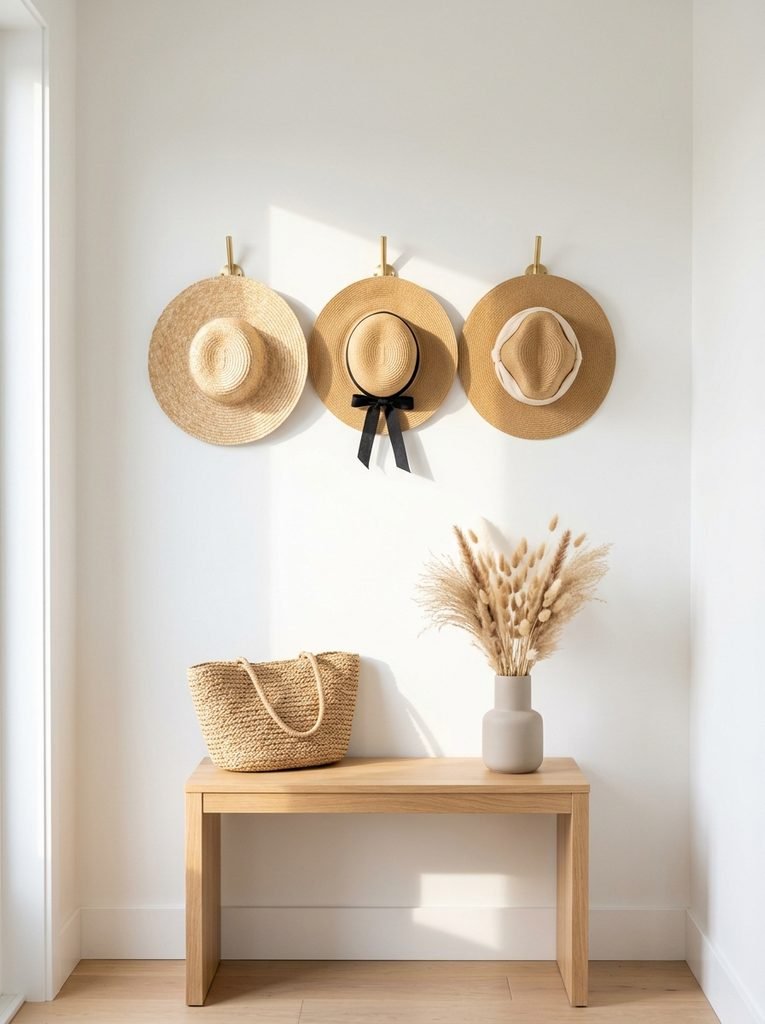
Wide brim sun hats are too big for shelves and too pretty to hide. Hang them on simple hooks in a row by the door. They’re easy to grab on your way out, and they add a summery touch to the hallway.
Hang them by the crown, not the brim. A small hook inside the crown keeps the brim from bending.
You’ll need: three to five brass or wooden wall hooks.
10. Men’s Cap Shelf Display
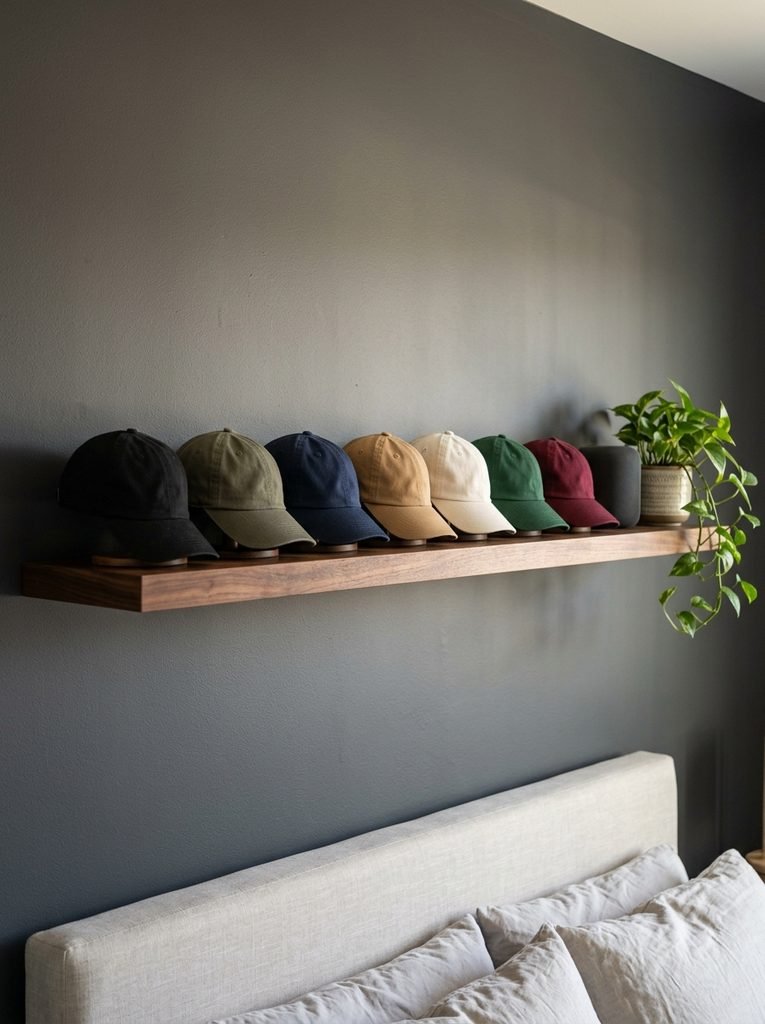
For a men’s bedroom or closet, a dark floating shelf with caps standing in a row looks clean and sharp, almost like a shop display. Small cap stands keep each one upright and the crowns full.
I’d pick a shelf color that contrasts with the wall. Dark wood on a light wall, or light oak on a dark wall, makes the caps pop.
You’ll need: a floating shelf and small plastic or wooden cap stands.
11. Golf Hat and Visor Station
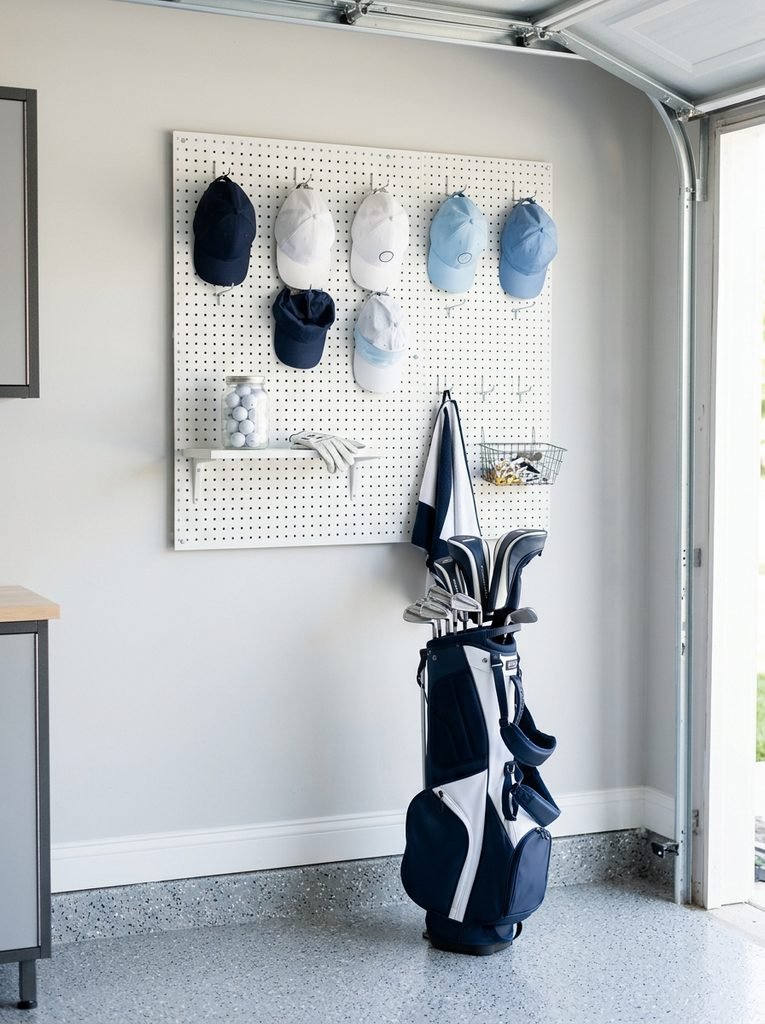
If you play golf, keep your golf hats and visors right where you keep your clubs. A pegboard in the garage holds caps, visors and gloves on hooks, so everything is ready to grab on your way to the course.
I like adding a small shelf for sunscreen and a jar of balls. Then the whole golf kit lives in one spot.
You’ll need: a pegboard panel, pegboard hooks and a small pegboard shelf.
12. Trucker Hat Display on a Curtain Rod
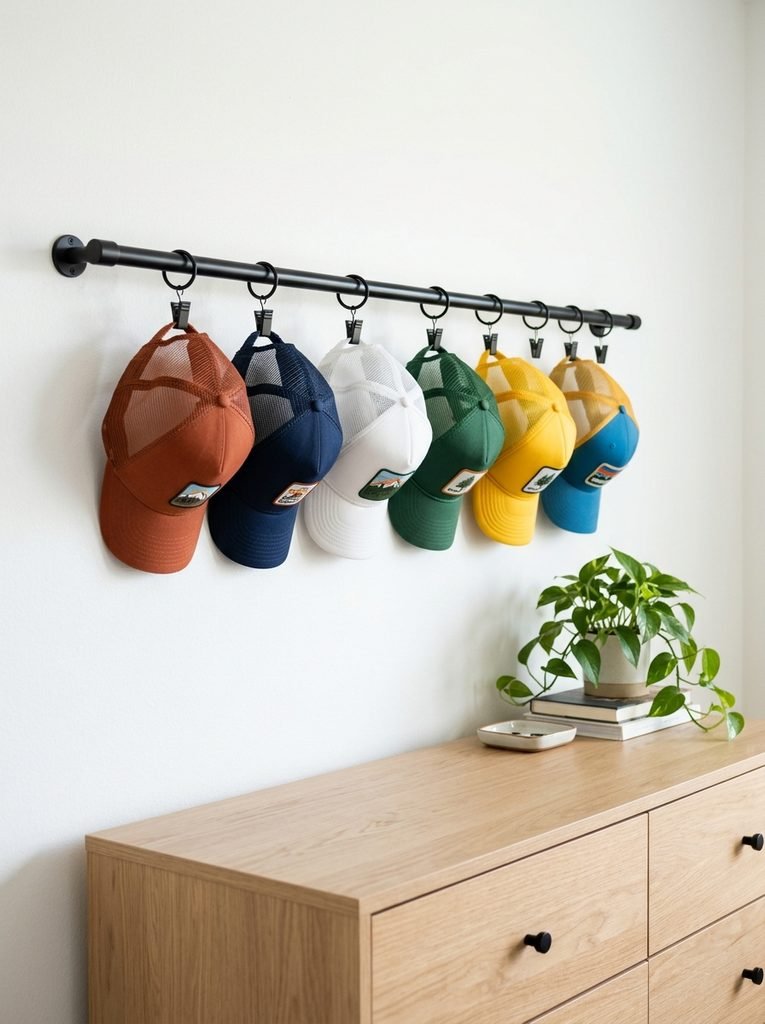
A curtain rod with ring clips makes a fun and cheap trucker hat display. Clip each hat by the back strap and slide them along the rod. You can fit a lot in a small space, and it’s easy to add more.
Honestly, this costs less than most cap racks, and it looks clean and modern.
You’ll need: a slim curtain rod with brackets and curtain ring clips.
13. Hanging Clip Organizer for Small Closets
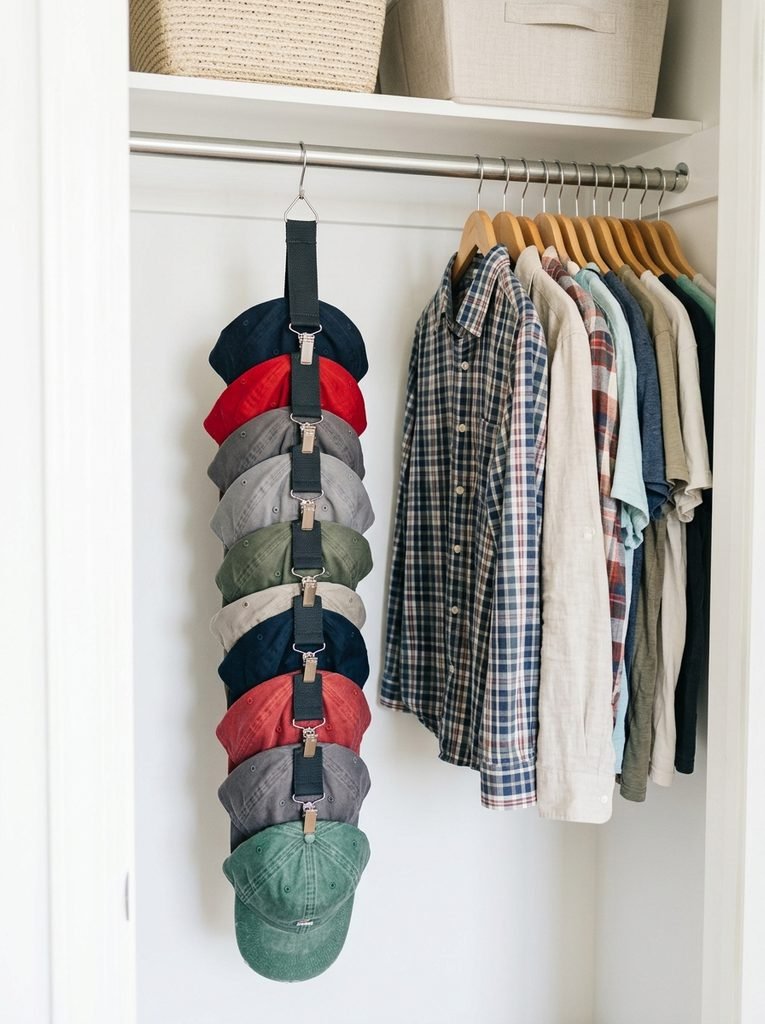
In a small closet, a hanging clip organizer holds ten caps in the space of one shirt. It hangs from the rod like a regular hanger, with clips running down a strap.
A tip I picked up: you can make one yourself by clipping caps onto a long ribbon with clothes pins and tying the ribbon to a hanger.
You’ll need: a hanging cap organizer or a hanger, a strong ribbon and wooden clothespins.
14. DIY Entryway Hat and Coat Rack
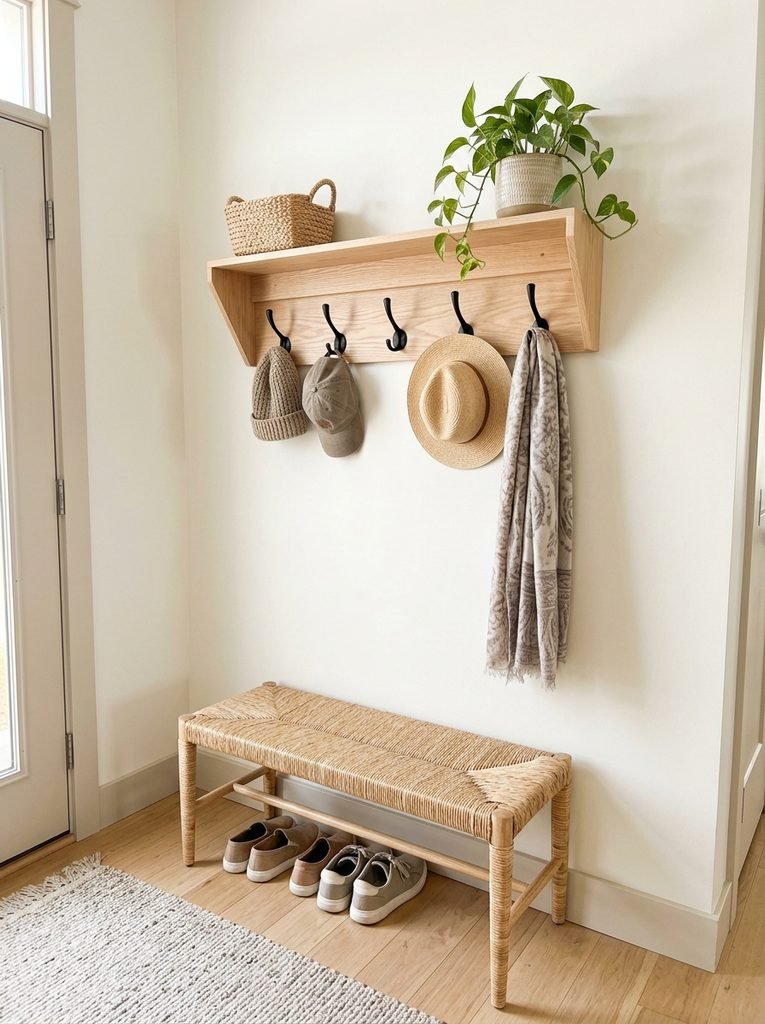
A simple entryway rack with a shelf on top and hooks below holds the hats you wear every day. Caps and knit hats go on the hooks, and the shelf is perfect for a basket of sunglasses or gloves.
I use double hooks, which have a small top hook and a bigger bottom hook. A hat goes on top and a jacket goes underneath.
You’ll need: a 1×8 board for the back, a 1×6 board for the shelf, small shelf brackets, five double hooks and wall screws.
15. Hat Stands on a Dresser or Vanity
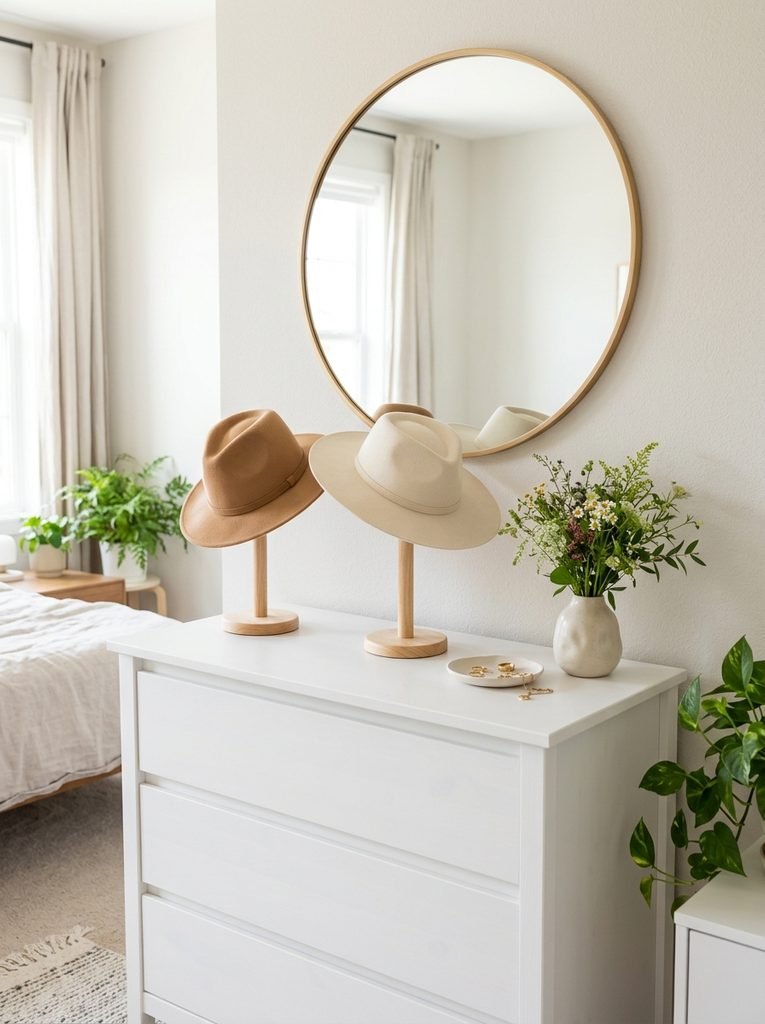
Your favorite one or two hats deserve a spot out in the open. A simple hat stand on a dresser or vanity keeps the shape perfect and doubles as decor. It’s ideal for felt fedoras and structured hats.
I keep the hat I’m wearing that week on the stand and the rest in boxes. It’s a nice little rotation.
You’ll need: one or two wooden or acrylic hat stands.
Final Thoughts on Hat Storage Ideas
The best hat storage ideas match the hat to the home. Caps love racks and clips, cowboy hats rest on their crowns, felt hats go into boxes, and beanies are happy in a basket. Start with the hats you wear most, give them an easy spot, and the rest of your collection will fall into place.


Amir Ali is the founder and site administrator of HomeDecorEdge, a modern home decor and interior design platform. Since starting the site, he has combined his passion for interior design, practical styling, and color coordination with hands-on content strategy and site management. He guides authors, curates high-quality articles, and ensures readers have access to actionable, visually inspiring, and user-focused home decor advice for apartments, small rooms, and family homes.