

There is a reason the paper plate penguin craft never leaves the winter classroom: it costs pennies, it works for almost every age, and a room full of finished penguins is one of the great sights of the school year. No two ever match, and that is the whole joy of it.

These twelve ideas start with three builds: the classic black plate penguin with a cotton round belly, folded plate penguin puppets on sticks, and the all important accessorizing stage, earmuffs and scarves. After that come nine variations, from footprint snow scenes to a zero prep printable.
You need plates, paper, googly eyes and glue; everything else is decoration. If your craft table is already out, our diy paper decor craft ideas keep older kids and grown ups busy at the same table.
Set out more plates than children. Somebody always wants to make a second penguin, and they are usually right.
Quick Picks
- Start here: The Classic Paper Plate Penguin (idea 1)
- Most fun after: Folded Plate Penguin Puppets (idea 2)
- Zero prep: The Printable Penguin (idea 12)
1. The Classic Paper Plate Penguin
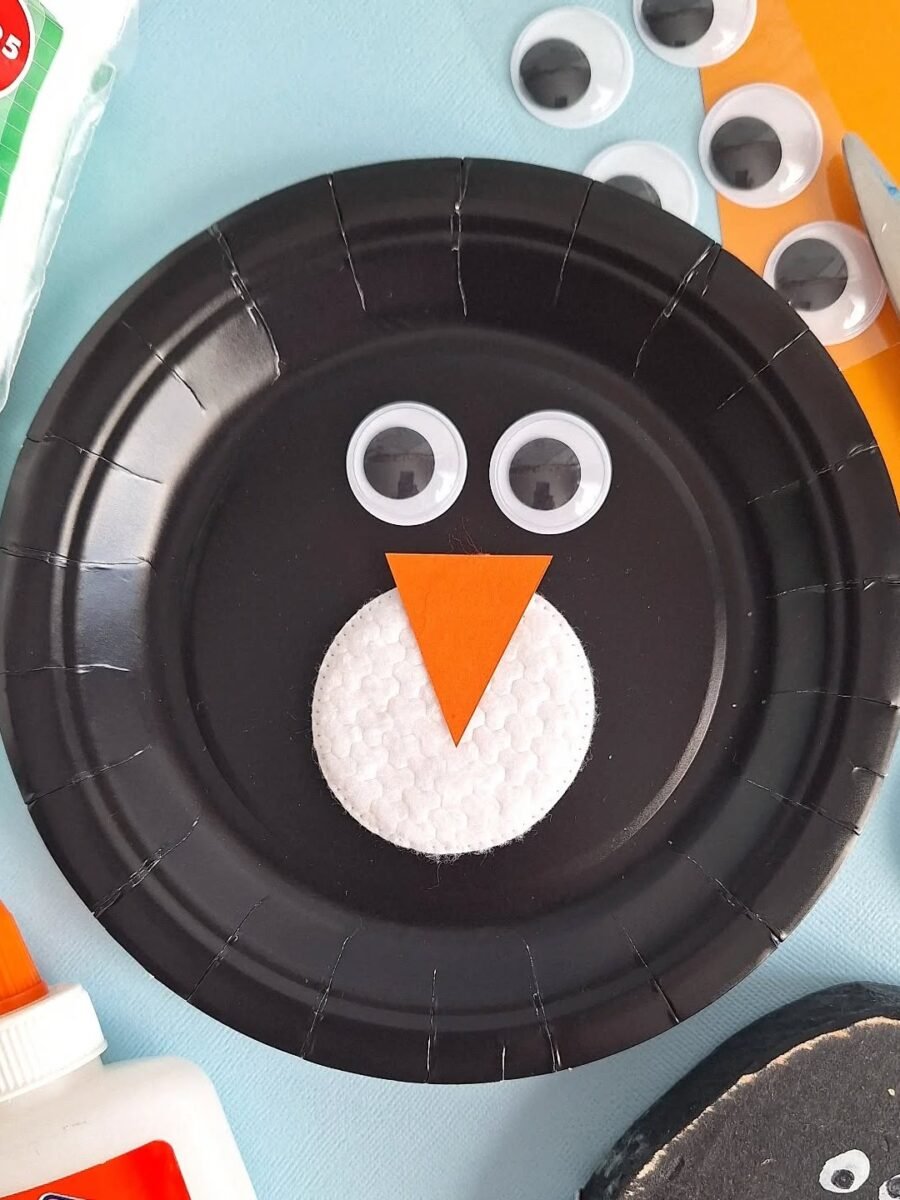
BuildAbout 10 minutesAges 3 and up with help
This is the paper plate penguin craft in its purest form: one black plate, one cotton round for the belly, two big eyes and a triangle beak. It takes ten minutes, works for toddlers with help and preschoolers alone, and every single one comes out with a different expression.
Materials Needed
- Black paper plates, one per penguin
- White cotton rounds or white paper circles
- Orange paper triangles for beaks
- Googly eyes, large
- Glue sticks or school glue
- Optional: orange paper feet
How to Make It
- Lay the black plate face up; the rim becomes the penguin’s round body edge.
- Glue a white cotton round low in the center for the belly. A paper circle works too.
- Add the orange triangle beak above the belly, point down.
- Stick on two googly eyes above the beak. Slightly crooked eyes are not a mistake; they are personality.
- Optional: glue two small orange feet under the rim at the bottom.
- Let it dry flat for a few minutes before the penguin stands up to be admired.
Tip: Pre cut beaks and bellies for little ones and let them do the gluing and the eyes. The eyes are the part they will talk about.
2. Folded Plate Penguin Puppets
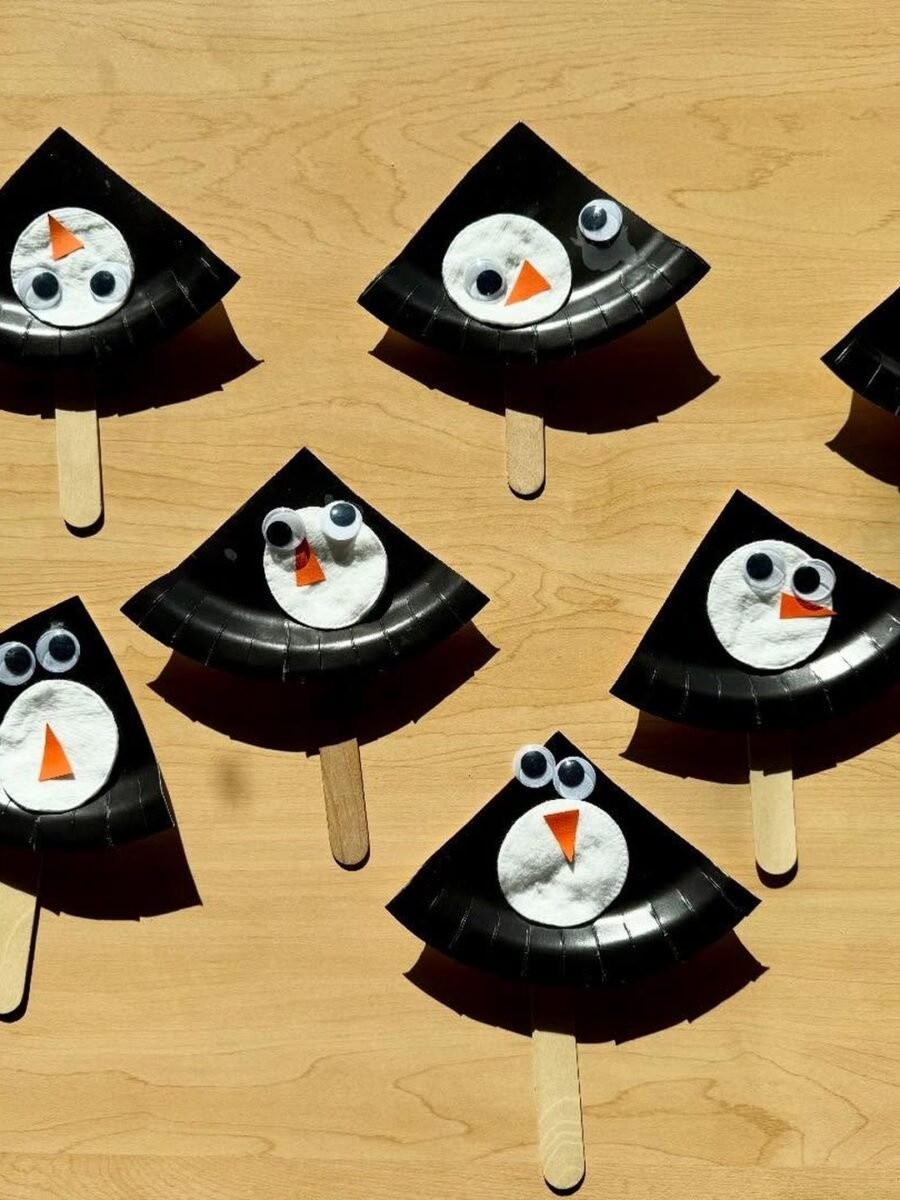
BuildAbout 15 minutesThen it is showtime
Fold the top of the plate down and a flat penguin gains a body; add a craft stick and it gains a career in puppetry. These folded plate penguins on sticks star in classroom puppet shows all winter, usually with very dramatic voices.
Materials Needed
- Black paper plates
- White paper or cotton pads for bellies
- Orange paper for beaks
- Googly eyes
- Craft sticks
- Glue and tape
- Scissors
How to Make It
- Fold the top third of a black plate forward and crease it well; this becomes the penguin’s head line.
- Glue a white oval or cotton pad onto the lower part as the belly.
- Add an orange triangle beak on the folded section and googly eyes above it.
- Tape or glue a craft stick firmly to the back bottom of the plate.
- Let the glue set fully; puppets live hard lives and loose sticks end shows early.
- Optional: fold the side edges of the plate slightly inward for wings.
Tip: Make two per child minimum. A puppet alone is a craft; two puppets are a conversation, and the learning doubles.
3. Penguins With Earmuffs and Scarves
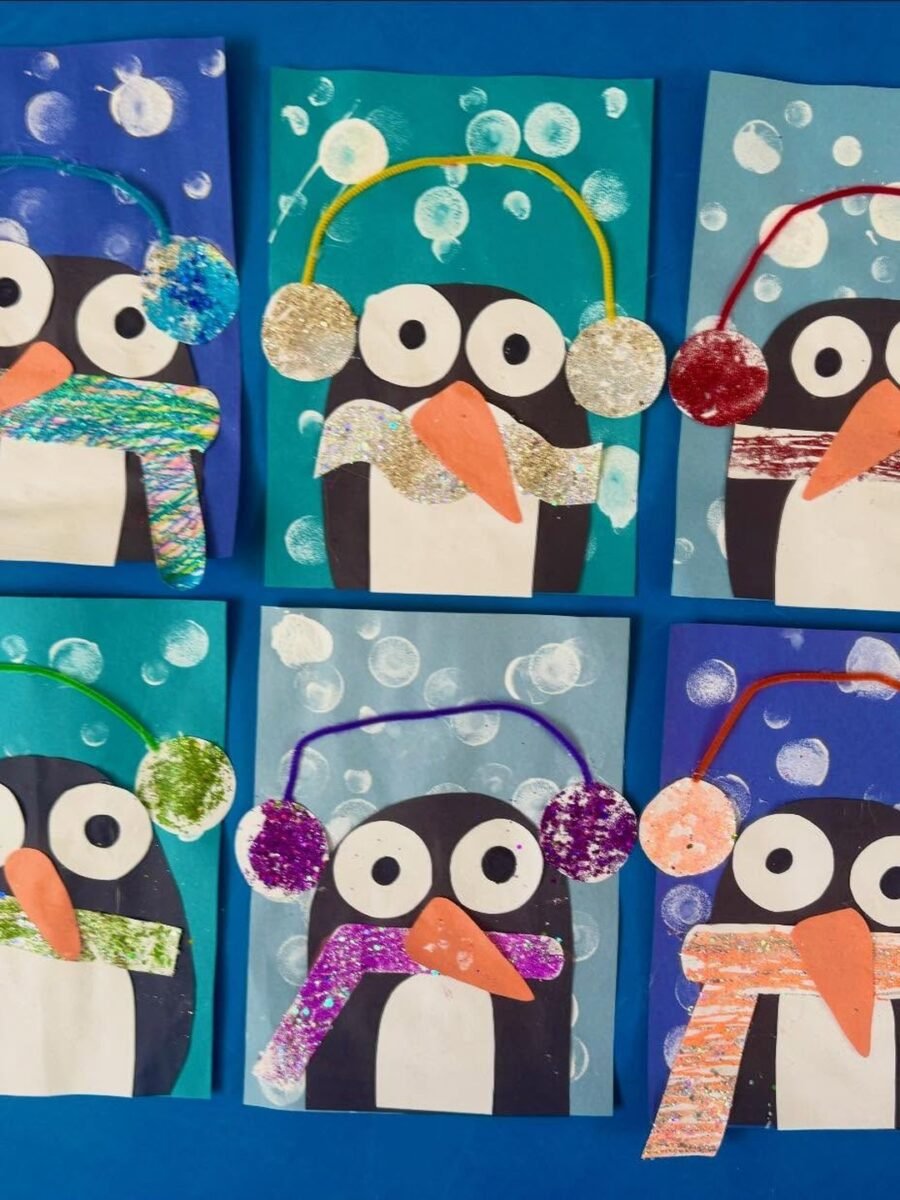
BuildAbout 20 minutesBest dressed penguins
Once the basic penguin exists, dressing it is where the afternoon goes. Pipe cleaner earmuffs with glittery ear covers and a sparkly scarf turn six identical penguins into six individuals, and the accessorizing teaches more fine motor skills than the base craft does.
Materials Needed
- Finished paper penguins (plate or paper)
- Pipe cleaners in bright colors
- Glitter card or foam circles for ear covers
- Glitter paper strips for scarves
- Glue
- Optional: pom poms, stickers, sequins
How to Make It
- Start with any finished penguin from this list, plate or paper.
- Bend a pipe cleaner into a U for the earmuff band and size it across the penguin’s head.
- Glue a glitter foam circle at each end for the ear covers, then glue the band in place.
- Cut a strip of glitter paper for a scarf and glue it around the neck area, adding two short hanging ends.
- Add a pom pom or sticker details if your penguin is going somewhere fancy.
- Line the finished penguins up and take the group photo. It is always the best one.
Tip: Let each child pick their own colors with no corrections. A penguin in neon earmuffs is still, scientifically, a penguin.
Printable Party Pack
Superhero Party Games Pack
Bingo, hero training games, a clue hunt, signs, photo props and thank you tags. Print at home and party today.
4. The Fold Over Penguin
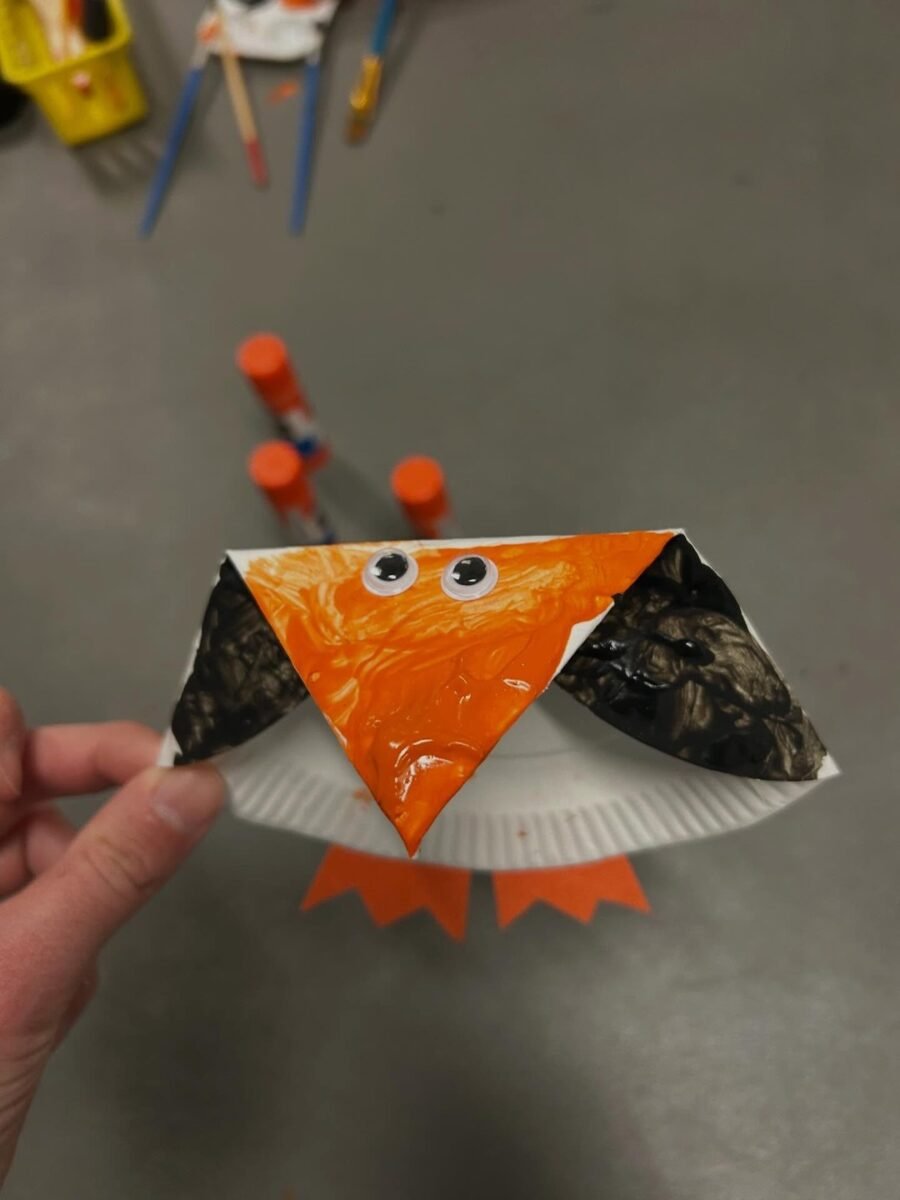
Fold the top of a white plate down over itself and the fold becomes the penguin’s face: orange on the fold, black wings at the sides, orange feet below. It stands with a slight lean and a lot of confidence. This is the version children carry around the house afterward.
You’ll need: a white paper plate, orange and black paper, glue, and scissors.
Best for: Kids who like their penguins 3D
5. Heart Faced Paper Penguins

No plate? Construction paper does the whole job: black body, a white heart shaped face, pink cheeks and the biggest googly eyes in the drawer. Cutting the heart is good scissor practice, and the pink cheeks should be considered mandatory.
You’ll need: black, white and orange construction paper, googly eyes, glue, and scissors.
Best for: Scissor practice with a cute result
6. Penguin Collages on Bright Backgrounds
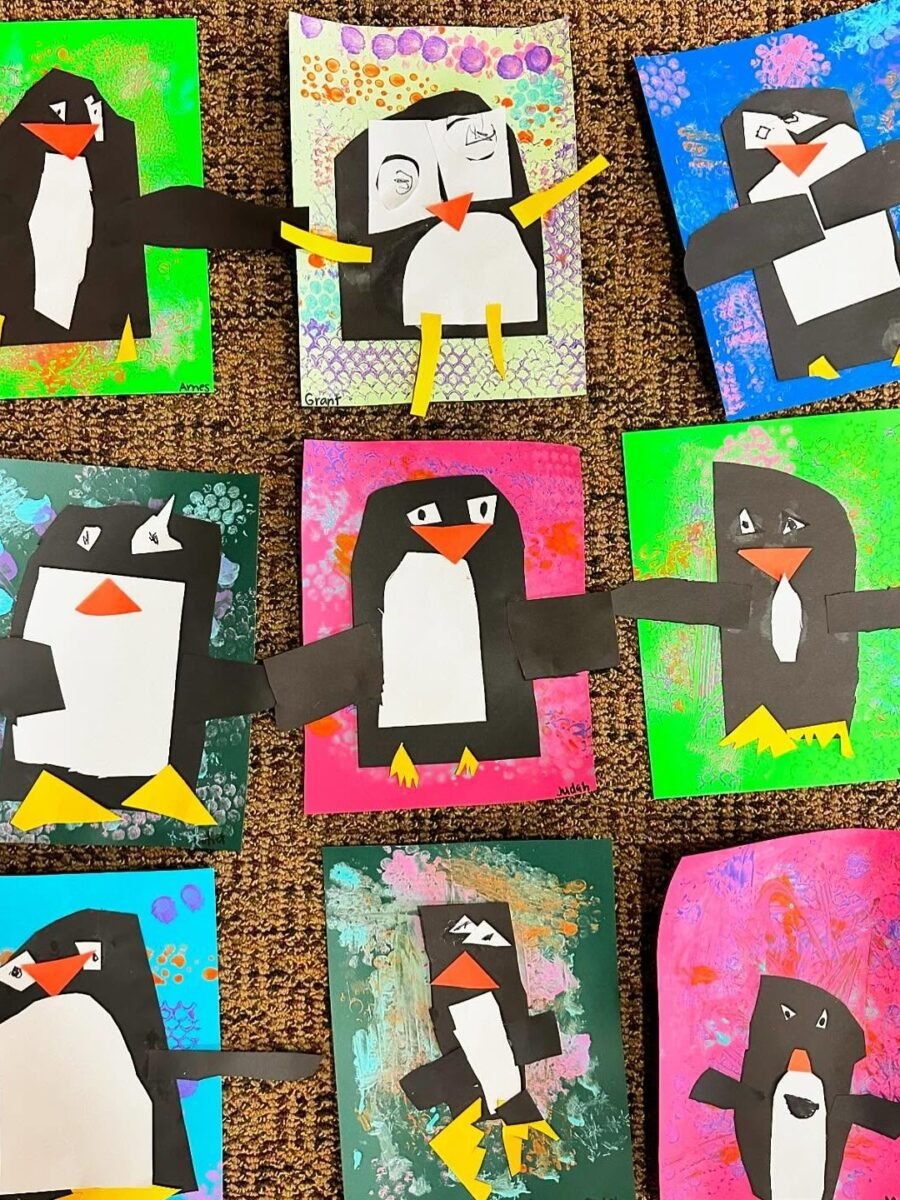
Paint the background first, in the brightest colors available, then build the penguin from cut shapes on top. Nine of these in a grid make a display that glows. The painted backgrounds are why this version suits slightly older kids; the penguin itself stays simple.
You’ll need: painted background papers, black and white paper shapes, glue, and orange scraps.
Best for: A bulletin board that stops traffic
7. Footprint Snow Penguins
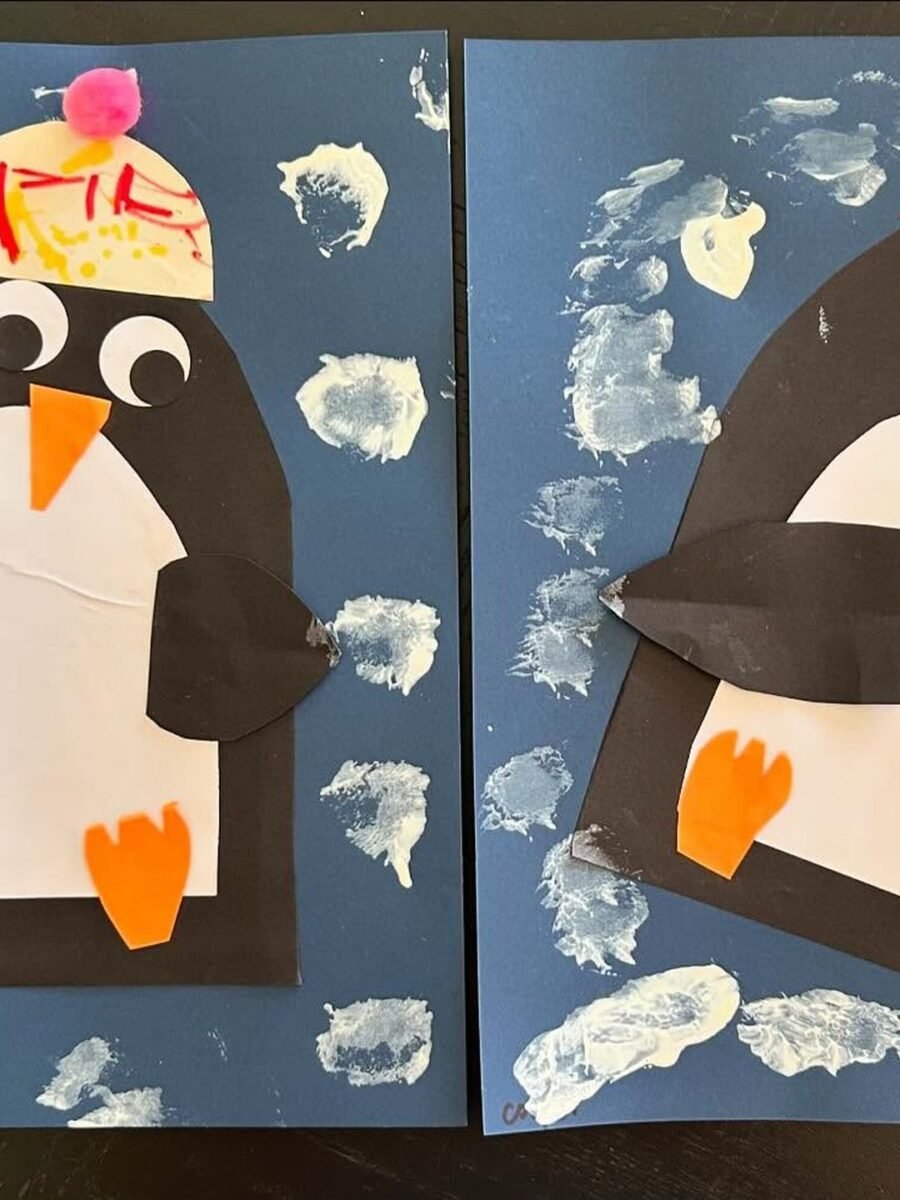
The penguin is paper; the snow is footprints. White footprints stamped around the penguin turn this into the version even the youngest children help make, because the foot is the stamp. Keep a washing bowl nearby and call it part of the activity.
You’ll need: dark blue paper, white paint for footprints, a paper penguin, and small feet.
Best for: Babies and toddlers joining in
8. Painted Penguins in a Snowstorm
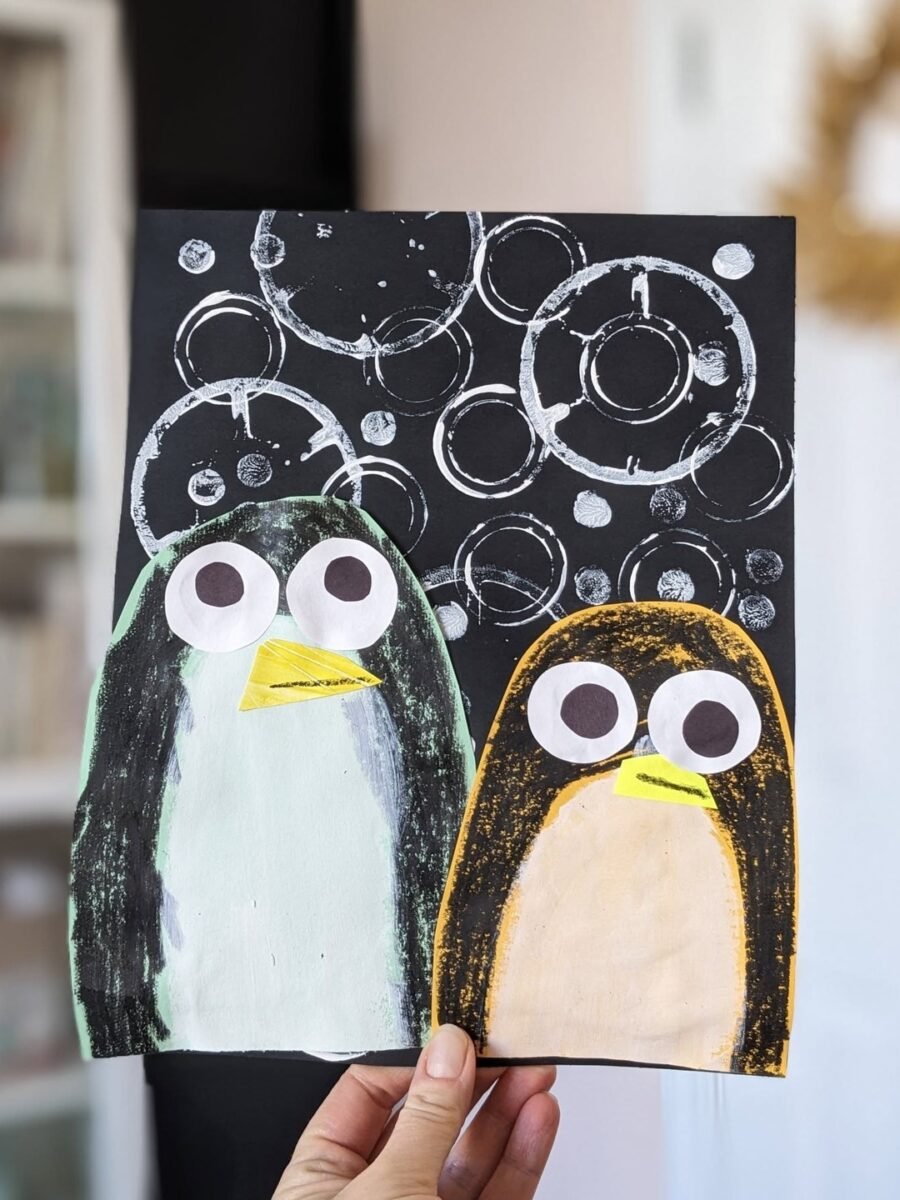
Paint two round penguins, one green tinted, one gold, give them enormous paper eyes, then stamp the snow with a bottle cap dipped in white paint. The snowstorm is the step children ask to repeat, so pour the white paint generously.
You’ll need: black paper, paint in black, white and a color, big paper eyes, and a bottle cap for stamping.
Best for: Paint lovers and snow day art
Printable Labels
Toy Bin Labels with Pictures
60 picture labels for toys, art supplies and kids' clothes. Kids see the picture and know where it goes.
9. Draw Your Penguin on a Plate
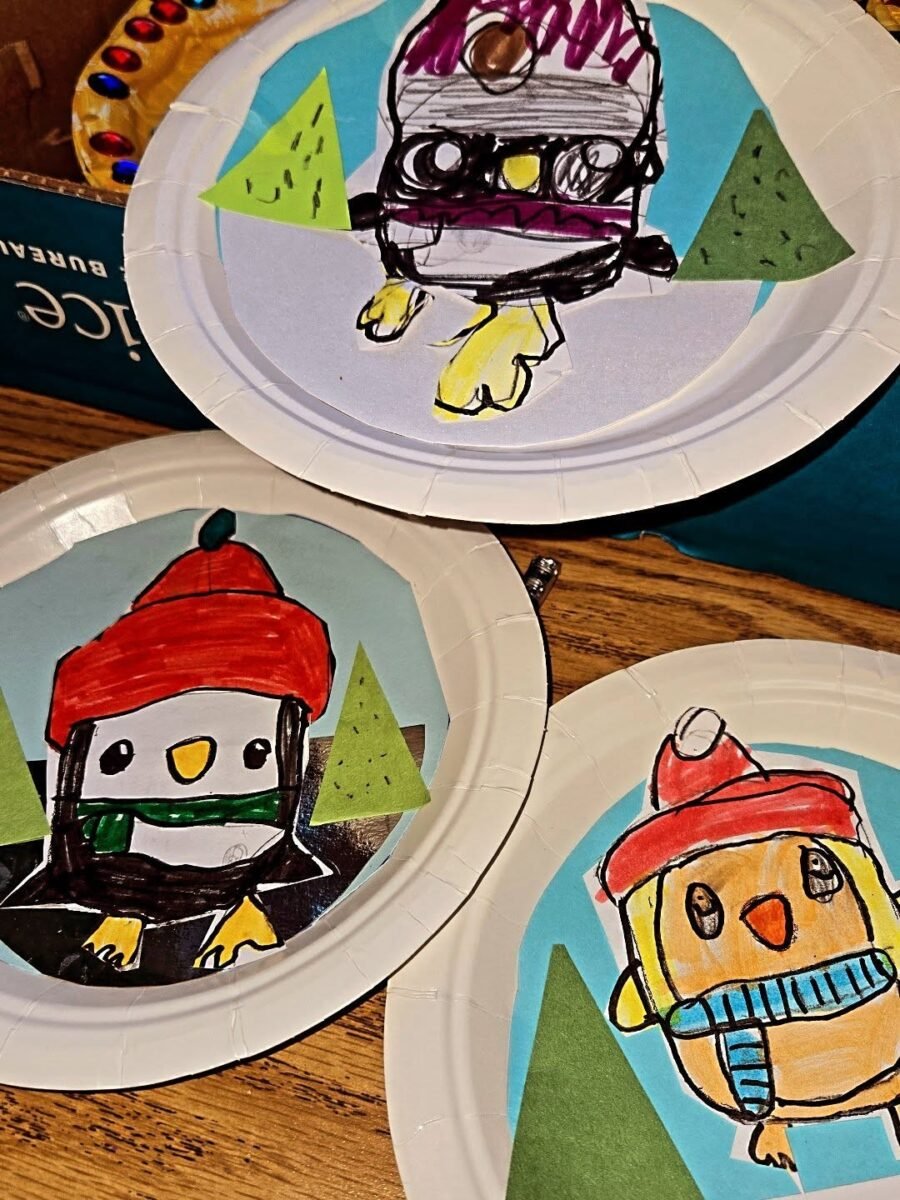
Skip the cutting entirely: the plate is a round canvas and the penguin gets drawn on, hat, scarf and all, with paper trees stuck around the edge. Drawing versions travel well, need no drying time, and suit the child who has opinions about exactly how a penguin should look.
You’ll need: paper plates, markers or crayons, and paper scraps for trees.
Best for: Kids who would rather draw than glue
10. Bonus: Toilet Roll Penguins
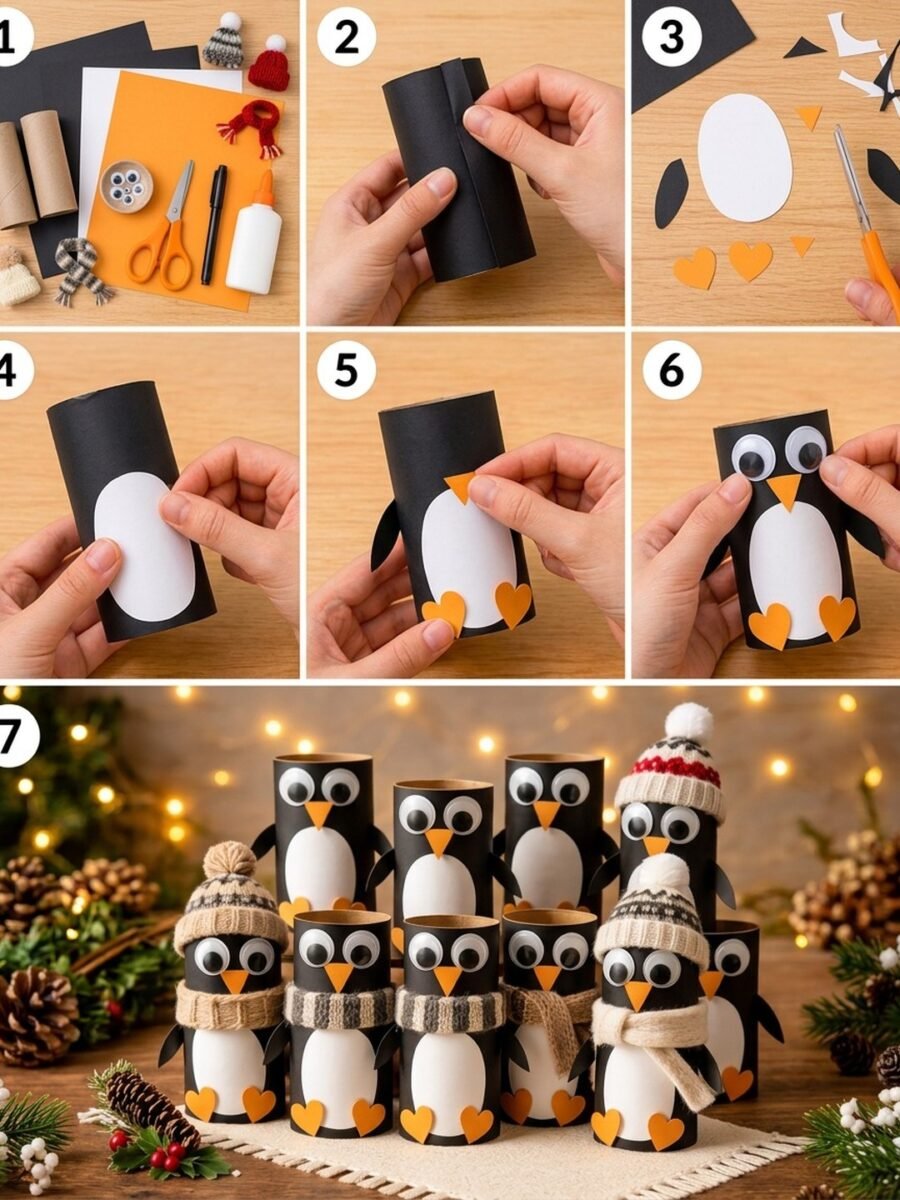
Not a plate, but too good to leave out: tubes wrapped in black paper, white oval bellies, and tiny knit hats and scarves if your craft box runs to such riches. The finished colony, all in a row, is the photograph every parent takes.
You’ll need: cardboard tubes, black, white and orange paper, googly eyes, and glue.
Best for: A bonus craft when the tubes pile up
11. Origami Penguins for Older Kids
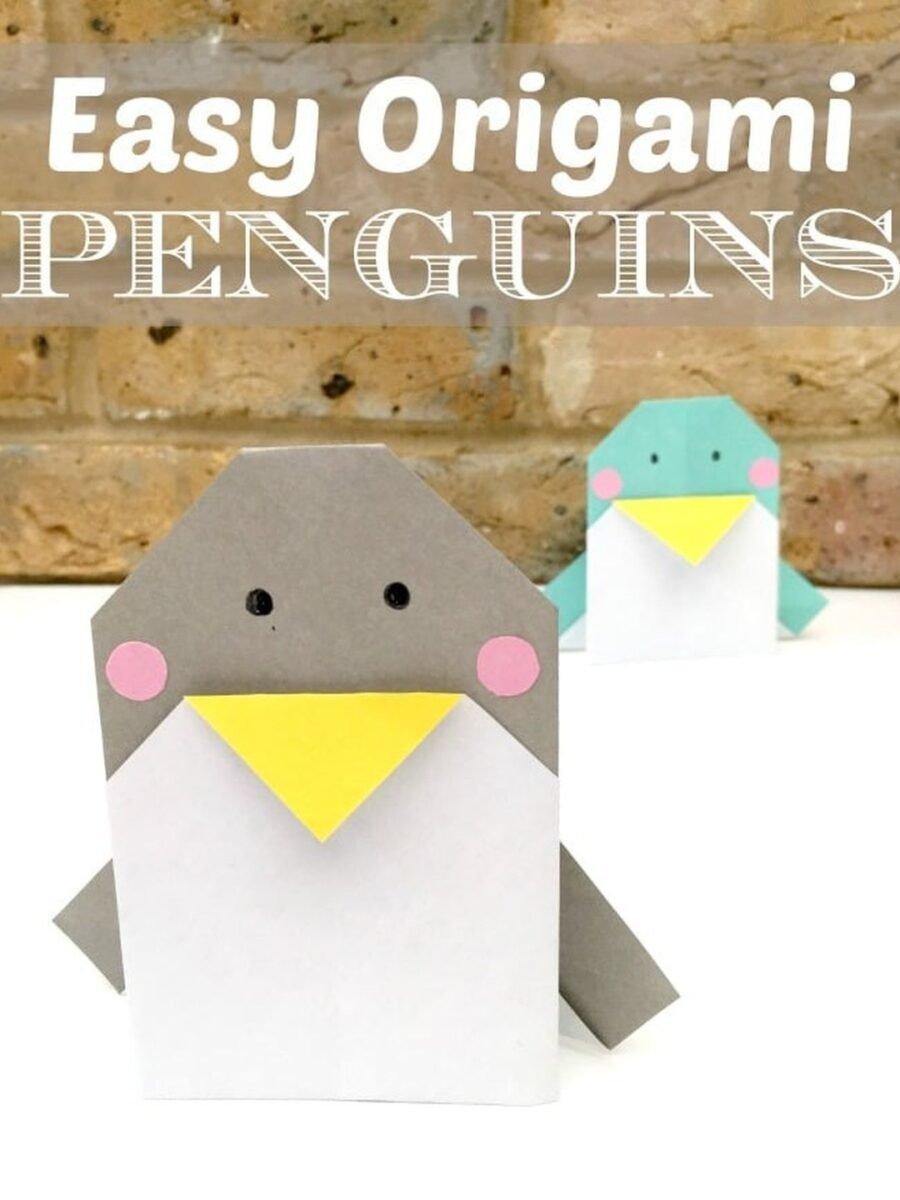
Folding instead of gluing: a few crisp folds and a square of paper stands up as a penguin, gray or teal. Origami suits the older end of the table, makes no mess at all, and produces penguins that fit in a pocket for the trip home.
You’ll need: square paper in penguin colors and a little patience.
Best for: Older kids and quiet tables
12. The Printable Penguin
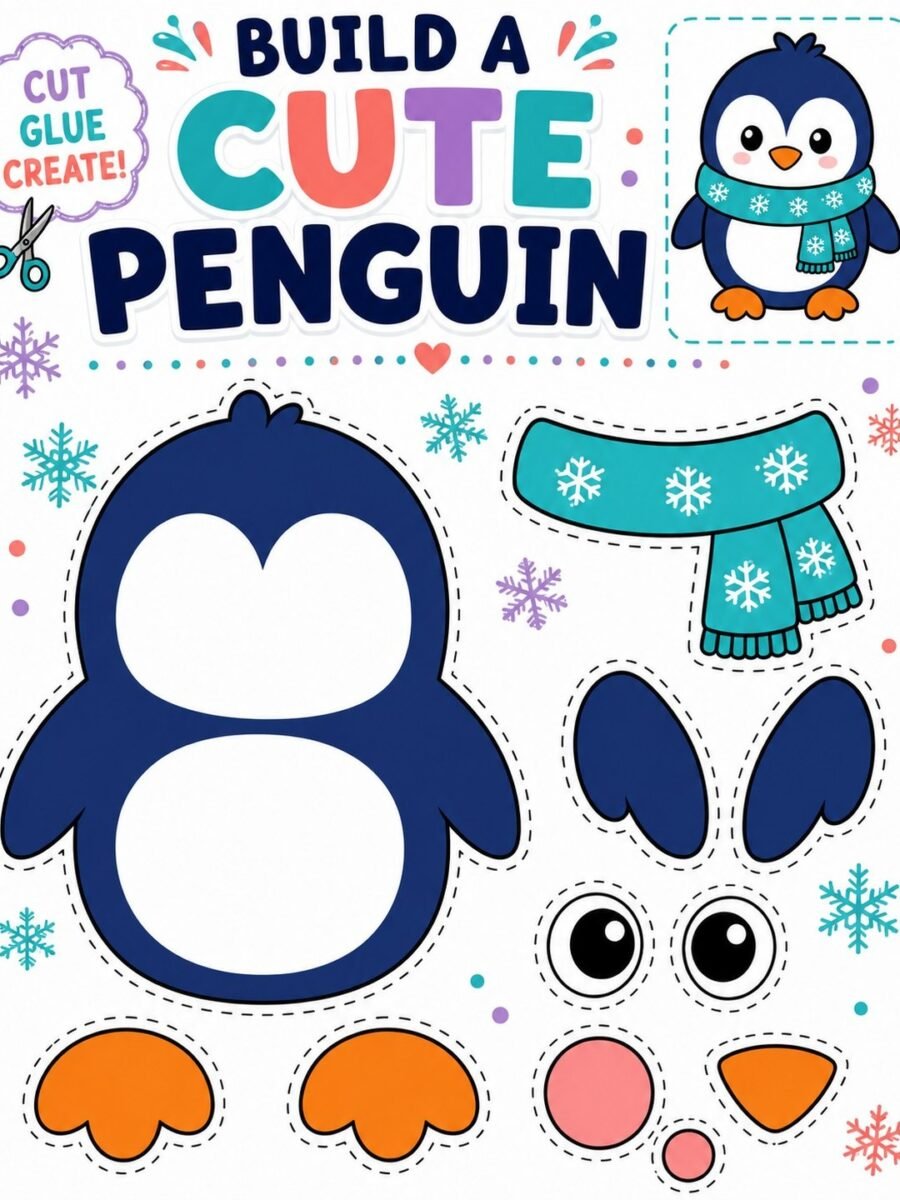
Cut, glue, create: the printable version has every piece drawn, body, scarf, eyes, feet and cheeks, so the work is cutting and assembling. It is the version to keep in a drawer for snow days, sick days and the afternoon nobody planned anything.
You’ll need: a printer, scissors, and a glue stick.
Best for: Zero prep days and substitute teachers
Frequently Asked Questions
What age is a paper plate penguin craft for?
The classic plate penguin suits ages 3 and up with an adult pre cutting pieces; ages 5 and up can usually cut, fold and glue independently. The printable version suits any age that can use scissors safely, and the origami penguins are best for 8 and up, or patient younger folders with help.
What supplies do we need?
Paper plates (black, or white to paint), white paper or cotton rounds for bellies, orange paper for beaks and feet, googly eyes, glue and scissors cover almost every idea here. Extras like pipe cleaners, glitter card and craft sticks dress them up. Most classrooms and kitchens already own the whole list.
Is this craft safe for toddlers?
Use washable paints and glue, and supervise googly eyes and small parts with under 3s, for whom big paper eyes drawn or glued from large circles are safer. All the materials here are standard classroom supplies; check individual products for your own group’s allergy and safety rules.
How do teachers display a whole class of penguins?
Mount them on a big blue or black board with cotton ball snow and you have a bulletin board in an hour. Add each child’s name on a paper snowball for name recognition practice. Penguins also make strong card fronts: glue the finished plate penguin onto folded card for grandparents.
How do we store the finished penguins?
Keep the plate flat and it stores in a folder or art portfolio. Cotton bellies and googly eyes survive storage well if pieces are not stacked under weight. Photograph the puppet shows before you store the stars; the performances are the real keepsake.
Can this be a learning activity too?
Read a penguin story first, then craft, then let the puppets retell the story. Counting penguins, sorting them by size or scarf color, and writing one sentence about each penguin turns craft time into literacy and math without anyone noticing.
Final Thoughts on Paper Plate Penguin Craft
A paper plate, a cotton round and two googly eyes: the penguin is not really the point. The point is twenty small hands all busy at once, and a table full of penguins no two alike, each one exactly right.
When the penguins are dry, our christmas card craft ideas for kids turn the same cutting and gluing energy into cards worth posting.

