
A garage full of stacked plastic bins is one of the most common storage problems and one of the easiest to solve with a dedicated rack. A proper storage bin rack keeps every bin individually accessible instead of buried under a pile, and building one yourself costs a fraction of what a pre-made unit sells for. These storage bin rack DIY plans cover every material and budget, from a simple PVC pipe frame to a full rolling wood rack with adjustable shelves.
Watch: Super Easy DIY Tote Storage Rack
For a complete visual walkthrough of a wood tote rack build with free plans included, this video covers the full process from cutting lumber to sliding totes into place.
This post contains affiliate links. If you purchase through these links I may earn a small commission at no extra cost to you.
A dedicated bin rack turns a pile of plastic totes into an actual storage system.
1. Build a PVC Pipe Storage Bin Rack
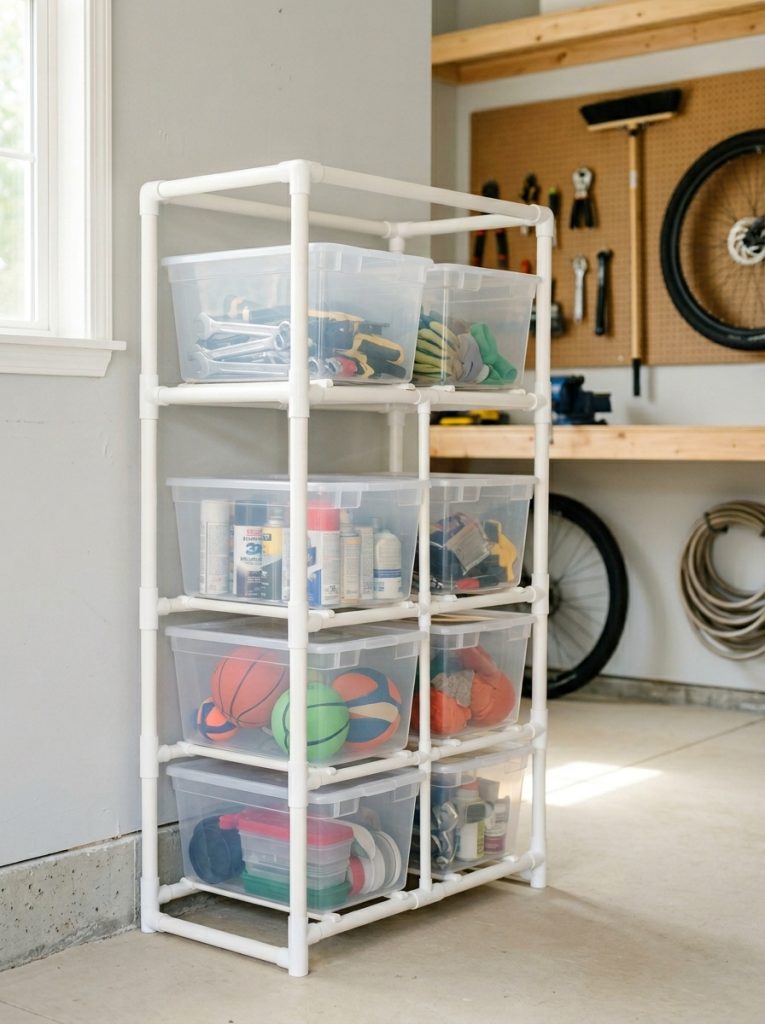
PVC pipe is one of the cheapest and easiest materials for a DIY bin rack because it requires no cutting tools beyond a basic pipe cutter and connects with simple push-fit joints. This storage bin rack PVC pipe kit includes the connectors needed to build a frame sized to standard bin dimensions. The lightweight frame holds surprising weight when assembled correctly and the whole structure can be disassembled and rebuilt in a different configuration anytime storage needs change.
Materials Needed:
- PVC pipe and connector fittings
- PVC pipe cutter
- PVC primer and cement (optional for permanent joints)
- Measuring tape
How to Make It:
- Measure your bins to determine the exact frame dimensions needed.
- Cut PVC pipe lengths to match the planned frame using a pipe cutter.
- Assemble the frame using elbow and tee connectors at each joint.
- Test fit bins on the frame before committing to permanent cement joints.
- Apply PVC cement at each joint if a permanent structure is wanted, or leave dry fit for an adjustable rack.

Storage Bin Rack PVC Pipe Kit
PVC pipe and connector kit for building a lightweight, adjustable bin rack frame with no special tools.
Check Price on Amazon2. Add Wheels for a Rolling Bin Rack
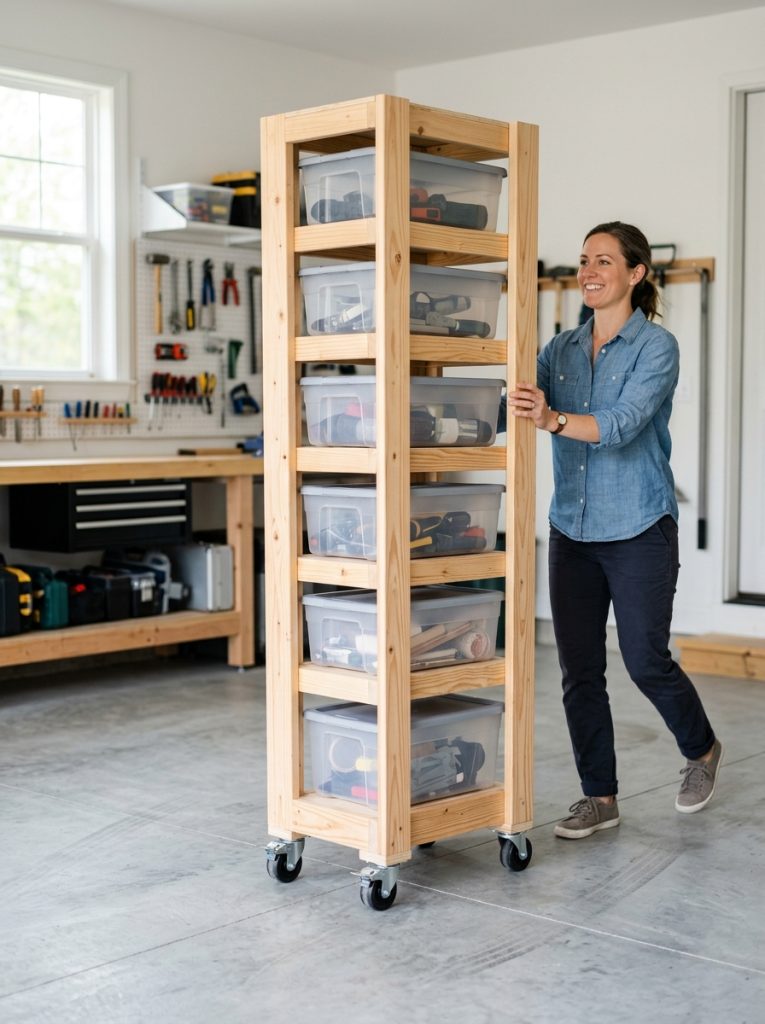
A storage bin rack on wheels can be rolled wherever it is needed and tucked out of the way when not in use, which matters in a garage that doubles as a workspace or parking spot. These storage bin rack wheels rolling casters are rated for heavy loads and lock in place to keep the rack stationary when loading or unloading bins. Mount them to the base of any rack frame and the whole unit becomes genuinely mobile.
Materials Needed:
- Bin rack frame (wood or PVC)
- 4 locking caster wheels
- Screws appropriate for caster mounting
- Drill
How to Make It:
- Build the bin rack frame using your chosen material.
- Flip the frame upside down and mark the four corner positions for casters.
- Screw each caster wheel into the marked corner positions.
- Flip the rack upright and test that all wheels roll smoothly and lock securely.
- Load bins and roll the rack to its storage position before locking the wheels.

Rolling Caster Wheels for Bin Rack
Heavy duty locking caster wheels that turn any bin rack frame into a mobile rolling storage unit.
Check Price on Amazon3. Build a Heavy Duty Garage Bin Rack

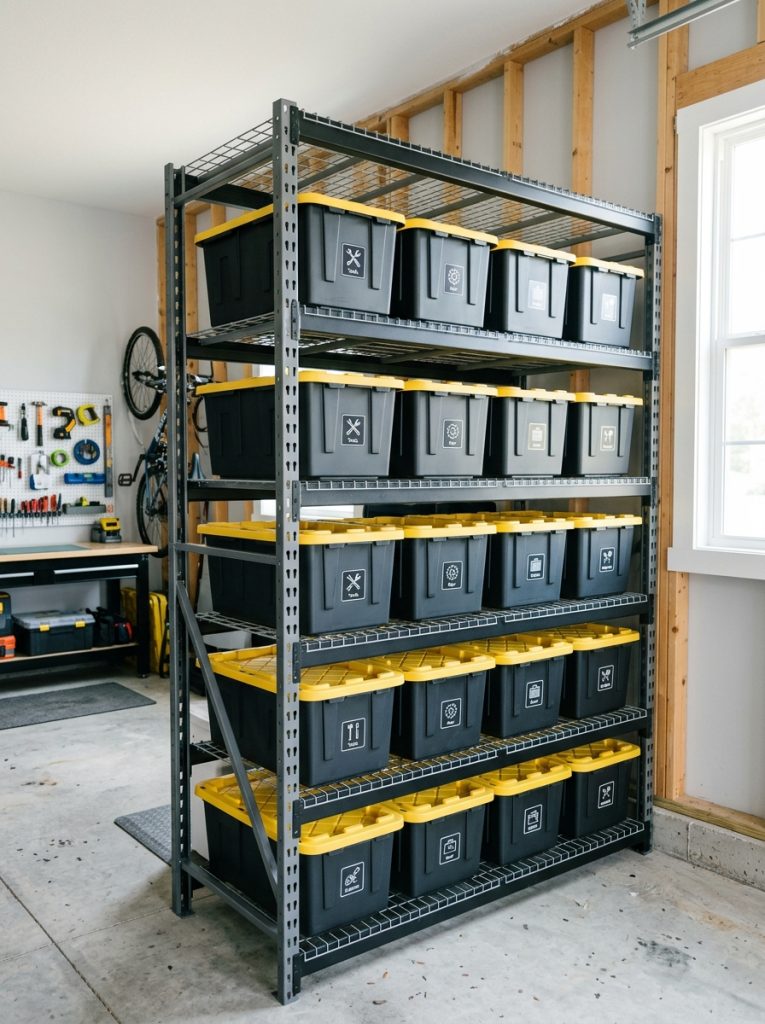
A garage often stores genuinely heavy bins — tools, automotive supplies, holiday decorations packed full. A heavy duty rack handles this weight without sagging or failing over time. This storage bin rack garage heavy duty is rated for serious loads across each shelf level. Bolt it securely to wall studs if floor space is tight, or set it freestanding with a wide stable base for a unit that holds a full garage worth of bins reliably.
Materials Needed:
- Heavy duty rack frame
- Wall anchors or floor bolts
- Level
- Drill
How to Make It:
- Determine whether the rack will be wall mounted or freestanding based on available space.
- For wall mounting, locate studs and secure the rack frame with appropriate anchors.
- For freestanding use, ensure the base is wide enough for stability with loaded shelves.
- Check level across all shelf positions before loading bins.
- Load heaviest bins on lower shelves to keep the center of gravity low.

Heavy Duty Garage Bin Rack
Rated heavy duty rack frame that handles a full garage worth of heavy storage bins reliably.
Check Price on Amazon4. Build a Classic Wood Bin Rack
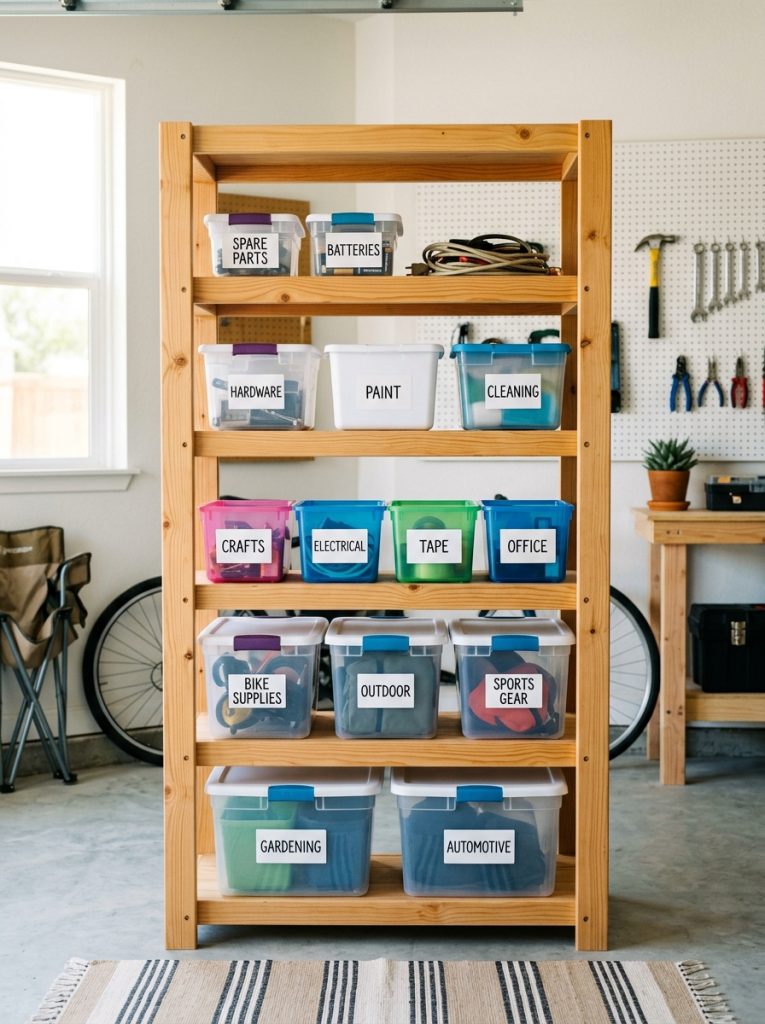
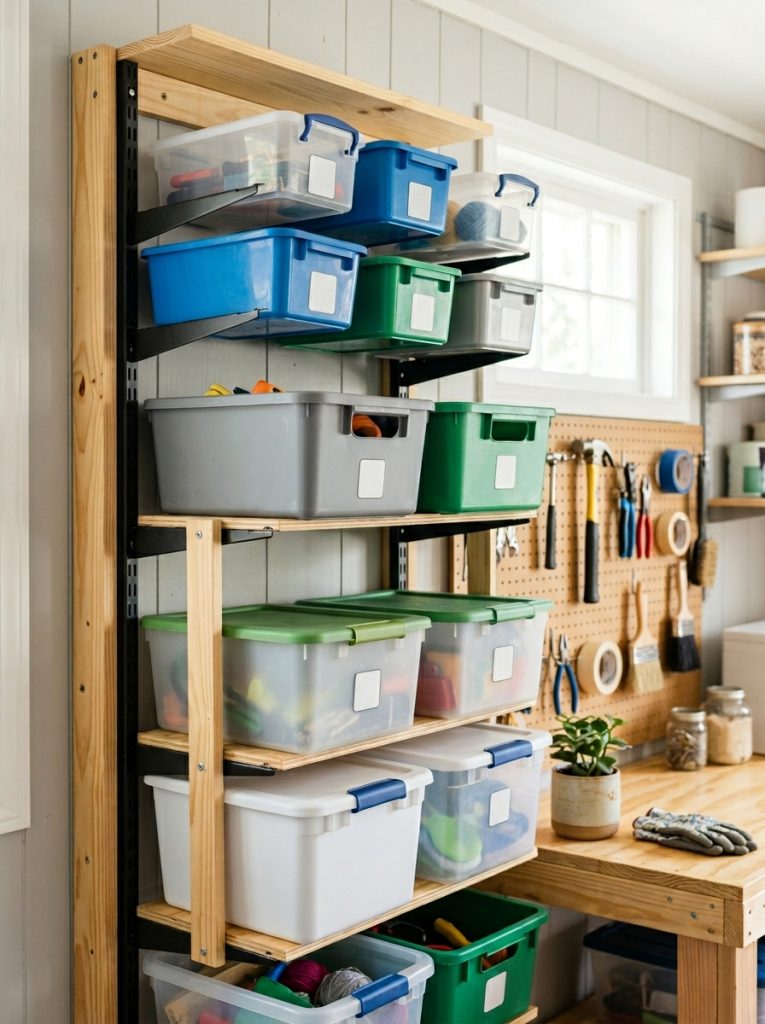
A wood bin rack is the most customizable build because the dimensions can match your exact bins and available space rather than fitting a pre-made unit. This storage bin rack wood DIY kit shows the finished style to aim for — simple shelf supports holding bins at a consistent height for easy sliding access. Build with 2×4 framing and plywood shelves for a sturdy result that costs a fraction of pre-made shelving units.
Materials Needed:
- 2×4 lumber for frame
- Plywood for shelves
- Wood screws and drill
- Level
- Wood stain or paint (optional)
How to Make It:
- Measure your bins and plan shelf spacing to match bin height with clearance for sliding access.
- Build the frame from 2×4 lumber with vertical supports at each corner.
- Cut plywood shelves to fit the frame width and depth.
- Attach shelves to the frame at the planned heights using screws.
- Sand and finish with stain or paint if desired before loading bins.

Wood DIY Storage Bin Rack
Wood bin rack design — great reference for building a custom version sized to your exact bins.
Check Price on Amazon5. Use Adjustable Shelves for Flexible Bin Sizes
Not every bin in a garage is the same size, which makes a fixed-shelf rack frustrating when a taller bin will not fit. Adjustable shelf brackets let each shelf level move independently to match whatever bin is being stored there. This storage bin rack adjustable shelf system uses a track and bracket system that repositions in minutes without any tools. As your storage needs change over time, the whole rack adapts instead of becoming obsolete.
Materials Needed:
- Adjustable shelf track and bracket system
- Shelf boards
- Wood screws and drill
- Level
How to Make It:
- Install the vertical track strips at each side of the rack frame, checking level carefully.
- Insert brackets into the tracks at the heights needed for your current bins.
- Rest or screw shelf boards onto the brackets.
- Adjust bracket heights anytime bin sizes change by repositioning in the track slots.
- Load bins onto the adjusted shelves.

Adjustable Shelf Bin Rack System
Adjustable track and bracket system that repositions shelves in minutes to fit bins of any size.
Check Price on Amazon6. Build a Sideways Slide Bin Rack
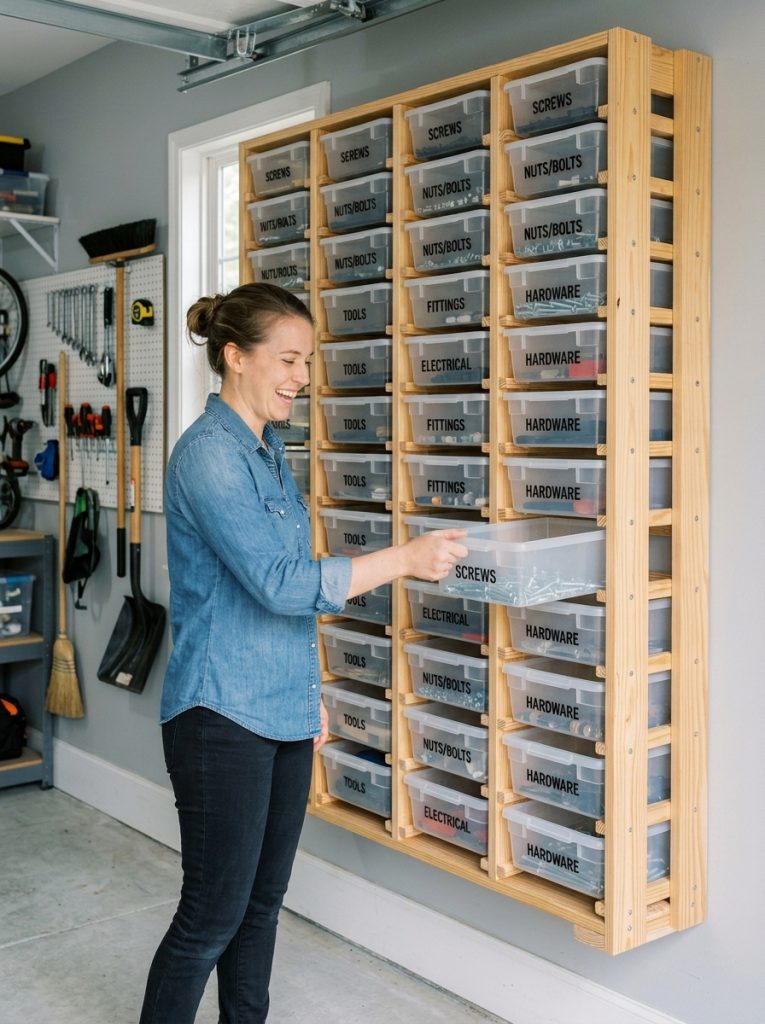
A sideways slide rack stores bins on their side and slides each one out individually like a drawer, which works exceptionally well in narrow spaces where a standard front-loading rack would not fit. This storage bin rack sideways slide system shows the rail mechanism that makes this style possible. Each bin pulls forward independently without needing to remove anything stacked on top, solving the classic problem of digging through a stack to reach the bottom bin.
Materials Needed:
- Sliding rail hardware
- Frame lumber or rack shelving
- Wood screws and drill
- Bins sized to fit the slide depth
How to Make It:
- Build or use an existing rack frame with horizontal slots sized to bin width.
- Install sliding rail hardware along each slot at the depth matching your bins.
- Test that bins slide smoothly in and out of each slot.
- Label the front edge of each bin for quick identification before sliding closed.
- Load bins sideways into the slide slots.

Sideways Slide Bin Rack Hardware
Sliding rail hardware that lets each bin pull out individually like a drawer in tight garage spaces.
Check Price on Amazon7. Get Exact Measurements Before Building
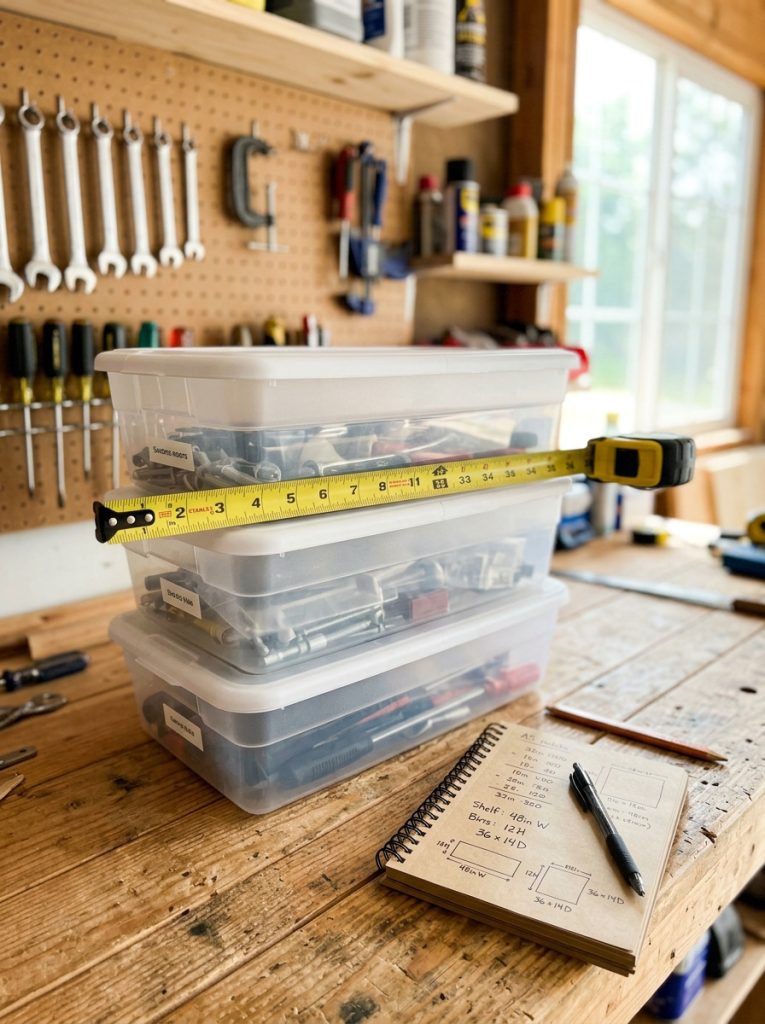
The single biggest mistake in any bin rack build is guessing at dimensions instead of measuring precisely. Measure the exact width, depth, and height of the specific bins you own — bin sizes vary significantly between brands even when labeled the same capacity. Add at least half an inch of clearance on every side for bins to slide in and out smoothly without binding against the frame. Write every measurement down before cutting a single piece of material.
Materials Needed:
- Tape measure
- Notebook or measurement app
- The actual bins to be stored
How to Make It:
- Measure the width, depth, and height of each bin type you plan to store.
- Add half an inch of clearance to each dimension for smooth sliding access.
- Write down final frame dimensions for width, shelf spacing, and depth.
- Double check measurements against the actual bins before cutting any materials.
- Use these confirmed measurements throughout the entire build process.
8. Find Free Plans from Home Improvement Retailers
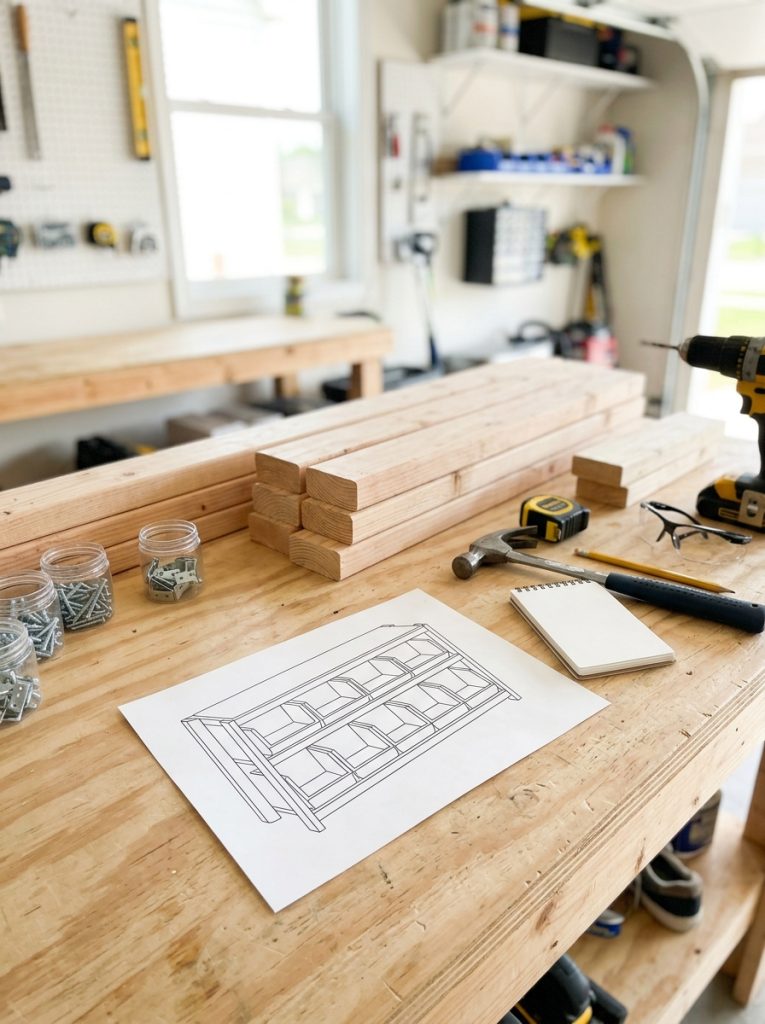
Major home improvement retailers regularly publish free downloadable plans for garage storage projects including bin racks, complete with cut lists and material lists. Searching directly on retailer websites for “storage bin rack plans” typically turns up several free PDF options with step by step diagrams. These plans save significant planning time and are designed around standard lumber dimensions available at the same store, making the shopping list straightforward.
Materials Needed:
- Printed or downloaded free plan
- Materials listed in the plan
- Basic tools (drill, saw, measuring tape)
How to Make It:
- Search a major home improvement retailer’s website for free storage bin rack plans.
- Download or print the plan along with its complete materials list.
- Purchase materials according to the plan’s cut list to minimize waste.
- Follow the plan’s step by step assembly instructions in order.
- Adjust any dimensions in the plan if your specific bins differ from the plan’s assumptions.
9. Build a Bin Rack from Bulk Warehouse Shelving
Bulk membership warehouse stores often sell heavy duty metal shelving units designed for garage and basement use that work perfectly as a ready-made bin rack with no building required. These units typically come with adjustable shelf heights and a high weight rating per shelf, making them one of the fastest paths to organized bin storage if a fully custom DIY build is not necessary. Assembly usually takes under an hour with basic tools included in the box.
Materials Needed:
- Bulk warehouse store shelving unit
- Basic assembly tools (usually included)
- Level
How to Make It:
- Purchase a heavy duty shelving unit sized for your garage space.
- Follow the included assembly instructions to build the frame.
- Adjust shelf heights to match your bin sizes before final tightening.
- Check the unit is level and stable before loading bins.
- Organize bins by category across the shelf levels.
10. Build a Compact Bin Rack for a Small Garage
A small garage needs a bin rack that prioritizes vertical space over footprint. Build a narrow rack that goes floor to ceiling in an unused corner rather than a wide rack that competes for parking or workspace. Stack bins higher than feels intuitive — a step stool for the top shelf is a worthwhile tradeoff for the storage capacity gained in a genuinely tight garage.
Materials Needed:
- 2×4 lumber for narrow frame
- Plywood shelves cut to narrow depth
- Wood screws and drill
- Step stool for top shelf access
How to Make It:
- Identify the narrowest usable corner or wall section in the garage.
- Build a tall narrow frame from 2×4 lumber matching that available width.
- Space shelves close together vertically to maximize the number of levels.
- Attach shelves and load with bins, placing least used items on top shelves.
- Keep a step stool nearby for safe top shelf access.
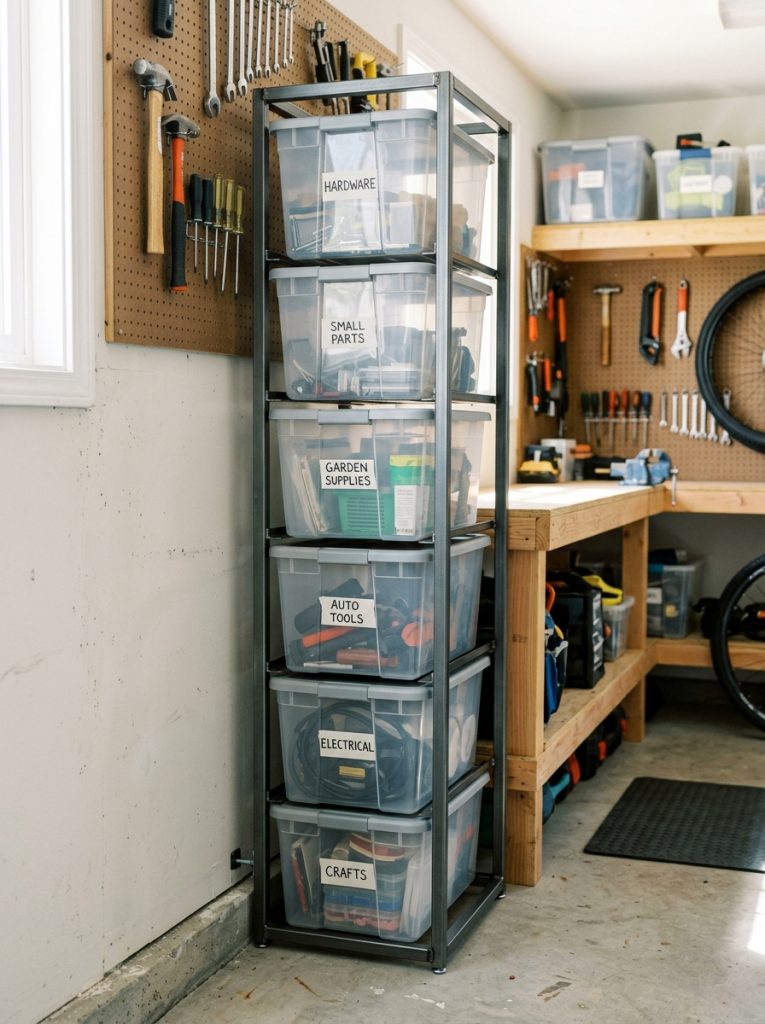
11. Add Labels and a Numbering System

Even the best built bin rack becomes disorganized without a labeling system applied consistently. Number each shelf position and label every bin with both a number matching its assigned spot and a brief category description. This two-part system means anyone in the household can return a bin to the correct spot without guessing, and finding a specific item means checking the inventory list rather than opening every bin on the rack.
Materials Needed:
- Label maker or marker and tape
- Numbered stickers
- Master inventory list (paper or digital)
How to Make It:
- Assign a number to each shelf position on the rack.
- Label each bin with its assigned number and a category description.
- Create a master list matching numbers to general contents for quick reference.
- Post the master list somewhere visible near the rack.
- Update the list whenever bin contents change significantly.
12. Combine Multiple Rack Styles for a Full System
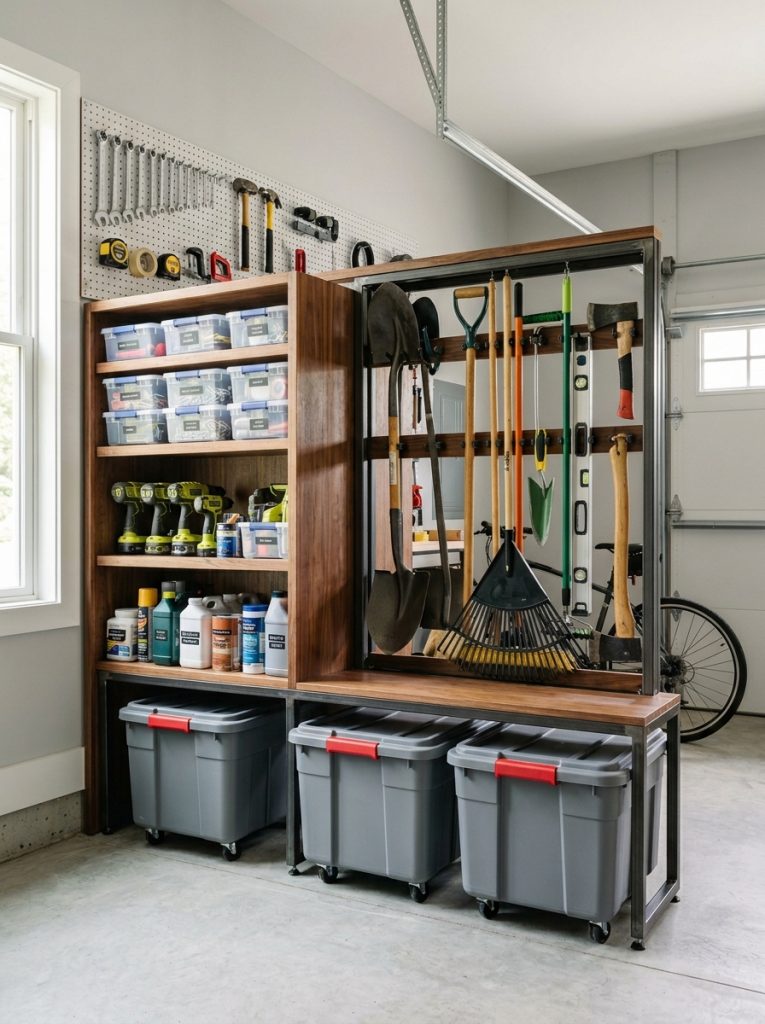
The most effective garage storage setups rarely rely on a single rack style for everything. Combine a tall wood shelf for stable long term bins, a rolling rack for items that need to move during projects, and a sideways slide section for narrow access points. This mixed approach matches the right storage method to each category of items rather than forcing everything into one rack design that compromises on every category.
Materials Needed:
- Components from multiple rack styles above
- Overall garage layout plan
- Basic tools for each chosen build
How to Make It:
- Map out the garage and decide which zone suits which rack style.
- Build or install each rack type in its planned zone.
- Sort all bins by category and assign each category to the most suitable rack style.
- Label everything consistently across the combined system.
- Walk through the full system to confirm clear pathways and easy access at every rack.
Final Thoughts on Storage Bin Rack DIY
A dedicated bin rack is one of the highest impact garage organization projects available, turning a pile of stacked totes into a system where every bin has its own accessible spot. Whether built from PVC pipe, wood, or repurposed warehouse shelving, the right rack design matches your specific bins, available space, and budget. Pick the plan that fits your garage and start building this weekend.

Amir Ali is the founder and site administrator of HomeDecorEdge, a modern home decor and interior design platform. Since starting the site, he has combined his passion for interior design, practical styling, and color coordination with hands-on content strategy and site management. He guides authors, curates high-quality articles, and ensures readers have access to actionable, visually inspiring, and user-focused home decor advice for apartments, small rooms, and family homes.