

Wood crafts have a warmth and permanence that paper or fabric projects simply cannot match. A painted wood sign stays on a shelf for years, a scrap wood snowman comes out every December, and a hand-burned rustic piece becomes something genuinely worth keeping rather than a craft that gets tucked away and forgotten. These wood crafts DIY ideas cover every season, every holiday, and every skill level — from a basic painted cutout that takes twenty minutes to a beginner laser engraving project that opens up a whole new world of making.
This post contains affiliate links. If you purchase through these links I may earn a small commission at no extra cost to you.
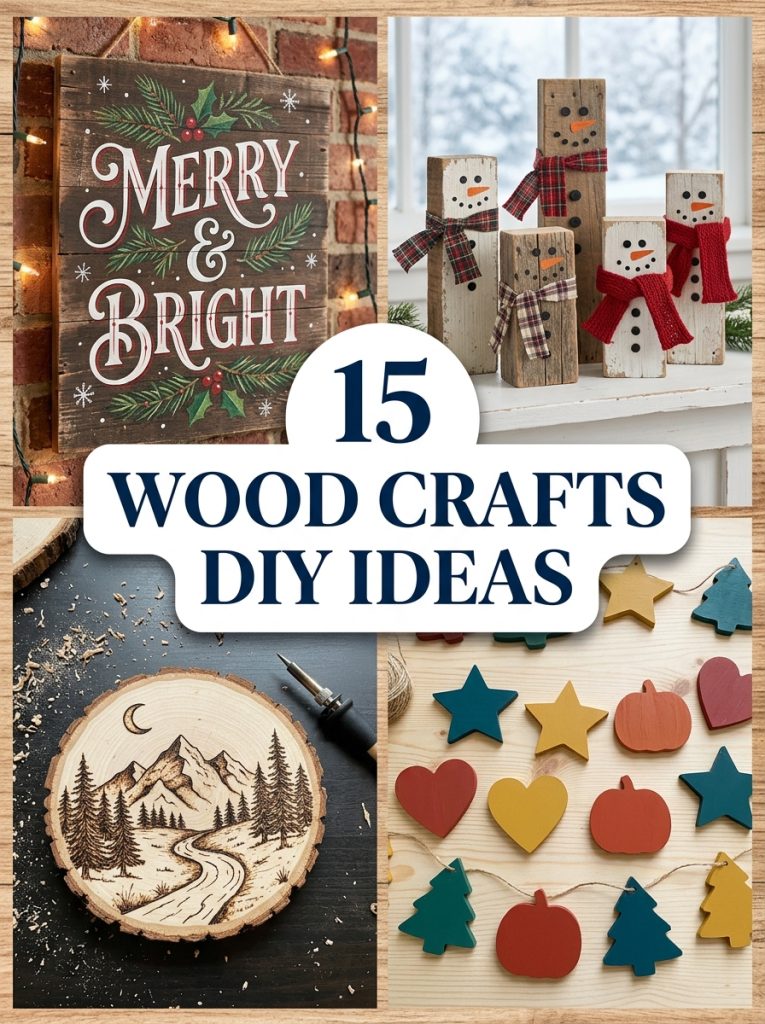
A good wood craft is the kind of project you make once and display for years.
1. Paint a Seasonal Wood Sign

A painted wood sign is the most versatile starting point in any wood craft collection because the same basic board becomes Christmas decor in December, a Valentine message in February, or a year-round kitchen sentiment depending on the paint. This wood craft sign board unfinished has a smooth sanded surface ready for paint without any prep work beyond wiping clean. Use stencils for crisp lettering or freehand for a more rustic look, and seal with a matte varnish once dry.
Materials Needed:
- Unfinished wood sign board
- Acrylic paint
- Stencils or brushes for lettering
- Matte varnish sealant
- Sandpaper for touch ups
How to Make It:
- Wipe the unfinished board clean with a damp cloth and allow to dry.
- Apply a base coat in the chosen background color and allow to dry fully.
- Position a stencil or sketch lettering lightly in pencil before painting.
- Paint the design or lettering in contrasting colors.
- Seal with matte varnish once completely dry to protect the finished surface.

Unfinished Wood Sign Board
Smooth sanded unfinished wood board ready for painting, stenciling, or burning seasonal signs.
Check Price on Amazon2. Build a Scrap Wood Christmas Snowman
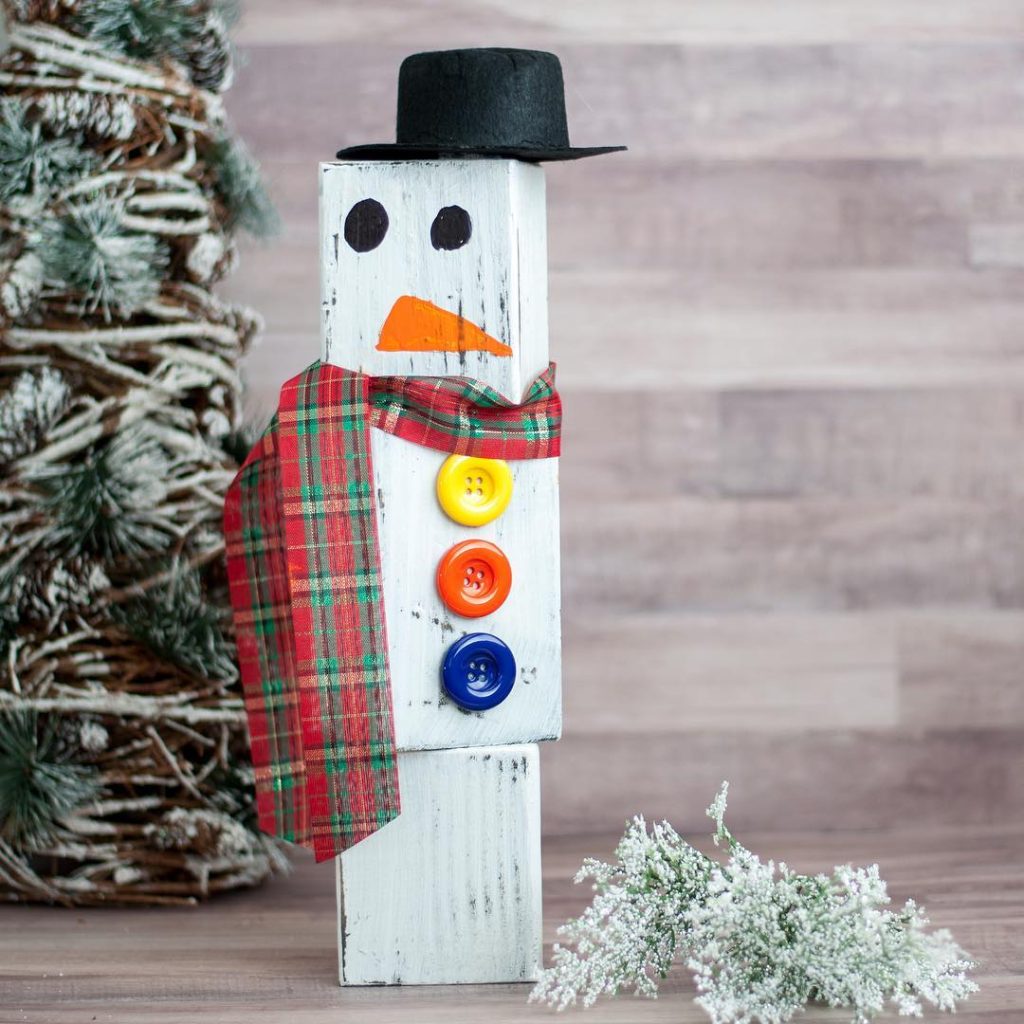
Scrap wood snowmen are one of the most beloved Christmas wood crafts because the rough imperfect edges of scrap lumber actually improve the finished look rather than detracting from it. Stack three graduated wood blocks or rounds on top of each other, paint white with a simple face, add a button trim line down the front, and tie a fabric scrap as a scarf. This wood craft scrap lumber pieces provides the varied sizes needed for a set of snowmen in different heights. For more Christmas craft ideas check out these DIY paper craft ideas.
Materials Needed:
- Scrap wood blocks or rounds in graduated sizes
- White acrylic paint
- Black paint for face details
- Buttons and twine
- Fabric scrap for scarf
How to Make It:
- Sand any rough edges on the scrap wood pieces.
- Paint all pieces white and allow to dry completely.
- Stack largest to smallest and glue or screw together.
- Paint a simple face and button details in black.
- Tie a fabric scrap scarf around the neck joint and add twine for hanging.

Scrap Wood Lumber Pieces
Varied scrap wood pieces in different sizes perfect for building rustic seasonal wood craft characters.
Check Price on Amazon3. Paint Wood Cutout Shapes for Any Season
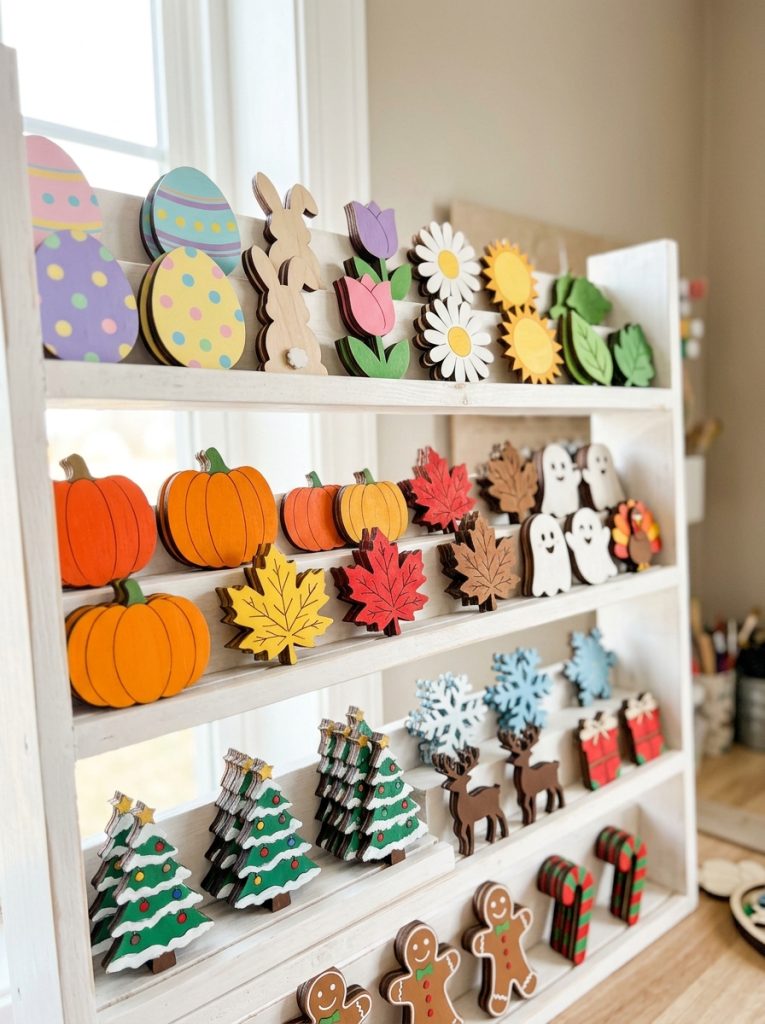
Pre-cut wood shapes remove the most time-consuming part of seasonal wood crafts, letting the painting and decorating happen immediately without any sawing or cutting. This wood craft blank shapes cutouts comes in holiday and seasonal shapes ready to paint. Keep a set of unpainted cutouts on hand and a full seasonal rotation becomes possible without buying new materials for every holiday throughout the year.
Materials Needed:
- Pre-cut wood shape blanks
- Acrylic paint set
- Fine detail brushes
- Matte sealant
- Ribbon or twine for hanging
How to Make It:
- Sand any rough edges on the blank wood shapes.
- Apply a base coat in the main color for each shape.
- Add detail painting once the base coat dries completely.
- Use a fine brush for small details like faces, lettering, or patterns.
- Seal with matte varnish and add a ribbon loop for hanging.

Wood Craft Blank Shape Cutouts
Pre-cut seasonal and holiday wood shapes ready to paint for year-round wood craft projects.
Check Price on Amazon4. Try Wood Burning for a Rustic Finish
Wood burning transforms a plain board into something that looks genuinely handcrafted in a way paint alone cannot replicate. The burned lines have a permanence and texture that makes even a simple design feel like real artisan work. This wood craft burning pen kit includes multiple tip shapes for different line widths and shading effects. Practice on scrap pieces first and the technique develops quickly even for a complete beginner.
Materials Needed:
- Wood burning pen kit with multiple tips
- Smooth sanded wood board
- Pencil for sketching design
- Sandpaper for preparation
- Clear sealant for finishing
How to Make It:
- Sand the wood surface extremely smooth — the smoother the better for clean burning lines.
- Sketch the design lightly in pencil before burning anything.
- Heat the pen fully before starting and test on scrap wood first.
- Burn outline lines first then fill in shading with slower movements.
- Erase any remaining pencil marks and apply clear sealant to protect the finished design.

Wood Burning Pen Kit
Multi-tip wood burning kit for creating detailed designs and shading on any smooth wood surface.
Check Price on Amazon5. Use Acrylic Paint for Bold Color Wood Crafts
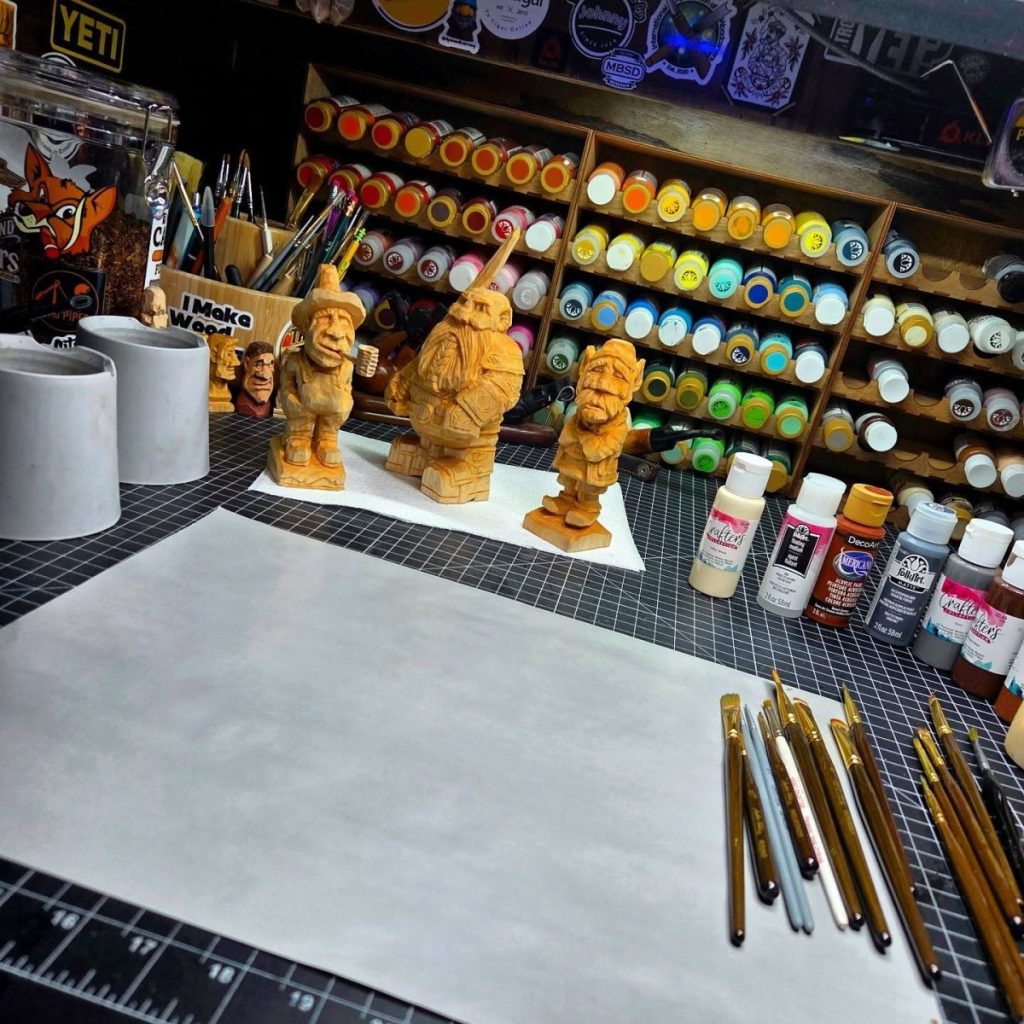
Acrylic paint is the material that makes wood crafts genuinely approachable for every skill level — it dries fast, cleans up with water, and covers wood in a single coat when used at full consistency. This wood craft paint acrylic set has a full range of seasonal colors in one set so switching between Christmas red and Valentine pink or Halloween orange and spring yellow never requires buying separate supplies. A good acrylic set also means mixing custom colors is always an option when the exact shade is not in the standard range.
Materials Needed:
- Acrylic paint set with multiple colors
- Wood surface or shape
- Flat and round brushes
- Palette for mixing
- Matte sealant
How to Make It:
- Prepare the wood surface by sanding smooth and wiping dust away.
- Squeeze small amounts of the needed colors onto a mixing palette.
- Apply base coat colors first using a flat brush for large areas.
- Switch to a round brush for detail work and smaller design elements.
- Allow to dry fully between color layers and seal with matte varnish at the end.
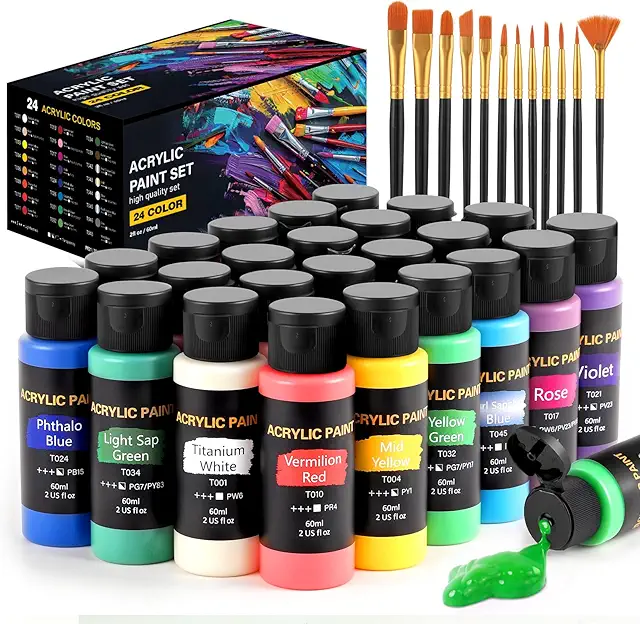
Acrylic Paint Set for Wood Crafts
Full seasonal color acrylic set that covers every holiday wood craft project from Christmas to Halloween.
Check Price on Amazon6. Try a Beginner Laser Engraver Project
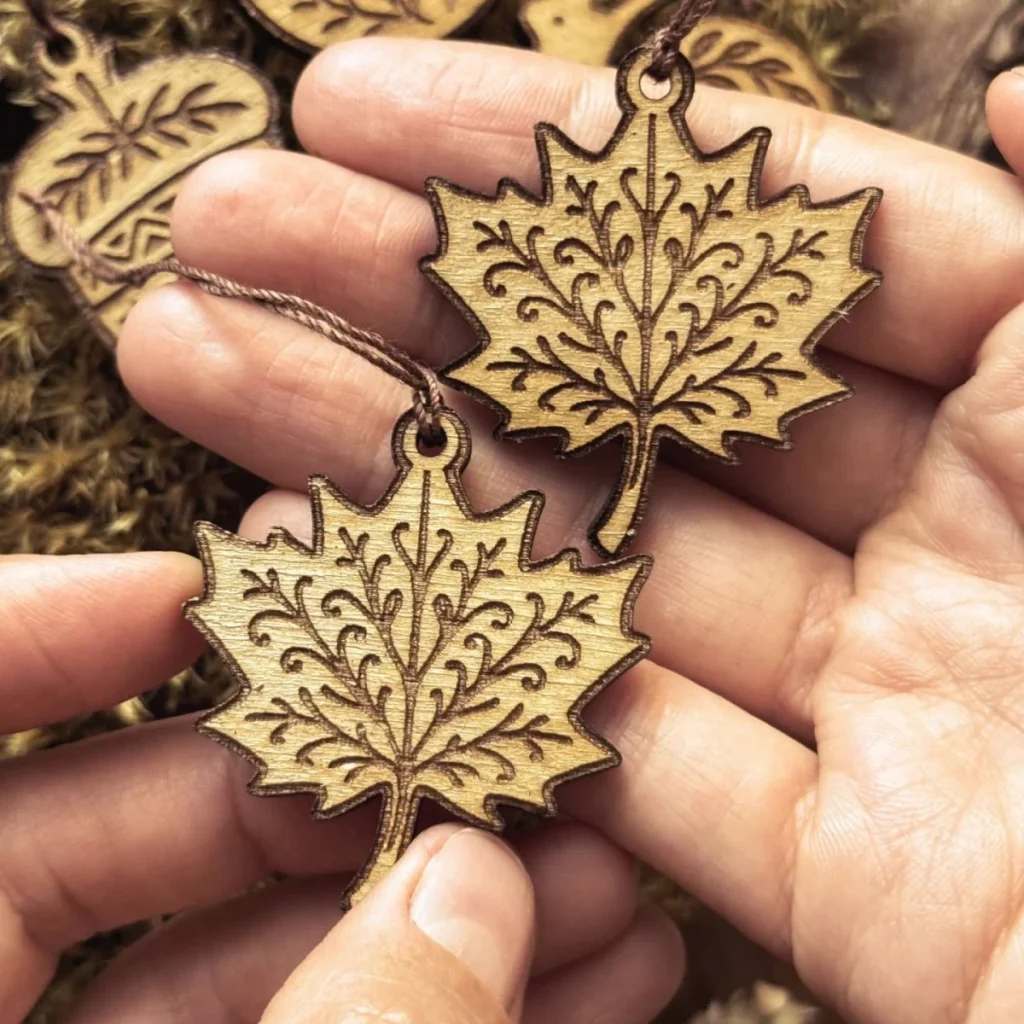
A beginner laser engraver opens up a completely different level of wood craft precision, producing designs and lettering that no hand tool can replicate in terms of consistency and detail. This wood craft laser engraver beginner connects to a computer and uses free design software to engrave any image or text onto wood within minutes. Custom signs, personalized gifts, and intricate seasonal decorations all become achievable from the first session without any advanced technical skill required.
Materials Needed:
- Beginner laser engraver machine
- Smooth sanded wood boards or blanks
- Computer with free engraving software
- Safety goggles
- Clear sealant for finishing
How to Make It:
- Download and install the free laser engraver software and connect the machine.
- Import or create a design in the software and set the wood dimensions.
- Position the wood piece on the engraver bed and secure it flat.
- Run a test pass at low power to check placement before the full engrave.
- Run the full engrave, allow to cool, and apply clear sealant to protect the finished surface.

Beginner Laser Engraver for Wood Crafts
Entry level laser engraver that produces precise designs and lettering on wood from the very first use.
Check Price on Amazon7. Make a 2×4 Christmas Reindeer
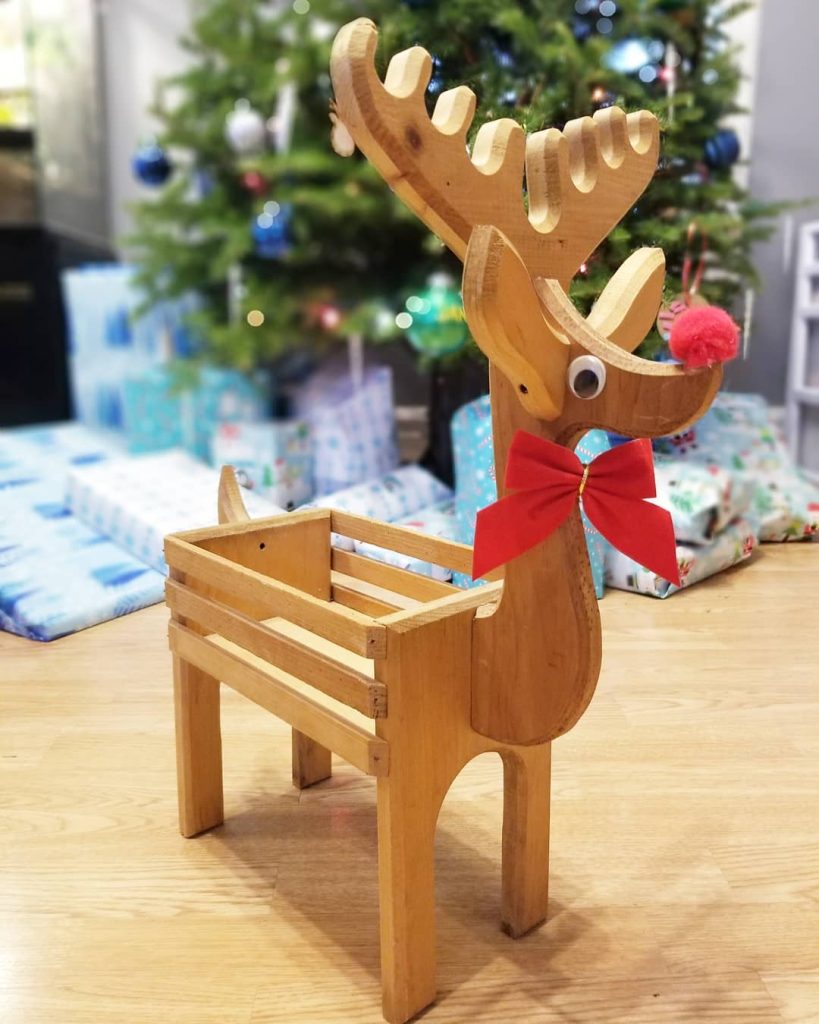
A 2×4 reindeer is a Christmas classic that proves basic construction lumber makes genuinely charming holiday decor when painted well. Cut the body and head from 2×4 sections, use thin branch pieces or cut wood strips for antlers, paint in brown with a simple face and red nose, and the finished reindeer has exactly the kind of rustic handmade charm that store bought versions never quite achieve.
Materials Needed:
- 2×4 lumber sections
- Thin branches or wood strips for antlers
- Brown and red acrylic paint
- Wood screws and drill
- Black paint for face details
How to Make It:
- Cut 2×4 sections into body, head, and leg pieces using a saw.
- Assemble and screw the body shape together.
- Attach branch antler pieces to the top of the head.
- Paint the entire figure in brown and allow to dry.
- Add face details in black and paint a red nose to finish.
8. Create a Rustic Barn Wood Sign
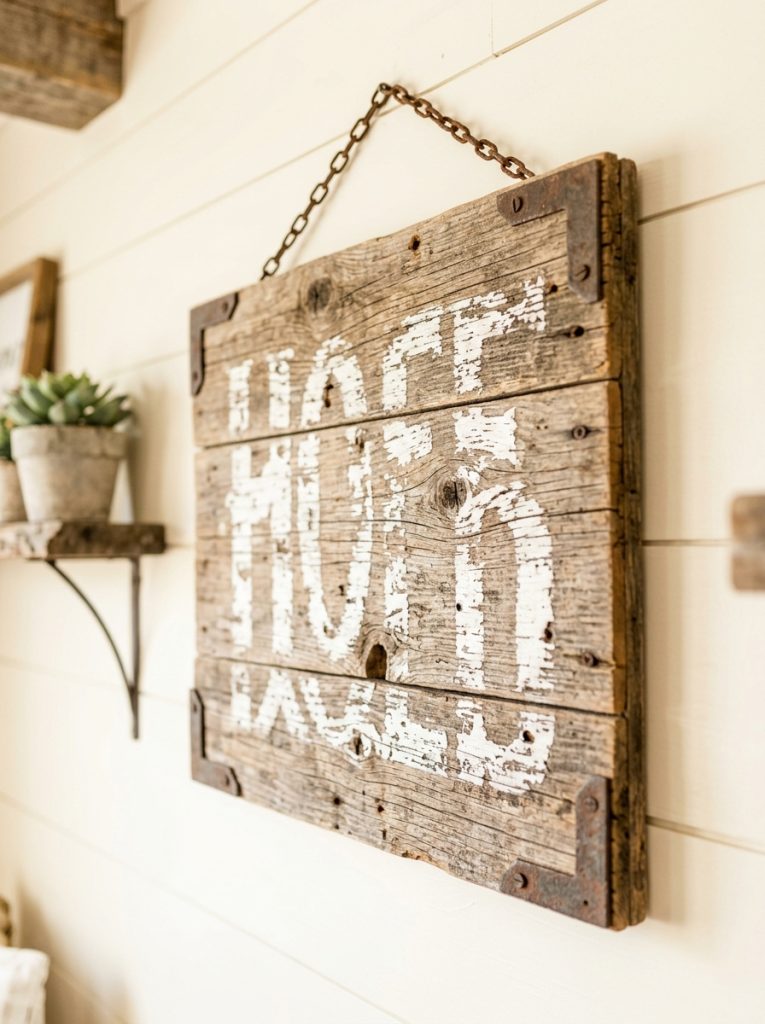
Barn wood signs have a weathered, lived-in quality that takes real aged barn wood years to develop but can be replicated on fresh lumber in an afternoon with the right paint technique. Apply a dark stain base, dry brush a lighter gray over it, then sand random areas to reveal the layers underneath for a convincing weathered look. White lettering stands out most clearly against the dark distressed background and reads as genuinely vintage rather than newly made.
9. Make Valentine Wood Hearts

Wood heart cutouts painted in red, pink, and white are the most versatile Valentine craft on this list — they work as standalone decorations, grouped in a wall arrangement, or attached to a larger Valentine sign or wreath. Paint each heart in a slightly different treatment — solid color, stripes, polka dots, or a stamped message — so a collection of them has visual variety even within the same tight color palette.
10. Craft a Halloween Wood Door Decoration
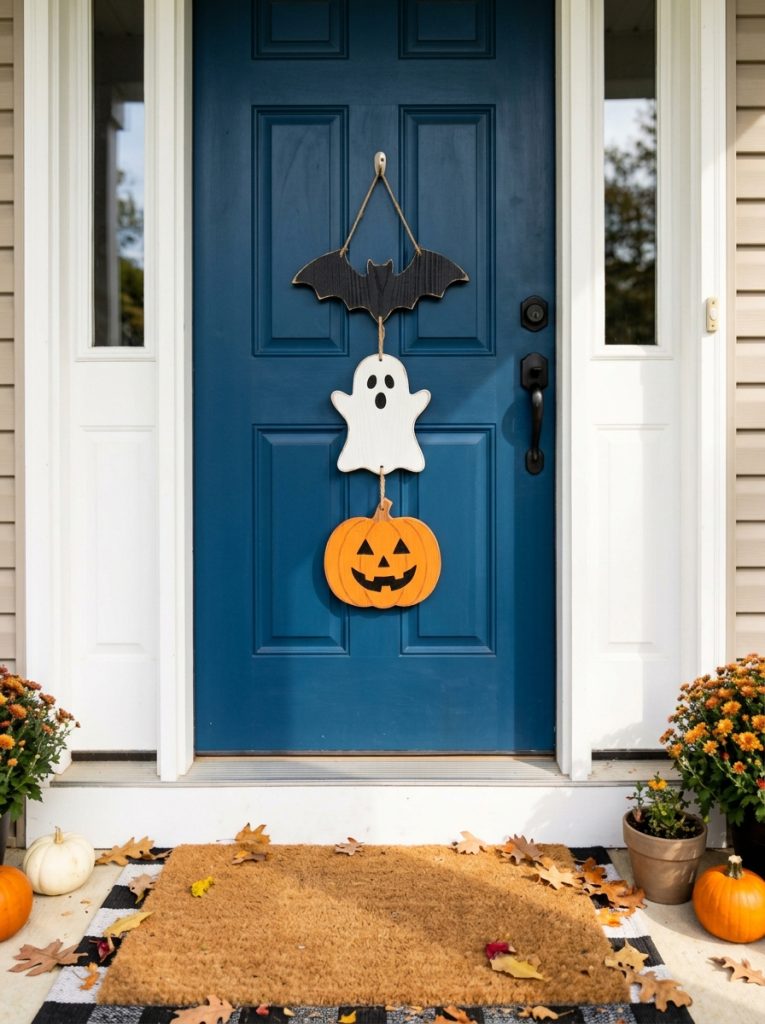
Halloween wood crafts work especially well for door and porch decorations because the classic imagery — pumpkins, ghosts, bats, and black cats — translates immediately into simple painted wood shapes that communicate the holiday even from a distance. Layer several painted cutout shapes on a base sign or scatter them across a porch vignette for a Halloween display that goes up in an hour and looks genuinely festive from the street.
11. Build a Spring Wood Flower Garden Stake
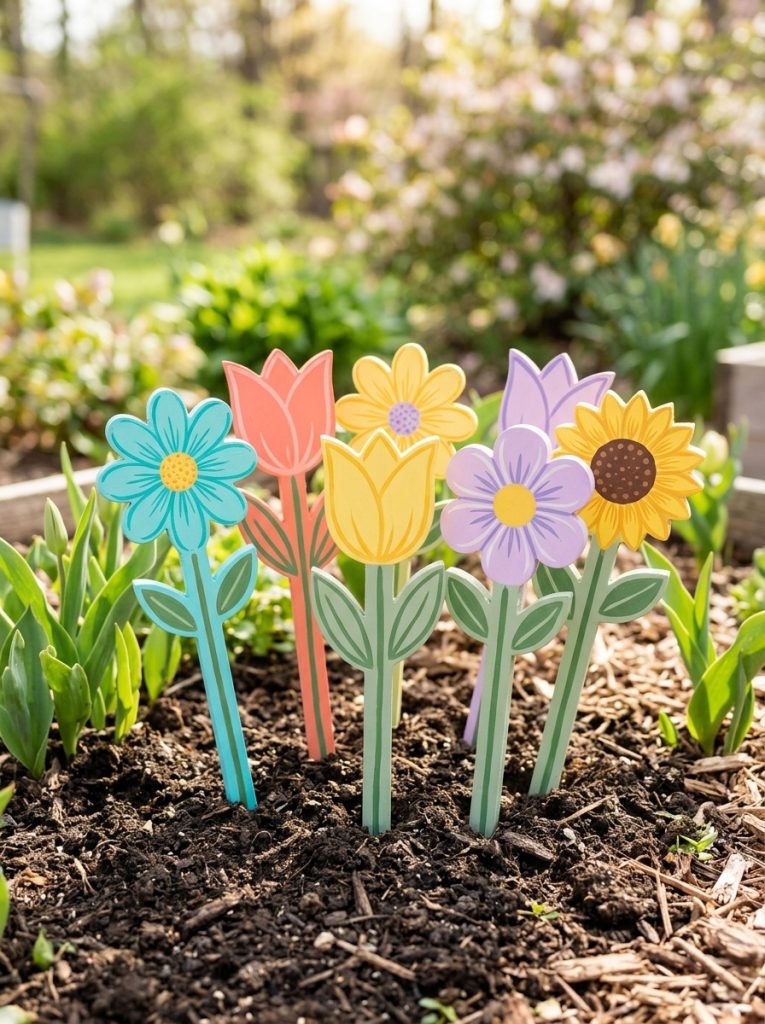
Spring wood garden stakes bring color to an outdoor garden before the real flowers catch up in early spring. Cut flower shapes from plywood or use pre-cut blanks, paint in bright tulip yellows, pinks, and purples, attach to a garden stake, and press directly into the garden bed. The painted wood flowers stay colorful through rain and wind when sealed properly and can be brought inside at the end of the season and stored for the following year.
12. Make Easy Wood Crafts with Kids
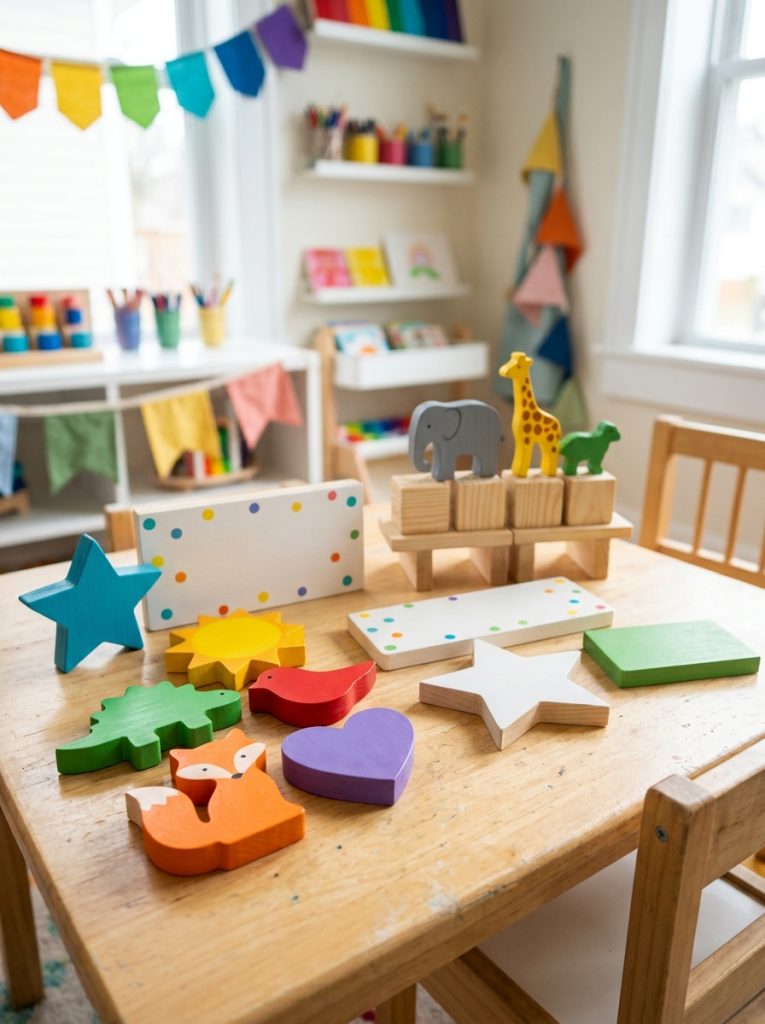
Wood crafts for kids work best when the cutting is already done — pre-cut blank shapes remove the sharp tool concern entirely and let kids focus on the painting and decorating. Simple holiday shapes, animal cutouts, and name signs all suit young crafters who want to make something real rather than a paper project. For more kids craft ideas check out these recycled crafts for kids and these outdoor crafts for kids.
13. Build a Primitive Wood Thanksgiving Turkey
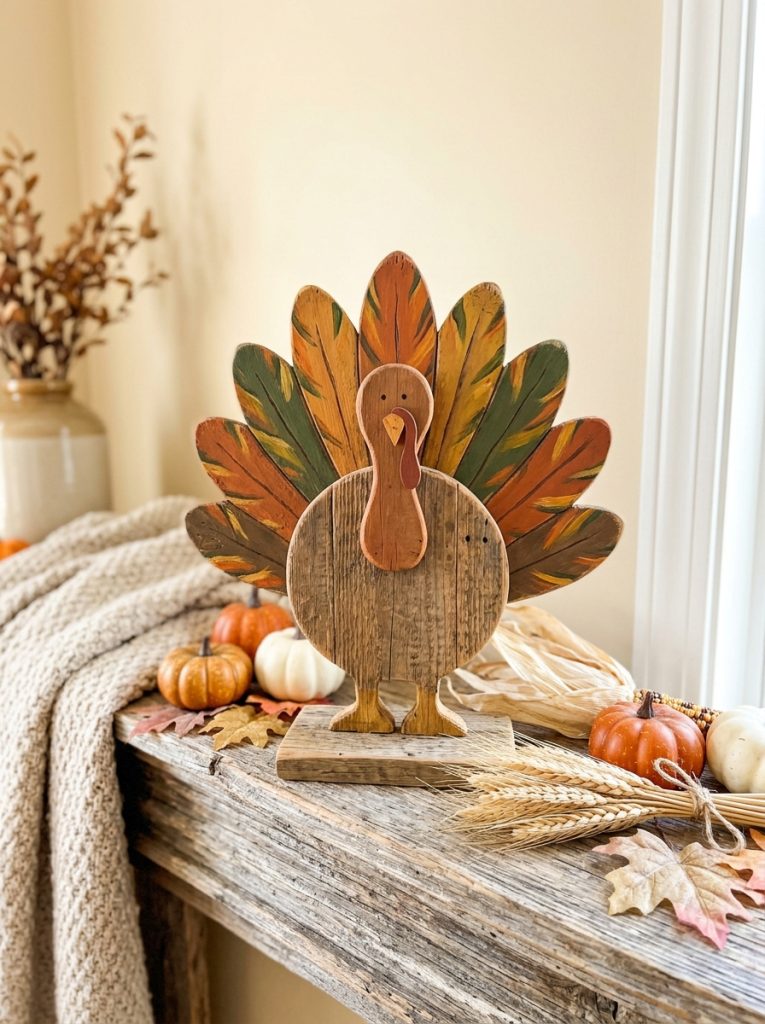
A primitive style wood turkey with folk art painted feathers in autumn orange, red, and gold is the quintessential Thanksgiving wood craft that fits right in with pumpkins, gourds, and harvest decor. The primitive style intentionally embraces imperfect lines and simplified shapes, which means it actually looks better when it is not too polished — rough brush strokes and deliberately naive proportions are part of the aesthetic.
14. Create an Easter Wood Bunny Display
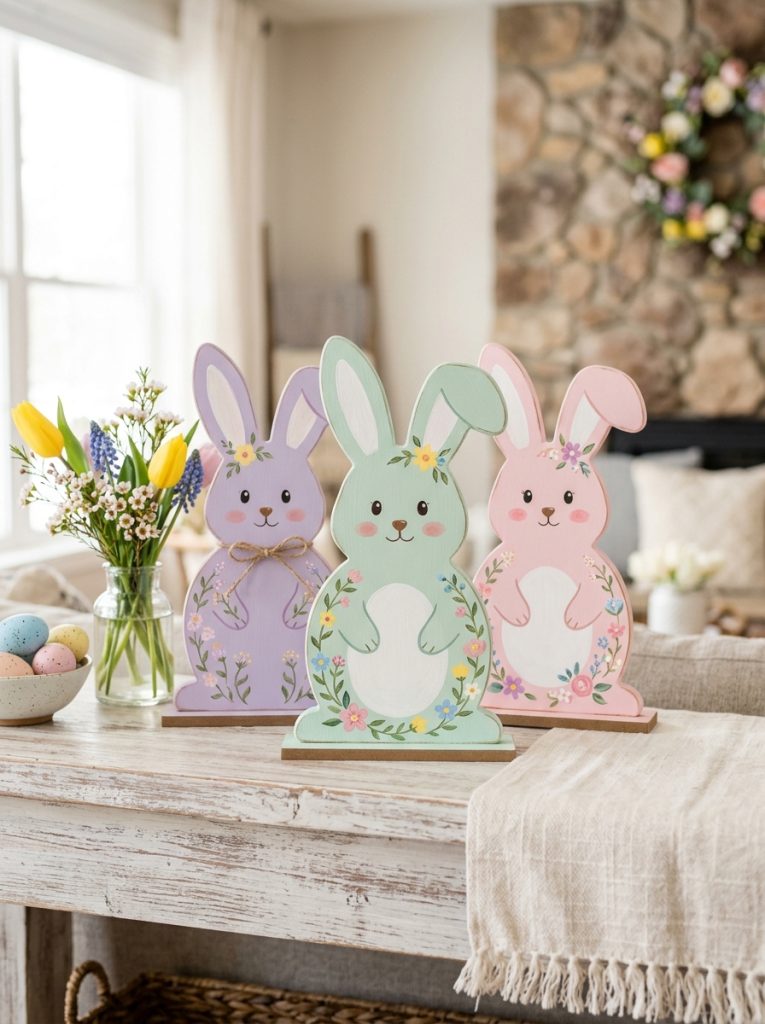
Painted wood Easter bunnies in soft pastel colors are one of the most appealing spring seasonal crafts because the gentle palette and simple silhouette work in almost every home style. Cut or source bunny shapes in a few sizes, paint in soft pink, lavender, and mint, and add simple floral details or a plaid bow tie for character. Group several together on a mantle or shelf for an Easter display that comes together in an afternoon.
15. Make a Summer Wood Beach Sign
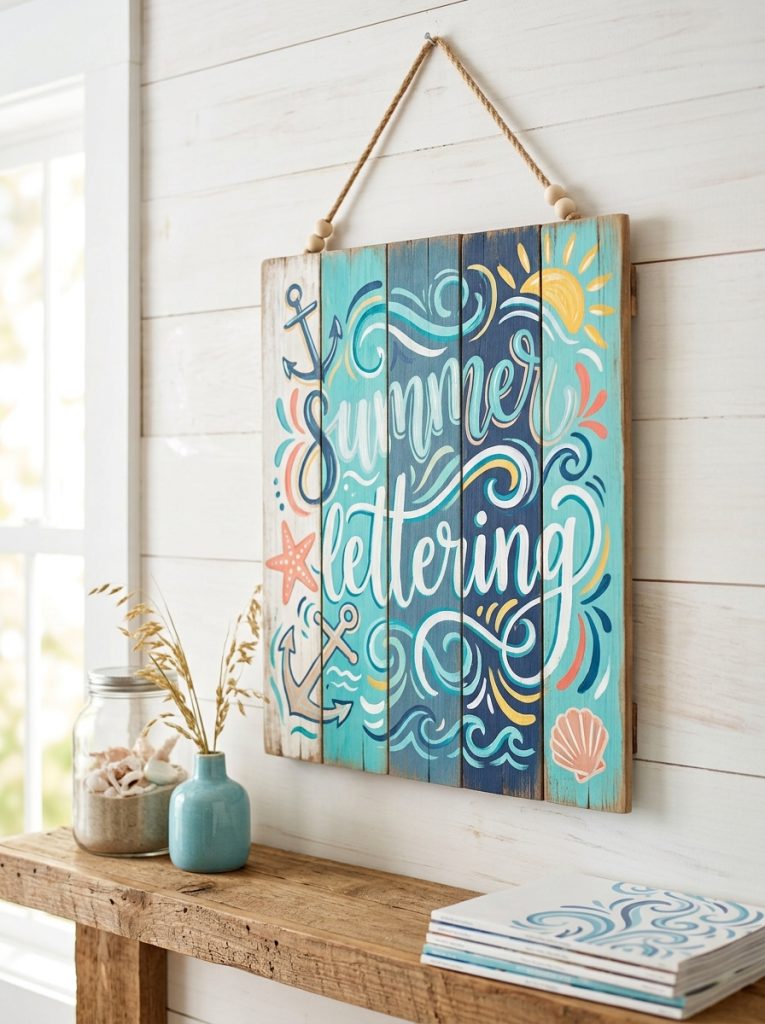
A summer beach sign with nautical lettering and coastal colors in navy, white, and sandy tan brings vacation atmosphere into any home regardless of how close to the actual beach it sits. Paint weathered white boards with navy blue lettering, add a simple anchor or wave detail, and the finished sign reads as genuinely beachy without being tacky. For more home decor crafts check out these air dry clay ideas.
Final Thoughts on Wood Crafts DIY
The best thing about wood crafts is that the same basic skill set — painting, burning, cutting, and assembling — applies across every season and holiday throughout the year. Build the foundational skills with a simple painted sign or scrap wood snowman, and the more ambitious projects like laser engraving or barn wood signs become genuinely achievable from there. Pick one idea from this list that matches the current season and start making something that will last.

Amir Ali is the founder and site administrator of HomeDecorEdge, a modern home decor and interior design platform. Since starting the site, he has combined his passion for interior design, practical styling, and color coordination with hands-on content strategy and site management. He guides authors, curates high-quality articles, and ensures readers have access to actionable, visually inspiring, and user-focused home decor advice for apartments, small rooms, and family homes.