

The first few weeks of a baby chick’s life are the most critical and the brooder is what makes those weeks safe and successful. A good brooder maintains the right temperature, keeps the chicks dry and draft-free, provides constant access to feed and water, and is easy to clean — the specific container used to achieve all of this matters far less than getting those four things right. These DIY chick brooder ideas use everything from a plastic storage tote to a kiddie pool to a repurposed dog crate, proving that an effective brooder does not require expensive specialist equipment.
This post contains affiliate links. If you purchase through these links I may earn a small commission at no extra cost to you.
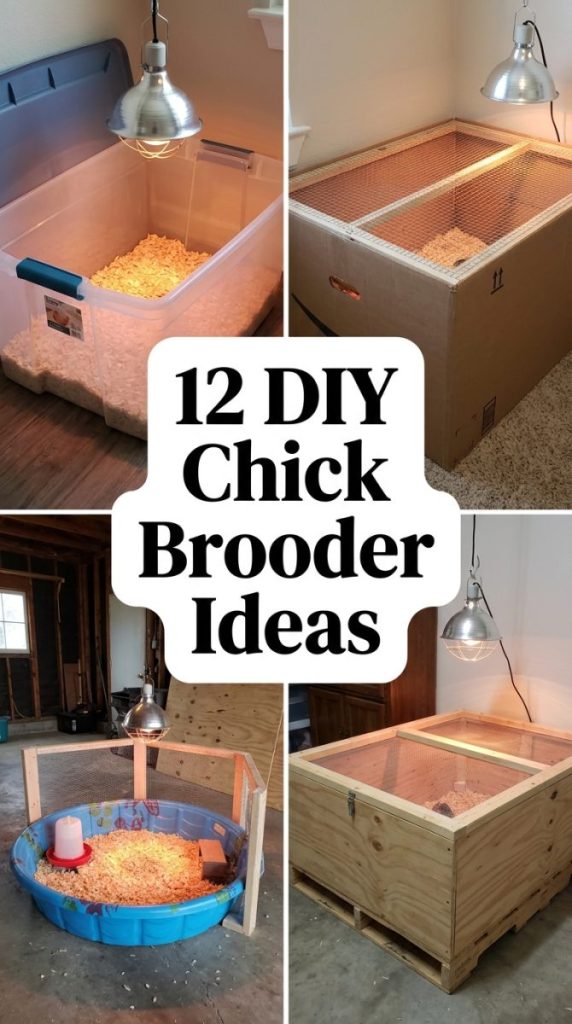
A good brooder keeps baby chicks warm dry and safe — the container it is made from matters far less than getting those three things right.
1. Set Up a Heat Lamp for the Right Temperature
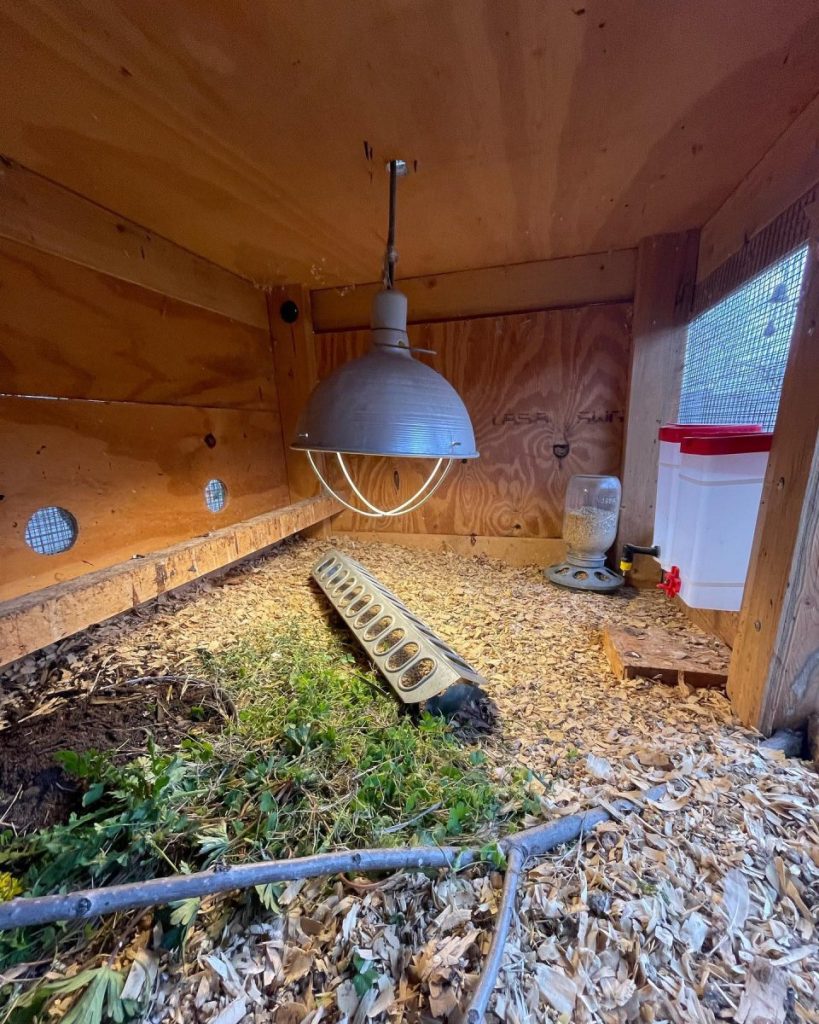
Temperature control is the single most important brooder function — baby chicks need 95 degrees Fahrenheit in the first week, dropping five degrees each week until fully feathered. This chick brooder heat lamp has the red bulb that provides warmth without disrupting the chick’s sleep cycle, unlike white bulbs that keep chicks unnaturally active around the clock. Clamp it securely to the brooder side and position it over one end only so chicks can self-regulate by moving toward or away from the heat source. For more backyard chicken ideas check out these easy DIY chicken coop plans.
Materials Needed:
- Heat lamp with red bulb
- Secure clamp or hanging hardware
- Thermometer for monitoring temperature
- Chain or wire for secondary safety attachment
How to Make It:
- Attach the heat lamp clamp securely to the brooder side wall or above the brooder.
- Position the lamp over one end of the brooder only — never centered — so a cool zone exists.
- Hang a secondary safety wire from the lamp to a fixed point so it cannot fall if the clamp slips.
- Check temperature at chick level with a thermometer before adding chicks.
- Raise the lamp height each week to reduce temperature by approximately five degrees.

Chick Brooder Heat Lamp
Red bulb heat lamp that provides warmth without disrupting chick sleep cycles in any DIY brooder setup.
Check Price on Amazon2. Monitor Temperature with a Thermometer
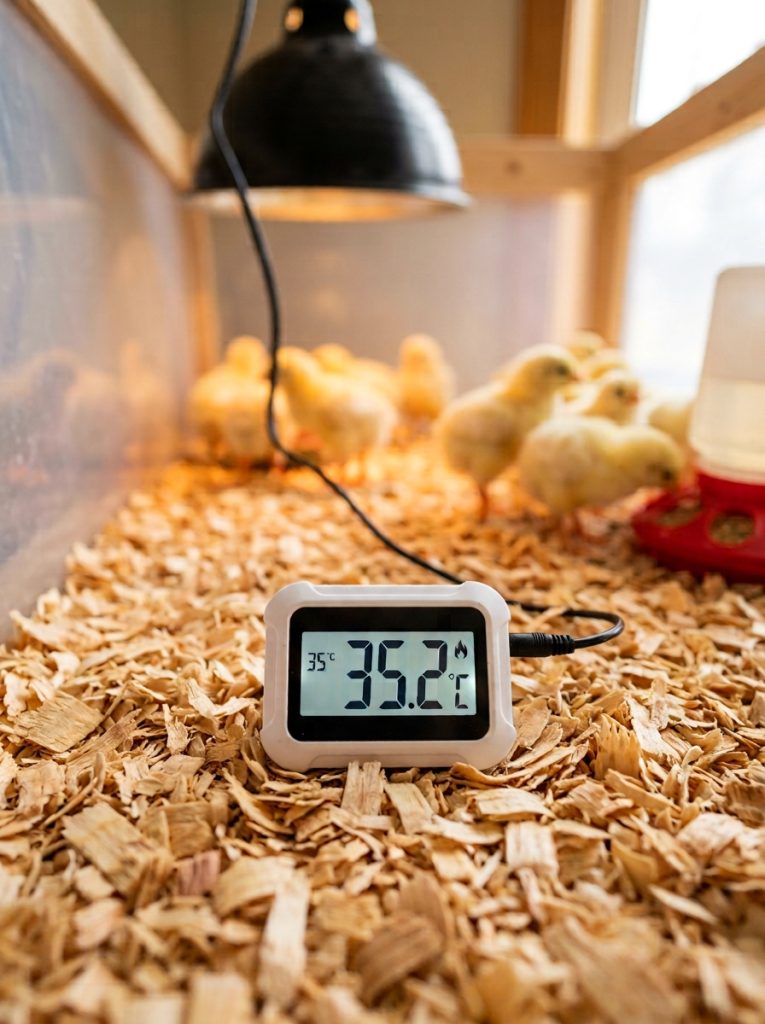
Guessing the brooder temperature from how the chicks look is possible but a thermometer removes the guesswork entirely and catches temperature problems before they become health issues. This chick brooder thermometer has a digital display that reads the temperature at chick level where it actually matters rather than at lamp level where the reading is significantly higher. Place at bedding level in the warm zone and check twice daily during the first week when getting the setup dialed in.
Materials Needed:
- Digital thermometer with probe
- Clip or tape for positioning at chick level
- Log sheet for temperature tracking (optional)
How to Make It:
- Place the thermometer probe at bedding level in the warm zone directly under the heat lamp.
- Allow the brooder to run for at least thirty minutes before reading the temperature.
- Adjust lamp height up or down until the warm zone reads 95 degrees Fahrenheit.
- Check temperature morning and evening for the first week.
- Reduce target temperature by five degrees each week by raising the lamp incrementally.

Chick Brooder Thermometer
Digital thermometer that reads temperature at chick level to remove guesswork from brooder temperature management.
Check Price on Amazon3. Use a Small Chick Feeder
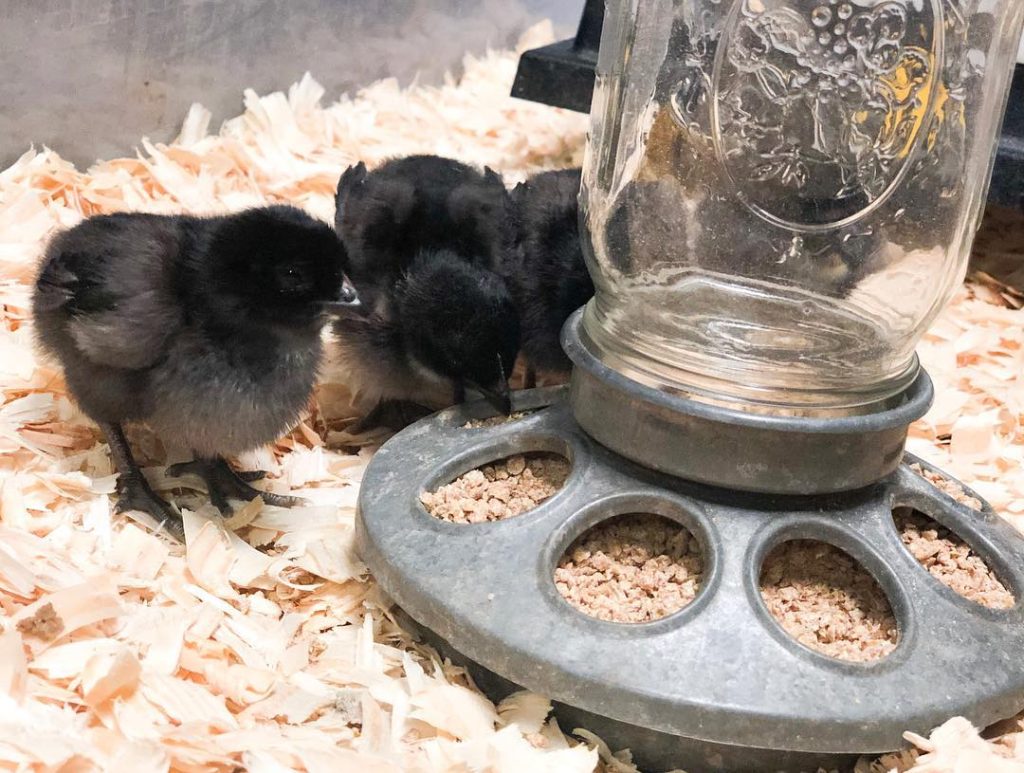
A proper chick feeder with the right opening size keeps feed accessible to small chicks while preventing them from scratching it all out and contaminating it with bedding. This chick brooder feeder small has holes sized for day-old chick beaks and a base that prevents tipping — both features that matter significantly more than they sound in practice. Fill with chick starter crumble rather than pellets which are too large for the first several weeks of life.
Materials Needed:
- Small chick feeder
- Chick starter crumble feed
- Small brick or tile to elevate feeder slightly (optional)
How to Make It:
- Place the feeder in the cooler zone of the brooder away from directly under the heat lamp.
- Fill with chick starter crumble to about two thirds full.
- Elevate slightly on a small brick or tile once chicks are a week old to reduce bedding contamination.
- Refill daily and clean the feeder completely every two to three days.
- Increase feeder size as chicks grow to ensure all birds can access feed simultaneously.
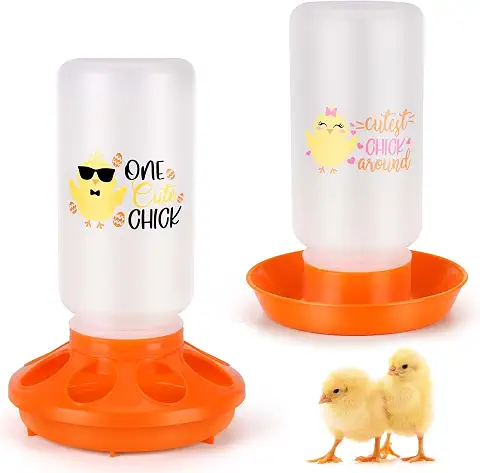
Small Chick Brooder Feeder
Properly sized chick feeder that keeps starter crumble accessible and clean without tipping or spilling.
Check Price on Amazon4. Install a Mini Waterer
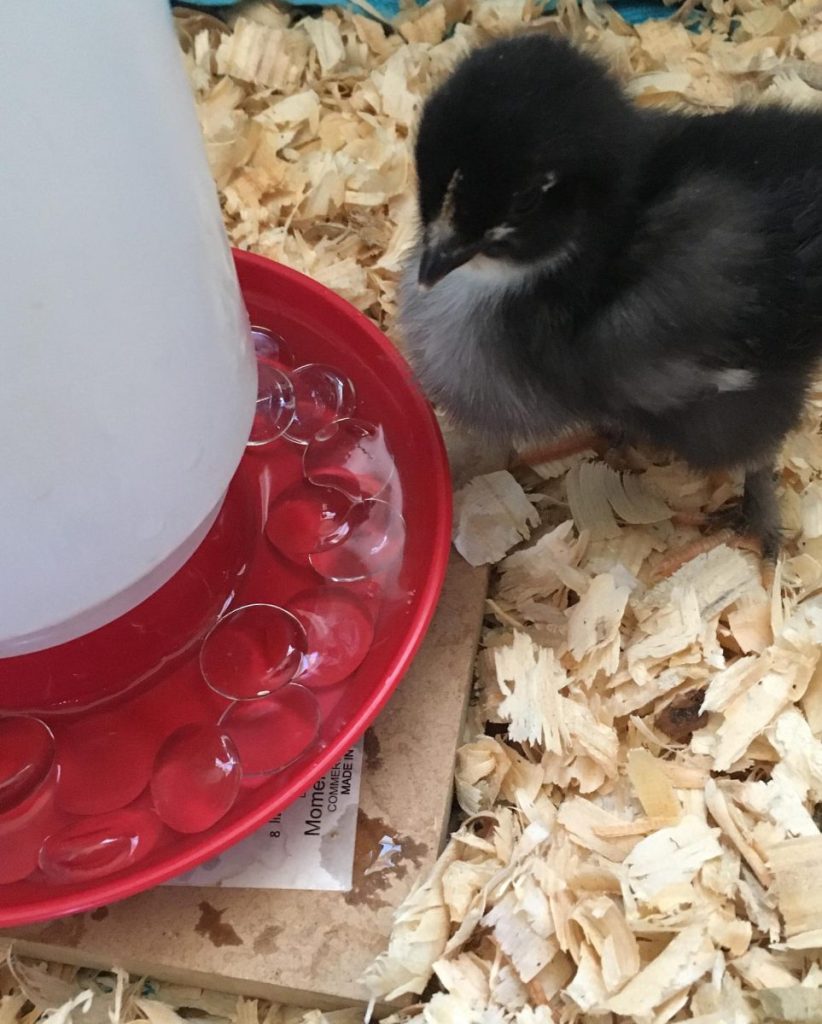
Water access from day one is critical for baby chicks but standard sized waterers present a drowning risk for very young chicks that can fall in and become chilled. This chick brooder waterer mini has a shallow base that gives chicks access to water without any depth that could trap them. Add a few clean marbles to the water base for the first few days so very young chicks cannot submerge themselves accidentally while learning to drink.
Materials Needed:
- Mini chick waterer
- Clean marbles for first week safety
- Small brick for elevation as chicks grow
How to Make It:
- Fill the waterer with fresh clean room temperature water — never cold water for day-old chicks.
- Place a few clean marbles in the water base to prevent accidental submersion in the first week.
- Position in the cool zone of the brooder away from the heat lamp.
- Change water at minimum twice daily since chicks contaminate it quickly with bedding and droppings.
- Remove marbles after week one and elevate the waterer slightly to reduce contamination.

Mini Chick Brooder Waterer
Shallow base waterer sized for baby chicks that provides water access without drowning risk.
Check Price on Amazon5. Use Pine Shaving Bedding
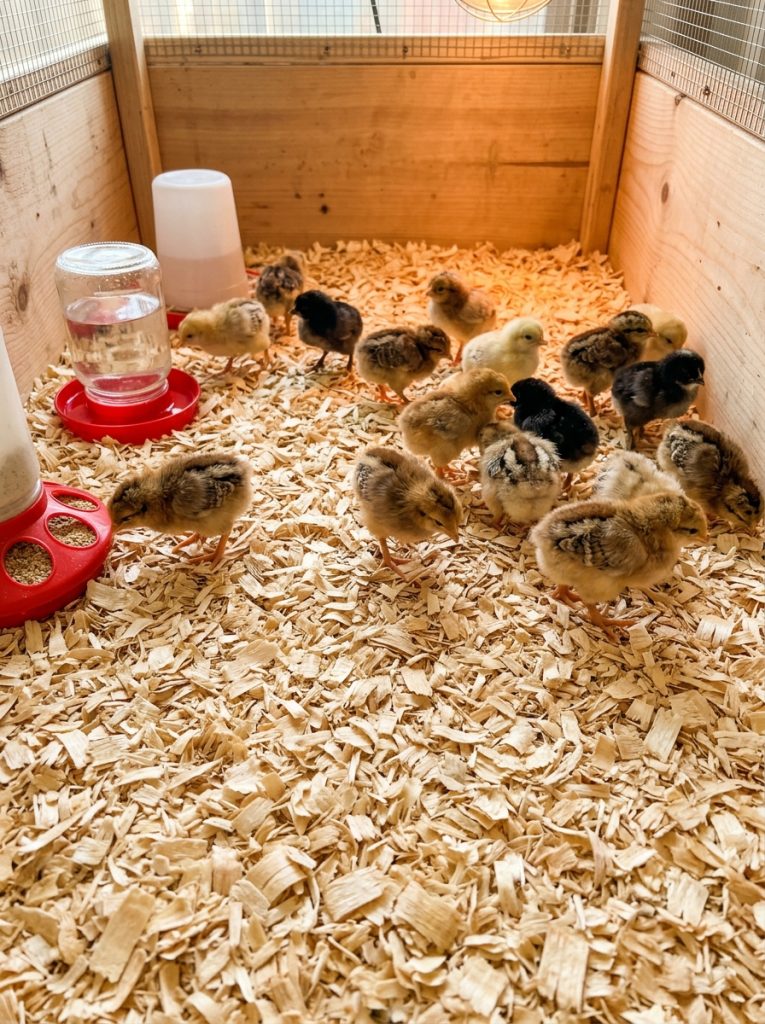
Pine shavings are the standard chick brooder bedding for good reasons — they are absorbent, relatively dust-free, smell pleasant, and provide enough texture for young chicks to grip without slipping. This chick brooder bedding pine shavings bag provides enough bedding for multiple brooder cleanings. Start with a two to three inch layer and add fresh shavings on top every day or two rather than doing a complete clean-out each time, which reduces the stress of full brooder disruption for young chicks.
Materials Needed:
- Pine wood shavings bag
- Newspaper for base layer (optional)
- Dustpan and small rake for spot cleaning
How to Make It:
- Line the brooder base with a layer of newspaper first to make complete cleanouts easier.
- Spread pine shavings to a depth of two to three inches over the newspaper base.
- Do not use cedar shavings which contain aromatic oils harmful to young chicks.
- Add a fresh layer of clean shavings on top every one to two days rather than full replacement.
- Do a complete bedding change every five to seven days or sooner if the brooder smells strongly of ammonia.

Pine Shavings Chick Brooder Bedding
Absorbent pine shavings bedding that keeps a chick brooder dry and comfortable through multiple cleanings.
Check Price on Amazon6. Add a Wire Mesh Screen Top
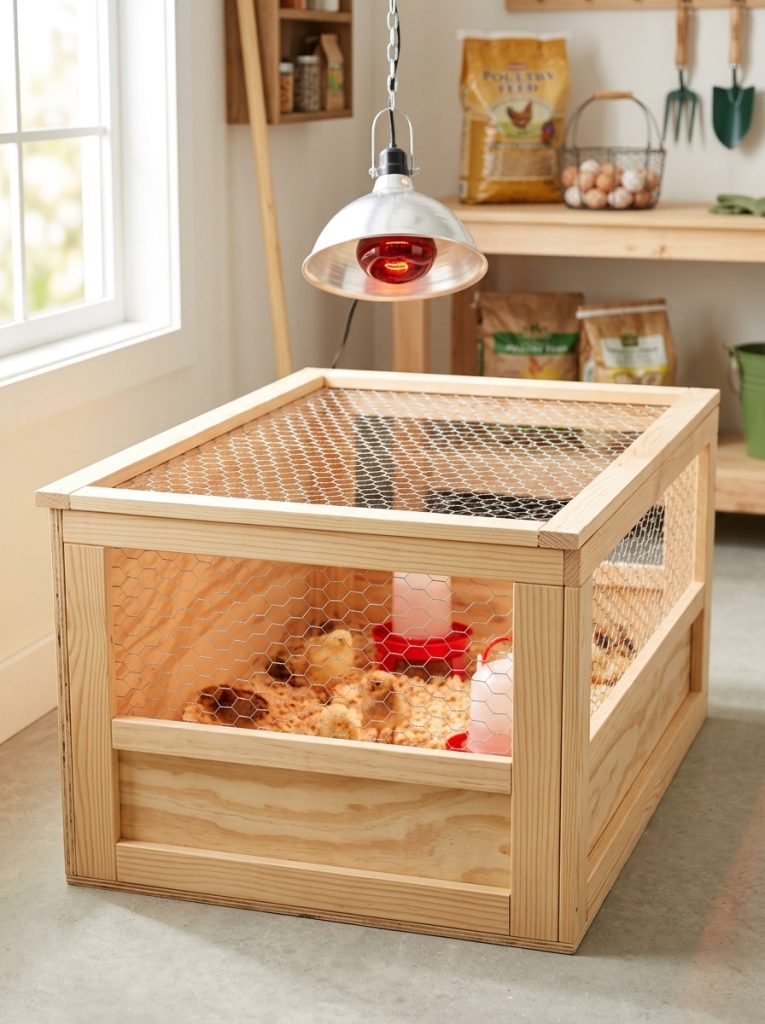
A wire mesh screen top serves two critical functions simultaneously — it prevents chicks from jumping out of the brooder once they are old enough to attempt it, which happens earlier than most people expect, and it allows the heat lamp to hang above the brooder without being inside it where the bulb poses a fire risk near bedding. This chick brooder wire mesh screen top fits over standard storage totes and brooder boxes and holds the heat lamp at a safe distance above the bedding.
Materials Needed:
- Wire mesh screen top or hardware cloth cut to size
- Frame or clips to hold the screen in place
- Zip ties or binder clips for securing
- Wire cutters for sizing if building custom
How to Make It:
- Measure the top opening of the brooder box or tote.
- Cut hardware cloth to a size that overlaps the brooder edges by two inches on all sides.
- Fold the edges down slightly so the screen sits securely without shifting.
- Secure with binder clips or zip ties on each side to prevent curious chicks from pushing it up.
- Hang the heat lamp above the screen so it shines through the mesh onto the bedding below.

Chick Brooder Wire Mesh Screen Top
Wire mesh screen that prevents chick escapes and keeps the heat lamp safely above the brooder at the right distance.
Check Price on Amazon7. Use a Plastic Storage Tote as a Brooder
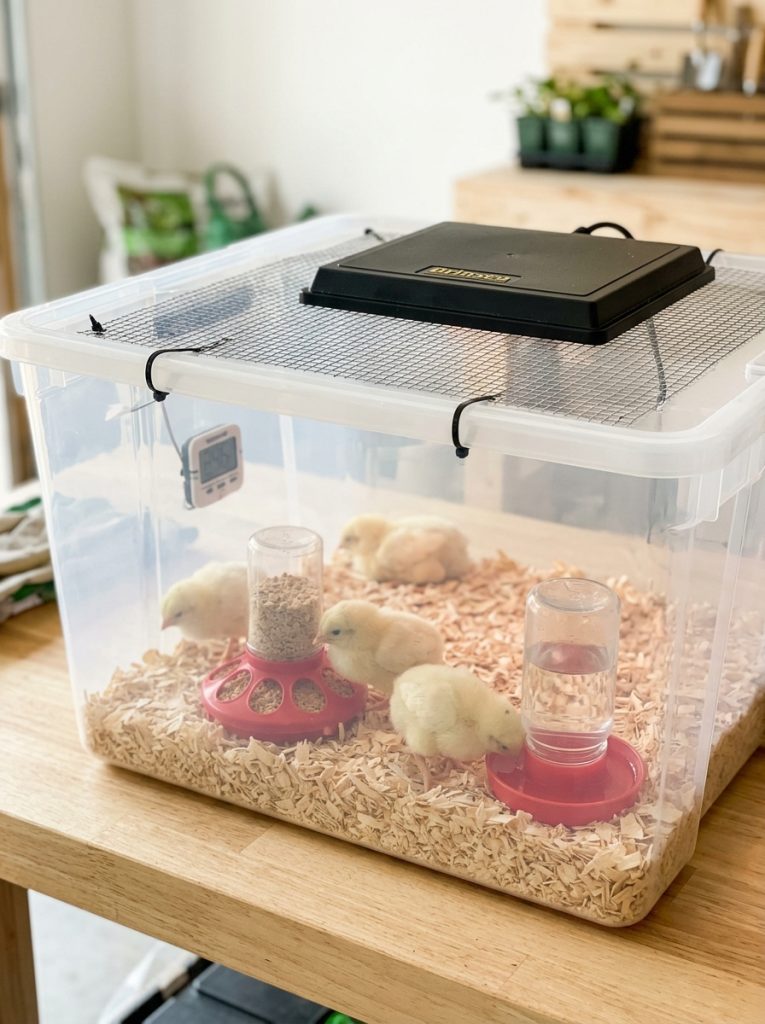
A large plastic storage tote is the most popular DIY chick brooder starting point because it is cheap, easy to clean, clear enough to see the chicks without opening the top, and deep enough to contain active chicks through the first two weeks. Choose the largest tote available — a 66-quart or larger size — since chicks grow remarkably fast and a small brooder becomes crowded and dirty within a week of adding chicks.
Materials Needed:
- Large plastic storage tote 66-quart or bigger
- Jigsaw or box cutter for cutting ventilation opening
- Hardware cloth for ventilation panel
- Pine shavings for bedding
How to Make It:
- Cut a large rectangular opening in the tote lid using a jigsaw or box cutter.
- Attach hardware cloth over the opening using zip ties for ventilation.
- Add two to three inches of pine shavings to the tote base.
- Position feeder and waterer in the cooler end away from the heat lamp.
- Hang the heat lamp above the wire mesh lid at the correct height for 95 degrees at chick level.
8. Build a Cardboard Box Brooder
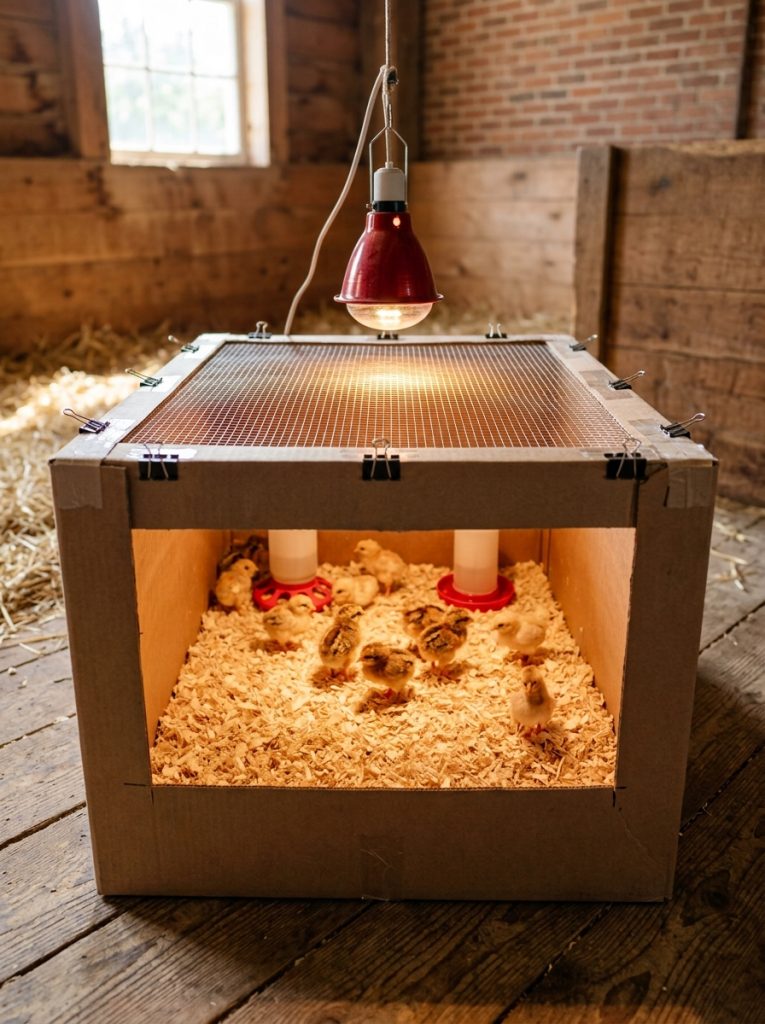
A large cardboard box brooder is the most genuinely free starting point for first-time chick keepers — a refrigerator or appliance box provides enough space for a small flock of chicks through the first week or two at zero material cost. The cardboard insulates well and absorbs moisture but will eventually become damp and need replacement, so have a second box ready for when the first becomes saturated. This works perfectly as a temporary first brooder while building something more permanent.
9. Use a Kiddie Pool as a Large Brooder
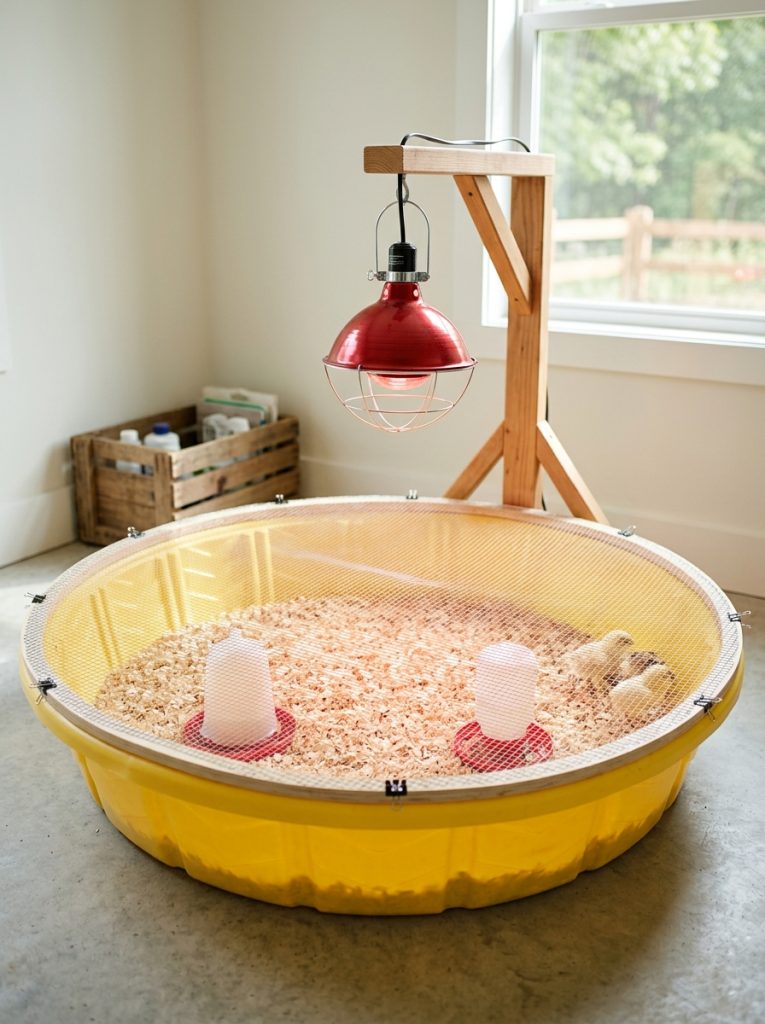
A kiddie pool brooder works exceptionally well for larger flocks of 20 or more chicks because the circular shape provides maximum floor space without any corners where timid chicks get trapped by more dominant ones. The plastic surface cleans easily and the low sides make daily chick care simple. Add a central heat lamp on a stand above the center and the whole pool becomes a workable brooder for a surprisingly large number of chicks at low cost.
10. Repurpose a Dog Crate as a Brooder
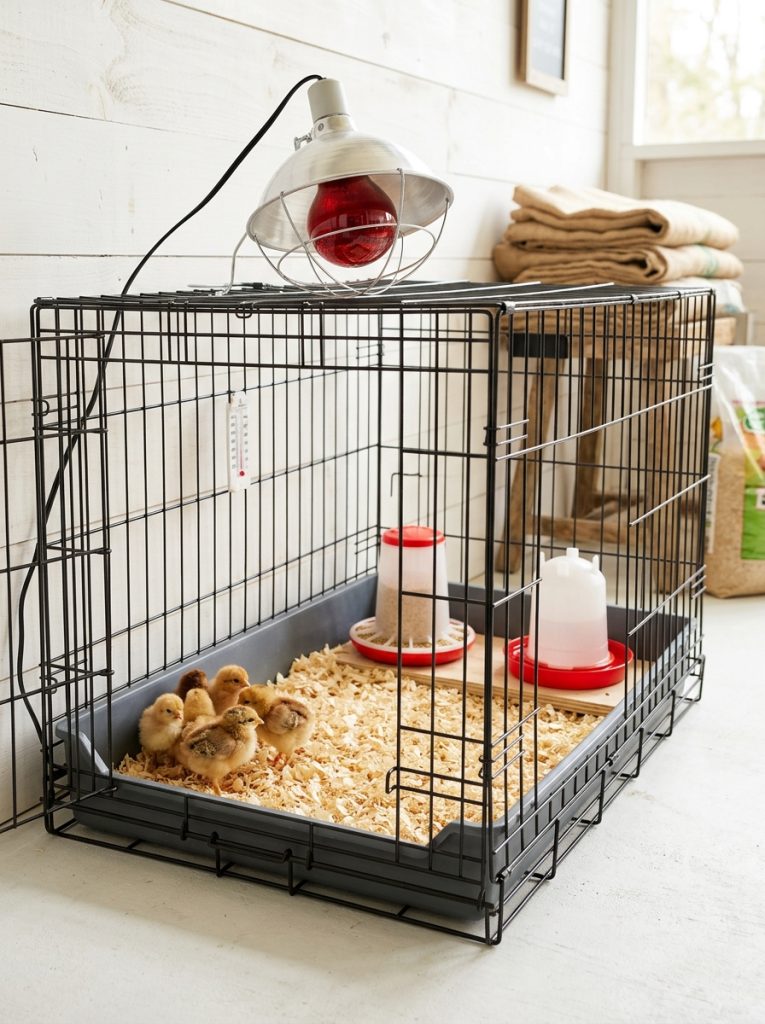
A wire dog crate repurposed as a brooder has excellent airflow, is easy to clean with a pull-out base tray, and the wire sides allow clear observation of the chicks from all angles without opening the crate. Line the base tray with cardboard and pine shavings, clamp the heat lamp to the top wire frame, and the dog crate becomes a functional brooder in under ten minutes. Most households with dogs already have a spare crate that suits this purpose perfectly.
11. Build a Wooden Pallet Brooder Box
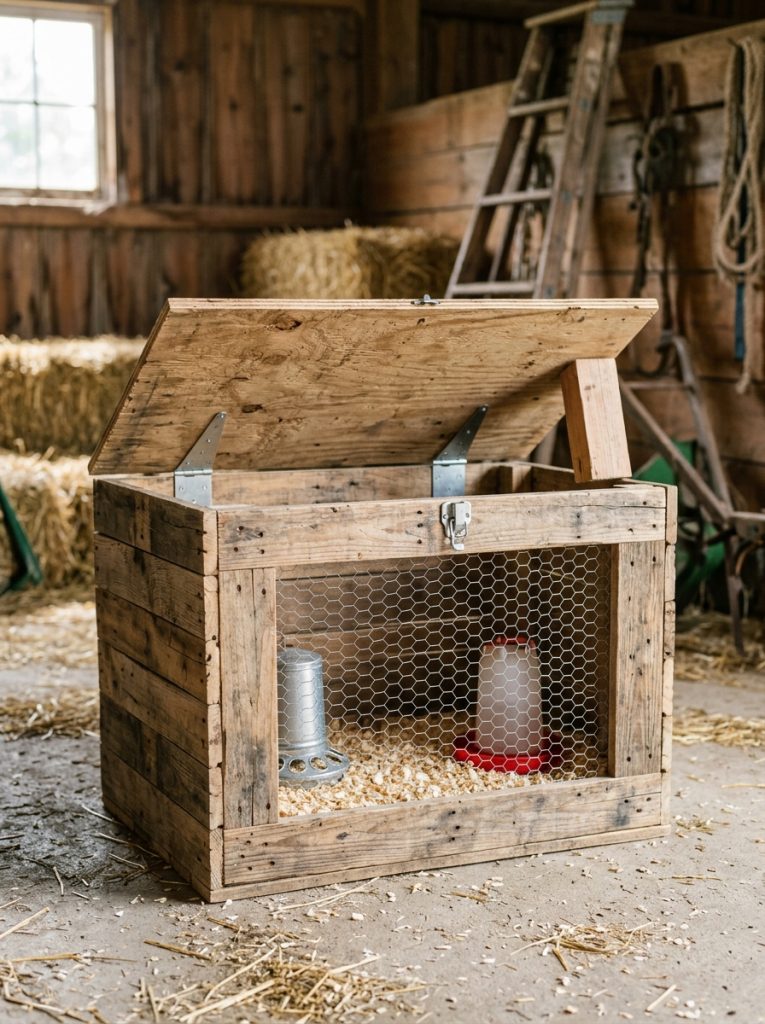
A wooden pallet brooder box is the most permanent and durable DIY brooder option — it lasts for multiple seasons, insulates better than plastic, and can be sized exactly right for the number of chicks being brooded. Disassemble pallets for the lumber, build a simple rectangular box with a hinged lid that opens for easy access, add a wire mesh ventilation panel, and line with plastic sheeting before adding bedding to make cleaning significantly easier.
12. Add a Small Roost Bar for Older Chicks
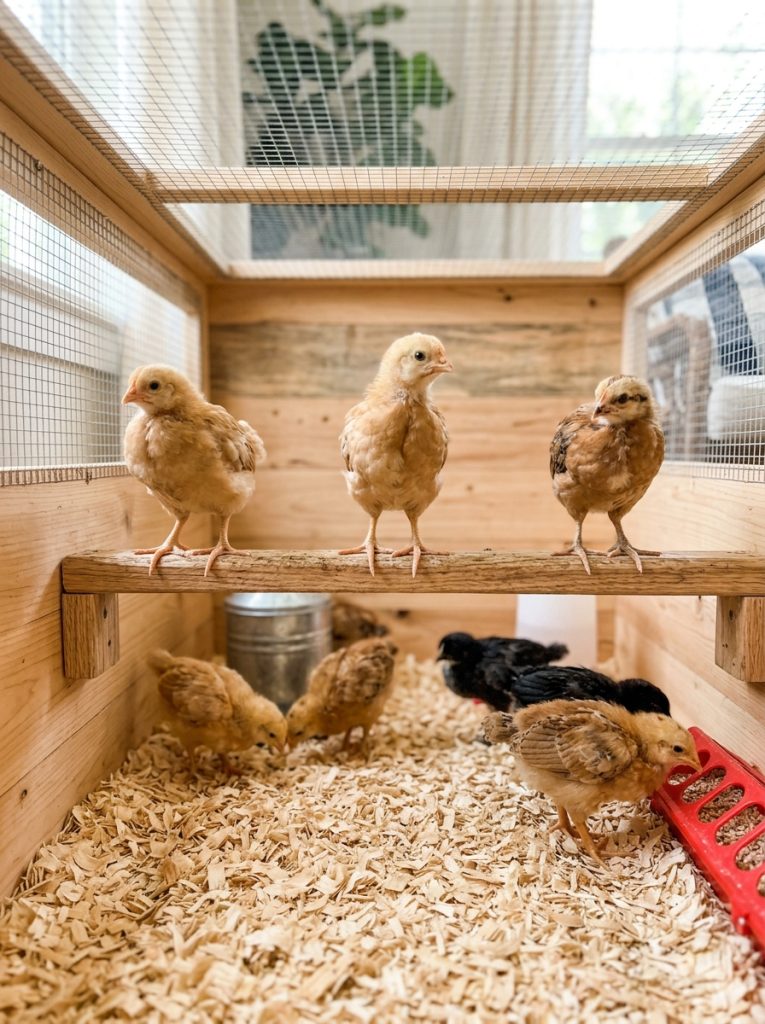
Once chicks reach two to three weeks old they start practicing the roosting behavior they will use for the rest of their lives, and a small low roost bar inside the brooder gives them an appropriate place to do this rather than roosting on the feeder or waterer. A simple wooden dowel or short section of branch secured two to three inches above the bedding at both ends is all that is needed — the chicks find it quickly and begin using it within hours of installation. For more chicken housing ideas check out these DIY chicken run cheap ideas.
Final Thoughts on DIY Chick Brooder Ideas
The best DIY chick brooder is the one that maintains the right temperature, stays clean with manageable effort, and is large enough for the specific number of chicks being raised — the material it is made from comes a distant fourth in importance. Start with whatever suitable container is available, get the heat lamp, thermometer, feeder, and waterer right, and the chicks will thrive in a plastic tote just as well as in a purpose-built wooden box.


Amir Ali is the founder and site administrator of HomeDecorEdge, a modern home decor and interior design platform. Since starting the site, he has combined his passion for interior design, practical styling, and color coordination with hands-on content strategy and site management. He guides authors, curates high-quality articles, and ensures readers have access to actionable, visually inspiring, and user-focused home decor advice for apartments, small rooms, and family homes.