

Clay crafts cover more ground than any other material in the craft box. The same lump of clay becomes earrings, ornaments, coasters, pots and tiny food for a dollhouse, and the only thing that changes is which clay you pick up. Air dry clay hardens on the counter, polymer clay bakes hard in a home oven, and salt dough costs pennies and keeps children busy for an afternoon.
These twelve clay crafts ideas start with three builds worth learning properly: polymer clay dangle earrings, salt dough Christmas ornaments, and hand painted clay coasters. After that, nine more ideas cover pinch pots, bead necklaces, miniatures, magnets, wreaths and mirrors. If you love the no bake route, our air dry clay crafts stay with that one material all the way through.
Keep a small bowl of water nearby when you work: a wet fingertip smooths cracks, joins and fingerprints on almost every clay. Roll pieces at least a quarter inch thick, dry or bake them slowly, and seal painted work so it lasts.
Pick the clay that matches your afternoon. By tonight, something handmade will be drying on the counter.
Quick Picks
- Start here: Polymer Clay Dangle Earrings (idea 1)
- Most beautiful: A Bright Clay Flower Wreath (idea 9)
- Best gift: A Marbled Clay Bead Necklace (idea 5)
1. Polymer Clay Dangle Earrings
BuildAbout 1 hour plus bakingWearable and giftable
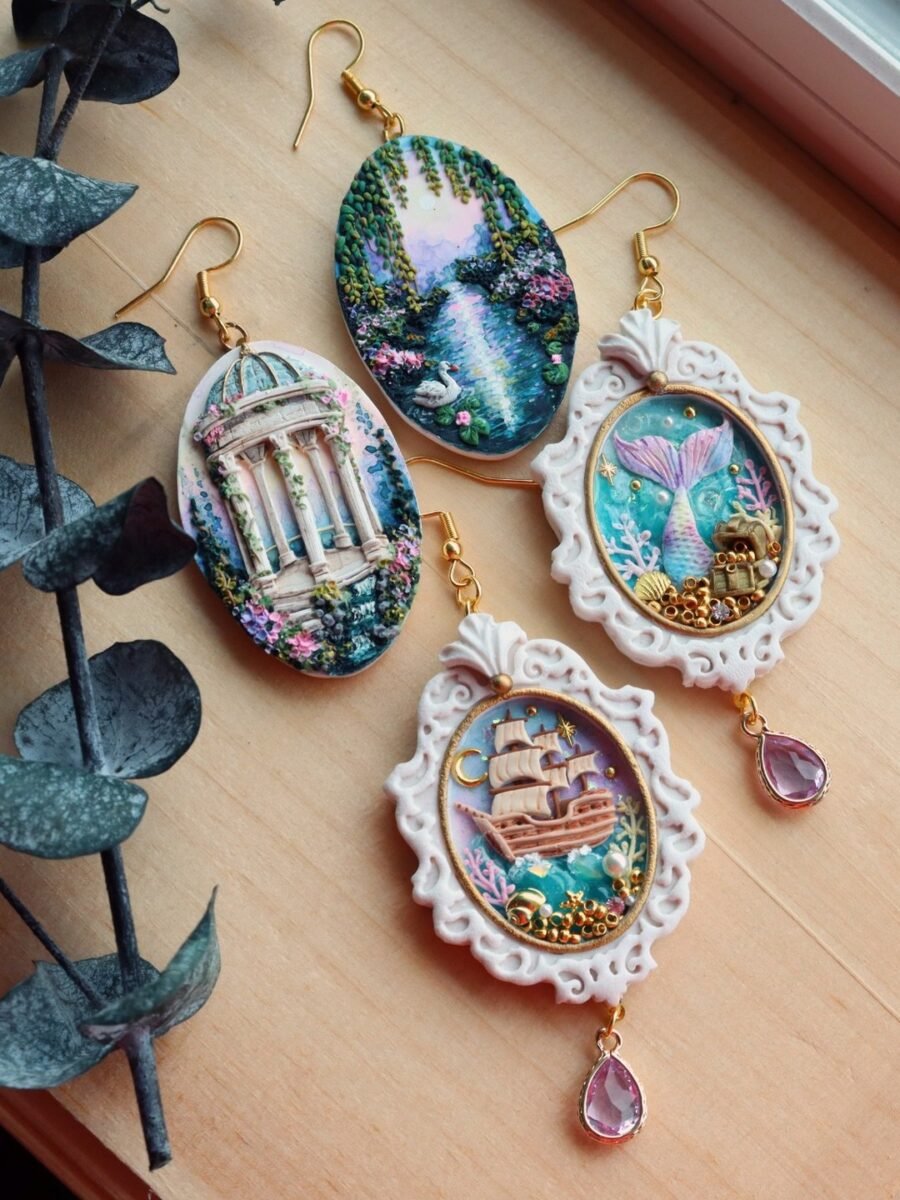
Polymer clay earrings are the fastest way to wear what you make. You condition the clay, cut your shapes, bake them hard in a home oven, and add hooks. No kiln, no glaze, no waiting days for drying. If you like small polymer projects, our polymer clay cat project uses the same bake and wear idea on a smaller scale.
Materials Needed
- Polymer clay in two or three colors
- A craft knife and a smooth tile or ceramic plate to work on
- Small shape cutters, round and oval
- A needle tool or toothpick for holes
- Earring hooks, jump rings and pliers
- Sandpaper, fine grit
- Optional: gold leaf, acrylic paint and gloss sealer
How to Make It
- Warm each color of clay in your hands until it is soft and smooth, then roll it flat to about an eighth of an inch thick.
- Cut your shapes with cutters, layering a smaller shape on a larger one and pressing the edges together gently.
- Poke a hole at the top of each piece with a toothpick, wiggling it slightly so the hole stays open in the oven.
- Lay the pieces on a foil lined tray and bake exactly as the packet says, usually around 275F for 15 to 30 minutes depending on thickness.
- Let the pieces cool fully in the oven before you touch them; hot polymer clay is soft and marks easily.
- Sand the edges smooth, add gold leaf or paint if you like, and seal with a thin gloss coat.
- Open a jump ring with pliers, thread it through the hole and the earring hook, and close it tight.
Tip: Bake a test piece first. Underbaked clay snaps; overbaked clay darkens. The packet temperature matters more than the time.
2. Salt Dough Christmas Ornaments
BuildAbout 30 minutes plus bakingThe best kids project
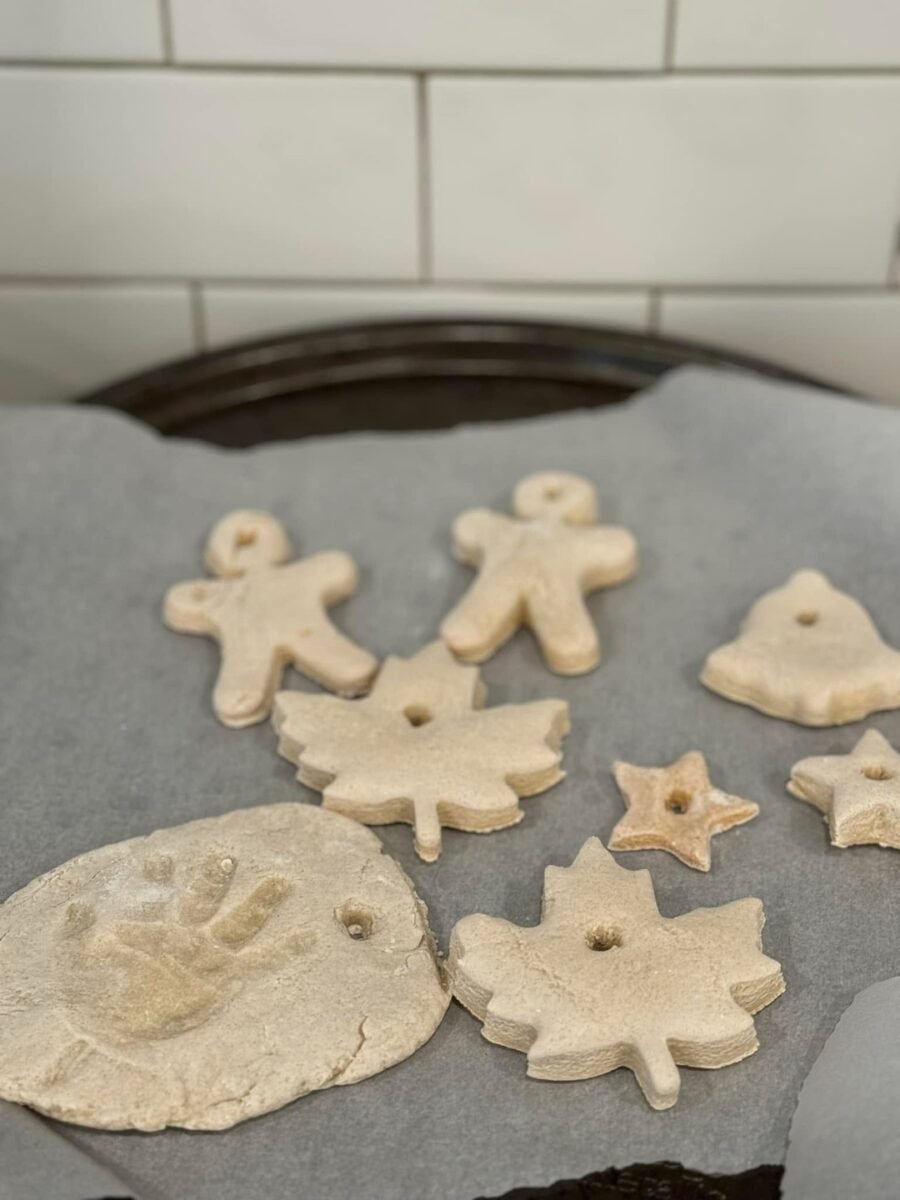
Salt dough is flour, salt and water, and it bakes into ornaments that last for years. Children can press a handprint into it, cut stars and gingerbread men, and paint them after baking. For more shapes in this style, our salt dough christmas ornaments gather the classic designs in one place.
Materials Needed
- 2 cups plain flour
- 1 cup fine salt
- 1 cup water
- Cookie cutters and a rolling pin
- A straw for hanging holes
- Acrylic paint and brushes
- Clear sealer
- Ribbon or twine
How to Make It
- Mix the flour and salt in a bowl, then add the water a little at a time and stir until a firm dough forms.
- Knead the dough on a floured surface for about five minutes until it is smooth and no longer sticky.
- Roll it out to about a quarter inch thick and cut shapes with cookie cutters, or press a small hand into a flattened round for a keepsake.
- Poke a hanging hole near the top of each shape with a straw, twisting gently so the hole stays round.
- Bake on a parchment lined tray at a low oven, around 200F, for two to three hours until the ornaments feel hard and sound hollow when tapped.
- Cool them fully, then paint both sides and let the paint dry before sealing.
- Thread ribbon or twine through the hole and hang, or wrap them as gifts.
Tip: Bake low and slow. A hot oven puffs salt dough and cracks the surface; patience gives you flat ornaments that paint beautifully.
3. Hand-Painted Clay Coasters
BuildAbout 20 minutes plus dryingUseful every single day
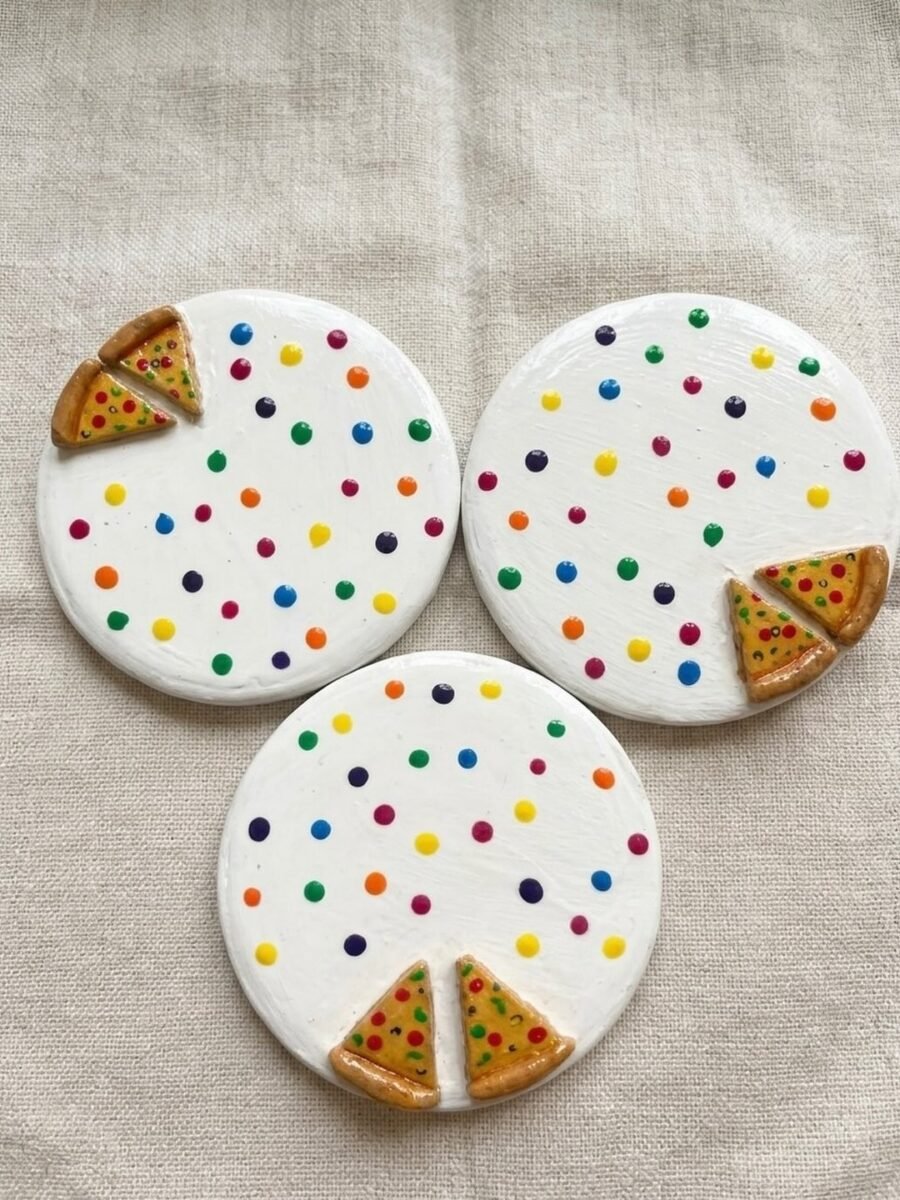
A coaster is a flat disc of clay, and that is exactly why it is a great first project: nothing to shape, nothing to balance, just a smooth surface to paint. Roll, cut, dry, then paint dots, slices or stripes, and every coffee in the house gets a handmade landing pad.
Materials Needed
- Air dry clay or oven bake clay
- A rolling pin
- A round cutter or a glass
- A straw for a hanging hole, optional
- Acrylic paint and a fine brush
- Clear sealer, gloss or matte
- Felt pads for the base, optional
How to Make It
- Roll the clay to about a quarter inch thick on a smooth surface.
- Cut circles with a round cutter or an upturned glass, pressing straight down for clean edges.
- Smooth the rims with a wet fingertip and lay the circles flat on parchment to dry, or bake if you used oven bake clay.
- Once fully dry and hard, paint your design: dots, stripes, a pizza slice, a flower, or a simple two tone split.
- Let the paint dry completely, then seal with two thin coats of clear sealer so condensation does not mark the paint.
- Stick a felt pad on the base if the coasters will sit on polished wood.
Tip: Make coasters in sets of four. One coaster is a craft; a matching set is a gift, and it uses the same paint session.
4. Leaf-Shaped Clay Pinch Pots
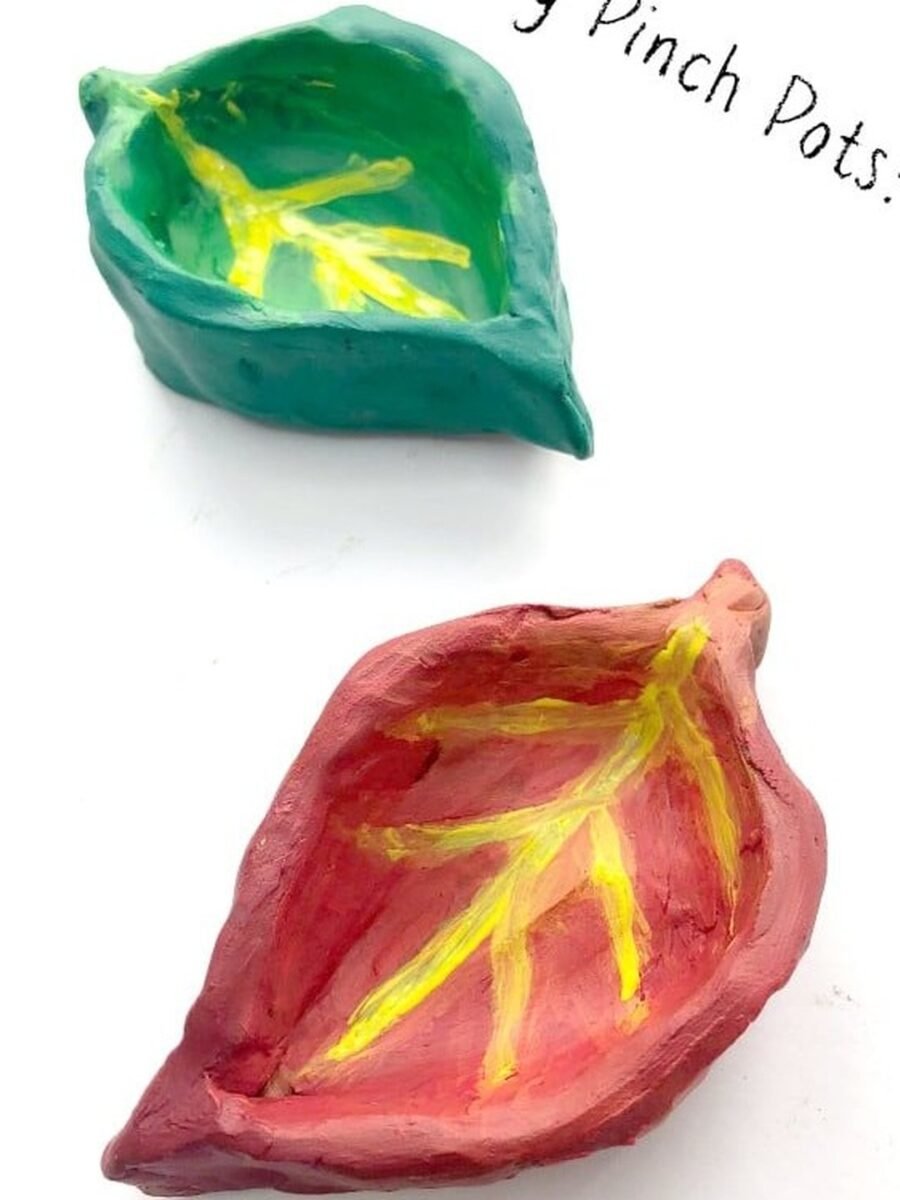
Push your thumb into a ball of clay, pinch the walls round and round, then pull the rim into a leaf point and paint the veins. Two of them, one green and one red, look like autumn fell on the shelf. They hold rings, air plants and paperclips, and they are the pot every clay beginner should make first.
You’ll need: clay, your thumbs, green and red paint, and a fine brush.
Best for: Ring dishes, air plants and autumn shelves
5. A Marbled Clay Bead Necklace
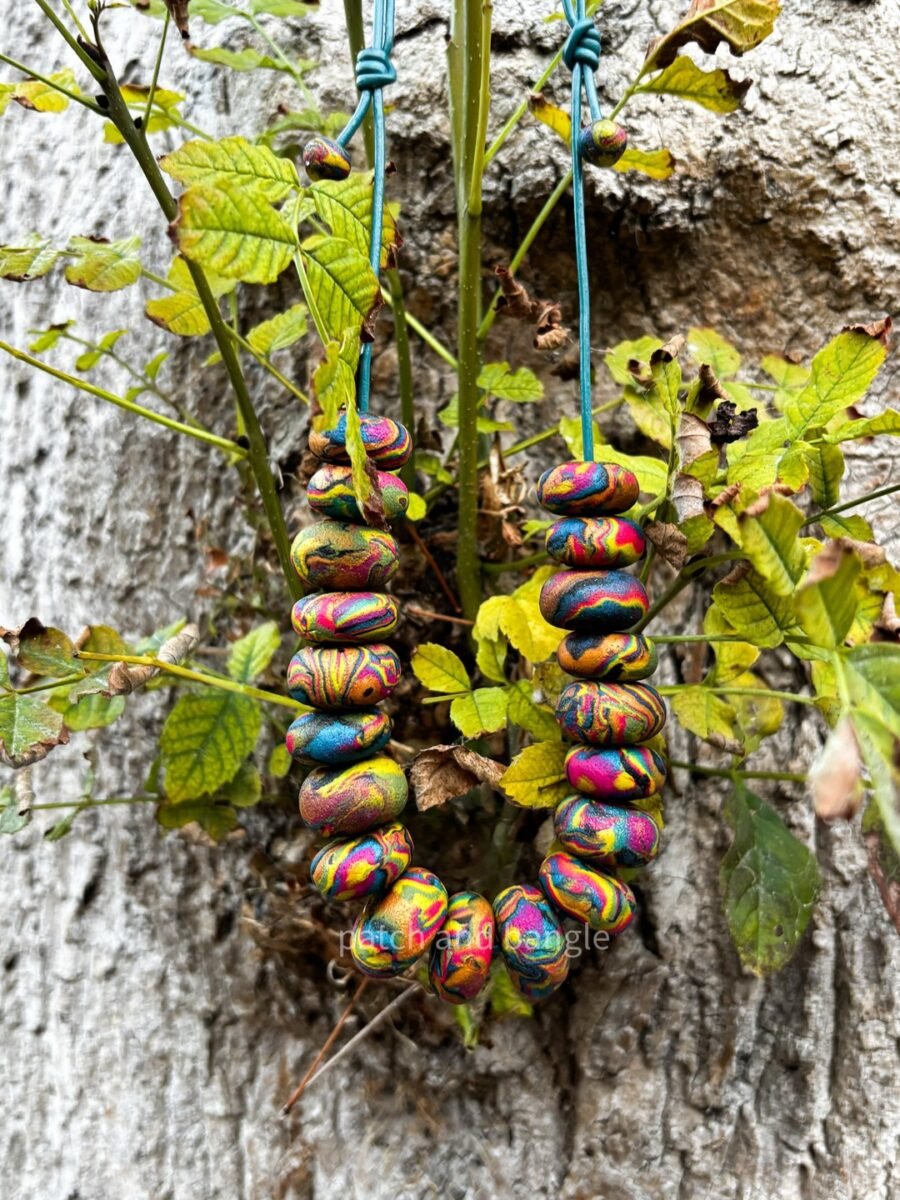
Roll two colors together without fully mixing them and the clay marbles itself: every bead comes out swirled and different. Bake the beads, string them on cord, and you have a necklace that looks bought from a market stall. Big flat beads show the marbling best, and no two necklaces ever match.
You’ll need: polymer clay in several colors, a bead roller or your hands, cord, and a clasp.
Best for: Statement jewelry and colorful outfits
6. Tiny Clay Breakfast Miniatures
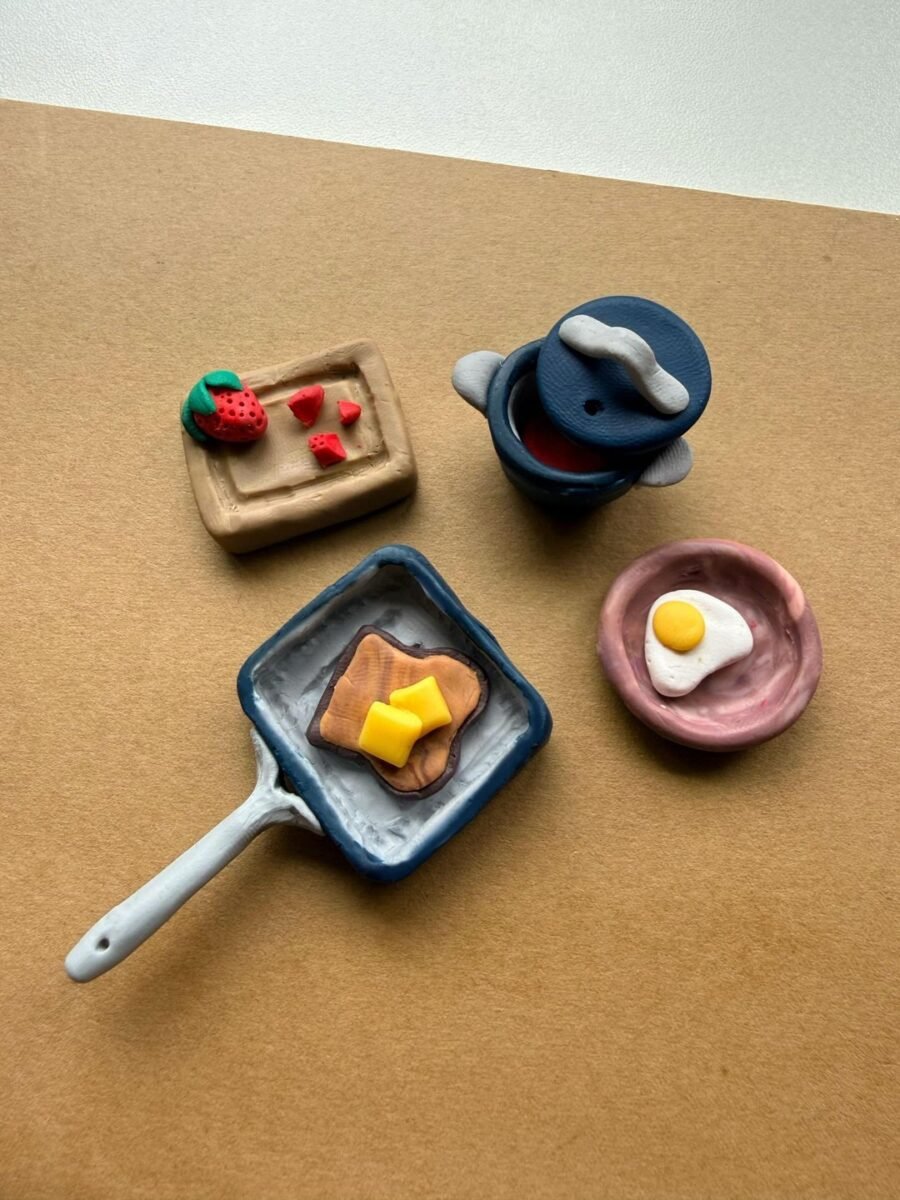
A strawberry on a cutting board, a pot with its lid ajar, toast with butter in a tiny pan, a fried egg in a bowl: a whole breakfast at the size of a coin. Miniatures are the most addictive clay craft there is, because each one takes minutes and looks impossible to anyone who has not tried it. Start with the egg; it is one white disc and one yellow ball.
You’ll need: polymer clay in food colors, a craft knife, and a steady hand.
Best for: Dollhouses, play kitchens and tiny collectors
7. Clay Photo Frame Magnets
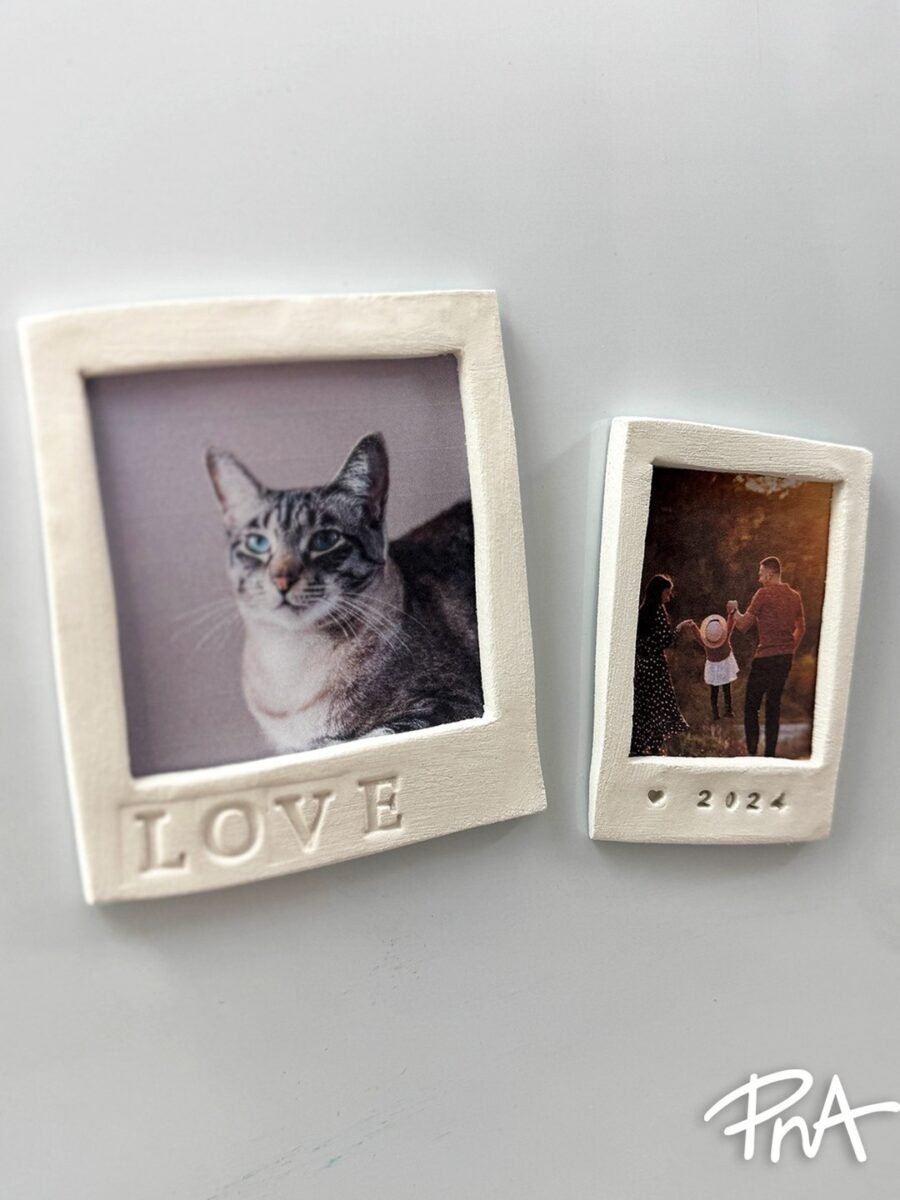
Roll a flat rectangle, cut a window in the middle, dry it, and glue a magnet on the back: the fridge gets a frame that holds a real photo. One large frame with LOVE written below it and one small one beside it turn a gray fridge door into a gallery. Make them in pairs, because photos always come in pairs too.
You’ll need: clay, a small rectangular cutter, a magnet strip, and glue.
Best for: Fridges, lockers and photo lovers
8. Little Clay House Tea-Light Holders
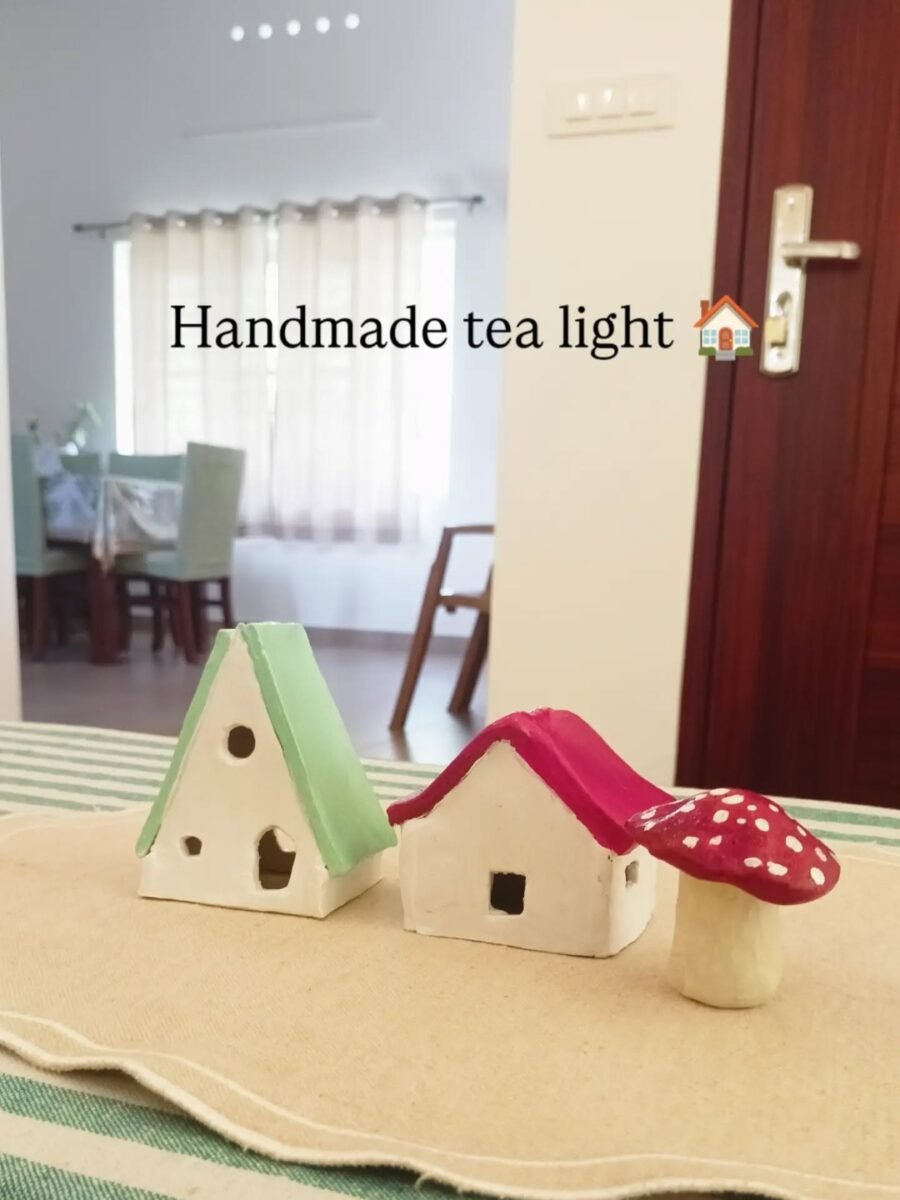
Shape a little house, cut a door and windows while the clay is soft, and set it over a tea light: the windows glow like a cottage at dusk. A red mushroom beside the houses finishes the village. Use battery tea lights so the clay never heats, and group two or three where the evening needs softening.
You’ll need: clay, a knife, a tea light to size the opening, and paint.
Best for: Evenings, mantels and cozy corners
9. A Bright Clay Flower Wreath
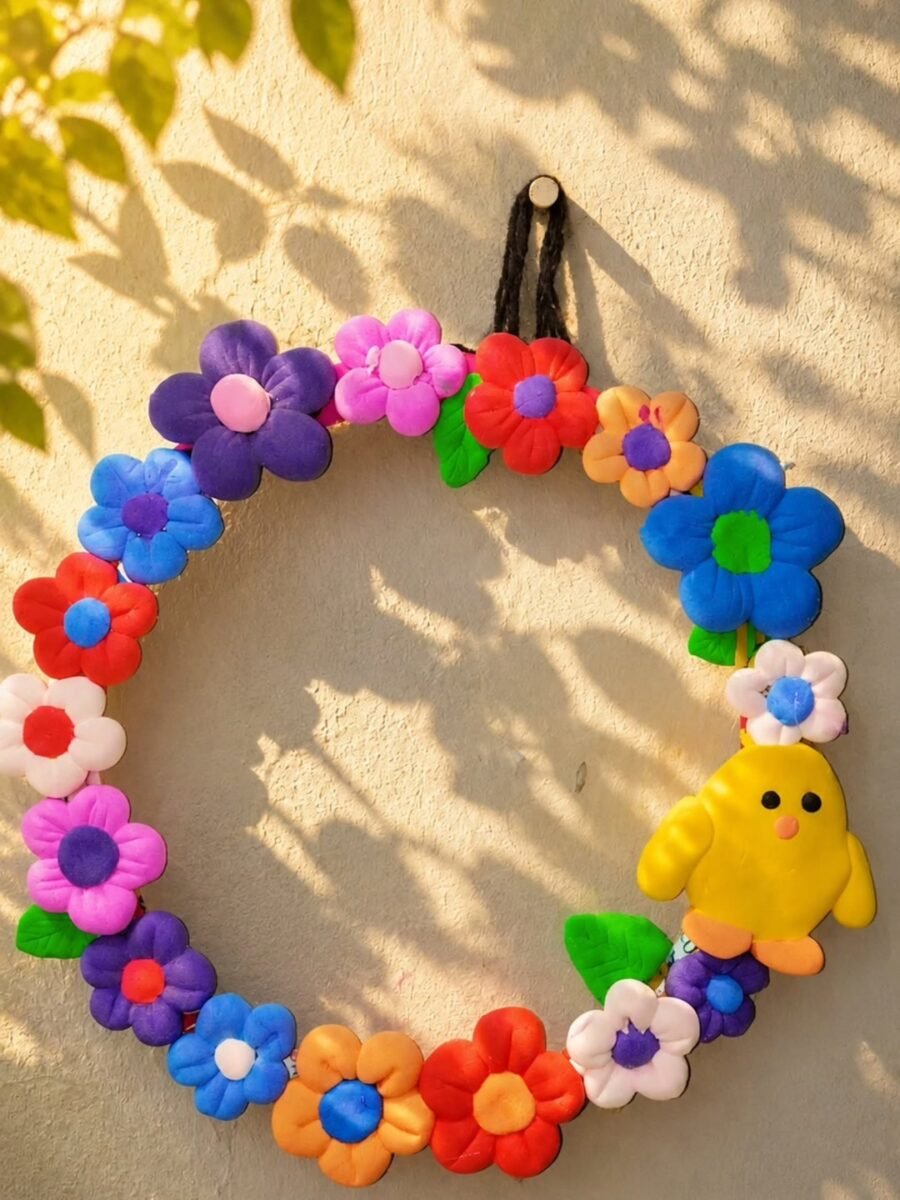
Roll a flower, then another, then twenty more, and glue them around a ring until it looks like a garden that never wilts. Pink, purple, red, blue and orange petals with a small yellow chick tucked in make the cheeriest door in the street. The flowers bake hard, so the wreath survives the front door all season.
You’ll need: polymer clay in bright colors, a wire or foam ring, and glue.
Best for: Front doors, kids rooms and spring walls
10. A Clay Owl Key Holder
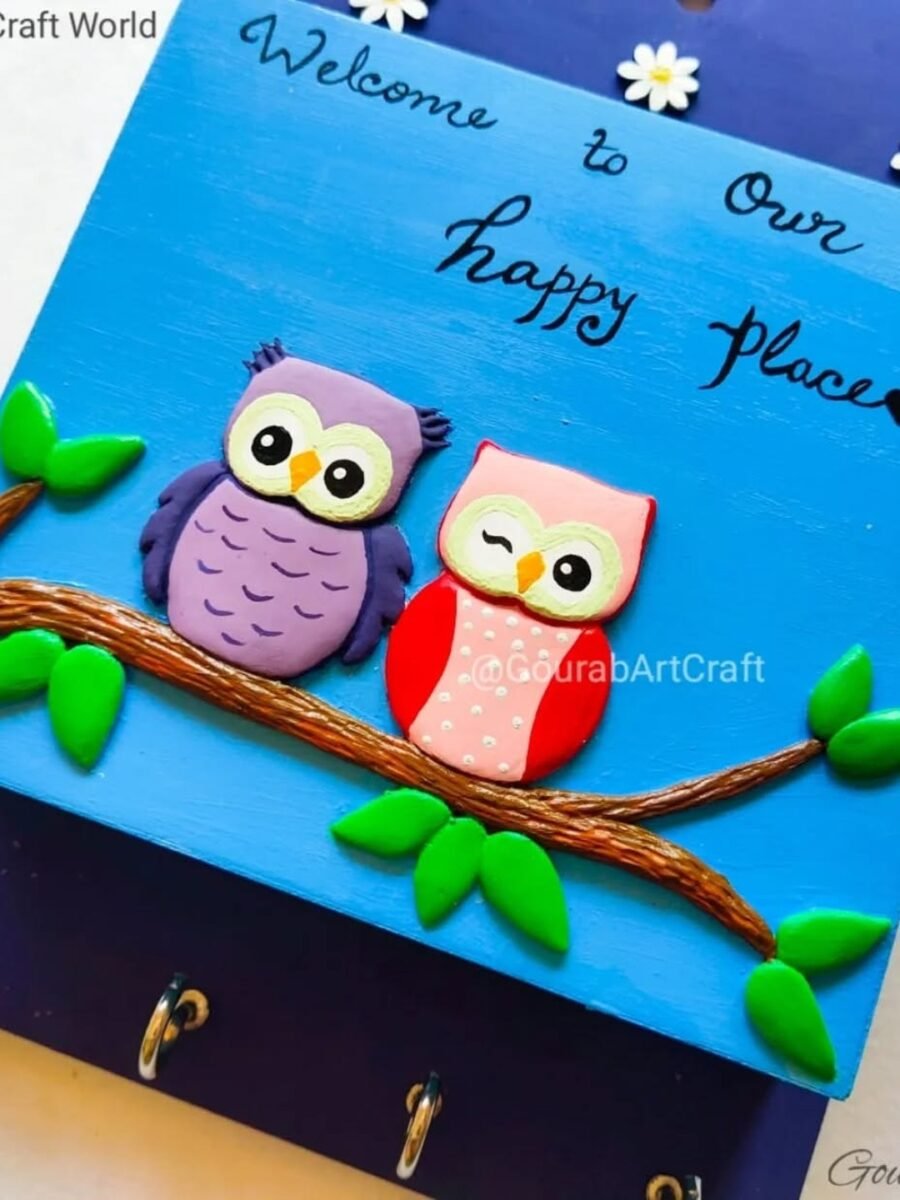
Two owls on a branch, a welcome message above them, and hooks below: the key holder that makes you smile every time you come home. Sculpt the owls from simple balls and ovals, paint them purple and pink, and mount them on a painted board. Keys finally have a home, and the hallway finally has a mascot.
You’ll need: clay, a board or plaque base, hooks, and bright paint.
Best for: Entryways and anyone who loses keys
11. A Clay House Fridge Magnet
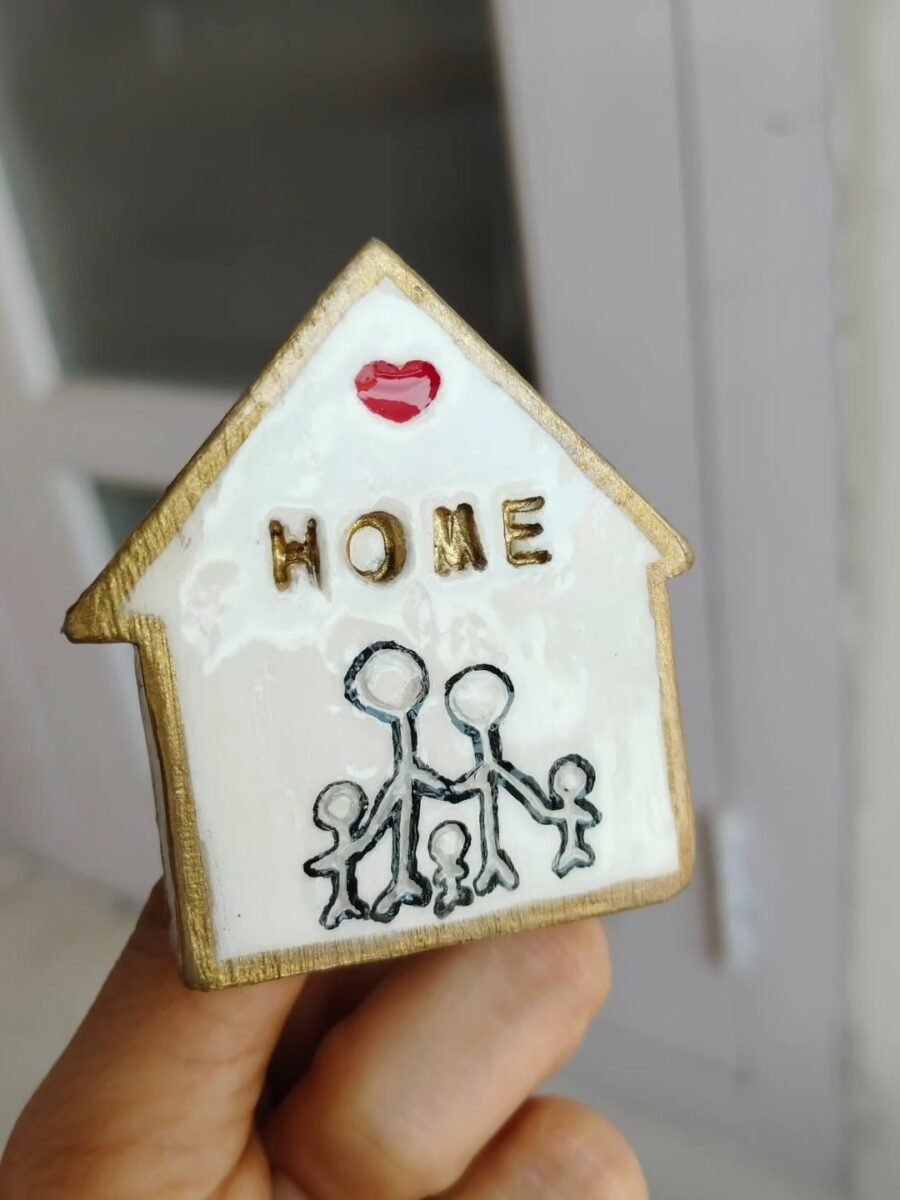
One small house, a red heart at the top, HOME across the middle, and a little family drawn below: a whole story on a magnet the size of a matchbox. Cut the house shape from rolled clay, dry it, paint the details with a fine pen, and glue a strong magnet on the back. It is the housewarming gift that fits in an envelope.
You’ll need: clay, a house template, a magnet, glue, and a fine paint pen.
Best for: Fridge galleries and housewarming gifts
12. A Handmade Clay Mirror
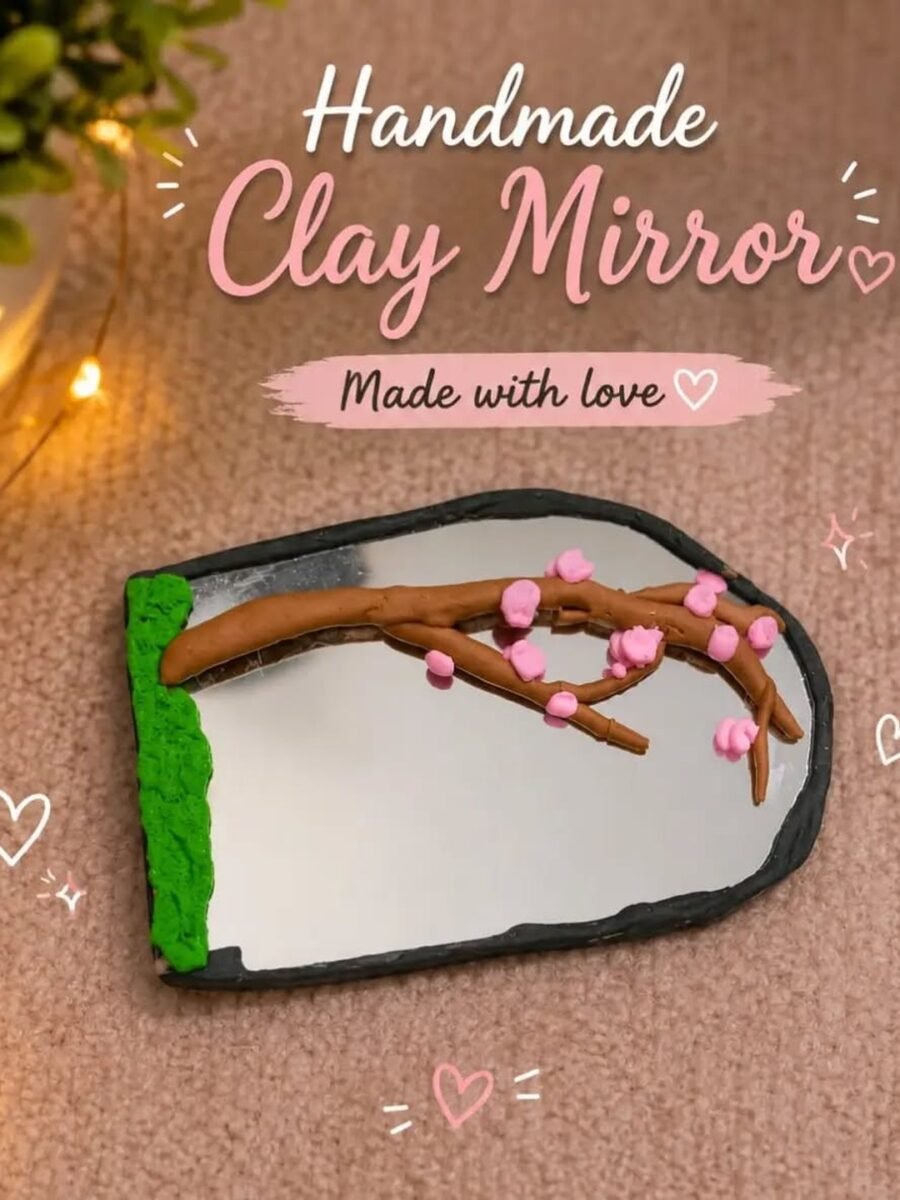
Frame a small mirror with clay and the mirror becomes the craft. A cherry blossom branch across the top, soft pink and green paint, and a wavy hand built frame turn a plain pocket mirror into something that looks made in a studio. Glue the mirror in after the clay is fully dry and sealed, never before.
You’ll need: clay, a small mirror, a strong glue, and paint in soft colors.
Best for: Bedrooms, vanities and handmade gifts
Frequently Asked Questions
What kind of clay is best for beginners?
Air dry clay is the easiest start: no oven, no kiln, just shape and leave it to dry. Polymer clay is best for jewelry and small detailed pieces because it bakes hard and strong in a home oven. Salt dough costs almost nothing and is perfect for kids and Christmas ornaments, though it is the least waterproof of the three.
Do I need a kiln for clay crafts?
No. Air dry clay hardens on the counter, salt dough bakes in a regular oven, and polymer clay bakes in a home oven too. A kiln only matters for real ceramic clay, which none of these projects use.
How do you bake polymer clay safely?
Follow the packet exactly, usually around 275F. Bake on foil or parchment on a dedicated tray, never on a tray you cook food on. Ventilate the room, never microwave polymer clay, and let pieces cool fully in the oven before handling them, because hot polymer clay is soft and marks easily.
Can clay crafts get wet or hold food?
Air dry clay is not food safe and not waterproof, even sealed. Use clay pieces for jewelry, decor and dry trinkets, and keep them out of sinks and dishwashers. A good sealer shrugs off a splash, but soaking will soften air dry clay and salt dough again.
What paint works on clay?
Acrylic paint is the standard: cheap, bright, and it seals slightly as it dries. Paint only after the clay is fully dry or fully baked, never before, or the moisture gets trapped under the paint. Finish with a clear sealer, matte for a stone look or gloss for a ceramic look.
Are clay crafts safe for kids?
Yes, with the usual craft table rules. Salt dough and most air dry clays are non toxic, but check the packet, supervise small children so pieces do not get eaten, and wash hands after. Keep finished clay pieces with small parts away from babies and pets, like any small object, and keep polymer clay baking an adults only job.
Final Thoughts on Clay Crafts Ideas
Twelve ideas, three kinds of clay, and not one of them needs a kiln. Start with the earrings, bake a batch of salt dough ornaments while the oven is warm, and paint a set of coasters with whatever is left.
If the ornaments have you hooked, our diy christmas ornaments have nine more handmade ways to dress the tree.

